
Chapter 18. Essential Troubleshooting Skills

The following topics are covered in this chapter:
The following RHCSA exam objectives are covered in this chapter:
Boot systems into different targets manually
Interrupt the boot process in order to gain access to a system
In Chapter 17, “Managing and Understanding the Boot Procedure,” you learned how a RHEL 8 server boots and which role the boot loader GRUB 2 and Systemd play in that process. In this chapter, you learn what you can do when common problems occur while booting your server. This chapter teaches general approaches that help to fix some of the most common problems that may occur while booting. Make sure to master the topics discussed in this chapter well; they might save your (professional) life one day!
“Do I Know This Already?” Quiz
The “Do I Know This Already?” quiz allows you to assess whether you should read this entire chapter thoroughly or jump to the “Exam Preparation Tasks” section. If you are in doubt about your answers to these questions or your own assessment of your knowledge of the topics, read the entire chapter. Table 18-1 lists the major headings in this chapter and their corresponding “Do I Know This Already?” quiz questions. You can find the answers in Appendix A, “Answers to the ‘Do I Know This Already?’ Quizzes and ‘Review Questions.’”
Table 18-1 “Do I Know This Already?” Section-to-Question Mapping
Foundation Topics Section |
Questions |
|---|---|
1 |
|
2–6 |
|
7 |
|
8–9 |
|
10 |
1. Which of the following comes first in the Red Hat Enterprise Linux 8 boot procedure?
a. Systemd
b. Kernel
c. GRUB 2
d. Initramfs
2. You have just entered a kernel argument on the GRUB 2 boot prompt. Pressing which key(s) enables you to start with this boot argument?
a. ZZ
b. Ctrl-X
c. Esc
d. Enter
3. Your initramfs seems faulty and cannot initialize the LVM volumes on your disk. Which configuration file should you check for options that are used?
a. /etc/dracut.d/dracut.conf
b. /etc/dracut.conf
c. /etc/sysconfig/dracut
d. /etc/mkinitrd.conf
4. You do not have the root password and want to reset it. Which kernel argument offers the recommended way to reset it?
a. init=/bin/bash
b. init=/bin/sh
c. systemd.unit=emergency.target
d. rd.break
5. You want to see exactly what is happening on system boot. Which two boot options should you remove from the GRUB 2 boot prompt? (Choose two.)
a. rhgb
b. logo
c. quiet
d. silent
6. You want to enter the most minimal troubleshooting mode where as few services as possible are loaded. Which boot argument should you use?
a. systemd.unit=break.target
b. systemd.unit=emergency.target
c. systemd.unit=rescue.target
d. 1
7. Which of the following situations can be resolved only by using a rescue disk?
a. The kernel stops loading.
b. The initramfs stops loading.
c. You never get to a GRUB 2 boot prompt.
d. You are prompted to enter the root password for maintenance mode.
8. You have entered a troubleshooting mode, and disk access is read-only. What should you do?
a. Restart the troubleshooting mode and pass the rw boot option to the kernel.
b. Use the rd.break boot argument to manually start into the initramfs mode.
c. Use mount -o remount,rw /.
d. Use mount /.
9. Your server shows a blinking cursor only while booting. No GRUB 2 menu is available. What is the first step in troubleshooting this issue?
a. From a rescue disk, try the Boot from local disk option.
b. Start a rescue environment and reinstall GRUB.
c. Start a rescue environment and re-create the initramfs.
d. Use the rd.break boot argument.
10. When recovering access to a virtual machine, you need to make the storage devices in the image file available. Which of the following commands would do that, assuming that the name of the image file is /home/user/lab1.img?
a. partx -ax /home/user/lab1.img
b. kpartx -ax /home/user/lab1.img
c. kpartx -av /home/user/lab1.img
d. partx -av /home/user/lab1.img.
Foundation Topics
Understanding the RHEL 8 Boot Procedure
To fix boot issues, it is essential to have a good understanding of the boot procedure. If an issue occurs during boot, you need to be able to judge in which phase of the boot procedure the issue occurs so that you can select the appropriate tool to fix the issue.
The following steps summarize how the boot procedure happens on Linux:

Performing POST: The machine is powered on. From the system firmware, which can be the modern Universal Extended Firmware Interface (UEFI) or the classical Basic Input Output System (BIOS), the Power-On Self-Test (POST) is executed, and the hardware that is required to start the system is initialized.
Selecting the bootable device: Either from the UEFI boot firmware or from the BIOS, a bootable device is located.
Loading the boot loader: From the bootable device, a boot loader is located. On RHEL, this is usually GRUB 2.
Loading the kernel: The boot loader may present a boot menu to the user or can be configured to automatically start a default operating system. To load Linux, the kernel is loaded together with the initramfs. The initramfs contains kernel modules for all hardware that is required to boot, as well as the initial scripts required to proceed to the next stage of booting. On RHEL 8, the initramfs contains a complete operational system (which may be used for troubleshooting purposes).
Starting /sbin/init: Once the kernel is loaded into memory, the first of all processes is loaded, but still from the initramfs. This is the /sbin/init process, which on RHEL is linked to Systemd. The udev daemon is loaded as well to take care of further hardware initialization. All this is still happening from the initramfs image.
Processing initrd.target: The Systemd process executes all units from the initrd.target, which prepares a minimal operating environment, where the root file system on disk is mounted on the /sysroot directory. At this point, enough is loaded to pass to the system installation that was written to the hard drive.
Switching to the root file system: The system switches to the root file system that is on disk and at this point can load the Systemd process from disk as well.
Running the default target: Systemd looks for the default target to execute and runs all of its units. In this process, a login screen is presented, and the user can authenticate. Note that the login prompt can be prompted before all Systemd unit files have been loaded successfully. So, seeing a login prompt does not necessarily mean that your server is fully operational yet.
In each of the phases listed, issues may occur because of misconfiguration or other problems. Table 18-2 summarizes where a specific phase is configured and what you can do to troubleshoot if something goes wrong.
Tip
Troubleshooting has always been a part of the RHCSA exam. If you encounter an issue, make sure that you can identify in which phase of the boot procedure it occurs and what you can do to fix it.
Table 18-2 Boot Phase Configuration and Troubleshooting Overview
Boot Phase |
Configuring It |
Fixing It |
|---|---|---|
POST |
Hardware configuration (F2, Esc, F10, or another key). |
Replace hardware. |
Selecting the bootable device |
BIOS/UEFI configuration or hardware boot menu. |
Replace hardware or use rescue system. |
Loading the boot loader |
grub2-install and edits to /etc/defaults/grub. |
GRUB boot prompt and edits to /etc/defaults/grub, followed by grub2-mkconfig. |
Loading the kernel |
Edits to the GRUB configuration and /etc/dracut.conf. |
GRUB boot prompt and edits to /etc/defaults/grub, followed by grub2-mkconfig. |
Starting /sbin/init |
Compiled into initramfs. |
init= kernel boot argument, rd.break kernel boot argument. |
Processing initrd.target |
Compiled into initramfs. |
Not typically required. |
Switch to the root file system |
Edits to the /etc/fstab file. |
Edits to the /etc/fstab file. |
Running the default target |
Using systemctl set-default to create the /etc/systemd/system/ default.target symbolic link |
Start the rescue.target as a kernel boot argument. |
In the next section you learn how to apply the different troubleshooting techniques described in this table.
Passing Kernel Boot Arguments
If your server does not boot normally, the GRUB boot prompt offers a convenient way to stop the boot procedure and pass specific options to the kernel while booting. In this section, you learn how to access the boot prompt and how to pass specific boot arguments to the kernel while booting.
Accessing the Boot Prompt
When your server boots, you briefly see the GRUB 2 menu. Look fast because it will only last for a few seconds. From this boot menu you can type e to enter a mode where you can edit commands, or c to enter a full GRUB command prompt, as shown in Figure 18-1. To pass boot options to a starting kernel, use e.
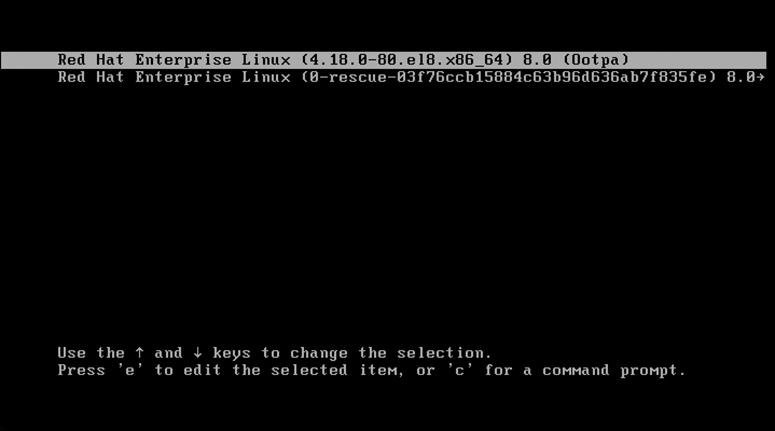
FIGURE 18-1 Entering the GRUB Boot Prompt
After passing an e to the GRUB boot menu, you’ll see the interface that is shown in Figure 18-2. From this interface, scroll down to locate the section that begins with linux ($root)/vmlinuz followed by a lot of arguments. This is the line that tells GRUB how to start a kernel, and by default it looks like this:
linux ($root)/vmlinuz-4.18.0-80.el8.x86_64 root=/dev/mapper/rhel-root
  ro crash kernel=auto resume=/dev/mapper/rhel-swap rd.lvm.lv=rhel/
  root rd.lvm.lv=rhel/swap rhgb quiet

FIGURE 18-2 Enter Boot Arguments on the Line That Starts with linux
To start, it is a good idea to remove the rhgb and quiet parts from this line; these arguments hide boot messages for you, and typically you do want to see what is happening while booting. In the next section you learn about some troubleshooting options that you can enter from the GRUB boot prompt.
After entering the boot options you want to use, press Ctrl-X to start the kernel with these options. Notice that these options are used one time only and are not persistent. To make them persistent you must modify the contents of the /etc/default/grub configuration file and use grub2-mkconfig -o /boot/grub2/grub.cfg to apply the modification. (Refer to Chapter 17 for more details about this procedure.)
Starting a Troubleshooting Target
If you encounter trouble when booting your server, you have several options that you can enter on the GRUB boot prompt:
rd.break: This stops the boot procedure while still in the initramfs stage. This option is useful if you do not have the root password available. The complete procedure for recovering a missing root password follows later in this chapter.
init=/bin/sh or init=/bin/bash: This specifies that a shell should be started immediately after loading the kernel and initrd. This is a useful option, but it’s not the best option because in some cases you’ll lose console access or miss other functionality.
systemd.unit=emergency.target: This enters a mode that loads a bare minimum number of Systemd units. It requires a root password. To see that only a very limited number of unit files have been loaded, you can type the systemctl list-units command.
systemd.unit=rescue.target: This starts some more Systemd units to bring you in a more complete operational mode. It does require a root password. To see that only a very limited number of unit files have been loaded, you can type the systemctl list-units command.
In Exercise 18-1, you learn how to enter the rescue.target mode. The other modes listed here are discussed in the following sections.
Exercise 18-1 Exploring Troubleshooting Targets
(Re)start your computer. When the GRUB menu shows, select the first line in the menu and press e.
Scroll down to the line that starts with linux $(root)/vmlinuz. At the end of this line, type systemd.unit=rescue.target. Also remove the options rhgb quit from this line.
Enter the root password when you are prompted for it.
Type systemctl list-units. This shows all unit files that are currently loaded. You can see that a basic system environment has been loaded.
Type systemctl show-environment. This shows current shell environment variables.
Type systemctl reboot to reboot your machine.
When the GRUB menu appears, press e again to enter the editor mode. At the end of the line that loads the kernel, type systemd.unit=emergency.target.
When prompted for it, enter the root password to log in.
After successful login, type systemctl list-units. Notice that the number of unit files loaded is reduced to a bare minimum.
Using a Rescue Disk
If you are lucky when you encounter trouble, you’ll still be able to boot from hard disk. If you are a bit less lucky, you’ll just see a blinking cursor on a system that does not boot at all. If that happens, you need a rescue disk. The default rescue image for Red Hat Enterprise Linux is on the installation disk. When booting from the installation disk, you’ll see a Troubleshooting menu item. Select this item to get access to the options you need to repair your machine.
Restoring System Access Using a Rescue Disk
After selecting the Troubleshooting option, you are presented with the following options, as shown in Figure 18-3:
Install Red Hat Enterprise Linux 8 in Basic Graphics Mode: This option reinstalls your machine. Do not use it unless you want to troubleshoot a situation where a normal installation does not work and you need a basic graphics mode. Normally, you should never need to use this option to troubleshoot a broken installation.
Rescue a Red Hat Enterprise Linux System: This is the most flexible rescue system. In Exercise 18-2, you can explore it in detail. This should be the first option of choice when using a rescue disk.
Run a Memory Test: Run this option if you encounter memory errors. It allows you to mark bad memory chips so that your machine can boot normally.
Boot from Local Drive: If you cannot boot from GRUB on your hard disk, try this option first. It offers a boot loader that tries to install from your machine’s hard drive, and as such is the least intrusive option available.

FIGURE 18-3 Starting from a Rescue Disk
After starting a rescue system, you usually need to enable full access to the on-disk installation. Typically, the rescue disk detects your installation and mounts it on the /mnt/sysimage directory. To fix access to the configuration files and their default locations as they should be available on disk, use the chroot /mnt/sysimage command to make the contents of this directory your actual working environment. If you do not use this chroot command, many utilities will not work, because if they write to a configuration file, it will be the version that exists on the read-only disk. Using the chroot command ensures that all path references to configuration files are correct.
In Exercise 18-2, you learn how to use the Rescue a Red Hat Enterprise Linux System option to troubleshoot a system that does not boot anymore.
Exercise 18-2 Using the Rescue Option
Restart your server from the installation disk. Select the Troubleshooting menu option.
From the Troubleshooting menu, select Rescue a Red Hat Enterprise Linux System. This prompts you to press Enter to start the installation. Do not worry: This option does not overwrite your current configuration; it just loads a rescue system.
The rescue system now prompts you that it will try to find an installed Linux system and mount on /mnt/sysimage. Press 1 to accept the Continue option (see Figure 18-4).

FIGURE 18-4 The rescue system looks for an installed system image and mounts it for you.
If a valid Red Hat installation was found, you are prompted that your system has been mounted under /mnt/sysimage. At this point, you can press Enter twice to access the rescue shell.
Your Linux installation at this point is accessible through the /mnt/sysimage directory. Type chroot /mnt/sysimage. At this point, you have access to your root file system and you can access all tools that you need to repair access to your system.
Type exit and reboot to restart your machine in a normal mode.
Reinstalling GRUB Using a Rescue Disk
One of the common reasons you might need to start a rescue disk is that the GRUB 2 boot loader breaks. If that happens, you might need to reinstall it. After you have restored access to your server using a rescue disk, reinstalling GRUB 2 is not hard to do and consists of two steps:
Make sure that you have made the contents of the /mnt/sysimage directory available to your current working environment, using chroot as described before.
Use the grub2-install command, followed by the name of the device on which you want to reinstall GRUB 2. So on a KVM virtual machine, the command to use is grub2-install /dev/vda, and on a physical server or a VMware or Virtual Box virtual machine, it is grub2-install /dev/sda.
Re-Creating the Initramfs Using a Rescue Disk
Occasionally, the initramfs image may get damaged as well. If this happens, you cannot boot your server into normal operational mode. To repair the initramfs image after booting into the rescue environment, you can use the dracut command. If used with no arguments, this command creates a new initramfs for the kernel currently loaded.
Alternatively, you can use the dracut command with several options to make an initramfs for specific kernel environments. There is also a configuration file with the name /etc/dracut.conf that you can use to include specific options while re-creating the initramfs. The dracut configuration is dispersed over different locations:
/usr/lib/dracut/dracut.conf.d/*.conf contains the system default configuration files.
/etc/dracut.conf.d contains custom dracut configuration files.
/etc/dracut.conf is used as the master configuration file.
Example 18-1 shows an example of the default dracut.conf configuration file.
Example 18-1 /etc/dracut.conf Default Contents
[root@server1 ~]# cat /etc/dracut.conf
# PUT YOUR CONFIG HERE OR IN separate files named *.conf
# in /etc/dracut.conf.d
# SEE man dracut.conf(5)

# Sample dracut config file

#logfile=/var/log/dracut.log
#fileloglvl=6

# Exact list of dracut modules to use. Modules not listed here are
    not going
# to be included. If you only want to add some optional modules use
# add_dracutmodules option instead.
#dracutmodules+=""

# dracut modules to omit
#omit_dracutmodules+=""

# dracut modules to add to the default
#add_dracutmodules+=""

# additional kernel modules to the default
#add_drivers+=""

# list of kernel filesystem modules to be included in the generic
    initramfs
#filesystems+=""

# build initrd only to boot current hardware
#hostonly="yes"
#

# install local /etc/mdadm.conf
#mdadmconf="no"

# install local /etc/lvm/lvm.conf
#lvmconf="no"

# A list of fsck tools to install. If it is not specified, module's
    hardcoded
# default is used, currently: "umount mount /sbin/fsck* xfs_db
    xfs_check
# xfs_repair e2fsck jfs_fsck reiserfsck btrfsck". The installation is
# opportunistic, so non-existing tools are just ignored.
#fscks=""

# inhibit installation of any fsck tools
#nofscks="yes"

# mount / and /usr read-only by default
#ro_mnt="no"

# set the directory for temporary files
# default: /var/tmp
#tmpdir=/tmp
Tip
According to the RHCSA objectives, you should not have to work with a rescue disk on the exam. However, as a Linux administrator, you should expect the unexpected, which it why it is a good idea to ensure that you can handle common as well as less common troubleshooting scenarios.
Fixing Common Issues
In one small chapter such as this, it is not possible to consider all the possible problems one might encounter when working with Linux. There are some problems, though, that are more likely to occur than others. In this section you learn about some of the more common problems.
Reinstalling GRUB 2
Boot loader code does not disappear just like that, but on occasion it can happen that the GRUB 2 boot code gets damaged. In that case, you better know how to reinstall GRUB 2. The exact approach depends on whether your server is still in a bootable state. If it is, reinstalling GRUB 2 is fairly easy. Just type grub2-install followed by the name of the device to which you want to install it. The command has many different options to fine-tune what exactly will be installed, but you probably will not need them because, by default, the command installs everything you need to make your system bootable again.
Reinstalling GRUB 2 becomes a little bit more complicated if your machine is in a nonbootable state. If that happens, you first need to start a rescue system and restore access to your server from the rescue system. (See Exercise 18-2 for the exact procedure for how to do that.) After mounting your server’s file systems on /mnt/sysimage and using chroot /mnt/sysimage to make the mounted system image your root image, reinstalling is as easy as described previously: Just run grub2-install to install GRUB 2 to the desired installation device. So if you are in a KVM virtual machine, run grub2-install /dev/vda, and if you are on a physical disk, run grub2-install /dev/sda.
Fixing the Initramfs
In rare cases, it might happen that the initramfs gets damaged. If you analyze the boot procedure carefully, you will learn that you have a problem with the initramfs because you’ll never see the root file system getting mounted on the root directory, nor will you see any Systemd units getting started. If you suspect that you are having a problem with the initramfs, it is easy to re-create it. To re-create it using all default settings (which is fine in most cases), you can just run the dracut --force command. (Without --force, the command will refuse to overwrite your existing initramfs.)
When running the dracut command, you can use the /etc/dracut.conf configuration file to specify what exactly is written to the initramfs. In this configuration file, you can see options like lvmconf="no" that can be used to switch specific features on or off. Use these options to make sure that you have all the required functionality in your initramfs.
Recovering from File System Issues
If you make a misconfiguration to your file system mounts, the boot procedure may just end with the message “Give root password for maintenance.” This message is, in particular, generated by the fsck command that is trying to verify the integrity of the file systems in /etc/fstab while booting. If fsck fails, manual intervention is required that may result in this message during boot. Make sure that you know what to do when this happens to you!
Tip
Make sure to master this topic very well. File system–related topics have a heavy weight in the RHCSA objectives, and it is likely that you will need to create partitions and/or logical volumes and put them in /etc/fstab for automatic mounting. That also makes it likely that something will go wrong, and if that happens on the exam, you better make sure that you know how to fix it!
If a device is referred to that does not exist, or if there is an error in the UUID that is used to mount the device, for example, Systemd waits first to see whether the device comes back by itself. If that does not happen, it gives the message “Give root password for maintenance” (see Figure 18-5). If that happens, you should by all means first enter the root password. Then you can type journalctl -xb as suggested to see whether relevant messages providing information about what is wrong are written to the journal. If the problem is file system oriented, type mount -o remount,rw / to make sure the root file system is mounted read/write and analyze what is wrong in the /etc/fstab file and fix it.

FIGURE 18-5 If You See This, You Normally Have an /etc/fstab Issue
Resetting the Root Password
A common scenario for a Linux administrator is that the root password has gone missing. If that happens, you need to reset it. The only way to do that is by booting into minimal mode, which allows you to log in without entering a password. To do so, follow these steps:
On system boot, press e when the GRUB 2 boot menu is shown.
Enter rd.break as a boot argument to the line that loads the kernel and press Ctrl-X to boot with this option.
You’ll now be dropped at the end of the boot stage where initramfs is loaded, just before a mount of the root file system on the directory /.
Type mount -o remount,rw /sysroot to get read/write access to the system image.
At this point, make the contents of the /sysimage directory your new root directory by typing chroot /sysroot.
Now you can enter passwd and set the new password for the user root.
Because at this very early boot stage SELinux has not been activated yet, the context type on /etc/shadow will be messed up. If you reboot at this point, no one will be able to log in. So you must make sure that the context type is set correctly. To do this, at this point you should load the SELinux policy by using load_policy -i. You’ll find more information about SELinux in Chapter 22, “Managing SELinux.”
Now you can manually set the correct context type to /etc/shadow. To do this, type chcon -t shadow_t /etc/shadow.
Reboot. You can now log in with the changed password for user root.
Note
In the preceding procedure you have read how to use the load_policy -i and chcon commands to correct the labels on the /etc/shadow file. An alternative (and easier) method is to create a file with the name /.autorelabel, which will force SELinux to restore labels that are set on the entire file system.
Recovering Access to a Virtual Machine
A special case of troubleshooting is a situation that involves a virtual machine. If you have a problem in the virtual machine, and you cannot access it using Virtual Machine Manager or virsh console, you also can’t connect to it using SSH. However, there is still an option. The technique described here is a bit advanced, but because it might someday help you reestablish access to a virtual machine that would otherwise have been lost, it is worth knowing about.
Tip
The procedure that is described here is relatively complicated, and you should not have to apply it unless you mess up severely during the exam. So instead of memorizing this procedure, just be very careful to prevent issues like this from happening!
To start, open a root shell on the KVM host. From that host file, make sure that the virtual machine is stopped by using virsh destroy vmname. (Use the name of the virtual machine as listed by the virsh list command.)
Find the disk image file. It normally is stored in the /var/lib/libvirt/images directory. If you cannot find it there, use virsh dumpxml vmname | grep "source file=" to find the name of the source file:
[root@lab ~]# virsh dumpxml sander-vm1 | grep "source file="
       <source file='/home/sander/lab1.img'/>
       <source file='/var/lib/libvirt/images/sander-vm1.img'/>
Now that you know the name of the virtual machine image file, you can mount it into the host environment by using the kpartx -a command. This command analyzes the disk layout on the virtual machine and creates storage devices that allow you to mount devices in the virtual machine in the host file system:
[root@lab ~]# kpartx -av /home/sander/lab1.img
add map loop0p1 (253:5): 0 1024000 linear /dev/loop0 2048
add map loop0p2 (253:6): 0 7362560 linear /dev/loop0 1026048
The kpartx command has created devices that enable you to access the two partitions in the virtual machine. If this is a typical RHEL 8 setup, the first partition is the /boot partition, and the second partition is normally used for LVM logical volumes. You can mount the /boot partition easily by using mount /dev/mapper/loop0p1 /mnt.
To access the logical volumes that exist within the virtual machine’s second partition, use the pvscan command:
[root@lab mapper]# pvscan /dev/mapper/loop0p2
   PV /dev/sda3 VG centos lvm2 [48.83 GiB / 0 free]
   PV /dev/sda4 VG centos lvm2 [50.00 GiB / 20.00 GiB free]
   PV /dev/sda5 VG vglvm lvm2 [347.32 GiB / 329.32 GiB free]
   PV /dev/mapper/loop0p2 VG centosvm lvm2 [3.51 GiB / 0 free]
   Total: 4 [449.65 GiB] / in use: 4 [449.65 GiB] / in no VG: 0 [0 ]
You now have activated the LVM setup within the virtual machine. If you type the lvs command, you should see the logical volumes listed as well, but in an active state. To activate them, use the vgchange command on the volume group that was found in the virtual machine disk image file. So for this exam, you type vgchange -a y centosvm to activate all logical volumes. After doing so, you can mount them also to directly access all files in the virtual machine file system and fix all issues that prevented the virtual machine from booting normally.
Warning
This procedure works well unless within the virtual machine the same LVM volume group name is used as on the host machine. This will normally not be the case because the VG name by default is the same as the hostname (and you normally want hostnames to be unique). If the VG names are not unique, though, you risk mixing them up and working on the wrong logical volume.
After you have fixed all issues in the virtual machine, you first need to unmount all file systems currently mounted. Next, you need to remove the device files that have been created based on the contents of the virtual machine image file by using the kpartx -dv /home/sander/lab1.img command. (Make sure to use the filename of the image file that is actually used on your computer.)
Summary
In this chapter, you learned how to troubleshoot the Red Hat Enterprise Linux 8 boot procedure. You learned in general what happens when a server boots and at which specific points you can interfere to fix things that go wrong. You also learned what to do in some specific cases. Make sure that you know these procedures well; you are likely to encounter them on the exam.
Exam Preparation Tasks
As mentioned in the section “How to Use This Book” in the Introduction, you have several choices for exam preparation: the end-of-chapter labs; the memory tables in Appendix B; Chapter 26, “Final Preparation”; and the practice exams.
Review All Key Topics
Review the most important topics in the chapter, noted with the Key Topic icon in the outer margin of the page. Table 18-3 lists a reference of these key topics and the page number on which each is found.
Table 18-3 Key Topics for Chapter 18
Key Topic Element |
Description |
Page |
|---|---|---|
List |
Summary of phases processed while booting |
|
Boot phase configuration and troubleshooting overview |
||
List |
Summary of relevant GRUB 2 boot options for troubleshooting |
|
List |
Resetting the root password |
Complete Tables and Lists from Memory
Print a copy of Appendix B, “Memory Tables” (found on the companion website), or at least the section for this chapter, and complete the tables and lists from memory. Appendix C, “Memory Tables Answer Key,” includes completed tables and lists to check your work.
Define Key Terms
Define the following key terms from this chapter and check your answers in the glossary:
Review Questions
The questions that follow are meant to help you test your knowledge of concepts and terminology and the breadth of your knowledge. You can find the answers to these questions in Appendix A.
1. Which key do you need to press to enter the GRUB boot menu editor mode?
2. During startup, the boot procedure is not completed and the server asks for the root password instead. What is likely to be the reason of this?
3. You want to enter troubleshooting mode, but you do not know the root password. Which argument would you pass to the kernel to enter a mode that provides access to most of the machine’s functionality?
4. You start your server and nothing happens. You just see a blinking cursor and that’s all. What is the first step to troubleshoot this issue?
5. You want to find out which units are available in a specific troubleshooting environment. Which command would you use?
6. You want to start troubleshooting a lost root password. Which argument would you pass to the GRUB 2 boot loader?
7. From the shell that you have started to troubleshoot a lost password for user root, you want to load the SELinux policy. Which command enables you to do that?
8. While troubleshooting the root password, what do you need to do to make sure the SELinux labels are set correctly?
9. You have applied changes to the GRUB 2 boot loader and want to save them. How do you do that?
10. You do know the root password on a machine where you want to enter the most minimal troubleshooting mode. Which GRUB 2 boot argument would you use?
End-of-Chapter Lab
Lab 18.1 shows you how to troubleshoot some common problems.
Lab 18.1
1. Restart your server and change the root password from the appropriate troubleshooting mode.
2. In /etc/fstab, change one of the device names so that on next reboot the file system on it cannot be mounted. Restart and fix the issue that you encounter.
3. Use a rescue disk to bring your server up in full troubleshooting mode from the rescue disk.
4. Re-create the initramfs.