
![]()
Nine-Volt Batteries
Sandwich, the line-following robot, uses a 9 V battery for power. In fact, most of my robots use 9 V batteries because the batteries are so small and lightweight. In this chapter, you’re going to learn how to test a 9 V battery (see Figure 7-1) and find out about the differences in battery brands and chemistries.

Figure 7-1. Alkaline 9 V battery
How many volts in a nine-volt battery? Yes, it’s sort of a trick question. Although the answer is somewhere around nine volts, the actual voltage varies based on what the battery is made of and how much of the battery’s power has been used up.
During this stage, it’s not necessary to understand exactly what “voltage” is. However, if you’d like, you can think of voltage as water pressure coming out of a water pump. A pump with more pressure can spray water harder than a pump with less pressure. Likewise, a battery with more voltage can spray electricity harder than a battery with less voltage.
The unit for voltage is volts or simply the letter V. So, 9 volts and 9 V mean the same thing.
Now you’re going to learn how to test a 9 V battery’s voltage with a multimeter. Robot builders measure battery voltage quite often. After all, you don’t want your robot starting out on an adventure with weak batteries.
![]() Caution This book presents directions applicable to most multimeters. However, you should always read and follow the instructions provided with the test equipment you’re using.
Caution This book presents directions applicable to most multimeters. However, you should always read and follow the instructions provided with the test equipment you’re using.
Setting Up a Multimeter for Voltage Testing
- Connect the black-colored test lead to the multimeter terminal (hole) marked COM (see Figure 7-2).

Figure 7-2. Common and voltage test lead terminals on multimeter
- Connect the red-colored test lead to the multimeter terminal marked V. (Depending on the meter, there may be additional markings alongside the V, such as Ω.)
- You’re testing for voltage; so turn the multimeter dial to the V or DCV setting.
If your meter is manually ranged (has several ranges in the V section of the dial), choose a number above 9 (see Figure 7-3). Autoranging meters usually don’t have any ranges on the dial since those kinds of meters automatically pick the maximum range.

Figure 7-3. Dialing a DC voltage range above 9
To protect the meter, you must always select a number that’s bigger than the maximum you expect to test. Since you expect to see a little more or less than 9 volts on a 9 V battery, pick a range a little more than 9.
Although it’s not harmful to dial too large of a number, like 1000, the resolution of the meter isn’t as descriptive. In other words, the quality of the reading is not going to be as good if you tell the meter it’s testing a number between 0 and 1000 when you know the meter is actually going to be testing a number between 0 and 10.
- Do not touch the metal tips of the probes to anything at this point. If the meter isn’t already turned on, press the power-on button.
The meter should now be displaying zero (see Figure 7-4). The number on the display may bounce around a little, but it should be near zero.

Figure 7-4. Meter displays no voltage
- Touch the metal tip of the black test lead to the battery’s negative terminal (the larger snap, which is usually marked “-”).
- Touch the metal tip of the red test lead to the battery’s positive terminal (the smaller snap, which is usually marked “+”). See Figure 7-5.

Figure 7-5. Probe tips touching battery terminals
If the multimeter display shows a negative number (see Figure 7-6), then something has gotten reversed. Check that the test leads are connected to their proper terminals on the battery and on the meter. Switch the probes if necessary. Don’t worry if you got a negative number, that doesn’t hurt the meter at all.
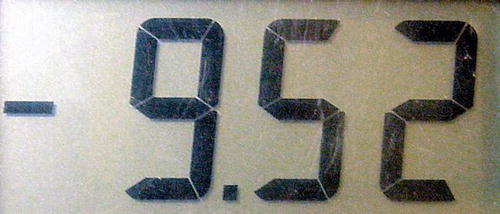
Figure 7-6. A negative number indicates a mixed-up connection
If the display shows zero, some connection isn’t making full contact. Make sure the leads are fully inserted into the meter terminals. Make sure the metal tips are touching the metal portion of the battery terminals.
If the meter displays a positive number (see Figure 7-7), then you’re measuring the battery correctly. Depending on the type of battery and the capacity remaining, a valid voltage of a 9 V battery should be between 5 and 10 volts.
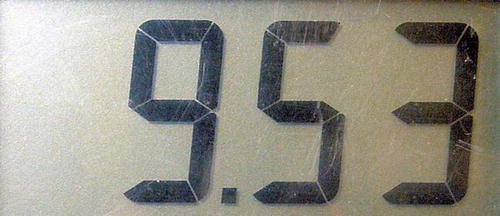
Figure 7-7. A positive number indicates a proper measurement
When you remove either probe from either battery snap terminal, the meter will display zero again. It’s worth noting that, in all cases, both probes must be touching the part in order to measure it.
Depending on their chemical makeup and age, the voltage and other attributes of a 9 V battery can differ considerably (see Table 7-1).
Table 7-1. Typical Characteristics of 9 V Batteries

It may now occur to you that it’s a bit of a misnomer to call the battery size “nine volt” since the actual voltage varies quite a bit from nine. Somehow the name for the size got mixed up with the voltage. Other consumer batteries avoid this problem with names like “AA,” “C,” “D,” and so on.
The Fresh column in Table 7-1 is approximately the voltage you may find when you test a brand-new (or newly recharged) battery not connected to a circuit. Voltage always reads a bit lower when testing a battery attached to other electronic parts. A fresh battery settles down to the officially rated voltage with age or after a short amount of use.
The Rated column describes the official voltage the manufacturer claims for this size of the battery. In all cases except rechargeables, the manufacturers state the batteries are designed to provide approximately 9 V.
The Halfway column was generated by taking the total number of hours the battery lasted until the discharged voltage was reached, and then looking at the voltage at half that time. This gives a sense of the voltage when half of the battery capacity has been used up.
In the Discharged column, the manufacturer arbitrarily picks this voltage number. For example, it isn’t as though an alkaline 9 V battery suddenly stops working below 4.8 volts. However, at some point you need to call the battery “dead.” By the way, some sneaky manufacturers may claim a battery is longer lasting just by choosing a lower final acceptable voltage.
Realistically, many consumer devices stop performing adequately when their 9 V battery falls below 7 V. Although you’ll usually design your homemade robot to operate at even lower voltages, the power output of most batteries drops like a rock at the end of their lives. So, even a low-voltage design won’t be able to extend useful battery life indefinitely.
Referring again to Table 7-1, the Mass column reflects the differences in battery masses due to differences in chemical makeup and case materials. For example, a plastic case weighs less than a steel or aluminum case. These differences also suggest a potential opportunity to shave a little weight from a robot by the choice of battery.
The Capacity column is stated in mAh. The unit “mA” is the abbreviation for milliamps and “h” is the abbreviation for hours. Basically, the capacity value indicates how much electricity can be circulated for an hour. If the device uses less electrical current, the battery will last longer than an hour. If the device uses more electrical current, the battery will last less than an hour.
9 V Battery Recommendations
Recommended
Nickel-Metal Hydride
NiMH (nickel-metal hydride) rechargeable batteries (see Figure 7-8) are preferable for robot experimentation and testing because you can recharge the batteries hundreds of times.

Figure 7-8. Nickel-metal hydride rechargeable 9 V batteries. Left: low-end 8.4 V 150 mAh. Right: high-end 9.6 V 260 mAh
![]() Note Technically, single-use (non-rechargeable) batteries are called primary batteries. Rechargeable batteries are called secondary batteries.
Note Technically, single-use (non-rechargeable) batteries are called primary batteries. Rechargeable batteries are called secondary batteries.
Unfortunately, rechargeable batteries have a lower run time (total capacity) compared to non-rechargeable batteries. Also, every day they lose some percentage of their electricity, even when not in use. However, because you can recharge them, simply top them off immediately before a robotic demonstration.
When purchasing NiMH 9 V-size batteries, look for the rated voltage and the rated capacity (mAh). For most uses, you want to purchase 8.4 V-rated batteries rather than 7.2 V-rated ones (most manufacturers have discontinued making these). You may want to have a 9.6 V-rated battery available to add a little more speed or pushing power in competitions. But, be aware that the 11.2 V fresh voltage of these batteries may be too high for some robots and may not work in many battery chargers.
A higher-capacity (mAh) battery outlasts a lower-capacity battery of similar chemistry. It also retains a higher voltage for a longer period of time during usage. All things being equal, a robot using a 260 mAh battery would continue operating 73% longer than if it were using a 150 mAh battery.
Retaining Charge When Not in Use
The newest NiMH batteries are much better at retaining their charge when not in use (see Figure 7-9). As such, you can use them immediately upon taking them out the package, because much of the manufacturer’s charge has been retained.
The batteries are advantageous to the robot builder, as you can have a stock of nearly charged batteries without constantly keeping them in the charger.
Lithium-Polymer
Li-poly (lithium-polymer) rechargeable batteries (see Figure 7-10) are similar to li-ion (lithium-ion) batteries used in laptops. You can recharge them hundreds of times, they retain their charge better than NiMH, are lightweight, can provide high current, and have capacities that nearly match alkaline batteries. As such, I switched from NiMH to lithium-polymer during robot competitions.

Figure 7-9. “Ready-to-use” rechargeable batteries

Figure 7-10. Lithium-polymer rechareable 9 V batteries
The disadvantages of lithium-polymer batteries are that they are more expensive and that you must use a charger specifically designed for lithium-polymer batteries.
Alkaline
Alkaline batteries (see Figure 7-11) are the most common and are readily available. These batteries retain their charge for years (when not in use), have a high starting voltage, and tend to keep a reasonable voltage during use. For medium or high-current electrical draw, alkalines are the longest-lasting non-rechargeable consumer batteries.

Figure 7-11. Some popular brands of alkaline 9 V batteries
Unfortunately, 9 V alkaline batteries aren’t rechargeable. After they’re used up, they must be discarded into the recycling bin. This practice can get very expensive.
Specialized Use
Lithium batteries (see Figure 7-12) have a couple of nice benefits: they’re lightweight, they operate even at cold temperatures, and they stay fresh for many, many years. So, these batteries might be good for a high-altitude balloon robot or a multi-year test project.

Figure 7-12. Non-rechargeable lithium 9 V batteries
Lithium 9 V batteries have a couple of downsides: they’re expensive, they can’t provide significant bursts of electricity (no more than 80 mA or 120 mA depending on brand), and their high-rated capacity (1200 mAh for 9 V) only holds true if you use the electricity in very small amounts. These disadvantages make lithium unsuitable for most motor-driven robots.
Don’t confuse single-use lithium batteries with rechargeable lithium-ion or lithium-polymer batteries. The rechargeable varieties offer higher current bursts without the same caveats.
Not Recommended
Poor “heavy-duty” battery! The greatest benefit I could come up with is they are the least expensive to buy for a single use. This might make a good choice for a robot that dives off cliffs or unsuccessfully explores lava pits.
Despite their low initial cost, the total lifetime price of carbon-zinc, magnesium-carbon, and zinc-chloride batteries (see Figure 7-13) is much higher than rechargeable batteries. This is because the rechargeable batteries can be recharged, but the carbon and zinc batteries cannot.

Figure 7-13. Classic and super heavy-duty 9 V batteries
Heavy-duty battery capacity is seriously eroded at higher discharge rates, so the respectable 400 mAh rating is hideously reduced in power-hungry robots. Older-technology carbon and zinc batteries have a short shelf life (they self-discharge faster).
Carbon and zinc battery voltage slopes down steadily during use, which decreases the useful battery life if the device requires a higher voltage. Ironically, the sloping voltage turns out to be useful for predicting remaining capacity.
For environmental reasons, nickel-cadmium (NiCd or NiCad) batteries are not recommended (see Figure 7-14). Additionally, NiCd batteries have a lower capacity and accept fewer recharges than NiMH batteries. The major brands no longer make NiCd batteries.

Figure 7-14. Nickel-cadmium rechargeable 9 V battery
The top two manufacturers of alkaline batteries have both introduced premium versions of their alkaline batteries (see Figure 7-15). These enhancements are basically marketing gimmicks. The companies charge a notably higher price for an unnoticeable change in performance. (Ouch!)

Figure 7-15. Tweaked alkaline 9 V batteries
Battery Brand Names
Stiff competition has ensured that there’s no performance difference between most popular battery brands. Instead of brand name, pay attention to battery chemistry (alkaline, NiMH, and so on), price, and freshness date.
Watch out for batteries with a voltage rated at less than 8.4 volts. For example, some NiMH rechargeable 9 V-size batteries are only 7.2 volts. The cause? Instead of seven internal cells, those batteries contain only six cells and some filler (see Figure 7-16). Tsk. Tsk.

Figure 7-16. Polystyrene foam filler in a less-powerful battery
Although a lower voltage is detrimental to many applications, it does provide a lower-weight and a lower-power battery in a standard form factor (case style). For example, if your robot doesn’t need all 9 volts, substituting the lower-voltage battery can save some weight or slow down a robot that fails because it operates too quickly.
Using 9 V Batteries in Robots
Generally speaking, the higher the voltage, the faster the motor’s speed and the greater the motor’s push.
The first time I set Sandwich down onto a track, I was disappointed in the robot’s line following. The motors were too fast for sharp turns. So, I switched from a fresh 9.5 V alkaline battery to a 7.2 V rechargeable. The lower voltage produced lower motor speed. The slower speed had a dramatically positive effect on the line following.
Alternatively, another robot was a little too slow and a little too weak in a robot Sumo contest. The motors were nominally rated for 12 volts, so it was safe to upgrade to a fresh 11.2 NiMH battery.
By using a standard-size battery in your robot, regardless of whether it is 9 V, AA, AAA, C, D, or whatever, you can switch between battery chemistries to adjust performance. That’s a good trick to remember. It is a lot easier and faster to switch batteries than to rebuild your robot or alter the software five minutes before a competition.
Batteries tend to be one of the heavier parts in a robot. For this reason, the battery in Sandwich is mounted near the wheel axle (see Figure 7-17). That way, most of the battery weight is on the tires (adding traction) rather than on the front part (which drags).

Figure 7-17. Battery mounted near rear axle
Since a robot’s battery is going to be replaced often, you want to make sure it is placed in a location that is easily accessible. I made a mistake in my mini-Sumo robot, Bugdozer. The batteries are stored underneath the wires and circuitry (see Figure 7-18), requiring most of the robot to be disassembled to swap in a fresh power source.

Figure 7-18. Spot the copper tops! There are two batteries hiding inside this robot. Your job: find them
There are a number of ways to physically connect a 9 V battery to a device. Most consumer products have specifically designed compartments formed into their cases. With the advent of 3D printing, custom compartments may be viable options for your robots. At the opposite end of the spectrum, masking tape is ugly and unreliable.
Rubber bands are okay for securing batteries, though not ideal. I’ve successfully used hook and loop fasteners, commonly called by their brand name, Velcro. The only problem with hook and loop fasteners is that one fastener strip needs to be permanently adhered to the battery. A new fastener strip needs to be attached to each replacement battery thereafter.
Preformed metal clips are available (Jameco #105794 or Mouser #534-080 or #534-095). They have a screw hole in the middle (see Figure 7-19) that makes it easy to secure against a frame. Use a washer (a flat, circular disc—see Figure 7-17) on the other side of the robot’s body so that the force of battery removal doesn’t rip the screw through the body wall.

Figure 7-19. Methods of mounting a 9 V battery: (left to right) rubber band, hook and loop fasteners, clip, molded part
A word of caution about metal clips: they tend to grab tightly against the battery, causing scrapes on the battery’s case during installation and removal. The damage is purely superficial, and a little masking tape around the ends of the clip eliminates the problem.
Molded plastic parts can cradle a battery and provide an electrical connection. If you have room on your robot for such a part, it’s preferable because the battery is less likely to slip out.
Powering Forward
You’ve now got a power source and you know how to test it. With a little bit of thought given to battery location, you can find it a spot in your robot. Looking ahead, the 9 V battery will supply power to each of the upcoming experiments.