
Chapter 7. Sign up
Now that we have a working User model, it’s time to add an ability few websites can live without: letting users sign up. We’ll use an HTML form to submit user signup information to our application (Section 7.2), which will then be used to create a new user and save its attributes to the database (Section 7.4). At the end of the signup process, it’s important to render a profile page with the newly created user’s information, so we’ll begin by making a page for showing users, which will serve as the first step toward implementing the REST architecture for users (Section 2.2.2). Along the way, we’ll build on our work in Section 5.3.4 to write succinct and expressive integration tests.
In this chapter, we’ll rely on the User model validations from Chapter 6 to increase the odds of new users having valid email addresses. In Chapter 11, we’ll make sure of email validity by adding a separate account activation step to user signup.
Although this tutorial is designed to be as simple as possible while still being professional-grade, web development is a complicated subject, and Chapter 7 necessarily marks a significant increase in the difficulty of the exposition. I recommend taking your time with the material and reviewing it as necessary. (Some readers have reported simply doing the chapter twice is a helpful exercise.) You might also consider subscribing to the courses at Learn Enough to gain additional assistance, both with this tutorial and with its relevant prerequisites (especially Learn Enough Ruby to Be Dangerous).
7.1 Showing users
In this section, we’ll take the first steps toward the final profile by making a page to display a user’s name and profile photo, as indicated by the mockup in Figure 7.1.1 Our eventual goal for the user profile pages is to show the user’s profile image, basic user data, and a list of microposts, as mocked up in Figure 7.2.2 (Figure 7.2 includes an example of lorem ipsum text, which has a fascinating story that you should definitely read about some time.) We’ll complete this task, and with it the sample application, in Chapter 14.

Figure 7.1: A mockup of the user profile made in this section.
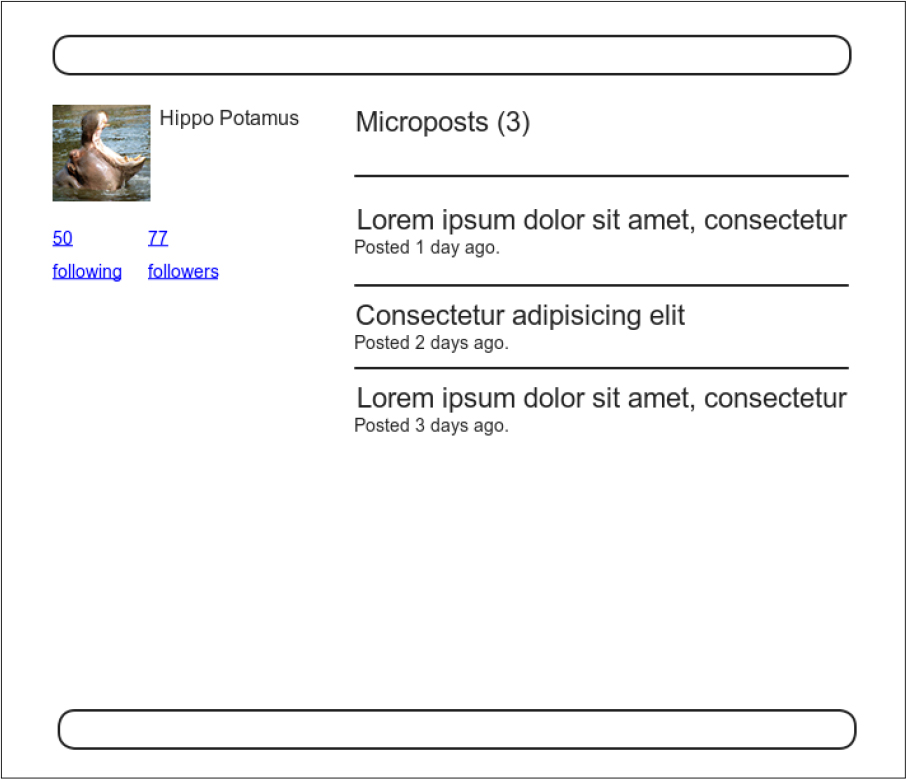
Figure 7.2: A mockup of our best guess at the final profile page.
1 Mockingbird doesn’t support custom images like the profile photo in Figure 7.1; I put that in by hand using GIMP.
2 Image retrieved from https://www.flickr.com/photos/43803060@N00/24308857/ on 2014-06-16. Copyright © 2002 by Shaun Wallin and used unaltered under the terms of the Creative Commons Attribution 2.0 Generic license.
If you’re following along with version control, make a topic branch as usual:
$ git checkout -b sign-up
7.1.1 Debug and Rails environments
The profiles in this section will be the first truly dynamic pages in our application. Although the view will exist as a single page of code, each profile will be customized using information retrieved from the application’s database. As preparation for adding dynamic pages to our sample application, now is a good time to add some debug information to our site layout (Listing 7.1). This displays some useful information about each page using the built-in debug method and params variable (which we’ll learn more about in Section 7.1.2).
Listing 7.1: Adding some debug information to the site layout.
app/views/layouts/application.html.erb
<!DOCTYPE html>
<html>
  .
  .
  .
  <body>
    <%= render 'layouts/header' %>
    <div class="container">
      <%= yield %>
      <%= render 'layouts/footer' %>
      <%= debug(params) if Rails.env.development? %>
    </div>
  </body>
</html>
Since we don’t want to display debug information to users of a deployed application, Listing 7.1 uses
if Rails.env.development?
to restrict the debug information to the development environment, which is one of three environments defined by default in Rails (Box 7.1).3 In particular, Rails.env.development? is true only in a development environment, so the embedded Ruby
3 You can define your own custom environments as well; see the RailsCast on adding an environment for details.
<%= debug(params) if Rails.env.development? %>
won’t be inserted into production applications or tests. (Inserting the debug information into tests probably wouldn’t do any harm, but it probably wouldn’t do any good, either, so it’s best to restrict the debug display to development only.)
Box 7.1. Rails environments
Rails comes equipped with three environments: test, development, and production. The default environment for the Rails console is development:
$ rails console
Loading development environment >> Rails.env
=> "development"
>> Rails.env.development?
=> true
>> Rails.env.test?
=> false
As you can see, Rails provides a Rails object with an env attribute and associated environment boolean methods, so that, for example, Rails.env.test? returns true in a test environment and false otherwise.
If you ever need to run a console in a different environment (to debug a test, for example), you can pass the environment as a parameter to the console script:
$ rails console test
Loading test environment
>> Rails.env
=> "test"
>> Rails.env.test?
=> true
As with the console, development is the default environment for the Rails server, but you can also run it in a different environment:
$ rails server --environment production
If you view your app running in production, it won’t work without a production database, which we can create by running rails db:migrate in production:
$ rails db:migrate RAILS_ENV=production
(I find it confusing that the idiomatic commands to run the console, server, and migrate commands in non-default environments use different syntax, which is why I bothered showing all three. It’s worth noting, though, that preceding any of them with RAILS_ENV=<env> will also work, as in RAILS_ENV=production rails server).
By the way, if you have deployed your sample app to Heroku, you can see its environment using heroku run rails console:
$ heroku run rails console
>> Rails.env
=> "production"
>> Rails.env.production?
=> true
Naturally, since Heroku is a platform for production sites, it runs each application in a production environment.
To make the debug output look nice, we’ll add some rules to the custom stylesheet created in Chapter 5, as shown in Listing 7.2.
Listing 7.2: Adding code for a pretty debug box, including a Sass mixin.
app/assets/stylesheets/custom.scss
@import "bootstrap-sprockets"; @import "bootstrap";

/* mixins, variables, etc. */

$gray-medium-light: #eaeaea;

@mixin box_sizing {
  -moz-box-sizing: border-box;
  -webkit-box-sizing: border-box;
  box-sizing: border-box;
}
.
.
.
/* miscellaneous */

.debug_dump {
  clear: both;
  float: left;
  width: 100%;
  margin-top: 45px;
@include box_sizing;
}
This introduces the Sass mixin facility, in this case called box_sizing. A mixin allows a group of CSS rules to be packaged up and used for multiple elements, converting
.debug_dump {
  .
  .
  .
  @include box_sizing;
}
to
.debug_dump {
  .
  .
  .
  -moz-box-sizing:    border-box;
  -webkit-box-sizing: border-box;
  box-sizing:         border-box;
}
We’ll put this mixin to use again in Section 7.2.1. The result in the case of the debug box is shown in Figure 7.3.4
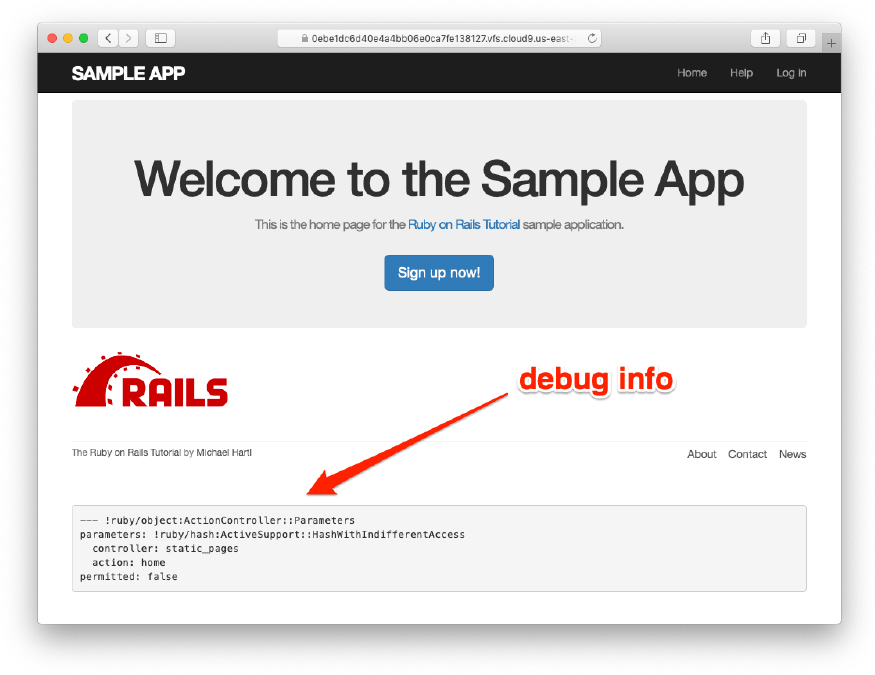
Figure 7.3: The sample application Home page with debug information.
4 The exact appearance of the Rails debug information is slightly version-dependent. For example, as of Rails 5 the debug information shows the permitted status of the information, a subject we’ll cover in Section 7.3.2. Use your technical sophistication (Box 1.2) to resolve such minor discrepancies.
The debug output in Figure 7.3 gives potentially useful information about the page being rendered:
---
controller: static_pages
action: home
This is a YAML5 representation of params, which is basically a hash, and in this case identifies the controller and action for the page. We’ll see another example in Section 7.1.2.
5 The Rails debug information is shown as YAML (a recursive acronym standing for “YAML Ain’t Markup Language”), which is a friendly data format designed to be both machine- and human-readable.
Exercises
Solutions to the exercises are available to all Rails Tutorial purchasers here.
To see other people’s answers and to record your own, subscribe to the Rails Tutorial course or to the Learn Enough All Access Bundle.
1. Visit /about in your browser and use the debug information to determine the controller and action of the params hash.
2. In the Rails console, pull the first user out of the database and assign it to the variable user. What is the output of puts user.attributes.-to_yaml? Compare this to using the y method via y user.attributes.
7.1.2 A Users resource
In order to make a user profile page, we need to have a user in the database, which introduces a chicken-and-egg problem: how can the site have a user before there is a working signup page? Happily, this problem has already been solved: in Section 6.3.4, we created a User record by hand using the Rails console, so there should be one user in the database:
$ rails console
>> User.count
=> 1
>> User.first
=> #<User id: 1, name: "Michael Hartl", email: "[email protected]",
created_at: "2019-08-22 03:15:38", updated_at: "2019-08-22 03:15:38",
password_digest: [FILTERED]>
(If you don’t currently have a user in your database, you should visit Section 6.3.4 now and complete it before proceeding.) We see from the console output above that the user has id 1, and our goal now is to make a page to display this user’s information. We’ll follow the conventions of the REST architecture favored in Rails applications (Box 2.2), which means representing data as resources that can be created, shown, updated, or destroyed—four actions corresponding to the four fundamental operations POST, GET, PATCH, and DELETE defined by the HTTP standard (Box 3.2).
When following REST principles, resources are typically referenced using the resource name and a unique identifier. What this means in the context of users—which we’re now thinking of as a Users resource—is that we should view the user with id 1 by issuing a GET request to the URL /users/1. Here the show action is implicit in the type of request—when Rails’ REST features are activated, GET requests are automatically handled by the show action.
We saw in Section 2.2.1 that the page for a user with id 1 has URL /users/1. Unfortunately, visiting that URL right now just gives an error (Figure 7.4).
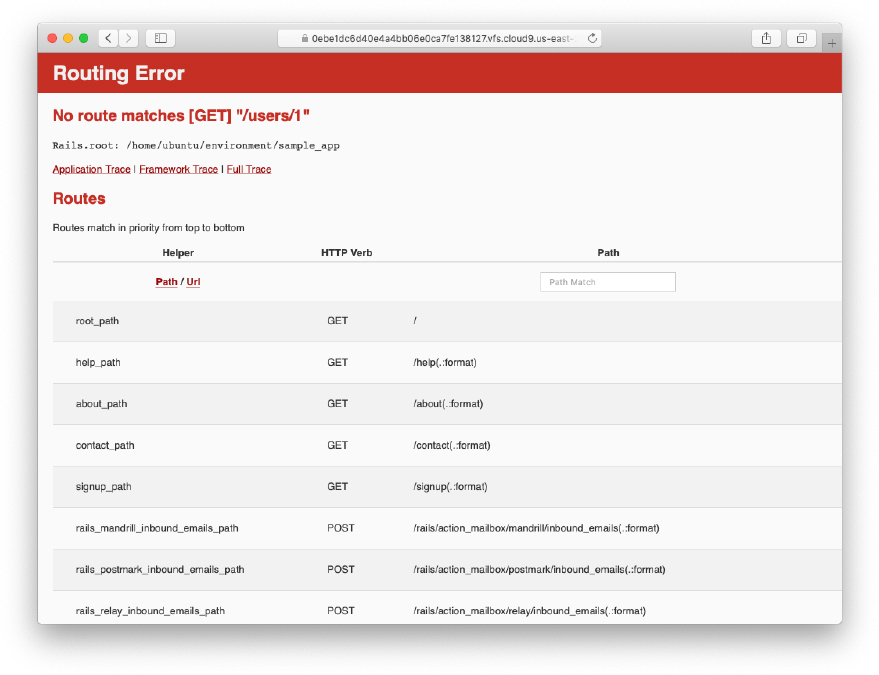
Figure 7.4: The current state of /users/1.
We can get the routing for /users/1 to work by adding a single line to our routes file (config/routes.rb):
resources :users
The result appears in Listing 7.3.
Listing 7.3: Adding a Users resource to the routes file.
config/routes.rb
Rails.application.routes.draw do
  root 'static_pages#home'
  get  '/help',    to: 'static_pages#help'
  get  '/about',   to: 'static_pages#about'
  get  '/contact', to: 'static_pages#contact'
  get  '/signup',  to: 'users#new'
  resources :users
end
Although our immediate motivation is making a page to show users, the single line resources :users doesn’t just add a working /users/1 URL; it endows our sample application with all the actions needed for a RESTful Users resource,6 along with a large number of named routes (Section 5.3.3) for generating user URLs. The resulting correspondence of URLs, actions, and named routes is shown in Table 7.1. (Compare to Table 2.2.) Over the course of the next three chapters, we’ll cover all of the other entries in Table 7.1 as we fill in all the actions necessary to make Users a fully RESTful resource.

Table 7.1: RESTful routes provided by the Users resource in Listing 7.3.
6 This means that the routing works, but the corresponding pages don’t necessarily work at this point. For example, /users/1/edit gets routed properly to the edit action of the Users controller, but since the edit action doesn’t exist yet actually hitting that URL will return an error.
With the code in Listing 7.3, the routing works, but there’s still no page there (Figure 7.5). To fix this, we’ll begin with a minimalist version of the profile page, which we’ll flesh out in Section 7.1.4.
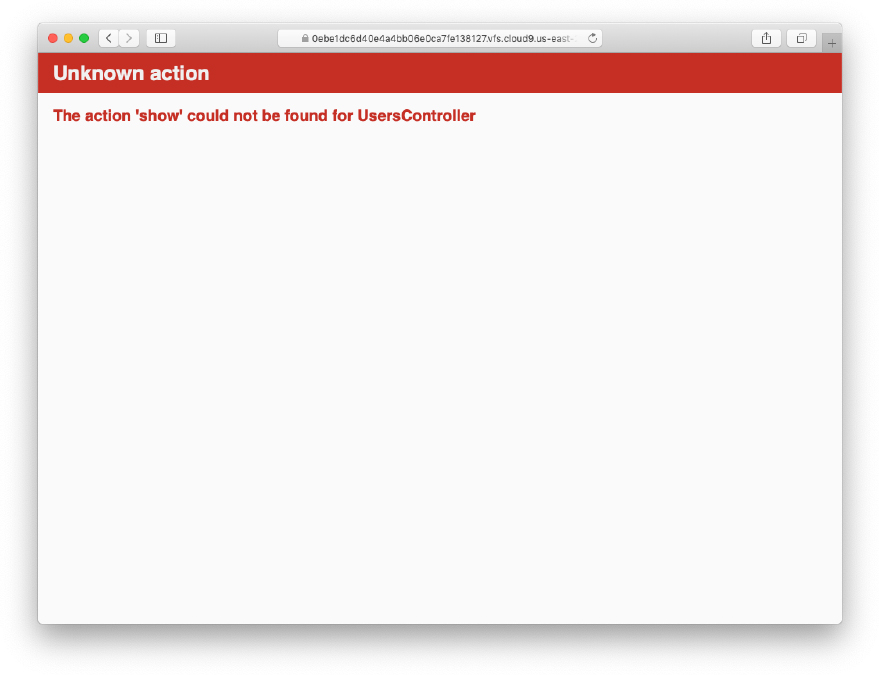
Figure 7.5: The URL /users/1 with routing but no page.
We’ll use the standard Rails location for showing a user, which is app/-views/users/show.html.erb. Unlike the new.html.erb view, which we created with the generator in Listing 5.38, the show.html.erb file doesn’t currently exist, so you’ll have to create it by hand,7 and then fill it with the content shown in Listing 7.4.
7 Using, e.g., touch app/views/users/show.html.erb.
Listing 7.4: A stub view for showing user information.
app/views/users/show.html.erb
<%= @user.name %>, <%= @user.email %>
This view uses embedded Ruby to display the user’s name and email address, assuming the existence of an instance variable called @user. Of course, eventually the real user show page will look very different (and won’t display the email address publicly).
In order to get the user show view to work, we need to define an @user variable in the corresponding show action in the Users controller. As you might expect, we use the find method on the User model (Section 6.1.4) to retrieve the user from the database, as shown in Listing 7.5.
Listing 7.5: The Users controller with a show action.
app/controllers/users_controller.rb
class UsersController < ApplicationController

  def show
    @user = User.find(params[:id])
  end

  def new
  end
end
Here we’ve used params to retrieve the user id. When we make the appropriate request to the Users controller, params[:id] will be the user id 1, so the effect is the same as the find method User.find(1) we saw in Section 6.1.4. (Technically, params[:id] is the string "1", but find is smart enough to convert this to an integer.)
With the user view and action defined, the URL /users/1 works perfectly, as seen in Figure 7.6. (If you haven’t restarted the Rails server since adding bcrypt, you may have to do so at this time. This sort of thing is a good application of technical sophistication (Box 1.2).) Note that the debug information in Figure 7.6 confirms the value of params[:id]:
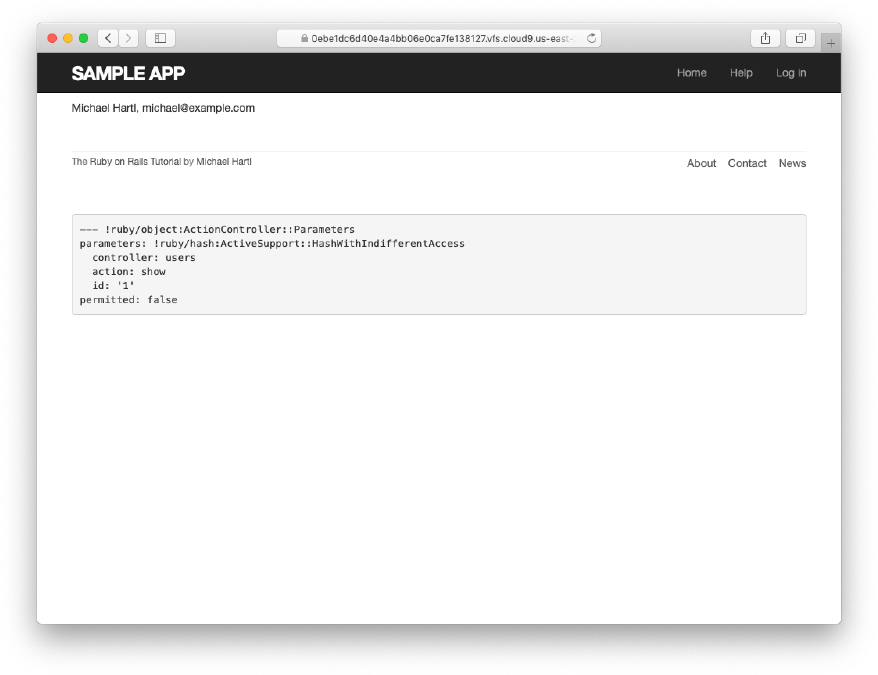
Figure 7.6: The user show page after adding a Users resource.
---
action: show
controller: users
id: '1'
This is why the code
User.find(params[:id])
in Listing 7.5 finds the user with id 1.
Exercises
Solutions to the exercises are available to all Rails Tutorial purchasers here.
To see other people’s answers and to record your own, subscribe to the Rails Tutorial course or to the Learn Enough All Access Bundle.
1. Using embedded Ruby, add the created_at and updated_at “magic column” attributes to the user show page from Listing 7.4.
2. Using embedded Ruby, add Time.now to the user show page. What happens when you refresh the browser?
7.1.3 Debugger
We saw in Section 7.1.2 how the information in the debug could help us understand what’s going on in our application, but there’s also a more direct way to get debugging information using the byebug gem (Listing 3.2). To see how it works, we just need to add a line consisting of debugger to our application, as shown in Listing 7.6.
Listing 7.6: The Users controller with a debugger.
app/controllers/users_controller.rb
class UsersController < ApplicationController

  def show
    @user = User.find(params[:id])
    debugger
  end

  def new
  end
end
Now, when we visit /users/1, the Rails server shows a byebug prompt (Figure 7.7):
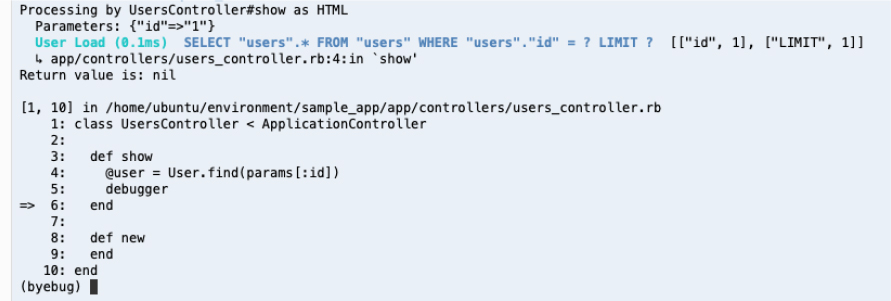
Figure 7.7: The byebug prompt in the Rails server.
(byebug)
We can treat byebug like a Rails console, issuing commands to figure out the state of the application:
(byebug) @user.name
"Michael Hartl"
(byebug) @user.email
"[email protected]"
(byebug) params[:id]
"1"
To release the prompt and continue execution of the application, press Ctrl-D, then remove the debugger line from the show action (Listing 7.7).
Listing 7.7: The Users controller with the debugger line removed.
app/controllers/users_controller.rb
class UsersController < ApplicationController

  def show
    @user = User.find(params[:id])
  end

  def new
  end
end
Whenever you’re confused about something in a Rails application, it’s a good practice to put debugger close to the code you think might be causing the trouble. Inspecting the state of the system using byebug is a powerful method for tracking down application errors and interactively debugging your application.
Exercises
Solutions to the exercises are available to all Rails Tutorial purchasers here.
To see other people’s answers and to record your own, subscribe to the Rails Tutorial course or to the Learn Enough All Access Bundle.
1. With the debugger in the show action as in Listing 7.6, hit /users/1. Use puts to display the value of the YAML form of the params hash. Hint: Refer to the relevant exercise in Section 7.1.1. How does it compare to the debug information shown by the debug method in the site template?
2. Put the debugger in the User new action and hit /users/new. What is the value of @user?
7.1.4 A Gravatar image and a sidebar
Having defined a basic user page in the previous section, we’ll now flesh it out a little with a profile image for each user and the first cut of the user sidebar. We’ll start by adding a “globally recognized avatar”, or Gravatar, to the user profile.8 Gravatar is a free service that allows users to upload images and associate them with email addresses they control. As a result, Gravatars are a convenient way to include user profile images without going through the trouble of managing image upload, cropping, and storage; all we need to do is construct the proper Gravatar image URL using the user’s email address and the corresponding Gravatar image will automatically appear. (We’ll learn how to handle custom image upload in Section 13.4.)
8 In Hinduism, an avatar is the manifestation of a deity in human or animal form. By extension, the term avatar is commonly used to mean some kind of personal representation, especially in a virtual environment. (In the context of Twitter and other social media, the term avi has gained currency, which is likely a mutated form of avatar.)
Our plan is to define a gravatar_for helper function to return a Gravatar image for a given user, as shown in Listing 7.8.
Listing 7.8: The user show view with name and Gravatar.
app/views/users/show.html.erb
<% provide(:title, @user.name) %>
<h1>
    <%= gravatar_for @user %>
    <%= @user.name %>
</h1>
By default, methods defined in any helper file are automatically available in any view, but for convenience we’ll put the gravatar_for method in the file for helpers associated with the Users controller. As noted in the Gravatar documentation, Gravatar URLs are based on an MD5 hash of the user’s email address. In Ruby, the MD5 hashing algorithm is implemented using the hex-digest method, which is part of the Digest library:
>> email = "[email protected]"
>> Digest::MD5::hexdigest(email.downcase)
=> "1fda4469bcbec3badf5418269ffc5968"
Since email addresses are case-insensitive (Section 6.2.4) but MD5 hashes are not, we’ve used the downcase method to ensure that the argument to hex-digest is all lower-case. (Because of the email downcasing callback in Listing 6.32, this will never make a difference in this tutorial, but it’s a good practice in case the gravatar_for ever gets used on email addresses from other sources.) The resulting gravatar_for helper appears in Listing 7.9.
Listing 7.9: Defining a gravatar_for helper method.
app/helpers/users_helper.rb
module UsersHelper

  # Returns the Gravatar for the given user.
  def gravatar_for(user)
    gravatar_id = Digest::MD5::hexdigest(user.email.downcase)
    gravatar_url = "https://secure.gravatar.com/avatar/#{gravatar_id}"
    image_tag(gravatar_url, alt: user.name, class: "gravatar")
  end
end
The code in Listing 7.9 returns an image tag for the Gravatar with a gravatar CSS class and alt text equal to the user’s name (which is especially convenient for visually impaired users using a screen reader).
The profile page appears as in Figure 7.8, which shows the default Gravatar image, which appears because [email protected] isn’t a real email address. (In fact, as you can see by visiting it, the example.com domain is reserved for examples like this one.)

Figure 7.8: The user profile page with the default Gravatar.
To get our application to display a custom Gravatar, we’ll use update_-attributes (Section 6.1.5) to change the user’s email to something I control:
$ rails console
>> user = User.first
>> user.update(name: "Example User",
?>             email: "[email protected]",
?>             password: "foobar",
?>             password_confirmation: "foobar")
=> true
Here we’ve assigned the user the email address [email protected], which I’ve associated with the Rails Tutorial logo, as seen in Figure 7.9.
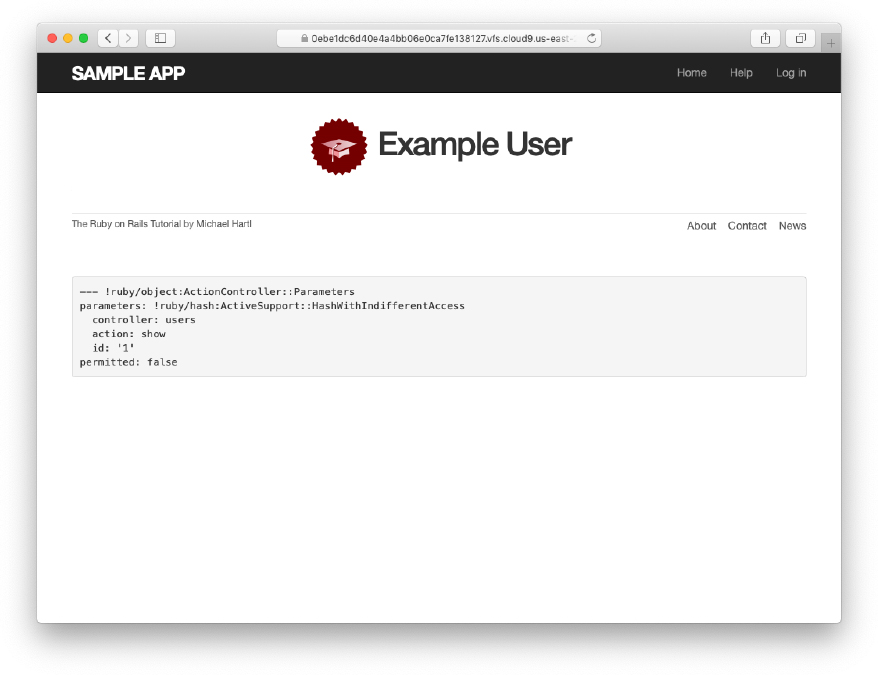
Figure 7.9: The user show page with a custom Gravatar.
The last element needed to complete the mockup from Figure 7.1 is the initial version of the user sidebar. We’ll implement it using the aside tag, which is used for content (such as sidebars) that complements the rest of the page but can also stand alone. We include row and col-md-4 classes, which are both part of Bootstrap. The code for the modified user show page appears in Listing 7.10.
Listing 7.10: Adding a sidebar to the user show view.
app/views/users/show.html.erb
<% provide(:title, @user.name) %>
<div class="row">
  <aside class="col-md-4">
    <section class="user_info">
      <h1>
        <%= gravatar_for @user %>
        <%= @user.name %>
      </h1>
    </section>
  </aside>
</div>
With the HTML elements and CSS classes in place, we can style the profile page (including the sidebar and the Gravatar) with the SCSS shown in Listing 7.11.9 (Note the nesting of the table CSS rules, which works only because of the Sass engine used by the asset pipeline.) The resulting page is shown in Figure 7.10.

Figure 7.10: The user show page with a sidebar and CSS.
9 Listing 7.11 includes the .gravatar_edit class, which we’ll put to work in Chapter 10.
Listing 7.11: SCSS for styling the user show page, including the sidebar.
app/assets/stylesheets/custom.scss
.
.
.
/* sidebar */

aside {
  section.user_info {
    margin-top: 20px;
  }
  section {
    padding: 10px 0;
    margin-top: 20px;
    &:first-child {
      border: 0;
      padding-top: 0;
    }
    span {
      display: block;
      margin-bottom: 3px;
      line-height: 1;
    }
    h1 {
      font-size: 1.4em;
      text-align: left;
      letter-spacing: -1px;
      margin-bottom: 3px;
      margin-top: 0px;
    }
  }
}

.gravatar {
  float: left;
  margin-right: 10px;
}

.gravatar_edit {
  margin-top: 15px;
}
Exercises
Solutions to the exercises are available to all Rails Tutorial purchasers here.
To see other people’s answers and to record your own, subscribe to the Rails Tutorial course or to the Learn Enough All Access Bundle.
1. Associate a Gravatar with your primary email address if you haven’t already. What is the MD5 hash associated with the image?
2. Verify that the code in Listing 7.12 allows the gravatar_for helper defined in Section 7.1.4 to take an optional size parameter, allowing code like gravatar_for user, size: 50 in the view. (We’ll put this improved helper to use in Section 10.3.1.)
3. The options hash used in the previous exercise is still commonly used, but as of Ruby 2.0 we can use keyword arguments instead. Confirm that the code in Listing 7.13 can be used in place of Listing 7.12. What are the diffs between the two?
Listing 7.12: Adding an options hash in the gravatar_for helper.
app/helpers/users_helper.rb
module UsersHelper

  # Returns the Gravatar for the given user.
  def gravatar_for(user, options = { size: 80 })
    size         = options[:size]
    gravatar_id  = Digest::MD5::hexdigest(user.email.downcase)
    gravatar_url = "https://secure.gravatar.com/avatar/#{gravatar_id}?s=#{size}"
    image_tag(gravatar_url, alt: user.name, class: "gravatar")
  end
end
Listing 7.13: Using keyword arguments in the gravatar_for helper.
app/helpers/users_helper.rb
module UsersHelper

  # Returns the Gravatar for the given user.
  def gravatar_for(user, size: 80)
    gravatar_id  = Digest::MD5::hexdigest(user.email.downcase)
    gravatar_url = "https://secure.gravatar.com/avatar/#{gravatar_id}?s=#{size}"
    image_tag(gravatar_url, alt: user.name, class: "gravatar")
  end
end
7.2 Signup form
Now that we have a working (though not yet complete) user profile page, we’re ready to make a signup form for our site. We saw in Figure 5.11 (shown again in Figure 7.11) that the signup page is currently blank: useless for signing up new users. The goal of this section is to start changing this sad state of affairs by producing the signup form mocked up in Figure 7.12.
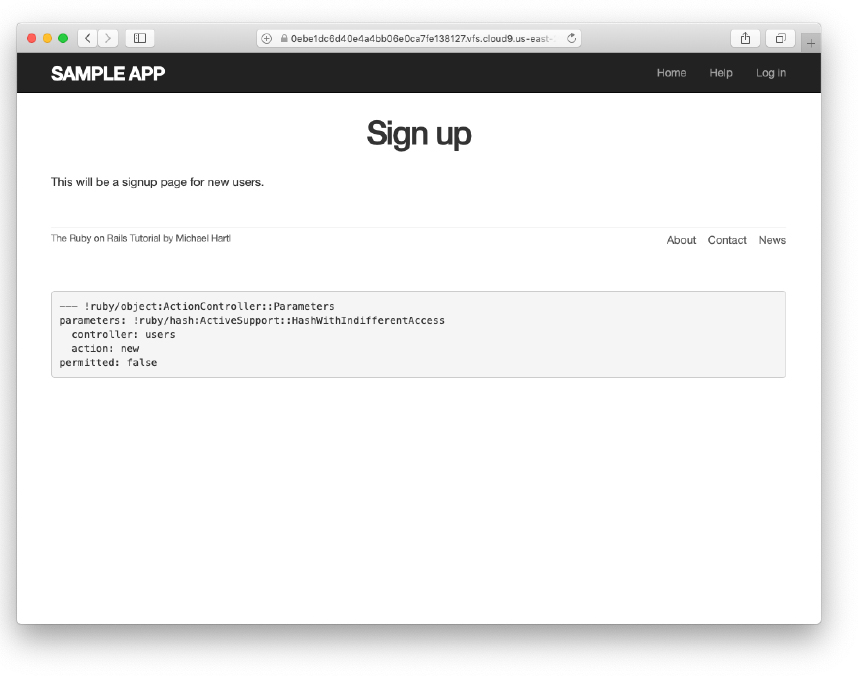
Figure 7.11: The current state of the signup page /signup.
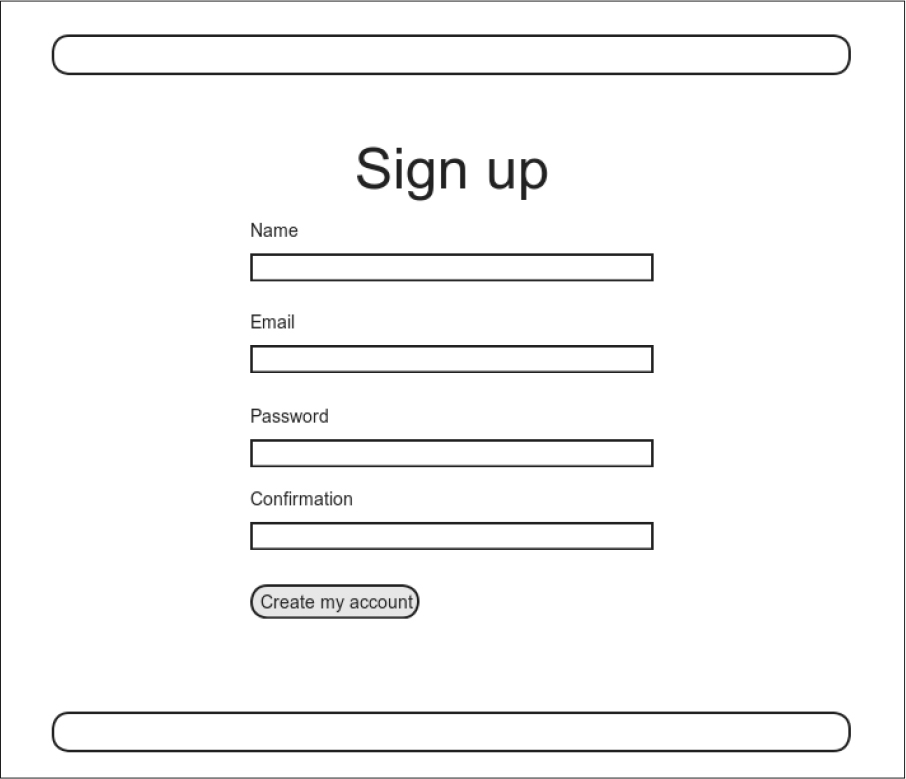
Figure 7.12: A mockup of the user signup page.
7.2.1 Using form_with
The heart of the signup page is a form for submitting the relevant signup information (name, email, password, confirmation). We can accomplish this in Rails with the form_with helper method, which uses an Active Record object to build a form using the object’s attributes.
Recalling that the signup page /signup is routed to the new action in the Users controller (Listing 5.43), our first step is to create the User object required as an argument to form_with. The resulting @user variable definition appears in Listing 7.14.
Listing 7.14: Adding an @user variable to the new action.
app/controllers/users_controller.rb
class UsersController < ApplicationController

  def show
    @user = User.find(params[:id])
  end

  def new
    @user = User.new
  end
end
The form itself appears as in Listing 7.15. We’ll discuss it in detail in Section 7.2.2, but first let’s style it a little with the SCSS in Listing 7.16. (Note the reuse of the box_sizing mixin from Listing 7.2.) Once these CSS rules have been applied, the signup page appears as in Figure 7.13.
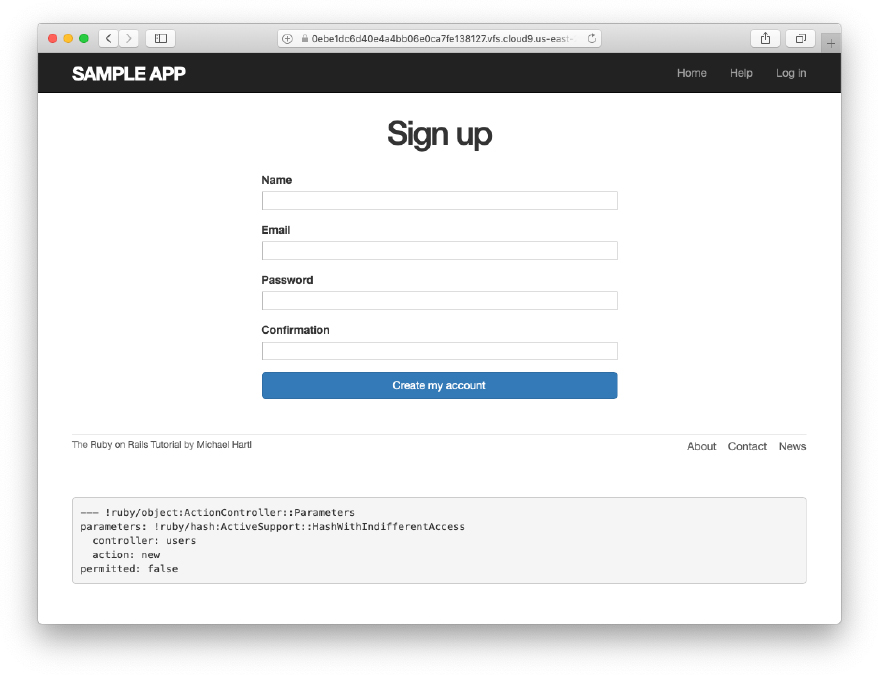
Figure 7.13: The user signup form.
Listing 7.15: A form to sign up new users.
app/views/users/new.html.erb
<% provide(:title, 'Sign up') %>
<h1>Sign up</h1>

<div class="row">
  <div class="col-md-6 col-md-offset-3">
    <%= form_with(model: @user, local: true) do |f| %>
      <%= f.label :name %>
      <%= f.text_field :name %>

      <%= f.label :email %>
      <%= f.email_field :email %>

      <%= f.label :password %>
      <%= f.password_field :password %>

      <%= f.label :password_confirmation, "Confirmation" %>
      <%= f.password_field :password_confirmation %>

      <%= f.submit "Create my account", class: "btn btn-primary" %>
    <% end %>
  </div>
</div>
Listing 7.16: CSS for the signup form.
app/assets/stylesheets/custom.scss
.
.
.
/* forms */

input, textarea, select, .uneditable-input {
  border: 1px solid #bbb;
  width: 100%;
  margin-bottom: 15px;
  @include box_sizing;
}

input {
  height: auto !important;
}
Exercises
Solutions to the exercises are available to all Rails Tutorial purchasers here.
To see other people’s answers and to record your own, subscribe to the Rails Tutorial course or to the Learn Enough All Access Bundle.
1. Confirm by replacing all occurrences of f with foobar that the name of the block variable is irrelevant as far as the result is concerned. Why might foobar nevertheless be a bad choice?
7.2.2 Signup form HTML
To understand the form defined in Listing 7.15, it’s helpful to break it into smaller pieces. We’ll first look at the outer structure, which consists of embedded Ruby opening with a call to form_with and closing with end:
<%= form_with(model: @user, local: true) do |f| %>
  .
  .
  .
<% end %>
The presence of the do keyword indicates that form_with takes a block with one variable, which we’ve called f (for “form”). Note the presence of the hash argument local: true; by default, form_with sends a “remote” XHR request, whereas we want a regular “local” form request, mostly so that our error messages will render properly (Section 7.3.3).
As is usually the case with Rails helpers, we don’t need to know any details about the implementation, but what we do need to know is what the f object does: when called with a method corresponding to an HTML form element— such as a text field, radio button, or password field—f returns code for that element specifically designed to set an attribute of the @user object. In other words,
<%= f.label :name %>
<%= f.text_field :name %>
creates the HTML needed to make a labeled text field element appropriate for setting the name attribute of a User model.
If you look at the HTML for the generated form by Ctrl-clicking and using the “inspect element” function of your browser, the page’s source should look something like Listing 7.17. Let’s take a moment to discuss its structure.
Listing 7.17: The HTML for the form in Figure 7.13.
<form accept-charset="UTF-8" action="/users" class="new_user"
      id="new_user" method="post">
  <input name="authenticity_token" type="hidden"
         value="NNb6+J/j46LcrgYUC60wQ2titMuJQ5lLqyAbnbAUkdo=" />
  <label for="user_name">Name</label>
  <input id="user_name" name="user[name]" type="text" />

  <label for="user_email">Email</label>
  <input id="user_email" name="user[email]" type="email" />

  <label for="user_password">Password</label>
  <input id="user_password" name="user[password]"
         type="password" />

  <label for="user_password_confirmation">Confirmation</label>
  <input id="user_password_confirmation"
         name="user[password_confirmation]" type="password" />

  <input class="btn btn-primary" name="commit" type="submit"
         value="Create my account" />
</form>
We’ll start with the internal structure of the document. Comparing Listing 7.15 with Listing 7.17, we see that the embedded Ruby
<%= f.label :name %>
<%= f.text_field :name %>
produces the HTML
<label for="user_name">Name</label>
<input id="user_name" name="user[name]" type="text" />
while
<%= f.label :email %>
<%= f.email_field :email %>
produces the HTML
<label for="user_email">Email</label>
<input id="user_email" name="user[email]" type="email" />
and
<%= f.label :password %>
<%= f.password_field :password %>
produces the HTML
<label for="user_password">Password</label>
<input id="user_password" name="user[password]" type="password" />
As seen in Figure 7.14, text and email fields (type="text" and type="email") simply display their contents, whereas password fields (type="password") obscure the input for security purposes, as seen in Figure 7.14. (The benefit of using an email field is that some systems treat it differently from a text field; for example, the code type="email" will cause some mobile devices to display a special keyboard optimized for entering email addresses.)

Figure 7.14: A filled-in form with text and password fields.
As we’ll see in Section 7.4, the key to creating a user is the special name attribute in each input:
<input id="user_name" name="user[name]" - - - />
.
.
.
<input id="user_password" name="user[password]" - - - />
These name values allow Rails to construct an initialization hash (via the params variable) for creating users using the values entered by the user, as we’ll see in Section 7.3.
The second important element is the form tag itself. Rails creates the form tag using the @user object: because every Ruby object knows its own class (Section 4.4.1), Rails figures out that @user is of class User; moreover, since @user is a new user, Rails knows to construct a form with the post method, which is the proper verb for creating a new object (Box 3.2):
<form action="/users" class="new_user" id="new_user" method="post">
Here the class and id attributes are largely irrelevant; what’s important is action="/users" and method="post". Together, these constitute instructions to issue an HTTP POST request to the /users URL. We’ll see in the next two sections what effects this has.
(You may also have noticed the code that appears just inside the form tag:
<input name="authenticity_token" type="hidden"
       value="NNb6+J/j46LcrgYUC60wQ2titMuJQ5lLqyAbnbAUkdo=" />
This code, which isn’t displayed in the browser, is used internally by Rails, so it’s not important for us to understand what it does. Briefly, it includes an authenticity token, which Rails uses to thwart an attack called a cross-site request forgery (CSRF). Knowing when it’s OK to ignore details like this is a good mark of technical sophistication (Box 1.2).)10
10 See the Stack Overflow entry on the Rails authenticity token if you’re interested in the details of how this works.
Exercises
Solutions to the exercises are available to all Rails Tutorial purchasers here.
To see other people’s answers and to record your own, subscribe to the Rails Tutorial course or to the Learn Enough All Access Bundle.
1. Learn Enough HTML to Be Dangerous, in which all HTML is written by hand, doesn’t cover the form tag. Why not?
7.3 Unsuccessful signups
Although we’ve briefly examined the HTML for the form in Figure 7.13 (shown in Listing 7.17), we haven’t yet covered any details, and the form is best understood in the context of signup failure. In this section, we’ll create a signup form that accepts an invalid submission and re-renders the signup page with a list of errors, as mocked up in Figure 7.15.
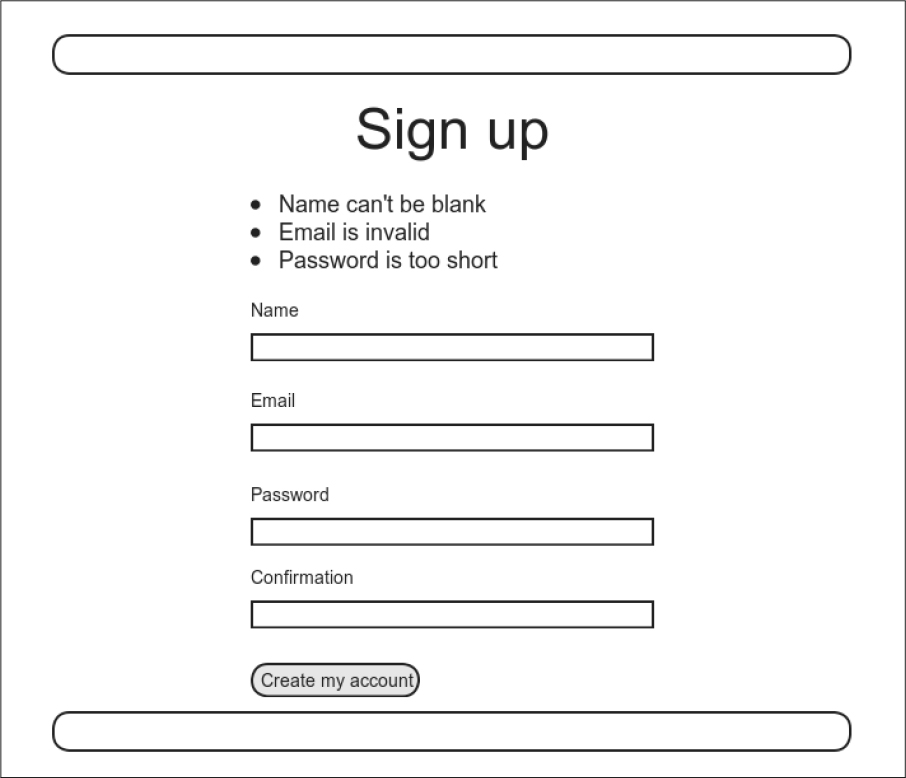
Figure 7.15: A mockup of the signup failure page.
7.3.1 A working form
Recall from Section 7.1.2 that adding resources :users to the routes.rb file (Listing 7.3) automatically ensures that our Rails application responds to the RESTful URLs from Table 7.1. In particular, it ensures that a POST request to /users is handled by the create action. Our strategy for the create action is to use the form submission to make a new user object using User.new, try (and fail) to save that user, and then render the signup page for possible resubmission. Let’s get started by reviewing the code for the signup form:
<form action="/users" class="new_user" id="new_user" method="post">
As noted in Section 7.2.2, this HTML issues a POST request to the /users URL.
Our first step toward a working signup form is adding the code in Listing 7.18. This listing includes a second use of the render method, which we first saw in the context of partials (Section 5.1.3); as you can see, render works in controller actions as well. Note that we’ve taken this opportunity to introduce an if-else branching structure, which allows us to handle the cases of failure and success separately based on the value of @user.save, which (as we saw in Section 6.1.3) is either true or false depending on whether or not the save succeeds.
Listing 7.18: A create action that can handle signup failure.
app/controllers/users_controller.rb
class UsersController < ApplicationController

  def show
    @user = User.find(params[:id])
  end

  def new
    @user = User.new
  end

  def create
    @user = User.new(params[:user]) # Not the final implementation!
    if @user.save
      # Handle a successful save.
    else
      render 'new'
    end
  end
end
Note the comment: this is not the final implementation. But it’s enough to get us started, and we’ll finish the implementation in Section 7.3.2.
The best way to understand how the code in Listing 7.18 works is to submit the form with some invalid signup data. The result appears in Figure 7.16, and the full debug information appears in Figure 7.17.
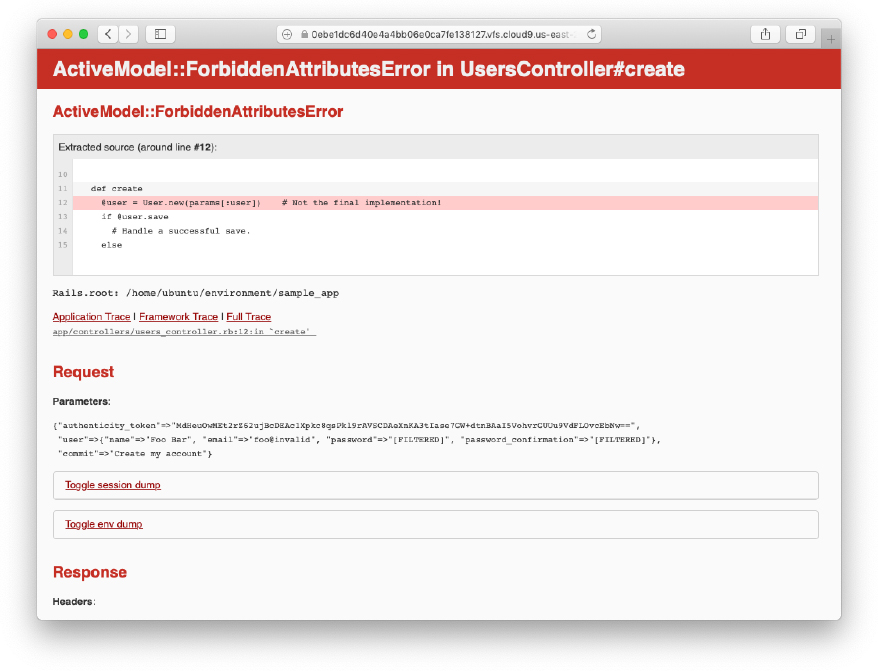
Figure 7.16: Signup failure upon submitting invalid data.

Figure 7.17: Signup failure debug information.
To get a better picture of how Rails handles the submission, let’s take a closer look at the user part of the parameters hash from the debug information (Figure 7.17):
"user" => { "name" => "Foo Bar",
            "email" => "foo@invalid",
            "password" => "[FILTERED]",
            "password_confirmation" => "[FILTERED]"
          }
This hash gets passed to the Users controller as part of params, and we saw starting in Section 7.1.2 that the params hash contains information about each request. In the case of a URL like /users/1, the value of params[:id] is the id of the corresponding user (1 in this example). In the case of posting to the signup form, params instead contains a hash of hashes, a construction we first saw in Section 4.3.3, which introduced the strategically named params variable in a console session. The debug information above shows that submitting the form results in a user hash with attributes corresponding to the submitted values, where the keys come from the name attributes of the input tags seen in Listing 7.17. For example, the value of
<input id="user_email" name="user[email]" type="email" />
with name "user[email]" is precisely the email attribute of the user hash.
Although the hash keys appear as strings in the debug output, we can access them in the Users controller as symbols, so that params[:user] is the hash of user attributes—in fact, exactly the attributes needed as an argument to User.new, as first seen in Section 4.4.5 and appearing in Listing 7.18. This means that the line
@user = User.new(params[:user])
is mostly equivalent to
@user = User.new(name: "Foo Bar", email: "foo@invalid",
                 password: "foo", password_confirmation: "bar")
In previous versions of Rails, using
@user = User.new(params[:user])
actually worked, but it was insecure by default and required a careful and error-prone procedure to prevent malicious users from potentially modifying the application database. In Rails version later than 4.0, this code raises an error (as seen in Figure 7.16 and Figure 7.17 above), which means it is secure by default.
7.3.2 Strong parameters
We mentioned briefly in Section 4.4.5 the idea of mass assignment, which involves initializing a Ruby variable using a hash of values, as in
@user = User.new(params[:user]) # Not the final implementation!
The comment included in Listing 7.18 and reproduced above indicates that this is not the final implementation. The reason is that initializing the entire params hash is extremely dangerous—it arranges to pass to User.new all data submitted by a user. In particular, suppose that, in addition to the current attributes, the User model included an admin attribute used to identify administrative users of the site. (We will implement just such an attribute in Section 10.4.1.) The way to set such an attribute to true is to pass the value admin='1' as part of params[:user], a task that is easy to accomplish using a command-line HTTP client such as curl. The result would be that, by passing in the entire params hash to User.new, we would allow any user of the site to gain administrative access by including admin='1' in the web request.
Previous versions of Rails used a method called attr_accessible in the model layer to solve this problem, and you may still see that method in legacy Rails applications, but as of Rails 4.0 the preferred technique is to use so-called strong parameters in the controller layer. This allows us to specify which parameters are required and which ones are permitted. In addition, passing in a raw params hash as above will cause an error to be raised, so that Rails applications are now immune to mass assignment vulnerabilities by default.
In the present instance, we want to require the params hash to have a :user attribute, and we want to permit the name, email, password, and password confirmation attributes (but no others). We can accomplish this as follows:
params.require(:user).permit(:name, :email, :password, :password_confirmation)
This code returns a version of the params hash with only the permitted attributes (while raising an error if the :user attribute is missing).
To facilitate the use of these parameters, it’s conventional to introduce an auxiliary method called user_params (which returns an appropriate initialization hash) and use it in place of params[:user]:
@user = User.new(user_params)
Since user_params will only be used internally by the Users controller and need not be exposed to external users via the web, we’ll make it private using Ruby’s private keyword, as shown in Listing 7.19. (We’ll discuss private in more detail in Section 9.1.)
Listing 7.19: Using strong parameters in the create action.
app/controllers/users_controller.rb
class UsersController < ApplicationController
  .
  .
  .
  def create
    @user = User.new(user_params)
    if @user.save
      # Handle a successful save.
    else
      render 'new'
    end
  end

  private

    def user_params
      params.require(:user).permit(:name, :email, :password,
                                   :password_confirmation)
    end
end
By the way, the extra level of indentation on the user_params method is designed to make it visually apparent which methods are defined after private. (Experience shows that this is a wise practice; in classes with a large number of methods, it is easy to define a private method accidentally, which leads to considerable confusion when it isn’t available to call on the corresponding object.)
At this point, the signup form is working, at least in the sense that it no longer produces an error upon submission. On the other hand, as seen in Figure 7.18, it doesn’t display any feedback on invalid submissions (apart from the development-only debug area), which is potentially confusing. It also doesn’t actually create a new user. We’ll fix the first issue in Section 7.3.3 and the second in Section 7.4.

Figure 7.18: The signup form submitted with invalid information.
Exercises
Solutions to the exercises are available to all Rails Tutorial purchasers here.
To see other people’s answers and to record your own, subscribe to the Rails Tutorial course or to the Learn Enough All Access Bundle.
1. By hitting the URL /signup?admin=1, confirm that the admin attribute appears in the params debug information.
7.3.3 Signup error messages
As a final step in handling failed user creation, we’ll add helpful error messages to indicate the problems that prevented successful signup. Conveniently, Rails automatically provides such messages based on the User model validations. For example, consider trying to save a user with an invalid email address and with a password that’s too short:
$ rails console
>> user = User.new(name: "Foo Bar", email: "foo@invalid",
?>                 password: "dude", password_confirmation: "dude")
>> user.save
=> false
>> user.errors.full_messages
=> ["Email is invalid", "Password is too short (minimum is 6 characters)"]
Here the errors.full_messages object (which we saw briefly before in Section 6.2.2) contains an array of error messages.
As in the console session above, the failed save in Listing 7.18 generates a list of error messages associated with the @user object. To display the messages in the browser, we’ll render an error-messages partial on the user new page while adding the CSS class form-control (which has special meaning to Bootstrap) to each entry field, as shown in Listing 7.20. It’s worth noting that this error-messages partial is only a first attempt; the final version appears in Section 13.3.2.
Listing 7.20: Code to display error messages on the signup form.
app/views/users/new.html.erb
<% provide(:title, 'Sign up') %>
<h1>Sign up</h1>
<div class="row">
  <div class="col-md-6 col-md-offset-3">
    <%= form_with(model: @user, local: true) do |f| %>
      <%= render 'shared/error_messages' %>

      <%= f.label :name %>
      <%= f.text_field :name, class: 'form-control' %>

      <%= f.label :email %>
      <%= f.email_field :email, class: 'form-control' %>

      <%= f.label :password %>
      <%= f.password_field :password, class: 'form-control' %>

      <%= f.label :password_confirmation, "Confirmation" %>
      <%= f.password_field :password_confirmation, class: 'form-control' %>

      <%= f.submit "Create my account", class: "btn btn-primary" %>
    <% end %>
  </div>
</div>
Notice here that we render a partial called 'shared/error_messages'; this reflects the common Rails convention of using a dedicated shared/ directory for partials expected to be used in views across multiple controllers. (We’ll see this expectation fulfilled in Section 10.1.1.)
This means that we have to create a new app/views/shared directory using mkdir and an error messages partial using (Table 1.1):
$ mkdir app/views/shared
We then need to create the _error_messages.html.erb partial file using touch or the text editor as usual. The contents of the partial appear in Listing 7.21.
Listing 7.21: A partial for displaying form submission error messages.
app/views/shared/_error_messages.html.erb
<% if @user.errors.any? %>
    <div id="error_explanation">
      <div class="alert alert-danger">
        The form contains <%= pluralize(@user.errors.count, "error") %>.
      </div>
      <ul>
      <% @user.errors.full_messages.each do |msg| %>
        <li><%= msg %></li>
      <% end %>
    </ul>
  </div>
<% end %>
This partial introduces several new Rails and Ruby constructs, including two methods for Rails error objects. The first method is count, which simply returns the number of errors:
>> user.errors.count
=> 2
The other new method is any?, which (together with empty?) is one of a pair of complementary methods:
>> user.errors.empty?
=> false
>> user.errors.any?
=> true
We see here that the empty? method, which we first saw in Section 4.2.2 in the context of strings, also works on Rails error objects, returning true for an empty object and false otherwise. The any? method is just the opposite of empty?, returning true if there are any elements present and false otherwise. (By the way, all of these methods—count, empty?, and any?—work on Ruby arrays as well. We’ll put this fact to good use starting in Section 13.2.)
The other new idea is the pluralize text helper, which is available in the console via the helper object:
>> helper.pluralize(1, "error")
=> "1 error"
>> helper.pluralize(5, "error")
=> "5 errors"
We see here that pluralize takes an integer argument and then returns the number with a properly pluralized version of its second argument. Underlying this method is a powerful inflector that knows how to pluralize a large number of words, including many with irregular plurals:
>> helper.pluralize(2, "woman")
=> "2 women"
>> helper.pluralize(3, "erratum")
=> "3 errata"
As a result of its use of pluralize, the code
<%= pluralize(@user.errors.count, "error") %>
returns "0 errors", "1 error", "2 errors", and so on, depending on how many errors there are, thereby avoiding ungrammatical phrases such as "1 errors" (a distressingly common mistake in both web and desktop applications).
Note that Listing 7.21 includes the CSS id error_explanation for use in styling the error messages. (Recall from Section 5.1.2 that CSS uses the pound sign # to style ids.) In addition, after an invalid submission Rails automatically wraps the fields with errors in divs with the CSS class field_with_errors. These labels then allow us to style the error messages with the SCSS shown in Listing 7.22, which makes use of Sass’s @extend function to include the functionality of the Bootstrap class has-error.
Listing 7.22: CSS for styling error messages.
app/assets/stylesheets/custom.scss
.
.
.
/* forms */
.
.
.
#error_explanation {
  color: red;
  ul {
    color: red;
    margin: 0 0 30px 0;
  }
}

.field_with_errors {
  @extend .has-error;
  .form-control {
    color: $state-danger-text;
  }
}
With the code in Listing 7.20 and Listing 7.21 and the SCSS from Listing 7.22, helpful error messages now appear when submitting invalid signup information, as seen in Figure 7.19. Because the messages are generated by the model validations, they will automatically change if you ever change your mind about, say, the format of email addresses, or the minimum length of passwords. (Note: Because both the presence validation and the has_secure_password validation catch the case of empty (nil) passwords, the signup form currently produces duplicate error messages when the user submits empty passwords. We could manipulate the error messages directly to eliminate duplicates, but luckily this issue will be fixed automatically by the addition of allow_nil: true in Section 10.1.4.)
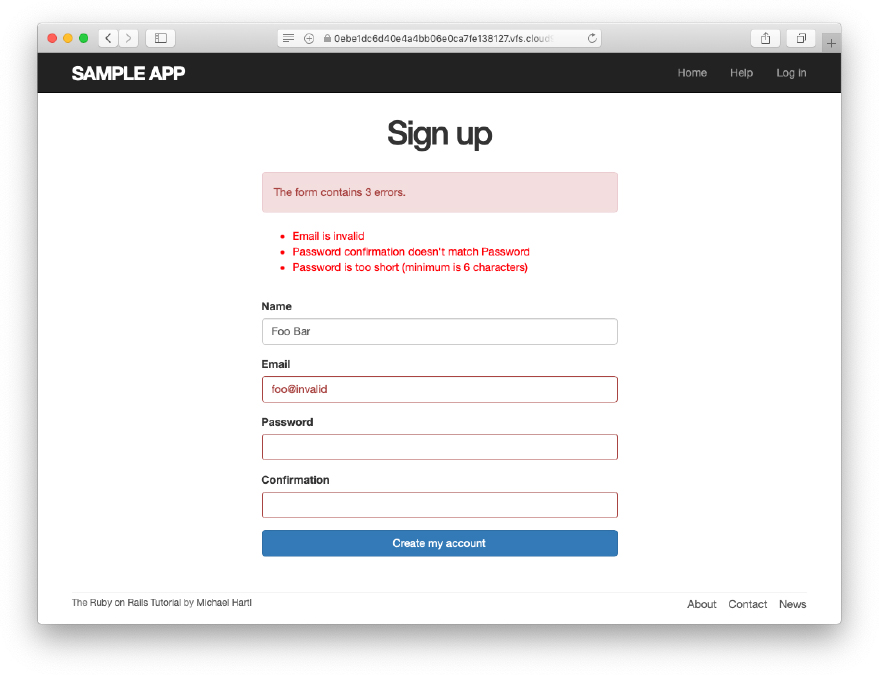
Figure 7.19: Failed signup with error messages.
Exercises
Solutions to the exercises are available to all Rails Tutorial purchasers here.
To see other people’s answers and to record your own, subscribe to the Rails Tutorial course or to the Learn Enough All Access Bundle.
1. Confirm by changing the minimum length of passwords to 5 that the error message updates automatically as well.
2. How does the URL on the unsubmitted signup form (Figure 7.13) compare to the URL for a submitted signup form (Figure 7.19)? Why don’t they match?
7.3.4 A test for invalid submission
In the days before powerful web frameworks with automated testing capabilities, developers had to test forms by hand. For example, to test a signup page manually, we would have to visit the page in a browser and then submit alternately invalid and valid data, verifying in each case that the application’s behavior was correct. Moreover, we would have to remember to repeat the process any time the application changed. This process was painful and error-prone.
Happily, with Rails we can write tests to automate the testing of forms. In this section, we’ll write one such test to verify the correct behavior upon invalid form submission; in Section 7.4.4, we’ll write a corresponding test for valid submission.
To get started, we first generate an integration test file for signing up users, which we’ll call users_signup (adopting the controller convention of a plural resource name):
$ rails generate integration_test users_signup
      invoke test_unit
      create test/integration/users_signup_test.rb
(We’ll use this same file in Section 7.4.4 to test a valid signup.)
The main purpose of our test is to verify that clicking the signup button results in not creating a new user when the submitted information is invalid. (Writing a test for the error messages is left as an exercise (Section 7.3.4).) The way to do this is to check the count of users, and under the hood our tests will use the count method available on every Active Record class, including User:
$ rails console
>> User.count
=> 1
(Here User.count is 1 because of the user created in Section 6.3.4, though it may differ if you’ve added or deleted any users in the interim.) As in Section 5.3.4, we’ll use assert_select to test HTML elements of the relevant pages, taking care to check only elements unlikely to change in the future.
We’ll start by visiting the signup path using get:
get signup_path
In order to test the form submission, we need to issue a POST request to the users_path (Table 7.1), which we can do with the post function:
assert_no_difference 'User.count' do
  post users_path, params: { user: { name: "",
                                     email: "user@invalid",
                                     password:              "foo",
                                     password_confirmation: "bar" } }
end
Here we’ve included the params[:user] hash expected by User.new in the create action (Listing 7.27). (In versions of Rails before 5, params was implicit, and only the user hash would be passed. This practice was deprecated in Rails 5.0, and now the recommended method is to include the full params hash explicitly.)
By wrapping the post in the assert_no_difference method with the string argument 'User.count', we arrange for a comparison between User.count before and after the contents inside the assert_no_difference block. This is equivalent to recording the user count, posting the data, and verifying that the count is the same:
before_count = User.count
post users_path, ...
after_count = User.count
assert_equal before_count, after_count
Although the two are equivalent, using assert_no_difference is cleaner and is more idiomatically correct Ruby.
It’s worth noting that the get and post steps above are technically unrelated, and it’s actually not necessary to get the signup path before posting to the users path. I prefer to include both steps, though, both for conceptual clarity and to double-check that the signup form renders without error.
Putting the above ideas together leads to the test in Listing 7.23. We’ve also included a call to assert_template to check that a failed submission re-renders the new action. Adding lines to check for the appearance of error messages is left as an exercise (Section 7.3.4).
Listing 7.23: A test for an invalid signup. green
test/integration/users_signup_test.rb
require 'test_helper'

class UsersSignupTest < ActionDispatch::IntegrationTest

  test "invalid signup information" do
    get signup_path
    assert_no_difference 'User.count' do
      post users_path, params: { user: { name: "",
                        email: "user@invalid",
                        password:              "foo",
                        password_confirmation: "bar" } }
    end
    assert_template 'users/new'
  end
end
Because we wrote the application code before the integration test, the test suite should be green:
Listing 7.24: green
$ rails test
Exercises
Solutions to the exercises are available to all Rails Tutorial purchasers here.
To see other people’s answers and to record your own, subscribe to the Rails Tutorial course or to the Learn Enough All Access Bundle.
1. Write a test for the error messages implemented in Listing 7.20. How detailed you want to make your tests is up to you; a suggested template appears in Listing 7.25.
Listing 7.25: A template for tests of the error messages.
test/integration/users_signup_test.rb
require 'test_helper'

class UsersSignupTest < ActionDispatch::IntegrationTest

  test "invalid signup information" do
    get signup_path
    assert_no_difference 'User.count' do
      post users_path, params: { user: { name: "",
                        email: "user@invalid",
                        password:              "foo",
                        password_confirmation: "bar" } }
    end
    assert_template 'users/new'
    assert_select 'div#<CSS id for error explanation>'
    assert_select 'div.<CSS class for field with error>'
  end
  .
  .
  .
end
7.4 Successful signups
Having handled invalid form submissions, now it’s time to complete the signup form by actually saving a new user (if valid) to the database. First, we try to save the user; if the save succeeds, the user’s information gets written to the database automatically, and we then redirect the browser to show the user’s profile (together with a friendly greeting), as mocked up in Figure 7.20. If it fails, we simply fall back on the behavior developed in Section 7.3.

Figure 7.20: A mockup of successful signup.
7.4.1 The finished signup form
To complete a working signup form, we need to fill in the commented-out section in Listing 7.19 with the appropriate behavior. Currently, the form simply freezes on valid submission, as indicated by the subtle color change in the submission button (Figure 7.21), although this behavior may be system-dependent. This is because the default behavior for a Rails action is to render the corresponding view, and there isn’t a view template corresponding to the create action (Figure 7.22).
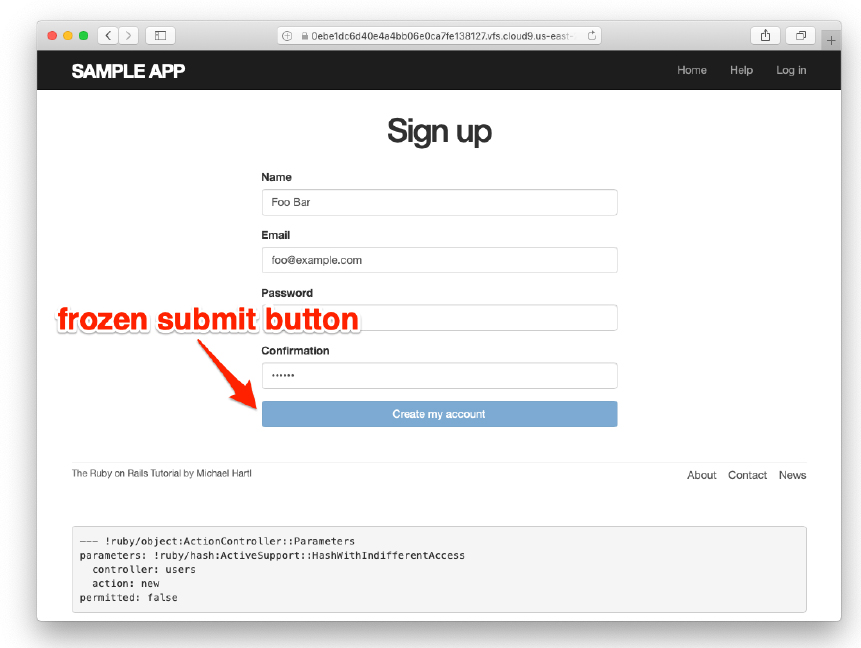
Figure 7.21: The frozen page on valid signup submission.

Figure 7.22: The create template error in the server log.
Although it’s possible to render a template for the create action, the usual practice is to redirect to a different page instead when the creation is successful.
In particular, we’ll follow the common convention of redirecting to the newly created user’s profile, although the root path would also work. The application code, which introduces the redirect_to method, appears in Listing 7.26.
Listing 7.26: The user create action with a save and a redirect.
app/controllers/users_controller.rb
class UsersController < ApplicationController
  .
  .
  .
  def create
    @user = User.new(user_params)
    if @user.save
      redirect_to @user
    else
      render 'new'
    end
  end

  private

    def user_params
      params.require(:user).permit(:name, :email, :password,
                                   :password_confirmation)
    end
end
Note that we’ve written
redirect_to @user
where we could have used the equivalent
redirect_to user_url(@user)
This is because Rails automatically infers from redirect_to @user that we want to redirect to user_url(@user).
Exercises
Solutions to the exercises are available to all Rails Tutorial purchasers here.
To see other people’s answers and to record your own, subscribe to the Rails Tutorial course or to the Learn Enough All Access Bundle.
1. Using the Rails console, verify that a user is in fact created when submitting valid information.
2. Confirm by updating Listing 7.26 and submitting a valid user that redirect_to user_url(@user) has the same effect as redirect_to @user.
7.4.2 The flash
With the code in Listing 7.26, our signup form is actually working, but before submitting a valid registration in a browser we’re going to add a bit of polish common in web applications: a message that appears on the subsequent page (in this case, welcoming our new user to the application) and then disappears upon visiting a second page or on page reload.
The Rails way to display a temporary message is to use a special method called the flash, which we can treat like a hash. Rails adopts the convention of a :success key for a message indicating a successful result (Listing 7.27).
Listing 7.27: Adding a flash message to user signup.
app/controllers/users_controller.rb
class UsersController < ApplicationController
  .
  .
  .
  def create
    @user = User.new(user_params)
    if @user.save
      flash[:success] = "Welcome to the Sample App!"
      redirect_to @user
    else
      render 'new'
    end
  end

  private

    def user_params
      params.require(:user).permit(:name, :email, :password,
                                   :password_confirmation)
    end
end
By assigning a message to the flash, we are now in a position to display the message on the first page after the redirect. Our method is to iterate through the flash and insert all relevant messages into the site layout. You may recall the console example in Section 4.3.3, where we saw how to iterate through a hash using the strategically named flash variable (Listing 7.28).
Listing 7.28: Iterating through a flash hash in the console.
$ rails console
>> flash = { success: "It worked!", danger: "It failed." }
=> {:success=>"It worked!", danger: "It failed."}
>> flash.each do |key, value|
?>   puts "#{key}"
?>   puts "#{value}"
>> end
success
It worked!
danger
It failed.
By following this pattern, we can arrange to display the contents of the flash site-wide using code like this:
<% flash.each do |message_type, message| %>
<div class="alert alert-<%= message_type %>"><%= message %></div>
<% end %>
(This code is a particularly ugly and difficult-to-read combination of HTML and ERb; making it prettier is left as an exercise (Section 7.4.4).) Here the embedded Ruby
alert-<%= message_type %>
makes a CSS class corresponding to the type of message, so that for a :success message the class is
alert-success
(The key :success is a symbol, but embedded Ruby automatically converts it to the string "success" before inserting it into the template.) Using a different class for each key allows us to apply different styles to different kinds of messages. For example, in Section 8.1.4 we’ll use flash[:danger] to indicate a failed login attempt.11 (In fact, we’ve already used alert-danger once, to style the error message div in Listing 7.21.) Bootstrap CSS supports styling for four such flash classes for increasingly urgent message types (success, info, warning, and danger), and we’ll find occasion to use all of them in the course of developing the sample application (info in Section 11.2, warning in Section 11.3, and danger for the first time in Section 8.1.4).
11 Actually, we’ll use the closely related flash.now, but we’ll defer that subtlety until we need it.
Because the message is also inserted into the template, the full HTML result for
flash[:success] = "Welcome to the Sample App!"
appears as follows:
<div class="alert alert-success">Welcome to the Sample App!</div>
Putting the embedded Ruby discussed above into the site layout leads to the code in Listing 7.29.
Listing 7.29: Adding the contents of the flash variable to the site layout.
app/views/layouts/application.html.erb
<!DOCTYPE html>
<html>
    .
    .
    .
    <body>
      <%= render 'layouts/header' %>
      <div class="container">
        <% flash.each do |message_type, message| %>
          <div class="alert alert-<%= message_type %>"><%= message %></div>
        <% end %>
        <%= yield %>
        <%= render 'layouts/footer' %>
        <%= debug(params) if Rails.env.development? %>
    </div>
    .
    .
    .
  </body>
</html>
Exercises
Solutions to the exercises are available to all Rails Tutorial purchasers here.
To see other people’s answers and to record your own, subscribe to the Rails Tutorial course or to the Learn Enough All Access Bundle.
1. In the console, confirm that you can use interpolation (Section 4.2.1) to interpolate a raw symbol. For example, what is the return value of "#{:success}"?
2. How does the previous exercise relate to the flash iteration shown in Listing 7.28?
7.4.3 The first signup
We can see the result of all this work by signing up the first user for the sample app. Even though previous submissions didn’t work properly (as shown in Figure 7.21), the user.save line in the Users controller still works, so users might still have been created. To clear them out, we’ll reset the database as follows:
$ rails db:migrate:reset
On some systems you might have to restart the webserver (using Ctrl-C) for the changes to take effect (Box 1.2).
We’ll create the first user with the name “Rails Tutorial” and email address “[email protected]”, as shown in Figure 7.23). The resulting page (Figure 7.24) shows a friendly flash message upon successful signup, including nice green styling for the success class, which comes included with the Bootstrap CSS framework from Section 5.1.2. Then, upon reloading the user show page, the flash message disappears as promised (Figure 7.25).

Figure 7.23: Filling in the information for the first signup.

Figure 7.24: The results of a successful user signup, with flash message.
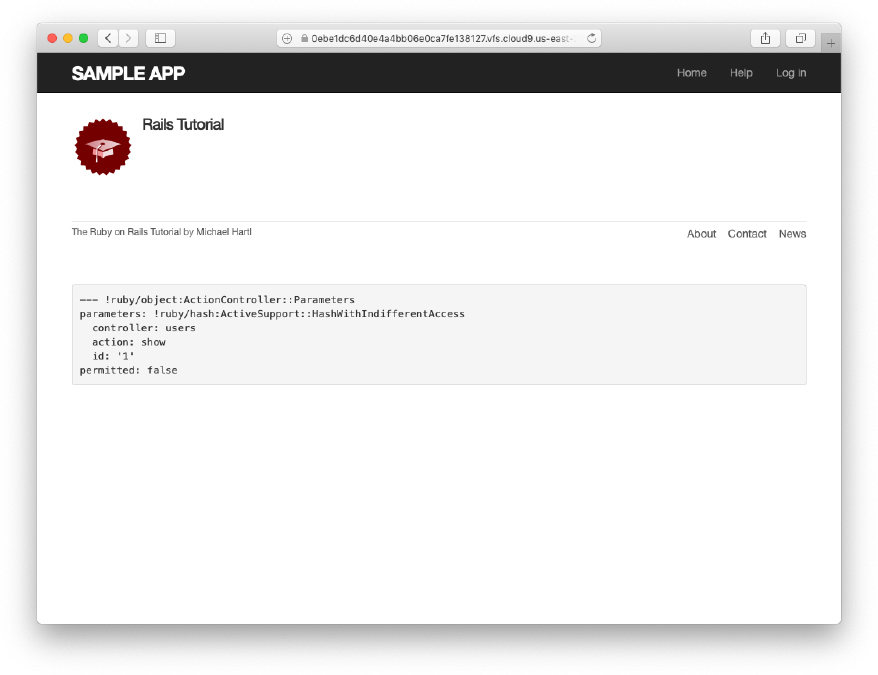
Figure 7.25: The flash-less profile page after a browser reload.
Exercises
Solutions to the exercises are available to all Rails Tutorial purchasers here.
To see other people’s answers and to record your own, subscribe to the Rails Tutorial course or to the Learn Enough All Access Bundle.
1. Using the Rails console, find by the email address to double-check that the new user was actually created. The result should look something like Listing 7.30.
2. Create a new user with your primary email address. Verify that the Gravatar correctly appears.
Listing 7.30: Finding the newly created user in the database.
$ rails console
>> User.find_by(email: "[email protected]")
=> #<User id: 1, name: "Rails Tutorial", email: "example@railstutorial.
org", created_at: "2016-05-31 17:17:33", updated_at: "2016-05-31 17:17:33",
password_digest: "$2a$10$8MaeHdnOhZvMk3GmFdmpPOeG6a7u7/k2Z9TMjOanC9G...">
7.4.4 A test for valid submission
Before moving on, we’ll write a test for valid submission to verify our application’s behavior and catch regressions. As with the test for invalid submission in Section 7.3.4, our main purpose is to verify the contents of the database. In this case, we want to submit valid information and then confirm that a user was created. In analogy with Listing 7.23, which used
assert_no_difference 'User.count' do
  post users_path, ...
end
here we’ll use the corresponding assert_difference method:
assert_difference 'User.count', 1 do
  post users_path, ...
end
As with assert_no_difference, the first argument is the string 'User.-count', which arranges for a comparison between User.count before and after the contents of the assert_difference block. The second (optional) argument specifies the size of the difference (in this case, 1).
Incorporating assert_difference into the file from Listing 7.23 yields the test shown in Listing 7.31. Note that we’ve used the follow_redirect! method after posting to the users path. This simply arranges to follow the redirect after submission, resulting in a rendering of the 'users/show' template. (It’s probably a good idea to write a test for the flash as well, which is left as an exercise (Section 7.4.4).)
Listing 7.31: A test for a valid signup. green
test/integration/users_signup_test.rb
require 'test_helper'

class UsersSignupTest < ActionDispatch::IntegrationTest
  .
  .
  .
  test "valid signup information" do
    get signup_path
    assert_difference 'User.count', 1 do
      post users_path, params: { user: { name: "Example User",
                                         email: "[email protected]",
                                         password:              "password",
                                         password_confirmation: "password" } }
    end
     follow_redirect!
     assert_template 'users/show'
  end
end
Note that Listing 7.31 also verifies that the user show template renders following successful signup. For this test to work, it’s necessary for the Users routes (Listing 7.3), the Users show action (Listing 7.5), and the show.html.-erb view (Listing 7.8) to work correctly. As a result, the one line
assert_template 'users/show'
is a sensitive test for almost everything related to a user’s profile page. This sort of end-to-end coverage of important application features illustrates one reason why integration tests are so useful.
Exercises
Solutions to the exercises are available to all Rails Tutorial purchasers here.
To see other people’s answers and to record your own, subscribe to the Rails Tutorial course or to the Learn Enough All Access Bundle.
1. Write a test for the flash implemented in Section 7.4.2. How detailed you want to make your tests is up to you; a suggested ultra-minimalist template appears in Listing 7.32, which you should complete by replacing FILL_IN with the appropriate code. (Even testing for the right key, much less the text, is likely to be brittle, so I prefer to test only that the flash isn’t empty.)
2. As noted above, the flash HTML in Listing 7.29 is ugly. Verify by running the test suite that the cleaner code in Listing 7.33, which uses the Rails content_tag helper, also works.
3. Verify that the test fails if you comment out the redirect line in Listing 7.26.
4. Suppose we changed @user.save to false in Listing 7.26. How does this change verify that the assert_difference block is testing the right thing?
Listing 7.32: A template for a test of the flash.
test/integration/users_signup_test.rb
require 'test_helper'
  .
  .
  .
  test "valid signup information" do
    get signup_path
    assert_difference 'User.count', 1 do
      post users_path, params: { user: { name: "Example User",
                                         email: "[email protected]",
                                         password:              "password",
                                         password_confirmation: "password" } }
    end
    follow_redirect!
    assert_template 'users/show'
    assert_not flash.FILL_IN
  end
end
Listing 7.33: The flash ERb in the site layout using content_tag.
app/views/layouts/application.html.erb
<!DOCTYPE html>
<html>
      .
      .
      .
      <% flash.each do |message_type, message| %>
        <%= content_tag(:div, message, class: "alert alert-#{message_type}") %>
      <% end %>
      .
      .
      .
</html>
7.5 Professional-grade deployment
Now that we have a working signup page, it’s time to deploy our application and get it working in production. Although we started deploying our application in Chapter 3, this is the first time it will actually do something, so we’ll take this opportunity to make the deployment professional-grade. In particular, we’ll add an important feature to the production application to make signup secure, we’ll replace the default webserver with one suitable for real-world use, and we’ll add some configuration for our production database.
As preparation for the deployment, you should merge your changes into the master branch at this point:
$ git add -A
$ git commit -m "Finish user signup"
$ git checkout master
$ git merge sign-up
7.5.1 SSL in production
When submitting the signup form developed in this chapter, the name, email address, and password get sent over the network, and hence are vulnerable to being intercepted by malicious users. This is a potentially serious security flaw in our application, and the way to fix it is to use Secure Sockets Layer (SSL)12 to encrypt all relevant information before it leaves the local browser. Although we could use SSL on just the signup page, it’s actually easier to implement it site-wide, which has the additional benefits of securing user login (Chapter 8) and making our application immune to the critical session hijacking vulnerability discussed in Section 9.1.
12 Technically, SSL is now TLS, for Transport Layer Security, but everyone I know still says “SSL”.
Although Heroku uses SSL by default, it doesn’t force browsers to use it, so any users hitting our application using regular http will be interacting insecurely with the site. You can see how this works by editing the URL in the address bar to change “https” to “http”; the result appears in Figure 7.26.

Figure 7.26: The result of using an insecure http URL in production.
Luckily, forcing browsers to use SSL is as easy as uncommenting a single line in production.rb, the configuration file for production applications. As shown in Listing 7.34, all we need to do is set config.force_ssl to true.
Listing 7.34: Configuring the application to use SSL in production.
config/environments/production.rb
Rails.application.configure do
  .
  .
  .
  # Force all access to the app over SSL, use Strict-Transport-Security,
  # and use secure cookies.
  config.force_ssl = true
  .
  .
  .
end
At this stage, we need to set up SSL on the remote server. Setting up a production site to use SSL involves purchasing and configuring an SSL certificate for your domain. That’s a lot of work, though, and luckily we won’t need it here: for an application running on a Heroku domain (such as the sample application), we can piggyback on Heroku’s SSL certificate. As a result, when we deploy the application in Section 7.5.2, SSL will automatically be enabled. (If you want to run SSL on a custom domain, such as www.example.com, refer to Heroku’s documentation on SSL.)
7.5.2 Production webserver
Having added SSL, we now need to configure our application to use a web-server suitable for production applications. By default, Heroku uses a pure-Ruby webserver called WEBrick, which is easy to set up and run but isn’t good at handling significant traffic. As a result, WEBrick isn’t suitable for production use, so we’ll replace WEBrick with Puma, an HTTP server that is capable of handling a large number of incoming requests.
To add the new webserver, we simply follow the Heroku Puma documentation. The first step is to include the puma gem in our Gemfile, but as of Rails 5 Puma is included by default (Listing 3.2). This means we can skip right to the second step, which is to replace the default contents of the file con-fig/puma.rb with the configuration shown in Listing 7.35. The code in Listing 7.35 comes straight from the Heroku documentation,13 and there is no need to understand it (Box 1.2).
13 Listing 7.35 changes the formatting slightly so that the code fits in the standard 80 columns.
Listing 7.35: The configuration file for the production webserver.
config/puma.rb
# Puma configuration file.
max_threads_count = ENV.fetch("RAILS_MAX_THREADS") { 5 }
min_threads_count = ENV.fetch("RAILS_MIN_THREADS") { max_threads_count }
threads min_threads_count, max_threads_count
port        ENV.fetch("PORT") { 3000 }
environment ENV.fetch("RAILS_ENV") { ENV['RACK_ENV'] || "production" }
pidfile ENV.fetch("PIDFILE") { "tmp/pids/server.pid" }
workers ENV.fetch("WEB_CONCURRENCY") { 2 }
preload_app!
plugin :tmp_restart
We also need to make a so-called Procfile to tell Heroku to run a Puma process in production, as shown in Listing 7.36. The Procfile should be created in your application’s root directory (i.e., in the same directory as the Gemfile).
Listing 7.36: Defining a Procfile for Puma.
./Procfile
web: bundle exec puma -C config/puma.rb
7.5.3 Production database configuration
The final step in our production deployment is properly configuring the production database, which (as mentioned briefly in Section 2.3.5) is PostgreSQL. My testing indicates that PostgreSQL actually works on Heroku without any configuration, but the official Heroku documentation recommends explicit configuration nonetheless, so we’ll err on the side of caution and include it.
The actual change is easy: all we have to do is update the production section of the database configuration file, config/database.yml. The result, which I adapted from the Heroku docs, is shown in Listing 7.37.
Listing 7.37: Configuring the database for production.
config/database.yml
# SQLite version 3.x
#  gem install sqlite3
#
#  Ensure the SQLite 3 gem is defined in your Gemfile
#  gem 'sqlite3'
#
default: &default
  adapter: sqlite3
  pool: 5
  timeout: 5000

development:
  <<: *default
  database: db/development.sqlite3

# Warning: The database defined as "test" will be erased and
# re-generated from your development database when you run "rake".
# Do not set this db to the same as development or production.
test:
  <<: *default
  database: db/test.sqlite3

production:
  adapter: postgresql
  encoding: unicode
  # For details on connection pooling, see Rails configuration guide
  # https://guides.rubyonrails.org/configuring.html#database-pooling
  pool: <%= ENV.fetch("RAILS_MAX_THREADS") { 5 } %>
  database: sample_app_production
  username: sample_app
  password: <%= ENV['SAMPLE_APP_DATABASE_PASSWORD'] %>
7.5.4 Production deployment
With the production webserver and database configuration completed, we’re ready to commit and deploy:14
14 We haven’t changed the data model in this chapter, so running the migration at Heroku shouldn’t be necessary, but only if you followed the steps in Section 6.4. Because several readers reported having trouble, I’ve added heroku run rails db:migrate as a final step just to be safe.
$ rails test
$ git add -A
$ git commit -m "Use SSL and the Puma webserver in production"
$ git push && git push heroku
The signup form is now live, and the result of a successful signup is shown in Figure 7.27. Note the presence of a lock icon in the address bar of Figure 7.27, which indicate that SSL is working.
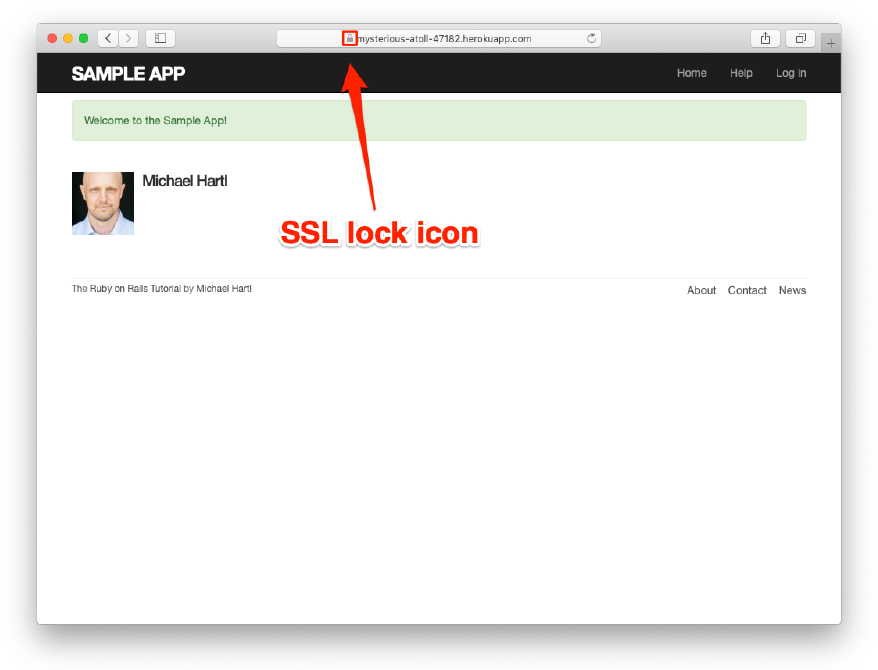
Figure 7.27: Signing up on the live Web.
Ruby version number
When deploying to Heroku, you may get a warning message like this one:
###### WARNING:
       You have not declared a Ruby version in your Gemfile.
       To set your Ruby version add this line to your Gemfile:
       ruby '2.6.3'
Experience shows that, at the level of this tutorial, the costs associated with including such an explicit Ruby version number outweigh the (negligible) benefits, so you should ignore this warning for now. The main issue is that keeping your sample app and system in sync with the latest Ruby version can be a huge inconvenience,15 and yet it almost never makes a difference which exact Ruby version number you use. Nevertheless, you should bear in mind that, should you ever end up running a mission-critical app on Heroku, specifying an exact Ruby version in the Gemfile is recommended to ensure maximum compatibility between development and production environments.
15 For example, at one point Heroku required Ruby 2.1.4, so I spent several hours trying unsuccessfully to install Ruby 2.1.4 on my local machine—only to discover that Ruby 2.1.5 had been released the previous day. (Attempts to install Ruby 2.1.5 then also failed.)
Exercises
Solutions to the exercises are available to all Rails Tutorial purchasers here.
To see other people’s answers and to record your own, subscribe to the Rails Tutorial course or to the Learn Enough All Access Bundle.
1. Confirm on your browser that the SSL lock and https appear.
2. Create a user on the production site using your primary email address. Does your Gravatar appear correctly?
7.6 Conclusion
Being able to sign up users is a major milestone for our application. Although the sample app has yet to accomplish anything useful, we have laid an essential foundation for all future development. In Chapter 8 and Chapter 9, we will complete our authentication machinery by allowing users to log in and out of the application (with optional “remember me” functionality). In Chapter 10, we will allow all users to update their account information, and we will allow site administrators to delete users, thereby completing the full suite of Users resource REST actions from Table 7.1.
7.6.1 What we learned in this chapter
• Rails displays useful debug information via the debug method.
• Sass mixins allow a group of CSS rules to be bundled and reused in multiple places.
• Rails comes with three standard environments: development, test, and production.
• We can interact with users as a resource through a standard set of REST URLs.
• Gravatars provide a convenient way of displaying images to represent users.
• The form_with helper is used to generate forms for interacting with Active Record objects.
• Signup failure renders the new user page and displays error messages automatically determined by Active Record.
• Rails provides the flash as a standard way to display temporary messages.
• Signup success creates a user in the database and redirects to the user show page, and displays a welcome message.
• We can use integration tests to verify form submission behavior and catch regressions.
• We can configure our production application to use SSL for secure communications and Puma for high performance.