© Benjamin Weissman and Enrico van de Laar 2020
B. Weissman, E. van de LaarSQL Server Big Data Clusters https://doi.org/10.1007/978-1-4842-5985-6_3

3. Deployment of Big Data Clusters

Benjamin Weissman1  and Enrico van de Laar2
(1)
Nurnberg, Germany
(2)
Drachten, The Netherlands
 
Now it is time to install your very own SQL Server 2019 Big Data Cluster! We will be handling three different scenarios in detail and we will be using a fresh machine for each of those scenarios:
  • Stand-alone PolyBase installation on Windows

  • Big Data Cluster using kubeadm on Linux

  • Big Data Cluster using Azure Kubernetes Service (AKS)

It is perfectly fine to run all options from the same box. But as it is likely that you will not be using all of them, we figured it would make sense to start fresh each time.

We will be covering the installation using the Microsoft Windows operating system. The goal of this guide is to get your Big Data Cluster up and running as quick as possible, so we will configure some options that may not be best practice (like leaving all the service accounts and directories on default). Feel free to modify those as it may fit your needs.

If you opt for the AKS installation, you will need an active Azure subscription. If you do not already have an Azure subscription, you can create one for free which includes credits which you can spend free of charge.

A Little Helper: Chocolatey

Before we get started, we’d like to point your attention to Chocolatey or choco. In case you haven’t heard about it, choco is a free package manager for Windows which will allow us to install many of our prerequisites with a single line in PowerShell or a command prompt. You can find more information on http://chocolatey.org (see Figure 3-1) and you can even create an account and provide your own packages there.
../images/480532_2_En_3_Chapter/480532_2_En_3_Fig1_HTML.jpg
Figure 3-1

Home page of Chocolatey

From a simple user perspective though, there is no need to create an account or to download any installer.

To make choco available on your system, open a PowerShell window in Administrative mode and run the script shown in Listing 3-1.
Set-ExecutionPolicy Bypass -Scope Process -Force; [System.Net.ServicePointManager]::SecurityProtocol = [System.Net.ServicePointManager]::SecurityProtocol -bor 3072; iex ((New-Object System.Net.WebClient).DownloadString('https://chocolatey.org/install.ps1'))
Listing 3-1

Install script for Chocolatey in PowerShell

Once the respective command has completed, choco is installed and ready to be used.

Installation of an On-Premises PolyBase Instance

In case you’re only interested in the data virtualization feature of SQL Server 2019 Big Data Clusters, the installation is actually much easier and lightweight than for a full environment. The PolyBase feature, which enabled the data virtualization feature, can be installed during the regular setup routine of SQL Server 2019 on any platform.

If you want to use Teradata through PolyBase, the C++ Redistributable 2012 is required to actually communicate with our SQL Server instance. Having SQL Server Management Studio (SSMS) may be helpful in either case and is nice to have it installed and ready to replay the examples we are showing throughout this book.

Let’s install the packages we mentioned earlier through Chocolatey. Just run the three commands from Listing 3-2 and choco will take care of the rest.
choco install sql-server-management-studio -y
choco install vcredist2012 -y
Listing 3-2

Install script for PolyBase prerequisites

With our prerequisites installed, we can get to the actual SQL Server installation. Navigate to www.microsoft.com/en-us/evalcenter/evaluate-sql-server-2019 and follow the instructions to download.

Run the downloaded file, as shown in Figure 3-2.

Select “Download Media” as the installation type.
../images/480532_2_En_3_Chapter/480532_2_En_3_Fig2_HTML.jpg
Figure 3-2

SQL Server 2019 installer – Installation type selection

Then confirm language and directory as shown in Figure 3-3.
../images/480532_2_En_3_Chapter/480532_2_En_3_Fig3_HTML.jpg
Figure 3-3

SQL Server 2019 installer – Download Media dialog

When the download is complete and successful, you will see the message in Figure 3-4.
../images/480532_2_En_3_Chapter/480532_2_En_3_Fig4_HTML.jpg
Figure 3-4

SQL Server 2019 installer – Download Media successful

Now navigate to the folder in which you have placed the download. Mount the image as shown in Figure 3-5.
../images/480532_2_En_3_Chapter/480532_2_En_3_Fig5_HTML.jpg
Figure 3-5

SQL Server 2019 installer – mount ISO

The installation can be run unattended, but for a first install, it probably makes more sense to explore your options. Run setup.exe, go to the Installation tab, and pick “New SQL Server stand-alone installation,” as shown in Figure 3-6.
../images/480532_2_En_3_Chapter/480532_2_En_3_Fig6_HTML.jpg
Figure 3-6

SQL Server 2019 installer – main screen

Pick the evaluation edition as shown in Figure 3-7, confirm the License Terms, and the check the “Check for updates” check box on the subsequent screens.
../images/480532_2_En_3_Chapter/480532_2_En_3_Fig7_HTML.jpg
Figure 3-7

SQL Server 2019 installer – edition selection

Setup rules identify potential problems that might occur while running the Setup. Failures and warnings as shown in Figure 3-8 must be corrected before the Setup can be completed.
../images/480532_2_En_3_Chapter/480532_2_En_3_Fig8_HTML.jpg
Figure 3-8

SQL Server 2019 installer – Install Rules

From the feature selection dialog shown in Figure 3-9, tick the “PolyBase Query Service for External Data.” Also tick its child node “Java connector for HDFS data sources.”
../images/480532_2_En_3_Chapter/480532_2_En_3_Fig9_HTML.jpg
Figure 3-9

SQL Server 2019 installer – Feature Selection

Using Instance Configuration specify the name and Instance ID for the Instance SQL Server. The Instance ID as shown in Figure 3-10 becomes part of the installation path.
../images/480532_2_En_3_Chapter/480532_2_En_3_Fig10_HTML.jpg
Figure 3-10

SQL Server 2019 installer – Instance Configuration

From the dialog in Figure 3-11, choose to configure a stand-alone PolyBase-enabled instance.
../images/480532_2_En_3_Chapter/480532_2_En_3_Fig11_HTML.jpg
Figure 3-11

SQL Server 2019 installer – PolyBase Configuration

As you can see in Figure 3-12, the PolyBase HDFS connector requires Java; you will be prompted to either install Open JRE with SQL Server or provide the location of an existing Java installation on your machine, if there is any.
../images/480532_2_En_3_Chapter/480532_2_En_3_Fig12_HTML.jpg
Figure 3-12

SQL Server 2019 installer – Java Install Location

Then confirm the default accounts as shown in Figure 3-13.
../images/480532_2_En_3_Chapter/480532_2_En_3_Fig13_HTML.jpg
Figure 3-13

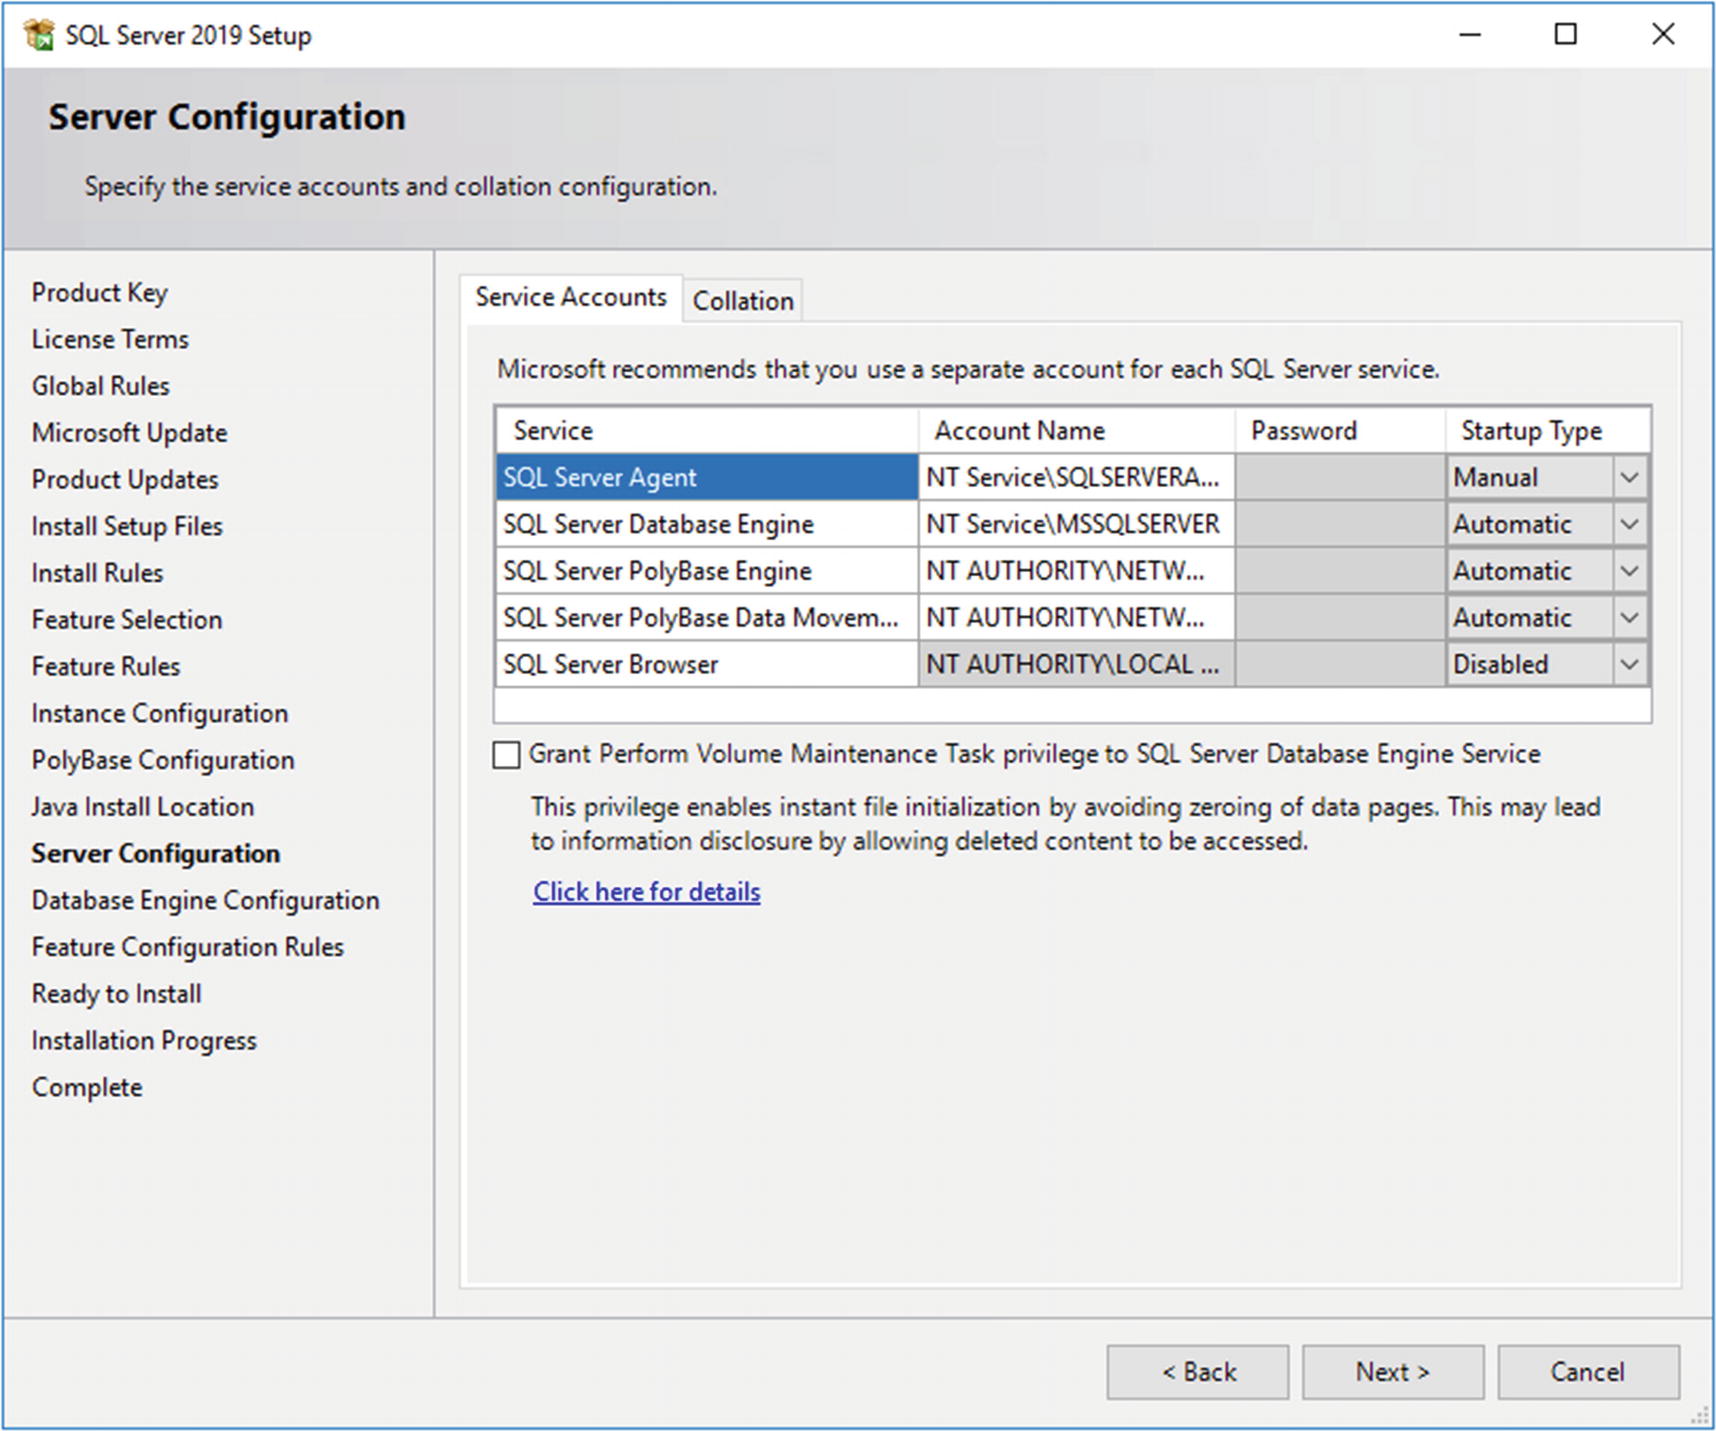
SQL Server 2019 installer – Server Configuration

Stick with Windows authentication and add your current user as shown in Figure 3-14.
../images/480532_2_En_3_Chapter/480532_2_En_3_Fig14_HTML.jpg
Figure 3-14

SQL Server 2019 installer – Database Engine Configuration

Click Install on the summary page shown in Figure 3-15 and wait for the installer to finish.
../images/480532_2_En_3_Chapter/480532_2_En_3_Fig15_HTML.jpg
Figure 3-15

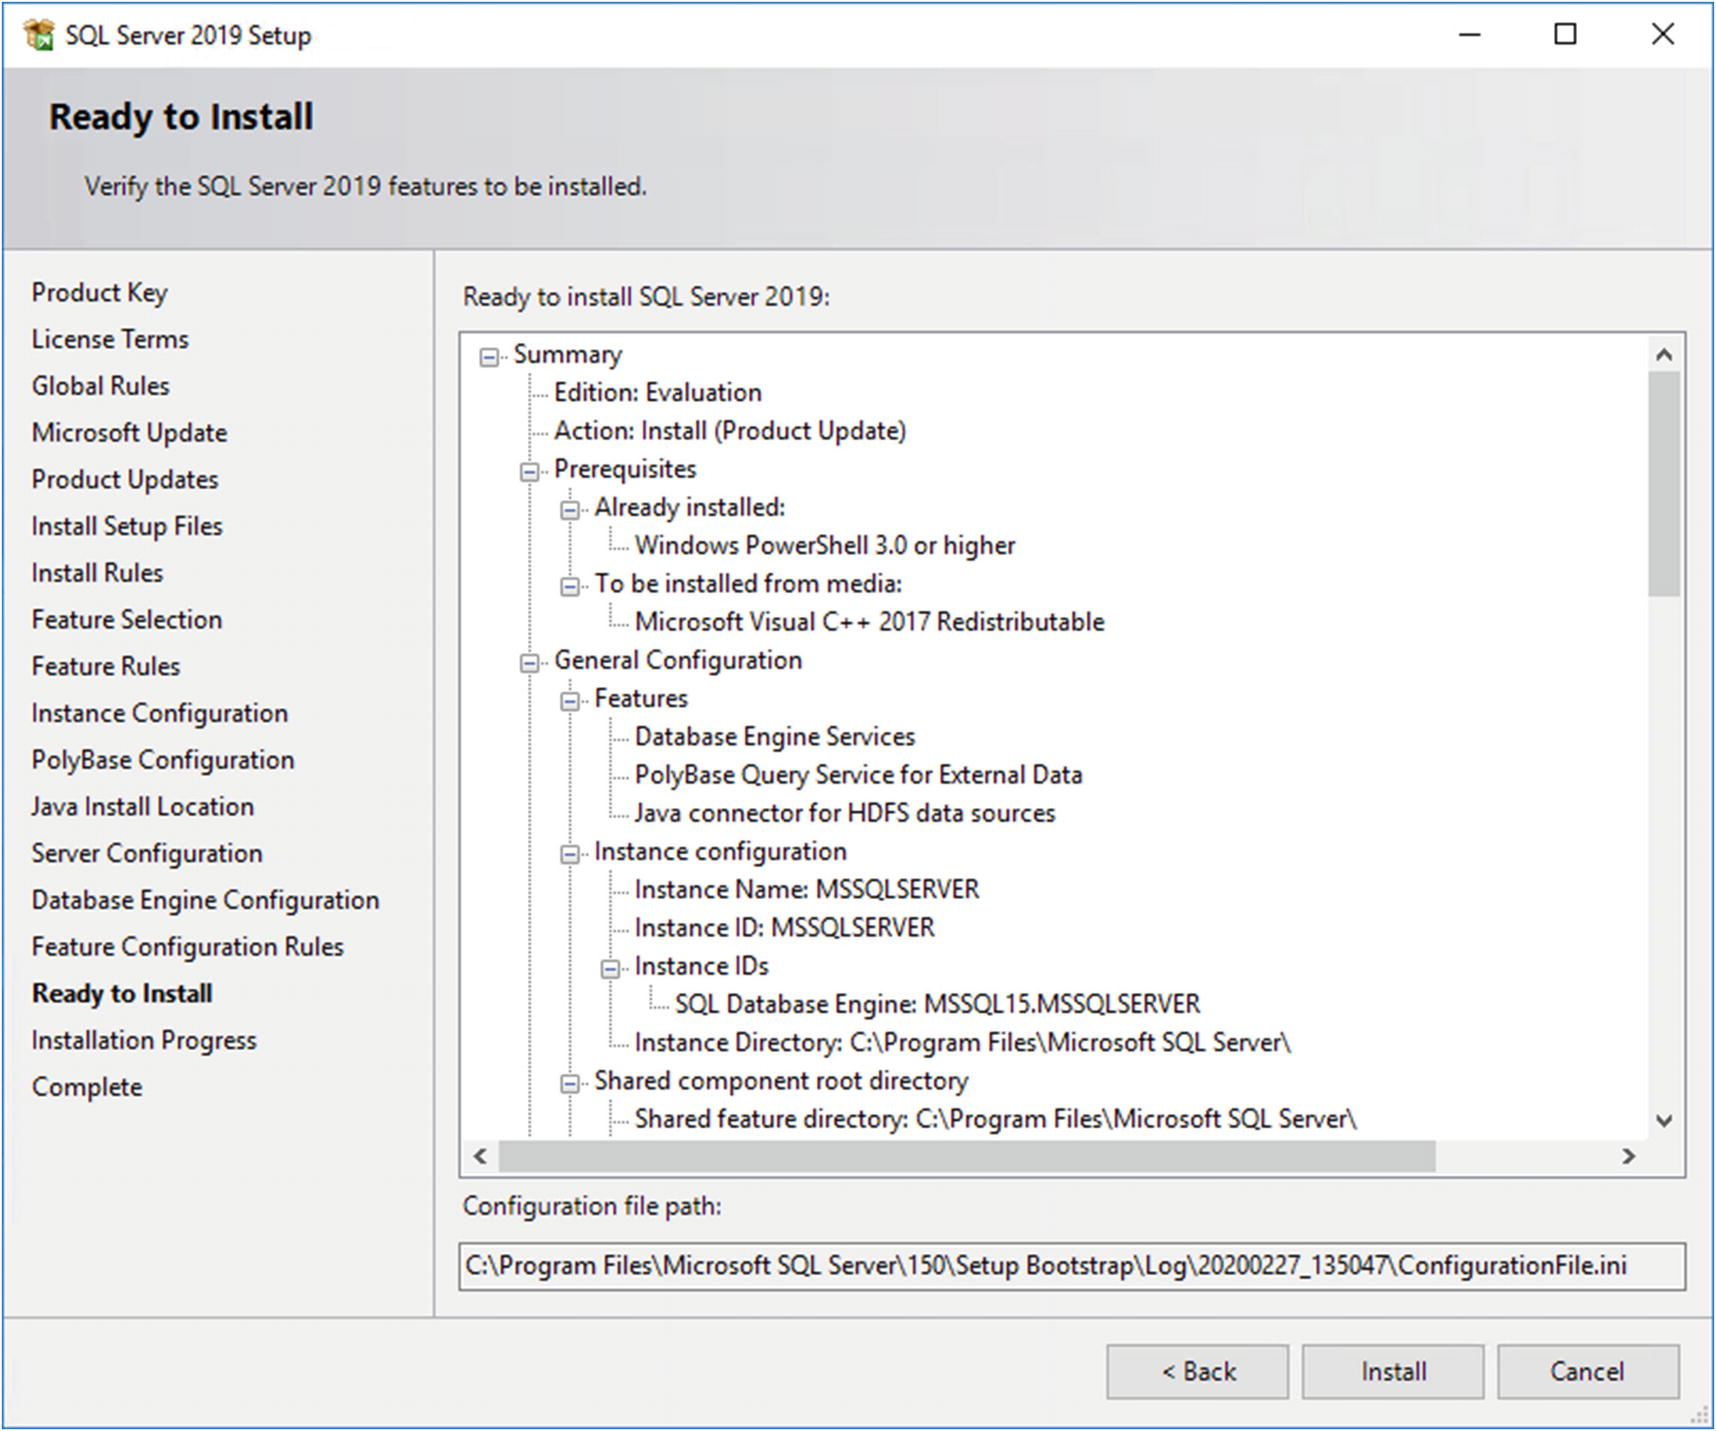
SQL Server 2019 installer – overview

Once the setup is successfully completed, a status summary as shown in Figure 3-16 is displayed and you can close the installer.
../images/480532_2_En_3_Chapter/480532_2_En_3_Fig16_HTML.jpg
Figure 3-16

SQL Server 2019 installer – Complete

Connect to the instance using SQL Server Management Studio (SSMS) or any other SQL Server client tool like Azure Data Studio, open a new query, and run the script shown in Listing 3-3.
exec sp_configure @configname = 'polybase enabled', @configvalue = 1;
RECONFIGURE
Listing 3-3

Enable PolyBase through T-SQL

The output should be
Configuration option 'polybase enabled' changed from 0 to 1. Run the RECONFIGURE statement to install.
Click “Restart” in the Object Explorer menu as shown in Figure 3-17 to restart the SQL Server Instance.
../images/480532_2_En_3_Chapter/480532_2_En_3_Fig17_HTML.jpg
Figure 3-17

Restart SQL Server Instance

You’re done – you do now have access to a PolyBase-enabled SQL Server 2019 installation.

Using Azure Data Studio to Work with Big Data Clusters

As part of Microsoft’s SQL Client tool strategy, it may not surprise you that most of the tasks necessary to work with a Big Data Cluster are achieved through Azure Data Studio (ADS) rather than SQL Server Management Studio or other tools. For those of you who are not familiar with this tool, we’re going to start with a little introduction including how to get your hands on this tool.

What Is Azure Data Studio?

Azure Data Studio is a cross-platform (Windows, MacOS, and Linux), extendable, and customizable tool which can be used for classic T-SQL queries and commands, as well as multiple new functions like notebooks. The latter can be enabled through extensions which are usually installed through a VSIX file, which you might be familiar with from working with other extensions for Visual Studio or Visual Studio Code.1

It was originally made public in 2017 as SQL Operations Studio but was rebranded before its official release in 2018. While the product name is a bit misleading, it is not only for cloud (Azure)-based services but for on-premises solutions and needs as well.

The fact that it, for example, does not come with an out-of-the-box interface for SQL Server Agent, but in exchange offers built-in charting, shows that it is not so much a replacement but more of a complimenting tool for SQL Server Management Studio (SSMS). SSMS is targeting an administrating and managing group (database administrators), whereas Azure Data Studio is more suitable for data professionals of all kinds, including data scientists.

Getting and Installing Azure Data Studio

You can get your free copy of Azure Data Studio directly from Microsoft at https://docs.microsoft.com/en-us/sql/azure-data-studio/download. Download the installer of your choice for your platform and run it.

Alternatively, simply run this Chocolatey command (Listing 3-4) which will install the latest version for you.
choco install azure-data-studio -y
Listing 3-4

Install ADS via choco

Installation of a “Real” Big Data Cluster

If you want to make use of the full Big Data Cluster feature set, you will need a full installation including all the different roles and pools.

kubeadm on Linux

A very easy way to deploy a Big Data Cluster is using kubeadm on a vanilla (freshly installed) Ubuntu 16.04 or 18.04 virtual or physical machine.

Microsoft provides a script for you that does all the work, so besides the Linux installation itself, there is not much to do for you, which makes this probably the easiest way to get your first Big Data Cluster up and running.

First, make sure your Linux machine is up to date by running the commands in Listing 3-5.
sudo apt update&&apt upgrade -y
sudo systemctl reboot
Listing 3-5

Patch Ubuntu

Then, download the script, make it executable, and run it with root permissions as shown in Listing 3-6.
curl --output setup-bdc.sh https://raw.githubusercontent.com/microsoft/sql-server-samples/master/samples/features/sql-big-data-cluster/deployment/kubeadm/ubuntu-single-node-vm/setup-bdc.sh
chmod +x setup-bdc.sh
sudo ./setup-bdc.sh
Listing 3-6

Download and execute the deployment script

As you can see in Figure 3-18, the script will ask you for a password and automatically start preparational steps afterward.
../images/480532_2_En_3_Chapter/480532_2_En_3_Fig18_HTML.jpg
Figure 3-18

Deployment on Linux with kubeadm

After pre-fetching the images, provisioning Kubernetes, and all other required steps, the deployment of the Big Data Cluster is started as shown in Figure 3-19.
../images/480532_2_En_3_Chapter/480532_2_En_3_Fig19_HTML.jpg
Figure 3-19

Deployment on Linux with kubeadm

Once the whole script completes, you are done! As demonstrated in Figure 3-20, the script will also provide all the endpoints that were created during the deployment.
../images/480532_2_En_3_Chapter/480532_2_En_3_Fig20_HTML.jpg
Figure 3-20

Successful deployment on Linux with kubeadm

Your cluster is now fully deployed and ready!

Azure Kubernetes Service (AKS)

Another straightforward way to deploy your cluster is to use Azure Kubernetes Service, in which the Kubernetes cluster is set up and provided in the Microsoft Azure cloud. While the deployment is started and controlled through any machine (either your local PC or a VM), the cluster itself will run in Azure, so this means that deployment requires an Azure account and will result in cost on your Azure subscription.

You can deploy either through a wizard in Azure Data Studio or manually through a tool called azdata (which was also called by the script deploying your previous cluster on Linux). Both methods have some prerequisites that need to be installed first. A full installation actually requires several tools and helpers:
  • Python

  • Curl and the SQL Server command-line utilities

    So we can communicate with the cluster and upload data to it.

  • The Kubernetes CLI

  • azdata

    This will create, maintain, and delete a big data cluster.

  • Notepad++ and 7Zip

    These are not actual requirements, but if you want to debug your installation, you will get a tar.gz file with potentially huge text files. Windows does not handle these out of the box.

The script in Listing 3-7 will install those to your local machine (or whichever machine you are running the script on), as this is where the deployment is controlled and triggered from. We will be installing those prerequisites through Chocolatey.
choco install python3 -y
choco install sqlserver-cmdlineutils -y
$env:Path = [System.Environment]::GetEnvironmentVariable("Path","Machine") + ";" + [System.Environment]::GetEnvironmentVariable("Path","User")
python -m pip install --upgrade pip
python -m pip install requests
python -m pip install requests --upgrade
choco install curl -y
choco install kubernetes-cli -y
choco install notepadplusplus -y
choco install 7zip -y
choco install visualcpp-build-tools -y
pip3 install kubernetes
pip3 install -r https://aka.ms/azdata
Listing 3-7

Install script for Big Data Cluster prerequisites

While the respective vendors obviously supply visual/manual installation routines for most of these tools, the scripted approach just makes the whole experience a lot easier.

In addition, as we want to deploy to Azure using a script, we need the azure-cli package shown in Listing 3-8 to be able to connect to our Azure subscription.
choco install azure-cli -y
Listing 3-8

Install azure-cli

While you technically could prepare everything (we need a resource group, the Kubernetes cluster, etc.) in the Azure Portal or through manual PowerShell scripts, there is a much easier way: get the Python script from https://github.com/Microsoft/sql-server-samples/tree/master/samples/features/sql-big-data-cluster/deployment/aks, which will automatically take care of the whole process and setup for you.

Download the script to your desktop or another suitable location and open a command prompt. Navigate to the folder where you’ve saved the script. You can also download using a command prompt as shown in Listing 3-9.
curl --output deploy-sql-big-data-aks.py https://raw.githubusercontent.com/microsoft/sql-server-samples/master/samples/features/sql-big-data-cluster/deployment/aks/deploy-sql-big-data-aks.py
Listing 3-9

Download deployment script

Of course, you can also modify and review the script as per your needs, for example, to make some parameters like the VM size static rather than a variable or to change the defaults for some of the values.

First, we need to log on to Azure which will be done with the command shown in Listing 3-10.
az login
Listing 3-10

Trigger login to azure from command prompt

A website will open; log on using your Azure credentials as shown in Figure 3-21.
../images/480532_2_En_3_Chapter/480532_2_En_3_Fig21_HTML.jpg
Figure 3-21

Azure logon screen

The website will confirm that you are logged on; you can close the browser as shown in Figure 3-22.
../images/480532_2_En_3_Chapter/480532_2_En_3_Fig22_HTML.jpg
Figure 3-22

Azure logon confirmation

Your command prompt, as shown in Figure 3-23, shows all subscriptions linked to the credentials you just used. Copy the ID of the subscription you want to use and execute the Python script, which will ask for everything ranging from subscription ID to the number of nodes inside the Kubernetes cluster.
../images/480532_2_En_3_Chapter/480532_2_En_3_Fig23_HTML.jpg
Figure 3-23

Input of parameters in Python deployment script

The script now runs through all the required steps. Again, this can take from a couple of minutes to hours, depending on the size of VM, number of nodes, and so on.

The script will report back in between just like the script during the installation on Linux. It is using the same tool (azdata), so the output when creating the actual Big Data Cluster is very similar as you can see in Figure 3-24.
../images/480532_2_En_3_Chapter/480532_2_En_3_Fig24_HTML.jpg
Figure 3-24

Output of Python deployment script

The script will also use azdata bdc config to create your JSON file.

As this SQL Server 2019 Big Data Cluster is being deployed to Azure, unlike during your local install which you could just reach it using the localhost address, you will need information about the IP addresses and ports of the installation. Therefore, IP addresses and ports are provided at the end as shown in Figure 3-25.
../images/480532_2_En_3_Chapter/480532_2_En_3_Fig25_HTML.jpg
Figure 3-25

Final output of Python deployment script including IP addresses

If you ever forget what your IPs were, you can run this simple script as shown in Listing 3-11.
kubectl get service -n <clustername>
Listing 3-11

Retrieve Kubernetes service IPs using kubectl

And if you forgot the name of your cluster as well, try Listing 3-12.
kubectl get namespaces
Listing 3-12

Retrieve Kubernetes namespaces using kubectl

If you are running more than one cluster at a time, the script in Listing 3-13 might also become helpful. Just save it as IP.py and you can run it as shown in Figure 3-26.
CLUSTER_NAME="myfirstbigdatacluster"
from subprocess import check_output, CalledProcessError, STDOUT, Popen, PIPE
import os
import getpass
def executeCmd (cmd):
    if os.name=="nt":
        process = Popen(cmd.split(),stdin=PIPE, shell=True)
    else:
        process = Popen(cmd.split(),stdin=PIPE)
    stdout, stderr = process.communicate()
    if (stderr is not None):
        raise Exception(stderr)
print("")
print("SQL Server big data cluster connection endpoints: ")
print("SQL Server master instance:")
command="kubectl get service master-svc-external -o=custom-columns=""IP:.status.loadBalancer.ingress[0].ip,PORT:.spec.ports[0].port"" -n "+CLUSTER_NAME
executeCmd(command)
print("")
print("HDFS/KNOX:")
command="kubectl get service gateway-svc-external -o=custom-columns=""IP:status.loadBalancer.ingress[0].ip,PORT:.spec.ports[0].port"" -n "+CLUSTER_NAME
executeCmd(command)
print("")
print("Cluster administration portal (https://<ip>:<port>):")
command="kubectl get service mgmtproxy-svc-external -o=custom-columns=""IP:status.loadBalancer.ingress[0].ip,PORT:.spec.ports[0].port"" -n "+CLUSTER_NAME
executeCmd(command)
print("")
Listing 3-13

Python script to retrieve endpoints of a Big Data Cluster

../images/480532_2_En_3_Chapter/480532_2_En_3_Fig26_HTML.jpg
Figure 3-26

Output of IP.py

You’re done! Your Big Data Cluster in Azure Kubernetes Service is now up and running.

Note Whether you use it or not, this cluster will accumulate cost based on the number of VMs and their size so it’s a good idea not to leave it idling around!

Deploy Your Big Data Cluster Through Azure Data Studio

If you prefer a graphical wizard for your deployment, the answer is Azure Data Studio (ADS)! ADS provides you multiple options to deploy SQL Server, and Big Data Clusters are among them. In ADS, locate the link “New Deployment” which can be found on the welcome screen as well as in a context menu next to your active connections as shown in Figure 3-27.
../images/480532_2_En_3_Chapter/480532_2_En_3_Fig27_HTML.jpg
Figure 3-27

New Deployment in ADS

On the following screen, select “SQL Server Big Data Cluster.” The wizard will ask you to accept the license terms, select a version, and also pick a deployment target. Supported targets for this wizard are currently a new Azure Kubernetes Service (AKS) cluster, an existing AKS cluster, or an existing kubeadm cluster. If you plan to deploy toward an existing cluster, the Kubernetes contexts/connections need to be present in your Kubernetes configuration. If the Kubernetes cluster was not created from the same machine, it’s probably still missing. In this case, you can either copy the .kube file to your local machine or configure Kubernetes manually as described at https://kubernetes.io/docs/tasks/access-application-cluster/access-cluster/.

On the lower end of the screen, the wizard will also list the required tools again and confirm whether all of them are installed in the appropriate version as shown in Figure 3-28.
../images/480532_2_En_3_Chapter/480532_2_En_3_Fig28_HTML.jpg
Figure 3-28

Deploy a BDC through ADS – intro

Let’s try another deployment using a new AKS cluster (which is also the default). Click “Select” and the wizard will take you to the first step. It will provide you the matching deployment templates for your target environment. The different templates differ by size as well as features, like authentication type and high availability, as you can see in Figure 3-29.
../images/480532_2_En_3_Chapter/480532_2_En_3_Fig29_HTML.jpg
Figure 3-29

Deploy a BDC through ADS – Step 1

The following screen will depend on your target. As we chose to deploy to Azure including a new cluster, we need to provide a subscription, resource group name, location, cluster name, as well as the number and size of the underlying VMs (see Figure 3-30).
../images/480532_2_En_3_Chapter/480532_2_En_3_Fig30_HTML.jpg
Figure 3-30

Deploy a BDC through ADS – Step 2

In Step 3, as illustrated in Figure 3-31, we define the name of the Big Data Cluster (unlike in the previous step where we’ve set the name for the Kubernetes cluster!) as well as the authentication type.
../images/480532_2_En_3_Chapter/480532_2_En_3_Fig31_HTML.jpg
Figure 3-31

Deploy a BDC through ADS – Step 3

In the last configuration screen which we show in Figure 3-32, you can modify the number of instances per pool as well as claim sizes and storage classes for data and logs.
../images/480532_2_En_3_Chapter/480532_2_En_3_Fig32_HTML.jpg
Figure 3-32

Deploy a BDC through ADS – Step 4

The final screen as shown in Figure 3-33 gives you a summary of your configuration. If you want to proceed, hit “Script to Notebook”; otherwise, you can navigate back using the “Previous” button to make any necessary changes and adjustments.
../images/480532_2_En_3_Chapter/480532_2_En_3_Fig33_HTML.jpg
Figure 3-33

Deploy a BDC through ADS – Summary

Unless you did so before, ADS will prompt you to install Python for notebooks as shown in Figure 3-34.
../images/480532_2_En_3_Chapter/480532_2_En_3_Fig34_HTML.jpg
Figure 3-34

Deploy a BDC through ADS – install Python

Wait for the installation to complete. All your settings have been populated to a Python notebook which you could either save and store for later or run right away. To execute the notebook, simply click “Run Cells” as shown in Figure 3-35. Just make sure that the Python installation has finished. The kernel combo box should read “Python 3”. If it’s still showing “Loading kernels…”, be patient.../images/480532_2_En_3_Chapter/480532_2_En_3_Figa_HTML.gif

../images/480532_2_En_3_Chapter/480532_2_En_3_Fig35_HTML.jpg
Figure 3-35

Deploy a BDC through ADS – notebook predeployment

Once you click “Run Cells,” the deployment process will run through and – unless there are any problems on the way – will report back with the cluster’s endpoints at the end, as you can see in Figure 3-36. You will also get a direct link to connect to the master instance. The deployment will take as long as it would with the same parameters using the scripted deployment option.
../images/480532_2_En_3_Chapter/480532_2_En_3_Fig36_HTML.jpg
Figure 3-36

Deploy a BDC through ADS – notebook postdeployment

What Is azdata?

As mentioned before, no matter which path of deployment you choose, the deployment of your Big Data Cluster will always be controlled through a tool call azdata. It’s a command-line tool that will help you to create a Big Data Cluster configuration, deploy your Big Data Cluster, and later potentially delete or upgrade your existing cluster.

The logical first step (which is somehow happening behind the scenes in the previous scripts) is to create a configuration as shown in Listing 3-14.
azdata bdc config init [--target -t] [--src -s]
Listing 3-14

Create cluster config using azdata

Target is just the folder name for your config files (bdc.json and control.json). The src is one of the existing base templates to start with.

Possible values are (at the time of writing)
  • aks-dev-test

  • aks-dev-test-ha

  • kubeadm-dev-test

  • kubeadm-prod

These match the options that you saw when deploying in Azure Data Studio. You can always get all valid options by running azdata bdc config init -t <yourtarget> without specifying a source. Keep in mind that these are just templates. If your preferred environment is not offered as a choice, this doesn’t necessarily imply that it’s not supported, just that you will need to make some adjustments to an existing template to make it match your target. The output is shown is Figure 3-37.
../images/480532_2_En_3_Chapter/480532_2_En_3_Fig37_HTML.jpg
Figure 3-37

Output of azdata bdc config init without specifying a source

The source to choose will depend on your deployment type.

Running azdata bdc config init results in two .JSON files – bdc.json and control.json – to be created in a subfolder which is named after your target. This will be based on defaults, so we need to make some changes to the configuration. This can be done either using any text editor or using azdata again using the config replace option, as shown in Listing 3-15, where we use it to modify the name of the Big Data Cluster in the bdc.json file.
azdata bdc config replace -c myfirstbigdatacluster/bdc.json -j metadata.name=myfirstbigdatacluster
Listing 3-15

Modify cluster config using azdata

The control file defines more general settings like which version, repository, and so on you want to use, whereas the bdc file configures the actual setup of your Big Data Cluster environment like the number of replicas per role and so on, as shown in Listings 3-16 and 3-17.
{
    "apiVersion": "v1",
    "metadata": {
        "kind": "Cluster",
        "name": "mssql-cluster"
    },
    "spec": {
        "docker": {
            "registry": "mcr.microsoft.com",
            "repository": "mssql/bdc",
            "imageTag": "2019-CU2-ubuntu-16.04",
            "imagePullPolicy": "Always"
        },
        "storage": {
            "data": {
                "className": "",
                "accessMode": "ReadWriteOnce",
                "size": "15Gi"
            },
            "logs": {
                "className": "",
                "accessMode": "ReadWriteOnce",
                "size": "10Gi"
            }
        },
        "endpoints": [
            {
                "name": "Controller",
                "dnsName": "",
                "serviceType": "NodePort",
                "port": 30080
            },
            {
                "name": "ServiceProxy",
                "dnsName": "",
                "serviceType": "NodePort",
                "port": 30777
            }
        ],
        "settings": {
            "controller": {
                "logs.rotation.size": "5000",
                "logs.rotation.days": "7"
            }
        }
    },
    "security": {
        "activeDirectory": {
            "ouDistinguishedName": "",
            "dnsIpAddresses": [],
            "domainControllerFullyQualifiedDns": [],
            "domainDnsName": "",
            "clusterAdmins": [],
            "clusterUsers": []
        }
    }
}
Listing 3-16

Sample control.json

{
    "apiVersion": "v1",
    "metadata": {
        "kind": "BigDataCluster",
        "name": "mssql-cluster"
    },
    "spec": {
        "resources": {
            "nmnode-0": {
                "spec": {
                    "replicas": 2
                }
            },
            "sparkhead": {
                "spec": {
                    "replicas": 2
                }
            },
            "zookeeper": {
                "spec": {
                    "replicas": 3
                }
            },
            "gateway": {
                "spec": {
                    "replicas": 1,
                    "endpoints": [
                        {
                            "name": "Knox",
                            "dnsName": "",
                            "serviceType": "NodePort",
                            "port": 30443
                        }
                    ]
                }
            },
            "appproxy": {
                "spec": {
                    "replicas": 1,
                    "endpoints": [
                        {
                            "name": "AppServiceProxy",
                            "dnsName": "",
                            "serviceType": "NodePort",
                            "port": 30778
                        }
                    ]
                }
            },
            "master": {
                "metadata": {
                    "kind": "Pool",
                    "name": "default"
                },
                "spec": {
                    "type": "Master",
                    "replicas": 3,
                    "endpoints": [
                        {
                            "name": "Master",
                            "dnsName": "",
                            "serviceType": "NodePort",
                            "port": 31433
                        },
                        {
                            "name": "MasterSecondary",
                            "dnsName": "",
                            "serviceType": "NodePort",
                            "port": 31436
                        }
                    ],
                    "settings": {
                        "sql": {
                            "hadr.enabled": "true"
                        }
                    }
                }
            },
            "compute-0": {
                "metadata": {
                    "kind": "Pool",
                    "name": "default"
                },
                "spec": {
                    "type": "Compute",
                    "replicas": 1
                }
            },
            "data-0": {
                "metadata": {
                    "kind": "Pool",
                    "name": "default"
                },
                "spec": {
                    "type": "Data",
                    "replicas": 2
                }
            },
            "storage-0": {
                "metadata": {
                    "kind": "Pool",
                    "name": "default"
                },
                "spec": {
                    "type": "Storage",
                    "replicas": 3,
                    "settings": {
                        "spark": {
                            "includeSpark": "true"
                        }
                    }
                }
            }
        },
        "services": {
            "sql": {
                "resources": [
                    "master",
                    "compute-0",
                    "data-0",
                    "storage-0"
                ]
            },
            "hdfs": {
                "resources": [
                    "nmnode-0",
                    "zookeeper",
                    "storage-0",
                    "sparkhead"
                ],
                "settings": {
                    "hdfs-site.dfs.replication": "3"
                }
            },
            "spark": {
                "resources": [
                    "sparkhead",
                    "storage-0"
                ],
                "settings": {
                    "spark-defaults-conf.spark.driver.memory": "2g",
                    "spark-defaults-conf.spark.driver.cores": "1",
                    "spark-defaults-conf.spark.executor.instances": "3",
                    "spark-defaults-conf.spark.executor.memory": "1536m",
                    "spark-defaults-conf.spark.executor.cores": "1",
                    "yarn-site.yarn.nodemanager.resource.memory-mb": "18432",
                    "yarn-site.yarn.nodemanager.resource.cpu-vcores": "6",
                    "yarn-site.yarn.scheduler.maximum-allocation-mb": "18432",
                    "yarn-site.yarn.scheduler.maximum-allocation-vcores": "6",
                    "yarn-site.yarn.scheduler.capacity.maximum-am-resource-percent": "0.3"
                }
            }
        }
    }
}
Listing 3-17

Sample bdc.json

As you can see, the file allows you to change quite a lot of settings. While you may leave many of them at their default, this comes in quite handy, especially in terms of storage. You can change the disk sizes as well as the storage type. For more information on storage in Kubernetes, we recommend reading https://kubernetes.io/docs/concepts/storage/.

All deployments use persistent storage by default. Unless you have a good reason to change that, you should keep it that way as nonpersistent storage can leave your cluster in a nonfunctioning state in case of restarts, for example.

Run the following command (Listing 3-18) in a command prompt where you’ve set the environment variables before.
azdata bdc create -c myfirstbigdatacluster --accept-eula yes
Listing 3-18

Create cluster using azdata

Now sit back, relax, follow the output of azdata as shown in Figure 3-38, and wait for the deployment to finish.
../images/480532_2_En_3_Chapter/480532_2_En_3_Fig38_HTML.jpg
Figure 3-38

Output of azdata bdc create

Depending on the size of your machine, this may take anywhere from minutes to hours.

Others

There are multiple other Kubernetes environments available – from Raspberry Pi to VMWare. Many but not all of them support SQL Server 2019 Big Data Clusters. The number of supported platforms will grow over time, but there is no complete list of compatible environments. If you are looking at a specific setup, the best and easiest way is to just give it a try!

Advanced Deployment Options

Besides the configuration options mentioned earlier, we would like to point your attention to two additional opportunities to make more out of your Big Data Cluster: Active Directory authentication and HDFS tiering.

Active Directory Authentication for Big Data Clusters

If you want to use Active Directory (AD) integration rather than basic authentication, this can be achieved through additional information provided in your control.json and bdc.json files. While bdc.json only requires the nameservers to be set to the domain controller’s DNS, control.json needs a couple of additional parameters, which are shown in Listing 3-19.
"security": {
        "activeDirectory": {
            "ouDistinguishedName": "",
            "dnsIpAddresses": [],
            "domainControllerFullyQualifiedDns": [],
            "domainDnsName": "",
            "clusterAdmins": [],
            "clusterUsers": []
        }
Listing 3-19

AD parameters in control.json

At the time of writing, there are quite a few limitations though. For example, AD authentication is only supported on kubeadm, not on AKS deployments , and you can only have one Big Data Cluster per domain. You will also need to set up a few very specific objects in your AD before deploying the Big Data Cluster. Please see the official documentation at https://docs.microsoft.com/en-us/sql/big-data-cluster/deploy-active-directory?view=sql-server-ver15 for detailed steps on how to enable this.

HDFS Tiering in Big Data Clusters

Should you already have an existing HDFS stored in either Azure Data Lake Store Gen2 or Amazon S3, you can mount this storage as a subdirectory of your Big Data Cluster’s HDFS. This will be achieved through a combination of environment variables, kubectl and azdata command. As the process differs slightly per source type, we refer you to the official documentation which can be found at https://docs.microsoft.com/en-us/sql/big-data-cluster/hdfs-tiering?view=sql-server-ver15.

Unlike enabling AD authentication, which happens at deployment, HDFS tiering will be configured on an existing Big Data Cluster.

Summary

In this chapter, we’ve installed SQL Server 2019 Big Data Clusters using various methods and to different extents.

Now that we have our Big Data Cluster running and ready for some workload, let’s move on to Chapter 4 where we’ll show and discuss how the cluster can be queried and used.

..................Content has been hidden....................

You can't read the all page of ebook, please click here login for view all page.
Reset
18.219.103.183