Lesson 10. Working with Photos
In this lesson, you learn how to upload, edit, and manage photos.
Exploring Google+ Photo Options
Google+ offers a comprehensive photo management solution, enabling you to upload, store, and share unlimited photos. You can upload photos up to 2,048 x 2,048 pixels in size. Google+ resizes photos larger than this.
Your photos display on the stream as well as on the Photos tab of your profile. Optionally, you can hide this tab. You also maintain complete control over who can view your photos. For example, you can share photos on the stream publicly, or share only with people in specific circles or your extended circle.
Note: Google+ Integrates with Picasa Web Albums
Google+ integrates directly with Picasa Web Albums (http://picasaweb.google.com), Google’s digital photo-management web application. When you upload photos to Google+, they are automatically available on Picasa Web Albums as well (all Google+ users receive an account for this app). As with Google+, you have complete control over who can view your web albums.
Uploading Photos to Google+
Google+ provides several places to upload and share photos:
• From the share box. You can access this box on your stream or by clicking the Share button in the upper-right corner of the page. Click the Add Photos icon in the lower-right corner of the share box to upload photos from your computer, create a photo album, or upload photos from your iPhone or Android smartphone. See Lesson 6, “Sharing Content on Google+,” for more information.
• From the Google+ ribbon. Pause your mouse over the Photos icon on the ribbon and click the Add Photos button on the pop-out menu.
• From the Google+ Photos page. Click the Upload New Photos button to create a photo album. See “Creating and Managing Photo Albums” later in this lesson for more information.
• From the Photos tab on your profile. Click the Upload New Photos button to create a photo album. See “Creating and Managing Photo Albums” later in this lesson for more information.
Exploring the Photos Page
The Photos page offers a centralized location to manage your photos and photo albums on Google+. To access the Photos page, click the Photos icon on the Google+ ribbon. Figure 10.1 shows the Photos page with the default tab selected, From Phone.

Figure 10.1. View, upload, and manage your photos on the Photos page.
The Photos page has four tabs:
• From Phone. View and manage photos you uploaded from your phone. You must have an iPhone or Android smartphone and download the Google+ app to use this feature. Google+ uploads the photos you take from your phone and places them on this tab, where they remain private until you choose to share them. Click the appropriate Google+ App button to download from either Google Play or the iPhone App Store.
• Albums. Add, view, and manage photo albums. See “Creating and Managing Photo Albums” for more information.
• From Posts. View photos you added to your Google+ posts.
• Photos of You. View photos tagged with your name. Note that even if you upload a profile photo of yourself, you need to tag it with your name for it to display on this tab. See “Tagging Photos” later in this lesson for more information.
Creating and Managing Photo Albums
A photo album is a collection of photos, usually on a specific topic or taken at a specific place or event. You can post and share photo albums on Google+ just like you do individual photos.
Tip: Use a Photo Album to Post a Slide Deck on Google+
You can also use a photo album to post a slide deck on Google+. For example, export all the slides in a PowerPoint presentation to images and post them as an album. Your Google+ network can comment on each slide/photo individually or on the presentation as a whole.
Google+ enables you to create a photo album from the share box on your stream and on the upper-right corner of any Google+ page, the Photos page, or the Photos tab on your profile. The process is similar for all three.
Creating a Photo Album
To create a photo album from the Photos page, follow these steps:
1. Click the Photos icon on the Google+ ribbon.
2. Click the Upload New Photos button in the upper-right corner of the page.
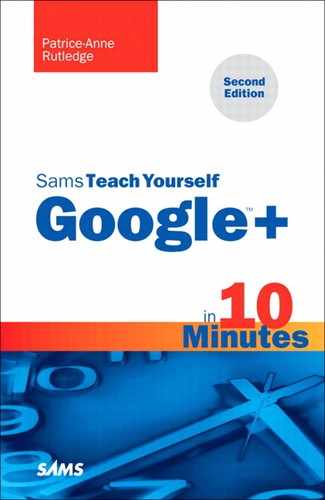
3. In the Upload and Share Photos dialog box, enter a name for your photo album in the Album Name field. By default, Google+ displays the current date as your album name, but changing this to a more meaningful name makes it easier to identify your photo albums.
4. Click the Select Photos from Your Computer button.
5. In the File Upload dialog box, select the photos you want to add and click the Open button. Depending on your operating system and browser, this dialog box and button might have different names.
6. Your selected photos display in the Upload and Share Photos dialog box, shown in Figure 10.2. Optionally, click the photo to add a caption, rotate it left or right, or delete it. You can also edit photos using the lightbox. See “Working in the Photo Lightbox” later in this lesson for more information.
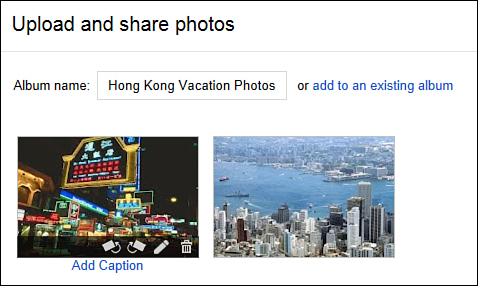
Figure 10.2. View, rotate, or delete the photos you upload.
7. Optionally, click the Upload More link if you want to upload additional photos for this album. You can also add more photos after you create your album.
8. Click the Create Album button in the lower-right corner of the dialog box.
9. In the Share Album dialog box, you can choose the people and circles you want to share your album with. You can share your album now or at a later time. Sharing an album displays it on the Google+ stream of everyone you share with. See “Sharing an Album” later in this lesson for more information. If you don’t want to share this album right now, click the Cancel button.
Your new album now displays on the Albums tab on the Photos page. See the “Viewing Your Photo Albums” section for more information about this tab.
Viewing Your Photo Albums
To view your photo albums, pause your mouse over the Photos icon on the Google+ ribbon and select Albums from the pop-out menu. You can also access your albums by clicking the Albums tab on the Photos page. On the Albums tab, you can do the following:
• View a collection of photos from your posts, your profile photos, your scrapbook photos, and your photo albums. Figure 10.3 shows a sample of the Albums tab.

Figure 10.3. View all your photo albums in one place.
• Determine who you’re sharing the album with by looking at the small icon next to each album. Pause your mouse over the icon to view its description. For example, a red circle with a diagonal line means that only you can view this album.
• Click an album to open its detail page, where you can view the photos it contains as well as rename, share, or delete it. In the album, click an individual photo to open it in lightbox view, where you can edit it.
• Click the Sharing Settings link to specify sharing options for each of your albums.
Sharing an Album
You can share a photo album when you create it or at any time after that.
To share a photo album, follow these steps:
1. Pause your mouse over the Photos icon on the Google+ ribbon and select Albums from the pop-out menu. You can also access your albums by clicking the Albums tab on the Photos page.
2. Select the album you want to share.
3. Click the Share button on the album detail page, as shown in Figure 10.4.
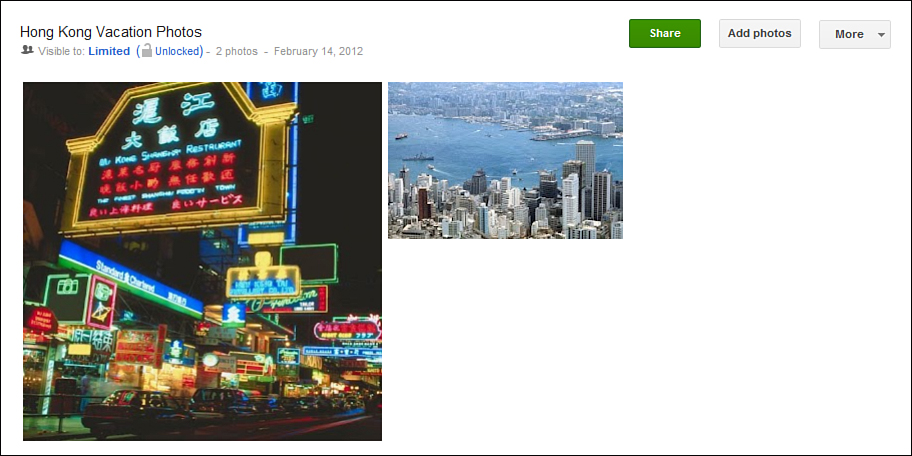
Figure 10.4. Share your photo album with others on Google+.
4. In the Share Album dialog box (see Figure 10.5), enter any introductory text about your album in the text box. For example, you could explain where you took these photos, why you’re posting them, or what feedback you want from the people you’re sharing with.
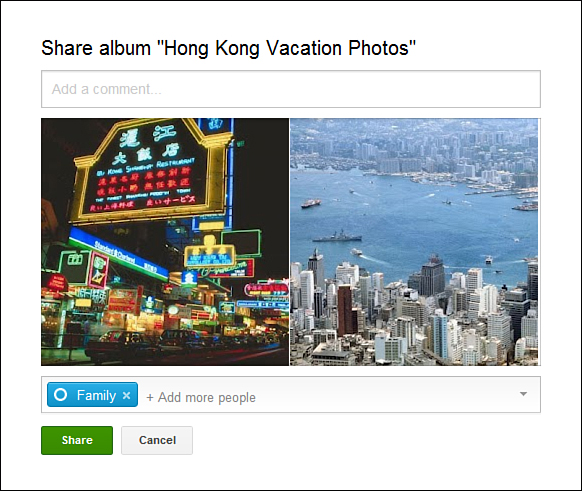
Figure 10.5. Choose exactly who you want to share with.
5. Specify who you want to share this album with. By default, Google+ displays your most recent sharing choices. For example, if you last shared a post with your Friends circle, that’s what displays here. You can share with this same group of people or click the Add More People link to select other people to share with. For example, you can share with the people in one or more circles, your extended circles (friends of friends), the general public, or one specific person (enter this person’s name in the text box). For a reminder on how to share on Google+, see Lesson 6.
6. Optionally, click the down arrow in the lower-right corner to select either Disable Comments or Lock This Post from the menu. Disabling comments prevents other users from commenting on your photo album post. Locking your post prevents people from sharing it.
7. Click the Share button to post your album on the stream, where only the people you shared with can view it. Figure 10.6 shows a sample shared album.
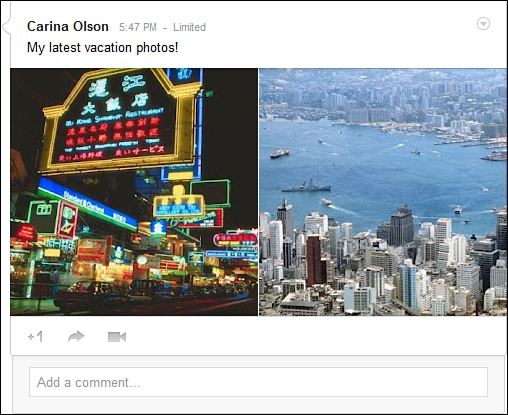
Figure 10.6. Display your album on the Google+ stream.
Tip: Share Your Photo Album via a Link
If you would like to share your photo album with a link, select Share Album via Link from the More drop-down menu. This opens a dialog box that displays a Web URL that you can share with others.
Updating Album Sharing Settings
If you change your mind about how your photo albums are shared, you can update these settings.
To update your sharing settings, follow these steps:
1. Pause your mouse over the Photos icon on the Google+ ribbon and select Albums from the pop-out menu.
2. Click the Share Settings button to open the Change How Your Albums Are Shared dialog box, shown in Figure 10.7.
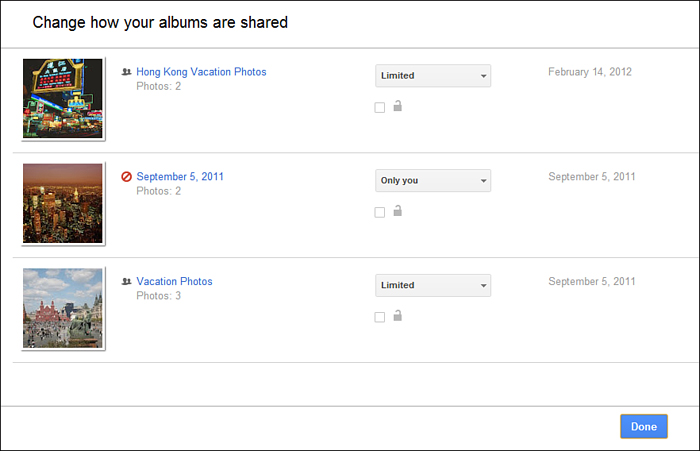
Figure 10.7. At any time you can change how your albums are shared.
3. From the drop-down list next to each album, select your sharing preference. Options include: Public, Extended Circles, Your Circles, Limited (you can choose who to share with), and Only You (private).
4. If you want to disable resharing, tagging, and + mentioning, select the check box next to the Lock icon.
5. Click the Done button to save your changes and close the dialog box.
Organizing an Album
Google+ makes it easy to rearrange the photos in your albums. This is particularly useful for a scrapbook album you display on your profile.
To organize a photo album, follow these steps:
1. Pause your mouse over the Photos icon on the Google+ ribbon and select Albums from the pop-out menu.
2. Select the album you want to organize.
3. Select Organize Album from the More drop-down menu to open the Organize Album page (see Figure 10.8).
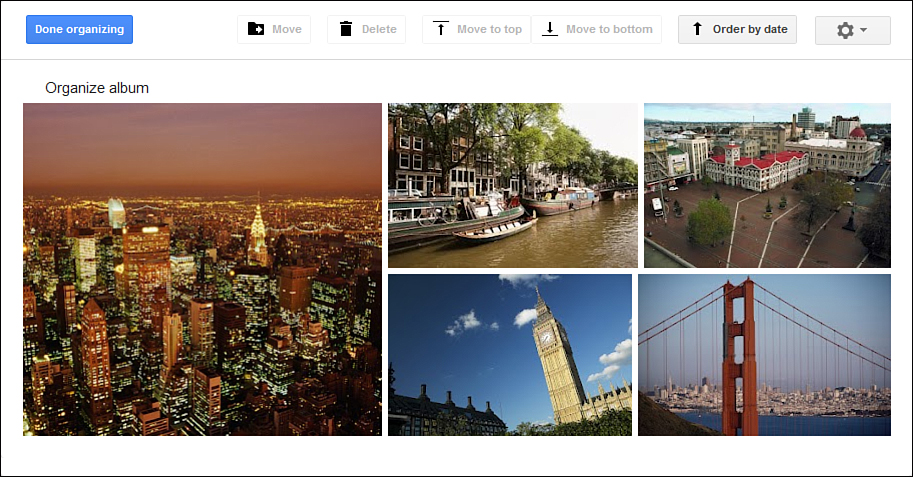
Figure 10.8. Quickly organize your Google+ photo albums.
4. On this page, you can:
• Select and drag photos to organize them.
• Select one or more photos and click the Move button to move your selection to another album. You can also create a new album for your selected photos.
• Select one or more photos and click the Delete button to delete your selection.
• Select a photo and click the Move to Top button or Move to Bottom button to rearrange the order in which the photo displays.
• Click the Order by Date button to arrange your photos by date.
5. Click the Done Organizing button to save your changes and close the dialog box.
Deleting an Album
If you no longer want to keep a photo album, or if you made a mistake and want to start over, you can delete it.
To delete a photo album, follow these steps:
1. Pause your mouse over the Photos icon on the Google+ ribbon and select Albums from the pop-out menu.
2. Select the album you want to delete.
3. Select Delete Album from the More drop-down menu.
4. Click the Delete button in the dialog box that opens to confirm that you want to delete this album. Google+ permanently deletes the album.
Adding Photos to an Existing Album
You can add photos to any existing photo album, following a process similar to creating your initial album.
To add more photos to an existing album, follow these steps:
1. Pause your mouse over the Photos icon on the Google+ ribbon and select Albums from the pop-out menu.
2. Select the album to which you want to add more photos.
3. Click the Add Photos button on the album detail page (refer to Figure 10.4).
4. Click the Select Photos from Your Computer button.
5. In the File Upload dialog box, select the photos you want to add and click the Open button. Depending on your operating system and browser, this dialog box and button might have different names.
6. The Add Photos dialog box displays your photos. Optionally, click a photo to add a caption, rotate it left or right, or delete it. You can also edit photos using the lightbox.
7. Click the Add Photos button in the lower-right corner of the dialog box.
8. In the Share Album dialog box, you can choose the people and circles you want to share your updated album with. You can share your album now or share it at a later time. See “Sharing an Album” earlier in this lesson for more information. If you don’t want to share this album right now, click the Cancel button.
Your updated album appears on the Albums tab on the Photos page. You might have to open your album again to view the new photos.
Working in the Photo Lightbox
The Google+ photo lightbox enables you to view, tag, caption, comment on, edit, delete, and manage your photos. Click a photo to open it in lightbox view, shown in Figure 10.9.
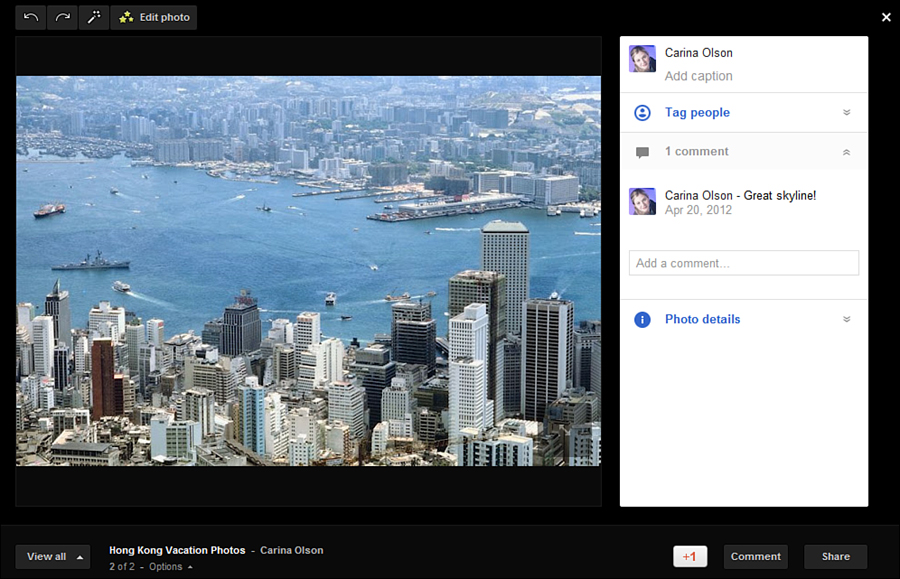
Figure 10.9. Lightbox view enables you to manage and edit photos.
You can click a photo in your stream, on any of the tabs on the Photos page, or on your profile’s Photos tab. The editing features available depend on whether you uploaded the photo or someone else did.
Tip: Turn on Find My Face to Help People Tag You in Photos
The first time you open a photo in the lightbox, the Help People Tag You in Photos dialog box opens. Click the Turn on Find My Face button if you want Google+ to prompt the people in your circles to tag you in photos. Otherwise, click the No Thanks button to close the dialog box.
Exploring the Lightbox
In lightbox view, you can do the following:
• Scroll through album photos. Click the large arrows to the left and right of a photo to scroll through an album with a large number of photos.
• Rotate a photo to the left. Click the Rotate Left button in the upper-left corner of the page to rotate the photo 180 degrees to the left.
• Rotate a photo to the right. Click the Rotate Right button in the upper-left corner of the page to rotate the photo 180 degrees to the right.
• Turn on Autofix. Click the Autofix button in the upper-left corner of the page to adjust photo flaws automatically.
• Edit a photo in Creative Kit. Click the Edit Photo button in the upper-left corner of the page. See “Editing Photos Using Creative Kit” later in this lesson for more information.
• Add a caption. Pause your mouse over the existing caption, which displays below your profile photo in the upper-right corner of the page. If you didn’t add a caption when you uploaded a photo, this field displays as “Add Caption.” Click the Edit link, enter your caption, and click the Save Caption button.
• Add a tag. Click the Tag People link in the sidebar to add a tag to a photo. See “Tagging Photos” later in this lesson for more information.
• Add a comment. Add your own commentary about the photo in the Add a Comment box in the lightbox sidebar. Click the Post Comment button to post your comment.
• Download a full-size photo. Select Download Full Size from the Options drop-down list to download and save a full-size version of this photo.
• View photo details. Select Photo Details from the Options drop-down list to view details about this photo, such as its dimensions, file size, exposure, aperture, and more.
• Report or delete comments. Select Manage Comments from the Options drop-down list. Be aware that this menu option is available only if your photo has comments. On the right side of the page (see Figure 10.10), click the Delete Comment button below a comment to delete it or the Flag as Inappropriate button below a comment to report it to Google+.

Figure 10.10. Delete or report any inappropriate photo comments.
• Delete a photo. Select Delete Photo from the Options drop-down list to delete the photo. Click OK in the dialog box that opens to confirm permanent deletion.
Note: You Can’t Edit a Photo You Didn’t Upload
If you’re viewing a photo in lightbox view that someone else uploaded, you can add a comment, add a tag, view photo details, and report abuse, but you can’t edit or delete the photo.
Tagging Photos
Tagging photos offers a way to identify the people in them. Google+ also gives you complete control over how and when others can tag you.
Tagging a Photo
To tag yourself or someone else in a photo, follow these steps:
1. Click a photo to open it in lightbox view.
2. Click the double-arrow button on the photo, shown in Figure 10.11.
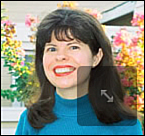
Figure 10.11. Tag photos in lightbox view.
Note: Google+ Recognizes Photos with Multiple People
If your photo includes multiple people, Google+ displays a box around each person’s face when you pause your mouse over the photo. Click the Click Face to Tag text box below each person to tag that person. Automatic recognition doesn’t work for all photos, but you can also tag a photo manually by clicking the Add a New Tag button in the sidebar.
3. Click the Tag button on the right side of the photo to display a circle around the person’s face.
4. In the text box, start typing the name of the person you want to tag, select the appropriate person from the drop-down list of Google+ users, and press Enter to save your tag. Figure 10.12 shows an example of adding a tag.
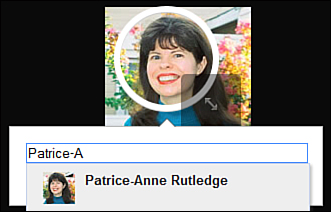
Figure 10.12. Select the name of a Google+ user to tag this photo.
5. Click the Close (x) button in the upper-right corner of the screen to close the photo in lightbox view.
If you tag a photo of yourself, it displays on the Photos of You tab on the Photos page.
If you tag a photo of someone else, that person is notified of your tag and has the option to approve or remove the tag.
Approving or Removing a Tag
When someone tags you in a photo, Google+ sends you a notification about this tag, allowing you to approve or remove it. By default, Google+ automatically approves tags from people in your circles. You can change this option, however. See “Specifying Photo Tag Approval Settings” later in this lesson for more information.
To respond to a photo tag notification, follow these steps.
1. Click the Notifications button in the upper-right corner of any Google+ page.
2. Scroll down to the photo notification you want to review or click the View All Notifications link to view additional notifications on the Notifications page.
Tip: Filter to Display Only All Photo Tag Notifications
To display only your photo tag notifications, select Photos of You from the More drop-down list in the upper-right corner of the Notifications page.
3. Google+ displays the current status of the tag below the photo. For example, in Figure 10.13, the tag is already approved because someone in one of your circles added it. If you want to accept the photo tag, you don’t need to do anything. If you want to remove the photo tag, click the Remove (x) button.
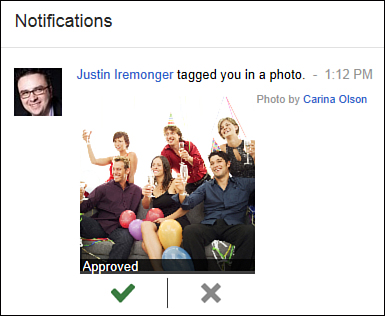
Figure 10.13. You can accept or remove photo tags.
Google+ displays photos tagged with your name on the Photos of You tab on the Photos page.
Removing a Photo Tag in Lightbox View
You can also remove photo tags in lightbox view.
To do so, follow these steps:
1. Click a photo to open it in lightbox view.
2. Pause your mouse over the tag you want to remove on the page’s right sidebar and click the Remove This Tag (small x) button (see Figure 10.14).
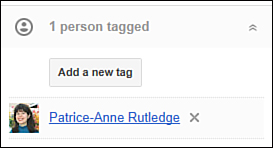
Figure 10.14. Remove photo tags in lightbox view.
3. Click the OK button in the dialog box that opens to confirm deletion.
Specifying Photo Tag Approval Settings
By default, Google+ automatically approves photo tags from anyone in your circles. You can change this default setting, however.
To specify whose tags you want Google+ to automatically approve, follow these steps:
1. Click the Home icon on the Google+ ribbon and select Settings from the drop-down menu in the upper-right corner of the page.
2. Scroll down the Google+ tab to locate the Photos section at the bottom of the page, as shown in Figure 10.15.
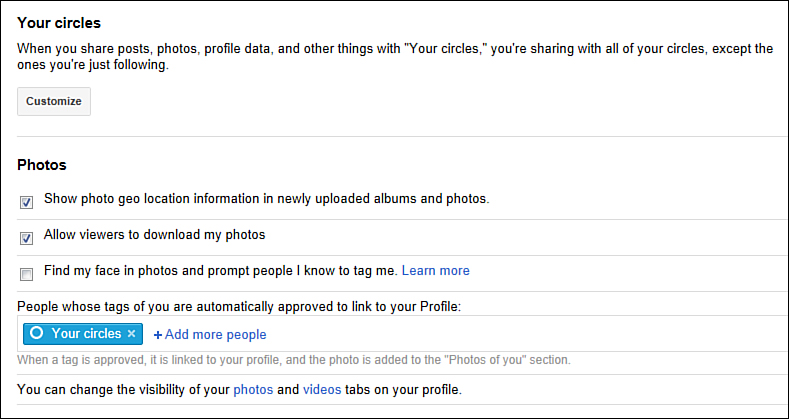
Figure 10.15. You’re in control of the photo tags Google+ automatically approves.
3. Click the Remove icon (x) to the right of the Your Circles chip to require your manual approval for a photo tag. Google+ sends you a notification about any tag requiring approval and also displays pending tag approvals on the Photos of You tab on the Photos page.
Tip: Automatically Approve the Photo Tags Only of People in Specific Circles
If you want to give only certain circles automatic approval, click the Add More People link and select the appropriate circles. For example, you might want to automatically approve everyone in the Family and Friends circles, but not the Acquaintances or Following circles.
Google+ requires your approval anytime someone tags you whose tags aren’t preapproved. See “Approving or Removing a Tag” earlier in this lesson for more information.
You can also specify photo tag approval settings when you edit the Photos tab on your profile.
Editing Photos Using Creative Kit
Google+ enables you to apply special effects and improve the quality of photos you upload using Creative Kit.
To edit a photo in Creative Kit, follow these steps:
1. Select a photo to open it in lightbox view.
2. Click the Edit Photo button in the upper-left corner of the page.
3. Edit your photo using Creative Kit (see Figure 10.16). Using this tool, you can crop, rotate, adjust exposure, modify colors, sharpen, resize, add special effects, add text, and more.
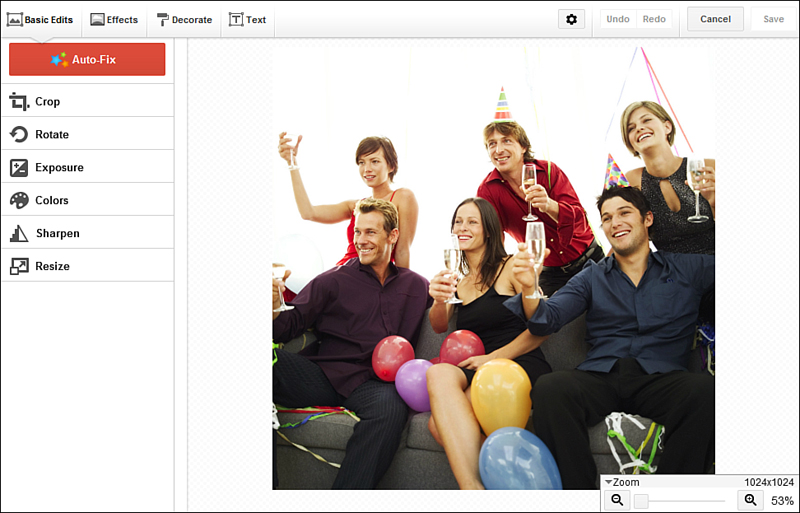
Figure 10.16. Apply effects to your photos.
4. If you don’t like an effect, click the Undo button and try a different effect.
5. If you’re satisfied with the effect you applied, click the Save button.
Summary
In this lesson, you learned how to upload, manage, and edit photos in Google+. Next, get chatting with Google+ Chat.