Lesson 11. Chatting on Google+
In this lesson, you learn how to chat on Google+, using text, voice, and video.
Understanding Google+ Chat
Google+ enables you to communicate directly with other users through its chat functionality. You can chat in a text-based chat window, optionally enhanced with voice or video chat.
Exploring the Chat List
The chat list displays on the right side of most Google+ pages, as shown in Figure 11.1.
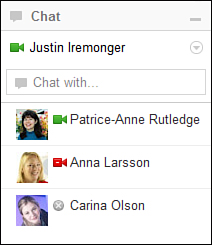
Figure 11.1. Color-coded icons let you know who is available to chat.
If the chat list doesn’t display on the right side of the page, it’s been minimized to the lower-right corner of Google+ (see Figure 11.2). Click the right side of the minimized window to restore the chat list.
Figure 11.2. Maximize the chat list to start chatting.
Google+ uses color-coded icons to communicate the availability of the people in your chat list:
• Green. Online and available to chat.
• Yellow. Idle. Google+ automatically switches a person’s status to idle after 15 minutes of inactivity.
• Red. Busy (online, but unavailable to chat). Google+ users can display this status if they don’t want to chat with others. For example, people who are at work might not be available to chat with friends.
• Gray. Offline or signed out of chat. Google+ users can display this status by selecting the Invisible status, even if they are still online.
See “Specifying Your Chat Availability” for more information about how to manually change your own status.
If users haven’t enabled voice and video chat, availability is designated by a color-coded circle. If they have enabled voice and video chat (either in Google+ or another Google product), the circle becomes a color-coded video icon.
See “Using Voice and Video Chat” later in this lesson for more information about enabling this feature.
Specifying Your Chat Availability
By default, you’re listed as available in the chat list (refer to Figure 11.1).
To change your availability status, click the down arrow to the right of your name in this chat list and select one of the following options from the drop-down menu (see Figure 11.3):
• Busy
• Invisible (changes your status to Offline)
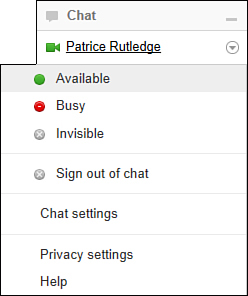
Figure 11.3. You’re in control of the chat availability you display to other Google+ users.
Specifying Your Chat Privacy Settings
By default, Google+ enables you to chat with people in your circles who also have you in their circles.
To restrict chat to specific circles, follow these steps:
1. Click the down arrow to the right of your name in the chat list and select Privacy Settings from the drop-down menu (refer to Figure 11.3).
2. In the pop-up box, click the Your Circles button and select Custom from the drop-down menu. The box expands with a list of your available circles, as shown in Figure 11.4.
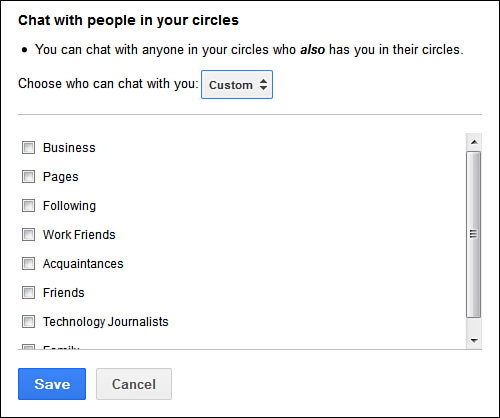
Figure 11.4. Select the specific circles of people you want to chat with.
3. Select the check box to the left of every circle you want to enable for chat.
4. Click the Save button to save your changes. People in circles for which you’ve disabled chat no longer display in your chat list. You can no longer initiate a chat with them, and they can no longer initiate a chat with you.
Chatting on Google+
Google+ offers several options for chatting. You can participate in a text-based chat or enhance your conversation with voice and video chat.
Participating in a Chat
To chat with someone, follow these steps:
1. Click the name of the person you want to chat with in the chat list that displays on the right side of the page (refer to Figure 11.1). A green icon displays before the names of people available to chat. See “Exploring the Chat List” earlier in this lesson for more information about the other icons in this list.
2. If you want to chat with someone who doesn’t display on your chat list, start typing that person’s name in the text box below your name and select from the drop-down list of users (see Figure 11.5). Be aware that you might not be able to find everyone in your Google+ circles. For example, you won’t see people who haven’t enabled chat or who have disabled chat for your circle.
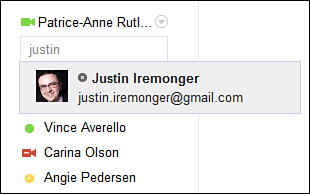
Figure 11.5. Search for people to chat with.
3. The chat window opens in the lower-right corner of the screen (see Figure 11.6). Type your chat message in the text box and press the Enter key. Your message displays in the chat window of your recipient, who can then respond to you (see Figure 11.7). If a recipient is offline, the chat window lets you know this.

Figure 11.6. Conduct chats in the chat window, which displays in the lower-right corner of your screen.
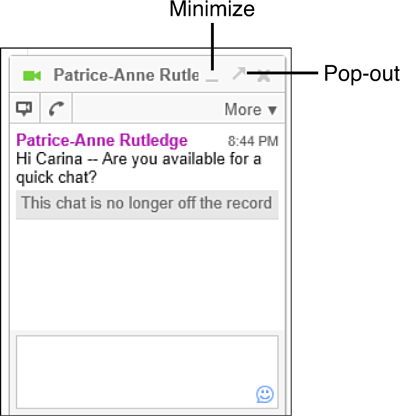
Figure 11.7. Your message as your recipient sees it.
4. Continue conducting your chat in the chat window.
5. When you’re finished chatting, click the Close (x) icon in the upper-right corner of the chat window.
During your chat, you can do the following:
• Minimize the chat window when you’re not actively chatting by clicking the Minimize icon in the upper-right corner of the chat window.
• Open a separate window for chatting by clicking the Pop-out icon in the upper-right corner of the chat window.
• Use emoticons in your chat, such as a smiley face, sad face, or heart. To do so, click the smiley face icon in the lower-right corner on the chat window. A pop-up box with numerous emoticon possibilities opens, as shown in Figure 11.8. You can select any of these to add a personal touch to your chats. Google+ converts any text-based emoticon you enter—such as “:-)” to create a smiley face—to a graphic icon in your chat.
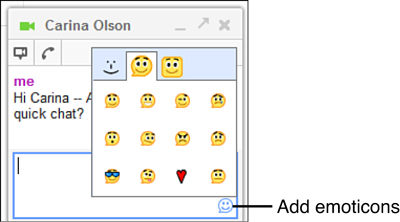
Figure 11.8. Add some emotion to text chats with emoticons.
Sending a File
If you’re discussing a file with someone on Google+, you can send the file to this person via the chat window. For example, you can send Word documents, presentations, spreadsheets, or photos to another Google+ user.
To a send a file from the chat window, follow these steps:
1. In the chat window, select Send a File from the More drop-down list (see Figure 11.9).

Figure 11.9. Send files to the people you chat with.
2. In the File Upload dialog box, select the file you want to send and click the Open button. Depending on your operating system and browser, the names of this dialog box and button could vary. The Chat window notifies you that you’re sharing a file, as shown in Figure 11.10.
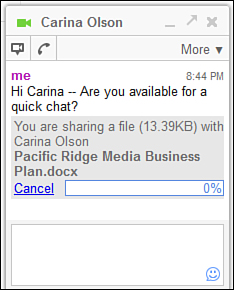
Figure 11.10. The chat window lets you know your file was sent.
3. Google+ alerts the recipient of the file, prompting this person to click the Accept link to open or save it.
4. When the recipient accepts your file, the chat window alerts you that the transfer is completed.
Using Voice and Video Chat
You can add free, computer-to-computer voice and video chat to your Google+ chats using a simple plug-in. This plug-in requires one of the following operating systems:
• Windows XP Service Pack 3 or later
• Intel Mac OS X 10.5 or later
• Linux
In addition, you also need a microphone, speakers, and webcam to use voice and video chat.
If you use chat using another Google product such as Gmail or iGoogle, you might already have this plug-in installed. If not, you can set it up from the Google+ chat window.
Note: Check Out Google+ Hangouts for Video Chat
If you want to participate in video chats, also check out Google+ Hangouts, which enables you to chat with multiple people. You can start a hangout from the chat window by clicking the Start a Hangout icon in the upper-left corner. See Lesson 12, “Using Hangouts for Video Chat,” for more information.
Setting Up Voice and Video Chat
To add voice and video chat, follow these steps:
1. In the chat window, click the Start Voice Chat icon (see Figure 11.11).
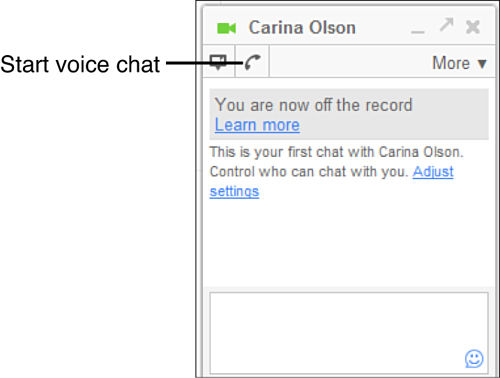
Figure 11.11. Setting up voice and video chat gives you more chat options.
2. Click the Click Here link to add voice and video chat.
3. The Chat Face to Face with Family and Friends page opens in a new window (see Figure 11.12). You can also navigate to this page directly at www.google.com/chat/video. Click the Install Voice and Video Chat button to install this plug-in. You might have to click the Allow button to continue installation.
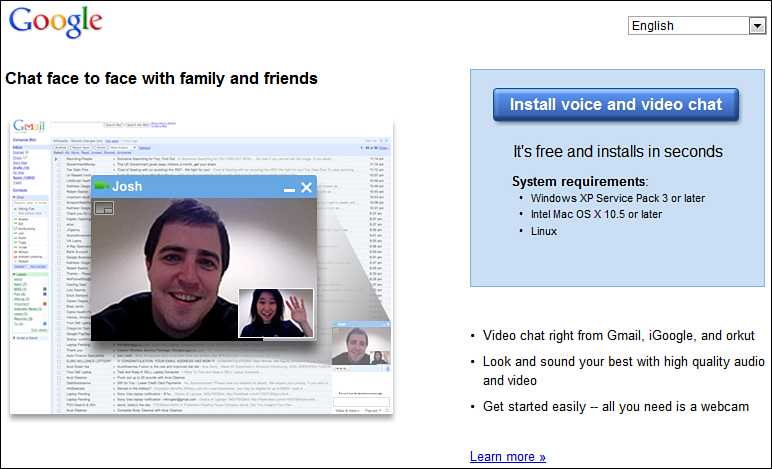
Figure 11.12. Click the Install Voice and Video Chat button to get started.
4. After installation is complete, close your browser and sign back in again.
5. On the chat list, click the down arrow to the right of your name and select Chat Settings from the menu.
6. In the Chat Settings dialog box, shown in Figure 11.13, click the Verify Your Settings link to verify that your camera, microphone, and speakers work properly. Optionally, you can select the appropriate camera, microphone, and speakers from the drop-down lists.
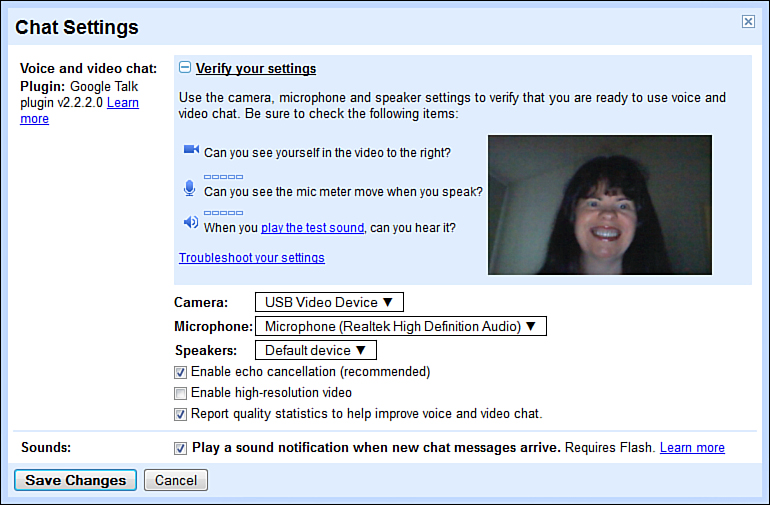
Figure 11.13. Verify your settings before starting to chat.
7. By default, Google+
• Enables echo cancellation, which helps reduce echo sounds during voice chats.
• Disables high-resolution video.
• Reports quality statistics to help improve voice and video chat.
• Plays a sound notification when new chat messages arrive (this feature requires Flash).
You can retain these default settings or change them by selecting or deselecting the related check box.
8. Click the Save Changes button to save your changes and close the dialog box.
You’re now ready to use voice and video chat. Google+ displays the video icon next to your status on the chat list (refer to Figure 11.1).
Participating in a Voice Chat
To add voice chat to an existing chat, follow these steps:
1. In the chat window, click the Start Voice Chat icon (see Figure 11.14).
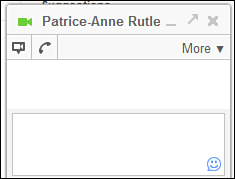
Figure 11.14. You can start a voice chat from the chat window.
2. Google+ alerts the person you’re chatting with that you would like to start a voice chat, as shown in Figure 11.15. This person must have enabled the voice and video plug-in and click the Answer button to participate in the call. If someone hasn’t enabled this plug-in yet, you can send an invite by selecting Invite [First Name] to Voice/Video Chat from the More drop-down list.
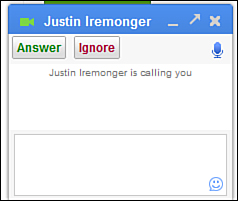
Figure 11.15. The person you want to talk with must answer your voice chat request.
3. Conduct your voice chat.
4. When you’re done talking, click the End button to end the voice chat.
5. Click the Close (x) icon in the upper-right corner of the chat window to close it.
Participating in a Video Chat
To add video chat to an existing chat, follow these steps:
1. In the chat window, select Start Video Chat from the More drop-down list (refer to Figure 11.9).
2. Google+ alerts the person you’re chatting with that you would like to start a video chat. This person must have enabled the voice and video plug-in, have a webcam, and click the Answer button to participate in the video chat.
3. Conduct your video chat, as shown in Figure 11.16.
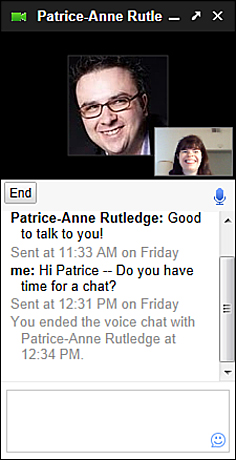
Figure 11.16. Participating in a video chat.
4. When you’re done, click the End button to end the video chat.
5. Click the Close (x) icon in the upper-right corner of the chat window to close it.
Chatting Off the Record
By default, Google+ retains a record of your chats in Gmail. You must have a Gmail account to use this feature. To view a record of your Google+ chats with a Gmail contact, pause your mouse over this person’s name in the Gmail chat list and select Recent Conversations from the Video & More drop-down menu (see Figure 11.17). If you haven’t enabled video, this menu is called the More menu.
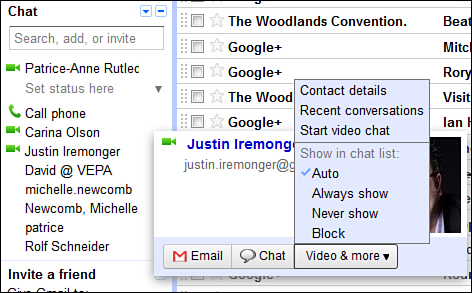
Figure 11.17. Google+ retains a record of your chats in Gmail.
If you don’t want to save a record of your chats with someone, however, you can go off the record with that person. Google+ notifies the person you’re chatting with when you choose to go off or on the record.
When chatting with someone in the chat window, select Go Off the Record from the More drop-down list (refer to Figure 11.9).
If you want to go back on the record again with this person, click the Cancel link.
Signing Out of Chat
You can sign out of chat completely and hide your availability from your contacts. (You’ll display as Offline.) To do so, click the down arrow to the right of your name in the chat list and select Sign Out of Chat from the drop-down menu (see Figure 11.18).
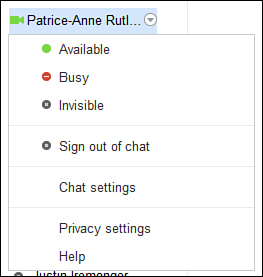
Figure 11.18. Sign out of chat when you don’t want to display in the chat list of your Google+ friends.
You won’t be able to chat again until you sign back into chat by clicking the Sign Into Chat link below the chat list. If you want to maintain a chat conversation with someone, but not be available to others, you should change your status to Invisible rather than sign out of Chat entirely.
Tip: Getting More Help with Google+ Chat
Although Google+ Chat is easy to use after you set it up, technical issues could complicate matters. If you follow the instructions in this lesson and still have problems with Chat, click the down arrow to the right of your name in the chat list and select Help from the drop-down menu.
Summary
In this lesson, you learned how to chat on Google+. Next, it’s time to get visual with Google+ Hangouts for video chat.