Hour 20. Game 4: Gauntlet Runner
What You’ll Learn in This Hour:
► How to design the game Gauntlet Runner
► How to build the Gauntlet Runner world
► How to build the Gauntlet Runner entities
► How to build the Gauntlet Runner controls
► How to further improve Gauntlet Runner
Let’s make a game! In this hour, you’ll make a 3D gauntlet-running game appropriately titled Gauntlet Runner. You’ll start the hour with the design of the game. From there, you’ll focus on building the world. Next, you’ll build the entities and controls. You’ll wrap up the hour by playing the game and seeing where improvements can be made.
Design
You learned about design elements in Hour 6, “Game 1: Amazing Racer.” In this hour, you’ll dive right into them.
The Concept
In this game, you will be playing as a cyborg running as far as possible through a gauntlet tunnel, attempting to grab power-ups to extend your game time. You need to avoid obstacles that will slow you down. The game ends when you run out of time.
The Rules
The rules of this game state how to play and allude to some of the properties of the objects. The rules for Gauntlet Runner are as follows:
► The player can move left or right and “phase out” (become ghost-like). The player cannot move in any other manner.
► A player who hits an obstacle is slowed by 50% for 1 second.
► If a player grabs a power-up, the player’s time is extended by 1.5 seconds.
► The player is bounded by the sides of the tunnel.
► The loss condition for the game is running out of time.
► There is no win condition, but the player aims to travel as far as possible.
The Requirements
The requirements for this game are simple:
► A gauntlet texture.
► A wall texture.
► A player model.
► A custom shader for when the player is phased out (as discussed later in this hour).
► A power-up and an obstacle. These will be created in Unity.
► A game manager. This will be created in Unity.
► A power-up particle effect. This will be created in Unity.
► Interactive scripts. These will be written in Visual Studio.
In an effort to make this game more visually appealing, you will be using more assets built by the great game development community. In this case, you will be using textures and a player model from the Adventure sample game released by Unity Technologies (https://assetstore.unity.com/packages/essentials/tutorial-projects/adventure-sample-game-76216). You will also be using a custom shader that was graciously provided for free by Andy Duboc (https://github.com/andydbc/HologramShader).
The World
The world for this game will simply be three cubes configured to look like a gauntlet. The entire setup is fairly basic; it’s the other components of the game that add challenge and fun.
The Scene
Before setting up the ground and its functionality, get your scene set up and ready to go. To prepare the scene, do the following:
1. Create a new 3D project called Gauntlet Runner. Create a new folder called Scenes and save your scene as Main in that folder.
2. Position the Main Camera at (0, 3, -10.7) with a rotation of (33, 0, 0).
3. In the book assets for Hour 20, locate two folders: Textures and Materials. Drag those folders into the Project view to import them.
4. In the Materials folder, locate the material Dark Sky. This material represents a skybox; notice that its shader type is Skybox/Procedural (see Figure 20.1). Drag the Dark Sky material from the Project view into the Scene view to change the sky.
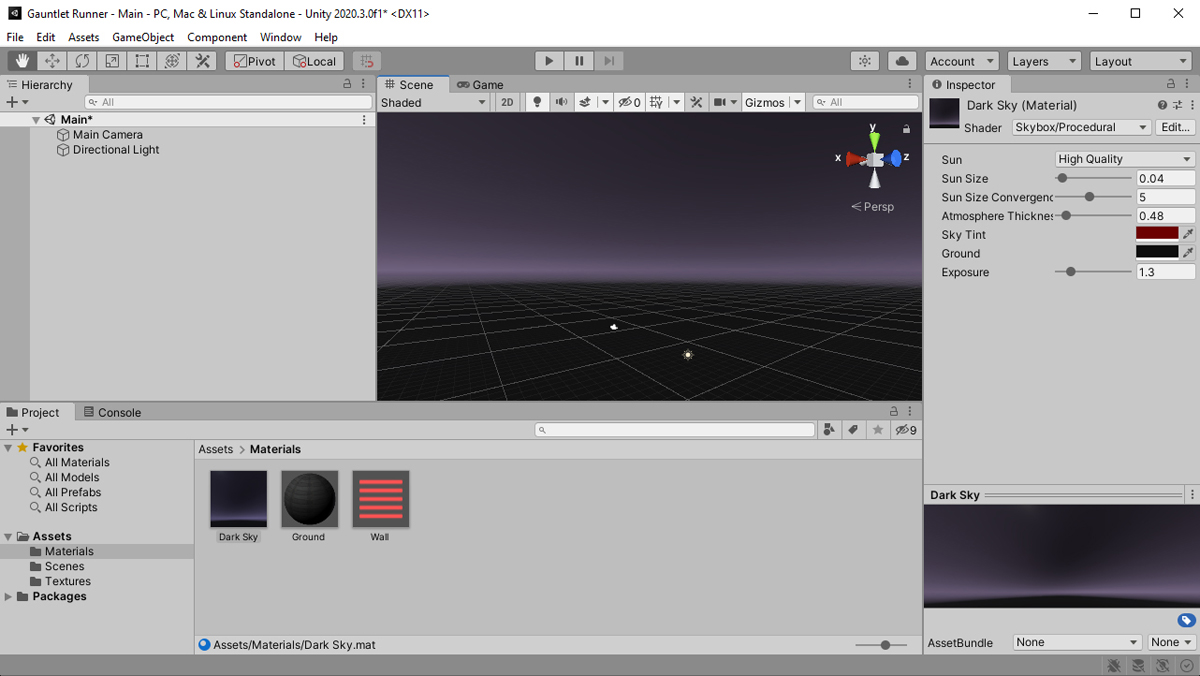
FIGURE 20.1
The new Dark Sky material.
The camera for this game will be in a fixed position, hovering over the gameplay. The rest of the world will pass underneath it.
The Gauntlet
The ground in this game will be scrolling gauntlet in nature; however, unlike with the scrolling background used in Captain Blaster (see Hour 15, “Game 3: Captain Blaster”), you will not actually be scrolling anything. This is explained in more detail in the next section, but for now just understand that you need to create only one ground object to make the scrolling work. The ground itself will consist of a basic cube and two quads. To create the ground, follow these steps:
1. Add a cube to the scene. Name it Ground and position it at (0, 0, 15.5) with a rotation of (0, 180, 0) and a scale of (10, .5, 50).
2. Add to the scene a quad named Wall and position it at (-5.25, 1.2, 15.5) with a rotation of (0, -90, 0) and a scale of (50, 2, 1). Duplicate the Wall object and position the new object at (5.25, 1.2, 15.5).
3. In the Materials folder you imported previously, examine the Ground and Wall materials. The Ground material is slightly metallic with some texture tiling. One of the built-in particle shaders gives the Wall material a glowing effect (see Figure 20.2).

FIGURE 20.2
The gauntlet materials.
4. Drag the Ground material onto the Ground game object. Drag the Wall material onto both Wall game objects.
That’s it! The gauntlet is fairly basic.
Scrolling the Ground
You saw in Hour 15 that you can scroll a background by creating two instances of that background and moving them in a “leapfrog” manner. In the Gauntlet Runner game, you are going to use an even more clever solution. Each material has a set of texture offsets. These can be seen in the Inspector when a material is selected (right below tiling). You need to modify those offsets at runtime via a script. If the texture is set to repeat (which it is by default), the texture will loop around seamlessly. The result, if done correctly, is an object that seems to scroll—without any actual movement. To create this effect, follow the steps on the next page.
1. Create a new folder named Scripts. Create a new script called TextureScroller. Attach the script to the ground.
2. Add the following code to the script (replacing the Start() and Update() methods that are already there):
public float speed = .5f;

Renderer renderer;
float offset;

void Start()
{
     renderer = GetComponent<Renderer>();
}

void Update()
{
     // Increase offset based on time
     offset += Time.deltaTime * speed;
     // Keep offset between 0 and 1
     if (offset > 1)
          offset -= 1;
     // Apply the offset to the material
     renderer.material.mainTextureOffset = new Vector2(0, offset);
}
3. Run the scene and notice your gauntlet scrolling. This is an easy and efficient way to create a scrolling 3D object.
The Entities
Now that you have a scrolling world, it is time to set up the entities: the player, the power-ups, the obstacles, and a trigger zone. The trigger zone will be used to clean up any items that make it past the player. You do not need to create a spawn point for this game. Instead, you are going to explore a different way of handling it: by letting the game control create the power-ups and obstacles.
The Power-ups
The power-ups in this game are going to be simple spheres with some effects added to them. You will be creating a sphere, positioning it, and then making a prefab out of it. To create the power-up, follow these steps:
1. Add a sphere to the scene. Position the sphere at (0, 1.5, 42) with a scale of (.5, .5, .5). Add a rigidbody to the sphere and uncheck Use Gravity.
2. Create a new material named Powerup and give it a yellow color. Set Metallic to 0 and Smoothness to 1. Apply the material to the sphere.
3. Add a point light to the sphere (by selecting Add Component > Rendering > Light). Give the light a yellow color.
4. Add a particle system to the sphere (by selecting Component > Effects > Particle System). If the particles have an odd purplish coloring, don’t worry. Just see the following caution for the fix.
5. In the main particle module, set Start Lifetime to .5, set Start Speed to −5, set Start Size to .3, and set Start Color to a light-yellow color.
6. In the Emission module, set Rate over Time to 30. In the Shape module, set Shape to Sphere and set Radius to 1.
7. In the Renderer module, set Render Mode to Stretched Billboard and Length Scale to 5.
8. Create a new folder called Prefabs. Rename the sphere Powerup and click and drag it from the Hierarchy view into the Prefabs folder. Then delete the power-up from the scene.
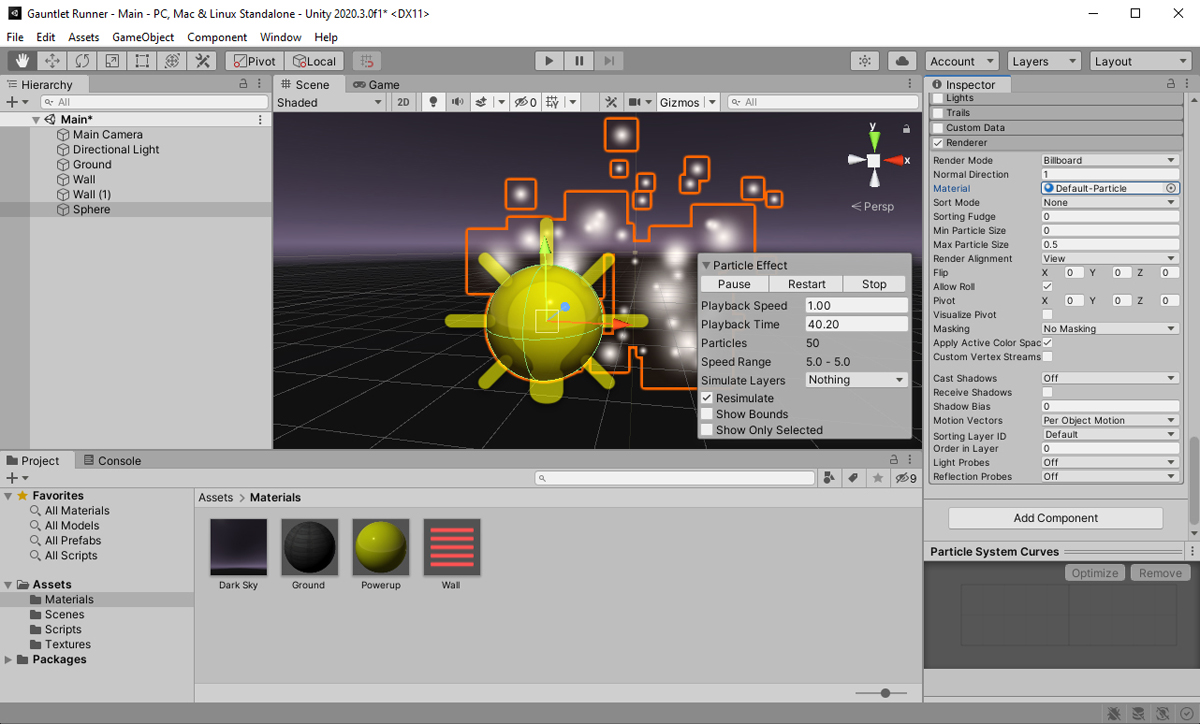
FIGURE 20.3
Assigning the Default-Particle material.
By setting the position of the object before putting it into the prefab, you can simply instantiate the prefab, and it will appear at that spot. As a result, you do not need a spawn point. Figure 20.4 illustrates the finished power-up (though the image doesn’t really do it justice).

FIGURE 20.4
The power-up.
The Obstacles
For this game, the obstacles are represented by small glowing red cubes. The player has the option of either avoiding them or phasing through them. To create the obstacles, follow these steps:
1. Add a cube to the scene and name it Obstacle. Position it at (0, .4, 42) with a scale of (1, .2, 1). Add a rigidbody to the cube and uncheck Use Gravity.
2. Add a Light component to the obstacle and give it a red color.
3. Create a new material called Obstacle and apply it to the Obstacle game object. Make the color of the material red, check the Emission check box, and give it a dark red emissive color (see Figure 20.5).
4. Drag the Obstacle game object into the Prefabs folder to turn it into a prefab. Delete the Obstacle game object.
FIGURE 20.5
The obstacle and material.
The Trigger Zone
Just as in games you’ve created in earlier hours, the trigger zone in Gauntlet Runner exists to clean up any game objects that make it past the player. To create the trigger zone, follow these steps:
1. Add a cube to the scene. Rename the cube TriggerZone and position it at (0, 1, -20) with a scale of (10, 1, 1).
2. On the Box Collider component of the trigger zone, check the Is Trigger check box.
The Player
The player requires a large portion of the work for this game. The player will need to be animated and will also have a controller and use a custom shader. We have talked about shaders before, but we haven’t yet used one that wasn’t built in to Unity. Before we get ahead of ourselves though, let’s get the player ready:
1. In the book files for this hour, locate the Models and Animations folders and drag them into the Project view to import them.
2. Inside the Models folder, select the Player.fbx model. As mentioned before, this asset is provided, free to use, in Unity’s Adventure sample game.
3. Under the Rig tab, change the animation type to Humanoid. Click Apply. You should now see a check mark next to the Configure button. (If you need a refresher on Humanoid rigs, be sure to go back to Hour 18, “Animators.”)
4. Drag the Player model into the scene and position it at (0, .25, -8.5). Give the Player game object the Player tag. (Reminder: An object’s tag can be found in the top-left drop-down in the Inspector view.)
5. Add a capsule collider to the player (by selecting Add Component > Physics > Capsule Collider). Check the Is Trigger check box. Finally, set the Center Y value to .7, Radius to .3, and Height to 1.5.
You now need to prepare and apply the Run animation, as follows:
1. From the Animations folder, select the Runs.fbx file. In the Inspector, click the Rig tab and change the animation type to Humanoid. Click Apply.
2. On the Animations tab, notice that there are three clips: RunRight, Run, and RunLeft. Select Run and ensure that the properties are set as shown in Figure 20.6. To avoid drift, it is important that the x axis value for the Average Velocity property be 0. If it is not, adjust the Root Transform Rotation Offset until it is. Click Apply.

FIGURE 20.6
The Run animation properties.
3. Expand the asset tray on the Runs.fbx model by clicking the arrow on the right side of the asset in the Project view. Locate the Run animation clip and drag it onto the Player model in the scene. You’ll know you did it correctly when an animator controller named Player appears in the folder next to Runs.fbx.
If you run the scene now, you will notice a couple animation issues. The first is that the player runs off into the distance. Recall that you only want to give the illusion that the player is moving—but not actually have the player move. The second issue is that the animation is too fast, and the player’s feet slide on the ground as a result. Follow these steps to fix these issues:
1. In order to remove the root motion and get the player to run in place, select the Player game object in the scene. On the Animator component, uncheck Apply Root Motion.
2. In the Project view, double-click the Player animator controller (in the Animations folder) to open the Animator window.
3. In the Animator window, select the Run state. In the Inspector view, set Speed to .7 and check Foot IK (see Figure 20.7). Run your scene and see how the player runs now.

FIGURE 20.7
The Run state properties.
The player entity is ready (for now). In the following sections you will add code that provides some interesting functionality in the game.
The Controls
It’s now time to add controls and interactivity to get this game going. Because the positions for the power-ups and obstacles are in the prefabs already, there is no need to create a spawn point. Therefore, almost all of the control will be placed on a game manager object.
Trigger Zone Script
The first script you need to make is the one for the trigger zone. Remember that the trigger zone simply destroys any objects that make their way past the player. To create this, simply create a new script named TriggerZone and attach it to the trigger zone game object. Place the following code in the script:
void OnTriggerEnter(Collider other)
{
     Destroy(other.gameObject);
}
The trigger script is very basic and just destroys any object that enters it.
The Game Manager Script
The game manager script is where a majority of the work takes place. To start, create an empty game object in the scene and name it Game Manager. This will simply be a placeholder for your scripts. Create a new script named GameManager and attach it to the Game Manager object you just created. In the following code for the game manager script, there is some complexity, so be sure to read each line carefully to see what it is doing. Add the following code to the script:
public TextureScroller ground;
public float gameTime = 10;

float totalTimeElapsed = 0;
bool isGameOver = false;

void Update()
{
     if (isGameOver)
          return;

     totalTimeElapsed += Time.deltaTime;
     gameTime -= Time.deltaTime;

     if (gameTime <= 0)
          isGameOver = true;
}

public void AdjustTime(float amount)
{
     gameTime += amount;
     if (amount < 0)
          SlowWorldDown();
}

void SlowWorldDown()
{
     // Cancel any invokes to speed the world up
     // Then slow the world down for 1 second
     CancelInvoke();
     Time.timeScale = 0.5f;
     Invoke(“SpeedWorldUp”, 1);
}

void SpeedWorldUp()
{
     Time.timeScale = 1f;
}

// Note this is using Unity’s legacy GUI system
void OnGUI()
{
     if (!isGameOver)
 {
     Rect boxRect = new Rect(Screen.width / 2 - 50, Screen.height - 100, 100, 50);
     GUI.Box(boxRect, “Time Remaining”);

     Rect labelRect = new Rect(Screen.width / 2 - 10, Screen.height - 80, 20, 40);
     GUI.Label(labelRect, ((int)gameTime).ToString());
 }
 else
 {
     Rect boxRect = new Rect(Screen.width / 2 - 60, Screen.height / 2 - 100, 120, 50);
     GUI.Box(boxRect, “Game Over”);

     Rect labelRect = new Rect(Screen.width / 2 - 55, Screen.height / 2 - 80, 90, 40);
     GUI.Label(labelRect, “Total Time: “ +(int)totalTimeElapsed);

     Time.timeScale = 0;
 }
}
Remember that one of the premises of this game is that everything slows down when the player hits an obstacle. You make this happen by changing the Time.timeScale for the entire game. The remaining variables maintain the game timing and state.
The Update() method keeps track of time. It adds the time since the last frame (Time.deltaTime) to the totalTimeElapsed variable. It also checks whether the game is over, which happens when the time remaining reaches 0. If the game is over, it sets the isGameOver flag.
The SlowWorldDown() and SpeedWorldUp() methods work in conjunction with one another. Whenever a player hits an obstacle, the SlowWorldDown() method is called. This method basically slows down time. It then calls the Invoke() method, which basically says, “Call the method written here in x seconds,” where the method called is the one named in the quotes and the number of seconds is the seconds value. You might have noticed the call to CancelInvoke() at the beginning of the SlowWorldDown() method. This basically cancels any SpeedWorldUp() methods waiting to be called because the player hit another obstacle. In the previous code, after 1 second, the SpeedWorldUp() method is called. This method speeds everything back up so that play can resume the game, as normal.
The AdjustTime() method is called whenever the player hits a power-up or an obstacle. This method adjusts the amount of time remaining. If that amount is negative (an obstacle), the method calls SlowWorldDown().
Finally, the OnGUI method draws the remaining time to the scene while the game is running, and it shows the total time the game lasted after it ends.
The Player Script
The Player script has two responsibilities: Manage the player movement and collision controls, and manage the phase effect. Create a new script called Player and attach it to the Player object in the scene. Add the following code to the script:
[Header(“References”)]
public GameManager manager;
public Material normalMat;
public Material phasedMat;

[Header(“Gameplay”)]
public float bounds = 3f;
public float strafeSpeed = 4f;
public float phaseCooldown = 2f;

Renderer mesh;
Collider collision;
bool canPhase = true;

void Start()
{
     mesh = GetComponentInChildren<SkinnedMeshRenderer>();
     collision = GetComponent<Collider>();
}

void Update()
{
     float xMove = Input.GetAxis(“Horizontal”) * Time.deltaTime * strafeSpeed;

     Vector3 position = transform.position;
     position.x += xMove;
     position.x = Mathf.Clamp(position.x, -bounds, bounds);
     transform.position = position;

     if (Input.GetButtonDown(“Jump”) && canPhase)
     {
     canPhase = false;
     mesh.material = phasedMat;
     collision.enabled = false;

     Invoke(“PhaseIn”, phaseCooldown);
   }
}

void PhaseIn()
{
     canPhase = true;
     mesh.material = normalMat;
     collision.enabled = true;
}
To start things off, this script uses something called an attribute. Attributes are special tags that modify code. As you can see, this code uses the Header attribute, which causes Inspector view to display the header’s string. (Check it out in the editor.)
The first three variables hold references to the game manager and two materials. When the player phases out, the materials are swapped. The rest of the variables handle gameplay preferences, such as the level bounds and the player’s sideways speed.
The Update() method starts by moving the player based on input. It then checks to make sure the player isn’t out of bounds. It does this by using the Mathf.Clamp() method. This keeps the player in the gauntlet. The Update() method then checks whether the player is currently pressing the spacebar (which the Input Manager calls “Jump”). If the user is pressing the spacebar, the player phases out and prepares to phase back in after a defined cooldown. A player who is phased out has a disabled collider so the player cannot hit obstacles or collect power-ups.
The Collidable Script
Both the power-ups and the obstacles need to move toward the player. They both also modify the game time when the player collides with them. Therefore, you can apply the same script to them to create this behavior. Create a script named Collidable and add it to both the power-up and obstacle prefabs. You can do this by selecting them both in the Inspector and clicking Add Component > Scripts > Collidable. Add the following code:
public GameManager manager;
public float moveSpeed = 20f;
public float timeAmount = 1.5f;

void Update()
{
     transform.Translate(0, 0, -moveSpeed * Time.deltaTime);
}

void OnTriggerEnter(Collider other)
{
     if (other.tag == “Player”)
     {
          manager.AdjustTime(timeAmount);
          Destroy(gameObject);
     }
}
This script is simple. There are variables for the game manager script, the movement speed, and the time adjustment amount. Then, at each Update() method call, the object is moved. When the object collides with something, it checks to see if it collided with the player. If it did, it lets the game manager know and then it destroys itself.
The Spawner Script
The Spawner script is responsible for creating the objects in the scene. Because position data is in the prefabs, you won’t need a dedicated spawner game object and can instead just place the script on the Game Manager object. Create a new script called Spawner and attach it to the Game Manager object. Add the following code to the script:
public GameObject powerupPrefab;
public GameObject obstaclePrefab;
public float spawnCycle = .5f;

GameManager manager;
float elapsedTime;
bool spawnPowerup = true;

void Start()
{
      manager = GetComponent<GameManager>();
}

void Update()
{
      elapsedTime += Time.deltaTime;
      if (elapsedTime > spawnCycle)
      {
          GameObject temp;
          if (spawnPowerup)
              temp = Instantiate(powerupPrefab) as GameObject;
          else
              temp = Instantiate(obstaclePrefab) as GameObject;

          Vector3 position = temp.transform.position;
          position.x = Random.Range(-3f, 3f);
          temp.transform.position = position;

          Collidable col = temp.GetComponent<Collidable>();
          col.manager = manager;

          elapsedTime = 0;
          spawnPowerup = !spawnPowerup;
    }
}
This script contains a reference to the power-up and obstacle game objects. The next variables control the timing and order of the object spawns. The power-ups and obstacles will take turns spawning; therefore, there is a flag to keep track of which one is going.
In the Update() method, the elapsed time is incremented and then checked to see if it is time to spawn a new object. If it is time, the script checks to see which object it should spawn. It then spawns either a power-up or an obstacle. The created object is then moved left or right randomly. The newly spawned object is given a reference to the game manager. Finally, the Update() method decreases the elapsed time and flips the power-up flag so that the opposite object will be spawned next time.
Putting It All Together
Now you’re ready to work with the last part of the game. You need to link the scripts and objects. Start by selecting the Game Manager object in the Hierarchy view. Drag the Ground object to its corresponding property in the Game Manager Script component (see Figure 20.8). Drag the Powerup and Obstacle prefabs onto their corresponding properties in the Spawner (Script) component.

FIGURE 20.8
Dragging the objects to their properties.
Next, select the Player object in the Hierarchy view and drag the Game Manager object onto the Manager property of the Player (Script) component (see Figure 20.9). In addition, if you look in the Model folder in the Project view, you see the PhasedOut material. Right next to it is the Hologram custom shader. Feel free to take a look at them if you are curious, but keep in mind that understanding how to write your own shaders is very complex and beyond the scope of this book. Don’t fret too much, though: Unity’s very own visual shader creation tools are being released as an “experimental” feature in Unity 2018.1! When you are ready, drag the Player material and the PhasedOut material onto the corresponding properties on the player’s Player (Script) component.

FIGURE 20.9
Adding the game control and materials to the player script.
Finally, select the Obstacle prefab and set the Time Amount property on the Collidable script to -.5. That’s it! The game is now complete and playable.
Room for Improvement
As always, a game is not fully complete until it is tested and adjusted. Now it is time for you to play through the game and see what you like and what you don’t like. Remember to keep track of the features that you think really enhance the gameplay experience. Also keep track of the items you feel detract from the experience. Be sure to make notes of any ideas you have for future iterations of the game. Try to have friends play the game as well and record their feedback about the game. All these things will help you make the game unique and more enjoyable.
Summary
In this hour, you have made the game Gauntlet Runner. You started by laying out the design elements of the game. From there, you built the gauntlet and got it to scroll using a texture trick. You then built the various entities for the game. After that, you built controls and scripts. Last but not least, you tested the game and recorded some feedback.
Q&A
Q. The movements of the objects and the ground aren’t exactly lined up in Gauntlet Runner. Is that normal?
A. In this case, yes. A fine level of testing and tweaking would be required to get these to sync perfectly. This is one element you can focus on refining.
Q. Since the duration of “phasing out” is as long as the cooldown, couldn’t the player always stay phased out?
A. Sure, I suppose. Though that would be able to happen for only about 10 seconds since players can’t collect power-ups while phased out.
Workshop
Take some time to work through the questions here to ensure that you have a firm grasp of the material.
Quiz
1. How does the player lose the Gauntlet Runner game?
2. How does the scrolling background work?
3. How does the Gauntlet Runner game control the speed of all the objects in the scene?
Answers
1. The player loses the game when time runs out.
2. The gauntlet stays stationary, and the texture is scrolled along the object. The result is that the ground appears to move.
3. It changes the time scale of the entire game. However, notice that power-ups and obstacles still appear to move fast. Why could this be?
Exercise
It is time for you to attempt to implement some of the changes you noted when playtesting this game. You should attempt to make the game unique to you. Hopefully, you were able to identify some weaknesses of the game or some strengths that you would like to improve. Here are some things to consider changing:
► Try adding new/different power-ups and obstacles.
► Try changing the old GUI code to instead use Unity’s new UI system.
► Try to increase or decrease the difficulty by changing how often power-ups and obstacles spawn. Also change how much time is added by power-ups or how long the world is slowed. You could even try to adjust how much the world is slowed or give different objects different slowed speeds.
► Give the power-ups and obstacles a new look. Play around with textures and particle effects to make them look awesome.
► Show the total distance traveled in place of a score, and perhaps even make the game speed continually increase to create a lose condition.