
We can make our data views more meaningful by setting up our data view to automatically use different styles in response to differing data values. This technique is known as conditional formatting.
Applying conditional formatting in SharePoint Designer requires us to use the XPath language. Don't worry though because SharePoint Designer makes this easy for us.
We would like to apply some conditional formatting to our data view so that it shows a differently formatted price for all wines that have a low number in stock.
We start this process by right-clicking on our data view and selecting Conditional Formatting from the shortcut menu. This will open up the Conditional Formatting task pane.

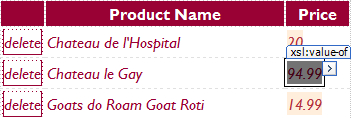
We then click on the data value that we would like to apply our conditional formatting to. We will select any of the prices in the data form. Below, I have selected the price of the most expensive wine, Chateau le Gay.
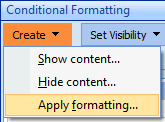
We then click the Create button in our Conditional Formatting task pane and select Apply Formatting.
Doing so presents us with the Condition Criteria dialog box. This dialog is used to specify the conditions for our formatting. To begin using the dialog, we click on the line that says Click here to add a new clause.... We would like our Price to be formatted differently if the number of products in stock is less than 10, and so select the options in the diagram below and then click OK:

Now that we have chosen our criteria, the next screen allows us to specify the style that will be automatically applied to our Price when the condition is met. In the Font category, we will select a font-weight of bold, and in the Background category, we will select a nice bright background-color of yellow (#FFFF00). This vivid style will ensure that the information stands out to the users of the site.
To modify the condition at a later date, we can click on the condition in our Conditional Formatting task pane and select Edit condition... from the drop-down list.

It is also worth noting that it is also possible to use conditional formatting to change the visibility of the data so that it can be displayed or hidden, depending on the value. This is useful to show or hide images. For example, if the type of wine is red, show a red bottle. If white, show a white bottle.