
8
Integrating Jotai in a React Native App
In the previous chapter, we ventured into the mathematical world of XState. We will continue our journey by exploring another young state management library called Jotai. Jotai is inspired by an experimental state management library created at Facebook called Recoil. In this chapter, we will take a brief look at Recoil, an experimental state management library created by Facebook. Once we’re comfortable with the main ideas of this library, namely a new concept called an “atomic state”, we will take a deep dive into Jotai. We will configure Jotai in our app, and we’ll continue to work on data fetching and managing liked images with the help of Jotai. Here’s what we will go over in this chapter:
- What is Recoil and an atomic state?
- What is Jotai?
- Configuring Jotai in the Funbook app
- Using Jotai for FavoritedImages
By the end of this chapter, you will have a new way of looking at global state management – by dividing it into small items, called atoms. You will also know how to set up Jotai in a new project, and how to use it for data fetching and data management.
Technical requirements
In order to follow along with this chapter, you will need some knowledge of JavaScript and ReactJS. If you have followed at least Chapters 1 to 4 of this book, you should be able to proceed without any issues.
Feel free to use an IDE of your choice, as React Native does not need any specific functionality. Currently, the most popular IDEs for frontend developers are Microsoft’s VSCode, Atom, Sublime Text, and WebStorm.
The code snippets provided in this chapter are here to illustrate what we should be doing with the code. They do not provide the whole picture. To code along easier, please open the GitHub repo in your IDE and look at the files in there. You can either start with the file in the folder named example-app-full or chapter-8. If you start with example-app-full, you will be responsible for implementing the solutions described in this chapter. If you choose to look at chapter-8, you will see the entire solution implemented by me.
If you get stuck or lost, you can check the code in the GitHub repo: https://github.com/PacktPublishing/Simplifying-State-Management-in-React-Native/tree/main/chapter-8.
What is Recoil and an atomic state?
If you’ve been following this book chapter by chapter, you may be feeling as though the list of different types of state management libraries is never-ending. You would be right, to some extent. New state management libraries pop up every few weeks; they are sometimes purely open source, and sometimes company-backed. However, they rarely propose groundbreaking solutions. More often than not, they are newer implementations of known concepts. Those implementations are greatly appreciated, as every developer likes working comfortably – and what are those known concepts, you may ask?
There’s a consensus in the ReactJS world that state management libraries can be divided into three types:
- Flux type – these are state management libraries that hold the state outside of components and use a unidirectional data flow. They are inspired by Facebook’s Flux, the most famous example being Redux. There are modern implementations of this flow, such as Redux Toolkit or Zustand.
- Proxy type – these libraries “wrap” the state, conceptually similar to what a proxy does. When using this type of state management, the developer can subscribe to, and read, wrapped values like any other values in the component. The best examples of proxy-type state management are React’s Context, MobX, or Valtio.
- Atomic type – this is the state set at the lowest level, managed naturally by setState in class components and the useState hook in function components. Values set in this way can be passed around the app and used in a bigger context. Facebook created an experimental library to promote this type of state management, called Recoil. Jotai soon followed suit.
Recoil was created around mid-2020 and quickly garnered lots of attention. It was published by Facebook itself, the creators of React, so everyone was expecting a great new solution. The idea of using the smallest possible denomination of pieces of state, peppered and accessible throughout React apps, was enticing. Unfortunately, after the first gasp of excitement, a big part of the React community lost interest in Recoil and went about their days continuing to work mostly with Redux. Two years later, Recoil’s documentation still states that it’s experimental and few people are talking about it.
A small community of developers was paying more attention than the rest of us though. Poimandres, an open source developer collective, went to work and created their implementation of an atomic state. They called it Jotai. If you visit their GitHub page, you will see they also developed Valtio, a proxy-type state management library, and Zustand, a lightweight flux-type state management library. Valtio and Zustand are so far in the shadow of their more famous alternatives, but Jotai has dominated the stage for atomic state management. This library is production-ready; it’s being actively developed through GitHub, and its developers provide constant support on an open Discord server. This is why we will talk about Jotai, and not Recoil, in this chapter.
What is Jotai?
As mentioned in the previous section, Jotai is an atomic-type state management library, created by a developer named Daishi Kato, as part of the Poimandres open source developer collective. I asked Daishi Kato a few questions through Twitter, and he was nice enough to answer me. The first question I had was why he decided to create Jotai. He said: “I have been creating various global state libraries, to eliminate necessity of memoizing selectors. One notable one is react-tracked, which is heavily depending on proxies. I noticed proxies don’t work best for many cases and wanted another solution. Recoil’s model is a best match for this. So, to solve my problem, I developed Jotai.” As simple as that! He added that maintaining the various state management libraries he created takes about half of his time, leaving the rest to do freelance work. Daishi said he likes working most with Jotai and Valtio as they have unique features. “Zustand is valuable for being minimal. It’s almost nothing. Likewise, react-tracked is still valuable providing minimal features.” – Daishi added. When I asked how he would categorize state management libraries, he said he would divide them into two groups: keeping the state internal (as with useState) or externally. Daishi is continually working on new things; you can observe all his work in the Jotai Labs GitHub repo: https://github.com/jotai-labs. He’s also interested in developing features for fetching and React’s Suspense. You can find more links to his projects in the Further reading section.
We now have a good understanding of why Jotai was created. It aims to solve state management problems from a new perspective, following React’s best practices and concepts proposed by the experimental Recoil library. It’s time we try this “atomic” state approach in our app. Let’s get to coding!
Configuring Jotai in the Funbook app
If you’re a fan of simplicity, my dear reader, you may just fall in love with this state management library. Configuring it in our app only requires running the install command in the terminal:
npm install jotai
Alternatively, see the following:
Yarn add jotai
There’s one hidden gem of configuration to be added: Suspense. I specifically used the word gem because this configuration requirement of Jotai will make your app crash less. Suspense is a new ReactJS functionality, created to only be able to render components that are ready to be rendered. As with any new functionality, the users need to get used to it, and sometimes need to be forced to try it. Jotai is doing exactly this: forcing the users to use Suspense, for their own good! Let’s go ahead and add it at the root of our app:
// ./App.js
import React, { useState, Suspense } from "react";
export default function App() {
//…
  if (!fontsLoaded) {
    return <AppLoading />;
  }
  return (
    <SafeAreaProvider>
//…
            <Suspense fallback={<AppLoading />}>
              <NavigationContainer theme={MyTheme}>
                <Stack.Navigator>
//…
Now, our app can use Jotai’s atoms and it’s less prone to unexpected crashes. Let’s move on to using atoms for ListOfFavoritedImages.
Using Jotai for ListOfFavoritedImages
You may have noticed that we didn’t give much of a theoretical introduction to Jotai. This is because this library is minimal. There is no boilerplate, no complex concepts. All we need to do is create an atom and use it thanks to a custom hook in the app. Let’s start by creating an atom with some mock data for the liked images:
// src/atoms/imagesAtoms.js
import { atom } from "jotai";
export const imageListAtom = atom([
  {
    "itemId": 1,
    "authorId": 11,
    "timeStamp": "2 hrs ago",
    "url": "…",
    "likes": "28",
    "conversations": "12"
  },
  {
    "itemId": 2,
    "authorId": 7,
    "timeStamp": "1 week ago",
    "url": "…",
    "likes": "8",
    "conversations": "123"
  },
]);
We have the mocked images array ready; all we need to do now is use it. Given our previous experiences with other state management libraries, you are probably expecting to see some sort of setup, wrapper, subscription, or something similar. I’m sorry to disappoint, but all we need to do to use the Jotai atom is… use it. Let’s change the code in the ListOfFavoritedImages component as follows:
import { useAtom } from "jotai";
import { imageListAtom } from "../atoms/imagesAtoms";
export const ListOfFavorites = ({ navigation }) => {
  const [imageList] = useAtom(imageListAtom);
  if (!imageList) {
    return <AppLoading />;
  }
//…
  return (
    //…
      <FlatList
        data={imageList}
//…
In the preceding code, we imported the Jotai custom hook named useAtom and the atom we created in our imagesAtom file. And what is the result? Let’s run the app in the simulator and find out!
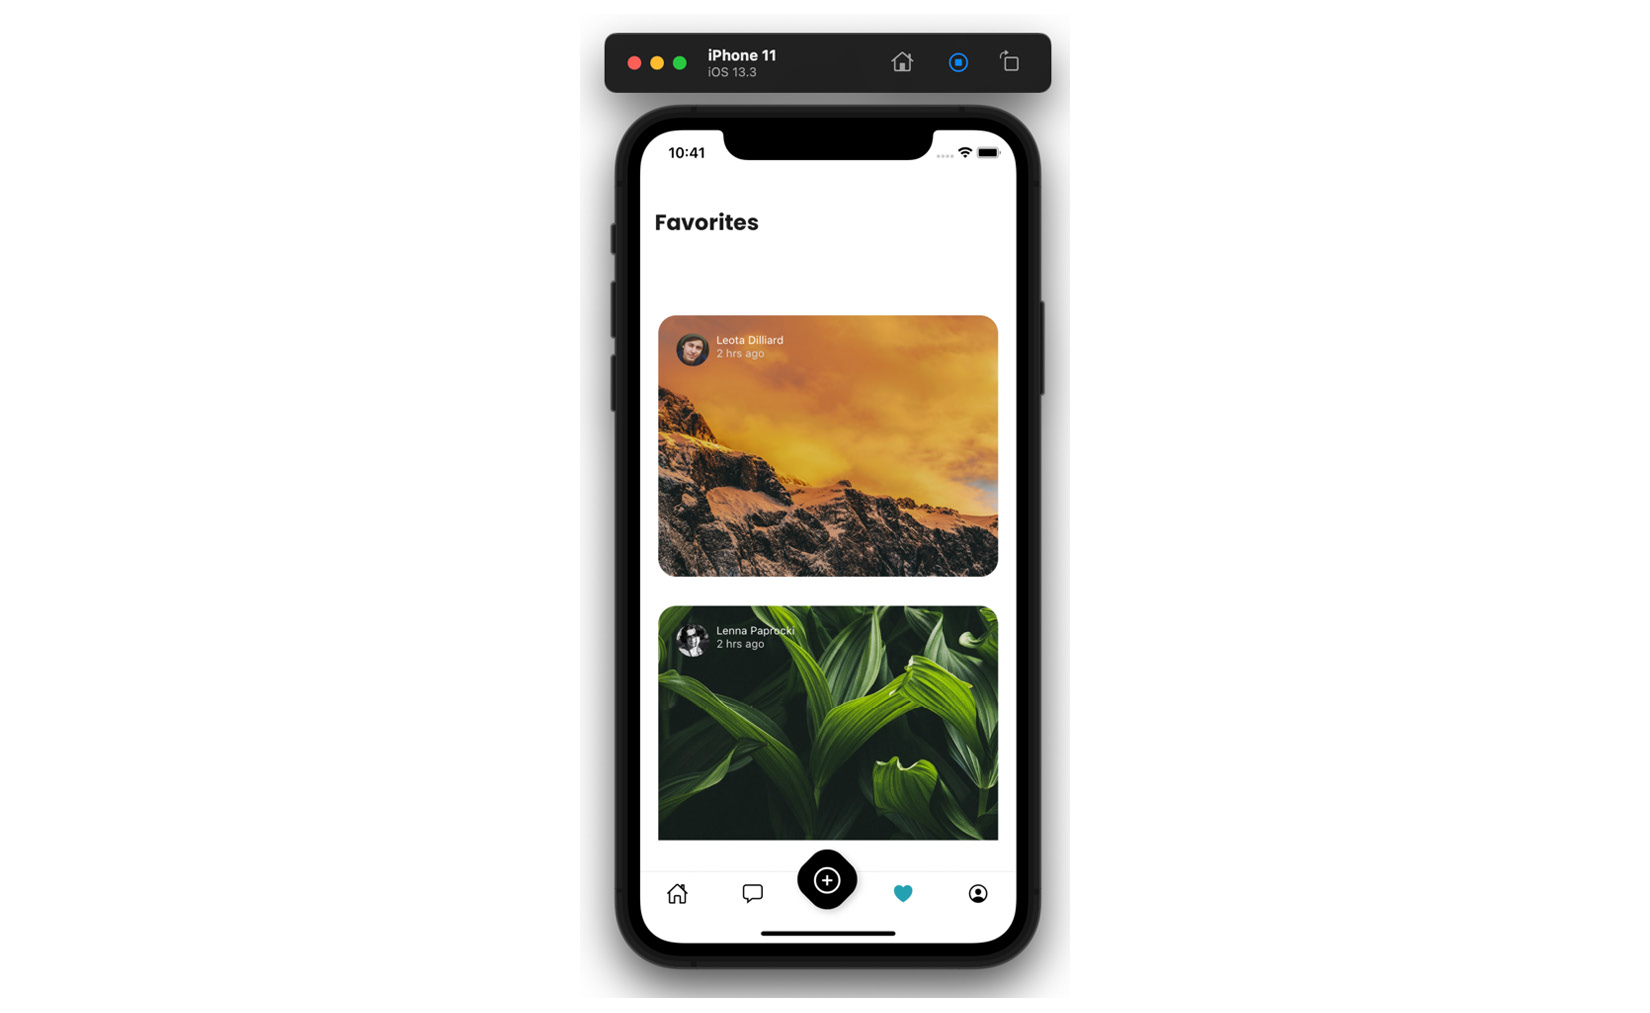
Figure 8.1 – App displaying images based on Jotai atoms
Everything works! I must admit, this feels almost magical. Surely, fetching will be more complicated?
Fetching data with Jotai
We successfully set up mocked image data in our app, but we would like to fetch real data from the server. Going back to the Jotai docs, we will find a guide on asynchronous atoms (you can find a link to this part of the documentation in the Further reading section). Here’s what our async atom for fetching images will look like:
// src/atoms/imageAtoms.js
import { requestBase } from "../utils/constants";
import { atom } from "jotai";
export const imageListAtom = atom([]);
  const urlAtom = atom(requestBase + "/john_doe/likedImages.    json");
export const fetchImagesAtom = atom(async (get) => {
  const response = await fetch(get(urlAtom));
  return await response.json();
});
We add a requestBase import to use URLs more comfortably. Then, we proceed to create a basic atom with the specific URL. The last function is the async atom. We know it’s async because it uses the async keyword. The body of the async atom function is a fetch function and data return. The atom is ready, but it’s not connected to anything just yet. We will need to call it in the app and make it fill imageListAtom. Let’s start by invoking the fetching. A good place to do so will be at the root of the app once the user is logged in. This means we will not be fetching in the App.js root component, but rather in the Home component:
// src/surfaces/Home.js
import { useAtom } from "jotai";
import { fetchImagesAtom } from "../atoms/imageAtoms";
//…
export const Home = () => {
  const [json] = useAtom(fetchImagesAtom);
We start by importing the necessary pieces: a custom hook from Jotai and our fetching atom. Then, we use the hook in the component. This is a good moment to check that everything is working correctly. I suggest adding a console.log to the component and seeing whether the value of json is the same as expected. By the way, there is no rule for naming the returns of atoms. You may as well write this:
const [thisIsAVeryFancyAndCuteFetchingMechanism] = useAtom(fetchImagesAtom);
If you’re using linter plugins (such as ESLint) in your IDE, you may have received a warning about the json value being declared but not used. What good does it do to fetch images if we’re not doing anything with them? And what should we do with them? We should make the newly fetched array of images fill imageListAtom. The way to accomplish this is to change our read-only imageListAtom to a read-write atom.
Reading and writing atoms
Ah! Finally, some theory! I’m sure you’ve been craving this, my dear reader! (Since it’s difficult to convey irony in a technical text, let me take this opportunity to explain: the previous sentence is sarcastic).
There are three types of atoms: read-only, write-only, and read-write atoms. The read-only atoms are the simplest: all you do is create them and set the value they need to hold on to, for example:
const onlyReadMe = atom('I like to read')Read-only atoms can hold more than simple values or strings. If you need more complex logic in your atom, you should use the following syntax:
const readMeButInUpperCase = atom((get) => get(onlyReadMe).toUpperCase())
In the preceding short snippet, you can observe that atoms have access to a getter function, which, in turn, can access other atoms.
If we wanted to add a write functionality to our atom, we can add a setter function as the second argument to the atom:
const readMeButInUpperCase  = atom(
      (get) => get(onlyReadMe).toUpperCase(),
      (get, set, newText) => {
          set(onlyReadMe, newText)
       }
)
We’ve added a new function, which will accept a new text and pass it to the onlyReadMe atom. If you were to use it in a component, it would look like this:
const FancyTextComponent = () => {
    const [fancyText, setFancyText] =      useAtom(readMeButInUpperCase  );
return (
      <Pressable onPress={() => setFancyText         ('I do not like to swim')>
        <Text>Likes and dislikes: {fancyText}</Text>
    </Pressable>
)
In the example component in the preceding screenshot, you can observe how a read-write atom can be implemented. We start by importing the atom, but we declare two values: the value and the setter, very similar to what we would use in a regular useState hook. Lower in the component, we use {fancyText} to display the text from the atom, and the setFancyText function to set a new text through a button press.
The last type of atom we can talk about is the write-only atom. The only difference between this atom and a read-write atom is that we declare the read argument as null. Here’s an example:
const onlyUsedForSettingValues  = atom(null,
       (get, set) => {
           set(onlyReadMe, 'I like using write only atoms')
       }
)
When using this type of atom, you always need to make sure to accommodate the hook with the non-existing default value. Here’s how this write-only hook would be used in the preceding example component:
const FancyTextComponent = () => {
const [readOnlyFancyText] = useAtom(onlyReadMe);
    const [, setStaticText] =      useAtom(onlyUsedForSettingValues  );
return (
    <Pressable onPress={() => setFancyText()>
        <Text>Likes and dislikes: { readOnlyFancyText }</Text>
    </Pressable>
)
Notice the comma in the array with values derived from the useAtom hook. It indicates there is a null value on the first index, but we choose to not use it.
Adding read-write functionality to the imageListAtom
So far, we have a read-only imageListAtom and an async fetchImagesAtom. Let’s add a write functionality to imageListAtom so that it can accept values from fetchImagesAtom:
// src/atoms/imageAtoms.js
export const imageListAtom = atom([], (get, set, newArray) => {
  set(imageListAtom, newArray);
});
The atom is ready to receive values, so let’s give it some. We have to go back to the Home component where we kicked off data fetching, and add a useEffect, which will update imageListAtom. Here’s what the code should look like:
// src/surfaces/Home.js
export const Home = () => {
  const [json] = useAtom(fetchImagesAtom);
  const [, setAllImages] = useAtom(imageListAtom);
  useEffect(() => {
    if (json) {
      setAllImages(json);
    }
  }, [json]);
This is a good moment to check again whether everything works fine in the app since we just implemented data fetching. If everything is, in fact, working as expected, we’ll move on to implementing functionality for the Like button. If you run into any issues, start by using console.log to check that the atoms hold and return the values you are expecting them to have. If you continue to have issues, you can join the Poimandres Discord server (link in the Further reading section), where you’ll find a Jotai-dedicated channel. Daishi Kato, the author of Jotai, answers all sorts of questions on this channel himself.
Once you are sure that everything is good, we’ll move on to implementing the Like button in ImageDetailsModal.
Implementing the Like button
The full functionality of the Like button in ImageDetailsModal consists of two parts: the heart icon being full or not – indicating whether the image has been liked, and the actual action of liking an image – which means adding the new image to the array of images on the Favorited surface.
Let’s start by creating the necessary atom for the heart icon. We need to know whether a given image has been liked or not. We can establish whether it has been liked by filtering the array of images and checking whether a given image is present in the array. Here’s what the resulting atom will look like:
// src/atoms/imageAtoms.js
  export const isImageLikedAtom = atom(false,    (get, set, newImage) => {
  const imageList = get(imageListAtom);
  const checkIfLiked =
      imageList?.filter((favoritedImg) => favoritedImg.itemId         === newImage.itemId)
      .length > 0;
  set(isImageLikedAtom, checkIfLiked);
});
As per the atom syntax, we start by establishing the default value as false. We then add a setter function, which will receive the new image object. Inside the setter function, we use Jotai’s get function to get imageListAtom and check our current image object against it. Finally, we set isImageLikedAtom to the correct value. Once the atom is created, we need to use it in the component:
// src/surfaces/ImageDetailsModal.js
export const ImageDetailsModal = ({ navigation, route }) => {
    const [isCurrentImageLiked, setIsLiked] =      useAtom(isImageLikedAtom);
  setIsLiked(route.params.imageItem);
//…
You may wonder why we are calling the setIsLiked function so crudely – why not add useEffect? The fact of the matter is that we need this function to be called when the component is rendered and only then. We could add a useEffect hook with an empty dependency array, but it would achieve the same result while looking more complicated.
When does it run?
There are some subtleties to the React component life cycle. They are more obvious with class components, where we would use componentDidMount, componentWillUnmount, and so on. Functional components have the same life cycle, without being as obvious about it. And it so happens that the useEffect hook only runs after a given component has finished rendering, while functions called directly do not wait for the render to finish.
As far as our example goes, we do not need to make sure the rendering is complete before calling the setIsLiked function. However, big applications often ask a lot of their developers, and you may face a case where you need to closely control when a given atom setter function (or any other function for that matter) is run. You can read more on this topic in Difference between ‘useEffect’ and calling function directly inside a component, linked in the Further reading section.
Circling back to our use case: we have a very nice isImageLiked atom in place. You can test that it works correctly by opening image modals on the Feed surface – where the heart icon should be empty – and on the Favorites surface – where the heart icon should be full.
Now, on to the liking action! We will not need to do anything too fancy here. We must take imageListAtom and add a new image to it:
// src/atoms/imageAtoms.js
export const addImageToArray = atom(
         null,
         (get, set, newImage) => {
          const clonedArray = get(imageListAtom);
          clonedArray.unshift(newImage);
          set(imageListAtom, clonedArray);
          set(isImageLikedAtom, newImage);
         }
);
As with the example write-only atom, we start by declaring a null for the default atom value. In the setter function, we get imageListAtom and we add the new image using the unshift function, which adds items to the beginning of the original array. We finish by setting the newly created array as imageListAtom and by triggering the setter in isImageLikedAtom. Let’s add this to the modal component:
// src/surfaces/ImageDetailsModal.js
export const ImageDetailsModal = ({ navigation, route }) => {
  const [, addImage] = useAtom(addImageToArray);
  const [isCurrentImageLiked, setIsLiked] = useAtom(isImageLikedAtom);
  setIsLiked(route.params.imageItem);
return (
//…
    <Pressable
          onPress={() => {
            if (isCurrentImageLiked) {
              // add remove image functionality here
            } else {
              addImage(route.params.imageItem);
            }
          }}
        >
            <Ionicons name={isCurrentImageLiked ? "heart" :              "heart-outline"} />
        </Pressable>
//…
We must import the addImageToArray atom into our component and then call it in the right place upon the button being tapped. Let’s test our app! Chances are everything is working perfectly fine. You can tap the heart icon when it’s empty and it becomes full, and when you close the modal and go to the Favorites surface, the image is present there. If you don’t see the new image on the Favorites surface appear immediately, you may be facing an issue caused by FlatList.
React Native’s FlatList is a pure component, which means it does not re-render unless specifically instructed to do so. We have encountered this same problem already when using MobX. In the case of MobX, we used special utilities to pass values to FlatList. Jotai, being minimal, does not offer these specialized utilities. We must manage this problem outside of Jotai. There are a few things we can do. We can try using the extraData prop from FlatList – we can pass atom values to useState and let the natural state re-render the component. We can also take advantage of the utilities provided by the React Navigation library. This is my favorite approach, and it is the one I chose to use. There’s a useIsFocused custom hook in React Navigation, which can be used to force a re-render when a tab is focused. From this description, you can see that this is exactly what we need! Let’s add this hook to the Favorites surface:
// src/surfaces/Favorites.js
import { useIsFocused } from "@react-navigation/native";
export const Favorites = ({ navigation }) => {
  const isFocused = useIsFocused();
  return (
      <SafeAreaView style={{ flex: 1, paddingTop: headerHeight         }}>
      <Suspense fallback={<AppLoading />}>
        <ListOfFavorites navigation={navigation} isFocused={isFocused} />
//…
Using this hook, the Favorites surface will re-render every time this tab is focused. Of course, this is a hook to be used with great caution. Too many re-renders cause apps to crash unexpectedly. If you do decide to use it, make sure the re-render is necessary.
Time to visit the Funbook app again! In this section, we started by using a basic hook with a mock array of images. We then implemented data fetching using Jotai. We learned about the three types of atoms: read-only, write-only, and read-write. We used all of this knowledge to create the Like button functionality with Jotai atoms. So, when you test your app, try using the Like button in ImageDetailsModal and check whether your images on the Favorites surface are updated correctly.
Summary
In this chapter, we covered Jotai, a new kid on the block of state management libraries. Inspired by a new, atomic approach to state management proposed by Facebook through their library named Recoil, Jotai has become more and more popular within the React community. It offers a bottom-up approach, as opposed to top-down libraries, such as Redux or MobX. It’s honestly stupidly easy to configure and use. It doesn’t offer many utilities, but the documentation is very clear and easy to use. In this chapter, we managed to use it to fetch and store data, and we also used it to implement actions on that data, such as adding items to an array. Jotai marks the end of our journey with classic state management libraries.
In the next chapter, we’ll talk about React Query, which is not a state management library, but a data-fetching library. It does have its place in this book, however. More on that in the next chapter! See you there!
Further reading
- https://marmelab.com/blog/2022/06/23/proxy-state-with-valtio.html: A State Management Tour: Proxy State with Valtio.
- https://github.com/facebookexperimental/Recoil/tree/main: Recoil GitHub page.
- https://opencollective.com/pmndrs: Poimandres website.
- https://github.com/dai-shi/react-suspense-fetch: react-suspense-fetch.
- https://github.com/dai-shi/react-hooks-fetch: react-hooks-fetch.
- https://github.com/dai-shi/react-hooks-worker: react-hooks-worker.
- https://jotai.org/docs/guides/async: Jotai – Async.
- https://discord.com/invite/poimandres: Poimandres Discord server.
- https://www.geekyhub.in/post/difference-between-useeffect-and-direct-function-call/: Difference between ‘useEffect’ and calling function directly inside a component.
- https://reactnavigation.org/docs/function-after-focusing-screen/#re-rendering-screen-with-the-useisfocused-hook: React Navigation useIsFocused hook.