
10 Spring Boot with Kotlin, Native Image, and GraphQL
- Using Spring Boot with Kotlin and Kotlin DSLs
- Using Spring Boot Native Image with GraalVM
- Using Spring Boot with GraphQL
In the previous chapter, you explored how to deploy Spring Boot applications on various platforms. In this final chapter of this book, we’ll discuss Spring Boot with Kotlin, GraalVM Native Image, and GraphQL.
Spring Framework 5.0 provided extensive support for Kotlin programming language, and the nature of the support is such that you can develop Spring Boot applications with Kotlin without even writing a single line of Java code. Besides, Spring Boot provides several domain-specific languages (DSLs) to further simplify the code syntax.
GraalVM Native Image and GraphQL are two major technologies for which Spring Boot extends its support. Currently, these technologies have experimental support in Spring Boot, and features are under development. GraalVM Native Image turns the Spring Boot applications into an architecture-specific native executable, which has a faster start-up time and has a smaller memory footprint. GraphQL offers an alternative approach to REST APIs to develop efficient APIs. Let’s see these in practice with Spring Boot.
10.1 Spring Boot with Kotlin
From its inception, Spring has been a Java-based framework and developers primarily use Java to develop Spring applications. Spring Framework 5.0 included dedicated support for the Kotlin programming language (http://mng.bz/Bxp0). With this, you can develop Spring applications with Kotlin without using Java. In this section, we’ll introduce you to using Kotlin to develop Spring Boot applications.
Spring provides several Kotlin DSLs that makes code clean and concise. We’ll explore some of the Kotlin DSLs in this section. However, before continuing with the Kotlin DSLs, let’s explore how to develop a Spring Boot application with Kotlin. We’ll rewrite the Course Tracker application with Kotlin.
10.1.1 Technique: Developing a Spring Boot application with Kotlin
In this technique, we’ll demonstrate how to develop Spring Boot application with Kotlin.
You have developed Spring Boot applications with Java. You recently learned Kotlin and were impressed with its conciseness, null safety, extensions, and many other powerful features. As Spring provides dedicated support for Kotlin, you can develop Spring Boot applications with Kotlin.
In this section, we’ll rewrite the Course Tracker Spring Boot application with Kotlin. We are using the same application, as we are already familiar with it, and we can keep ourselves focused on Kotlin-specific changes.
To start with, let’s create a new Spring Boot application through Spring Initializr (https://start.spring.io/) with the language as Kotlin. Select Web, validation, JPA, h2, and Thymeleaf dependencies. You can refer to appendix A of this book for more information about using Spring Initializr. We’ll also need the Web JAR dependencies for the UI. The following listing shows the final pom.xml file.
Listing 10.1 Maven pom.xml file
<?xml version="1.0" encoding="UTF-8"?>
<project xmlns="http:/ /maven.apache.org/POM/4.0.0"
➥ xmlns:xsi=”http:/ /www.w3.org/2001/XMLSchema-instance”
➥ xsi:schemaLocation="http:/ /maven.apache.org/POM/4.0.0
➥ https:/ /maven.apache.org/xsd/maven-4.0.0.xsd">
    <modelVersion>4.0.0</modelVersion>
    <parent>
        <groupId>org.springframework.boot</groupId>
        <artifactId>spring-boot-starter-parent</artifactId>
        <version>2.6.3</version>
        <relativePath/> <!-- lookup parent from repository -->
    </parent>
    <groupId>com.manning.sbip.ch10</groupId>
    <artifactId>course-tracker-kotlin-app</artifactId>
    <version>0.0.1-SNAPSHOT</version>
    <name>course-tracker-kotlin-app</name>
    <description>Course Tracker Kotlin Application</description>
    <properties>
        <java.version>17</java.version>
        <kotlin.version>1.6.10</kotlin.version>
    </properties>
    <dependencies>
        <dependency>
            <groupId>org.springframework.boot</groupId>
            <artifactId>spring-boot-starter-thymeleaf</artifactId>
        </dependency>
        <dependency>
            <groupId>org.springframework.boot</groupId>
            <artifactId>spring-boot-starter-data-jpa</artifactId>
        </dependency>
        <dependency>
            <groupId>org.springframework.boot</groupId>
            <artifactId>spring-boot-starter-validation</artifactId>
        </dependency>
        <dependency>
            <groupId>org.springframework.boot</groupId>
            <artifactId>spring-boot-starter-web</artifactId>
        </dependency>
        <dependency>
            <groupId>com.fasterxml.jackson.module</groupId>
            <artifactId>jackson-module-kotlin</artifactId>
        </dependency>
        <dependency>
            <groupId>org.jetbrains.kotlin</groupId>
            <artifactId>kotlin-reflect</artifactId>
        </dependency>
        <dependency>
            <groupId>org.jetbrains.kotlin</groupId>
            <artifactId>kotlin-stdlib-jdk8</artifactId>
        </dependency>
        <dependency>
            <groupId>org.webjars</groupId>
            <artifactId>bootstrap</artifactId>
            <version>4.4.1</version>
        </dependency>
        <dependency>
            <groupId>org.webjars</groupId>
            <artifactId>jquery</artifactId>
            <version>3.4.1</version>
        </dependency>
        <dependency>
            <groupId>org.webjars</groupId>
            <artifactId>webjars-locator</artifactId>
            <version>0.38</version>
        </dependency>

        <dependency>
            <groupId>com.h2database</groupId>
            <artifactId>h2</artifactId>
            <scope>runtime</scope>
        </dependency>
        <dependency>
            <groupId>org.springframework.boot</groupId>
            <artifactId>spring-boot-starter-test</artifactId>
            <scope>test</scope>
        </dependency>
    </dependencies>

    <build>
        <sourceDirectory>${project.basedir}/src/main/kotlin</sourceDirectory>

<testSourceDirectory>${project.basedir}/src/test/kotlin</testSourceDirectory>
        <plugins>
            <plugin>
                <groupId>org.springframework.boot</groupId>
                <artifactId>spring-boot-maven-plugin</artifactId>
            </plugin>
            <plugin>
                <groupId>org.jetbrains.kotlin</groupId>
                <artifactId>kotlin-maven-plugin</artifactId>
                <configuration>
                    <args>
                        <arg>-Xjsr305=strict</arg>
                    </args>
                    <compilerPlugins>
                        <plugin>spring</plugin>
                    </compilerPlugins>
                </configuration>
                <dependencies>
                    <dependency>
                        <groupId>org.jetbrains.kotlin</groupId>
                        <artifactId>kotlin-maven-allopen</artifactId>
                        <version>${kotlin.version}</version>
                    </dependency>
                </dependencies>
            </plugin>
        </plugins>
    </build>

</project>
In listing 10.1, you may notice additional dependencies and plugins are configured, as we’ve selected the language type as Kotlin. Let’s discuss each of these dependencies and plugins:
-
jackson-module-kotlin—This dependency provides support serialization and deserialization for Kotlin classes and data classes (https://kotlinlang.org/docs/data-classes.html). As we have included thespring-boot-starter-webdependency in the application, this is included automatically. You can find more details about this dependency at https://github.com/FasterXML/jackson-module-kotlin. -
kotlin-reflect—This is the Kotlin reflection library. Like Java, Kotlin also provides support for reflection to allow introspecting the Kotlin program at runtime. To avoid unnecessary bloating of the runtime libraries, Kotlin distributes the reflection features separately with thekotlin-reflectdependency. You can find more details on this at https://kotlinlang.org/docs/reflection.html. -
kotlin-stdlib-jdk8—Kotlin provides its standard library through thekotlin-stdlibdependency. Thekotlin-stdlib-jdk8is the Java 8 extension of thekotlin-stdlibdependency. You can find more details aboutkotlin-stdlibat https://kotlinlang.org/api/latest/jvm/stdlib/. -
kotlin-maven-plugin—This plugin compiles Kotlin sources and modules. The -Xjsr305=strictenables strict support for JSR 305, which deals with null safety (https://kotlinlang.org/docs/null-safety.html) in the application.
Next, let’s create the Course class, as shown in the following listing.
Listing 10.2 The Course JPA entity
package com.manning.sbip.ch10.model

import javax.persistence.*;                    ①
import javax.validation.constraints.*;         ②

@Entity
@Table(name = "Courses")
class Course(

    @Id
    @GeneratedValue(strategy = GenerationType.IDENTITY)
    @Column(name = "ID")
    var id: Long? = 0,                         ③

    @Column(name = "NAME")
    @NotEmpty(message = "Course name field can't be empty")
    var name: String? = "",

    @Column(name = "CATEGORY")
    @NotEmpty(message = "Course category field can't be empty")
    var category: String? = "",

    @Column(name = "RATING")
    @Min(value = 1)
    @Max(value = 5)
    var rating : Int? = 0,                     ③

    @Column(name = "DESCRIPTION")
    @NotEmpty(message = "Course description field can't be empty")
    var description: String? = ""
)
① We are using the @Entity, @Table, @Id, @GeneratedValue, and @GeneratedType from this package.
② We are using the @NotEmpty, @Min, and @Max annotations from this package.
③ We declare a variable with the var keyword in Kotlin. Also, the type of the variable is declared after the variable declaration. The ? along with the type indicates that the variable can contain a null value. By default, variables in Kotlin can’t have null values.
Next, let’s define the data access layer. We’ll define the CourseRepository interface, as shown in the following listing.
Listing 10.3 The CourseRepository interface
package com.manning.sbip.ch10.repository

import com.manning.sbip.ch10.model.Course
import org.springframework.data.repository.CrudRepository
import org.springframework.stereotype.Repository

@Repository
interface CourseRepository : CrudRepository<Course, Long>
Next, let’s define the service layer. First, we’ll create an interface with a list of operations available in the service layer. The following listing shows the CourseService interface.
Listing 10.4 The CourseService interface
package com.manning.sbip.ch10.service

import com.manning.sbip.ch10.model.Course

interface CourseService {
    fun createCourse(course: Course): Course      ①
    fun findCourseById(courseId: Long): Course
    fun findAllCourses(): Iterable<Course>
    fun updateCourse(courseId: Long, updatedCourse: Course): Course
    fun deleteCourseById(courseId: Long)
}
① In Kotlin, we declare a function with the fun keyword.
Next, let’s provide an implementation of this interface. The following listing shows the DefaultCourseService class.
Listing 10.5 The DefaultCourseService class
package com.manning.sbip.ch10.service

import com.manning.sbip.ch10.exception.CourseNotFoundException
import com.manning.sbip.ch10.model.Course
import com.manning.sbip.ch10.repository.CourseRepository
import org.springframework.http.HttpStatus
import org.springframework.stereotype.Service

@Service
class DefaultCourseService (private val courseRepository: CourseRepository)
➥ : CourseService {

    override fun createCourse(course: Course): Course =
➥ courseRepository.save(course)

    override fun findCourseById(courseId: Long): Course =
➥ courseRepository.findById(courseId)
            .orElseThrow {
➥ CourseNotFoundException(HttpStatus.NOT_FOUND, "No course with supplied
➥ course id was found") }

    override fun findAllCourses(): Iterable<Course> =
➥ courseRepository.findAll()

    override fun updateCourse(courseId: Long, updatedCourse: Course):
➥ Course  {
        return if(courseRepository.existsById(courseId)) {
            courseRepository.save(
                    Course(
                            id = updatedCourse.id,
                            name = updatedCourse.name,
                            category = updatedCourse.category,
                            rating = updatedCourse.rating,
                            description = updatedCourse.description
                    )
            )
        }
        else throw CourseNotFoundException(HttpStatus.NOT_FOUND, "No course
➥ with supplied course id was found")
    }


    override fun deleteCourseById(courseId: Long) {
        return if (courseRepository.existsById(courseId)) {
            courseRepository.deleteById(courseId)
        }
       else throw CourseNotFoundException(HttpStatus.NOT_FOUND, "No course
➥ with supplied course id was found")
    }
}
Next, let’s define the custom CourseNotFoundException class. We are throwing this exception if there is an attempt to delete or update a course that does not exist. The following listing shows this class.
Listing 10.6 The CourseNotFoundException class
package com.manning.sbip.ch10.exception

import org.springframework.http.HttpStatus

class CourseNotFoundException(status: HttpStatus, message: String) :
➥ RuntimeException()
You can find the Course Tracker HTML and CSS files in the project source code available on GitHub. These are the same files we’ve used previously in the application. Let’s start the application using the mvn spring-boot:run command. You can access http:/ /localhost:8080 from your browser to find the index page of the application.
In this section, you’ve explored the use of Kotlin in a Spring Boot application. We’ve shown you the previously developed Java-based Couse Tracker application with Kotlin. As you may have already noticed, there are not many differences in terms of the application design from the Java version. Thus, using Kotlin programming language in a Spring Boot application is a matter of preference of the user. The main benefit of using Kotlin over Java is that Kotlin provides several built-in features, such as null-safety, when expressions, and others, and its concise way of coding. There are several Kotlin DSLs that make the code less verbose and clean as you’ll see in the upcoming technique. In the next technique, we’ll discuss some of these DSLs.
10.1.2 Technique: Securing a Spring Boot Kotlin application with Spring Security
In this technique, we will discuss how to secure a Spring Boot Kotlin application using Spring Security.
With the previous technique, you developed a Spring Boot application with Kotlin. You need to secure the application with Spring Security.
The Spring Boot Kotlin application developed in the previous technique works well but has one issue: there is no security mechanism in place. Let’s enable form-based login to secure the application access. Form-based login allows the user to log in to the application with a login form.
To continue with this technique, you can continue with the Spring Boot Kotlin application used in the previous technique. As we want to enable security through Spring Security, we need to introduce the spring-boot-starter-security in the pom.xml file. Include the following dependency in your Spring Boot application pom.xml, as shown in the following listing.
Listing 10.7 The Spring Boot starter dependency
<dependency>
    <groupId>org.springframework.boot</groupId>
    <artifactId>spring-boot-starter-security</artifactId>
</dependency>
Next, we’ll enable the Spring Security configuration in the application. Listing 10.8 shows the KotlinSecurityConfiguration class that contains the necessary security configurations to enable form-based security in the Course Tracker application.
Listing 10.8 The KotlinSecurityConfiguration class
package com.manning.sbip.ch10.security

//imports

@EnableWebSecurity
class KotlinSecurityConfiguration : WebSecurityConfigurerAdapter(),
➥ ApplicationContextInitializer<GenericApplicationContext> {             ①

    val beans = beans {                                                   ②
        bean("passwordEncoder") {
            BCryptPasswordEncoder()
        }
        bean {
            fun user(user : String, password: String, vararg  roles :
➥ String) = User
                 .builder()
                 .username(user)
                 .password(ref<PasswordEncoder>().encode(password))
                 .roles(*roles)
                 .build()

      InMemoryUserDetailsManager(user("user", "password", "USER"),
➥ user("admin", "password", "ADMIN"))
        }
    }

override fun initialize(applicationContext: GenericApplicationContext){   ③
        beans.initialize(applicationContext)
    }

    override fun configure(http: HttpSecurity?) {                         ④
        http {
            formLogin {
                loginPage = "/login"
                failureUrl = "/login-error"
            }
            authorizeRequests {
                authorize("/login", permitAll)
                authorize("/login-error", permitAll)
                authorize(anyRequest, authenticated)
            }
        }
    }

}
① The KotlinSecurityConfiguration class extends WebSecurityConfigurerAdapter and implements the ApplicationContextInitializer interface.
② Defining the passwordEncoder, InMemoryUserDetailsManager beans, using the Spring Boot Kotlin Beans DSL. Note the concise nature of the code due to the use of beans DSL.
③ Overidden method of ApplicationContextInitializer. This is needed to initialize the beans defined previously.
④ Overidden method of WebSecurityConfigurerAdapter class. We are using the Spring Security Kotlin Beans DSL. Again, note the use of the DSL and how concisely the code is written.
If you’ve gone through the technique in section 5.3.2 in chapter 5, then the code snippet in listing 10.8 should look familiar to you. Nonetheless, it’s the same Spring Security configuration that enables form-based, in-memory authentication in the Course Tracker application. However, the code in listing 10.8 is in Kotlin, and more precisely, we are using Kotlin’s Spring Beans and Spring Security DSLs. The DSL provides syntactic sugar on top of existing APIs that make the code more expressive, concise, and readable.
In listing 10.8, we’ve defined passwordEncoder and the InMemoryUserDetailsManager beans through the Beans DSL. The passwordEncoder bean definition is straightforward. We’ve created the BCryptPasswordEncoder bean. If you recall, a password encoder encodes a plain-text password to a scrambled text for security purposes. Next, we are defining the InMemoryUserDetailsManager bean, as shown in the following listing.
Listing 10.9 The InMemoryUserDetailsManager bean definition
bean {
            fun user(user : String, password: String, vararg  roles :
➥ String) =
➥ User.builder().username(user).password(ref<PasswordEncoder>().encode(pa
➥ ssword)).roles(*roles).build()
            InMemoryUserDetailsManager(user("user", "password", "USER"),
➥ user("admin", "password", "ADMIN"))
        }
To define the InMemoryUserDetailsManager bean, we’ve first created a function called user that allows us to define Spring Security User instances. Pay attention to how we are referencing the other passwordEncoder bean to encode the password. We’ve created two users, user and admin, in the InMemoryUserDetailsManager bean.
In the KotlinSecurityConfiguration class, we are extending the WebSecurityConfigurerAdapter class, so we can customize the HttpSecurity configuration. We’ve overridden the configure() method to configure the form-based login, as shown in the following listing.
Listing 10.10 Customizing HttpSecurity configuration
override fun configure(http: HttpSecurity?) {
    http {
        formLogin {
            loginPage = "/login"
            failureUrl = "/login-error"
        }
        authorizeRequests {
            authorize("/login", permitAll)
            authorize("/login-error", permitAll)
            authorize(anyRequest, authenticated)
        }
    }
}
In listing 10.10, we used the Spring Security Kotlin DSL to define the HTTP security configuration. We enabled form-based login with login URL as /login and failed login URL as /login-error. Also, we are allowing access to /login and /login-error endpoints to all users. Any other endpoints (anyrequest) requires users to be authenticated. Next, we’ll configure the following property in the application.properties, as shown in the following listing.
Listing 10.11 The context.initializer.classes property
In listing 10.11, we are configuring the context.initializer.classes property for the KotlinSecurityConfiguration class, so the beans defined in the class are initialized. Next, let’s define the LoginController class that defines the /login and /login-error endpoints. This Spring controller class is shown in the following listing.
Listing 10.12 The LoginController class
package com.manning.sbip.ch10.controller

import org.springframework.stereotype.Controller
import org.springframework.ui.Model
import org.springframework.ui.set
import org.springframework.web.bind.annotation.GetMapping

@Controller
class LoginController {

    @GetMapping("/login")
    fun login(): String {
        return "login"
    }

    @GetMapping("/login-error")
    fun loginError(model: Model): String {
        model["loginError"] = true
        return "login"
    }
}
The /login endpoint returns the user to login.html page. The /login-error endpoint redirects the user to the login page with the loginError flag set to true. This flag is used in the login.html page to display that the user login has failed.
Let’s now start the application and access the http://localhost:8080 URL from the browser. You’ll notice you are redirected to the application login page. Use any of the configured username and password to log in to the application. For instance, you can use the username as user and password as password to log in. For a successful login, you’ll be redirected to the application index page.
In this technique, we have shown you how to secure a Spring Boot Kotlin application with Spring Security DSLs. We’ve also demonstrated how to use the Spring Beans Kotlin Beans DSL to define the bean definitions. These DSLs provide a very neat and clean approach to writing the code. There is the Spring Router Kotlin DSL that allows you to define the REST endpoints. You can find an example of the router DSL available at http://mng.bz/REdK.
10.2 Introducing Spring Native
Spring Native provides support to compiling Spring applications to architecture-specific native executables using the GraalVM native-image compiler. Native images offer several benefits compared to the traditional JVM-based approach in terms of a fast startup and a smaller memory footprint. A native image platform, such as GraalVM, statically analyzes the application source code and the classpath at compilation time. It considers only the codebase that will be used at runtime and discards everything else. This enables the native images to contain only the contents required at runtime.
In this section, we’ll focus on Spring Native with GraalVM (https://www.graalvm.org/) and explore the approaches to using GraalVM with Spring Boot applications. However, before we dive into the use of it, let’s understand GraalVM.
10.2.1 Introduction to GraalVM
GraalVM is a high-performance JDK distribution from Oracle that aims to accelerate the execution of Java and other JVM applications. It also supports non-JVM languages, such as JavaScript, Ruby, Python, and several others. This polyglot capability of GraalVM allows mixing multiple languages in an application. Before we explore some of these features, let’s understand the high-level architecture of GraalVM, as shown in figure 10.1.

Figure 10.1 GraalVM architecture. The GraalVM just-in-time compiler is on top of the Java HotSpot compiler. The Truffle language implementation framework provides support for other non-JVM languages, such as JavaScript, Python, and others.
The GraalVM includes an advanced just-in-time (JIT) compiler on top of HotSpot Virtual Machine. It also includes the Truffle language implementation framework (http://mng.bz/2jP0) that allows GraalVM to run languages, such as NodeJs, Python, and others. Due to the GraalVM Truffle framework, it is possible for Java and other languages to directly interoperate with each other. The interpreters for the Truffle language that supports the other languages are Java programs running on the JVM. Thus, it is possible to define and invoke JavaScript code in your Java application. The following listing shows a sample.
Listing 10.13 Calling JavaScript code from Java
import org.graalvm.polyglot.*;
import java.io.PrintStream;
import java.util.Set;

public class Polyglot {

  public static void main(String[] args) {

    Context context = Context.newBuilder().allowAllAccess(true).build();
    Set<String> languages = context.getEngine().getLanguages().keySet();
    System.out.println("Languages available in GraalVM: " + languages);

    System.out.println("Java: Hello World");

    context.eval("js","console.log('JavaScript: Hello World')");
  }
}
Further, the GraalVM provides several runtime modes of operation: JVM runtime mode, Native Image, and Java on Truffle. While running applications on the HotSpot JVM, GraalVM uses the GraalVM compiler as the top-tier JIT compiler. At runtime, the application is executed normally on the JVM. The JVM passes the Java or JVM-native language to the compiler, which returns the machine code. In this book, we’ll focus on GraalVM Native Image. You may refer to GraalVM documentation at https://www.graalvm.org/docs/introduction/ for further details on additional features.
10.2.2 GraalVM native image
GraalVM contains a native-image build tool. The native image is a new technology that compiles Java code directly into a standalone binary executable or a native shared library. The native image build includes application classes, dependencies, third-party libraries, and any JDK classes that are required in the application runtime. The generated native executables are specific to the operating system and machine architecture and do not require a JVM.
In a typical Java application compilation, first, the Java source code complies with the bytecode, and the bytecode is interpreted by the JVM. The JIT compiler identifies the frequently accessed bytecode and compiles it directly into native architecture-specific code for better performance.
The ahead-of-time (AOT) compiler in native-image builder takes the application components and statically analyzes them. It discards everything which is not relevant at runtime. This process takes a very long time, as the compiling process requires scanning all source files and the associated classpaths. The resulting native code after the compilation is relatively small, as it contains only the components needed at runtime. It contains the minimum JRE and minimum types from all the libraries from the classpath that are required to support the application. You’ll notice shortly that it is possible to generate the native image of a Spring Boot application that contains a Web server, data access support, and the minimum JRE.
10.2.3 Spring Boot native image
Spring provides support to generate the native image of Spring applications through the Spring Native project. There are two approaches to building a native image of a Spring Boot application:
-
Spring Boot buildpacks support—Generates a lightweight container containing a native executable
-
GraalVM native image Maven plugin—Maven plugin that generates a native executable
Let’s discuss these two approaches in the next two techniques.
10.2.4 Technique: Generating Spring Boot native image using buildpacks
In this technique, we’ll demonstrate how to generate native image using buildpacks for a Spring Boot application.
So far, the Course Tracker application is built and executed using a traditional approach. You need to generate a native image of the Course Tracker application and run it.
Spring Native provides built-in support to generate the native image of a Spring Boot application through buildpacks. Buildpacks allow you to convert your source code to a container image. You can refer to https://buildpacks.io/docs/concepts/ for more details on buildpacks.
To continue with this project, you need to have Docker configured and running in your machine. The native image building process requires the Docker daemon to be available.
To start this technique, we’ll use the same Course Tracker application we’ve used in the book so far. Let’s create a new Spring Boot application with the following dependencies:
Listing 10.14 shows the final pom.xml file.
Listing 10.14 The pom.xml file for Spring Native application
<?xml version="1.0" encoding="UTF-8"?>
<project xmlns="http:/ /maven.apache.org/POM/4.0.0"
➥ xmlns:xsi="http:/ /www.w3.org/2001/XMLSchema-instance"
➥    xsi:schemaLocation="http:/ /maven.apache.org/POM/4.0.0
➥ https:/ /maven.apache.org/xsd/maven-4.0.0.xsd">
    <modelVersion>4.0.0</modelVersion>
    <parent>
        <groupId>org.springframework.boot</groupId>
        <artifactId>spring-boot-starter-parent</artifactId>
        <version>2.6.3</version>
        <relativePath/> <!-- lookup parent from repository -->
    </parent>
    <groupId>com.manning.sbip.ch10</groupId>
    <artifactId>course-tracker-native-app</artifactId>
    <version>0.0.1-SNAPSHOT</version>
    <name>native</name>
    <description>course-tracker-native-app</description>
    <properties>
        <java.version>17</java.version>
        <repackage.classifier/>
        <spring-native.version>0.11.2</spring-native.version>
    </properties>
    <dependencies>
        <dependency>
            <groupId>org.springframework.boot</groupId>
            <artifactId>spring-boot-starter-web</artifactId>
        </dependency>
        <dependency>
            <groupId>org.springframework.experimental</groupId>
            <artifactId>spring-native</artifactId>
            <version>${spring-native.version}</version>
        </dependency>
        <dependency>
            <groupId>org.projectlombok</groupId>
            <artifactId>lombok</artifactId>
        </dependency>

        <dependency>
            <groupId>org.springframework.boot</groupId>
            <artifactId>spring-boot-starter-test</artifactId>
            <scope>test</scope>
        </dependency>
    </dependencies>

    <build>
        <plugins>
            <plugin>
                <groupId>org.springframework.boot</groupId>
                <artifactId>spring-boot-maven-plugin</artifactId>
                <configuration>
                    <classifier>${repackage.classifier}</classifier>
                    <image>
                        <builder>paketobuildpacks/builder:tiny</builder>
                        <env>
                            <BP_NATIVE_IMAGE>true</BP_NATIVE_IMAGE>
                        </env>
                    </image>
                </configuration>
            </plugin>

            <plugin>
                <groupId>org.springframework.experimental</groupId>
                <artifactId>spring-aot-maven-plugin</artifactId>
                <version>${spring-native.version}</version>
                <executions>
                    <execution>
                        <id>test-generate</id>
                        <goals>
                            <goal>test-generate</goal>
                        </goals>
                    </execution>
                    <execution>
                        <id>generate</id>
                        <goals>
                            <goal>generate</goal>
                        </goals>
                    </execution>
                </executions>
            </plugin>
        </plugins>
    </build>
    <repositories>
        <repository>
            <id>spring-releases</id>
            <name>Spring Releases</name>
            <url>https:/ /repo.spring.io/release</url>
            <snapshots>
                <enabled>false</enabled>
            </snapshots>
        </repository>
    </repositories>
    <pluginRepositories>
        <pluginRepository>
            <id>spring-releases</id>
            <name>Spring Releases</name>
            <url>https:/ /repo.spring.io/release</url>
            <snapshots>
                <enabled>false</enabled>
            </snapshots>
        </pluginRepository>
    </pluginRepositories>

    <profiles>
        <profile>
            <id>native</id>
            <properties>
                <repackage.classifier>exec</repackage.classifier>
                <native-buildtools.version>0.9.9</native-
➥ buildtools.version>
            </properties>
            <dependencies>
                <dependency>
                    <groupId>org.graalvm.buildtools</groupId>
                    <artifactId>junit-platform-native</artifactId>
                    <version>${native-buildtools.version}</version>
                    <scope>test</scope>
                </dependency>
            </dependencies>
            <build>
                <plugins>
                    <plugin>
                        <groupId>org.graalvm.buildtools</groupId>
                        <artifactId>native-maven-plugin</artifactId>
                        <version>${native-buildtools.version}</version>
                        <executions>
                            <execution>
                                <id>test-native</id>
                                <phase>test</phase>
                                <goals>
                                    <goal>test</goal>
                                </goals>
                            </execution>
                            <execution>
                                <id>build-native</id>
                                <phase>package</phase>
                                <goals>
                                    <goal>build</goal>
                                </goals>
                            </execution>
                        </executions>
                    </plugin>
                </plugins>
            </build>
        </profile>
    </profiles>

</project>
So far, Spring Native has experimental support, as this project is under development. In listing 10.14, let’s focus on the spring-boot-maven-plugin and spring-boot-aot-plugin plugins configuration. In the spring-boot-maven-plugin, the Paketo buildpacks are used to generate the Docker Image. The BP_NATIVE_IMAGE argument is used to indicate a native image needs to be built. The spring-aot-maven-plugin provides the ahead-of-time compiler to compile the code. Note that this plugin is also in experimental mode. We’ll deep dive into the role of this plugin and how it compiles the source later in this section.
We have also defined the Course domain object and created two courses. Refer to the application source code for further details. Let’s start building the native image using the command, as shown in the following listing.
Listing 10.15 Generating native image
This command takes a while to generate the container image. After a successful build, you’ll find output similar to what’s shown in figure 10.2.
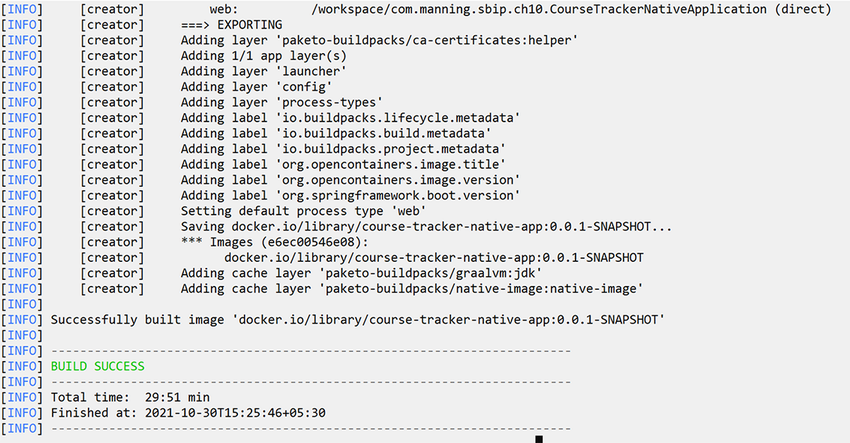
Figure 10.2 Building a native image of the Course Tracker application. Based on the CPU and RAM configuration, this process takes a little while to generate the image.
Once the image is built, you can start the application using the command, as shown in the following listing.
Listing 10.16 Docker command to run the generated image
You’ll find output similar to what’s shown in figure 10.3.

Figure 10.3 Spring Boot Course Tracker native image startup logs. The application started in 85 milliseconds.
In figure 10.3, note the application start up time. In the example, the application started in 85 milliseconds. You can access the http:/ /localhost:8080/courses endpoint and find the course details.
Using this technique, we’ve demonstrated how to generate a native image of a Spring Boot application. Spring Boot uses Paketo buildpacks (https://paketo.io/) to generate the image. First, the AOT compiler compiles the source code and identifies the smaller subset of code needed in the runtime. The spring-boot-maven-plugin uses this code to generate the Docker image. There is another approach to generate the native image without building a container image using the native-maven-plugin. Let’s discuss that in the next technique.
10.2.5 Technique: Generating Spring Boot native image using a Maven plugin
In this technique, we’ll demonstrate how to generate a native image using Maven for a Spring Boot application.
In the previous technique, you explored the use of buildpacks to generate a native image. Spring Boot offers a Maven plugin-based approach to generate the native image. You need to explore this alternative approach.
Spring Boot offers an alternative approach to building the native image of a Spring Boot application using the native-maven-plugin. This approach does not require you to have a Docker setup, and you can generate the native image via Maven build.
To continue with this approach, we’ll continue with the Course Tracker application we’ve used in the previous technique. You’ll notice in listing 10.14 that in the pom.xml there is a profile called native, and it contains the native-maven-plugin plugin among other details. Let’s generate the native image using this plugin.
Note On Windows, you need to use x64 Native Tools Command Prompt. It is recommended in the GraalVM native-image prerequisites.
The following listing shows the Maven build command. The -Pnative instructs Maven to use the native profile. The -DskipTests argument indicates Maven skipped executing the test cases.
Listing 10.17 Generating a native image using Maven plugin
Once the build succeeds, you’ll notice an output similar to that shown in figure 10.4.

Once the image generation is successful, you can browse to the target of the application and find the generated native executable, as shown in figure 10.5.

To execute the native executable, you can either run it through the command line or double click on the executable file. In this example, the executable file is course-tracker-native-app.exe. Figure 10.6 shows the output.

In this technique, we’ve explored the use of the native-maven-plugin to generate the native image of a Spring Boot application. The native-maven-plugin configuration is available through the native profile configuration in the pom.xml file. We’ve enabled this profile with -Pnative flag in the Maven package command, which generates the executable. In the next section, we’ll learn the spring-aot-maven-plugin compilation process.
10.2.6 Understanding Spring AOT Maven Plugin
In the previous section, we discussed that the Spring AOT plugin provided ahead-of-time compilation support. The AOT compiler statically analyzes the application source code and the application classpath and determines the types needed at application runtime. Let’s trigger the AOT compiler in the previously used Course Tracker application and explore its outcome. Listing 10.18 shows the Spring AOT command to trigger the spring AOT plugin’s generate goal. Recall that in the pom.xml file we have the spring-aot-maven-plugin that allows us to execute this goal.
Listing 10.18 Invoking Spring AOT generate goal
Once the command executes successfully, navigate to the targetgenerated-sources spring-aot folder, and you’ll notice an output similar to that shown in figure 10.7.

Figure 10.7 The Spring AOT-generated sources. The srcmainjava folder contains the AOT generated source code, and the srcmain esources contains the generated configurations.
The srcmainjava folder contains the minimal source code needed at application runtime. You can inspect the StaticSpringFactories class that contains Spring Boot Factory classes, interfaces, and more. The other packages (e.g., boot and core.io.support) contain various other Spring Boot and other additional configurations. The spring-aot folder inside the resources folder contains several important configurations used by the GraalVM native image builder. The following configuration files are provided:
The native-image.properties files contain the arguments used by the native-image builder to generate the image. The other four configuration files provide details for the native-image builder related to the proxy, reflect, resource, and serialization configuration, respectively. All these features are related to application runtime behavior. For instance, by default the native image builder does not integrate to any resource (e.g., files, images, etc.) present in the classpath. Thus, if at runtime your code attempts to load these files, it won’t be available. Therefore, you need to explicitly specify the AOT compiler about this.
Similarly, the Java reflection API allows inspecting classes, methods, and fields at runtime. The native-image builder needs to know about the reflectively accessed program elements ahead of time.
Note You can find further details about the native image and other configurations available at https://www.graalvm.org/reference-manual/native-image/.
10.3 Spring Boot with GraphQL
In this section, we’ll discuss GraphQL and how to use GraphQL with a Spring Boot application.
10.3.1 Issues with REST
In chapter 8, you learned how to build REST APIs with Spring Boot. A REST API allows you to expose the application functionality through API endpoints. An API client can access the exposed API endpoints and interact with the application. For instance, in chapter 8, for our Course Tracker application, we developed a REST API that allows the API clients to interact with the application through the available endpoints. To get existing course details, a client can access the GET /courses endpoint and get all available courses. Similarly, to create a new course, a client can invoke POST /courses endpoint with a course request body, and the API creates a new course.
The above REST API-based approach works well, and REST has become the de facto standard to develop APIs. However, although REST is commonly adopted, it has some issues as well. One major issue with REST is it’s overfetching of application data. The other issue is multiple API calls to retrieve the desired data. Let’s explain these in detail.
In a REST API, you define endpoint per resource. A resource represents a specific part or feature of the application. For instance, in the Course Tracker application, the course is a resource we manage. For instance, if an API client requests details about course ID 123, all the details about the specific course ID are returned to the user. This includes course ID, name, category, rating, and description. This is where we have the problem of data overfetching. The API client doesn’t have the flexibility to specify the set of fields they are interested in. It is always forced to consume the data the server provides. Thus, although the API client needs only a subset of the fields, it is overfetching the data. You’ll notice how GraphQL solves this problem in the following sections.
Let’s now talk about the multiple API invocation issues with REST API. As we’ve discussed in the previous paragraph, REST API endpoints are defined based on the application resource. The more application resources you have, the more endpoints you need to define in the REST API. Let’s consider an example of a different scenario in the Course Tracker application. Imagine you are managing course details and the course reviews in the application, as shown in figure 10.8. Thus, you have two resources to manage: the course and its reviews. Hence, you need to define one set of endpoints related to the course and another set related to reviews.

Let’s now imagine that an API client needs to access course details by a course name and reviews for the course. In a REST API, the client first needs to make an API call to obtain the course details and get the course ID. It then needs to make another API call to get all the reviews using the course ID obtained in the first API call. This is shown in figure 10.9.

It will be better if the API client could access all these requested details in a single API call. In the next sections, you’ll notice how GraphQL solves this problem of REST API.
10.3.2 Introduction to GraphQL
Note GraphQL is a large topic, and it is beyond the scope of this text to provide in-depth coverage. In this chapter, we intend to show you the use of GraphQL with Spring Boot and will focus on that. For a better understanding of GraphQL, you can refer to GraphQL documentation available at https://graphql.org/learn/.
GraphQL is a query language for API and a server-side runtime for executing queries. It uses a type system to define the application data model. We create a GraphQL service by defining types and the fields associated with those types. For instance, we can define a GraphQL service that returns all courses. We do this by defining a GraphQL Query type and a regular object type. Listing 10.19 shows this for the Course type. Create a folder called ghraphql inside the srcmain
esources directory. Create a file called schema.graphqls inside the graphql folder, and insert the content from the following listing.
Listing 10.19 Defining a Query and a regular GraphQL type
type Query {
    courses : [Course]
}

type Course {      ①
    id: ID
    name: String
    category: String
    description: String
    reviews: [Review]
}
① We’ll define the Review type shortly. To keep the example lean, we kept only the Course type.
In listing 10.19, we’ve defined a GraphQL type Query. A Query is a specialized GraphQL type that allows you to define query services to fetch data from a GraphQL server. Inside the Query type, we’ve defined a course service that returns an array of courses, which is represented with [Course]. Next, we’ve defined a regular GraphQL type that represents the type of data that is returned to the client. In the above example, we’ve defined the Course GraphQL type with the associated fields and their types.
The Query type allows a client to fetch data from a GraphQL server. GraphQL provides other specialized types: Mutation and Subscription. As the name suggests, the Mutation type allows you to define services to modify data in the GraphQL server. The Subscription type allows you to define Subscription to events in the GraphQL server. The following listing shows a sample of Mutation and Subscription type definitions in the previously defined schema.graphqls file.
Listing 10.20 GraphQL mutation type definition
type Mutation {
    addCourse(name: String, category: String, description: String) : Course
}
type Subscription {
    reviewEvents (courseId: Int) : Review
}
In listing 10.20, we defined a GraphQL Mutation type and defined a service that allows us to add a new course. Note that the service accepts several arguments and returns a Course type. Similarly, the Subscription type defines a subscription to review events and returns a stream of reviews.
10.3.3 Using GraphQL with Spring Boot
Now that we’ve introduced you to GraphQL, let’s explore the use of it along with Spring Boot. We’ll discuss two techniques: in the first one, we’ll show you how to design an API with GraphQL that allows you to retrieve data, create new resources, or modify existing resources. In the second technique, we’ll explore the notion of subscription over WebSocket in a GraphQL API. Let’s start with the first technique.
10.3.4 Technique: Developing a GraphQL API with a Spring Boot application
In this technique, we’ll discuss how to develop a GraphQL API with a Spring Boot application.
Previously, you developed REST APIs with Spring Boot. You recently explored GraphQL and need to redesign the Course Tracker REST API with GraphQL.
With this technique, we’ll show you how to build a GraphQL API with a Spring Boot application. We’ll use the previously used Course Tracker application with a few modifications to design the API.
Let’s begin by creating a new Spring Boot project through Spring Initializr with the following dependencies:
Note that the GraphQL support in Spring Boot is in experimental mode. This means GraphQL support is an experimental feature and under development. Thus, Spring Boot GraphQL is not available in the Spring Initializr. We’ll need to include this dependency manually in the pom.xml. Listing 10.21 shows the final pom.xml.
Listing 10.21 The pom.xml file for a Spring Boot GraphQL application
<?xml version="1.0" encoding="UTF-8"?>
<project xmlns="http:/ /maven.apache.org/POM/4.0.0"
➥ xmlns:xsi="http:/ /www.w3.org/2001/XMLSchema-instance"
➥ xsi:schemaLocation="http:/ /maven.apache.org/POM/4.0.0
➥ https:/ /maven.apache.org/xsd/maven-4.0.0.xsd">
    <modelVersion>4.0.0</modelVersion>
    <parent>
        <groupId>org.springframework.boot</groupId>
        <artifactId>spring-boot-starter-parent</artifactId>
        <version>2.6.0</version>
        <relativePath/> <!-- lookup parent from repository -->
    </parent>
    <groupId>com.manning.sbip.ch10</groupId>
    <artifactId>course-tracker-graphql-app</artifactId>
    <version>0.0.1-SNAPSHOT</version>
    <name>course-tracker-graphql-api</name>
    <description>Course Tracker GraphQL API</description>
    <properties>
        <java.version>17</java.version>
    </properties>
    <dependencies>

        <dependency>
            <groupId>org.springframework.experimental</groupId>
            <artifactId>graphql-spring-boot-starter</artifactId>
            <version>1.0.0-M2</version>
        </dependency>
        <dependency>
            <groupId>org.springframework.boot</groupId>
            <artifactId>spring-boot-starter-webflux</artifactId>
        </dependency>
        <dependency>
            <groupId>org.springframework.boot</groupId>
            <artifactId>spring-boot-starter-data-r2dbc</artifactId>
        </dependency>
        <dependency>
            <groupId>io.r2dbc</groupId>
            <artifactId>r2dbc-h2</artifactId>
            <scope>runtime</scope>
        </dependency>
        <dependency>
            <groupId>org.projectlombok</groupId>
            <artifactId>lombok</artifactId>
            <optional>true</optional>
        </dependency>
        <dependency>
            <groupId>org.springframework.boot</groupId>
            <artifactId>spring-boot-starter-test</artifactId>
            <scope>test</scope>
        </dependency>
    </dependencies>

    <build>
        <plugins>
            <plugin>
                <groupId>org.springframework.boot</groupId>
                <artifactId>spring-boot-maven-plugin</artifactId>
                <configuration>
                    <excludes>
                        <exclude>
                            <groupId>org.projectlombok</groupId>
                            <artifactId>lombok</artifactId>
                        </exclude>
                    </excludes>
                </configuration>
            </plugin>
        </plugins>
    </build>

    <repositories>
        <repository>
            <id>spring-milestones</id>
            <name>Spring Milestones</name>
            <url>https:/ /repo.spring.io/milestone</url>
            <snapshots>
                <enabled>false</enabled>
            </snapshots>
        </repository>
        <repository>
            <id>spring-snapshots</id>
            <name>Spring Snapshots</name>
            <url>https:/ /repo.spring.io/snapshot</url>
            <releases>
                <enabled>false</enabled>
            </releases>
        </repository>
    </repositories>
    <pluginRepositories>
        <pluginRepository>
            <id>spring-milestones</id>
            <name>Spring Milestones</name>
            <url>https:/ /repo.spring.io/milestone</url>
            <snapshots>
                <enabled>false</enabled>
            </snapshots>
        </pluginRepository>
        <pluginRepository>
            <id>spring-snapshots</id>
            <name>Spring Snapshots</name>
            <url>https:/ /repo.spring.io/snapshot</url>
            <releases>
                <enabled>false</enabled>
            </releases>
        </pluginRepository>
    </pluginRepositories>
</project>
We’ve included the graphql-spring-boot-starter dependency in the pom.xml file. Notice that the group ID of the dependency is org.springframework.experimental. Also, the artifact ID of the dependency is different than the other Spring Boot starter dependency. Lastly, the release version of the dependency indicates it is a milestone release. Due to this, we’ve included the spring-milestones and spring-snapshots repositories in the pom.xml, so Maven can download the required libraries.
Next, let’s include the Course domain object, as shown in listing 10.22. Notice that we’ve removed the rating field, which we have used in the previous examples. As you’ll notice shortly, we are using another domain object called Review to explain a GraphQL concept.
Listing 10.22 The Course domain object
package com.manning.sbip.ch10.model;

import lombok.AllArgsConstructor;
import lombok.Data;
import org.springframework.data.annotation.Id;

@Data
@AllArgsConstructor
public class Course {
    @Id
    private Integer id;
    private String name;
    private String category;
    private String description;
}
Each course can be reviewed by its users, and the review details are captured in the Review domain object, as shown in the following listing.
Listing 10.23 The Review domain object
package com.manning.sbip.ch10.model;

import lombok.AllArgsConstructor;
import lombok.Data;
import org.springframework.data.annotation.Id;

@Data
@AllArgsConstructor
public class Review {

    @Id
    private Integer id;
    private Integer courseId;       ①
    private String reviewerName;
    private Integer rating;
    private String comment;
}
① A review belongs to a course. Thus, the courseId is part of the review.
Let’s create the repository interfaces to manage the Course and the Review details in the application. The following listing shows the CourseRepository interface.
Listing 10.24 The CourseRepository interface
package com.manning.sbip.ch10.repository;

import com.manning.sbip.ch10.model.Course;
import org.springframework.data.repository.reactive.ReactiveCrudRepository;
import org.springframework.stereotype.Repository;
import reactor.core.publisher.Flux;

@Repository
public interface CourseRepository extends ReactiveCrudRepository<Course, Integer>  {

    Flux<Course> findByCategory(String category);
}
Listing 10.24 contains a custom method called findByCategory(..) that returns a Flux of courses for a given course category. Also, the CourseRepository interface extends the ReactiveCrudRepository interface, which provides the CRUD operation support for the bounded domain object (e.g., Course). We’ve covered reactive Spring Boot application development in chapter 8. Let’s now define the ReviewRepository interface, as shown in the following listing.
Listing 10.25 The ReviewRepository interface
package com.manning.sbip.ch10.repository;

import com.manning.sbip.ch10.model.Review;
import org.springframework.data.repository.reactive.ReactiveCrudRepository;
import org.springframework.stereotype.Repository;
import reactor.core.publisher.Flux;

@Repository
public interface ReviewRepository extends ReactiveCrudRepository<Review,
➥ Integer> {

    Flux<Review> findByCourseId(Integer courseId);
}
Listing 10.25 contains a custom method called findByCourseId(..) that returns a Flux of reviews for a given courseId.
Now that we’ve defined the domain objects and the associated repository interfaces, let’s start building the GraphQL schema. Create a file called schema.graphqls in the srcmain esourcesgraphql folder. The following listing shows the contents of the schema.graphqls file.
Listing 10.26 The GraphQL schema file
type Query {
    courses : [Course]
    coursesByCategory (category: String) : [Course]!
    reviews (courseId: Int) : [Review]!
}

type Course {
    id: ID
    name: String
    category: String
    description: String
    reviews: [Review]!
}

type Review {
    id: ID,
    courseId: Int,
    reviewerName: String
    rating: Int,
    comment: String
}

type Mutation {
    addCourse(name: String, category: String, description: String) : Course
    addReview(courseId: Int, reviewerName: String, rating: Int, comment:
➥ String) : Review
}
In listing 10.26, we defined four GraphQL types: the Query, Course, Review, and Mutation. The query and mutation are special GraphQL types, whereas the course and the review are regular object types. The difference between special types and regular types is that special types provide an entry point to the GraphQL schema. For instance, the Query type allows us to fetch data from the server. The mutation type allows us to change data in the server.
In listing 10.26, in the Query type, we defined the following queries:
-
courses: [Course]—Returns an array of courses, which is represented as[Course]. -
coursesByCategory (category: String) : [Course]!—It takes an argument of string type calledcategoryand returns an array of courses. The exclamation mark indicates the returned array can be empty. -
reviews (courseId: Int) : [Review]!—Takes an argument of integer type calledcourseIdand returns an array of typeReview.
Next, we defined the type of Course. It has the same fields specified in the Course domain object, as shown in listing 10.22. We’ve additionally included reviews that return the array of reviews for the Course. Note that the GraphQL types are slightly different than what has defined the Course Java types. The id field has a type of GraphQL type ID, the reviews field has an array type of Review, and all other fields are of GraphQL String type.
Next, we’ve defined the type of Review. It contains the same fields as specified in the Review domain object. Note that the id field has a GraphQL type ID, and the rating field has a GraphQL type Int. The other fields are of GraphQL String type.
Lastly, we defined the type Mutation and defined two different fields: addCourse and addReview. The addCourse field creates a new Course in the server and accepts name, category, and description as the arguments. It returns the created Course details. Similarly, the addReview field creates a new Review and accepts courseId, reviewerName, rating, and comment as the arguments. It returns the created Review details.
Note You can find more information about GraphQL schema and types in the GraphQL documentation at https://graphql.org/learn/schema/.
Let’s now define a Spring controller to define the GraphQL endpoints, as shown in the following listing.
Listing 10.27 The GraphQL Spring controller
package com.manning.sbip.ch10.controller;

import com.manning.sbip.ch10.model.Course;
import com.manning.sbip.ch10.model.Review;
import com.manning.sbip.ch10.repository.CourseRepository;
import com.manning.sbip.ch10.repository.ReviewRepository;
import lombok.RequiredArgsConstructor;
import org.springframework.graphql.data.method.annotation.*;
import org.springframework.stereotype.Controller;
import reactor.core.publisher.Flux;
import reactor.core.publisher.Mono;

import java.time.Duration;

@Controller
@RequiredArgsConstructor
public class GraphqlCourseController {

    private final CourseRepository courseRepository;
    private final ReviewRepository reviewRepository;

    @QueryMapping
    Flux<Course> courses() {
        return this.courseRepository.findAll();
    }

    @QueryMapping
    Flux<Review> reviews(@Argument Integer courseId) {
        return this.reviewRepository.findByCourseId(courseId);
    }

    @QueryMapping
    Flux<Course> coursesByCategory(@Argument String category) {
        return this.courseRepository.findByCategory(category);
    }

    @MutationMapping
    Mono<Course> addCourse(@Argument String name, @Argument String
➥ category, @Argument String description) {
        return this.courseRepository.save(new Course(null, name, category,
➥ description));
    }

    @MutationMapping
    Mono<Review> addReview(@Argument Integer courseId, @Argument String
➥ reviewerName, @Argument Integer rating, @Argument String comment) {
        return this.reviewRepository.save(new Review(null, courseId,
➥ reviewerName, rating, comment));
    }
}
Listing 10.27 is a Spring controller class consisting of three QueryMapping and two MutationMapping definitions. Recall from the GraphQL schema definition that we have three queries and two mutations defined in it. We’ve defined the GraphQL endpoints accordingly in the controller.
Let’s now define the course and review table DDLs and add a few sample course and review details. Create a file named schema.sql in the srcmain esources folder. The following listing shows the contents of the schema.sql file.
Listing 10.28 The schema.sql file
CREATE TABLE COURSE (
  ID          INT auto_increment,
  NAME       VARCHAR(255),
  CATEGORY    VARCHAR(255),
  DESCRIPTION VARCHAR(255),
  PRIMARY KEY (id)
);

CREATE TABLE REVIEW
(
    ID       INT auto_increment,
    COURSE_ID INT,
    REVIEWER_NAME VARCHAR(100),
    RATING   INT,
    COMMENT  VARCHAR(2000)
)
Next, let’s create a file called data.sql in the srcmain esources folder. The following listing shows the contents of this file.
Listing 10.29 The data.sql file
INSERT INTO COURSE(ID, NAME, CATEGORY, DESCRIPTION)  VALUES(1, 'Rapid
➥ Spring Boot Application Development’, ‘Spring’, ‘Learn Enterprise
➥ Application Development with Spring Boot');
INSERT INTO COURSE(ID, NAME, CATEGORY, DESCRIPTION)  VALUES(2, 'Getting
➥ Started with Spring Security DSL', 'Spring', 'Learn Spring Security DSL
➥ in Easy Steps');
INSERT INTO COURSE(ID, NAME, CATEGORY, DESCRIPTION)  VALUES(3, 'Getting
➥ Started with Spring Cloud Kubernetes', 'Spring', 'Master Spring Boot
➥ Application Deployment with Kubernetes');


INSERT INTO REVIEW(ID, COURSE_ID, REVIEWER_NAME, RATING, COMMENT)
➥ VALUES(1,1, 'John', 4, 'Excellent Course');
INSERT INTO REVIEW(ID, COURSE_ID, REVIEWER_NAME, RATING, COMMENT)
➥ VALUES(2,1, 'Jane', 5, 'Awesome Course');
INSERT INTO REVIEW(ID, COURSE_ID, REVIEWER_NAME, RATING, COMMENT)
➥ VALUES(1,2, 'Mark', 4, 'Useful');
INSERT INTO REVIEW(ID, COURSE_ID, REVIEWER_NAME, RATING, COMMENT)
➥ VALUES(2,2, 'Josh', 4, 'Recommended Course for all');
INSERT INTO REVIEW(ID, COURSE_ID, REVIEWER_NAME, RATING, COMMENT)
➥ VALUES(1,3, 'Stephen', 3, 'Good for beginners');
INSERT INTO REVIEW(ID, COURSE_ID, REVIEWER_NAME, RATING, COMMENT)
➥ VALUES(2,3, 'Laura', 4, 'Engaging Content');
That’s it. Let’s now start the application and test the GraphQL endpoints. There are several ways we can test the GraphQL endpoints. With this technique, we’ll demonstrate three alternatives:
GraphiQL (https://github.com/graphql/graphiql) is a browser-based IDE that allows you to explore GraphQL endpoints. It is an official project under the GraphQL Foundation. Let’s demonstrate how to test the courses endpoint with GraphiQL. Open a browser window and navigate to http://localhost:8080/graphiql?path=/graphql. You’ll find a screen similar to that shown in figure 10.10.

Figure 10.10 The GraphiQL in-browser IDE. The top-left window is the place we define the GraphQL queries and mutations. The bottom-left window is where we defined the query variables (if any) used in the GraphQL query. The right-side window is where the output is presented.
Let’s now access the courses GraphQL endpoint. Figure 10.11 shows the output.

Figure 10.11 Accessing the courses endpoint in GraphiQL IDE. We’ve requested the ID, name, category, and description fields. On the right-hand side, the result is presented.
Notice that, unlike a REST API, in the GraphQL API, you have the flexibility to request the fields you are interested in. You are not forced to retrieve all fields of the domain object, as this happens with a REST API. For instance, we can request only course name and category, and the GraphQL will return only the requested fields. This is shown in figure 10.12.

Figure 10.12 Accessing courses endpoint requesting only the name and category fields. The presented result provides names and categories for all available courses.
Let’s now demonstrate how to use Postman to access the courses endpoint. Open Postman and create a new HTTP request. Create a POST request with the URL http://localhost:8080/graphql with the request body, as shown in the following listing.
Listing 10.30 The GraphQL query for the courses endpoint
Note that you need to use the GraphQL radio button to indicate this is a GraphQL request. Figure 10.13 shows this. Click on the Send button, and you’ll find the details of all courses.

Let’s now demonstrate how to access GraphQL endpoint through HTTPie (https://httpie.io/). Open a command prompt or terminal window, and access the command, as shown in the following listing.
Listing 10.31 Httpie command to access the courses GraphQL endpoint
You’ll find the output as shown in listing 10.32.
Listing 10.32 Httpie command output of courses GraphQL endpoint
HTTP/1.1 200 OK
Content-Length: 474
Content-Type: application/json

{
    "data": {
        "courses": [
            {
                "category": "Spring",
                "description": "Learn Enterprise Application Development with Spring Boot",
                "id": "1",
                "name": "Rapid Spring Boot Application Development"
            },
            {
                "category": "Spring",
                "description": "Learn Spring Security DSL in Easy Steps",
                "id": "2",
                "name": "Getting Started with Spring Security DSL"
            },
            {
                "category": "Spring",
                "description": "Master Spring Boot Application Deployment with Kubernetes",
                "id": "3",
                "name": "Getting Started with Spring Cloud Kubernetes"
            }
        ]
    }
}
Let’s now explore how to access the reviews GraphQL endpoint. Note that this endpoint accepts a courseId argument. Figure 10.14 shows how to supply the courseId argument in the request and the associated result.

You have another query-based GraphQL endpoint coursesByCategory. We leave that as an exercise for you to try.
Let’s now focus on the mutation types. We have defined two mutation types: addCourse and addReview. Let’s add a new course using the addCourse mutation type. The following listing shows the request of the addCourse mutation type.
Listing 10.33 The addCourse GraphQL mutation request
mutation {
  addCourse(name: "GraphQL in Action", category: "GraphQL", description:
➥ "GraphQL in Action gives you a solid overview of GraphQL") {
    id,
    name,
    description
  }
}
In listing 10.33, the type is mutation, and the addCourse accepts the name, category, and description arguments. In the same definition, we also query for id, name, and description fields. Let’s execute this request through GraphiQL IDE, as shown in figure 10.15.

Figure 10.15 Accessing addCourse mutation endpoint to add a new Course. We are accessing the ID, name, and description fields of the newly created course. On the right-hand side, the server presents the requested course details.
We have another mutation type, addReview, which allows you to add a review for a given course. We leave that as an exercise for you to create a review for one of the existing courses.
Now that we are done with the basic endpoints, let’s now understand another important concept. If you recall, the Course GraphQL type has the following definition, as shown in the following listing.
Listing 10.34 The GraphQL course type definition
In listing 10.34, the Course GraphQL type has the reviews additional field along with the id, name, category, and description (which are also part of the equivalent Java Course type). Thus, in our GraphQL courses query, we can also access the reviews field. The following listing shows the modified courses GraphQL query request along with the review type.
Listing 10.35 The modified courses GraphQL query request
However, if you try to access the reviews field, you’ll find the reviews field for all courses are appearing as null. The output is shown in figure 10.16.

Figure 10.16 The courses GraphQL query output. The reviews fields in all courses are presented as null.
Although each course we’ve created in this application has reviews available, there is no mapping between a course and the associated review in the GraphQL schema. Let’s do the schema mapping between the course and reviews. In the Spring Boot controller class, add the following SchemaMapping annotation, as shown in the following listing.
Listing 10.36 Schema mapping between course and review
@SchemaMapping(typeName = "Course")
Flux<Review> reviews(Course course) {
    return this.reviewRepository.findByCourseId(course.getId());
}
In listing 10.36, we provided the mapping through @SchemaMapping annotation for the Course type. The mapping is defined such that for a given course it returns all the reviews. Restart the application, and execute the GraphQL query, which is provided in listing 10.35. Figure 10.17 shows the query and the associated output.

With this technique, you’ve learned how to develop a GraphQL API with Spring Boot. Spring GraphQL is intended to provide GraphQL support on Spring Framework and is based on graphql-java (https://www.graphql-java.com/). The graphql-java project is the Java implementation of GraphQL.
Spring Boot provides support for GraphQL through the graphql-spring-boot-starter dependency. This dependency provides the necessary support for GraphQL autoconfiguration and brings necessary GraphQL libraries.
To define a GraphQL Spring Boot application, we’ve provided the GraphQL schema file inside the srcmain
esourcesgraphql directory. You can customize this path by configuring the spring.graphql.schema.locations property in the application.properties file. Besides, in the Course Tracker example, we’ve placed all GraphQL type definitions in a single file. However, you can provide multiple graphqls files inside the graphql schema location if you need to segregate the type definitions. Further, by default, the Spring Boot GraphQL application runs on the /graphql path. You can customize the path to the spring.graphql.path property.
With this technique, we’ve used the Spring Boot GraphQL with the transport as HTTP. You can also use other protocols such as WebSocket as transport. Besides, with this technique, you’ve explored the Query and Mutation GraphQL types. We have another GraphQL type called Subscription. Let us explore these concepts in the next technique.
10.3.5 Technique: Developing a GraphQL API over WebSocket with a Spring Boot application
In this technique, we’ll develop a GraphQL API over WebSocket protocol with a Spring Boot application.
In the previous technique, we saw the use of Spring Boot GraphQL over HTTP. We used the Query and Mutation GraphQL types. You want to explore the use of WebSocket as the transport. You also want to explore the use of the Subscription GraphQL type.
Previously, we used HTTP as the transport for the GraphQL Spring Boot application. Spring Boot GraphQL also allows you to use other protocols, such as WebSocket in place of HTTP. As we discussed in chapter 8, WebSocket is a different protocol that allows two-way communication between the client and server. With this technique, we’ll explore using WebSocket protocol in the Course Tracker GraphQL Spring Boot application.
To continue with this technique, we’ll use the Spring Boot project used in the previous technique. The first change we’ll introduce is adding the following properties to the application.properties file, as shown in the following listing.
Listing 10.37 Enable WebSocket support in the application
The first property defines the WebSocket connection initialization timeout to 60 seconds. It indicates the time within which a CONNECTION_INIT message must be received from the client. The second property enables WebSocket support in the application. Note that since we are using WebFlux in the current Course Tracker application, configuring the spring.graphql.websocket.path property is sufficient to enable the WebFlux support. If you intend to use a Web MVC-based application, you need to include the spring-boot-starter-websocket dependency.
Next, let’s define the Subscription type in the GraphQL schema. Open the schema.graphqls file available in the srcmain
esourcesgraphql folder and include the following Subscription type definition, as shown in the following listing.
Listing 10.38 The subscription type definition
In listing 10.38, we defined a GraphQL subscription type called reviewEvents. It accepts an argument called courseId of GraphQL type Int and returns a Review.
Let’s now define the associated subscription mapping in the Spring controller class. Open the GraphqlCourseController class, and include the following subscription mapping, as shown in the following listing.
Listing 10.39 The reviewEvents subscription mapping
@SubscriptionMapping
Flux<Review> reviewEvents(@Argument Integer courseId) {
    return this.courseRepository.findById(courseId)
            .flatMapMany(review ->
➥ this.reviewRepository.findByCourseId(review.getId()))
            .delayElements(Duration.ofSeconds(1))
            .take(5);
}
In listing 10.39, the reviewEvents mapping accepts the courseId argument and finds the available course. The @Argument annotation binds the courseId method parameter to the GraphQL input. Next, for the course, all available reviews are retrieved and sent back in one second. Note that, for simplicity reasons, we take a maximum of five reviews from the publisher.
The next step is to test the Subscription GraphQL endpoint. The tools, such as GraphiQL, Postman, and HTTPie, we’ve used to test the Query and Mutation endpoints are not suitable for Subscription type. Thus, we’ll use a JavaScript-based HTML client to test the subscription mapping. The client is available at http://mng.bz/q2Kr. In this client, we are using a JavaScript library called graphql-ws, and this JavaScript file is intended for testing Subscriptions.
Start the application, and access the http:/ /localhost:8080/index.html URL. Open the browser console, and you’ll notice the following review details printed in the browser console, as shown in figure 10.18.

Figure 10.18 Browser console output of the GraphQL subscription mapping. The reviews are printed in one second.
With this technique, you’ve explored the use of WebSocket in a Spring Boot GraphQL application. Also, we’ve demonstrated the use of GraphQL Subscription type with Spring Boot GraphQL subscription mapping. A subscription allows a client to subscribe to the events, and once the client accesses them, the events are streamed to the client. Like the other GraphQL types, Spring Boot provides the @SubscriptionMapping annotation to define a subscription mapping.
With the previous two techniques, we’ve covered how to define the create and read operations in a GraphQL API. You can also define the delete and update operations in a GraphQL API through the GraphQL Mutation type. We leave this as an exercise to you to develop the delete and update operations through the GraphQL mutation type.
Another important aspect is the GraphQL API security. Like you can secure REST API endpoints, you can also secure GraphQL API endpoints. Again, we are leaving using Spring Security to secure the endpoints as an exercise for the reader. You can find a sample application with HTTP Basic authentication available at http://mng.bz/7Wov.
Summary
-
We introduced developing Spring Boot applications with Kotlin.
-
We covered generating Native Image of Spring Boot applications with GraalVM native image.
-
We explored the use of buildpacks for building Spring Boot native image.
-
We introduced generating a native image of Spring Boot application using GraalVM native build tools.
-
We covered developing efficient APIs with Spring Boot GraphQL.
-
We explored performing
Query,Mutation, andSubscriptionwith GraphQL.