Ideally, this book has given you enough information to perform your own basic troubleshooting on your tablet. If you can’t figure out the problem fairly quickly, the next best step is the Help and Support system, shown in Figure A-1, available through the Help And Support option on the Start menu.
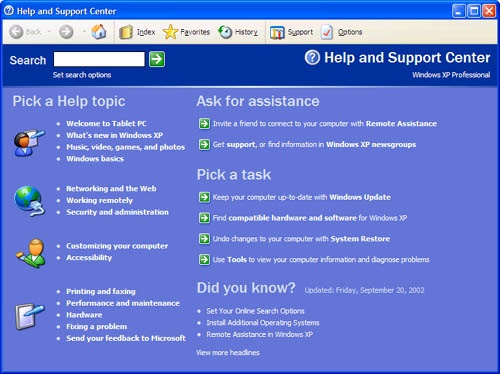
Figure A-1. The Help and Support system of Windows XP is interactive and helps you isolate the problem.
This interactive Help is far more capable than previous Windows Help systems and is linked to several built-in diagnostic tools, troubleshooting wizards, thousands of individual topics, and the online database known as the Microsoft Knowledge Base. The Knowledge Base contains thousands of articles containing step-by-step explanations of common fixes and useful tips, such as the one shown in Figure A-2. Because the Knowledge Base is on the Web, you should connect to the Internet to get full utility out of Windows XP Help and Support.
Most of the problems you encounter will not be issues specific to the Tablet PC Edition of Windows XP, but here are some strategies to help troubleshoot the most common snags that are specific to the tablet or are likely to be encountered by tablet users.
Tip
Windows XP has built-in features that allow another Windows user to connect to your computer remotely and administer it. These features are named Remote Assistance and Remote Desktop. If you will be on the road often and have good IT support staff or a knowledgeable friend who can help in a pinch, get them to configure and test these features in person before you need help from some far-off location.
If the pen is not behaving correctly, the problem could be in the hardware of the pen itself or the software that interprets the signals. If the pen is working very poorly or not at all, try attaching a USB mouse to control the tablet while you troubleshoot.
First check out the hardware.
Try another pen if one is available. The pen is the most likely failure if you are having a hardware problem. If you don’t have a backup pen already, you should seriously consider getting one.
If your pen uses batteries, make sure the batteries are installed and working.
If your tablet is running on batteries, plug it in. It’s unlikely that low power is the culprit because the power draw for the pen and digitizer is far less than for the screen, but it’s best to eliminate the possibility.
Make sure you’re holding the pen fairly upright and pressing down firmly on the screen to write or tap. The tip of the pen must actually compress slightly to register contact with the screen.
Check that none of the pen buttons are stuck in the pressed position. You should be able to feel each button press down and come back up. Use the Tablet And Pen Settings control panel to disable the press and hold, barrel button, and top of pen eraser. If this fixes the problem, you have a stuck button. By turning these functions back on one at a time, you can figure out which button it is. If press and hold is the problem, then that button is the one that is compressed when you press down with the tip of the pen on the screen.
Next try the software.
Recalibrate the screen for the appropriate mode, landscape or portrait. If your pen works well in one screen orientation but not the other, calibration is a likely culprit.
If the pen does not work at all but an external mouse or trackpad does, try restarting the tablet with no external USB or FireWire items attached and see whether the pen works then.
If the pen stopped working after installing new software or devices, you might have a corrupted file or driver conflict. This is unlikely, but it is possible. Windows XP provides a utility to restore the system to an earlier point, and it creates these system restore points every time you install software, patches, or drivers compatible with this feature. System restore does not affect any of your data files, so your work will be left unharmed; however, it’s a good idea to back up all your data before doing anything to your system. If the pen works after a system restore, that was the problem. If not, you might want to undo the restore because it wasn’t the problem and could interfere with the last program or device you installed.
If the pen still isn’t working, you should contact your hardware manufacturer for further troubleshooting.
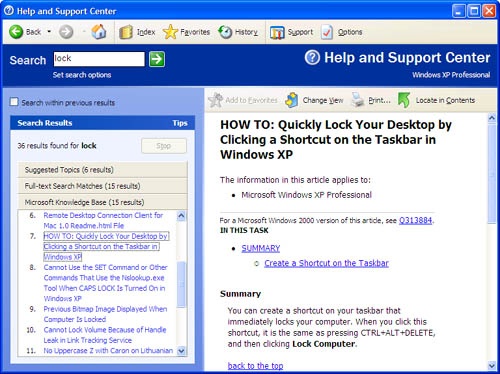
To perform a system restore, close all open applications and then choose Help And Support from the Start menu. Under Pick A Task, select Undo Changes To Your Computer With System Restore. When the System Restore screen appears, as shown in Figure A-3, select the Restore My Computer To An Earlier Time option.
Note
The Undo My Last Restoration option for System Restore appears only after you have restored the system to an earlier configuration.
Select the restore point you want using the calendar and the description of the last restore point, as shown in Figure A-4. If you installed multiple software packages on one day, there may be many restore points. Select a date prior to the pen and digitizer problem.

After you select a restore point, the confirmation screen appears as shown in Figure A-5.
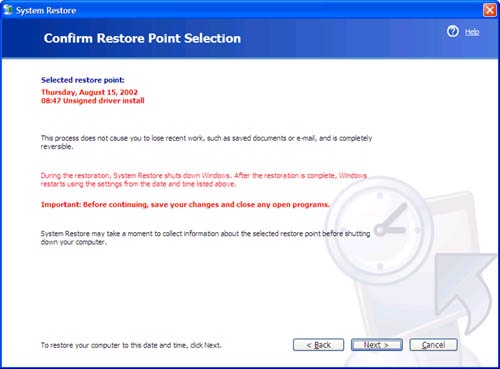
After you tap Next, Windows will shut down, restore the system, and restart. When you log back in, the system will be back to its earlier point.
Troubleshooting network problems could be a book chapter all by itself, but overall the key is isolating the problem. The Help And Support Network Troubleshooter will walk you through a process to do exactly that, but here is an overview of the steps involved.
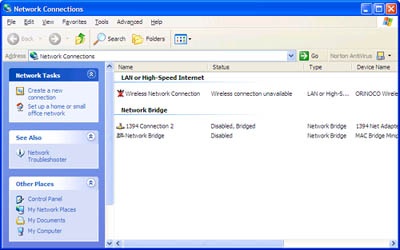
Is your tablet actually connecting to the network? Before any network service can work properly, the tablet must communicate with the network. To view the status of your current network connection, open the Network Connections control panel. Network Connections will list your current high-speed and modem connections, as shown in Figure A-6.
Network connections that are not working will have a red X through them. If you see the red X, then that is your problem. If you’re trying to connect to a wireless network, right-tap the wireless connection icon, select Properties, and tap the Wireless Networks tab to list all the available networks. If none are available, you are out of range, the network is closed to outside access and requires a custom connection, or your network hardware is not working. In this situation, try a different network connection, such as a wired connection instead of a wireless one.
Tip
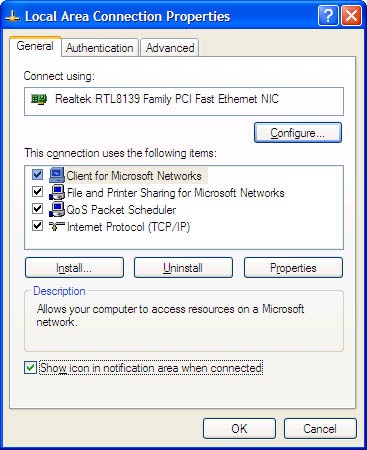
If you’ve enabled the option, you can see the connection status of any network in the notification area of the Windows taskbar. You can enable this option in the Properties dialog box for a network connection. Right-tap a network connection in the Network Connections control panel, and select Properties from the shortcut menu. On the General tab, make sure Show Icon In Notification Area When Connected is checked as shown in Figure A-7. You must check this option for each wired, wireless, and modem connection you create. This is very handy if you hop on and off networks often.
If the network is connected, is the problem with the entire network or a network service? For example, if Internet Explorer isn’t working, but you can log in to a file server, the file sharing services are working but Internet services are not. If no services are working, make sure you have the correct type of login for the network, workgroup vs. domain login, and a valid user name and password. See Chapter 7 for more information on logging on to various networks. You can also try selecting the network connection in the Network Connections control panel and tapping the Repair This Connection option in the list on the left-hand side of the window. Usually this option works only if you lost a network by taking the tablet out of range, and it’s having trouble reconnecting when you come back in range.
If only one service is not working, that service is probably not configured correctly for this network. This situation often requires the help of an IT person who knows that network. As a quick fix, you can try closing all the connections using that service, such as all your browser windows and your e-mail program, and then relaunching them. Another thing to try is switching to a different network connection, such as a wired connection instead of a wireless, and then switching back. Sometimes this will reestablish a broken service. It’s also possible that your tablet is not the problem and that service is down on that network.
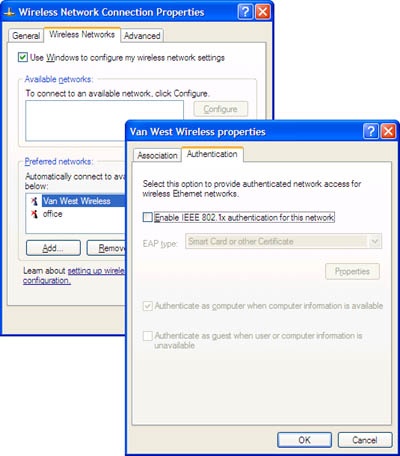
One annoying network problem that is particular to wireless networks is incompatible authentication. The symptom is that you can connect to a wireless network without problems, it suddenly disconnects after a few minutes, and then is immediately available for reconnection. Right-tap the wireless network connection in the Network Connections control panel, select Properties, tap the Wireless Network tab, select the wireless network you are having trouble with in the Preferred Networks area, and tap Properties. The properties on the Association tab are correct, otherwise you couldn’t connect at all. Tap the Authentication tab and change the Enable IEEE 802.1x Authentication For This Network option as shown in Figure A-8
If you’re new to USB and FireWire, you’ll find these devices much easier to work with than old serial and parallel peripherals. For the most part, you simply plug them in, wait a moment for them to be recognized, and then proceed. Both USB and FireWire are quite reliable under Windows XP and usually work flawlessly, but here are a couple of quick tips to help with problems if they do appear.
USB and FireWire devices still require drivers to operate correctly. Many of these drivers ship with Windows XP, so you may be able to plug in the device and let Windows install the driver itself. If you have an install program that came with the device, it’s usually better to run the installer before hooking up the device so that Windows makes the best choice for a driver.
When you first connect and power up the device, the Add Hardware Wizard will launch and guide you through the setup process. On subsequent connections you may simply see a notification that the new hardware was found and configured for you, as shown in Figure A-9.
If the device isn’t found automatically after a few seconds, try turning it off, unplugging it, plugging it back in, and powering it up again. If recognition continues to be a problem, restart the tablet with the device unplugged, and then connect it and turn it on. Getting the device recognized for the first time is the most common problem with USB and FireWire.
When you want to disconnect the device be sure to stop it. Tap on the icon in the notification area for USB and FireWire peripherals and select the device you want to remove, as shown in Figure A-10.
Depending on the device, you might see a dialog box asking you to verify the item you want stopped. If it appears, tap Stop, and then OK on the next screen. It’s more likely, though, that the system will stop them automatically and display the notification that they can be removed, as shown in Figure A-11. Once the device is removed, you will need to turn it off and then back on or unplug and then plug it back in to use it again.


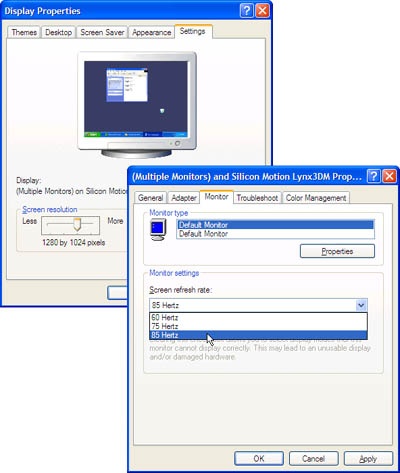
While many laptops support multiple monitors, the idea of sometimes using a standard keyboard and an external monitor is practically fundamental to the tablet. Unlike large computer monitors where you can use one of many screen resolutions, the LCD screens found on tablets work best at only one screen resolution. LCD screens also have a slow refresh rate, which is the speed at which the image on the screen is redrawn. Slow refresh rates don’t matter on an LCD screen, but on a normal monitor they cause a slight flicker that can give you a serious headache. If you attach your tablet to an external monitor and don’t like what you see, try changing the screen resolution. To change the screen resolution, open the Display control panel, go to the Settings tab, and adjust the slider for screen resolution to a larger number. To increase the refresh rate, tap the Advanced button and then tap the Monitor tab. The available refresh rates appear in the list, as shown in Figure A-12. Usually the best results are achieved by selecting the highest setting available. Screen resolution and monitor refresh rate are interdependent. The larger your screen resolution, the slower the monitor may be able to refresh, so you might have to experiment to find the best balance.
Caution
Do not uncheck the Hide Modes That This Monitor Cannot Display option. Doing so can allow you to select options that prevent you from seeing anything on the screen. If this does happen, just wait. The original settings should return after fifteen seconds.
Some tablet hardware allows you to use different resolutions and refresh rates for the external monitor and the tablet screen. In this case, the two screens can act as one large extended desktop, and you can move your mouse and drag windows from one monitor to the other. The advanced settings should provide an option for which screen is primary and contains your taskbar, and which is secondary. You may even be allowed to keep the tablet in portrait mode with the external monitor in landscape mode. Other tablet hardware presents the same desktop on both the tablet screen and the external monitor, so you must switch the tablet to landscape orientation to use the external monitor. In some mirrored configurations, you must turn off the tablet screen to get a good refresh rate and resolution on the external monitor. Check your hardware owners manual for a way to turn off the tablet screen if you are having trouble getting a good picture on the external monitor.
If you have an extended desktop system, you must set up PowerPoint to use the correct screen for its slide show. In PowerPoint, select Set Up Show on the Slide Show menu to find the setting for multiple monitors.