
Use iCloud Family Sharing
Family Sharing, an iCloud feature, makes it easy for up to six family members to share App Store, Books, and iTunes Store purchases, as well as an Apple Music subscription, without having to share an Apple ID. Family purchases route through the family organizer, which means you can require kids to get permission before spending money (if you choose). As a bonus, when you use Family Sharing, a shared calendar and reminders list are generated automatically, which makes coordinating the family schedule and to-do list extra convenient. You can also share an iCloud Storage plan and find each others’ locations easily with Find My.
Set Up Family Sharing
You can set up Family Sharing on your Mac, iPhone, or iPad. After you do, it’s enabled on all devices that share the same iCloud account. Here are the steps to follow on your Mac:
Go to Apple > System Preferences > Family Sharing and click the Next button.
Make sure that your Apple ID is listed if you want to be the family organizer (Figure 97). That job’s responsibilities include providing a credit card for purchases, managing kid accounts, and approving requests from kids—though, you can designate another adult to help with that. If you’re up for it, click Next.
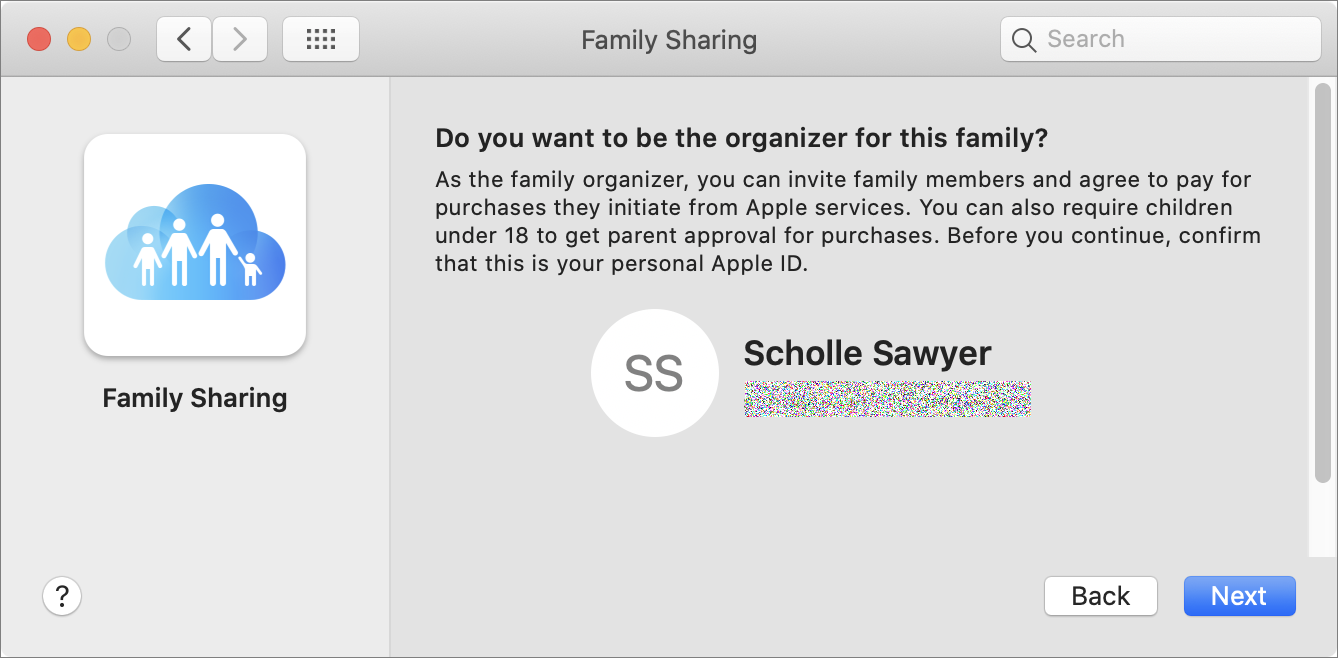
Figure 97: When you set up Family Sharing, you become the organizer. Family members will be able to view and download your music, movie, book, and app purchases. If that’s OK, select “Share your purchases” and click Next. (If you want to use a different Apple ID account as the family organizer, click Use a Different Account” instead.)
By default, purchases will be charged to the credit card you’ve associated with your Apple ID. If your Apple ID isn’t already associated with a credit card, click Add to set up a family payment method.
On the next screen, confirm your payment method. Click Next.
If you want to share your location with family members, select “Share your location.” This is handy if you’re wondering if a spouse has left work yet or you’re trying to pick up a teen at the mall. As of Catalina, family members can also help find your devices using Siri or Find My. If you don’t want to share your location, select “Not now.” Click Done.
The first time you add a family member, you’ll see an Add Family Member button in the Family Sharing preference pane (Figure 98).
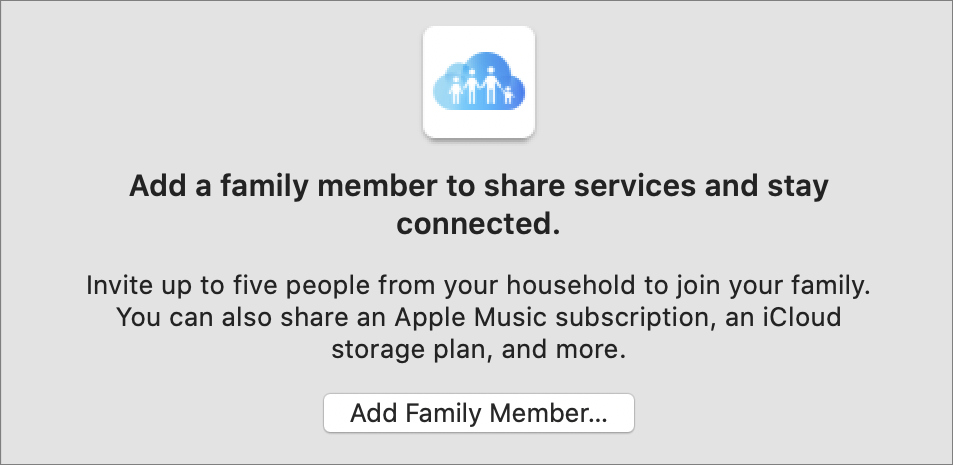
Click it to begin. To add more family members later, click the Add ![]() button at the bottom of the list. (To remove a family member, select their name in the list and click the Remove
button at the bottom of the list. (To remove a family member, select their name in the list and click the Remove ![]() button.)
button.)
How you proceed after that depends on the person’s age.
Add an Adult Family Member
To add an adult family member or a teen who already has an Apple ID, follow these steps:
Select “Enter a family member’s name, email address or Game Center nickname” and type the name or email address in the field.
Follow the prompts as you enter your Apple ID password, and verify that you are the family organizer by typing in the security code for the credit card associated with your Apple account.
Once you finish following the prompts, your Mac sends the person an invitation (typically in a notification and by email). If they accept, they’re added to the group.
Add a Child Family Member
The process is different for kids who don’t have an Apple ID and anyone under the age of 13. (See Parent Supervision Required.)
To add the younger members of the family, follow these steps:
Select “Create an Apple ID for a child who doesn’t have an account” and then click Continue.
The next dialog asks you to fill in a bunch of information to create their new Apple ID (Figure 99).
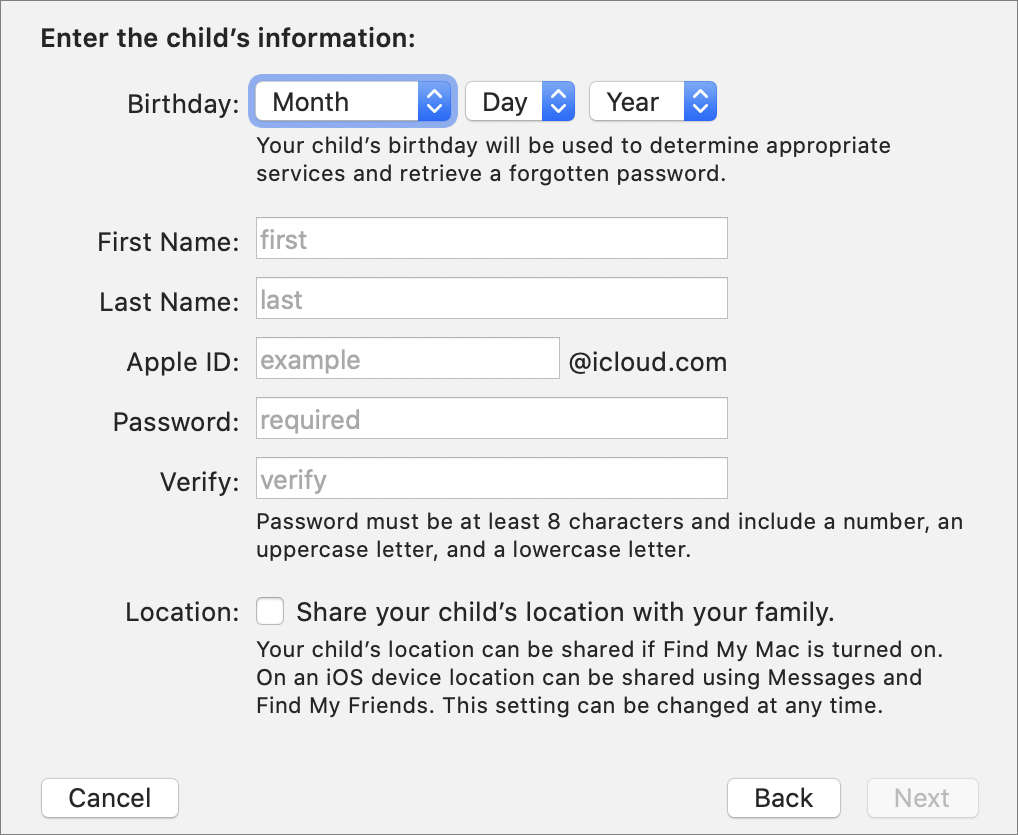
Figure 99: Provide information to create an Apple ID for a child. Click Next and follow the prompts as you read the Parent Privacy Disclosure, enter your credit card security code, and set up security questions—make the answers relevant to you, not your child—so you can retrieve a lost password later.
You must agree to two more sets of terms and conditions and then enter the password for your Apple ID when prompted before you finally see a summary of the child’s account.
If you want your child to ask your approval for iTunes, App Store, and Books purchases, select Ask to Buy.
Click Done. Other members receive a notification when a new family member is added.
Make Adjustments to Family Sharing
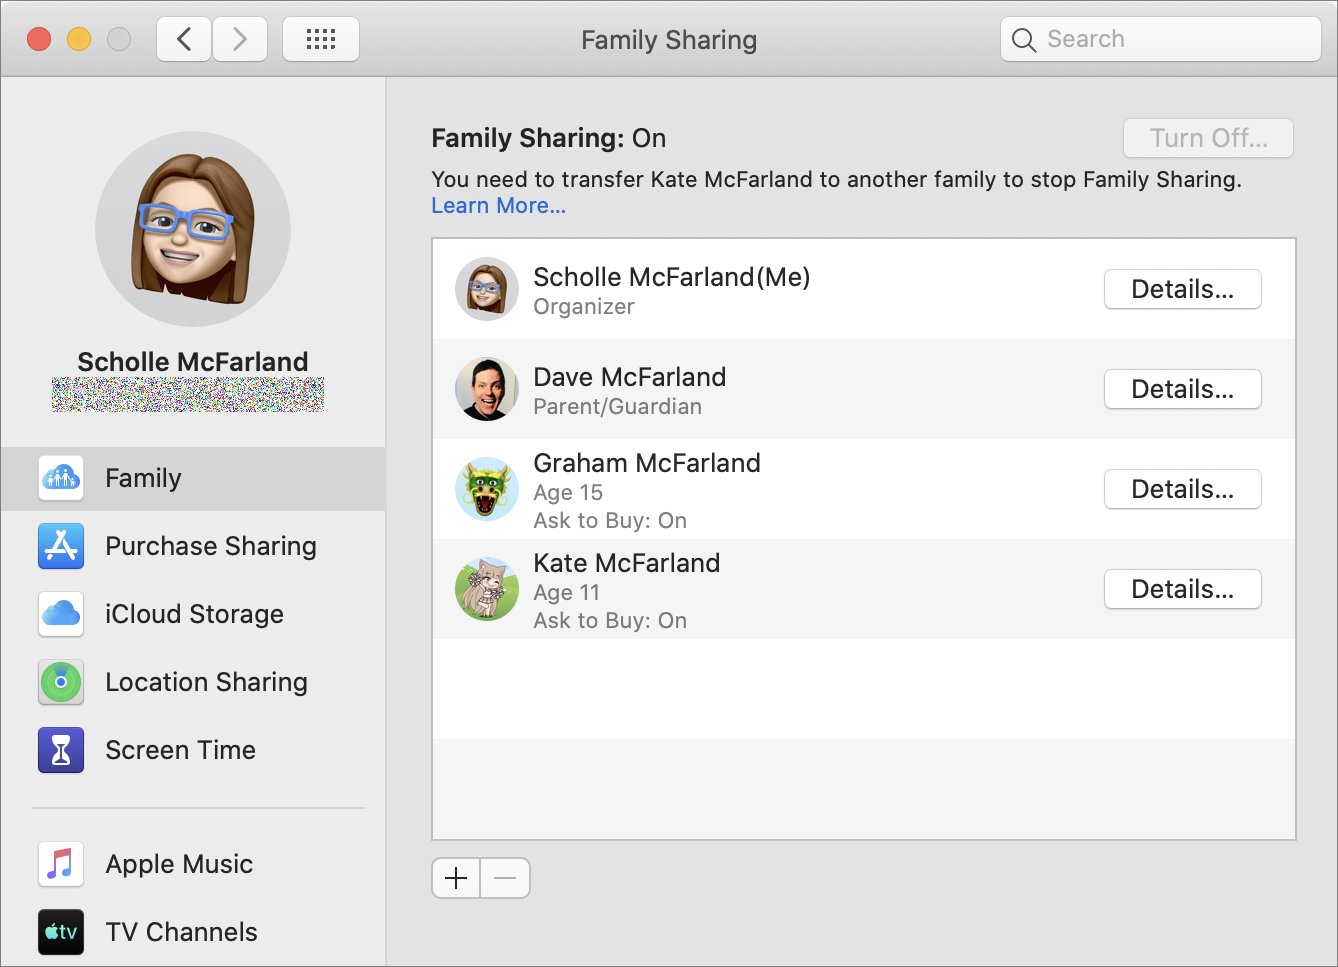
Once you’ve established your family, you make changes to settings and manage shared resources from the Family Sharing pane. Your sharing options are organized by category in the sidebar (Figure 100).
See Family Members’ Status
Select Family to see a list of everyone who belongs to the group. Each family member’s status is summarized under their name. For instance, they might be labeled Adult, Parent/Guardian, or (in your case) Organizer. If any are children, their age appears under their name.
Click the Details button next to a name for more options. If the person is an adult (but not the organizer), you see their account name and email address. If you want them to be able to approve purchases and Screen Time requests from child members, select the Parent/Guardian checkbox.
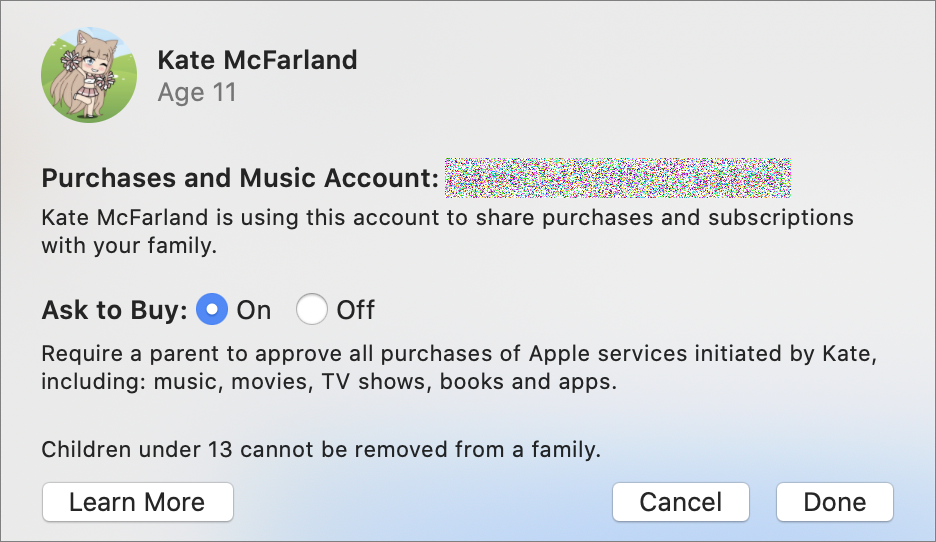
If the family member is a child, you’ll see basics like their account name, age, and what iCloud address they use to make purchases. Toggle the “Ask to Buy” radio button to On if you want to approve their purchases, including free downloads (Figure 101).
Share Apps and More
One of the most convenient Family Sharing features is purchase sharing. If you choose to turn this feature on, when one family member buys an album, movie, TV show, book, or app, everyone has the option to download and use it.
Click Edit next to your account name to switch to a different Apple ID. (You’ll need the password to confirm.) Check or uncheck the Share My Purchases box, depending on how altruistic you feel. Update the Shared Payment Method by clicking Edit.
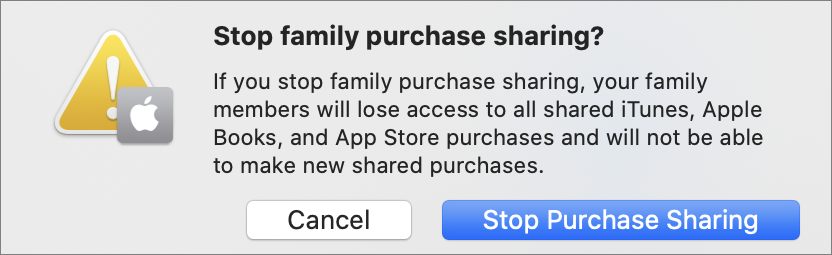
If you want to cut off your family members’ ability to make purchase and share past purchases, click the Turn Off button at the bottom of the window. A warning appears (Figure 102). Click Stop Purchase Sharing to continue.
Share an iCloud Storage Plan
All iCloud users get 5 GB of storage free, but if family members start using iCloud in earnest to store files and digital media, they might find themselves running out of space. Luckily, members can share an upgraded storage plan. Select iCloud Storage in the sidebar to see details.
To upgrade your storage plan, click the Change button. You’ll see your current plan as well as any available plans that offer more storage, along with their price. Only the 200 GB and 2 TB plans can be shared. Select the one you want and then click Next.
Enter your Apple ID password and click Buy to finalize the purchase. To share a plan, click the Share button. The window shows a list of family members next to how much storage they’re using.
To stop sharing iCloud storage, click the Turn Off button at the bottom of the window.
Share Everyone’s Location
Location sharing makes it easy to see where family members are. After Activating Siri, ask Siri “Where’s Dave?” or check the Find My app. It also makes it possible for family members to help find each other’s lost devices.
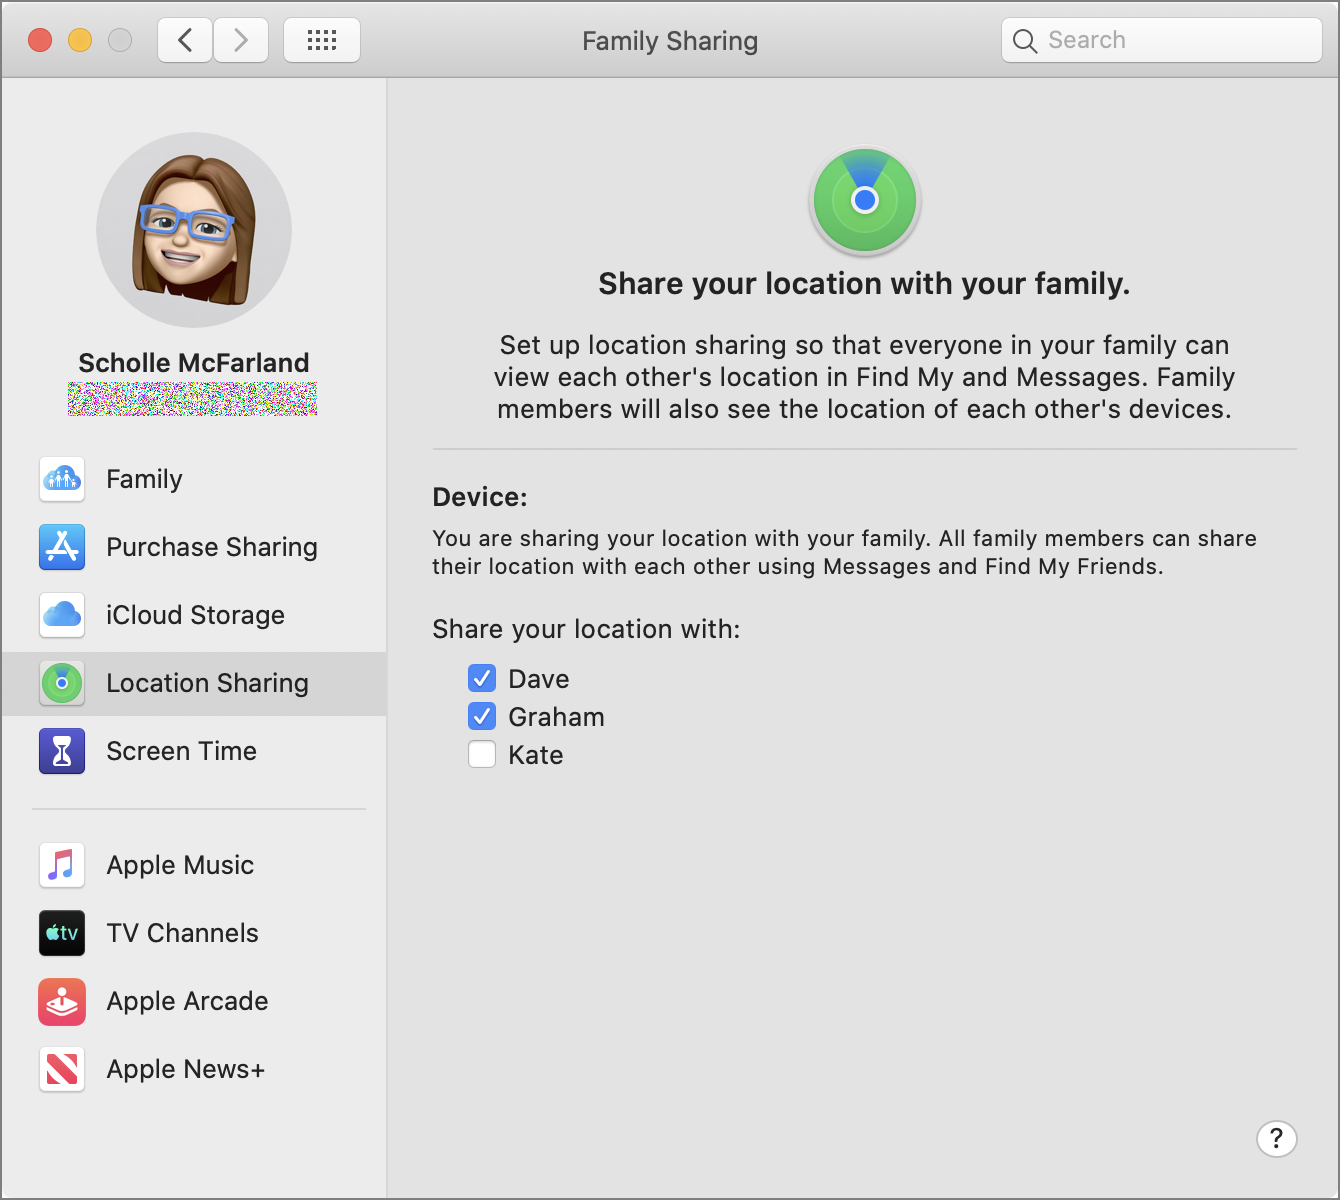
When you create a Family Sharing group, members are asked if they’d like to share their location with each other. But what if you don’t want the twins to know where you are, say, when you’re out shopping for their birthday presents? Check or uncheck the box next to one or more members’ names to temporarily change settings (Figure 103).
Check Screen Time Settings
Catalina brings Screen Time, introduced in iOS 12, to the Mac and updates it with more robust parental controls: reporting how much time kids spend across their devices and in different apps, letting you set time limits for certain apps, and giving you the option to screen out explicit content. You can also schedule downtime.
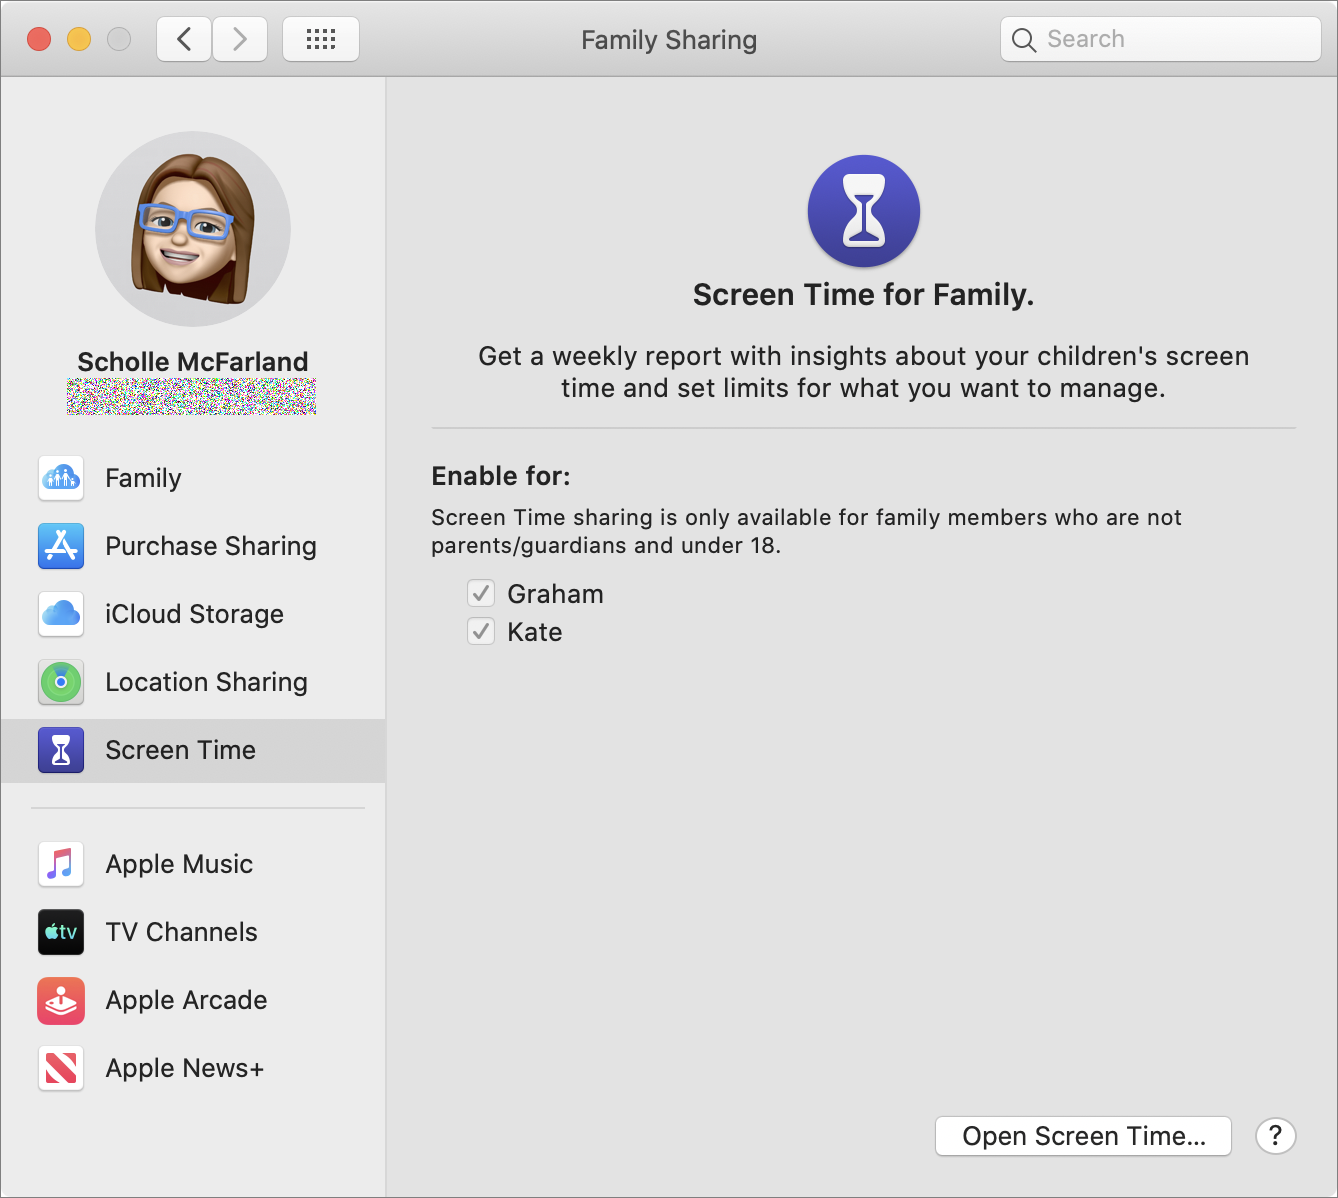
Select Screen Time in the sidebar to see which children are affected by restrictions (Figure 104). You can enable Screen Time only for family members under the age of 18.
Click the Open Screen Time button to get everything set up.
Share More Services with the Family
Family Sharing simplifies the process of sharing more than just the iCloud Storage service. Other Apple services appear at the bottom of the sidebar:
Apple Music: Apple’s streaming service lets subscribers tap into a huge catalog of tunes and music videos. That means you can listen to almost any song you might think of on a whim, from Taylor Swift’s “You Need to Calm Down” to “Summertime” by DJ Jazzy Jeff & The Fresh Prince to Dolly Parton’s “Jolene.” To check on the status of your family’s Apple Music subscription, select Apple Music in the sidebar (Figure 105). If you don’t have a Family plan membership, click the “Start a Free Trial” button to get one. Note that you don’t have to be the family organizer to share a Family Apple Music subscription with your group.
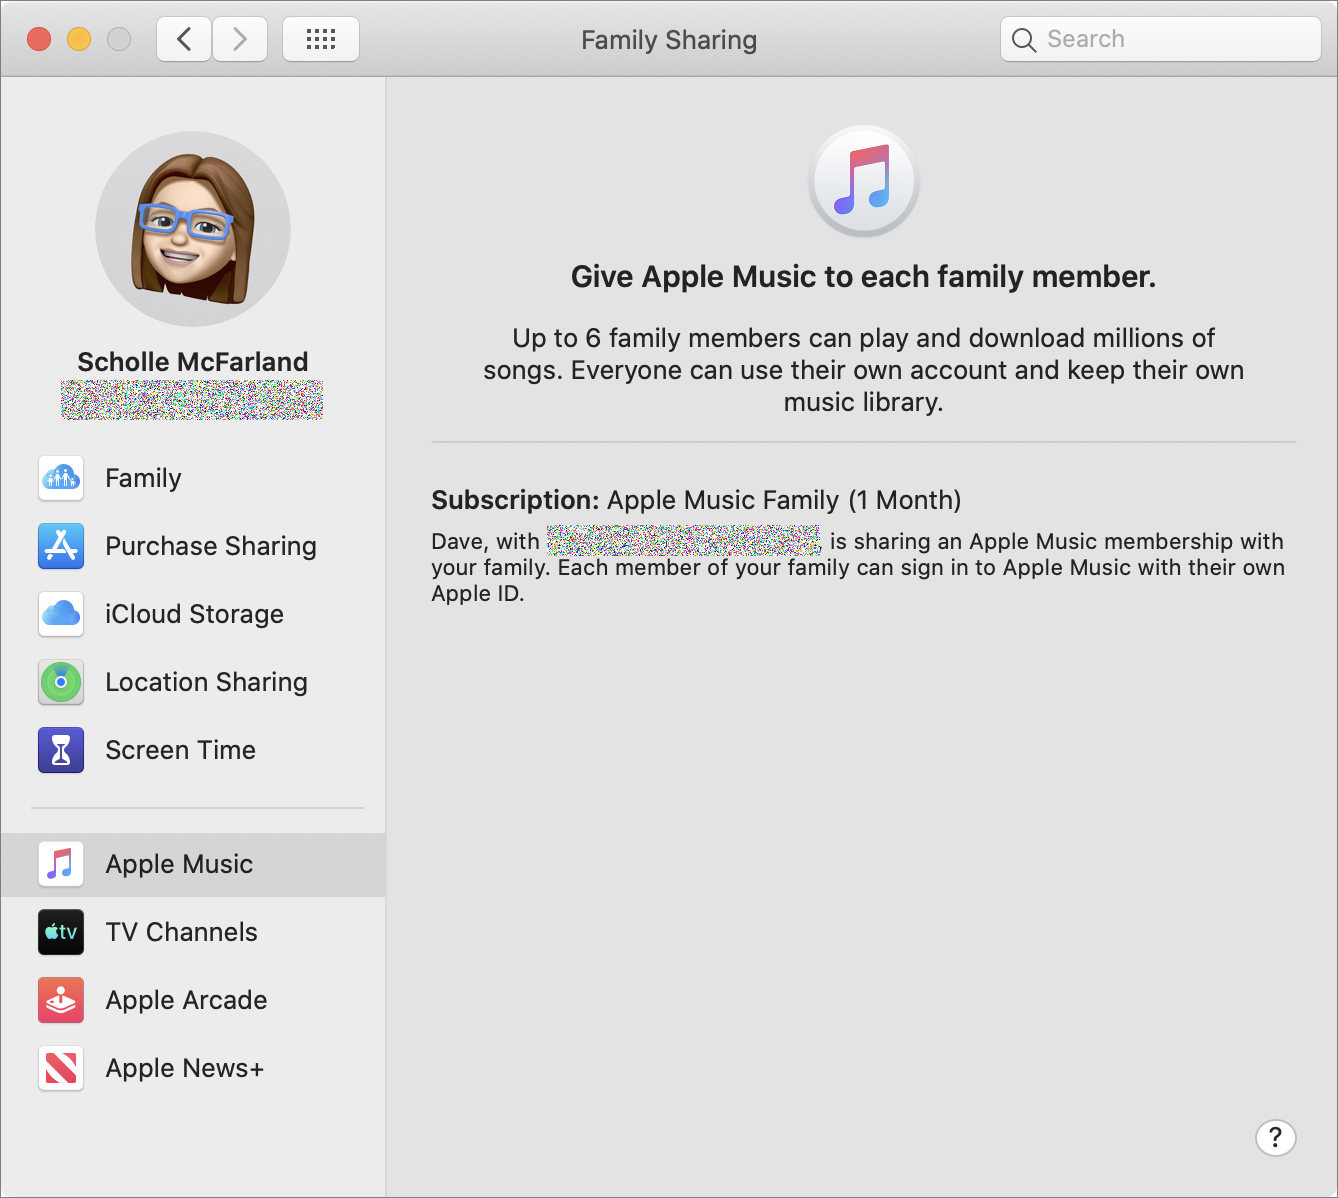
Figure 105: The whole group can share an Apple Music Family Plan. Note that the family organizer does not need to be the subscription holder. TV Channels: Using the new TV app, you can subscribe to particular channels (like HBO or CBS All Access) without downloading extra apps; your subscriptions are available to the whole family group. You can stream content from each channel on up to 3 devices at the same time. Pricing varies by channel. To keep track of your subscriptions, select TV Channels in the sidebar.
Apple Arcade: This new service from Apple brings a curated selection of more than 100 exclusive games to your iPhone, iPad, Mac, and Apple TV for a monthly fee. You can jump in between your Apple devices and play offline. There are no in-app purchases or advertisements; a monthly subscription is $4.99. Try the first month for free—or the first year for free with the purchase of a new iPhone, iPad, Mac, or Apple TV. To see the status of your family subscription, select Apple Arcade in the sidebar.
Apple News+: A $10 per month subscription to Apple News+ gives you and your family members access to 300 magazines and newspapers, including People, Vogue, Rolling Stone, Sports Illustrated, Wired, National Geographic Magazine, The Wall Street Journal, the Los Angeles Times, and more. To see the status of your family subscription, select Apple News+ in the sidebar. (Sign up in the News app.)
Stop Family Sharing
The family organizer can stop Family Sharing by removing themselves from the group. (Things gets more complicated if there’s a family member under the age of 13. See Transfer a Child to Another Family.) Choose Apple > System Preferences > Family Sharing. Select Family in the sidebar, select your name in the list, and click the Remove ![]() button.
button.
When you stop Family Sharing, here’s what happens:
Other family members’ purchases no longer appear in the Purchased section of the iTunes Store, App Store, or Books Store.
Copy-protected music, movies, TV shows, books, and apps purchased by one family member and downloaded by others become unavailable to anyone but the original purchaser.
Family members lose access to services the family shared, such as an Apple Music family subscription or iCloud storage, unless they purchased the service themselves.
If you downloaded an app another family member bought and then made in-app purchases for it, you must buy the app yourself to access them.
You can no longer use Find My to find (former) family members’ devices.
Transfer a Child to Another Family
If one of your family members is younger than 13, you’ll need to transfer them to another family group before you can stop Family Sharing. To learn why, see Parent Supervision Required.
To do so, you need to ask another family organizer to invite them to their group. When they do, you’ll get a notification. Approve the move, and the child switches to the other group.