
Discover Stage Manager
When Ventura was announced, one of the new features that got the most attention and press coverage was Stage Manager, which Apple clearly feels is a revolutionary new way to manage windows. Turn it on, and files on your desktop disappear, while the frontmost app moves to the center of the screen, and all other apps shrink to thumbnails on the side of your screen, with multiple windows grouped by app (only the five most recent apps are shown). You can bring back other windows (or groups of windows) with a click, and you can customize Stage Manager in various ways to meet your needs.
I’ve been using Stage Manager for a while now, and although I don’t exactly hate it, it seems to me to be a solution to a problem I didn’t have—or, rather, an eleventh solution to a problem I already had ten other adequate ways to solve. If your problem is too much window clutter, you already had many ways to deal with that (besides closing the window or quitting the app)—see Do You Really Need Stage Manager? a bit later.
All those existing features are still around, but Stage Manager gives you yet another way to manage your windows. It also works on iPads with M-series chips. You should try it out, because it may “click” for you in ways that it didn’t for me. But if you find it sort of “meh,” it’s also easy to ignore.
Enable and Use Stage Manager
You can enable Stage Manager in any of three ways. Click the Control Center ![]() icon on your menu bar and then click Stage Manager, click the Stage Manager
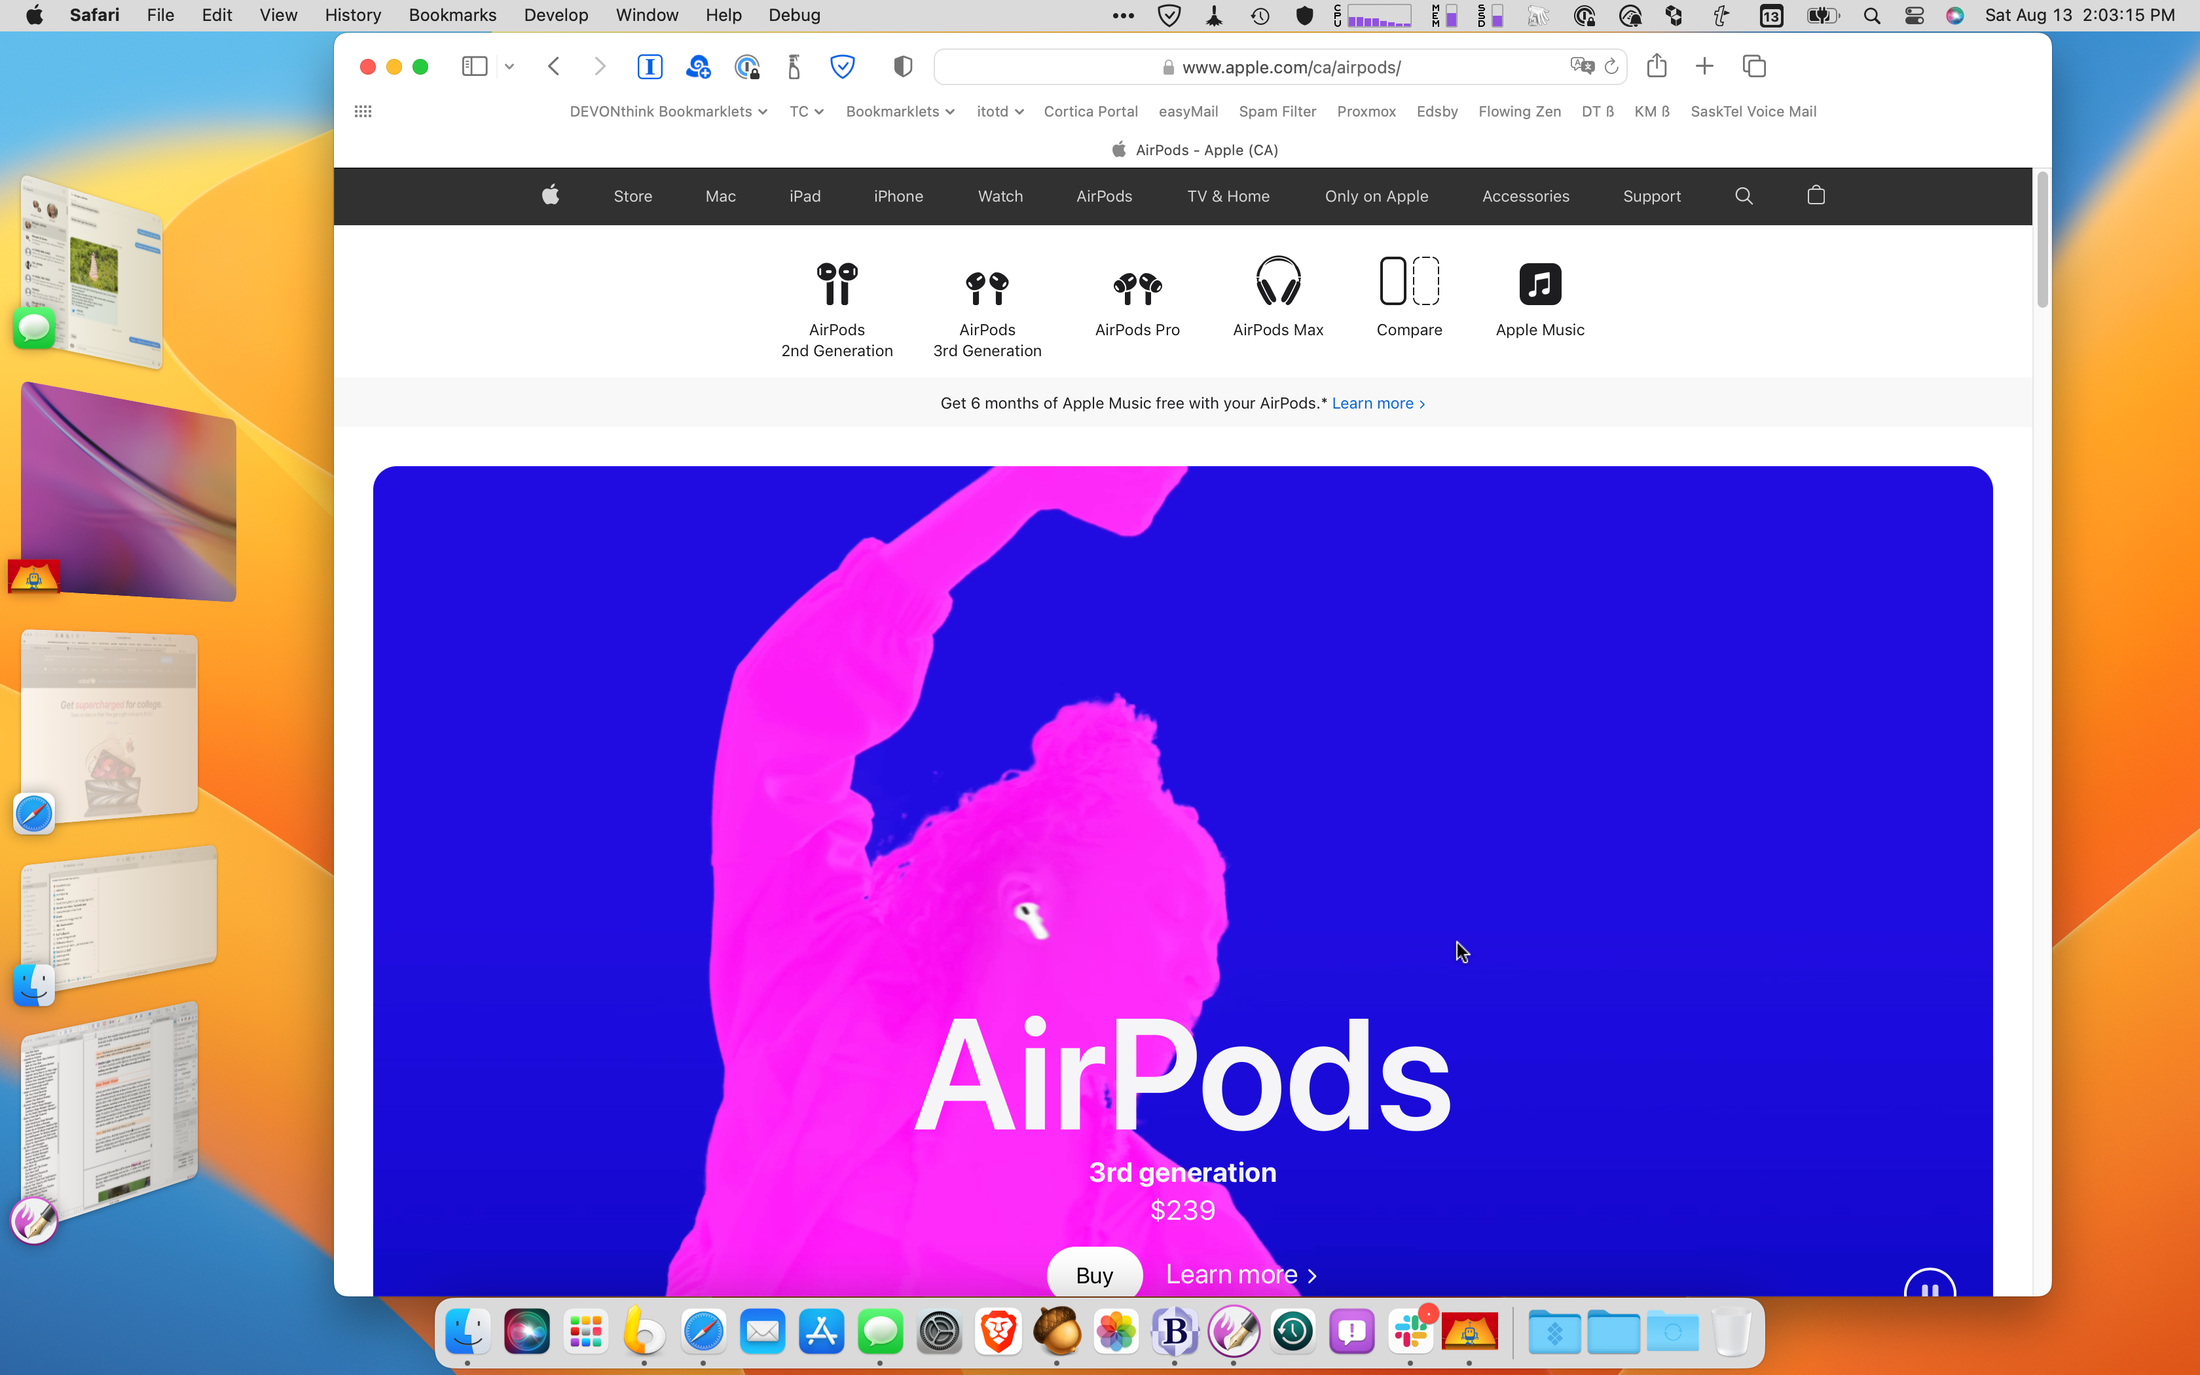
icon on your menu bar and then click Stage Manager, click the Stage Manager ![]() icon on the menu bar and turn on the switch, or go to System Settings > Desktop & Dock and turn on Stage Manager there. Surprisingly, you can’t (yet?) assign a keyboard shortcut to toggling Stage Manager on and off, nor does it appear as Hot Corner option in System Settings > Desktop & Dock. In any case, when you enable Stage Manager, your screen rearranges itself with the thumbnails on the left and your current window centered on the screen (Figure 19). Apple refers to the portion of the screen to the right of the thumbnails as the canvas.
icon on the menu bar and turn on the switch, or go to System Settings > Desktop & Dock and turn on Stage Manager there. Surprisingly, you can’t (yet?) assign a keyboard shortcut to toggling Stage Manager on and off, nor does it appear as Hot Corner option in System Settings > Desktop & Dock. In any case, when you enable Stage Manager, your screen rearranges itself with the thumbnails on the left and your current window centered on the screen (Figure 19). Apple refers to the portion of the screen to the right of the thumbnails as the canvas.
Once in this mode, you can do everything you normally would—move and resize windows, minimize windows to the Dock, hide apps, use Mission Control and Spaces, switch to full-screen or split-screen mode, and so on. But, as long as there’s enough space, those thumbnails keep floating on the left. Click any thumbnail to bring that item to the center, and turn your current window into a thumbnail. If an app to the side has multiple windows in a stack and you don’t want the top one, click the app icon to expand the stack to find the one you want.
If you move or resize the frontmost window so that it covers most of the thumbnails, they slide out of the way and disappear. Move your pointer all the way to the left side of the screen to bring them back, and they float over your frontmost window.
Most of us find it useful, at least some of the time, to be able to see windows from two or more apps at once. And at first glance, it isn’t obvious how to do that with Stage Manager active. But it’s easy to create an ad hoc group of windows (even from different apps) once you know the trick. Bring one of those windows to the foreground and then drag the thumbnail of the next window into the center of the screen. Repeat as desired; those windows will stick together as a unit as long as they remain open or until you drag one back to the left side.
And what about all those files and folders that used to be on your desktop and are now hidden? To bring them back, just click anywhere on the desktop, and your current app slides off to the side. Click the desktop again to bring the most recent back, or click any other thumbnail to switch to that window or group.
To turn Stage Manager off, click the Control Center ![]() icon on your menu bar, click Stage Manager, and then click the on/off switch. Or, go back to System Settings > Desktop & Dock and turn off Stage Manager there. If you disable and then re-enable Stage Manager, your previous groupings reappear, as long as the windows are still open.
icon on your menu bar, click Stage Manager, and then click the on/off switch. Or, go back to System Settings > Desktop & Dock and turn off Stage Manager there. If you disable and then re-enable Stage Manager, your previous groupings reappear, as long as the windows are still open.
Configure Stage Manager Options
What I’ve described so far is how Stage Manager works by default, but in fact there are a few settings you can adjust to suit your needs. You can do so by going to System Settings > Desktop & Dock and clicking the Customize button next to Stage Manager (Figure 20).
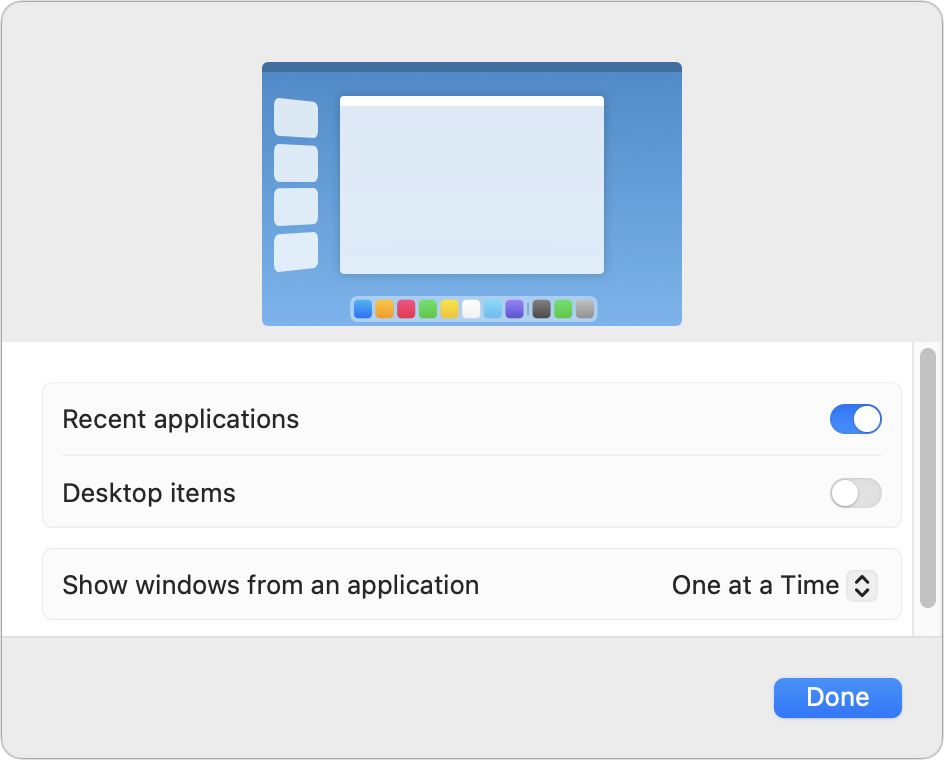
The options, which are reflected in the image at the top of the dialog, are:
Recent applications: This setting refers to the thumbnails of your recent apps that appear on the left side of your screen. If you want to hide them until needed, you can turn this switch off. That gives you more horizontal screen space, but if you move your pointer all the way to the left edge, they reappear, floating on top of your frontmost window. Move your pointer away to hide them again.
Desktop items: Desktop items are hidden by default, but if you’d rather keep them visible even when Stage Manager is in use, click the on/off switch.
Show windows from an application: With One at a Time (the default setting), only a single window from each app appears when you click its thumbnail; you can click again to see a different window from that app. With All at Once chosen, clicking an app’s thumbnail brings all its windows to the front.
Do You Really Need Stage Manager?
macOS has no shortage of ways to arrange things on your screen, and if you’re anything like me, you’ve already forgotten half of the fancy techniques that were the new cool thing in some previous version of the operating system. So I thought it would be worth a quick reminder. After all, Stage Manger won’t suit everyone’s way of doing things, and if you feel like it isn’t quite your thing, you still have many other options.
I wasn’t kidding about there being (at least!) ten existing ways to handle window clutter in macOS besides Stage Manager. Off the top of my head:
Manually resize and/or move a window.
Minimize a window to the Dock (choose Window > Minimize, press ⌘-M, or click the yellow
 button).
Switch to full-screen mode, blocking all other windows and apps (click the green
 button; menu commands and keyboard shortcuts vary by app)
Use split-screen mode, which is just like full-screen mode but with two apps side by side (Choose Window > Tile Window to Left of Screen or Tile Window to Right of Screen, and then click another window).
Hide the frontmost app and all its windows (application menu > Hide App Name, or press ⌘-H)—or hide everything except the frontmost app (application menu > Hide Others, or press ⌘-Option-H).
Put groups of windows or apps in different Spaces (activate Mission Control with F9 or a trackpad gesture, click the + icon at the top of the screen to create a new space, and drag windows to different spaces).
Use Mission Control to temporarily separate all the windows in your current Space so you can see what’s where (F9 or a trackpad gesture—swipe up with three fingers by default).
Use App Exposé to show only the windows from the frontmost app and thumbnails of the most recent documents from that app (F10 or a trackpad gesture—swipe down with three fingers by default).
Slide all windows out of the way to show just your desktop (F11 or a trackpad gesture—spread out with thumb and three fingers).
Use any of numerous third-party window management apps.