
Get a Better Webcam with Continuity Camera
Continuity Camera is the name of a set of features that, since macOS Mojave and iOS 12, have allowed you to use your iPhone to insert photos into documents you’re creating on your Mac, or “scan” pages (with macOS programmatically straightening out the images). In Ventura, Continuity Camera gets another feature: your iPhone can function as a live webcam for video calls with FaceTime, Zoom, Skype, and other apps.
Most Macs have built-in webcams (or “FaceTime cameras,” as Apple dubs them). But even the nicest built-in camera is not nearly as good as what you’ll find on any recent iPhone. iPhone cameras have much higher resolution, better low-light performance, and sometimes a much wider field of view. So by using your iPhone’s camera to send a video feed to your Mac, you can significantly improve the way you look while chatting, videoconferencing, giving presentations, or whatever else you might do with live video. Plus, your iPhone’s camera can do neat tricks like keeping you centered in the frame as you move around and sharing a view of your physical desktop.
To use this feature, you’ll need an iPhone XR or later running at least iOS 16. (Sorry, this feature doesn’t work with iPads.) It can connect wirelessly or with a cable, but a cable will help to extend your iPhone’s battery life—an important consideration, since video capture can drain the battery faster than usual.
Position Your iPhone
To use your iPhone as a webcam, you’ll want some way to mount it so that the screen is facing away from you and the back camera(s), which are thus facing you, sit just above and behind your Mac’s display. Belkin offers a special mount for just this purpose that clips onto the top of your display and features a MagSafe connector for your phone. Alternatively, you can use a tabletop tripod, gooseneck mount, or other bracket to hold your phone in place. But remember that most mounts with MagSafe connector assume the screen will be facing you, so be sure to get one that lets you position your phone the other way around.
Use Continuity Camera
No setup is required to use Continuity Camera as a webcam, but you can turn the feature off if you prefer. To confirm that it’s on when you need it, go to Settings > General > AirPlay & Handoff. If Continuity Camera Webcam is turned on, you’re ready to go; if not, turn it on.
When you’re ready to use it, open a video app (such as FaceTime or Zoom) and bring your iPhone close to your Mac if it’s not already there. Within a few seconds, the video app may automatically recognize your iPhone’s camera and begin using it; if not, go to the Video menu (or wherever you choose the camera source within the app) and choose your iPhone.
Your iPhone’s microphone is also available to be used as an audio source in video calls. Once again, it may be selected automatically, but if not and you want to use it, go to the Video menu (or wherever you choose the audio input within the app) and choose your iPhone.
Add Video Effects
While using Continuity Camera as a webcam, you can optionally enable three effects to enhance your image. Click the Control Center ![]() icon on your menu bar and then click Video Effects. A view appears (Figure 40), showing your iPhone’s battery level and enabling you to turn several effects on or off.
icon on your menu bar and then click Video Effects. A view appears (Figure 40), showing your iPhone’s battery level and enabling you to turn several effects on or off.

Choose any or all of the following:
Portrait mode: This mode gently blurs the background, keeping only your body in sharp focus.
Center Stage: This feature, which requires an iPhone 11 or later, keeps your face roughly centered within the frame even as you move from side to side. Center Stage can also compensate for an off-center camera.
Studio Light: The Studio Light feature, which requires an iPhone 12 or later, simulates studio lights by dimming the background and making your face brighter. This effect can make poorly lit spaces look more professional.
Use Desk View
A final, and rather impressive, trick in Continuity Camera is to share a view of the physical desktop in front of your Mac, as if you had positioned a camera directly overhead, pointing down at your desk. If you need to show video of physical objects (for example, showing visual aids to students, teaching a card trick, or demonstrating how to do a complex multi-finger gesture on an iPad), Desk View may be just the ticket. It employs your iPhone’s Ultra Wide camera plus some sophisticated image processing to make it appear as though the angle of view is different by about 90°. And, all the while Desk View is active, your face can also be visible (as it’s captured by a different camera).
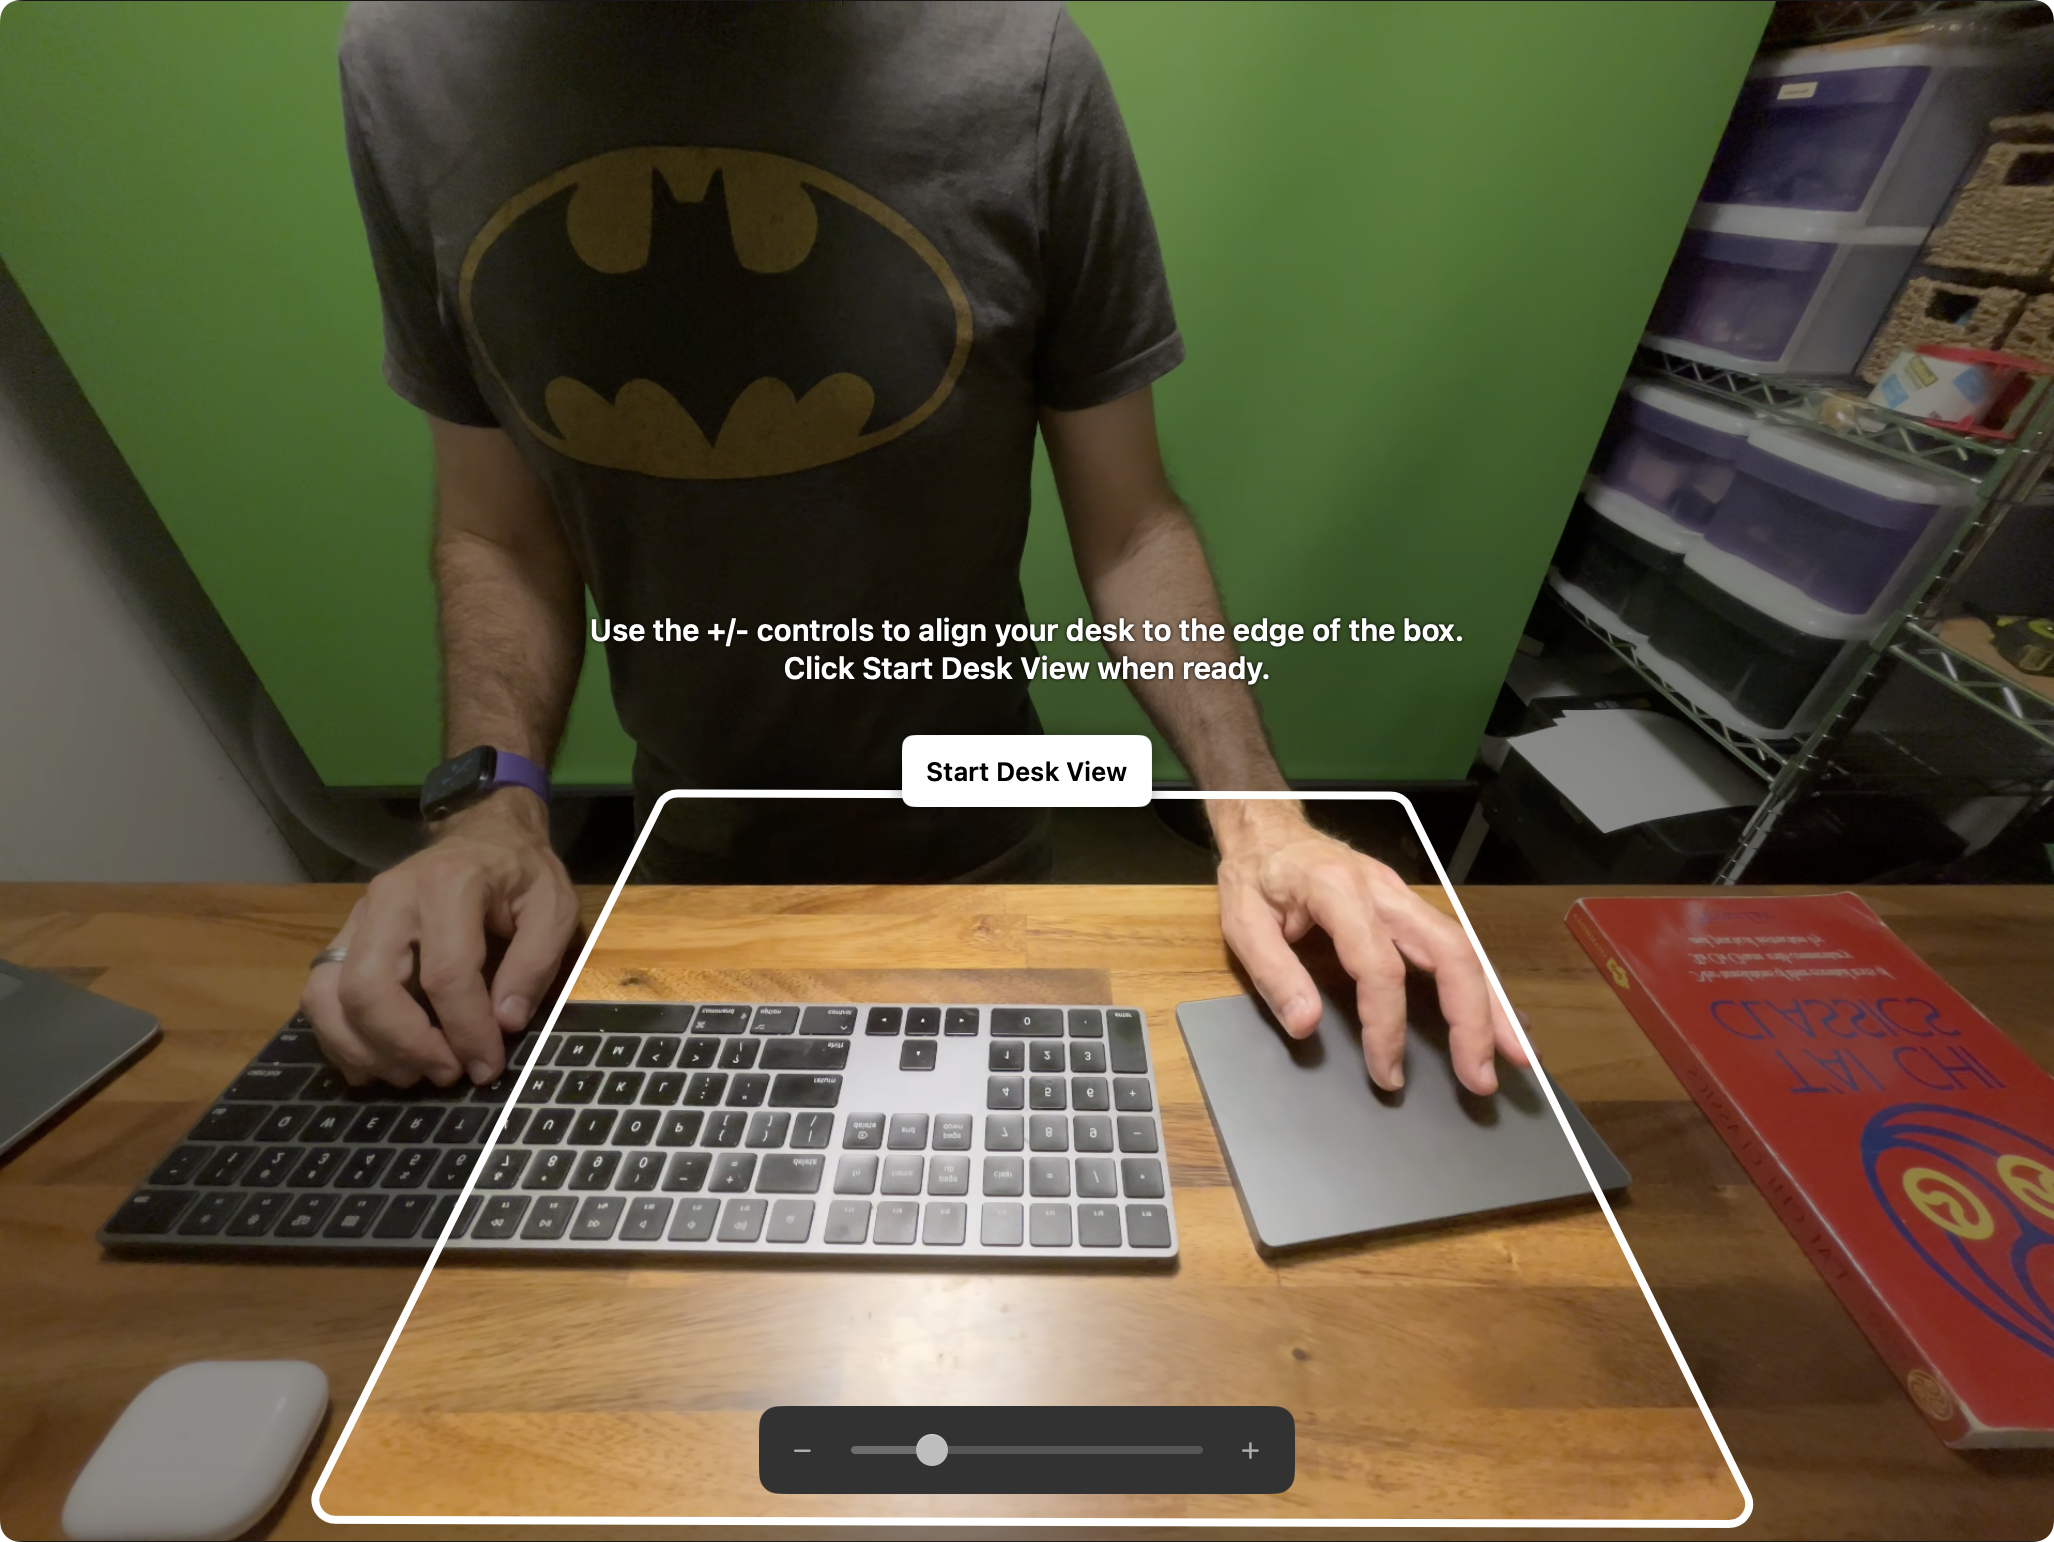
To use Desk View, click the Control Center ![]() icon on your menu bar, click Video Effects, and click Desk View. (The first time you enable this feature, a dialog pops up to tell you what it does. Click Continue to dismiss the dialog.) The new Desk View app opens, initially displaying an overview of the area that will be shown (Figure 41). Adjust your iPhone’s angle if necessary, and use the –/+ slider to change the size of the area. When you’re happy with the area to be shown, click Start Desk View.
icon on your menu bar, click Video Effects, and click Desk View. (The first time you enable this feature, a dialog pops up to tell you what it does. Click Continue to dismiss the dialog.) The new Desk View app opens, initially displaying an overview of the area that will be shown (Figure 41). Adjust your iPhone’s angle if necessary, and use the –/+ slider to change the size of the area. When you’re happy with the area to be shown, click Start Desk View.
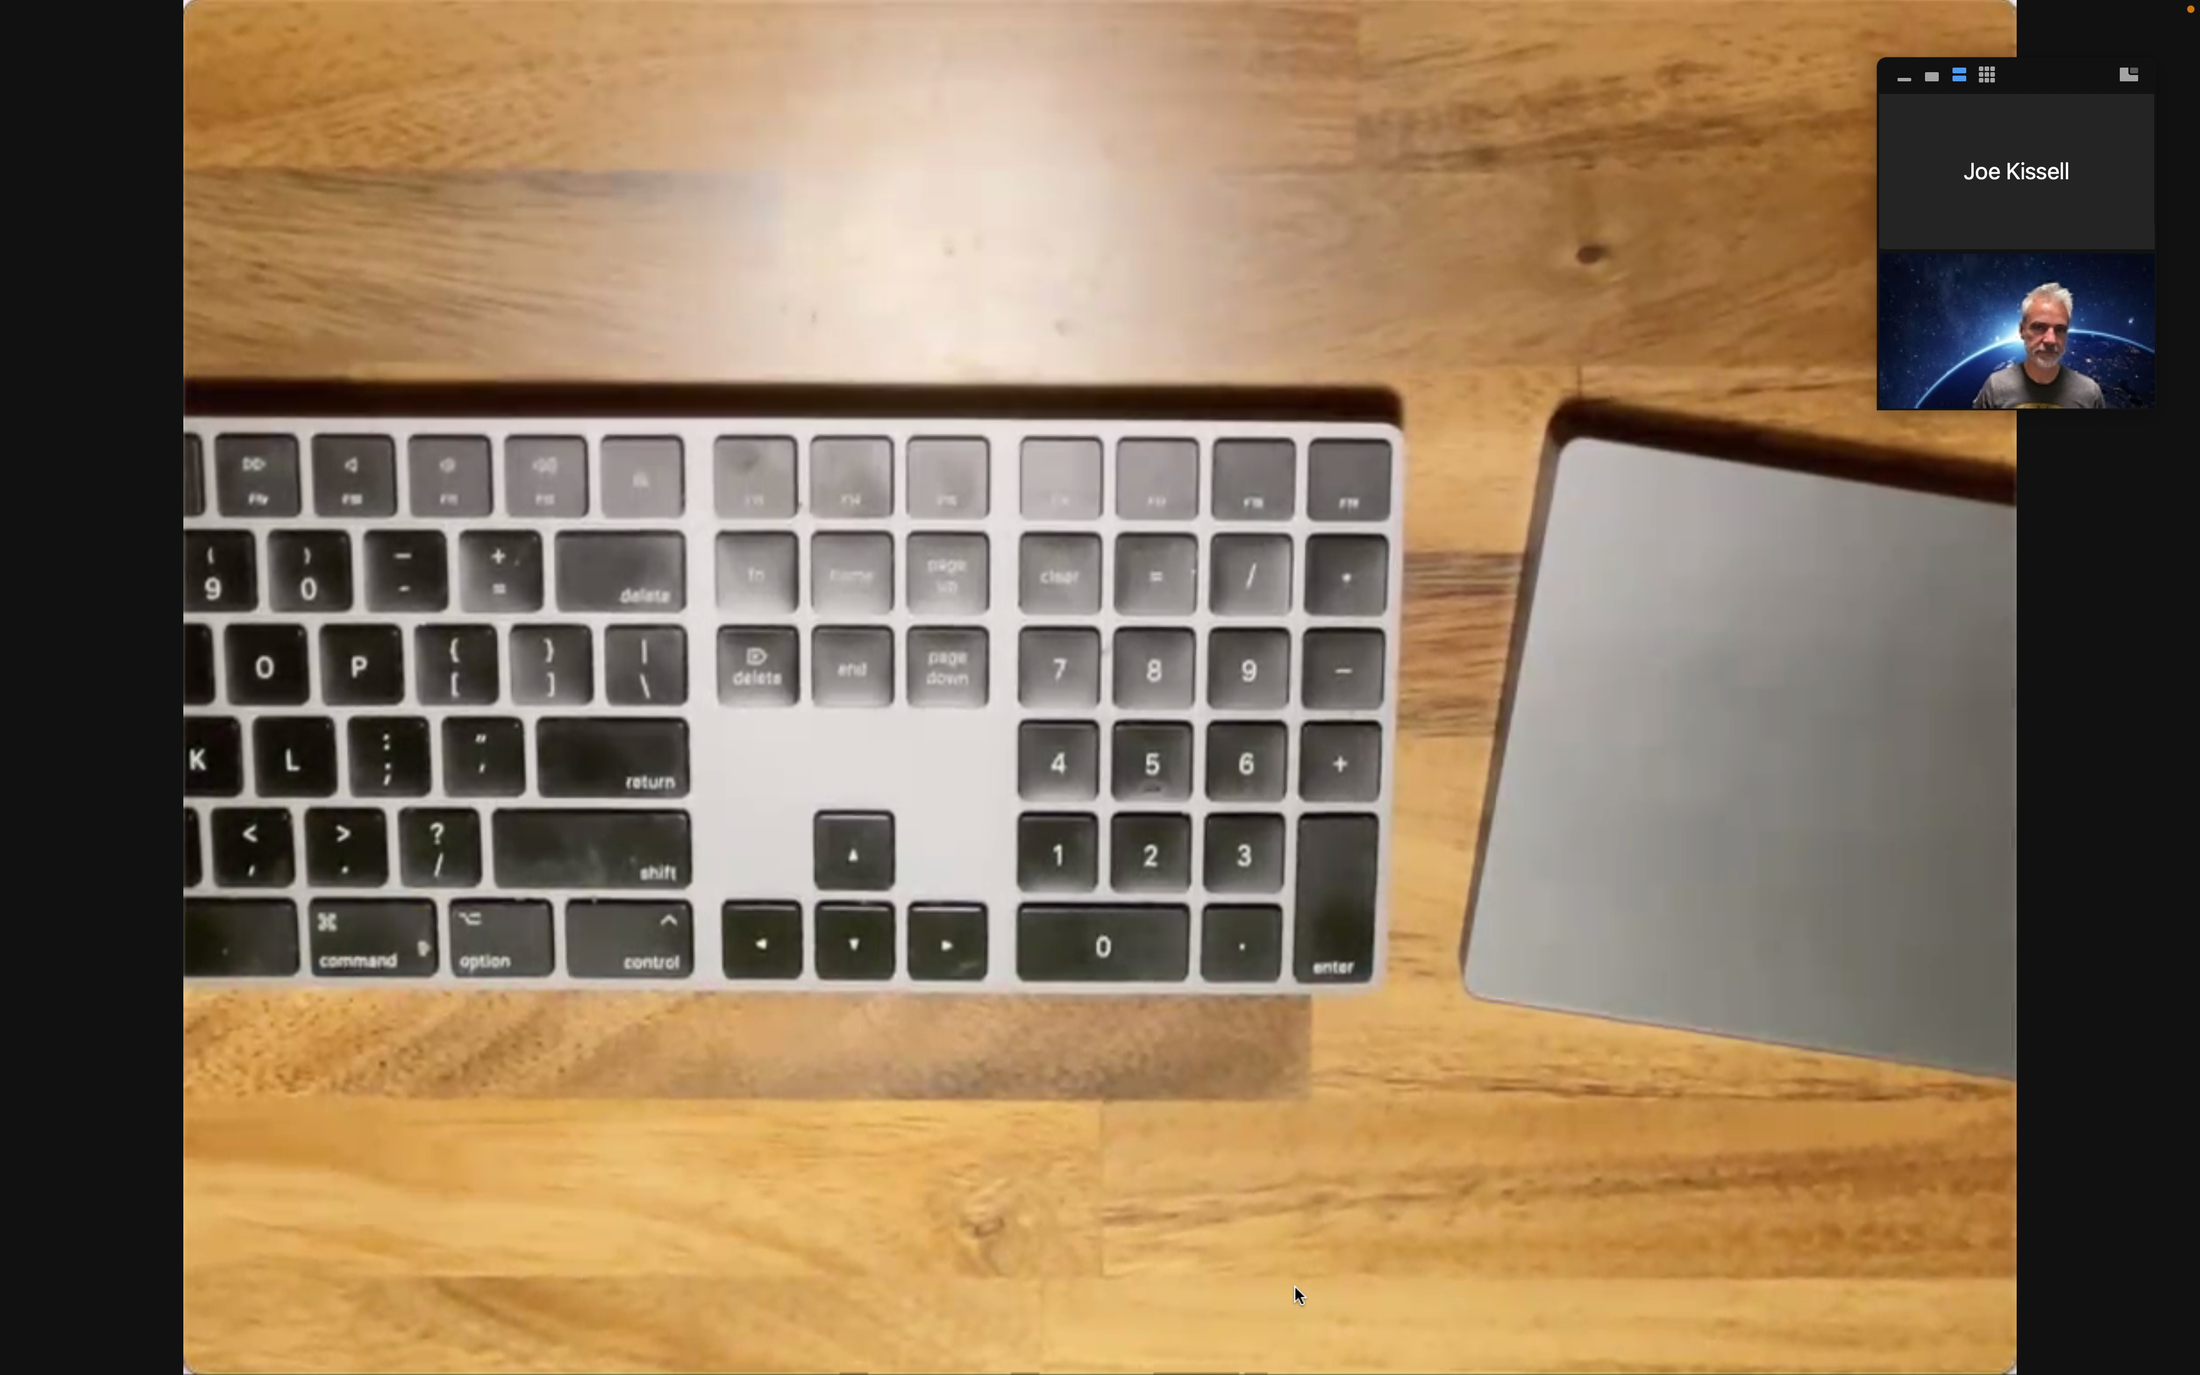
Now the Desk View app is showing a view of your desktop, but that view isn’t automatically sent to FaceTime or whatever other video app you’re using. To do that, share your screen (or, more specifically, share the Desk View window). Then, depending on the app you’re using and what view the other participants have chosen, they may see something like Figure 42.
You can stop sharing your screen at any time to prevent the view of your desktop from being shared. To leave Desk View entirely, choose Desk View > Quit Desk View (⌘-Q).