10
Google Cloud Integration
In this last chapter of our journey, we will take a look at how to integrate Terraform with specific Google Cloud services. In particular, we show how to use Cloud Build, Google Cloud’s Continuous Integration/Continuous Delivery (CI/CD) service, to provision infrastructure using Terraform and build a service catalog that uses Terraform for its solution. We will then conclude with a feature of Google Cloud currently still in preview mode, which helps you import existing resources into Google Cloud but is also a great learning resource.
In this chapter, we will cover the following main topics:
- Using Terraform with Cloud Build
- Building a service catalog with Terraform solutions
- Importing and exporting Terraform resources
Technical requirements
This chapter has no special technical requirements, although general knowledge of CI/CD pipelines, and especially Cloud Build, is helpful. The code for this chapter is at https://github.com/PacktPublishing/Terraform-for-Google-Cloud-Essential-Guide/tree/main/chap10.
Using Terraform with Cloud Build
Note
The code for this section is under the chap10/cloudbuild directory in the GitHub repository of this book.
Cloud Build is Google Cloud’s CI/CD platform. It is considered to be a serverless service, as we don’t have to provision or manage any servers to utilize it. This makes it an ideal platform to run Terraform, particularly as you grow your team and your deployments become more complex.
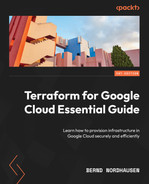
To start using Cloud Build, you must first configure it by enabling the Cloud Build API and setting the appropriate service account permission. Cloud Build uses a Google Cloud service account with an email address of <PROJECT-NUMBER>@cloudbuild.gserviceaccount.com. We can enable the necessary IAM permission at https://console.cloud.google.com/cloud-build/settings/service-account, or if we require additional IAM roles, we can set them in the IAM section. For our example, we only need the Compute Engine permission, as shown in Figure 10.1:
Figure 10.1 – Cloud Build Settings
We define the steps for Cloud Build in a configuration file. The basic workflow of Terraform in a CI/CD workflow is the same as it is on the CLI with some minor adjustments to ensure a smooth flow. First, we explicitly run the Terraform plan step and save the plan in a file. Second, we run apply for Terraform using the saved plan file as an argument. The primary reason for separating the plan and apply steps is so that Cloud Build terminates if the plan has any errors and does not attempt the final apply step. We also attach the -auto-approve flag to skip the interactive approval step, and add the -input=false flag so that Terraform does not ask for any input of variables that are not set. We can also include a check of tflint and abort the pipeline if it doesn’t pass.
Thus, our workflow is as follows:
$ terraform init -input=false
$ tflint --init
$ tflint
$ terraform plan -input=false -out=tfplan
$ terraform apply -auto-approve -input=false tfplan
Cloud Build uses a configuration file that provides the instructions for the pipeline (https://cloud.google.com/build/docs/overview#build_configuration_and_build_steps). The configuration file format is either YAML or JSON, but we generally use YAML format, as it is easier to edit. A configuration file consists of a number of build steps executed in sequence. Each build step has several fields that define the details of the step. Cloud Build uses Docker under the hood, so we specify the Docker image to be pulled using the name field and specify the arguments passed to the Docker container using the args field. We can pass parameters in our configurations using the substitution block. For example, we can pass the Terraform version as an argument to Cloud Build with a default value or on the command line. Thus, our basic Cloud Build configuration is shown as follows:
chap10/cloudbuild/cloudbuild.yaml
steps:
- id: 'terraform init'
  name: 'hashicorp/terraform:${_TERRAFORM_VERSION}'
  args:
  - 'init'
  - '-input=false'
- id: 'tflint init'
  name: 'ghcr.io/terraform-linters/tflint-bundle'
  args:
  - '--init'
- id: 'tflint'
  name: 'ghcr.io/terraform-linters/tflint-bundle'
- id: 'terraform plan'
  name: 'hashicorp/terraform:${_TERRAFORM_VERSION}'
  args:
  - 'plan'
  - '-input=false'
  - '-out=tfplan'
- id: 'terraform apply'
  name: 'hashicorp/terraform:${_TERRAFORM_VERSION}'
  args:
  - 'apply'
  - '-auto-approve'
  - '-input=false'
  - 'tfplan'
substitutions:
  _TERRAFORM_VERSION: 1.3.0
Once we have defined the cloudbuild.yaml file, we can now run cloudbuild directly from the command line as follows:
$ gcloud builds submit
Cloud Build creates a temporary tarball which is a tar archive file of the current directory, uploads it into Cloud Storage, and then executes the build steps as defined in the configuration file. We can observe the progress on the command line, but a better way to see the details is to check under the History tab of the Cloud Build console as shown in Figure 10.2. If we click on the Build ID, we see the details of each step and what, if anything, went wrong. For example, we can change the machine type in terraform.tfvars to an incorrect value and rerun the build. We see that tflint catches the error and does not proceed to the plan and apply steps:

Figure 10.2 – Cloud Build console
Note
To reduce the size of the tarball, we can specify the files to be excluded in the .gcloudignore file, which is similar to a .gitignore file.
To make Cloud Build a truly continuous CI/CD pipeline, that is, to start a build process automatically rather than calling it from the CLI, we need to set up a trigger. A trigger automatically starts a build as soon as we check our code into a source code repository. To know more details to set up a trigger and link to different source code systems, such as GitHub or BitBucket, refer to the documentation at https://cloud.google.com/build/docs/triggers.
Building a service catalog with Terraform solutions
Note
A Google Cloud organization is required to create a service catalog. See Creating and managing organizations (https://cloud.google.com/resource-manager/docs/creating-managing-organization) for how to create an organization.
A service catalog enables IT organizations to offer approved services to an enterprise. Google Cloud provides a service catalog as a managed service to offer cloud services using a self-service model, which is one of the essential characteristics of cloud computing (https://bigdatawg.nist.gov/_uploadfiles/M0006_v1_3333767255.pdf).
That is, a user can browse a service catalog, pick from a list of service offerings, and then provision the required resources. Behind the scenes, we use Terraform to provision the solution, so the end user does not need to know the details of Terraform and uses an easy-to-use web interface to fill out any configuration details. The service catalog solution hides the complexity and ensures that the solution adheres to security and compliance policies. For example, Figure 10.3 shows an example of a service catalog that lets users provision a server using different operating systems.

Figure 10.3 – Service Catalog
After selecting the solution, the user fills in the configuration details for the particular solution, as shown in Figure 10.4, and clicks on the Preview and Deploy button to deploy the solution:

Figure 10.4 – Service Catalog deployment
We use the Service Catalog Admin console to define a service catalog and assign the solutions to be offered in the service catalog. We first create the appropriate Terraform configuration files to add a Terraform solution. The configuration should not define a remote backend or variable definitions. That is, it should not include backend.tf or terraform.tfvars files. The service catalog manages the remote backends for each actual deployment. As shown in Figure 10.4, all the declared variables are presented as parameters to fill in when the solution is given to the user, so we should include a good description and default value for each variable. This is where variable mapping, as introduced in Chapter 4, Writing Reusable Code Using Modules, comes in handy, as it can hide some of the complexity from the end user. For example, the user will likely only care about the general size of the machine instead of the actual machine type.
Once, we have defined the Terraform configuration, we need to combine all the files into a single zip file, and upload it to a Google Cloud Storage bucket. Please note that this bucket needs to have versioning enabled.
Once the Terraform config is uploaded, we can add the solution, as shown in Figure 10.5:

Figure 10.5 – Terraform solution
The service catalog uses Cloud Build to execute service catalog deployments. It handles all the details, such as constructing the Cloud Build configuration files and managing the states for the actual deployments. You can share a service catalog across multiple projects within (or even outside of) your organization. Users can then easily deploy solutions provided by a Terraform configuration. They also can change the deployment by changing the machine size, or they can destroy the deployment.
Importing and exporting Terraform resources
Note
The code for this section is under the chap10/import-export directory in the GitHub repository of this book. We recommend that you create a new project for this exercise.
In Chapter 2, Exploring Terraform, we discussed the concept of configuration drift: changes made outside of Terraform. Once we start using Terraform, we should not use the web console or gcloud to manage cloud inafrastructure resources. However, what do we do when there is an existing cloud resource we want to manage using Terraform?
Terraform provides the capability to import existing infrastructure resources. What this means is that we can bring existing resources into the realm of Terraform by using the command terraform import (learn more about it from here – https://developer.hashicorp.com/terraform/cli/import). However, this is often easier said than done. We should resort to importing existing resources only as a last option because bringing an existing cloud resource into the realm of your Terraform configuration is essentially a reverse engineering process. terraform import is only the first step of this process.
Let us demonstrate this. For this exercise, we start with a fresh Google Cloud project. First, we create a virtual machine through the web console or gcloud, shown as follows:
$ gcloud services enable cloudasset.googleapis.com
$ gcloud compute instances create myinstance
--zone=us-central1-a
Now, if we look at the Terraform state file, it is empty, as we created this virtual machine outside of Terraform.
To import an existing resource, we need two items. First, we must create a skeleton resource definition of the item we want to import. In our case, this is a google_compute_instance. Thus, we need to create a file shown as follows:
chap10/import-export/import.tf
resource "google_compute_instance" "myinstance" {
}
Second, we need to know the ID of the resource to be imported. In our case, we want the ID of the compute instance named myinstance. In Google Cloud, the syntax of IDs varies from cloud resource to resource. The specifics of the format can be found at https://cloud.google.com/iam/docs/full-resource-names. For a compute engine, the full resource name is //compute.googleapis.com/projects/project-id/zones/zone/instances/instance-id, so we can import the virtual machine with the following command:
$ terraform init
$ terraform import google_compute_instance.myinstance
//compute.googleapis.com/projects/<PROJECT-ID>/zones/us-central1-a/instances/myinstance
Now, the virtual machine is in the state file and hence in the realm of Terraform. Therefore, if we run terraform state list, we can see the resource.
However, we do not have a usable configuration file. If we run terraform plan, we get a number of error messages because the configuration file for myinstance is incomplete. This is where the reverse engineering process starts. We need to fill in all the required attributes and ensure they are consistent with the state file. This often becomes an iterative process – fill in attributes, run terraform plan, and repeat the process until Terraform reports no errors and detects no changes. At this point, the configuration file is consistent with our current state file. This process is tedious, particularly when we want to import multiple resources.
Google Cloud export
Google Cloud introduced a new feature that lets you export Google Cloud resources directly in the Terraform format. You can learn about this more here – https://cloud.google.com/docs/terraform/resource-management/export.
Note
As of writing this chapter (November 2022), this feature was only available in preview, meaning it can change without any notice.
To start using the feature, we need to enable the cloudasset API and install the Config Connector CLI:
$ gcloud services enable cloudasset.googleapis.com
$ gcloud components install config-connector
This feature is useful in more ways than one. First, by exporting a resource into the Terraform format, it creates a ready-to-use Terraform configuration file. Thus, we can create a compliant Terraform configuration by running the following command:
$ gcloud beta resource-config bulk-export
  --resource-types=ComputeInstance
  --project=<PROJECT-ID>
  --resource-format=terraform > import.tf
When we run terraform plan, Terraform reports no errors and no changes. However, once we have a look at the input.tf file, we see that the configuration is not quite ready to use. Many of the values in the configuration file are fully qualified resource names. Furthermore, if we run terraform destroy and terraform plan again, Terraform reports several errors. Thus, edits are still required before the configuration file becomes truly usable. For example, we want to remove any spurious attributes and replace many fully qualified values with variables.
Therefore, the Google Cloud export feature is useful when for bringing resources into the realm of Terraform. However, this feature is handy in another way. Terraform syntax can sometimes be confusing, especially when you are new to Terraform. While the documentation is good and often includes examples, it cannot show all variations. However, with the export feature, we can generate our own examples. We can create a cloud resource using the web console and then generate a fully compliant Terraform configuration file. The web console is easy to use, as all the options and features are clearly labeled.
For example, let’s say we want to create a storage bucket with versioning but are unsure of the exact syntax of the Terraform configuration, so we create a storage bucket using the web console. We set the maximum number of versions per object to 5, and the expiration of non-current versions to 30 days, as shown in Figure 10.6:

Figure 10.6 – Cloud Storage Bucket with versioning
We can then create the Terraform configuration file shown as follows to create an example of a compliant configuration:
$ gcloud beta resource-config bulk-export
  --resource-types=StorageBucket
  --project=<PROJECT_ID>
  --resource-format=terraform > bucket.tf
The file still requires some editing, but we now have an excellent example of how to create a bucket with versioning enabled, specify the maximum number of versions, and expire noncurrent versions.
This feature can also reveal some interesting aspects of Google Cloud. For example, you can provision a GKE cluster only using the default values and then export all resources in that project:
$ gcloud container clusters create-auto mycluster
--region=us-central1
$ gcloud beta resource-config bulk-export
--path=gkeout --project=<PROJECT_ID>
--resource-format=terraform
We can see a large number of Terraform files in various subdirectories. This reveals all the cloud resources that are created behind the scenes. For example, we can see the default node pool configuration and several GKE-specific firewall rules.
Please note that at the time of writing, the export feature does not support all Google Cloud resource types, but we hope that when this feature becomes generally available, most resource types will be supported.
So far, we have seen that, while technically possible, importing existing resources is an exercise of reverse engineering and should only be used as a last resort, particularly for multiple and complex resources. The unique Google Cloud export feature can help in this process, but the feature is actually more helpful as a learning resource.
Summary
The final chapter covered how to integrate Terraform into Google Cloud services. Cloud Build is Google Cloud’s CI/CD service and a great way to incorporate Terraform into a CI/CD pipeline. Service Catalog enables IT organizations to offer solutions built by Terraform to the enterprise while managing the distribution and ensuring compliance with internal security and compliance policies.
Lastly, we showed an interesting preview feature of Google Cloud to export existing resources directly into Terraform. This feature can be used to bring existing cloud resources under the control of Terraform as an absolute last resource. However, it can very useful as a learning tool.
Closing thoughts
Congratulations on making it to the end of this book! We hope you enjoyed the journey as much as we did guiding you. There is a reason Terraform is by far the most popular IAC tool. Terraform is powerful, yet it is easy to get started with. The workflow is straightforward, and the syntax is easy to understand. However, as is the case with any other tool, it takes time and experience to master Terraform. We encourage you to experiment. The beauty of Terraform is that it is as easy and fast to destroy cloud resources as it is to create them. Learn from others. Review the code of the modules in the Terraform Registry and the Google Terraform blueprints.
While each cloud provider has its own unique set of resources, the techniques and best practices are similar regardless of the provider, so study the best practices and apply what works for you.
The Terraform ecosystem is vibrant. New tools, both commercial and open source, appear all the time. Some of them are valuable, others not as much.
Lastly, consider getting certified. The Hashicorp Terraform Associate certification is a badge of honor and proves your proficiency in Terraform. The exam is provider-agnostic, and we have covered most of the topics included in the exam. We are confident that with a little bit of additional preparation, you will pass the exam and become a certified Terraform Associate.
And never stop learning!