
Introduction to Drawing Supplies
Learning to draw and paint is a combination of mastering techniques and using the correct materials. Understanding the basics can prevent a lot of frustration later.
Selecting Drawing Paper
Paper Texture
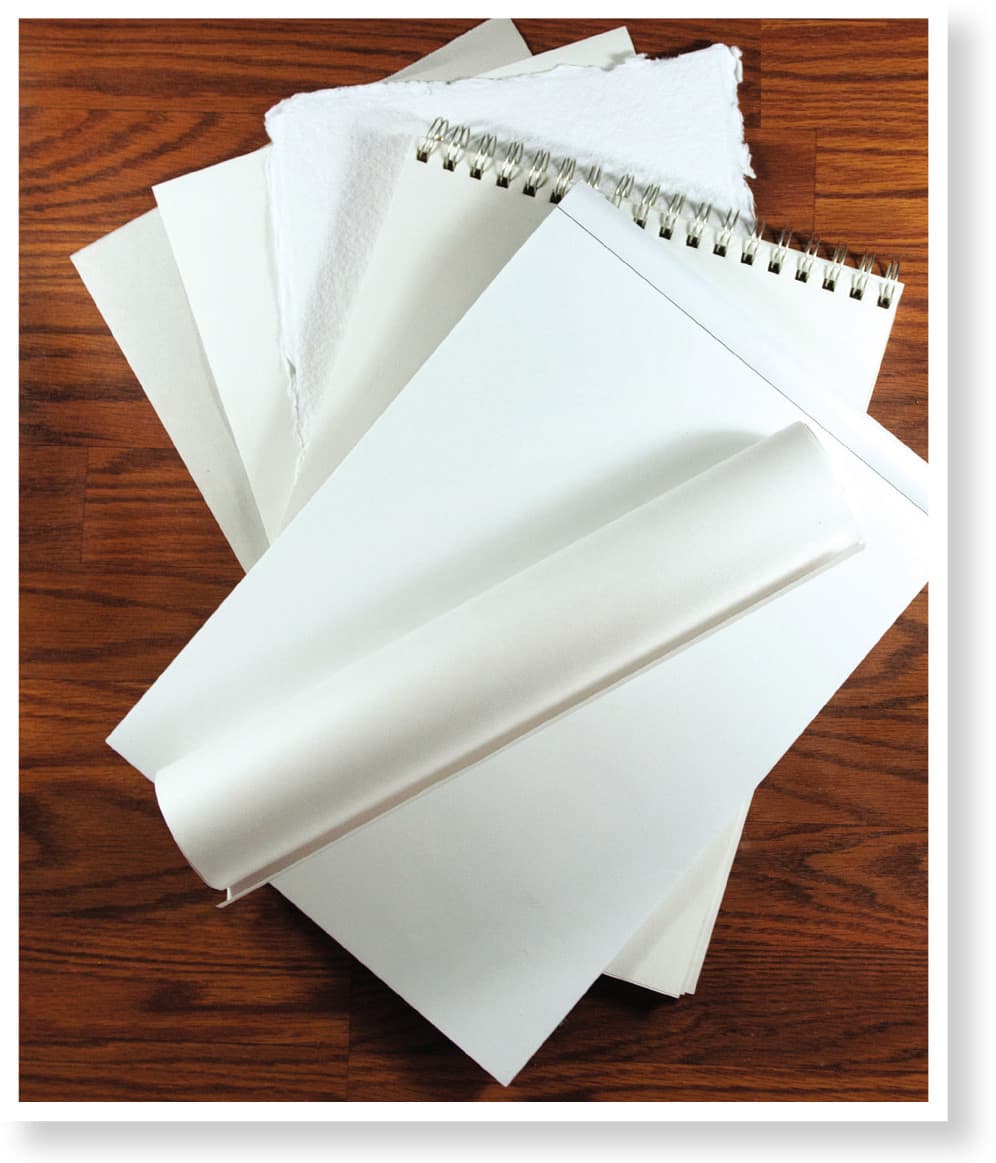
Drawing paper is one of the most important aspects for hassle-free drawing. To create a wide range of tone (areas of light to dark) in a drawing, artists build up graphite in layers. The surface of the paper must have a “tooth,” or texture. The tooth of the paper creates hills and valleys that collect graphite. As layers are applied to the paper, it becomes darker. If the paper is too smooth, the graphite has nowhere to settle into and simply sits on top. The paper saturates quickly, and the result is a flat, monochromatic appearance. When the paper has a moderate amount of tooth, the results are three-dimensional and detailed. A lot of tooth results in a rough drawing with minimal detail. Paper is also available recycled, bright white, natural, and colored. I prefer to work with Strathmore® drawing paper, medium-texture recycled.
Paper Thickness
All art papers, whether made for drawing, watercolor, colored pencil, or pastel, are classified by the thickness, or “weight,” of the paper. Below is a basic listing of how papers are categorized by weight and what they are best suited for.
Acid-Free
I recommend choosing, whenever possible, a paper that is listed as “acid-free” by the manufacturer. This kind of paper is made from cellulose pulp, which comes from wood, cotton, and other natural resources. Within the natural order of these plant-based materials, the pH level is on the acidic side. Acid breaks down paper over time, turning it yellow and disintegrating it. Acid-free papers have gone through a process that removes the acid. The paper is “neutralized” and is considered “archival,” which means it won’t yellow, disintegrate, or fade over time. This will protect your drawings for a very long time.
Tracing Papers
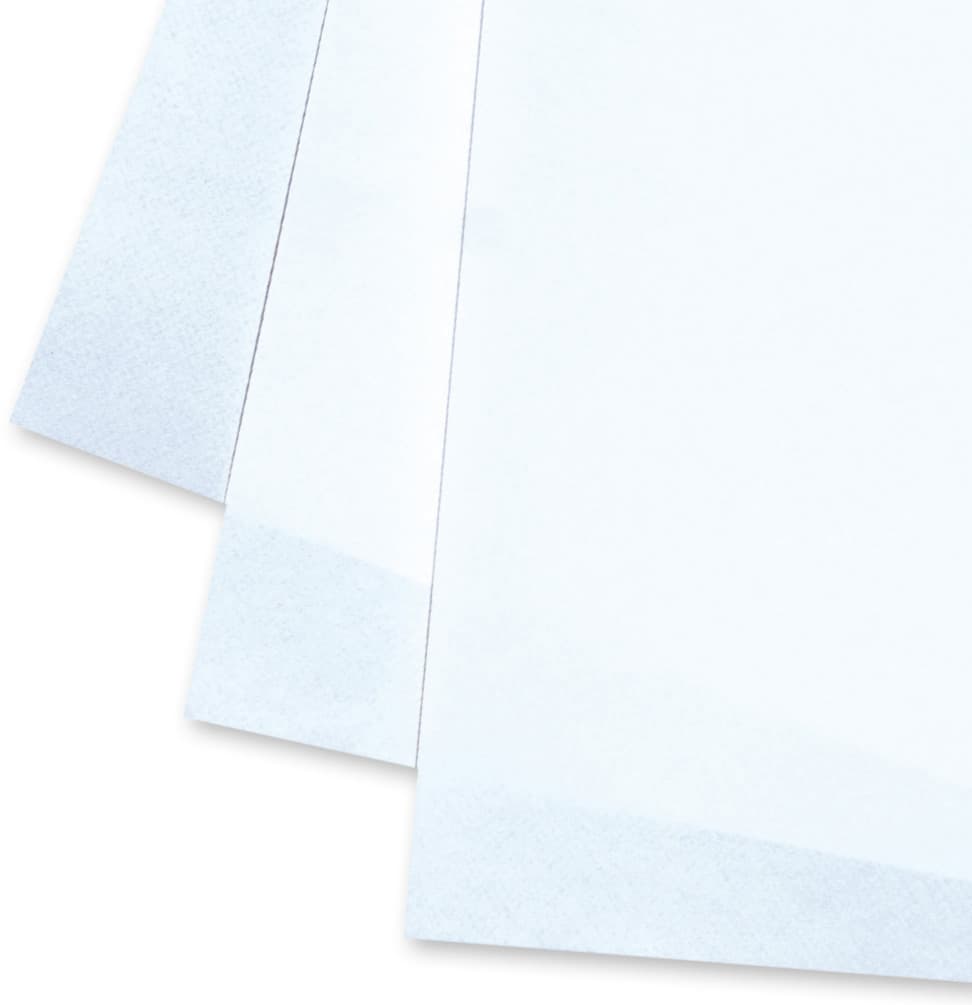
Tracing paper is an inexpensive, translucent paper. It yellows quickly, tears easily, and is usually not acid-free. Tracing vellum is a heavier-weight tracing paper that is often available acid-free. I prefer tracing vellum, but the cost may be prohibitive, since it is more expensive than tracing paper. I use tracing vellum to create my compositions, correct drawing errors, and protect paintings during and after the painting process. All my compositions are created and finalized in multiple “layers” on tracing vellum, and I save them in a folder as an archive of the elements of the painting. I can also reuse the drawings in future compositions.
Watercolor Papers
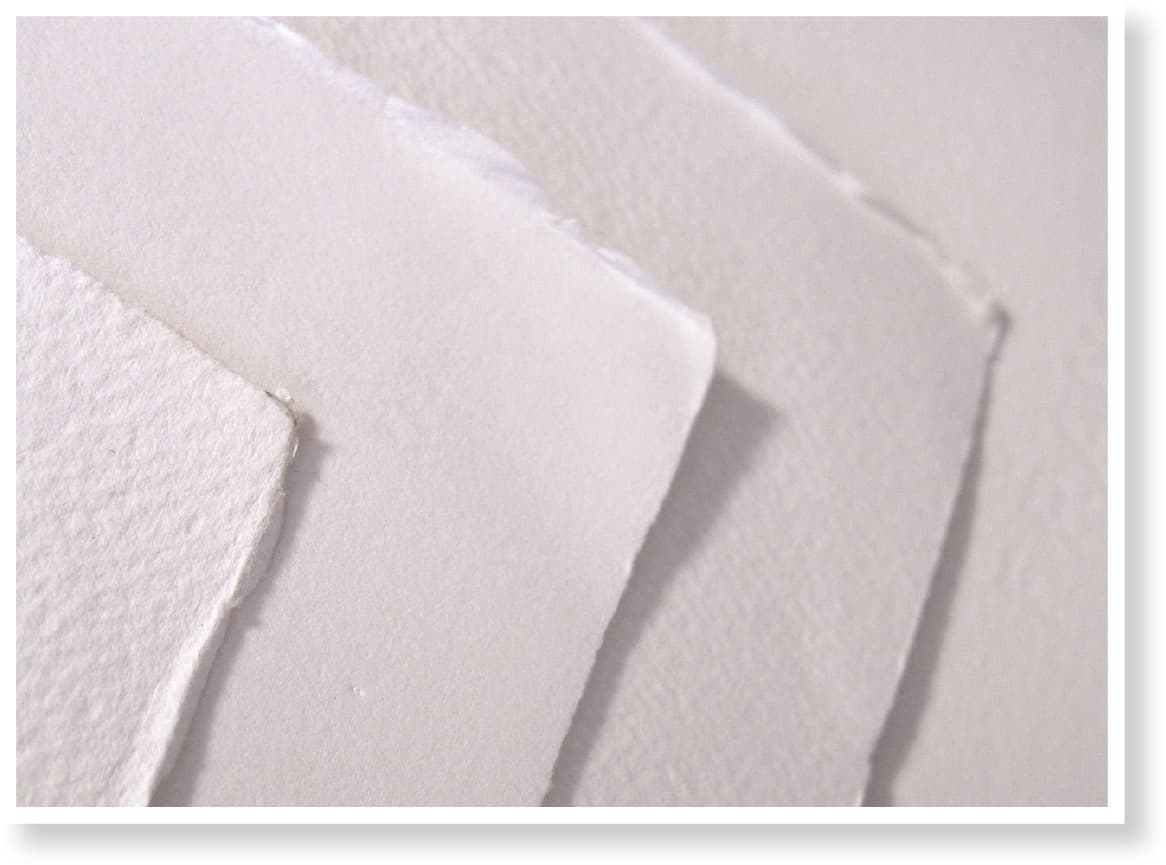
Watercolor paper is available in large sheets and blocks in different dimensions. There are three basic textures: hot-pressed, cold-pressed, and rough. Hot-pressed has the smoothest surface. Cold-pressed has a slightly bumpy texture. Rough, as the name implies, has the coarsest texture. The color of the paper can be white, off-white, or bright white. For beginners, I recommend cold-pressed, because it is easier to work on. Hot-pressed paper is more challenging, but the smooth surface allows for more details.
You can use watercolor paper for all mediums, not just watercolor. I use it with pencil, colored pencil, watercolor pencils, watercolor, gouache, and pastels. I prefer working on hot-pressed, 300-lb. paper, because it doesn’t warp or buckle. The heavier the paper, the more expensive it is. There are several online art supply retailers that offer trial packages of paper. This is an affordable way to purchase small quantities of paper to experiment with to find what works best for you.
Specialty Papers
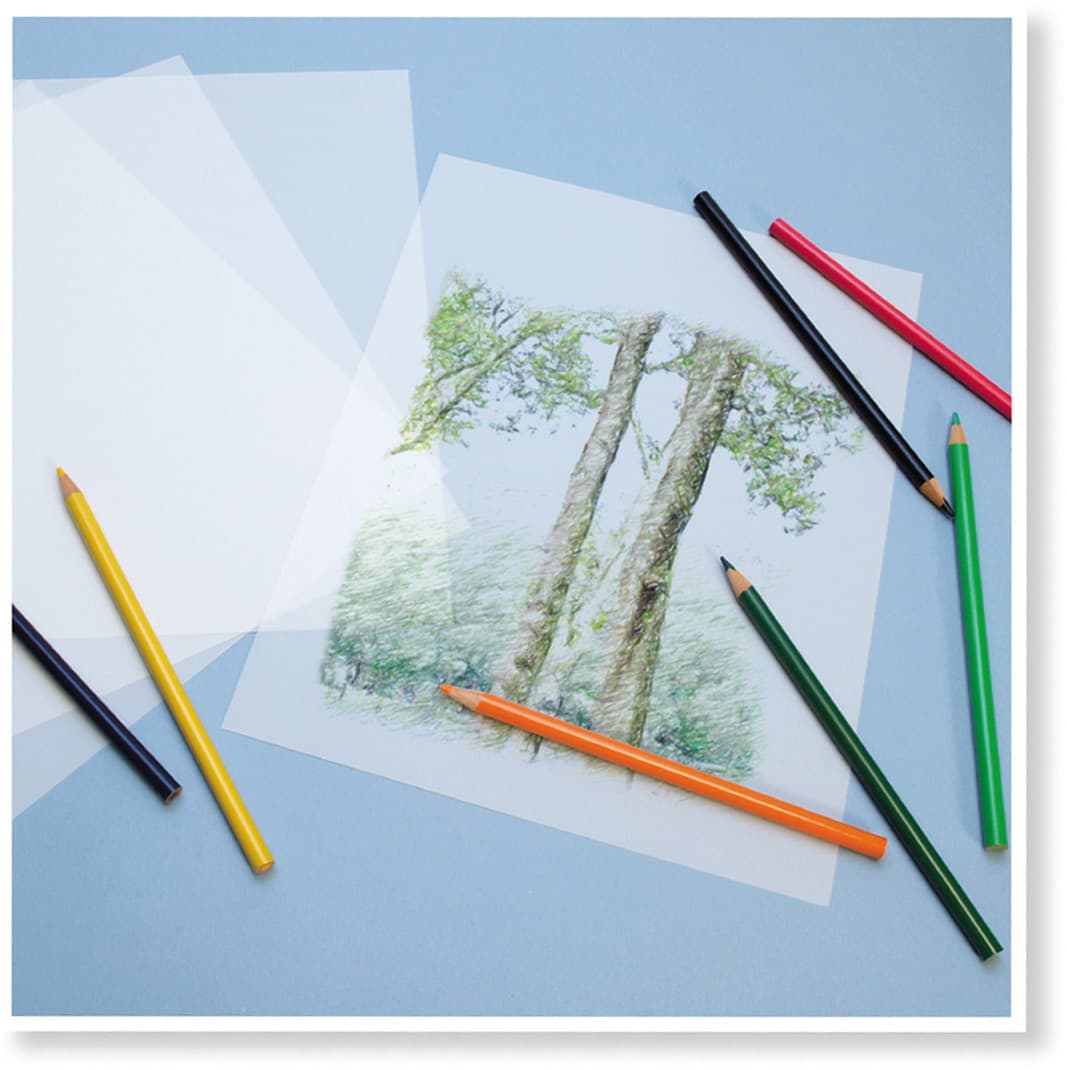
One of my favorite papers for use with colored pencil isn’t actually paper, but a type of plastic film called Mylar®. I like to work with Grafix® Dura-Lar® double-frosted Mylar. Grafix makes a variety of plastic “drafting” films, but my favorite is the 5-mil double-frosted Mylar. It comes in pads and looks very much like tracing paper, but it is thicker and doesn’t tear, rip, or yellow. It’s also acid-free. The surface of the paper has a “frosted,” semi-opaque texture on both sides, which allows layering of colored pencil on both sides. I like the way the color lays down on the surface. The final appearance looks more like a painting than a colored pencil drawing. The microscopic tooth of the paper allows for fine details. You can also use decorative papers behind the drawings for decorative and collage purposes.
Graphite
Starting out is as easy as using a simple drawing pencil. What’s the difference between a drawing pencil and a regular writing pencil? The answer is in the hardness or softness of the lead. H pencils are hard, and B pencils are soft. The higher the number that accompanies the letter, the harder or softer the lead is. F and HB, which is the lead of a standard No. 2 pencil, are in the middle of the range. Look for manufacturers that create pencils using high-quality lead.
Pencil hardness scale
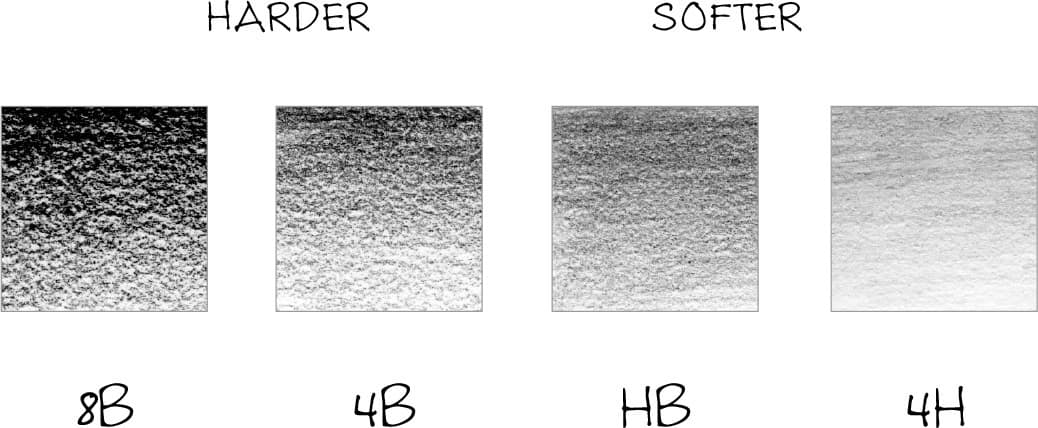
Pictured here are gradations of 8B, 4B, HB, and 4H leads over medium drawing paper, allowing you to see differences in stroke quality and darkness.
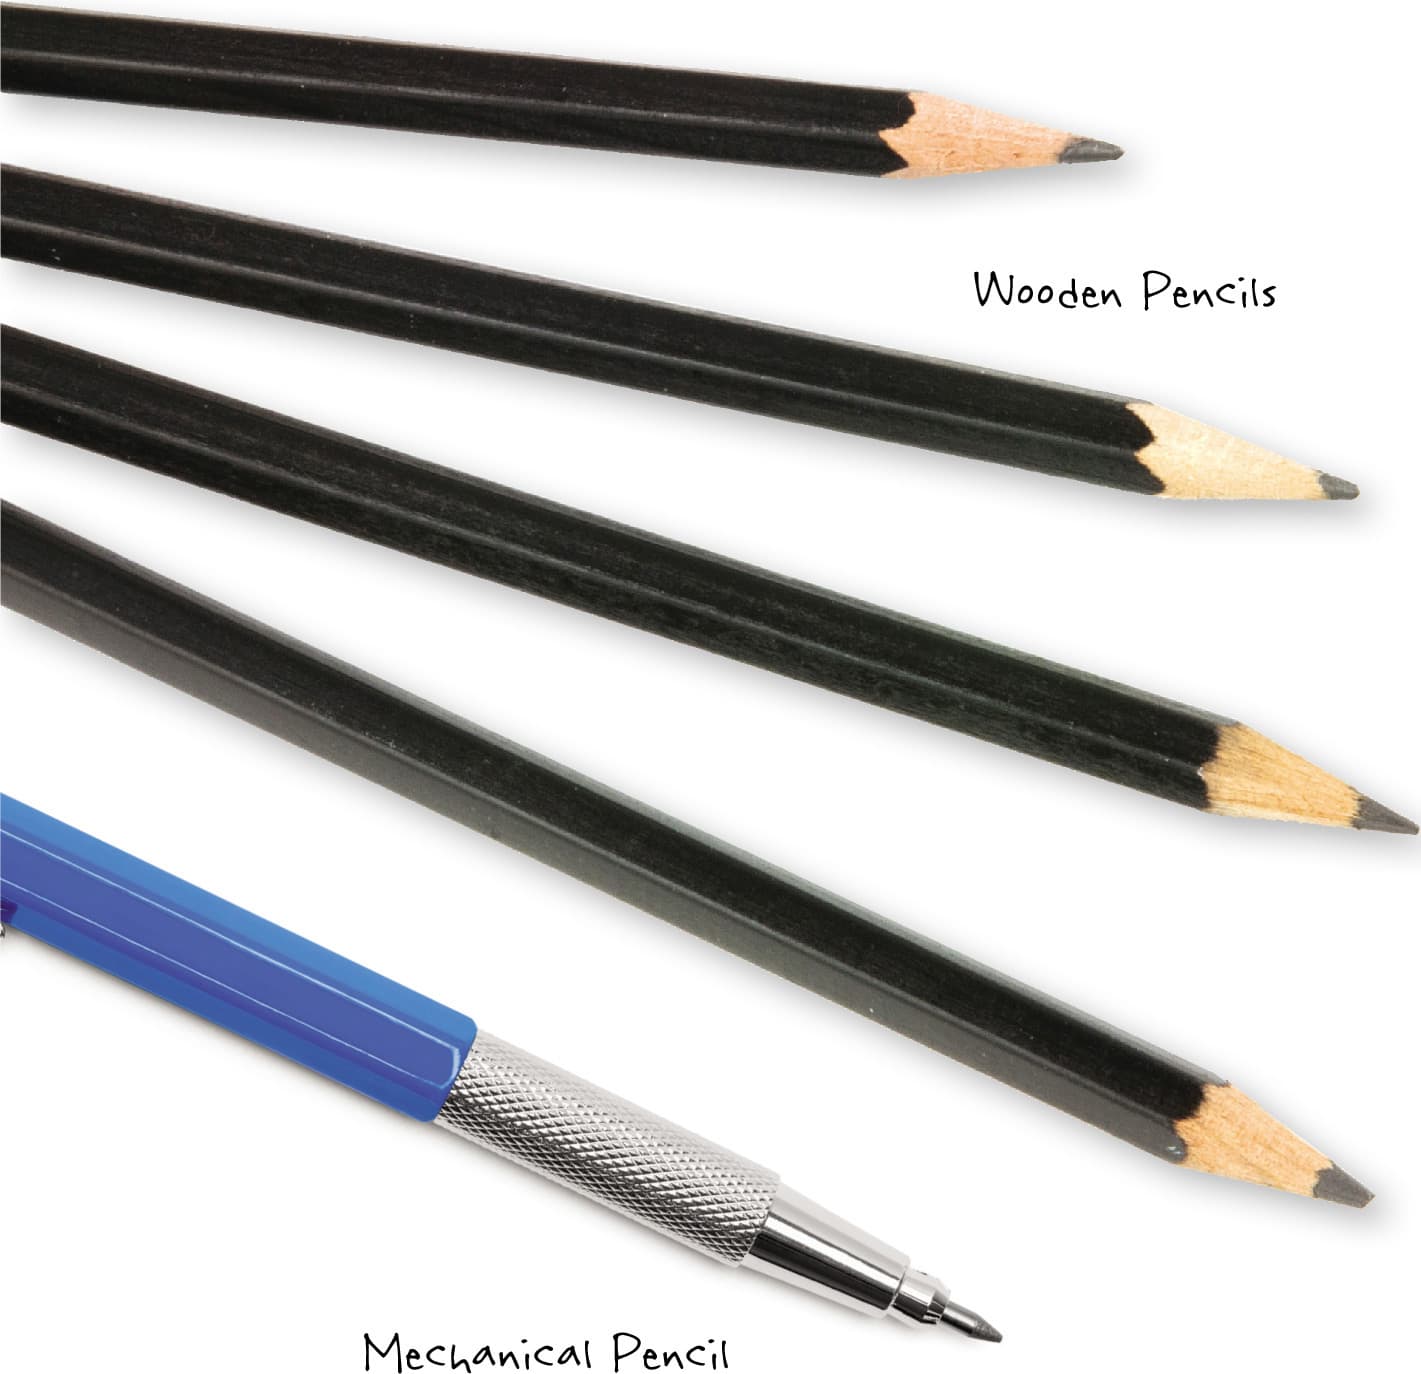
Types of Pencils
Many manufacturers offer a wide range of drawing pencils. Look for pencils that deliver consistent, even coverage. Not all pencils or manufacturers are the same, so it’s important to experiment with different brands to find what works best for you.
Pencils are available in two forms: wooden and mechanical. Wooden pencils come in sets or can be purchased individually and can be sharpened with a standard pencil sharpener. Regular mechanical pencils that you find at any office supply store only take one kind of lead and don’t require sharpening—they are great for sketching in the field. Mechanical pencils from the art store come in various leads and require a special pencil sharpener. The point on this pencil is the best for getting sharp, crisp, well-defined details. You can purchase a single lead holder and interchange different lead weights.
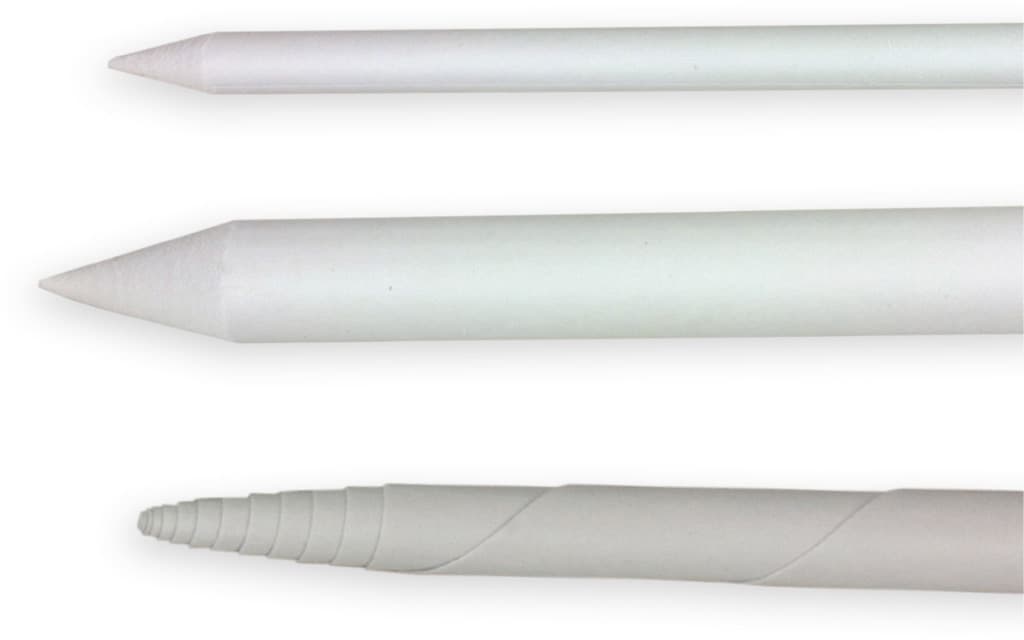
Paper Stumps or Tortillions
“Tortillion” is a fancy name for a paper stump. This cylindrical drawing tool, tapered at one or both ends, is made of rolled paper. You can use them to blend, smear, and apply graphite, pastel, and charcoal on paper. There are two kinds of paper stumps: hollow and solid. Hollow stumps are inexpensive and disposable. Solid stumps can be used over and over again—just sharpen with a piece of fine sandpaper. Paper stumps come in a variety of sizes.
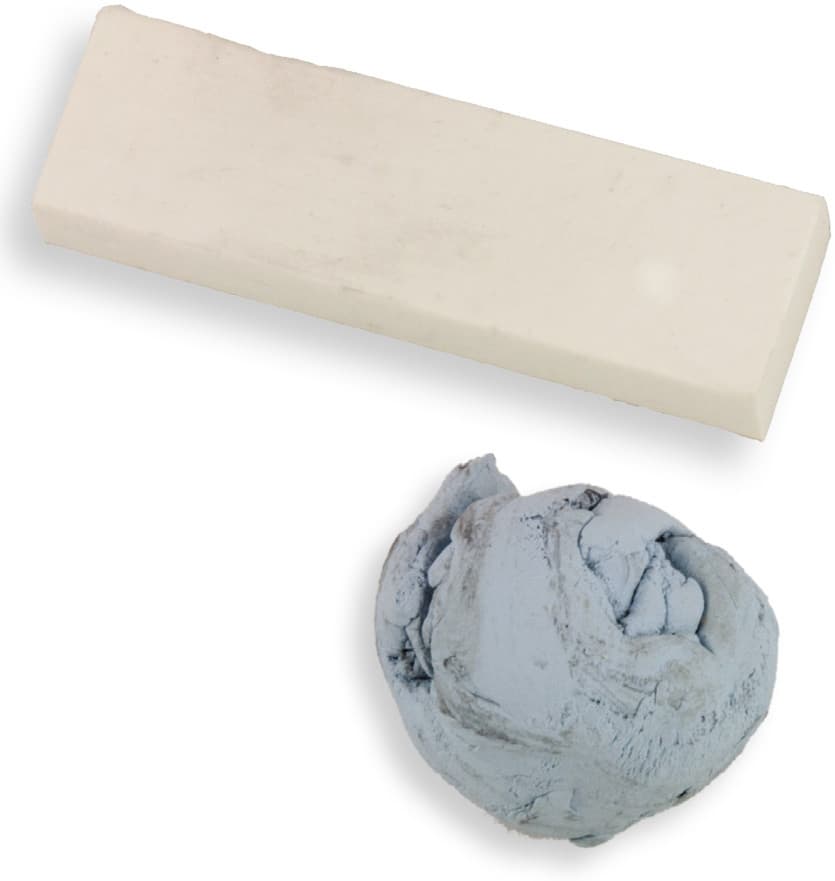
Erasers
I recommend two types of erasers: kneaded and plastic. A kneaded eraser lifts tone without removing the entire drawing. To clean and keep it pliable, simply pull it apart and “knead.” Kneaded erasers can be used with graphite or colored pencil. I recommend having one designated for graphite and one for colored pencil.
Plastic erasers come in a variety of sizes and shapes and are usually white. This kind of eraser can be used on all kinds of papers and plastic surfaces, such as Mylar, without damaging the paper.
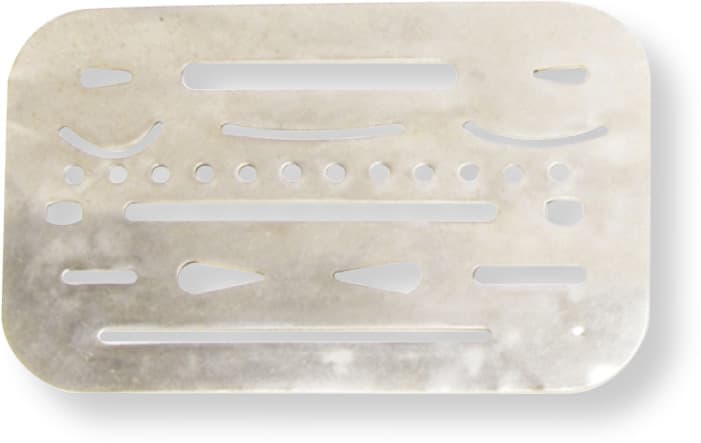
Eraser Shield
This tiny flat piece of metal is a great asset in protecting areas adjacent to where you want to erase something. It’s available at office and art supply stores.
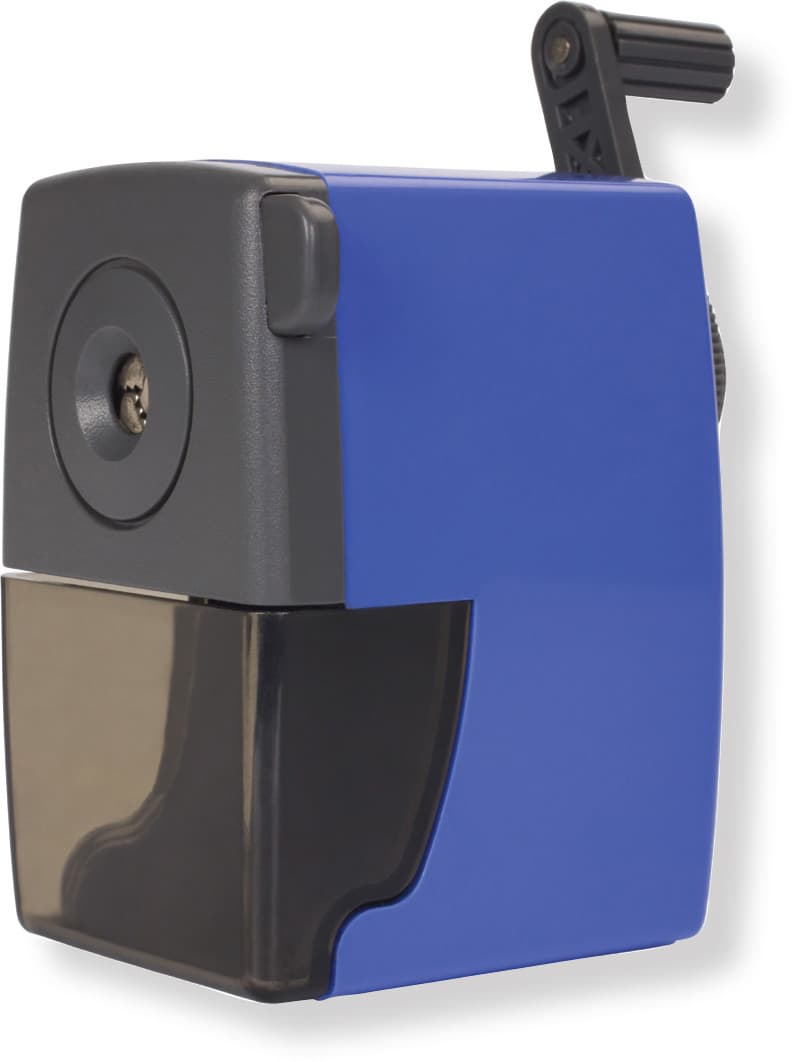
Pencil Sharpener
Maintaining a sharp point while working in graphite or colored pencil is essential for getting crisp details. Small handheld sharpeners typically don’t get the point quite sharp enough. Electric pencil sharpeners produce a great point, but they are more expensive and tend to “eat” the pencil. I prefer to use an affordable, handheld, desktop pencil sharpener.
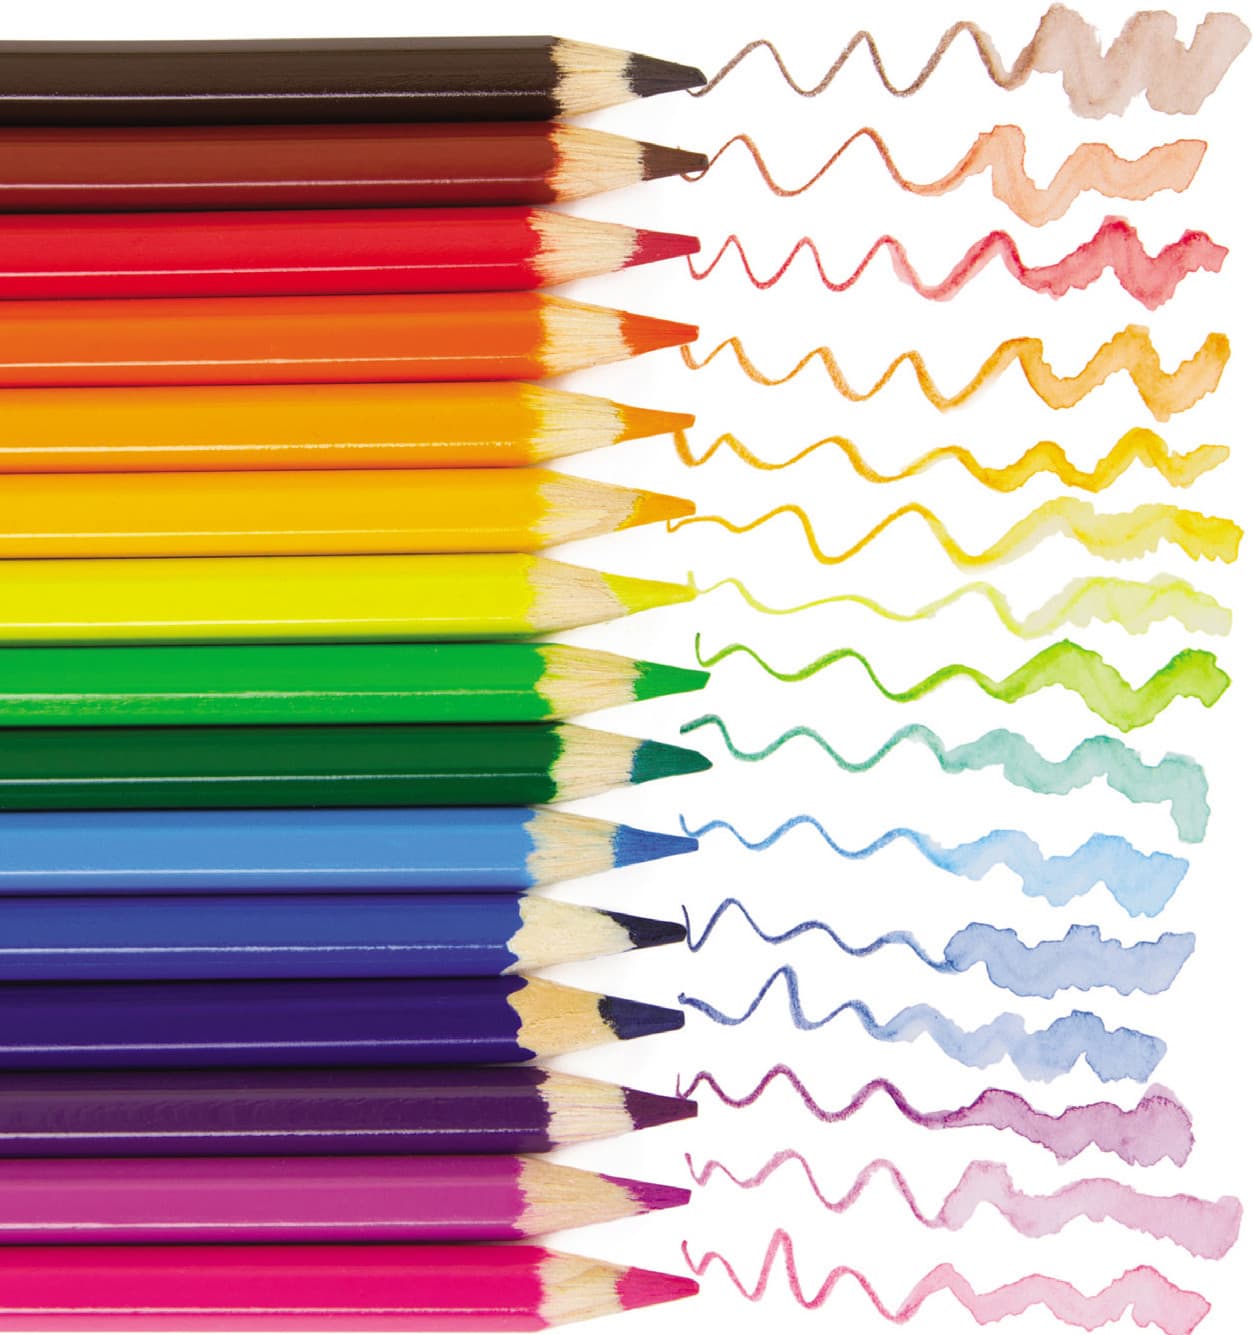
Colored Pencils
Colored pencils are made from pigments that are mixed with fillers and wax or oil. There are many colored pencil manufacturers. I highly recommend beginning with a basic, minimal assortment of colors purchased individually. Experiment to find the brand you like best. Some are creamy, waxy, soft, and brilliantly colored, such as Premier® Colored Pencils by Prismacolor®. Others, such as Prismacolor’s Verithin®, are not as vibrant, and the lead is harder and doesn’t break when pressed into the paper. Softer pencils are great for covering large areas evenly, and harder pencils work well for outlining and defining edges and details.

Watercolor Pencils
Watercolor pencils offer the control of colored pencils with the look of fluid watercolor paint. The application is the same as wax- or oil-based colored pencils, but you can add water any time, which intensifies and spreads the pigment. Once dry, subsequent layers of watercolor pencil can be added, either dry or wet. You can also add wax- or oil-based colored pencils on top as a final layer.
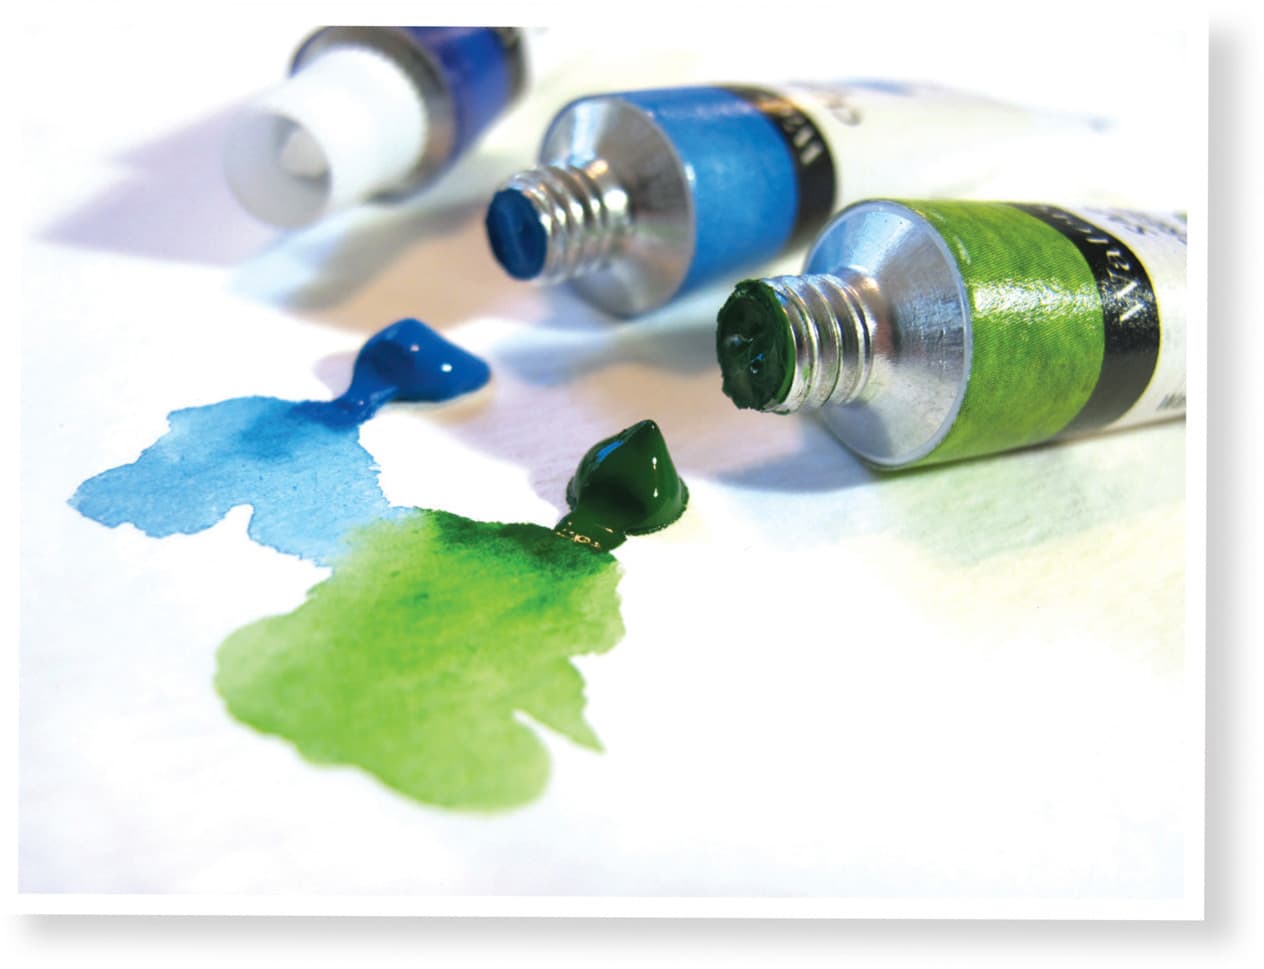
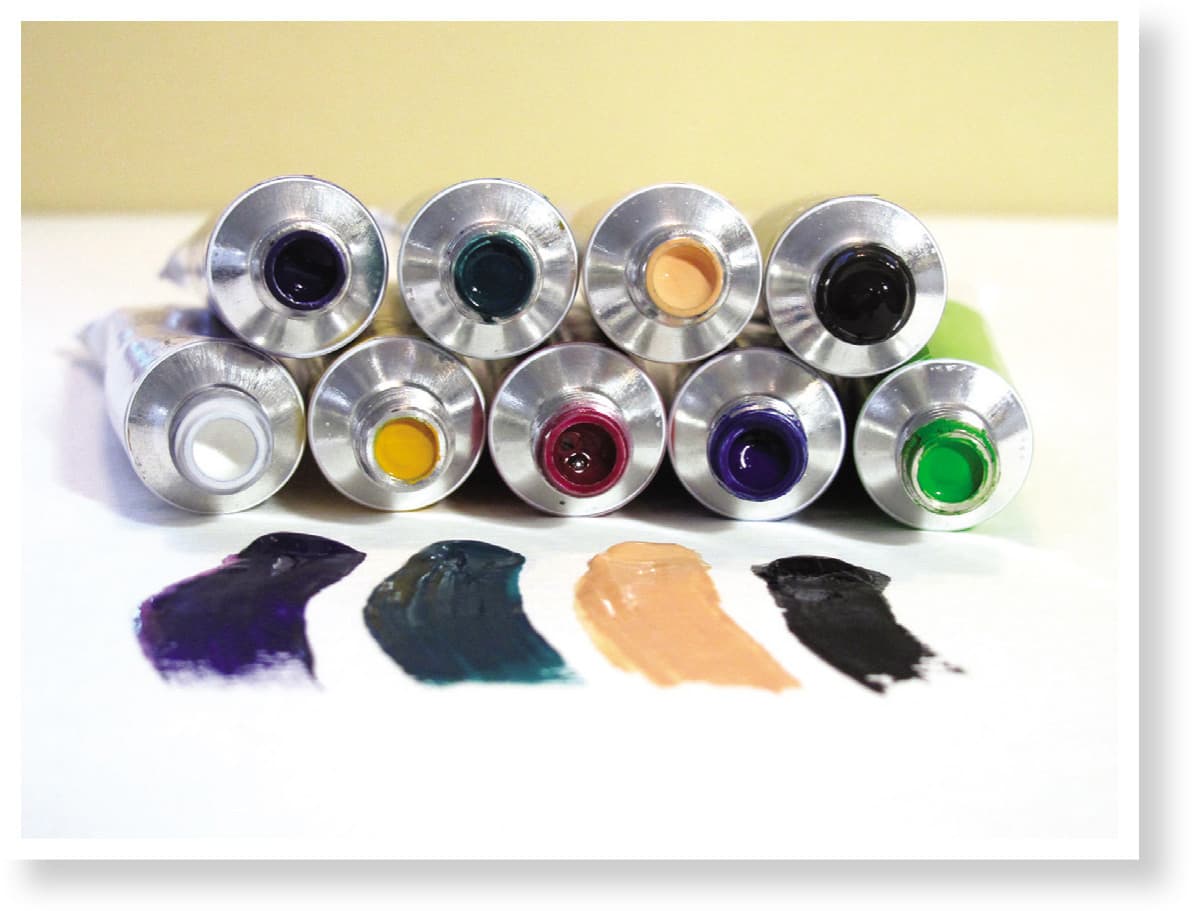
Watercolors
Watercolor is known for its transparent characteristics. Like watercolor pencils, there are many manufacturers, and it’s best to buy the colors separately, rather than in sets. Watercolor paints are available in individual tubes or pans. I prefer to work with tube paints, as they are already fluid and easier to work with. If you’re not sure where to start with watercolors, I recommend you explore these brands: Daniel Smith®, Winsor & Newton™, DaVinci™, and Holbein®.
Gouache
Gouache (“gwash”—rhymes with squash!) is very similar to watercolor. The pigments tend to be more saturated than watercolor, making them less transparent and more opaque. You can add white gouache to any watercolor to make it opaque and less vibrant. Gouache can also be watered down to make it more transparent. The inherent quality of a pigment will determine how transparent or opaque the color will be.
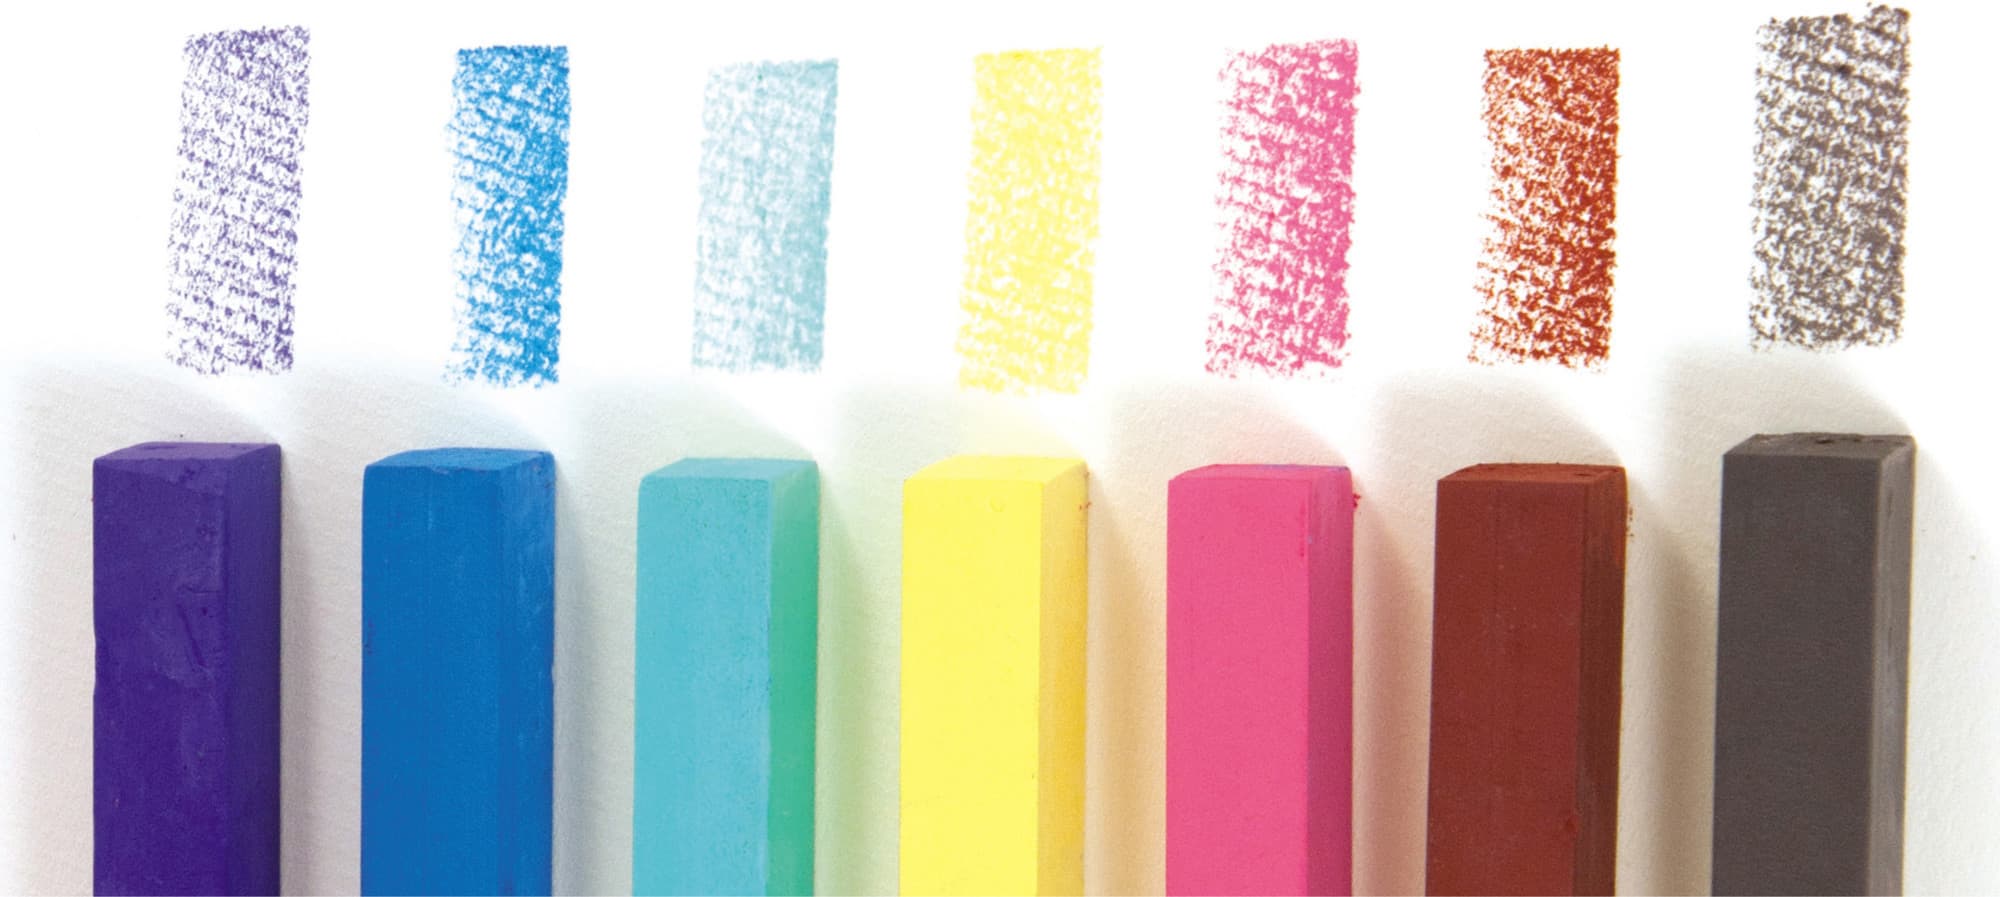
Pastels
Pastels are typically in stick form, similar to chalk, and are usually applied with your fingers. Pastels have a higher pigment concentration than any other medium, and they can be either hard or soft. Soft pastels contain more pigment and less binder, so they are easier to smudge and are brighter. Hard pastels contain less pigment and more binder than soft pastels. It’s a good idea to wear a mask when working with pastels, as the pigment dust can go airborne and be inhaled. You can also find pastels in pans.
Brushes
When I first started studying botanical and natural science illustration, I received a recommendation to work with Kolinsky pure sable brushes. These brushes are made from the fur of a specific type of weasel and come in a variety of shapes and sizes. They are relatively expensive. Personally, I didn’t like these brushes; I prefer my brushes, no matter the size or shape, to have a flexible but stiff bristle. I prefer to work with synthetic brushes. Not only are they much less expensive, but also they afford better control. I love to draw, and I feel the most in “control” with this type of brush.
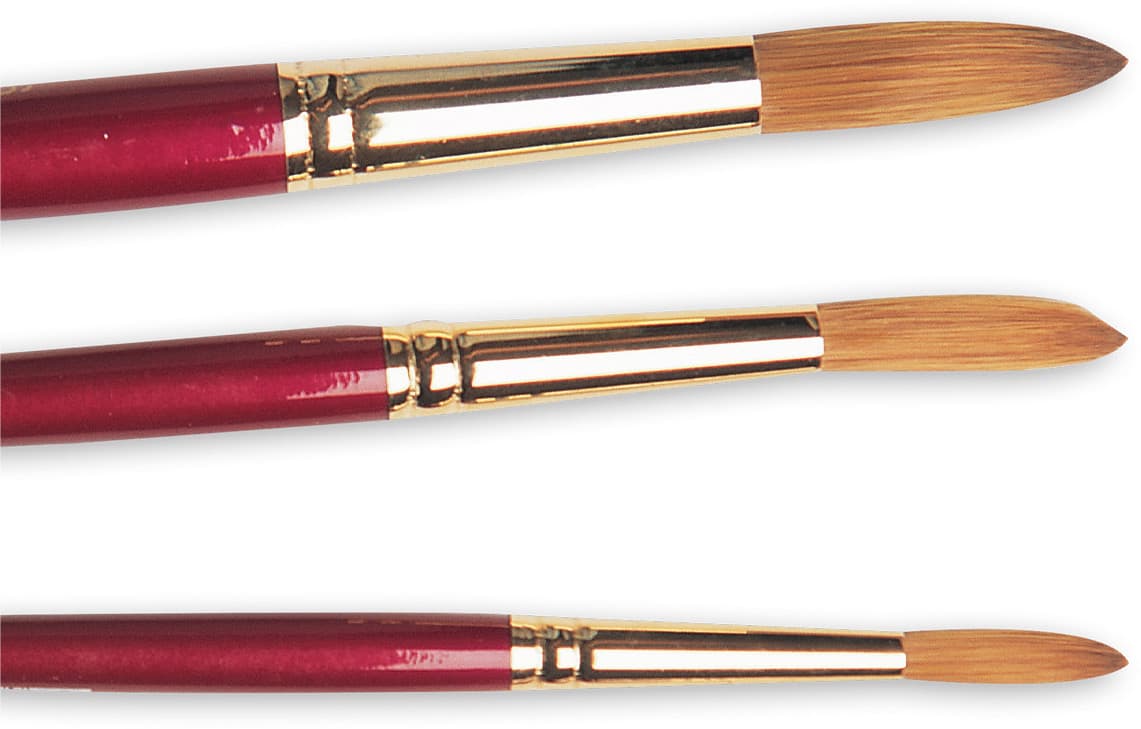
Watercolor Rounds When starting with watercolor and gouache, I recommend using a variety of round brushes. As the numbers on the brush get larger, the size of the brush increases. When covering a big area, I usually use a #10 or #12 round brush. For details, I work with a “spotter” brush, which is shorter and fatter and comes to a fine point. I usually work with a #0 or #2.
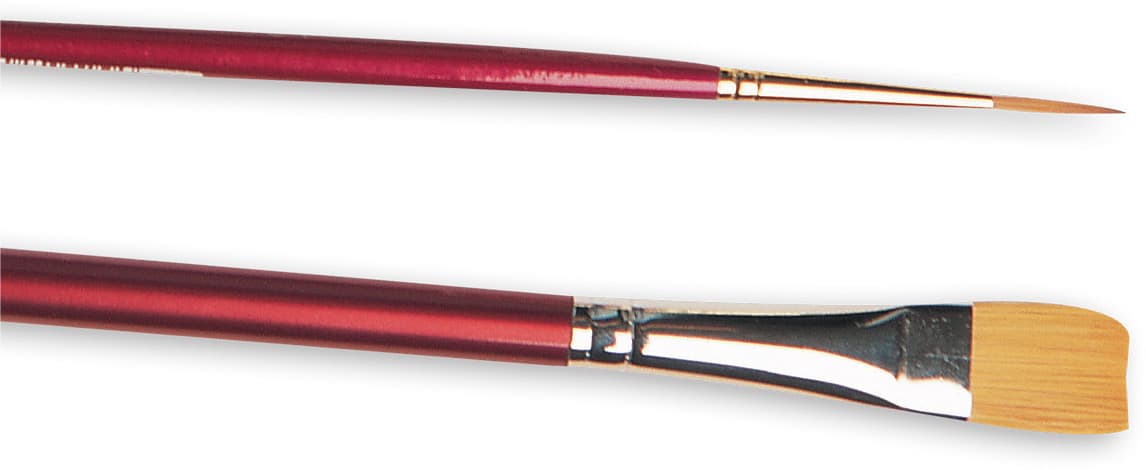
Chisel Brush A chisel brush looks very much like a square flat brush when looking at the brush head-on. When viewed from the side, the brush is wider at the base or “ferrule” of the brush, and tapers at the edge. This type of brush is great for cleaning up edges or lifting small lines when painting feathers or leaf veins. I prefer a #4.
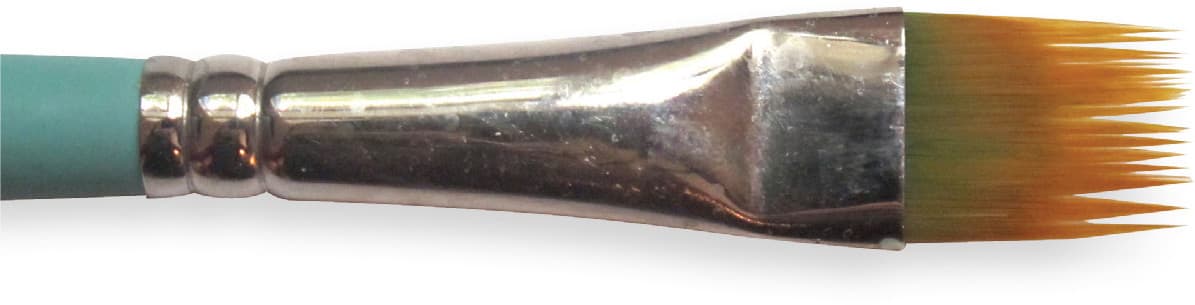
Rake or Comb Brush This brush is often used in decorative or folk art painting. It has the appearance of a flat brush, but half of the bristles are longer than the other half. The result looks like a comb or rake. This brush is perfect for creating textures like fur and feathers. I work with a 14"- or 12"-wide brush.
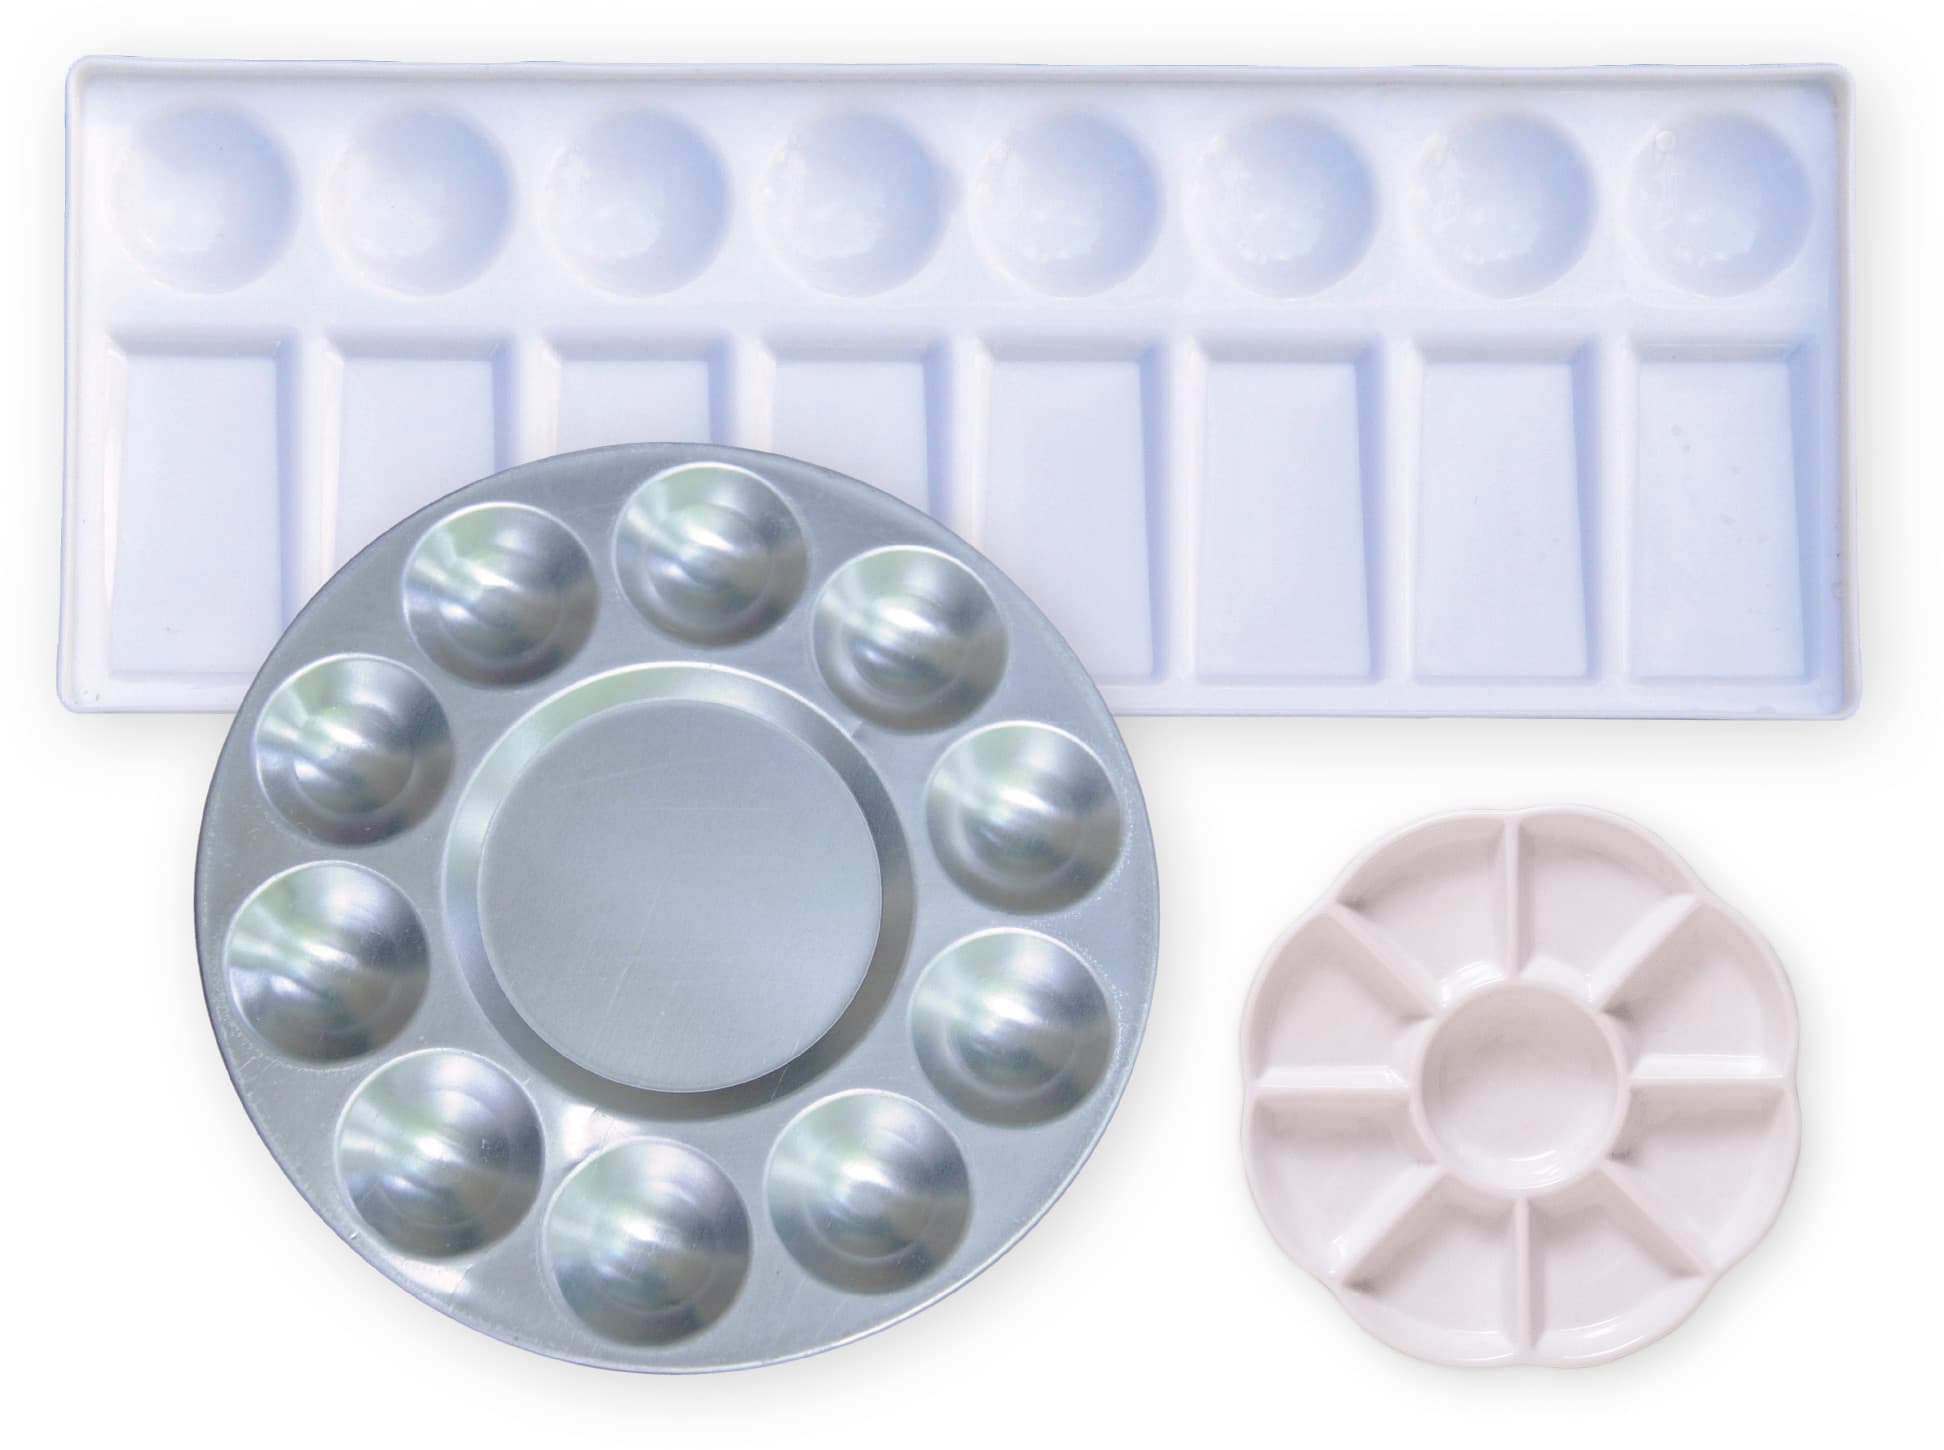
Watercolor Palettes
If working with tube paints, you’ll need a palette to place your watercolor or gouache paints in. A palette can be as simple as a disposable plastic plate, a white china dish, or one of many options available in art & craft stores. I prefer to work with white porcelain palettes with six to twelve wells to give me areas in which to mix colors. I almost never completely clean my palette; this would be pouring money down the drain. Simply add a few drops of water to your dried paints to reconstitute them. White porcelain doesn’t stain and accurately shows you the colors when mixing. Keep gouache and watercolor in separate palettes.
Studio Lighting
Working in a room with natural light is the best way to work. To add more light, I recommend a lamp specially formulated to replicate natural daylight. There are desktop models, standing lamps, battery-operated lights, and lamps with magnifiers built in. OttLite® is a reputable brand in the United States that can be found in art & craft stores and online retailers, as well as fabric stores.
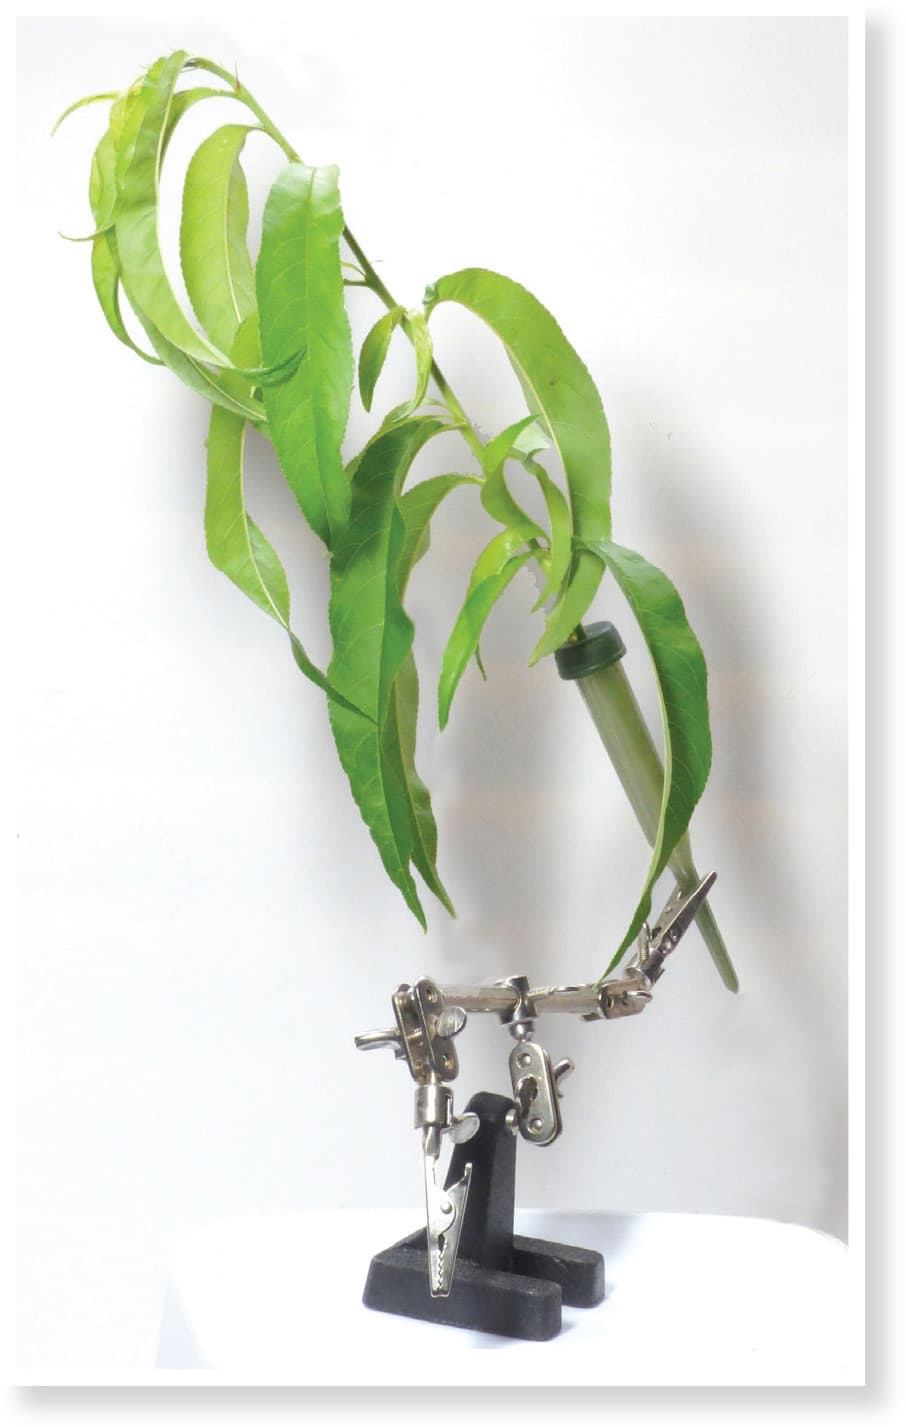
Helping Hands
This little tool can be a great asset in the studio for holding flower tubes, as well as branches for drawing. It has several clips that can hold the tubes or branches, which can pivot to different angles. This allows for natural positioning, and all hands-free, for easier drawing. The base is weighted for balance to keep plants from falling over.
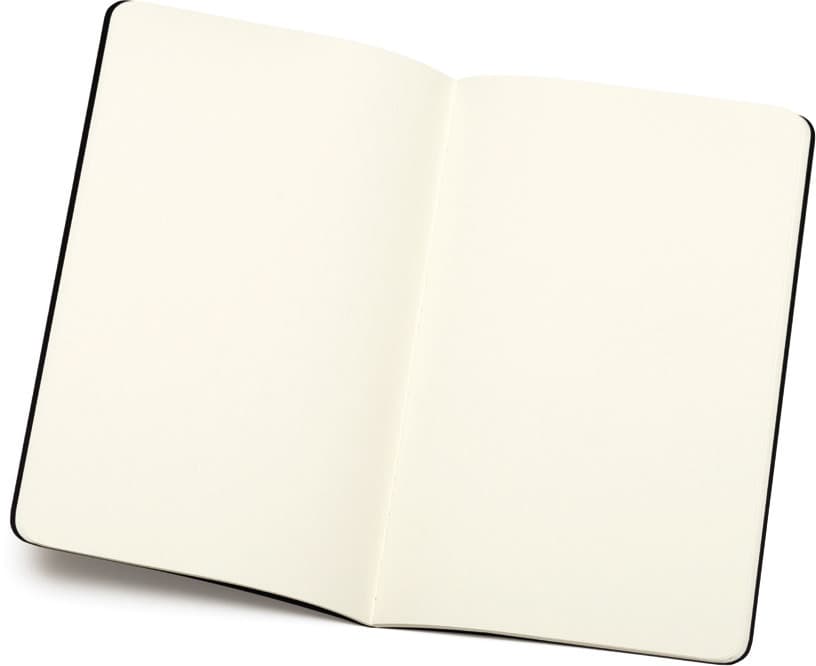
Sketching on the Go
Having a sketchbook with you all the time is a great idea. Some artists create amazing sketchbooks, with each page artfully done. For me, this kind of “sketching” is an art form unto itself and can take just as much time as a “finished” work of art. You can certainly work this way if you like. I believe sketchbooks can be used at five- to ten-minute intervals on the go. Keeping a small sketching kit with you can help you record bits of information and keep the momentum of your passion for nature going.
Sketchbook Paper size and type is a personal choice. I prefer something that easily fits into my backpack or purse. I currently work with a Moleskine® watercolor sketchbook (5" × 8¼"), because I like the overall surface to be lightly textured. This paper also prevents ink or watercolor from bleeding to the other side. The pages lay flat, and the cover is sturdy, providing stability when sketching and protecting drawings from bending or folding.
Pencil & Eraser I like to work with a mechanical pencil because it doesn’t require sharpening. I also carry a “click” eraser for correcting drawing errors.

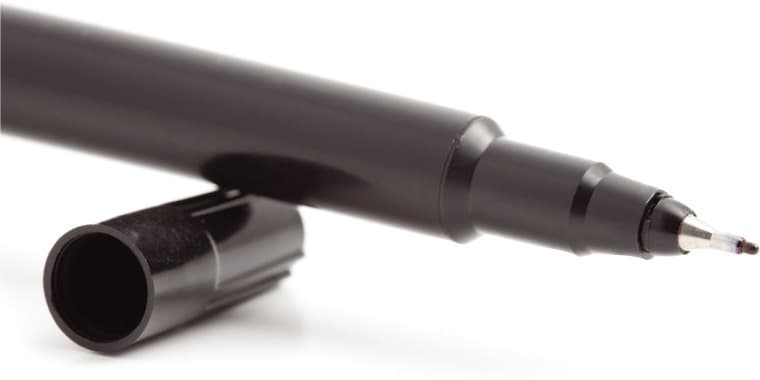
Ink If you want to work in ink, I suggest a marker with waterproof ink. There are many manufacturers that offer waterproof pens with different tip sizes. Waterproof ink allows you to apply watercolor on top of the ink drawing without the black lines bleeding or smearing.
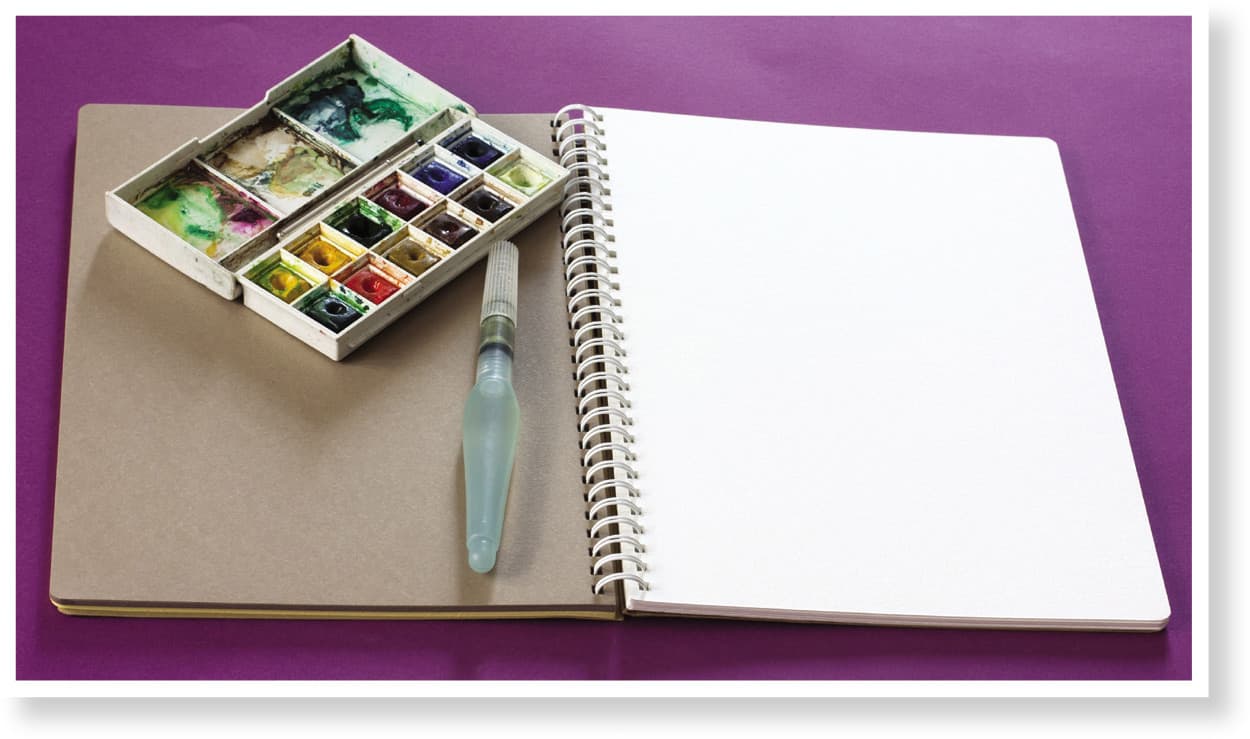
Palette & Brush If you want to work in color, you can use a small travel watercolor kit. They can be expensive but are compact with mixing wells. You can also make your own by using a small pill dispenser and putting paints into the wells. A convenient, portable watercolor brush is great to have on hand. Load water into the barrel, and it’s ready to go. Simply squeeze the barrel of the brush to release water into the bristles and into the paint in your palette.
Cameras
Working from photographs has its challenges. One of the key considerations when working from photos is how much of your subject is in focus. Trying to understand and work from photos with soft or out-of-focus details can be frustrating. The term “depth of field” refers to how much of the subject is in focus. Greater depth of field means that more of the subject is in focus as the image recedes back. Price is always a consideration when considering a new camera. It’s up to you to decide what you will be using your camera for and how much you want to spend.
Smartphone Cameras With today’s technology, digital cameras are now standard on smartphones. I have an iPhone® that takes excellent photographs, as long as I’m not too far from my subject. I can easily capture flowers, plants, and close-ups with my phone. It’s not useful for photographing birds, however. The zoom feature isn’t good enough. As technology progresses, these types of features are improving. Smartphones may not take the best photographs all the time, but most people have them handy all the time, and your phone allows you to capture a moment without carrying too much equipment.
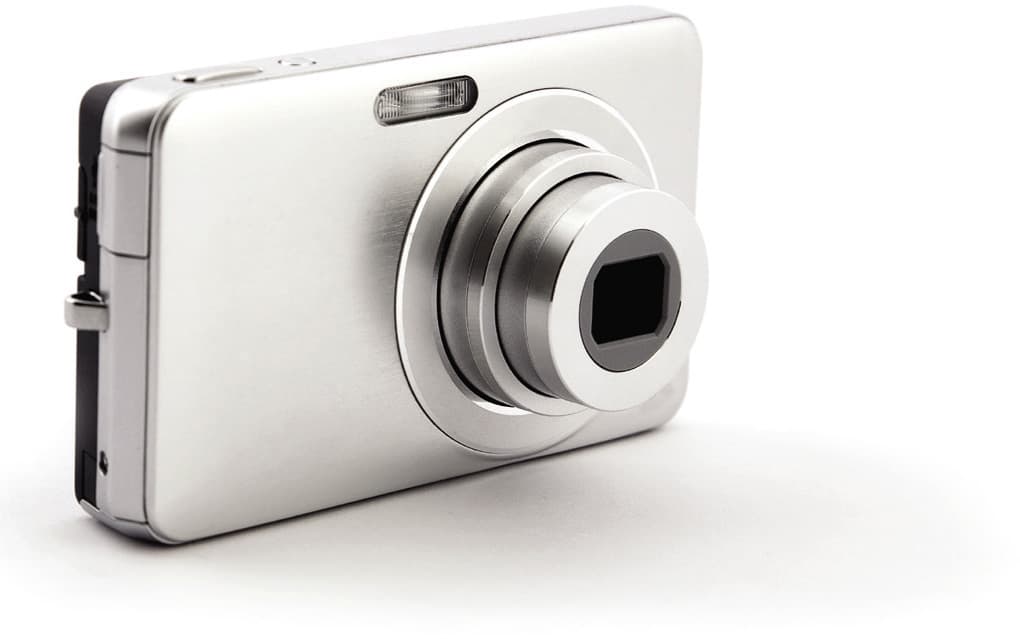
Digital Cameras There are two basic categories of digital cameras: point-and-shoot and digital single-lens reflex (DSLR). Point-and-shoot digital cameras, for the most part, are less expensive, more compact, and easier to use than DSLRs. Look for a point-and-shoot camera that has a high zoom capability, offers options to take photos with manual settings, and shoots photos at 12 megapixels or higher.
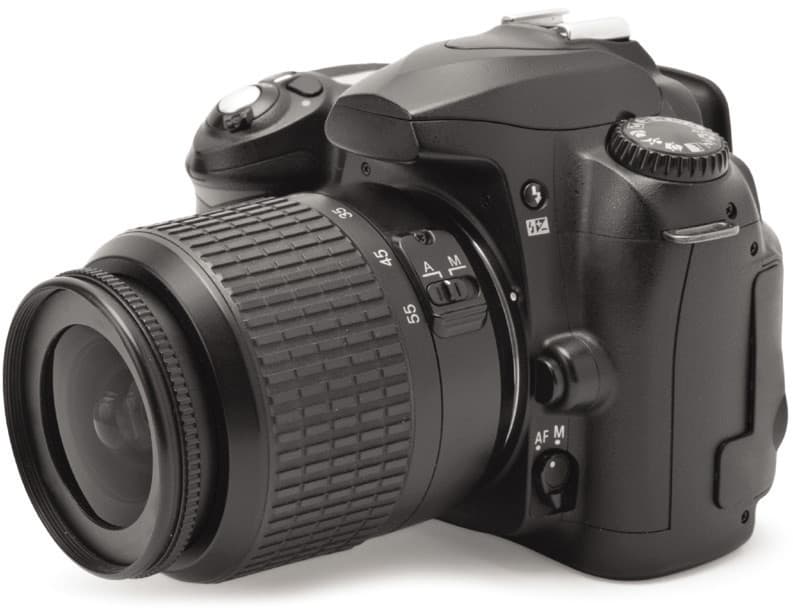
A DSLR camera consists of a main body that accepts interchangeable lenses. For instance, you can have a macro lens for close-ups, a telephoto lens for long-distance shots, and a wide-angle lens for panoramic views. These cameras are heavier, more expensive, and more complicated to use. They usually provide higher-quality image output.
iPad® & Tablets
I fell in love with the iPad when it first hit the market. It completely changed the way I worked. When I first started a photo reference library, I used physical images cut out of magazines. Today, I use the iPad as a filing system for my digital pictures. Not only is this less expensive than printing all my photos, it takes up less space and I can easily zoom in on details. With the combination of Pinterest® and my own photo library, I have access to my reference images from anywhere.