
Chapter 11
Audio Crash Course
You have made it through your shoot, and you have drives with extra backups lying around. It is time to start assembling your workflow for post.
Whether you have converted your footage or are working in an editing program that lets you edit native H.264 files, now is the time to sync up your footage. This is a critical and potentially time-consuming process. You have to do it right from the start, or there is a very good chance you will have to redo it later.
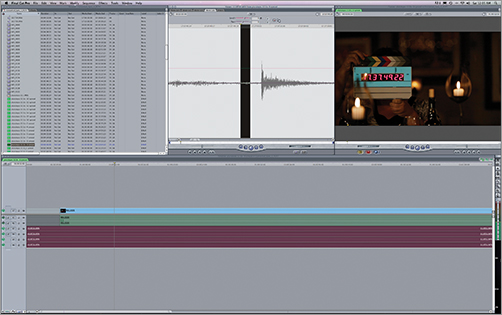
One way to sync your audio and video files is manually syncing them. This time-honored tradition stretches back to the invention of sound for movies. This is a pretty simple yet very time-consuming way to sync your footage. You just find the start of each scene where you used a clapboard (or your hands), find the frame where the clapboard first closes, and find the audio spike on your audio waveform. Line them up, and you are done (Figure 11-1). Considering you will have hundreds if not thousands of shots, you can see how this may not be the most efficient way to work.
Figure 11-1: Working in Final Cut Pro and syncing audio with video clips
Syncing Automatically with PluralEyes
Another way is to let a software program automate the syncing process. The most popular today is a plug-in called PluralEyes made by Singular Software (www.singularsoftware.com). This plug-in sells for $149 and works with Final Cut Pro, Premiere Pro, and Vegas Pro.
PluralEyes works by reading the audio file in the H.264 movie files from the camera and compares them to the audio files off your external recorder. It matches up the waveforms and syncs them automatically. This is why it is critical if you choose a dual audio system to get a good strong audio signal into your camera. If you are shooting a scene with two cameras and one is close to the actors and the other is much farther away, this could cause problems. If the audio signal is too weak, PluralEyes can’t match the waveforms, and you will be stuck doing all these takes manually. Trust us, it is much easier to make sure to get a strong audio feed into the camera than to be touching a lot of your scenes manually in post.
To sync your audio from your external device to your video clips, follow these steps:
1. Open PluralEyes.
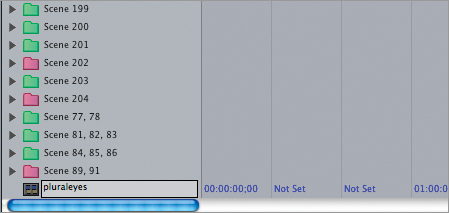
2. Create a new sequence, and call it “pluraleyes” (Figure 11-2).
Figure 11-2: It is important to name it pluraleyes exactly and make sure there is only one in your bin at a time.
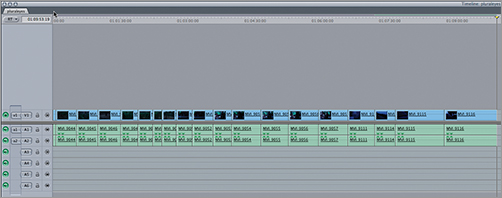
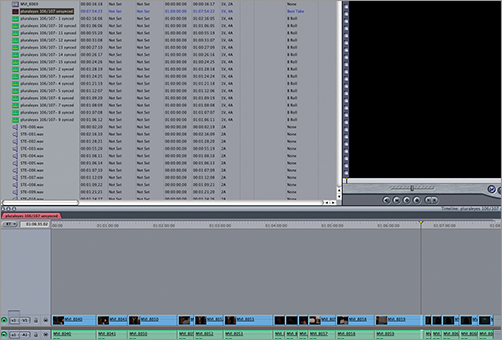
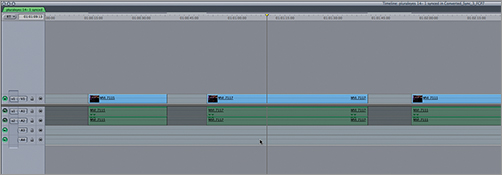
3. Take your raw movie files from one of your scenes, and drop them on the timeline (Figure 11-3).
Figure 11-3: Place all the video files you want to sync on the timeline of the project pluraleyes.
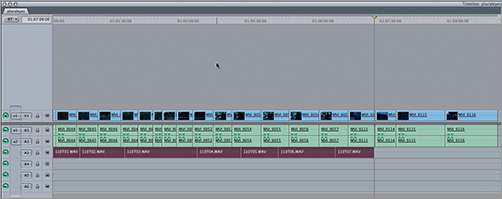
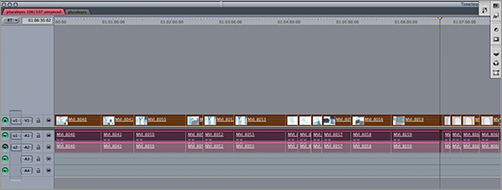
4. Take the audio files for that scene, and drop them on one of the audio tracks (Figure 11-4).
Figure 11-4: Lay your audio files on the first audio track under your footage. Don’t worry if the audio track is longer than your video clips or shorter than your video clips.
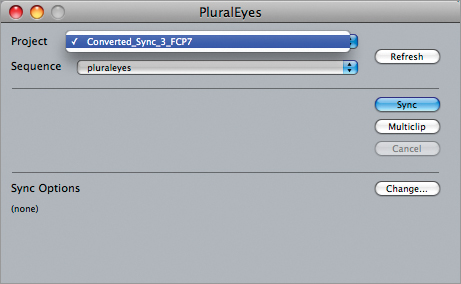
5. Go back to PluralEyes, select the project and sequence you want to sync (Figure 11-5), and click Sync. Make sure you have the correct one selected.
Figure 11-5: If you have more than one project open, the projects will appear in this drop-down menu for you to choose from.
This process can take a long time depending on the number of files you are trying to sync and how strong your reference audio is on your raw movie files.
Unsynced Files?
When you are done running PluralEyes, there may be some files that get placed into a sequence labeled “unsynced.” This can be because you placed movie files where there was no reference audio or because the reference audio was too bad for the waveforms to be matched up.
Look through the unsynced files and determine whether they were supposed to sync or whether you had extra files in your sequence. Sometimes you will find you had extra video clips in the bin for a scene they weren’t supposed to be in or MOS video clips that you shot without audio. Just make sure at this point all video clips that need to have synced sound are synced, and categorize MOS clips that need to be moved to another bin.
If you shot with multiple cameras, you will need to add the audio files again to the sequence. If you shot a scene with two or more cameras, you will have only one audio file from your external recorder. This means each time you run PluralEyes to sync the audio, one or more video clips will be put in the unsynced project. This is misleading because it can be synced; it just means the audio file was synced to the other camera before this clip was touched by PluralEyes. If you add all the audio clips from that scene back to the pluraleyes project and rerun the syncing, you will find that the original audio file will now be synced with the other camera now that the first camera’s footage was removed from the first pass of syncing. Continue this process for the total number of cameras you had for the scene:
1. Go to the unsynced sequence (Figure 11-6).
Figure 11-6: Select the unsynced sequence from your bin or just go to the open unsynced tab after you finished the sync.
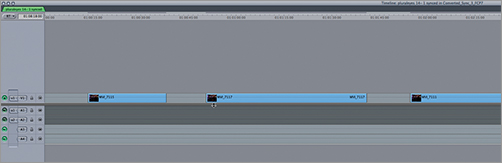
2. Select and copy the movie files (Figure 11-7).
Figure 11-7: Select all the unsynced movie files from the timeline, and copy them to the clipboard.
3. Paste the files into the pluraleyes sequence (Figure 11-8).
Figure 11-8: Paste all of the copied video clips onto the pluraleyes timeline.
4. Run PluralEyes again.
This will sync the audio to other takes from a different camera angle. Once you have all of your video files synced, then you can move them to one master sequence, line them up, and begin your edit.
Troubleshooting Out-of-Sync Sound
Sometimes your synced audio/video clip starts out matching, but the longer you watch, it starts to drift out of sync. This is not a new problem, nor is it unique to DSLR filmmaking. However, more and more people who shoot on DSLR cameras are doing more of the post work themselves, and a lack of knowledge of what is going on behind the scenes can create headaches such as this needlessly.
Dropped Frames When using traditional video tape or codecs such as AVCHD, when you log in your footage, you actually “capture” the video instead of transferring it. There are times during this process where you can have “dropped frames.” Losing several frames of your video changes where the frames that follow line up with the audio track. Dropping frames in more than one place during capture compounds the audio drift. This is not the case with DSLR cameras, and we have yet to hear of a camera dropping frames while recording; however, you can never rule things out completely. If you are an adventuresome type who will install hardware hacks and push the cameras, this may be something you come across.
Recording Device Not Accurate As you have read in this book, the Zoom H4n is the recommended audio capture device for the dual system if you cannot hire a professional audio person or rent a 744T digital recording device. With that said, there are many other audio recorders on the market. There is a predecessor to the Zoom H4N called the H4; it is not as accurate as the H4N and is more prone to syncing problems in post. Other devices, such as the M-Audio Microtrack, are not as reliable either. Most of these audio capture devices have an internal clock that helps them keep track of time and sync. Some models are not as accurate as you need for syncing people speaking.
It is best to do your research and make sure the audio device you are going to record with is accurate for syncing sound and can be changed to support the actual frame rate that you are shooting in the camera.
Frame Rates Many of the current DSLR cameras can shoot in a variety of frame rates, including 30, 29.97, 25, 24, 23.976, 60/50, and 59.97 fps. When so many different frame rates are available and you have two different recording systems, it is very easy to run into trouble.
The funny thing is that rarely is it the video or audio files that are the cause of most of the problems. Most problems arise from how you set up your editing program settings.
Setting Up Your Editing Timelines Properly
The most likely explanation for audio sync issues is that your project has not been set up properly. More specifically, if you shoot with NTSC frame rates (like 23.98 or 29.97) and have your project set up with non-NTSC frame rates (like 25 or 30), then you will have troubles.
Changing the Speed of the Audio Clips
You have the option of changing the speed of your audio clips, which in theory will help you correct for the difference between 30 fps and 29.97 fps. The best reason to not do this is you are resampling your audio twice. This causes you a quality drop right up front and can cause more issues as you move through post. Just because you can speed up or slow down clips from 99.9 percent or 100.1 percent and sync them doesn’t mean you should. The best practice always is to set things up right to begin with and only deal with issues at the last few steps of post, not right up front.
Setting Up Your NLE Properly
In a nonlinear editor (NLE), do these two key things to avoid sync problems:
- Never mix NTSC and non-NTSC footage in one sequence. Use Twixtor or Compressor to conform your clips to a common frame rate.
- Utilize an Easy Setup—an option in Final Cut Pro—that automatically matches your properties and frame rate.
To use an Easy Setup in Final Cut Pro, before you start importing your clips and setting up your projects and sequences, do the following steps. This will reduce troubles and prevent having to re-create a lot of your work at a later point.
1. Close all open projects.
2. From the Final Cut Pro menu, choose an Easy Setup that matches the frame rate of your video clips. If you can’t find an exact match, pick one with the same NTSC properties as your video. For example, if you are working with 30.00 fps material from a Canon 5D, then choose an Easy Setup with a 25 fps frame rate.
3. Close Final Cut and restart.
4. Create a new project, and import your footage.
5. Add your clips to the timeline (do this first so that Final Cut will autoconform the sequence if the settings are different from your clip).
Just like most things in filmmaking, it is best to check and double-check before you start. It is much harder to correct and change course after you have started down the path in one direction. Test your audio and make sure it is working before you jump in and start syncing hundreds or thousands of clips only to have to redo them later.
Automated Dialogue Replacement (ADR)
On any film there is no way to avoid at least one automated dialogue replacement (ADR) scene. Here are some quick tips and a step-by-step guide to ADRing a bad audio scene.
In the field, you need to make sure to capture or have your audio engineer capture room tone. This is a two- to three-minute audio recording of the ambient noise of your location. This is the foundation for all ADR work in post. If you don’t get this on location, you can expect many extra hours or days of post work to get close to matching but may never match the audio that surrounds the new ADR scene.
1. Open your project with the scene you need to ADR (Figure 11-9).
Figure 11-9: Open the project and sequence you want to do your ADR work on.
2. Open your sequence, and delete the original audio from the timeline (Figure 11-10). You may need to unlink your video and audio files before you can delete just the audio files. If you didn’t record with any audio (meaning you turned off the audio recording function on your camera), you can skip this step.
Figure 11-10: You may need to unlink your video and audio files before you can delete just the audio files.
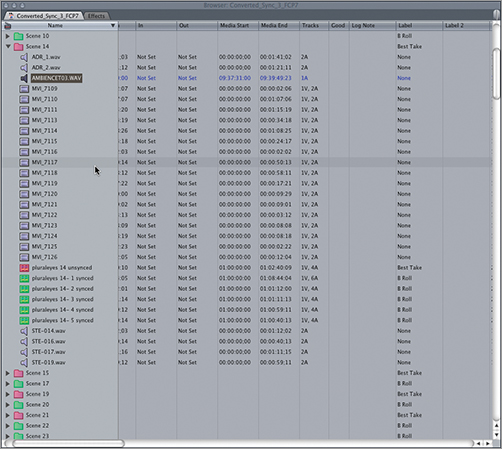
3. Select your room tone audio file that you recorded in that location (Figure 11-11).
Figure 11-11: In this bin, the room tone is labeled AMBIENCET03.WAV.
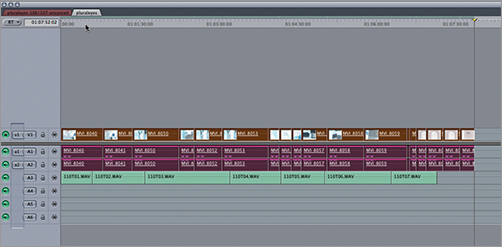
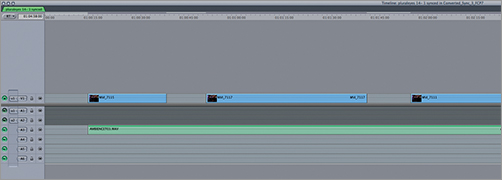
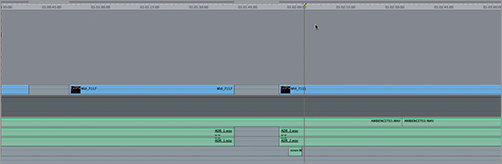
4. Lay the room tone audio down in the timeline to fit the exact amount of time you need to fill (Figure 11-12). (If you need longer than the two to three minutes, you can just duplicate the clip over and over until you fill the total time you need filled. The reason you record three minutes of audio is that humans can detect audio looping if the loops are too short. If you have two to three minutes, you can just keep copying the file, and you are good to go.)
Figure 11-12: Lay down the room tone track as your baseline.
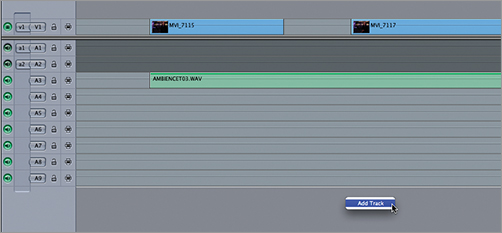
5. Add additional audio tracks (Figure 11-13) for the number of items you will be using to rebuild the audio.
Figure 11-13: In Final Cut Pro on the Mac, you can simply Control+click under the audio files to add more tracks.
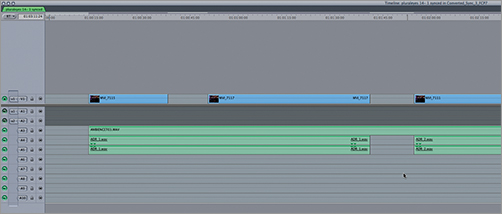
6. Lay your voice audio files to the video on their own audio track (Figure 11-14). Add each ADR track on its own track to keep each audio level separate and allow for maximum control during the edit.
Figure 11-14: Add your voice over tracks under the ADR audio tracks.
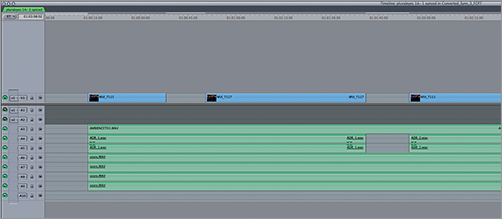
7. Lay down your sound effects in their own track, if you need any (Figure 11-15).
Figure 11-15: Add the sound effects to their own track under the room tone and ADR tracks.
8. Lay down your music track (Figure 11-16).
Figure 11-16: Continue adding the score to its own track(s) under the other audio tracks.
This will help you rebuild any scene where you recorded bad audio or if some external noise pollution wrecked the perfect take. Just a little time and planning can make for a very smooth and successful ADR session.