
LEVEL UP YOUR DIAMOND PAINTING GAME
For some, the phrase “Diamonds are a girl’s best friend” may hold true, but in the world of diamond painting, I prefer my tool-kit accessories. You don’t necessarily need to purchase any extra tools, as a diamond painting kit has everything you need. However, if you would like to take your experience to a new level, keep reading. I’m sure by the end of this section, you will be joining me in the world of diamond painting and accessory addiction.
WASHI TAPE
Adhesive is a key component of diamond painting; the diamonds are placed on the adhesive in order to create a beautiful mosaic image. Adhesive is sticky, plain and simple, and although it is meant for diamonds, it can collect dust, fuzz, dirt, hair, etc. Washi tape is a decorative tape sold originally for scrapbooking and card making; however, the diamond painting community has found a new use for it.

This decorative tape can be used as a border around a working piece to help eliminate undesired material that collects around the edges of a canvas’s adhesive. It also allows for a new level of aesthetic layering during the diamond painting process. Washi tape is minimally sticky and so does not compete with the adhesive. It is easily removed once a painting is completed.
Washi tape is also beautiful addition in the finishing process. If you were to watch me behind the scenes, you would witness me removing the “working” washi tape (what I used during the diamond painting process) and replacing it with a color-corresponding tape to add to the framing aesthetic. For more ideas, check out my “Tips and Tricks” playlist on YouTube under DP Addiction Adventures.


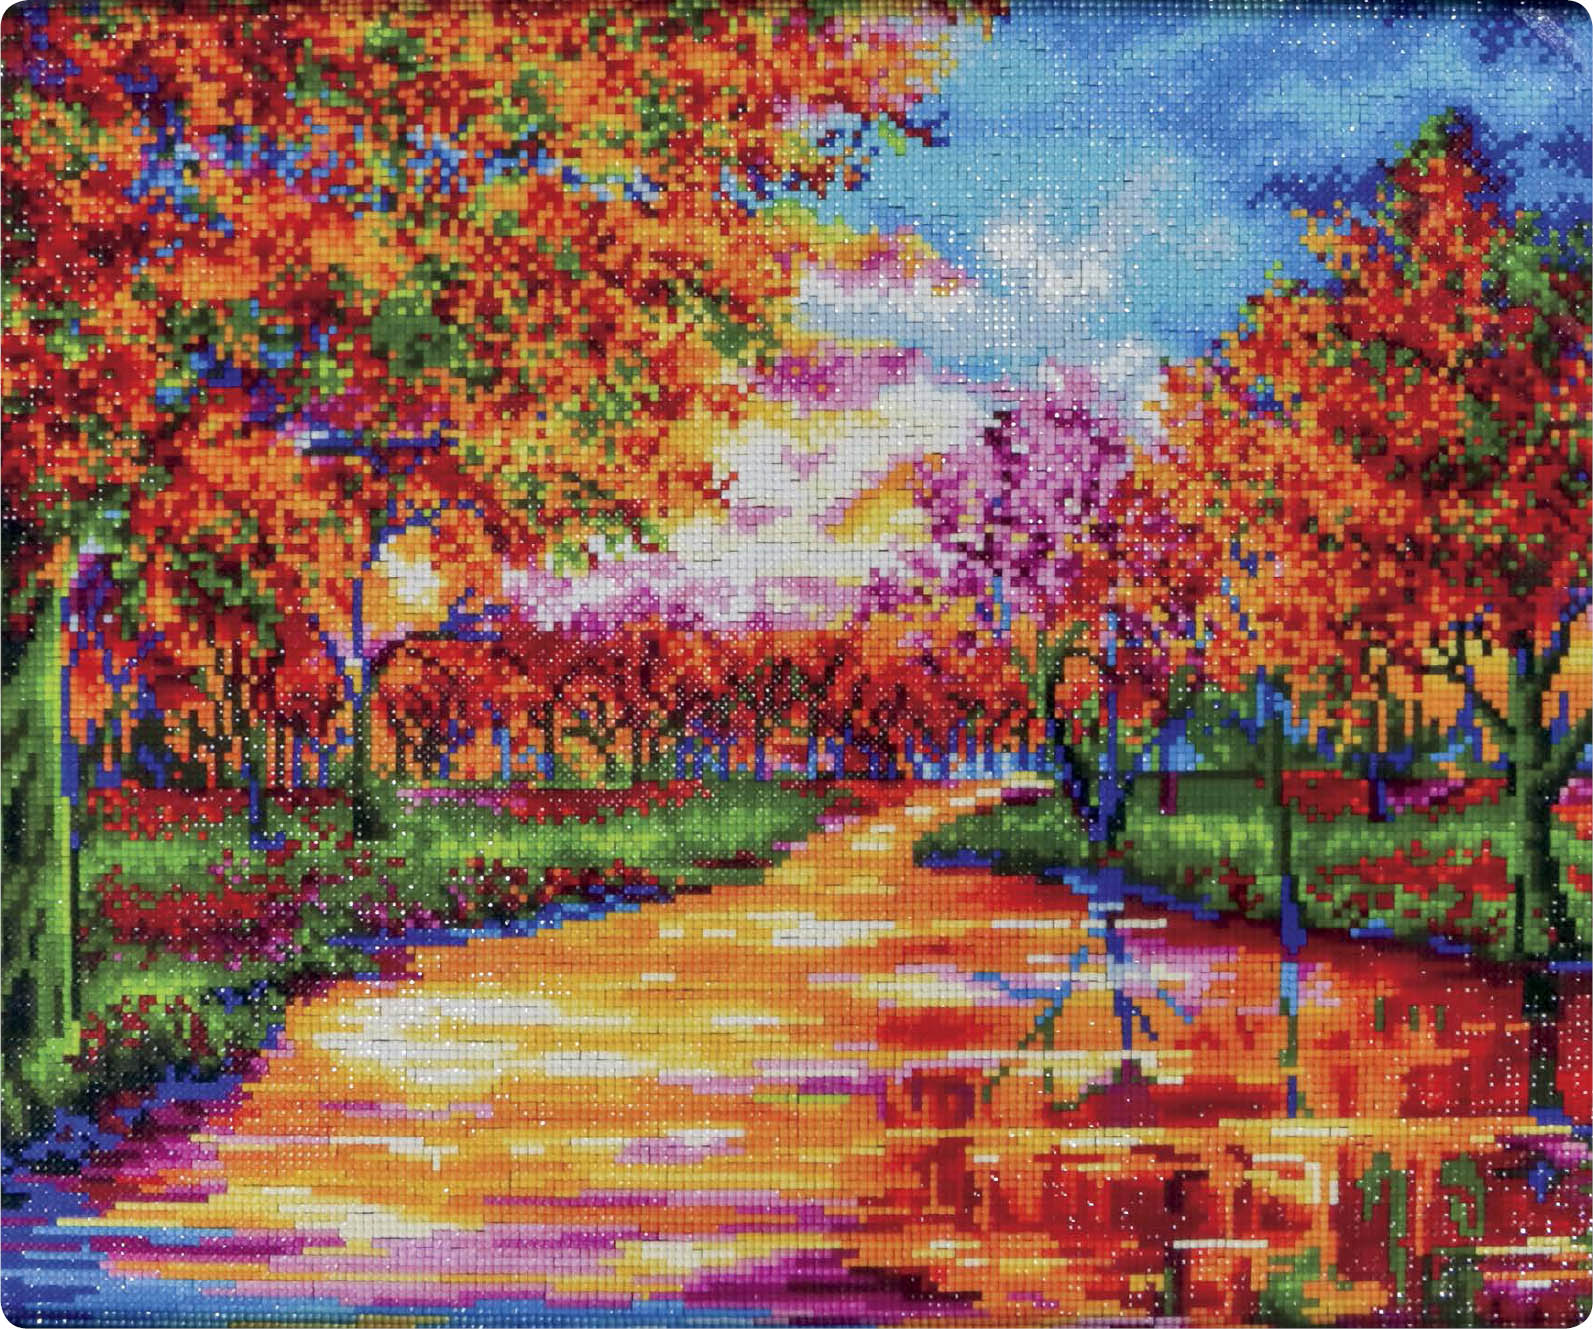
“The Tower” design by Claudia McKinney from the Diamond Art Club.

Girl and elephant design from Goang Store on AliExpress.
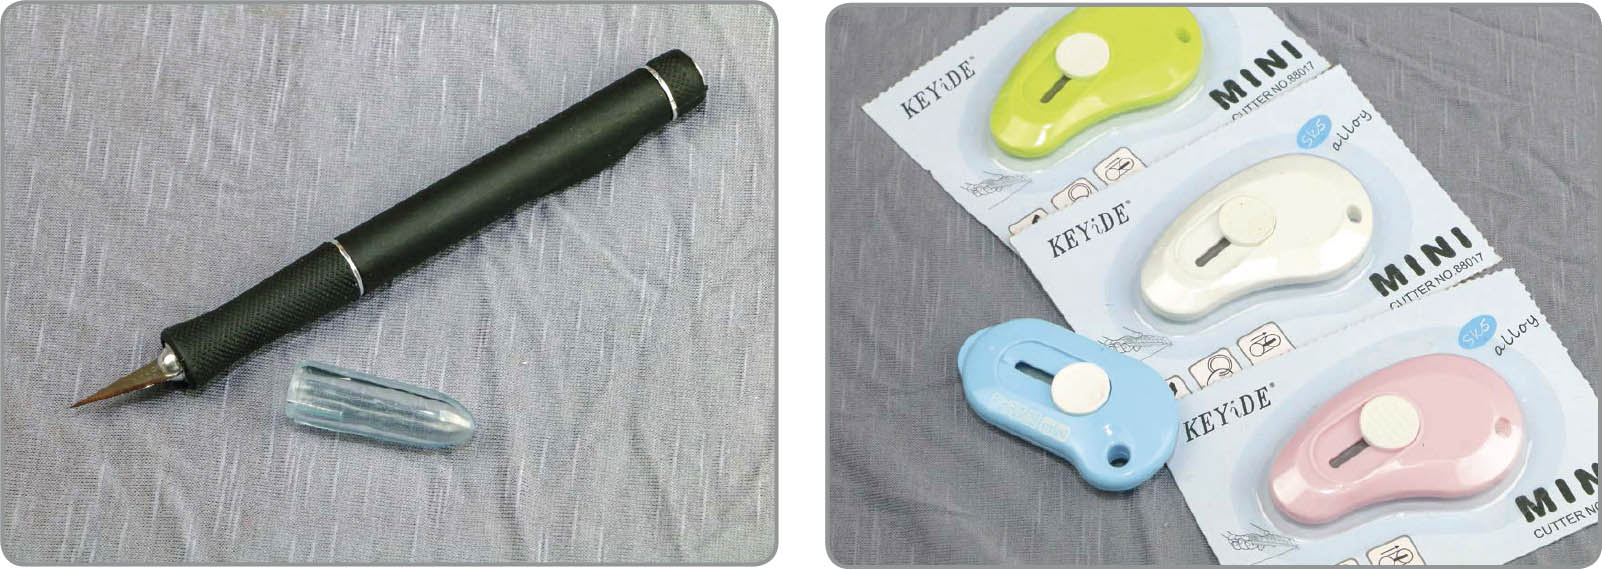
CUTTING TOOLS
Every craft room needs a good pair of scissors. Why is it when I go to grab the scissors they are never there? One answer may be my 12-year-old daughter; the other is I love my other cutting tools so much, I don’t notice when my scissors go missing. I recommend a sturdy X-Acto knife and a slicer. Slicers are mini X-Acto knives that can be used to open boxes and packages, cut washi tape, fix damaged glue sections, cut opaque or clear covers, and much more.
STORAGE SYSTEMS
Another of my addictions (after diamond painting) is collecting and using amazing storage units. I dream of how to have each tool in its designated space, easily accessible, and ready to use. Here are some storage systems to check into.
DIAMOND STORAGE
It is important to keep the diamonds organized and separated when using them on your painting. Using storage allows you quick-and-easy access, less spillage, protection from color mixing, and provides the ability to move diamonds when needed. After the addiction takes hold, you may find yourself working on numerous paintings at once. Storage allows for you to switch which painting you are working on without jeopardizing the integrity of your diamond organization. There are multiple ways to store your diamonds. I’m going to take you on the journey of my storage evolution—from beginning to what I use today.
Option 1: The Bag. When I first began diamond painting, I didn’t read the instructions, as they were in Chinese. And although YouTube has hundreds of diamond painting channels now, there were not many when I began. All I knew was I had these little bags full of diamonds, and once I cut them open there was no turning back.
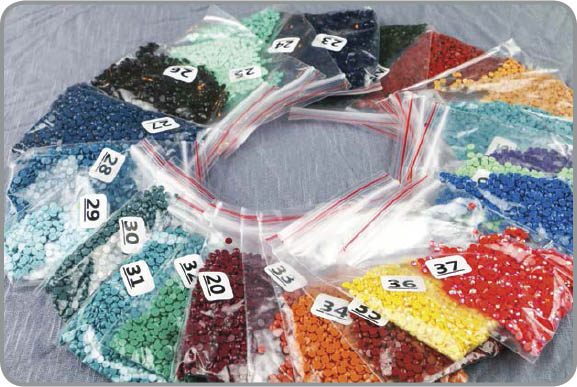
THE BAG
The company I ordered from sent me five small resealable plastic bags. I used these bags to hold the open diamonds, but it was not enough. I bought more baggies. As I began obtaining more diamond paintings, I realized opening these bags over and over again and pouring diamonds in and out was taking up much of my time. There had to be a better way. (Price: 2x3" size, 100–200 count, $2–$3)
diamond painting lingo
Snack-Size Painting
A painting that is smaller and takes much less time than your usual projects. Some even call a partial painting a snack size, as it has fewer diamonds to lay down. I prefer a 40x50cm painting, so, for me, anything smaller than this is a snack.
Option 2: The Condiment Cup. After much searching, I found a diamond painting channel that discussed the difficulty with baggies and showed their storage choice. The YouTube creator shared that she had gone to the Dollar Store, bought condiment cups, and labeled each of them.

THE CONDIMENT CUP
I was watching the video in the car as my husband drove us home from my in-law’s house after Thanksgiving dinner. So, I did what every good crafting wife does and asked him to stop at the Dollar Store (which was open for the Black Friday sales) and I ran in and bought cups. To this day, he rolls his eyes at my storage obsession.
I spent all Thanksgiving weekend transferring diamonds from baggies to cups and labeling. I was a new woman! What I hadn’t anticipated is how much room these cups took up compared to the baggies. Nor did I realize how hard it would be to store 40+ condiment cups for each painting. One tap of the craft table and they would fall over. There had to be a better way. (Price: 8–12 count, $1–$3)
Option 3: The Round Cylinder. Jackpot! In my search online for my next diamond painting, I came across what I call the round cylinder storage unit. These are circular containers that screw into one another and stack neatly in a latched storage box. I bought three and transitioned all my condiment cup items over.

THE ROUND CYLINDER
I was in heaven. Now I had three nicely stacked storage units labeled and ready to go. The downside was their size and the cheap, hard plastic’s instability. If you are doing a larger painting, this storage system will not hold enough colors or enough diamonds for each color. I recommend this system for what we call “snack size” paintings.
Also, over time, the area where the two containers screw together chips and breaks down, no longer holding the containers together as intended. As a storage system, I still recommend the round cylinder, and use it often myself, but only for smaller paintings or my rhinestone paintings, which usually have fewer colors. (Price: $5–$10)
Option 4: The Harbor Freight. By the time I entered my Harbor Freight days, YouTube was alive with creators seeking out new and improved ways to help diamond painters. Together we formed a family and continue to help each other discover hidden gems, such as the hardware store Harbor Freight. While far from a craft store, their products are where it’s at when it comes to inventive storage units for small parts.

THE HARBOR FREIGHT
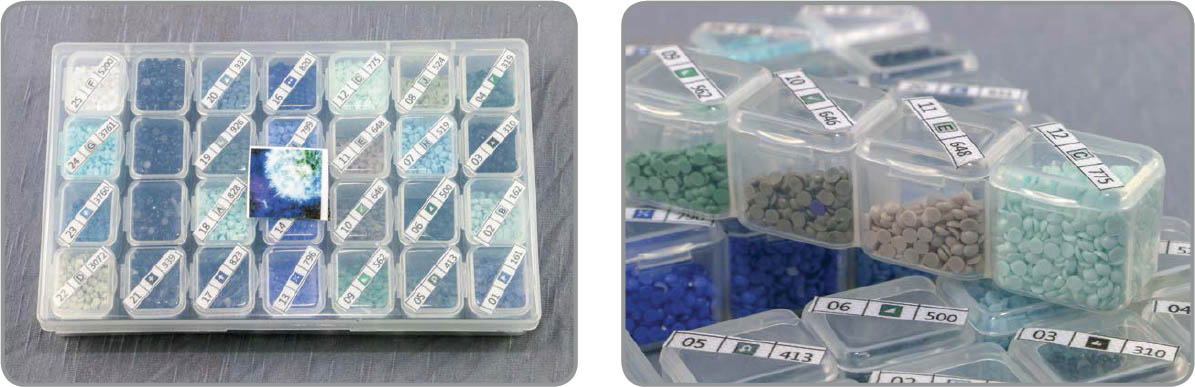
In this store you can find a 25-piece storage system (24 individual units, and one large unit to hold the smaller ones), which has proven nearly perfect for diamond storage. The small containers hold up to 2,000 diamonds, which fits the need for most paintings. The 24 containers fit nicely together, each latch separately, have space for labeling which color and symbol you are using, and is transparent so you can see what you need. The plastic is durable, and the system stores nicely.
These units are heaven to work with on a day-to-day basis. The only complaint I have is that the diamonds will get stuck in the lid crevice. At first it was a nuisance, but once I figured out to open the lid above my tray, I was good to go. A little tap also helps. (Price: $4–$5)

DIAMONDS STUCK IN CRACK OF STORAGE CONTAINER
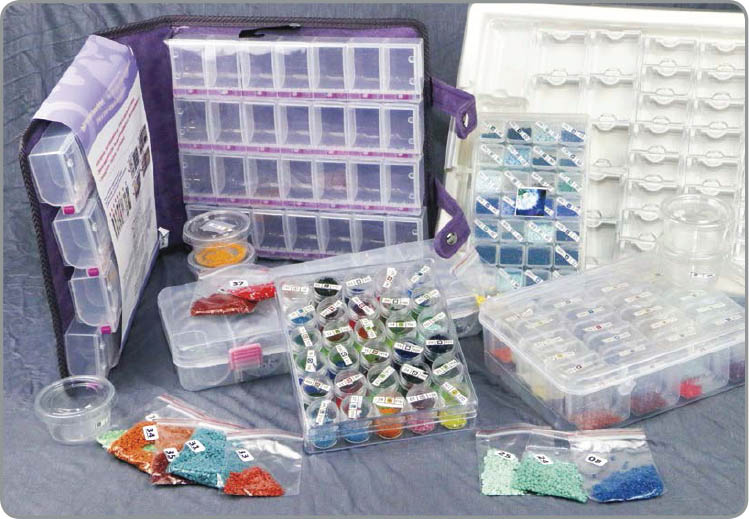
Option 5: The Elizabeth Ward/Darice System. Another highly sought-after storage unit is the Elizabeth Ward/Darice system. These can be found at www.consumercrafts.com or purchased at any major craft store or Amazon. They were originally designed for jewelry makers but have proven perfect for storing diamonds. The containers come in one size, but the individual units inside the container can be customized. The common containers hold either 45 multiple size units, or 82 uniform small units. You can also buy a large container and fill it with individually purchased unit sizes. I prefer to use this as my long-term storage for the diamonds I keep from each project. (Price: $16–$40)
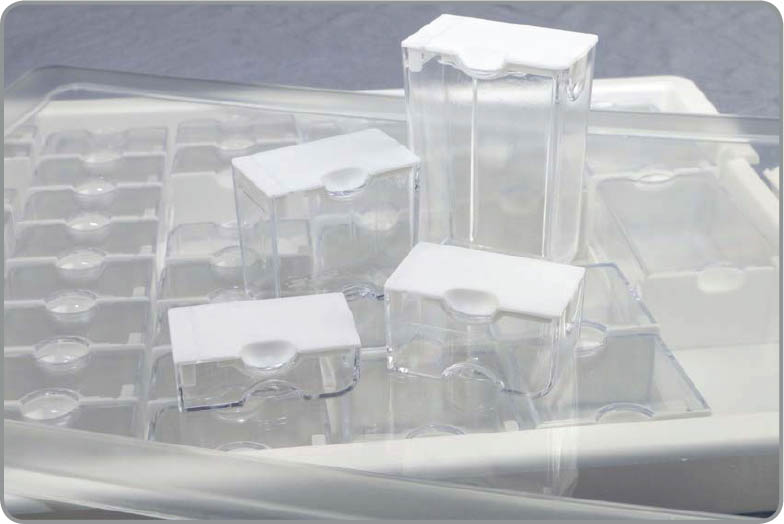
ELIZABETH WARD/DARICE 45
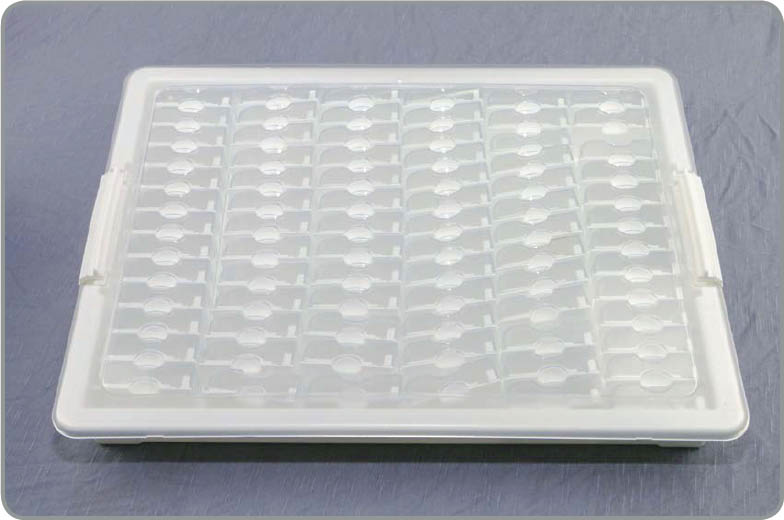
ELIZABETH WARD/DARICE 82
Option 6: Tic Tac Boxes. This storage is named for its similar appearance to a Tic Tac box. It is a great option in concept; however, I have found there are more cons then pros. Although they are compact and organized, they do not hold the number of diamonds needed for most paintings. The tabs loosen after opening and shutting often and do not close as tightly as needed for diamond storage. And the lid has a tendency to pop out, as it is not attached to the bottom of the container, and diamonds will freely fly through your craft space. My advice is to use at your own risk.
Honorable Mentions. Storage ideas and products continue to emerge. Here are some photos of other storage options I use. What is your favorite?
28-CUBED STORAGE UNIT
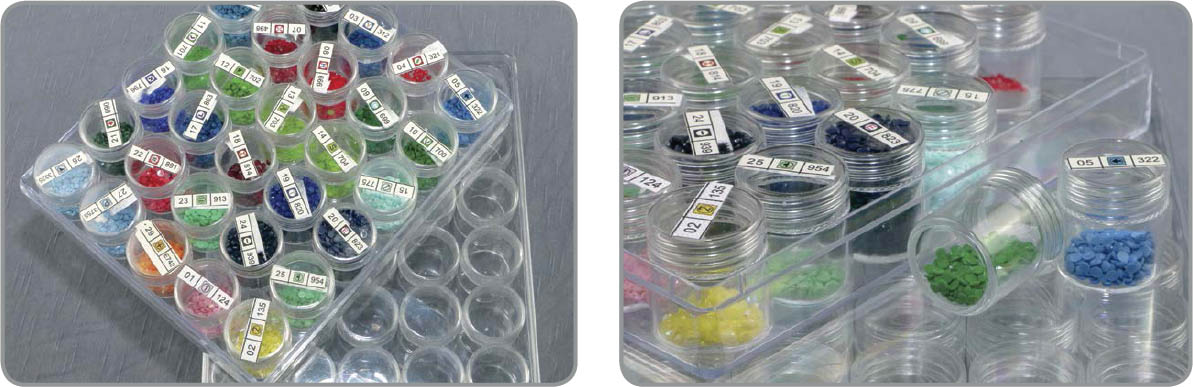
30-PIECE INDIVIDUAL CYLINDER CONTAINERS

LOCKABLE BRAND 56-PIECE CONTAINER, SPOONS SOLD SEPARATELY
DIAMOND PEN STORAGE
Each diamond painting kit will come with a standard diamond pen. I do not find a need to store these pens as I mail them to friends who make the polymer clay pens discussed in an earlier section. I love using and collecting polymer clay and acrylic pens. I may write another book on my collection, but until then, my storage solution recommendations are anything fun and cute that you store your ink pens in.
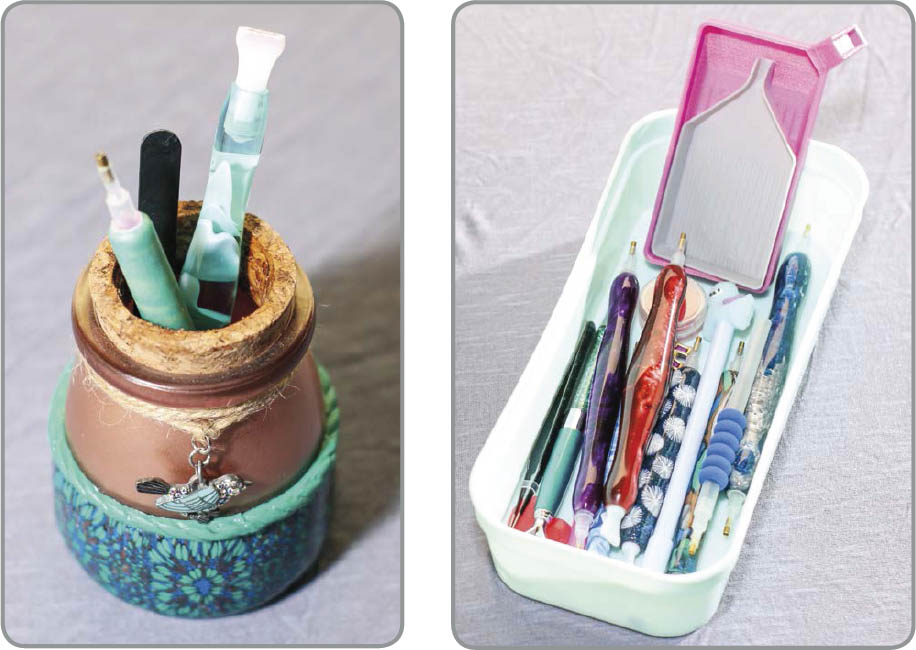
I have three ways I store my pens: 1) an adorable polymer clay container from STORM Sisters Studio on Etsy; 2) a rectangular divider tray by Simply Tidy from Michael’s (love the turquoise!); and 3) a silicone sewing desktop organizer by Anddyam from Amazon.

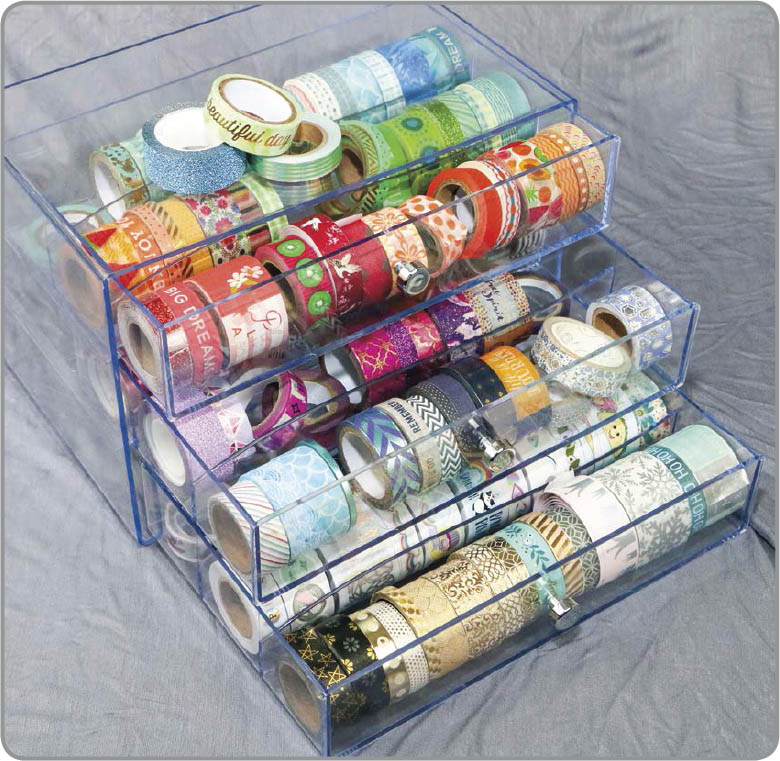
WASHI TAPE STORAGE
These rolls of beautiful tape will roll around, go missing, or hide behind your desk if not stored. There are multiple ways to store your tape. Some throw the tape in a large clear container with a lid and it becomes décor. Some put dowel rods on a peg board and hang them. Others throw them in a shoe box or decorative box and put it on a shelf. I prefer to use a clear container with drawers. This allows me to see my colors, but also keep the tape safe from dust—and falling behind my desk. There are many washi tape options; have fun exploring what works for you.
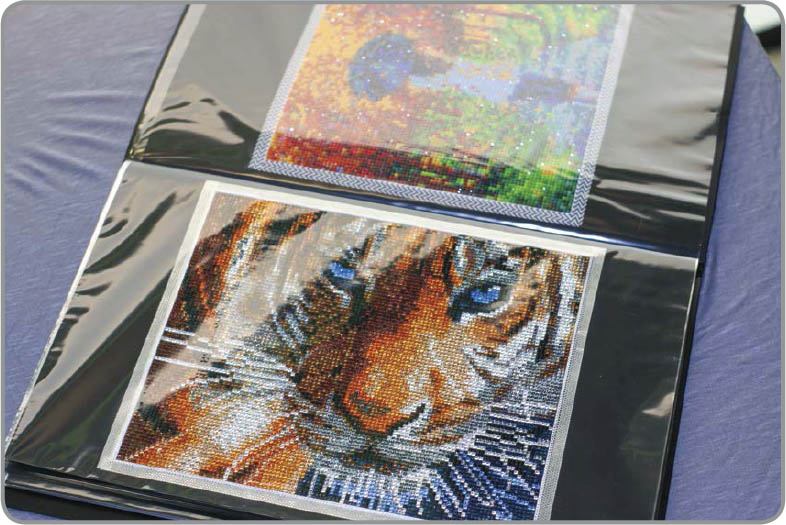
CANVAS STORAGE
Once a canvas has been completed it is important to store appropriately. If the canvas is one you want to display, the storage is simply the framing process. (See “Tips and Tricks” for framing ideas.) Other storage options include an artist portfolio, either one with plastic sleeves for each individual canvas, or one that holds the images flat, protected, and has a handle. I have multiple plastic sleeve portfolios, which I purchased from www.consumercrafts.com, and love to decorate around the canvas with washi tape.
Another alternative is an artist tube. These can be plastic or hard cardboard. Some have straps. Rolling up your canvas and placing it in the tube will keep it safe from dust and movement. The disadvantages are that it stores a limited amount, you could forget what you have completed, and it is not a viable option for sealed canvases, as it will break the integrity of the sealant when the canvas is rolled.
Other storage ideas are colored metal carts, pegboards, dresser drawers, cubbies with cube boxes, decorative storage boxes, baskets from your craft stores, and more.

©ISTOCK/Cagkan Sayin
EASEL
An easel helps prevent neck and back pain. As you diamond paint, it is recommended to take breaks every 20–40 minutes. Remember to move, twist, turn, go to the bathroom, and give your neck, shoulders, and wrists a break. Our bodies were not meant to sit hours in one position.
If you are an avid diamond painter, more than breaks are needed to maintain a comfortable position for your neck and shoulders. An easel is a flat surface with the ability to raise and lower on a tilt, giving you the opportunity to clip your painting to it and adjust your neck into a healthier position. Easels come in both wood and metal mesh. The wood form is best, as it allows you to diamond paint with or without a light pad. A metal mesh form requires a light pad between the painting and the easel for stability.
When choosing an easel, consider the size you may need as well as the tilt you expect to use, as some easels are more restrictive than others. See “Resources” to find out where to purchase.
LIGHT PAD
A light pad is a flat lightboard to place under your painting in order to shine light through your painting. Its function is to assist in seeing symbols more clearly on your canvas. When light comes from above (e.g., a desk lamp), there may be a reflective shine from the adhesive. However, if the light is coming through the canvas, it will illuminate your colors and symbols and reduce eye strain.
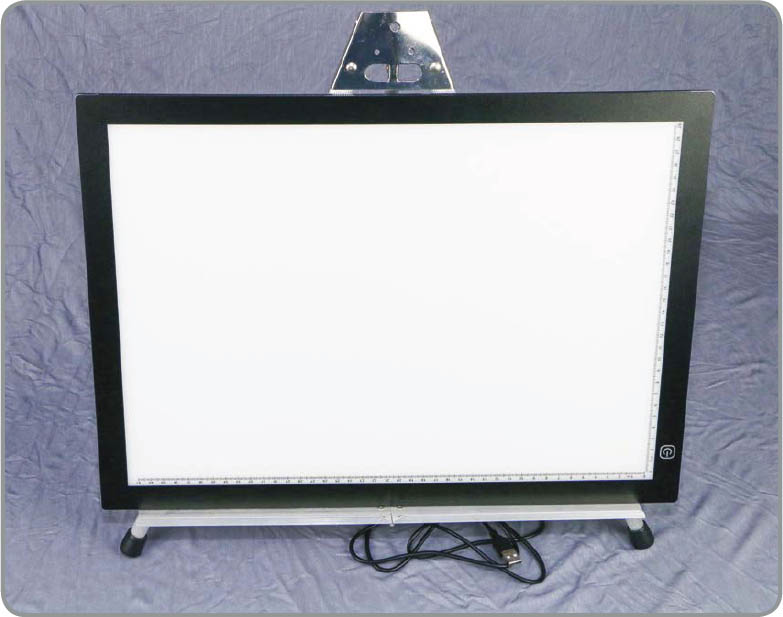
Remember, diamond painting is a time-consuming craft, and the more you squint at each symbol, the more you may experience headaches, neck pain, and tension. Diamond painting is meant to induce relaxation; a light pad helps this be a reality for you.
There are different sizes and qualities of light pads.
Sizing: The smaller the number after the letter “A,” the bigger the light pad.
- A4: 9"x14" (the size of a piece of copy paper)
- A3: 14"x19" (will hold a 30x40cm painting nicely)
- A2: 19"x25" (will hold a 40x50cm painting nicely
Quality: Research your light pad before you purchase.
Power Options. Some cheaper models have an on/off option only, others have a three-setting dimmer switch. Higher-quality light pads will give you more brightness settings than you will ever need.
Cord Options. A light pad’s cord will make or break your purchase. If a light pad has a USB cord, it will need to be plugged into your computer or into an adapter in the wall to be used. If the cord must be plugged directly into the light pad, you may find the unit will crack at cord insert and your light pad will be useless after a few months.

I highly recommend a light pad with a permanent cord. This allows for a more evenly-distributed stress point when plugging and unplugging your cord. A light pad where the cord plugged directly into the pad itself lasted me three months before breaking. My current light pad has the cord extended connection and is still going strong after 1-plus years.
As with anything, there is a wide range of light pads from which to choose. You do not need a fancy unit, but my dream light pad is an A3 rechargeable. This light pad can be plugged into a power block, allowing more movement while diamond painting. I hope Santa will bring me one this year.
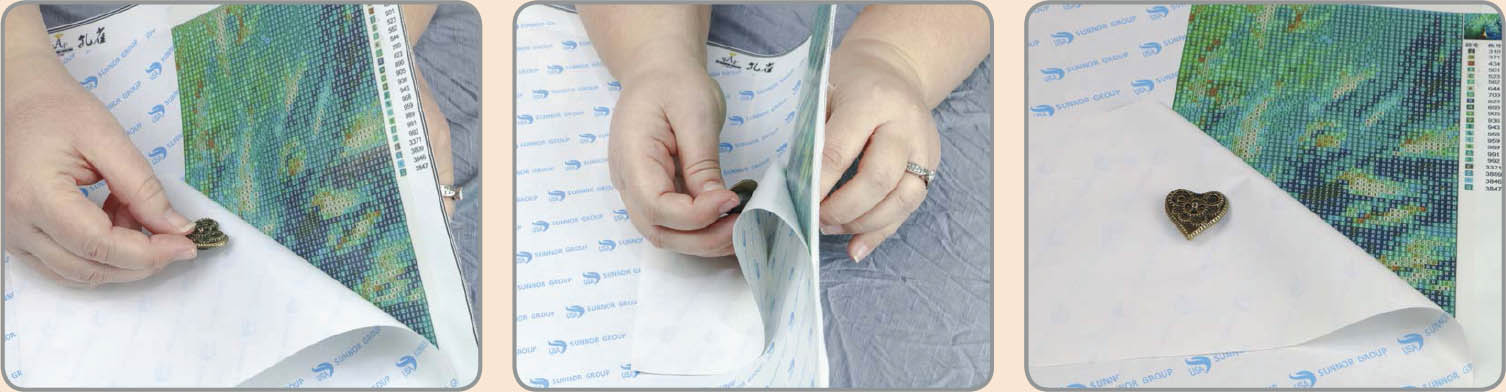
COVERMINDERS
The term coverminders was invented from a YouTube creator and friend of mine, Diamond Painting by Doni. Doni was watching another YouTube creator (Stitcherista), who was explaining how she was using a needle minder to keep her diamond painting canvas secured. (A needle minder is a magnetic object that cross-stitchers use to hold their needles when not in use.) Doni shared with me how she could make these en masse for the diamond painting community, and thus a coverminder was born.

Coverminders are whimsical, beautiful, unique objects with magnets that connect together on either side of the canvas and keep it in place. This allows your cover to remain in place without having to cut it off, which risks dust, fuzz, or rogue diamonds getting in places they do not belong. As coverminders have evolved, they have become functional in other ways. Some people have used small containers as coverminders to help keep trash diamonds separated from the good ones, or to hold their wax so it’s always easily accessible.

MATCHING DECORATIVE COVERMINDER AND WAX CONTAINER
(Photos courtesy of STORM Sisters Studio.)
Coverminder storage has also become its own accessory. I have found magnet sheets and put them inside containers. I’ve also used metal containers and magnetic strips on the side of my craft table. Whatever a magnet can stick to can be a fun use for storage.

COVERMINDER STORAGE
MESH RULER
As someone who loves order, I am obsessed with the mesh ruler. “What is that metal thing you are using?” is one of the most frequently asked questions I receive. A mesh ruler is a metal piece with diamond-sized holes punched through it to help you line up your diamonds.
When diamond painting, lay your ruler over the adhesive and line up the holes with the symbols. Once the ruler is placed, it will not move until you lift it. Then begin diamond painting. I find I need to press a little harder with the ruler to push the diamonds through, but in the end, it is worth it, as all my diamonds are lined up perfectly.

MESH RULER

Once finished with the area, I will roll my roller (see next accessory) over the diamonds to ensure they are pressed into the adhesive, and then lift the ruler from one end and gently pull. If your diamonds begin to lift with the ruler, don’t worry; continue to lift the ruler as you roll your roller and the diamonds will obey. If any diamonds do not push through, do not force them as it will break your ruler. Instead, select a new diamond in the same color and place it on the symbol freehand style.
pro tip
When ordering a mesh ruler, pay attention to the length size, because companies use different methods of showing size. Some will give you number of holes, others will post the cm (centimeter length). The first ruler I ordered was 3 inches long, and I was seriously disappointed. Now I look for 800+ holes or 30–31cm (12 inches).
Rulers come both round and square. They also come in different lengths and size of the diamond hole. There are too many options for me to go into great detail here, but I have found that the most popular round size is 141mm. When shopping, do not purchase unless you know the ruler size, otherwise you may find yourself disappointed.
The square rulers are more uniform in size and look as if plus signs have been punched out of the square. Rounds allow for room between each diamond, therefore, you can have a hole for each diamond. Squares, on the other hand, have holes right next to one another. The disadvantage to this is, once all the diamonds are placed and you pull the square diamond ruler up, you will need to go back in and fill in the other 50 percent of the diamonds. No matter which ruler you use, your diamonds will be beautifully in line.
ROLLER
A roller is a simple tool to help click diamonds into place. It can be used with a mesh ruler, or when needing to snap a square diamond into place. In the Tips and Tricks section, I discuss popping diamonds. The roller is your friend when diamonds do not behave as they should. Some roller options: plastic hand roller, wooden rolling pin, rubberized roller, a smooth thick wooden dowel. One time I used a can of vegetables while waiting for my roller to arrive (shh, that’s our little secret).
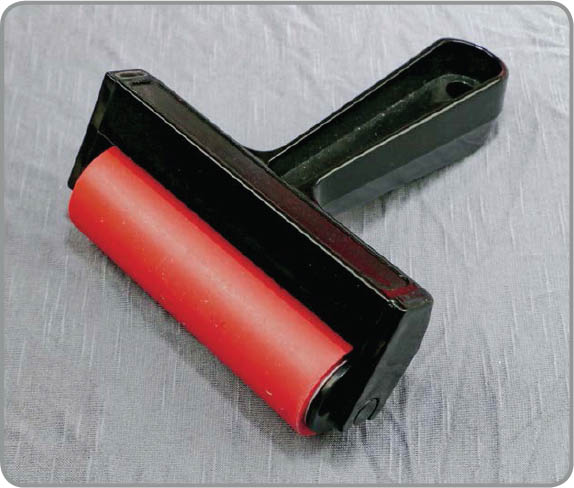
ROLLER
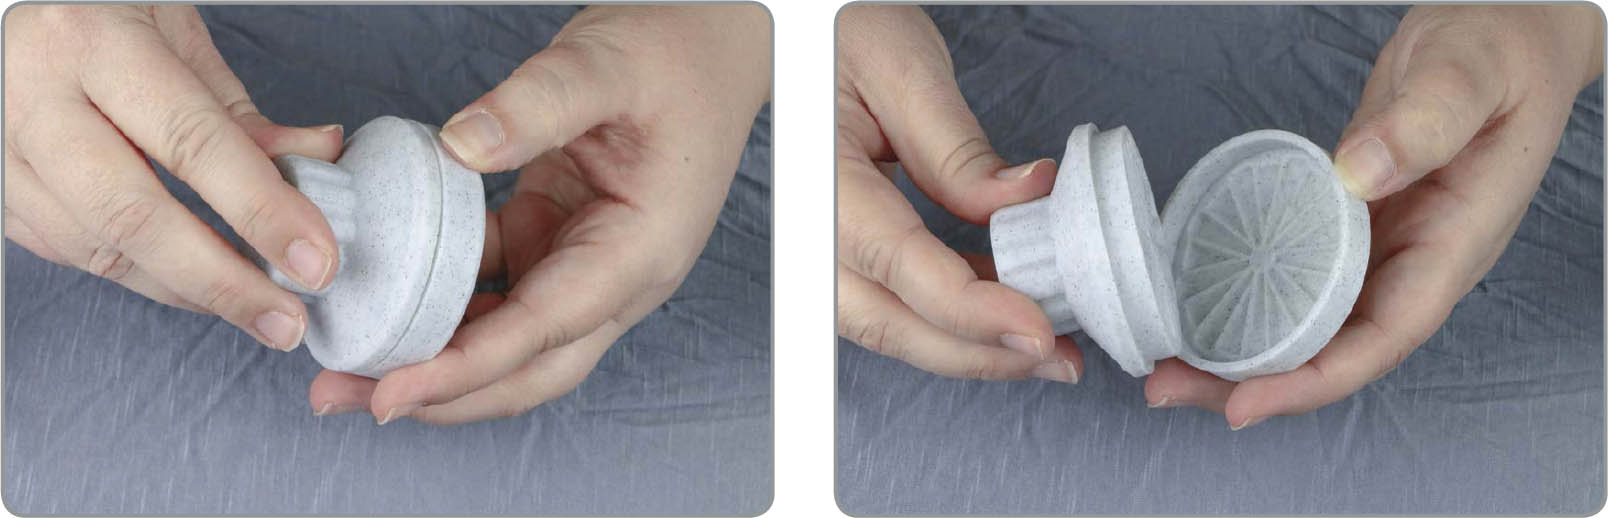
DIAMOND GRINDER
The majority of diamonds are made from plastic. At times, the plastic sticks together. Trying to pull 2mm diamonds apart with your fingers can be a tedious—or even painful—process. If a grinder can grind herbs into small pieces, why not diamonds?

DIAMOND GRINDERS
Pour your stuck diamonds into one side of the grinder, replace the lip, and gently twist in one direction (not back and forth). The grinder will make a cracking noise. Once the noise dissipates, the diamonds will be separated. My favorite diamond grinder is made by Archer’s Art on Facebook. It is a trademark design created by the Archer family and made from 3D printers. They also have different designs to help those with arthritis and hand pain. I have many myself and find them a dream to work with when confronted with stuck diamonds.
TWEEZERS
Diamond painting has opened my eyes to styles of tools I had never considered. Who knew there were so many types of tweezers? The three to consider are the “metal bent,” “pointy,” and “rounded” tweezers. Most kits with square diamonds will include either the metal bent or pointy tweezers to aid in picking up square diamonds for both placement (instead of using a diamond painting pen) and repositioning. The rounded tweezers are better for round diamonds, as the other tweezers may damage the diamond. Beware of the pointy tweezers, however, as they are sharp—but oh so fun to collect and use as needed.
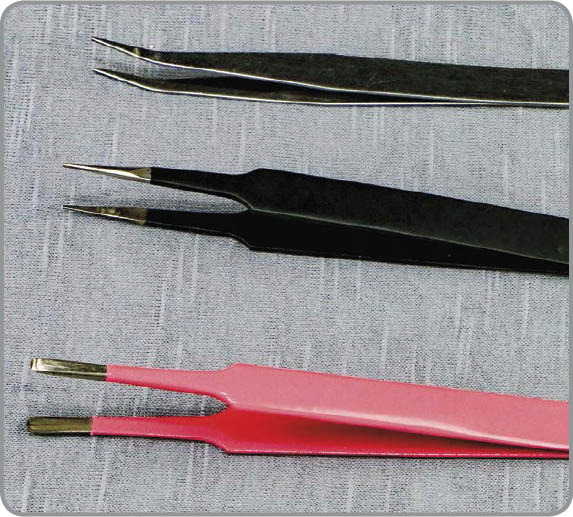
TWEEZERS
TRAY ORGANIZER
If you like to have multiple diamond colors out at once, the tray organizer is for you. These can be homemade using shoebox lids taped to your trays or purchased in a painted wood design. The painted wood designs from Diamond Painting Accessories on Facebook allow you to choose the color and diamond container shape desired. The wood also allows for more stability than shoebox lid cardboard and is less likely to move around on your craft table as you diamond paint.

TRAY ORGANIZERS
BABY WIPES
Diamond quality is as individual as the stores from which the paintings are purchased. Higher-end diamond painting companies guarantee high-quality diamonds. Diamond painting on a budget (like myself), opens the door to lower quality-control standards.
This means that your diamonds may come oily. At the factory, a diamond is punched through the template that utilizes oil in order to keep the diamond from flying out of the machine. If the machines are not cleaned regularly, the diamonds pick up this oil and it gets trapped in the bag. The oil does not hurt the diamond, but the diamond needs to be cleaned in order to stick to your pen and to the canvas. Baby wipes are perfect for this. Pour the oily diamonds into the baby wipe, fold the wipe over, and massage. The baby wipe will remove the oil and allow you to use the diamonds right away.
Work and Lurk This phrase speaks to someone who joins a live YouTube video where chat is enabled but is chooses not to participate in chat due to working diligently on their craft (or other things). Sometimes I’ve even worked and lurked while cooking, cleaning, doing laundry, diamond painting, and more. I personally share when I’m in chat to help the YouTube creators feel loved and heard.
OTHER NOTABLE ACCESSORIES
- Clips for holding your canvas in place on your light pad and/or easel.
- Small desk vacuum to clean up spilled diamonds.
- Small spoon or scoop to aid in transferring of diamonds from containers.
- Fun ink pen for labeling, note-taking, recording completed works.
- Measuring tape for framing options and/or measuring diamond painting area vs. full canvas size.
- Diamond funnel—aids in transfer of diamonds from tray to container.
- Wax holder/diamond trash container—to keep wax fresh and/or diamond trash secure.
- Phone, tablet, or TV to watch your favorite YouTube creators.
- Headphones.

CLIPS

DIAMOND FUNNEL
Accessories can be just as fun as diamond painting itself. Once you know this is the craft for you, have fun, explore, and enjoy the ride.