
Chapter One. Using Flash Like a Pro
If You Hate the Way Photos Look with Flash, You’re Not Alone
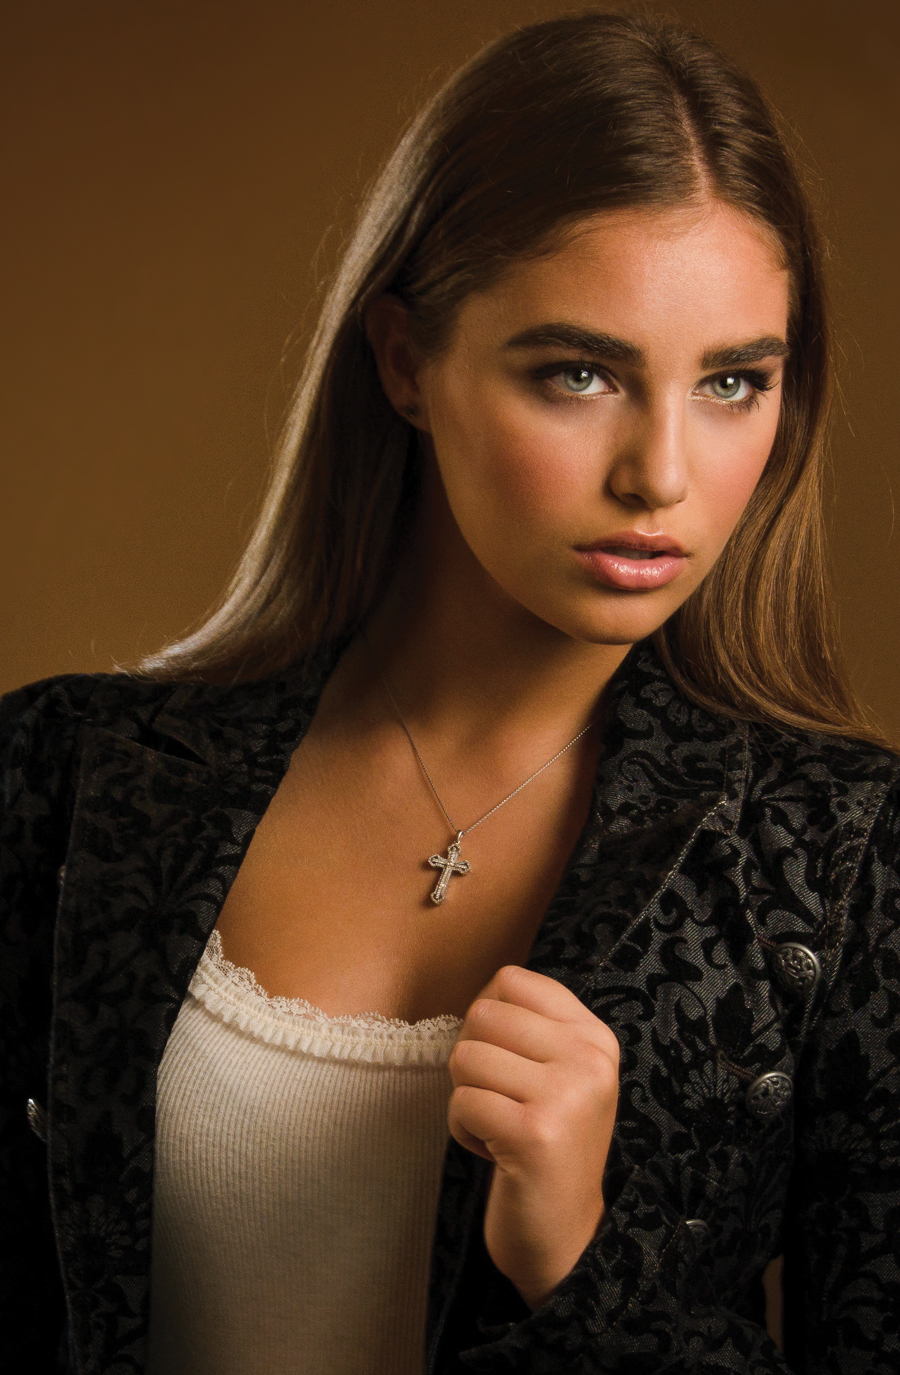
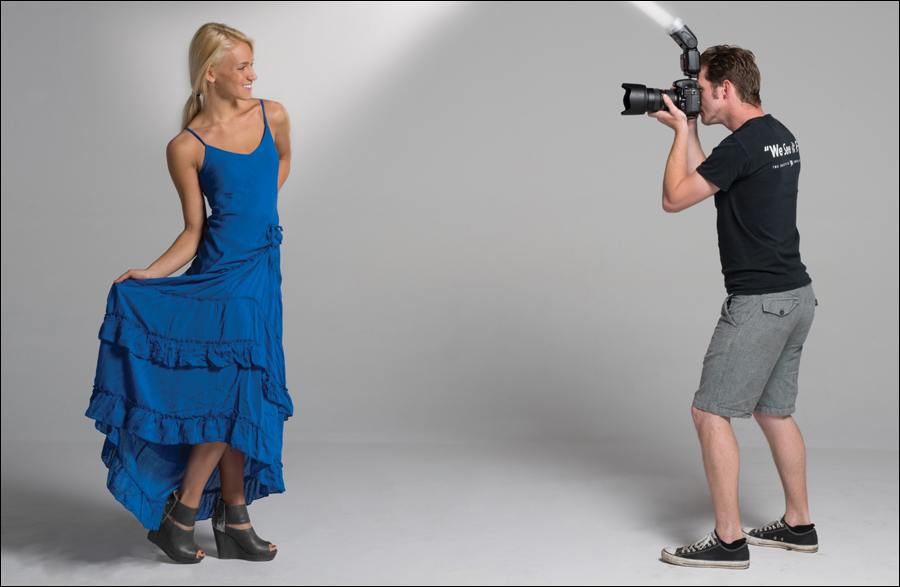
SHUTTER SPEED: 1/15 SEC F-STOP: F/9 ISO: 100 FOCAL LENGTH: 55MM PHOTOGRAPHER: SCOTT KELBY
 If you’ve taken a photo with your camera’s pop-up flash, you’re probably wondering how camera manufacturers list pop-up flash as a feature and keep a straight face. It’s probably because the term “pop-up flash” is actually a marketing phrase dreamed up by a high-powered PR agency, because its original, more descriptive, and more accurate name is actually “the ugly-maker.” You’d usually have to go to the Driver’s License Bureau to experience this quality of photographic light, but luckily for us, it’s just one simple push of a button, and—BAM—harsh, unflattering, annoying, blinding light fires right into your subject’s face. Seriously, does it get any better than that? Actually, it does. You just have to get your flash off your camera. Now, the first time you actually use pop-up flash and you see the quality of light it creates (and by “quality” I mean “a total lack thereof”), you’ll be tempted to do just that—rip that tiny little flash right off the top of your camera (I’m not the only one who did that, right?). I have to figure that camera manufacturers include a pop-up flash on most camera models to do one thing and one thing only: spur sales of dedicated off-camera flash units (which are actually fantastic). Because as soon as you see the results from your pop-up flash, you think, “There has just got to be something better than this!” or maybe “I must be doing something wrong,” or “My camera must be broken,” or “This camera must have been stolen from the Driver’s License Bureau.” Anyway, this chapter is for people who figured there must be something better, and if someone would just show them how to use it, they could love flash again (not pop-up flash, mind you, but off-camera flash, which is a gas, gas, gas!).
10 Things You’ll Wish You Had Known...
Okay, there aren’t really 10, there are just eight, but “Eight Things” sounded kinda lame.
(1) First, go right now to http://kelbytraining.com/books/digphotogv2 and watch the short video I made to explain these points in more detail. It’s short, it’s quick, and it will help you read this book in half the time (that “half the time” thing is marketing hype, but you’ll get a lot out of the video, so head over there first. I’ll make it worth your while).
(2) Here’s how this book works: Basically, it’s you and me together at a shoot, and I’m giving you the same tips, the same advice, and sharing the same techniques I’ve learned over the years from some of the top working pros. When I’m with a friend, I skip all the technical stuff, so for example, if you turned to me and said, “Hey Scott, I want the light to look really soft and flattering. How far back should I put this softbox?” I wouldn’t give you a lecture about lighting ratios or flash modifiers. In real life, I’d just turn to you and say, “Move it in as close as you can to your subject without it actually showing up in the shot. The closer you get, the softer and more wrapping the light gets.” I’d tell you short and right to the point. Like that. So that’s what I do.
(3) Sometimes you have to buy stuff. This is not a book to sell you stuff, but before you move forward, understand that to get pro results, sometimes you have to use some accessories that the pros use. I don’t get a kickback or promo fee from any companies whose products I recommend. I’m just giving you the exact same advice I’d give a friend.
...Before Reading This Book!
(4) We don’t all have budgets like the pros, so wherever possible I break my suggestions down into three categories:
![]() If you see this symbol, it means this is gear for people on a tight budget.
If you see this symbol, it means this is gear for people on a tight budget.
![]() If you see this symbol, it means photography is your passion, and you’re willing to spend a bit more to have some pretty nice gear.
If you see this symbol, it means photography is your passion, and you’re willing to spend a bit more to have some pretty nice gear.
![]() If you see this symbol, it means this gear is for people who don’t really have a budget, like doctors, lawyers, venture capitalists, pro ball players, U.S. senators, etc.
If you see this symbol, it means this gear is for people who don’t really have a budget, like doctors, lawyers, venture capitalists, pro ball players, U.S. senators, etc.
To make this stuff easier to find, I’ve put up a webpage with links to all this gear, and you can find it at http://kelbytraining.com/books/vol2gear.
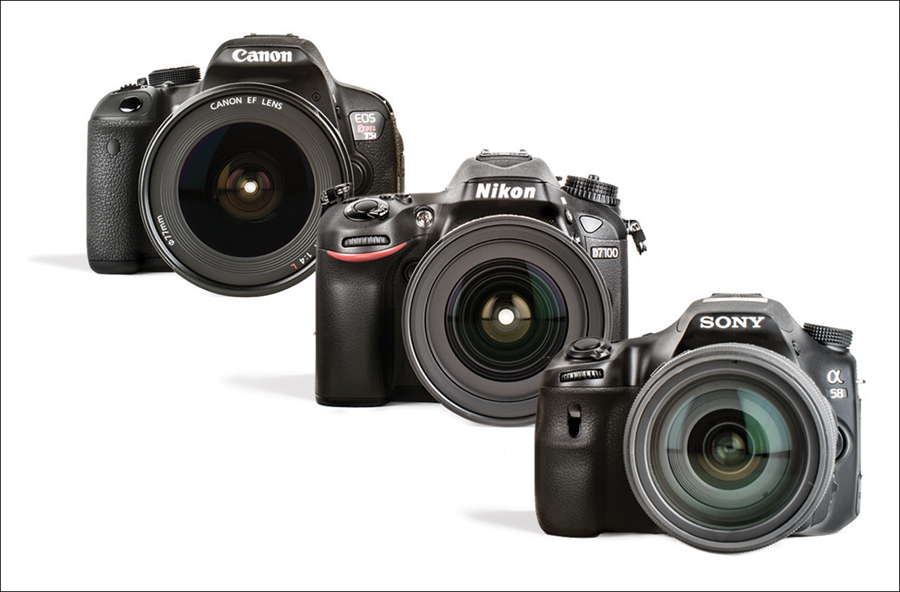
(5) If you’re shooting with an Olympus or a Sigma digital camera, don’t let it throw you that a Nikon, Canon, or Sony camera is pictured. Since most people are shooting with a Nikon, Canon, or Sony, I usually show one of them, but don’t sweat it if you’re not—most of the techniques in this book apply to any digital SLR camera, and many of the point-and-shoot digital cameras, as well.
Here Are Those Last Three Things
(6) The intro page at the beginning of each chapter is designed to give you a quick mental break, and honestly, they have little to do with the chapter. In fact, they have little to do with anything, but writing these off-the-wall chapter intros is kind of a tradition of mine (I do this in all my books), but if you’re one of those really “serious” types, you can skip them because they’ll just get on your nerves.
(7) This is part 2 of The Digital Photography Book and it picks up where the last book left off (so it’s not an update of that book, it’s new stuff that people who bought the first book asked me to write about next). If you didn’t buy part 1, now would be a really good time to do that (just think of it as a “prequel.” Hey, it worked for George Lucas).
(8) Keep this in mind: This is a “show me how to do it” book. I’m telling you these tips just like I’d tell a shooting buddy, and that means, oftentimes, it’s just which button to push, which setting to change, where to put the light, and not a whole lot of reasons why. I figure that once you start getting amazing results from your camera, you’ll go out and buy one of those “tell me all about it” digital camera or lighting books. Okay, it’s almost time to get to work. I do truly hope this book ignites your passion for photography by helping you get the kind of results you always hoped you’d get from your digital photography. Now pack up your gear, it’s time to head out for our first shoot.
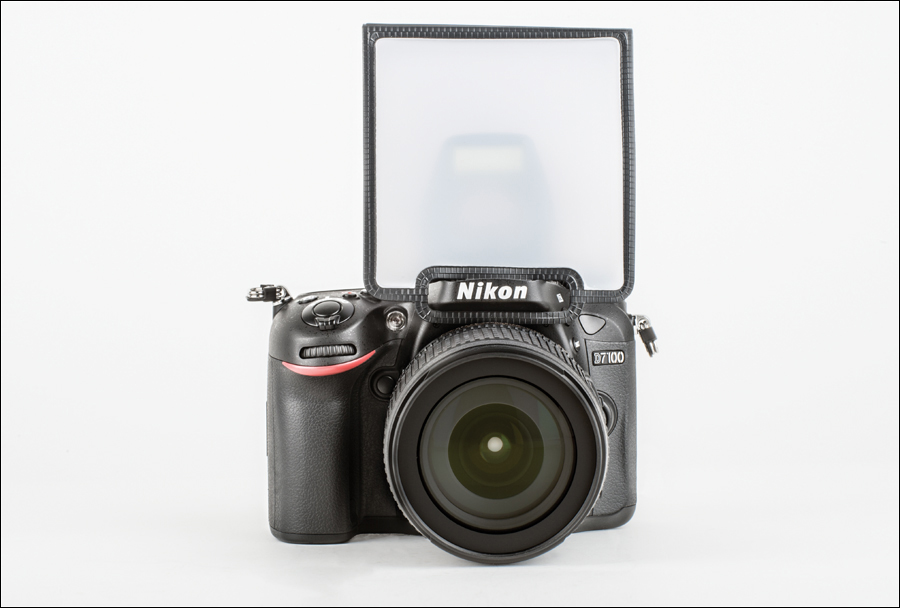
Pop-Up Flash: Use It as a Weapon
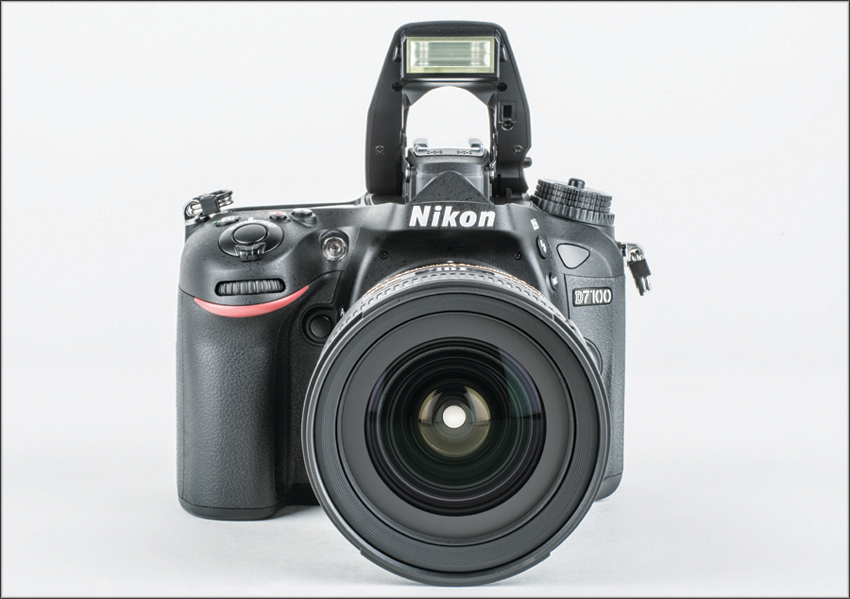
The pop-up flash built into your digital camera is designed to do one thing: give you the flattest, harshest, most unflattering light modern-day man has ever created. If you have a grudge against someone, shoot them with your camera’s pop-up flash and it will even the score. Here are just some of the reasons why you want to avoid using that flash at all costs: (1) The face of the pop-up flash itself (where the light comes out) is very, very tiny and the smaller the light source, the harsher the light it produces. (2) Since the flash is positioned right above your camera’s lens, you get the same quality of light and angle that a coal miner gets from the light mounted on the front of his helmet. (3) Using a pop-up flash is almost a 100% guarantee that your subject will have red eye, because the flash is mounted so close to, and directly above, the lens. (4) Because the flash hits your subject straight on, right square in the face, your subject tends to look very flat and lack dimension all around. (5) You have little control over the light, where it goes, or how it lands. It’s like a lighting grenade. These are the reasons why so many people are so disappointed with how their shots look using their camera’s flash, and it’s exactly why using your pop-up flash should be absolutely, positively a last resort and only done in the most desperate of situations (okay, actually it can do a somewhat decent job if you’re shooting outdoors, your subject has the sun behind them, and you need a little bit of light so they’re not just a silhouette. Then, maybe, but other than that...). So, what should you use instead? That’s on the next page.
The Advantages of a Dedicated Flash
If you want to get pro-quality results from using flash, you’re going to need to get a dedicated flash unit (like the one shown above or the ones listed below). What makes these dedicated flashes so great is:
(a) You can aim the flash in different directions (a pop-up flash just blasts straight ahead);
(b) You can angle the flash upward (this is huge—you’ll see why later in this chapter);
(c) You can take this flash off your camera to create directional light;
(d) Even when mounted on your camera, because it’s higher, you’ll get less red eye;
(e) You get control, a more powerful flash, and most importantly, a better quality of light.
Best of all—today’s dedicated flashes do almost all the work for you. Here are some I like:
Scott’s Gear Finder
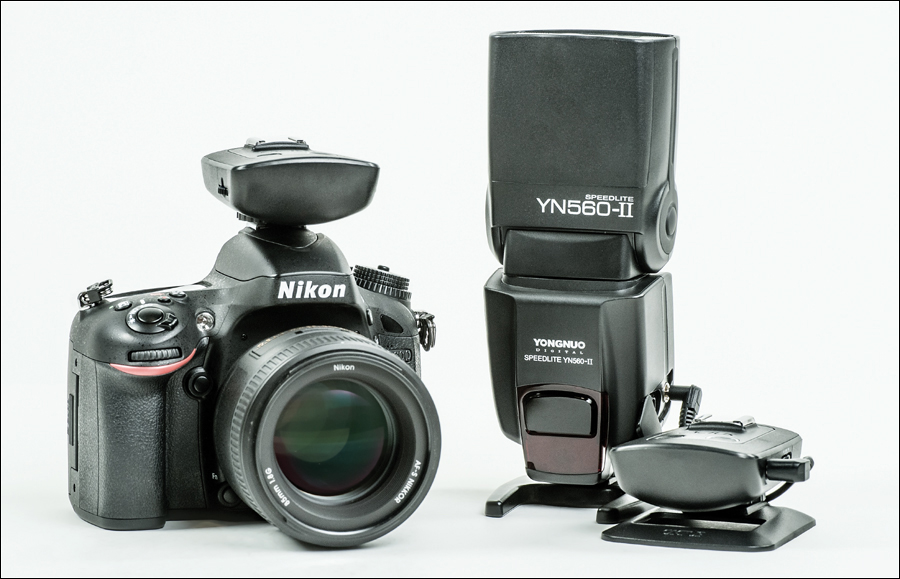
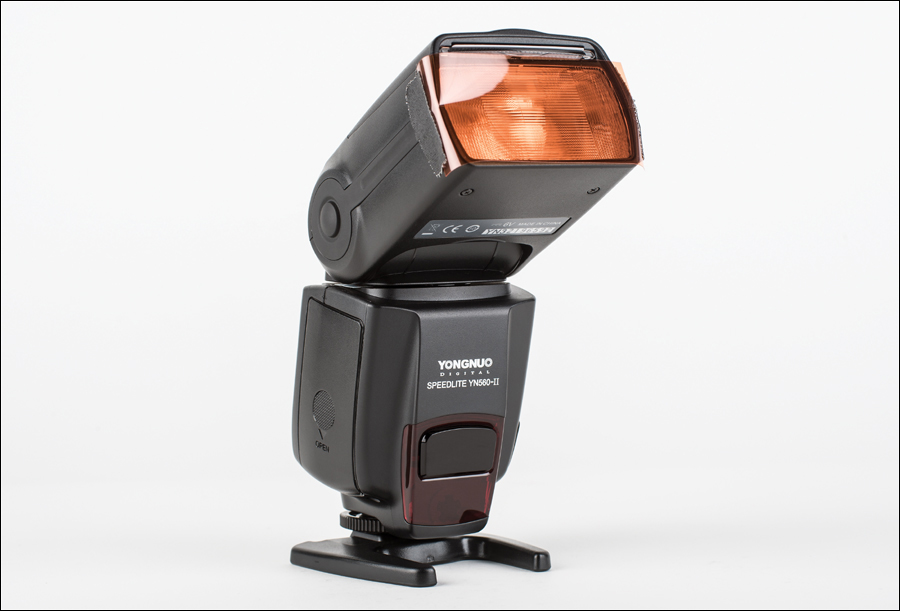
 Yongnuo YN-560 II Flash (around $62)
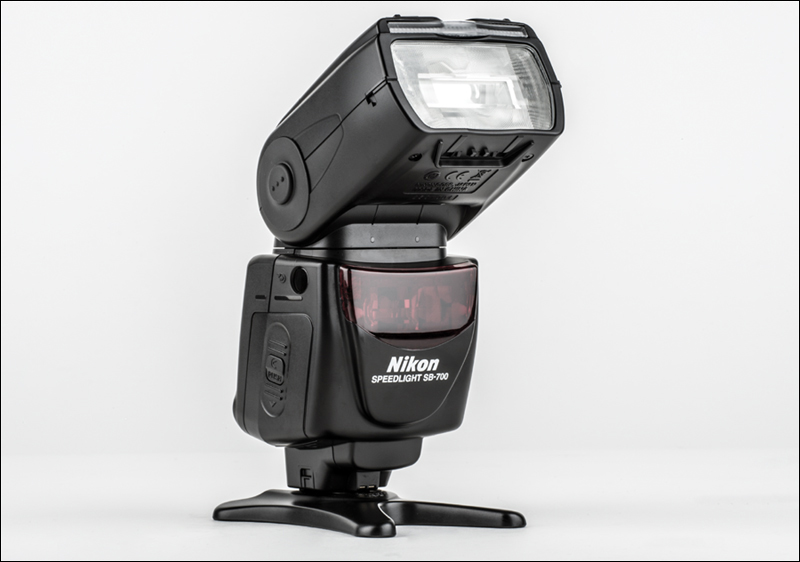
 Nikon SB-700 Flash (around $327) or Canon 320EX (around $209)
 Nikon SB-910 (around $547) or Canon 600EX-RT (around $499)
If You Don’t Already Own a Dedicated Flash
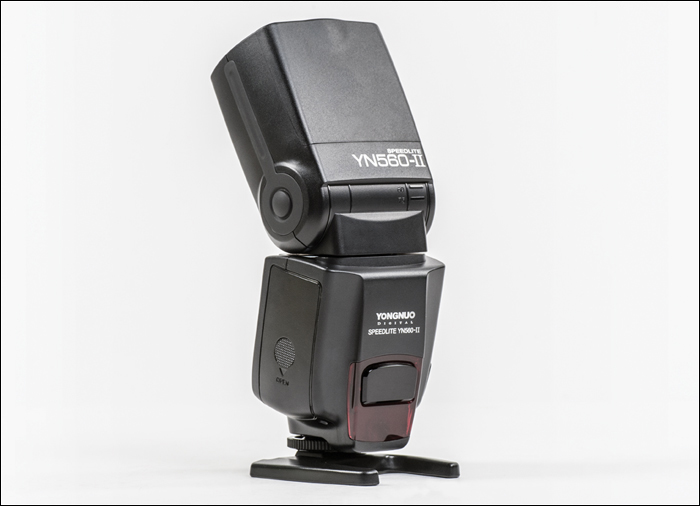
Nikon and Canon both make really great, pro-quality dedicated flashes (we call them “hot shoe flashes” because they’re designed to sit in the hot shoe flash mount on top of DSLR cameras). But, if you’re just getting into this and you’re not sure you want to plunk down a few hundred bucks for a Nikon or Canon entry-level flash, you might want to consider a Yongnuo YN-560 II flash for around $62. These inexpensive flashes look and feel pretty much like a Canon 600EX-RT flash, for about $437 less (in fact, if I handed you one and you didn’t look closely, you’d just assume it was the Canon 600EX-RT flash). They actually work well and do a pretty darn good job (after all, any flash unit just creates a “bright flash of white light.” It’s really what you do with that bright flash of light—how you aim it, how you soften the light from the flash, and so on—that determines how your light will actually look on your subject). By buying a Yongnuo for just $62, you’re fully in the flash game without risking a big chunk of change right up front, and if you eventually fall in love with hot shoe flash, then you can go buy a fancy Nikon or Canon flash.
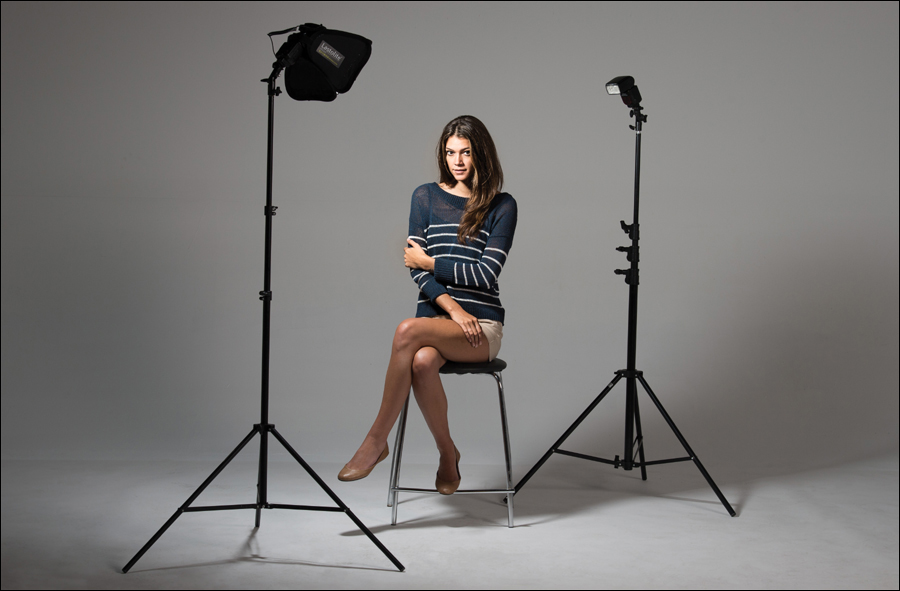
The Pro Look: Get It Off-Camera & Soften It

There are really just four things you need to do to get professional-looking images using a dedicated flash, and the two that are the most essential are: (1) you’ve got to get that flash off the top of your camera, so you can place it where it’s much more flattering for your subjects (which you’ll learn next, and there are a number of ways to do just that), and (2) you’ve got to find a way to soften and diffuse the light from the flash to make it beautiful. Otherwise, these flashes create really bright, really harsh, really unflattering light (and there are a number of ways to do that, as well, and we’ll cover those in a bit). So, just so you know going in, these are the two hurdles we’re going to focus on, because they pretty much are the key to great-looking flash images. So, if you keep that in mind (and don’t overthink everything), the whole hot shoe flash thing becomes pretty easy and fun. Remember: Our goal is to get it off the top of the camera, and then make it soft and beautiful. That’s what the rest of this chapter is about.
Get Your Flash Off Your Camera, Method #1
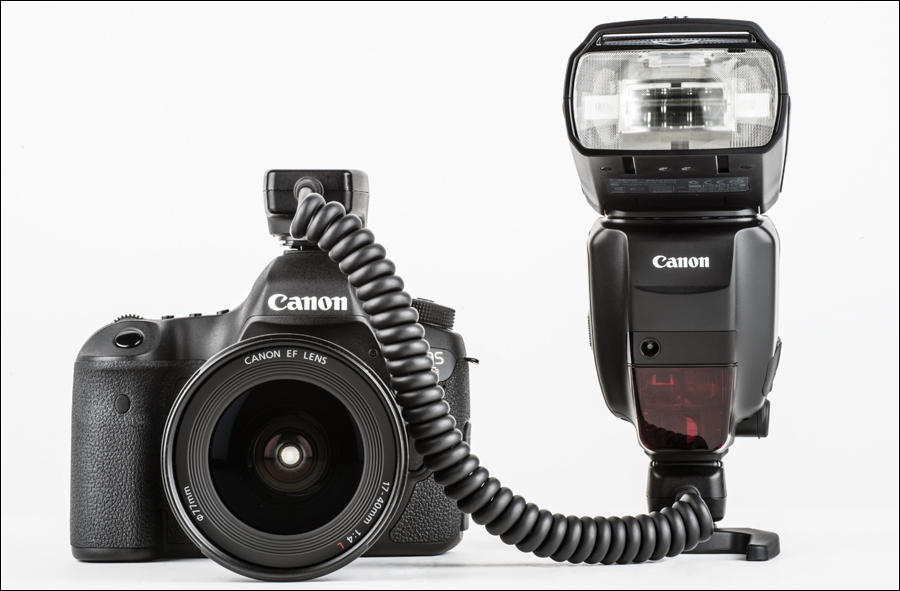
As I just mentioned, one of the best things you can do to get better results from your dedicated flash is to literally get it off the camera. That way, you can create directional light—light that comes from the side of your subject or above (or both)—rather than the flat, straight-on light you get when your flash is mounted on your camera. Directional light is much more flattering, more professional looking, and it adds dimension and depth to your photos. There are three ways to get your flash off your camera, and we’ll cover the first one here, which is to use a flash sync cord. One end plugs into the flash; the other end connects to the sync terminal on your camera or slides into its hot shoe flash mount. Easy enough. Prices vary for the cord. It’s not pretty. It’s not elegant (and you’ll probably trip over it at some point, if it’s a long one), but it beats the heck out of having the flash on top of your camera. Although you’re about to learn the two other ways to get your flash off-camera, it doesn’t matter which method you choose, because getting that dedicated flash unit off-camera is one of the big steps to getting pro-quality results, and is all that’s standing between you and more professional-looking directional light.
Using Pop-Up Flash Wirelessly (#2)
If your DSLR camera has a built-in pop-up flash, you can configure that pop-up flash so it doesn’t light your subject, but instead sends out a dim, mini pre-flash that fires your big dedicated flash wirelessly (and you don’t have to worry about your flash sync cord breaking or getting lost. In fact, you don’t have to worry about dealing with cables at all). However, for this to work, the dedicated flash has to be able to “see” the mini pre-flash from your pop-up flash (that’s why this type of wireless flash triggering is called “line of sight”—if the dedicated flash can’t see the light from the pop-up flash, it won’t fire). This won’t ever be a problem until the one time where you really, really need it to fire, which is why there is a second way to fire your flash wirelessly (on the next page).
Using a Wireless Triggering System (#3)
You can consistently fire your wireless flash using a wireless triggering system (these work the best and, of course, they’re the most expensive). There are two parts to this: (1) a wireless flash transmitter (which sits in your camera’s hot shoe flash socket on top of your camera) and (2) a wireless receiver that attaches to a small socket on your dedicated flash itself with a very small utility cable (only a few inches long). This used to be a very expensive proposition, but today you can buy a decent set (both a transmitter and a receiver) for around $60. That’s a steal. Just a few years ago, it was more like $400. What’s great about these is they’re not line of sight. These are real radio transmitters, so you can put them wherever you need them, even a few hundred feet away, and they’ll still fire every time. The downside: you change the power of the flash by walking over to the flash and turning the power up/down (although there are some transmitters that will let you change power from the transceiver itself).
Scott’s Gear Finder
Cactus Wireless Flash Transceiver V5 Duo (around $60—includes both parts)
PocketWizard PlusX Transceiver (around $99 each—you need two)
PocketWizard Plus III Transceiver (around $149 each—you need two)
Going Wireless (Nikon), Part I
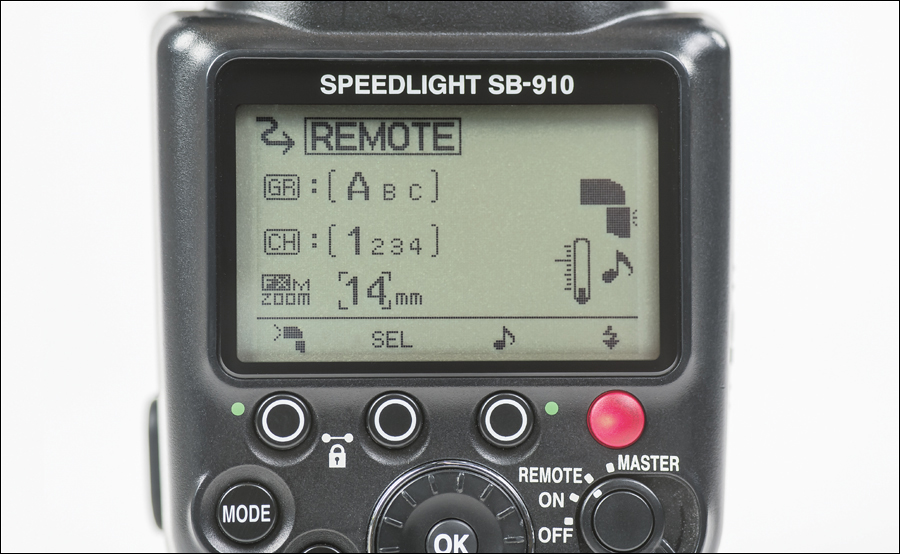
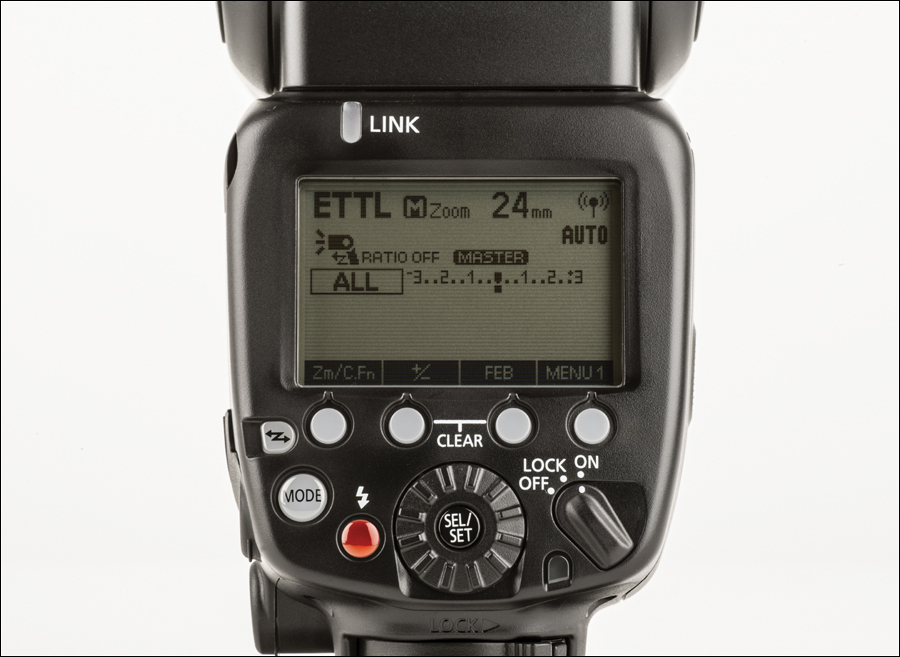
If your Nikon camera has a built-in pop-up flash, you can make a Nikon SB-700, SB-900, or SB-910 flash go wireless in two easy steps: (1) On the back of your Nikon flash unit, just turn the ON/OFF switch to Remote and your flash is now wireless. (See? At least step one is really easy.) The second step is on the next page (because it kinda needs its own page).
Note: If you have a higher-end Nikon pro camera, they don’t come with a built-in pop-up flash, so you have to buy something to trigger your other flash. So, what will work? Well, you could buy another Nikon flash, which you can use to trigger your first Nikon flash (as if it was a pop-up flash), or you can buy a Nikon SU-800 Wireless Speedlight Commander Unit for around $250, which despite its fancy name is still line of sight [sigh]. They both work, but they’re both kinda expensive (well, in comparison to a pop-up flash anyway, which is free as long as your camera has one).
Going Wireless with an Older Nikon SB-600 or SB-800 Flash
Press-and-hold the Zoom and – (minus sign) buttons until the Custom Settings menu appears. You should see the word “OFF” and a squiggly line with an arrow beneath it. Press the Mode button to turn the wireless function On, then press the ON/OFF button, and your flash is now wireless.
(1) First, pop up your camera’s built-in pop-up flash (it actually triggers the wireless flash, so if you don’t have your built-in flash popped up, it won’t work) by pressing the little flash symbol button near the flash.
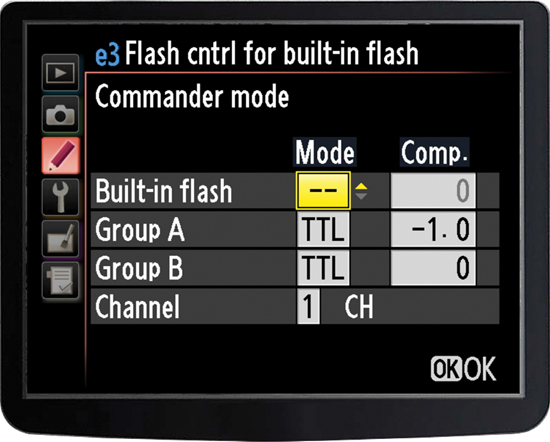
(2) Now, you need to switch your camera’s pop-up flash into Commander mode, so instead of firing its flash, it only sends a small light pulse to your wireless off-camera flash unit to trigger it. To do this, press the Menu button on the back of your camera, go to the Custom Settings menu, and choose Bracketing/Flash. When the Bracketing/Flash menu appears, choose Built-in Flash, then choose Commander Mode. Highlight the Built-in Flash field, and use the dial on the back of your camera to toggle the setting until it reads just “--” (as shown above), which means the pop-up flash is off (except for that little light pulse, of course).
(3) Now when you fire your shutter, as long as your flash unit’s sensor can see the little light pulse (it’s that small red circle on the side), it will fire when you press the shutter button. You control the brightness of your wireless flash from this same menu—just scroll down to Group A and over to the last field on the right. To lower the brightness (power output), use a negative number (like –1.0, as shown above, for one stop less power) or a positive number to make the flash brighter. I’ve put together a short video clip just to show how to set this all up at http://kelbytraining.com/books/digphotogv2.
Going Wireless (Canon), Part I
With Canon flashes, to go wireless you’ll need either of the following:
(1) A Canon Speedlite Transmitter ST-E2 (around $220 at B&H Photo) or ST-E3-RT for radio transmission (around $287), which sit right on your camera’s hot shoe, and not only trigger the wireless flash, but let you control its brightness (power output), which is a key part of this process.
(2) You can use another Canon Speedlite flash (like a second 600EX-RT, which does line of sight or radio transmission) as your transmitter. This second flash sits on the hot shoe on top of your camera, doing basically the same job that the Speedlite Transmitter does, which is to send a tiny light pulse or radio signal from your camera to the wireless flash unit to tell it when to flash, and it lets you control the brightness of the wireless flash, as well.
Either way, the process is pretty similar: If you’re using the transmitter, it’s already set up as your wireless controller, and it has no flash of its own to turn off, so just put it into your camera’s hot shoe and it’s ready to go—you can jump over to the next page and pick up there. If you’re using a Canon 600EX-RT, press the wireless button on the back of the flash until you see the radio transmission icon or optical transmission icon and Master. Now go to Part 2 on the next page. (Note: If you’re using an older flash, like the 580EX II Speedlite, put it in your camera’s hot shoe, then hold the Zoom button on the back of the flash until the display starts flashing. Then turn the Select dial until the screen reads Master and press the center Select button.)
Going Wireless (Canon), Part II
Now that you have a master flash mounted on your camera’s hot shoe, you have to set up the other flash (the one you want to be wireless). (1) If you’re using a Canon 600EX-RT, press the wireless button on the back of the flash until you see the radio transmission icon or optical transmission icon and Slave. (Note: If you’re using an older Canon flash, like the 580EX II Speedlite, hold the Zoom button on the back of the flash until the display starts flashing. Then turn the Select dial until the screen reads Slave and press the center Select button.) Now, to recap: The flash unit on top of your camera is set to be the master unit (the controller), and the other flash is set to be the wireless unit (the slave). (2) Turn off the flash on the master unit so it just emits a pulse of light or radio signal, which triggers the wireless flash (you don’t actually want it to light your subject). To do this, press function button 4 on the back of the flash to display Menu 2. Then press function button 1 until you see the Master Flash Firing OFF icon. I’ve put together a video to show you exactly how this all is done, and you can watch it at http://kelbytraining.com/books/digphotogv2.
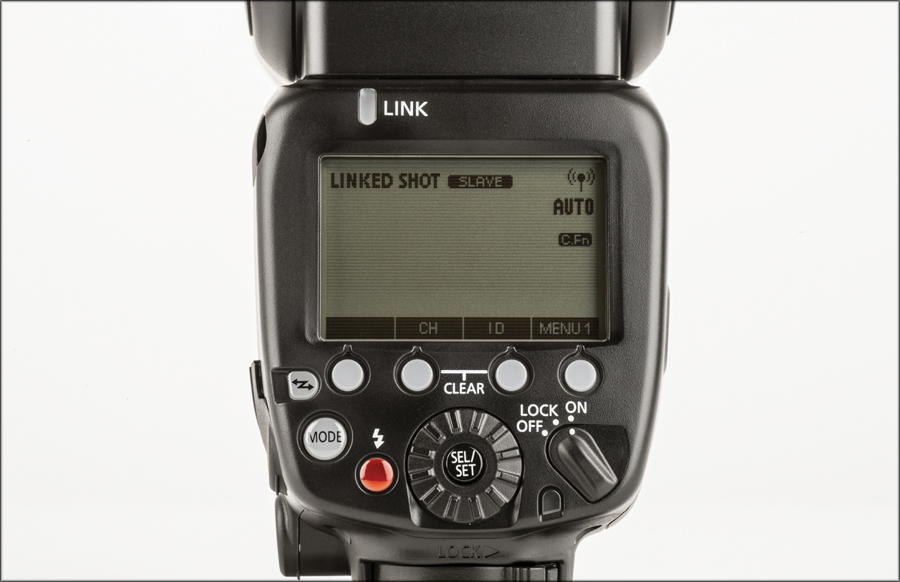
If Your Wireless Flash Doesn’t Fire
If your wireless flash isn’t firing, make sure your master unit and slave unit are both on the same channel (or wireless radio ID). If not, press function button 4 to display Menu 3, then press function button 1 to set the channel or function button 2 to set the radio ID, and turn the Select dial.
“Drag the Shutter” to See More Background
Like I mentioned, there are four big things the pros do to get beautiful quality light (and professional-looking images) from their dedicated flash units. One, you’ve already learned, is getting the flash off the camera so you can create directional light. The second is to set up your flash so it blends in with the available light already in the room, so the background behind your subjects looks natural. Without using this technique, you’ll get what everybody else gets—the background behind your subjects turns black, they look harsh, and the shot will look pretty awful, which is why most people hate flash shots. The technique is called “dragging the shutter,” and what you’re doing is slowing down your camera’s shutter speed so it allows in the existing light, then your flash fires to light your subject. Although this sounds complicated, it’s incredibly simple. First, set your camera to shoot in program mode. Then, aim at your subject and hold the shutter button down halfway, so your camera takes a meter reading of the scene. Look in your viewfinder and see the f-stop and shutter speed your camera chose to properly expose your subject, and remember those two numbers. Now, switch to manual mode and dial in those same two numbers. If the camera showed a shutter speed of ![]() of a second, to drag the shutter you’d need to use a slower shutter speed, right? So try lowering the shutter speed to
of a second, to drag the shutter you’d need to use a slower shutter speed, right? So try lowering the shutter speed to ![]() of a second and take the shot. Don’t worry—your subject won’t be blurry, because when the flash fires it will freeze your subject. You’ll be amazed at what just lowering the shutter speed like this will do to the quality of your flash photos.
of a second and take the shot. Don’t worry—your subject won’t be blurry, because when the flash fires it will freeze your subject. You’ll be amazed at what just lowering the shutter speed like this will do to the quality of your flash photos.
How to Soften the Light from Your Flash
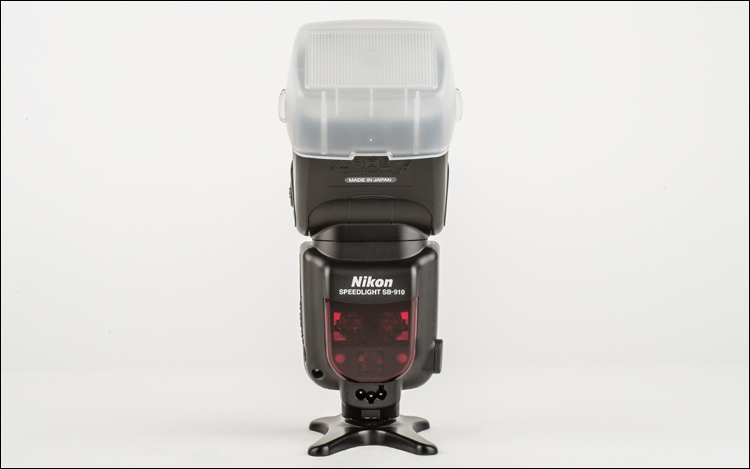
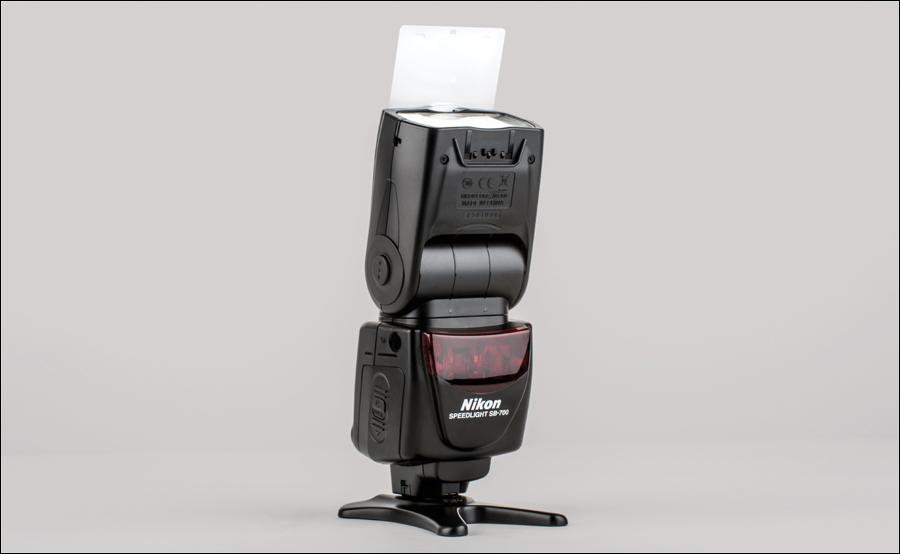
Okay, so you’ve used all the tricks we’ve covered so far, and your flash photos are already looking better—but there’s still a problem. The light is still harsh because the flash itself is very small, and the smaller the light source, the harsher the light. So, to get softer, more flattering light, you need to make your light source larger, right? Right! There are a number of different tricks for doing this, and each pro does it differently, but I will tell you this—they all do it. They all use tricks to soften and diffuse the light from their flash (it’s the third thing [and second most essential one] to do to get professional-looking light from your dedicated flash). Probably the quickest and easiest way to soften the light from your flash is to snap a diffusion dome cap over the end of your flash (like the one shown above), which softens and diffuses your light. Considering how small and light it is, it does a pretty decent job. Once this cap is on, you aim your flash head upward at a 45° angle and it takes care of the rest. If you’re a Nikon user and buy a Nikon SB-910 flash, it comes with the diffusion dome you see above right in the box (if you’ve lost your SW-13H dome, you can buy a replacement from B&H Photo). If you have a Canon flash, you can buy a diffusion dome separately, and the one I recommend is the Sto-Fen Omni-Bounce, which does a great job and is a favorite with pro wedding and event photographers (it sells for around $10 at B&H Photo). One thing to note: Adding this diffusion dome works great indoors, but outdoors where there’s really nothing much for the light to bounce off of, it doesn’t do much at all. Hey, I thought you should know.
Make It Softer Light by Bouncing It
Another popular way to soften the quality of your light is to bounce your light off a ceiling. This does three wonderful things: (1) When your small, direct flash of light hits the large ceiling, it spreads out big time, so the quality of the light that falls back onto your subject is much wider and much softer. It immediately takes the harshness out of your flash, and gives you better quality light. (2) Because the light is now coming from above, it’s no longer that one-dimensional, straight-on flash—now it’s directional flash, which creates nice shadows and lots of dimension for your subject’s face, and as a bonus (3) it keeps you from having harsh shadows on the wall behind your subject. Because the light is coming from above (down from the ceiling), the shadows appear on the floor behind your subject, not on the wall behind them. Plus, because the light is softer, the shadows are softer, too. So, if this bouncing off the ceiling technique is so great, why don’t we use it all the time? Well, there are a number of reasons: (1) There’s not always a ceiling you can bounce off. Sometimes you’re outdoors, or (2) the ceiling is too high to bounce off of (like in a church). If the ceiling is much higher than about 10 feet, the bounce trick really doesn’t work because the light has too far to travel up and back, and your subject doesn’t get properly lit. Of course there’s also (3) the fact that light picks up the color of what it hits, so if the ceiling is yellowish, your light becomes yellowish, and your subject will now appear (come on, say it with me) yellowish! However, if it’s an 8′ or 9′ white ceiling, you’re set.
Putting That Nice Twinkle of Light in the Eyes
If you’re using bounce flash and you want to add a little bit of life and sparkle into your subject’s eyes, then simply pull out and raise the little white bounce card that’s tucked into your flash head (well, at least it is if you’re using a Nikon or Canon flash), as shown above. When you put that little white bounce card up, it redirects just enough of that light heading toward the ceiling back onto your subject to add a nice little catch light in their eyes, and the bonus is this also often removes some of the shadows that appear under their eyes. The key to making this work is that your flash head is aiming up at a 45° angle and the card is fully extended.
What to Do If You Don’t Have a Bounce Card or Yours Breaks
If your bounce card is broken, or if your flash doesn’t have a bounce card (hey, it’s possible), then try this: use your hand. That’s right—shoot with your camera in one hand, and then put your other hand up at the same position and angle a bounce card would be. It will send some of that light forward (like a bounce card), and because light picks up the color of whatever it reflects off of, your light will be nice and warm (thanks to your skin tone).
Softbox-Quality Softening from Your Flash
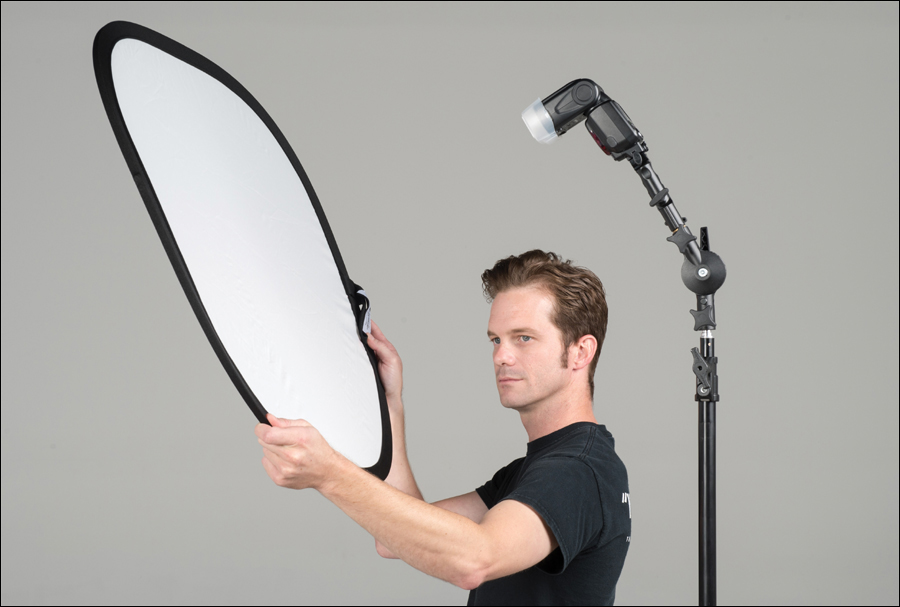
If you want to take this whole softening thing to the next level (quality-wise), you could buy a small softbox that mounts over your flash, but the problem is they’re small, so the light doesn’t spread and soften all that much. So, one really easy way to spread and soften your light is to shoot your flash directly through a large diffusion panel. These panels are made of white translucent stretched fabric (usually round or square with rounded corners like the one you see above), and they spread and diffuse the light from your flash. Since they’re just fabric, they’re super-lightweight—they’re designed to collapse down into a very small, flat size, so they’re easy to take with you (they come with a small, flat carrying pouch)—and best of all, they’re a bargain! You can get a Westcott 30″ 5-in-1 Reflector (the same one I use), which includes a 30″ diffuser, for around $30 (plus, now you have a great reflector, as well. Actually, you’ll have four reflectors—more on them later). To use this diffuser, have an assistant (or a friend, spouse, etc.) hold the panel about 1 foot or more in front of your flash. That way, when the tiny light from the flash hits the panel, it causes the light to spread out dramatically, which gives you much softer, smoother, more flattering light. If you don’t have an assistant or a friend nearby, you can clamp your diffuser on a second light stand using a Manfrotto 275 Mini Clip Clamp for around $14.50. If you want to invest in a pro-quality diffusion panel, check out Lastolite’s 30″ TriGrip Diffuser, One Stop (with a built-in handle) for around $70.
Tip for Shooting Through a Diffuser
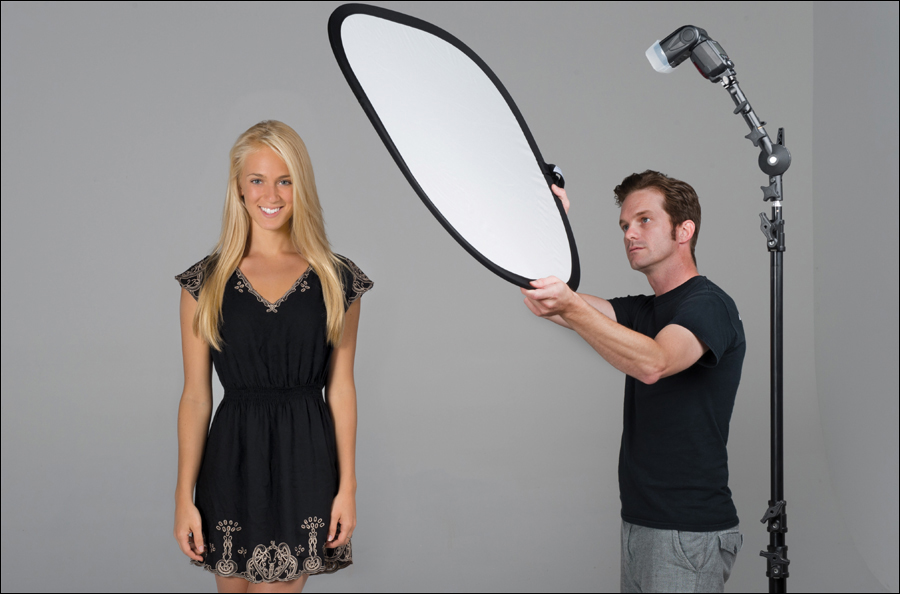
If you’re shooting your flash through a diffuser (like the Westcott diffuser I just mentioned), here’s a tip: position the diffuser as close to your subject as possible without it actually being seen in the photo. This gives you the best quality wraparound light that is the softest and most flattering (think “closer is better”). Then position your flash so it’s aimed at your subject, but still firing through the diffuser (set it at least 1 foot back from the diffuser, or even farther if you’d like softer, smoother light, but just know that the farther away you move the flash, the lower the power the light will become, so if you move it far away, you’ll have to increase the power of the flash).
Where to Learn More about Off-Camera Flash
If this chapter ignites your passion for off-camera flash, and you want to take things to the next level, you’ll definitely want to check out Strobist, which is the #1 site on the web for flash enthusiasts (both amateurs and pros). It’s run by David Hobby, a tremendous photographer and teacher who has built an entire worldwide community of flash users, and there’s really nothing like it anywhere on the web. Highly recommended (you’ll find it at www.strobist.blogspot.com).
Why You Might Want a Stand for Your Flash

Most of us don’t have the luxury of having an assistant to hold and position our wireless flash for us, so we either wind up holding the flash in our left hand (so our right hand is still free to press the shutter button), or we put our flash on a lightweight light stand and position it where we’d like it. You can buy a standard light stand, like the 8′ Impact Air-Cushioned Light Stand, for around $33. You’ll also need a flash shoe mount (less than $25 from B&H Photo), which lets you mount your flash on a light stand like the Impact. This mount has a little plastic hot shoe on it, and your flash slides right into that hot shoe to hold your flash securely on top of the light stand. That flash shoe mount is surely the inexpensive route, but the downside is they don’t all allow you to angle your flash head downward—only upward, and that’s why the Justin Clamp, while more expensive, is really the way to go (see the next page for more on this). So, once you’ve got your flash on this light stand, where do you put it? There’s no single right answer, but I’ll give you a good starting point—put it to the left, and in front, of your camera, up about a foot or so higher than your subject. That way, if you have your flash mounted on a Justin Clamp, you can aim the flash head back down at your subject, so the light is more like studio light (or window light) and helps to create that all-important directional light.
Mounting Flashes Anywhere
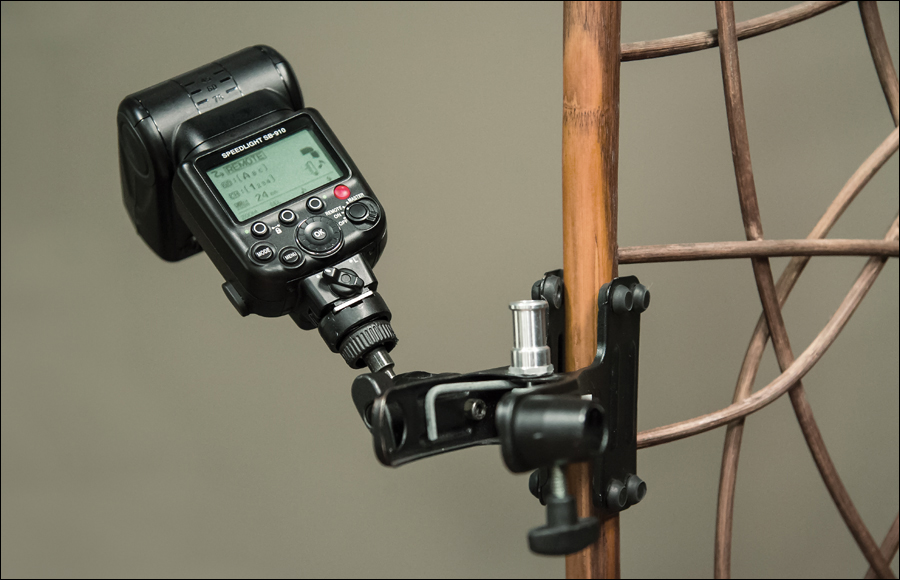
If you’re going to wind up attaching your flash to something other than a light stand (heck, this works great even if you’re using a light stand), I recommend picking up a Manfrotto 175F Justin Spring Clamp with Flash Shoe (better known as simply a “Justin Clamp”). This is just the handiest little gizmo and you’ll love it for two reasons: (1) Your flash slides into a little plastic hot shoe on the top of the clamp, and that clamp is connected to a miniature ballhead that lets you easily and instantly position your flash in any direction or at any angle. So, instead of moving the light stand every time you want to change the angle of the flash, you just move that little ballhead. (2) It has a large clamp on one end, so if setting up a light stand isn’t practical (or isn’t allowed), you can clamp it onto just about anything, from a railing, to a tree branch, to a ceiling tile. These sell for around $61 (at B&H Photo, anyway), and it’s one of those accessories that once you use it, you’ll never go anywhere without it.
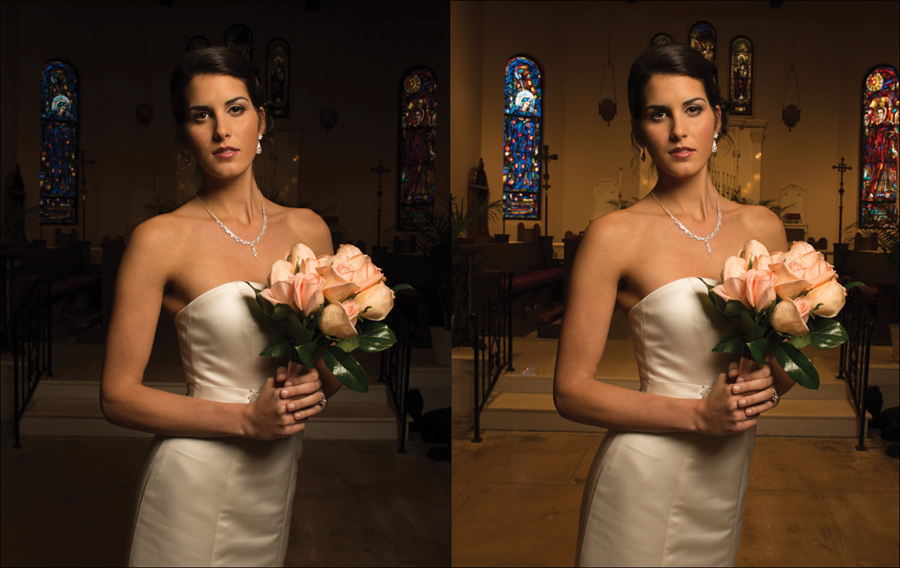
Rear Sync Rocks (& Why You Should Use It)
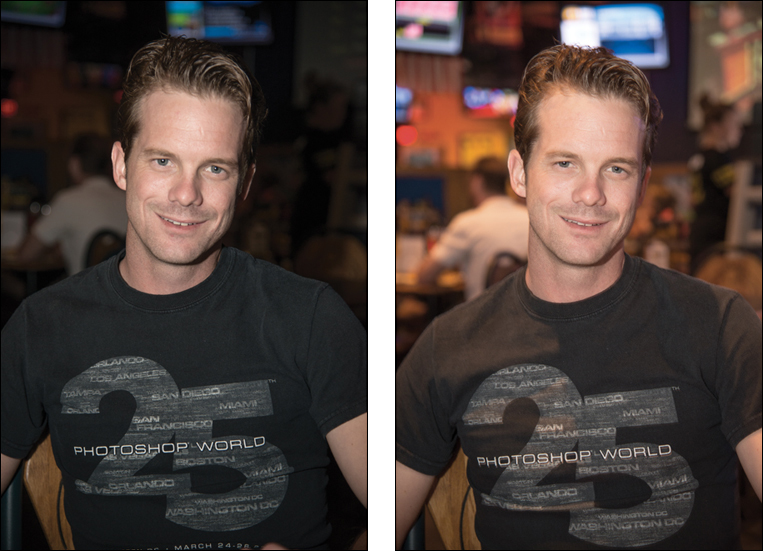
There’s a setting on your camera that will help you get better-quality photos using flash. In fact, your flash shots will get so much better that you’ll wonder why this feature isn’t turned on by default (but it’s not—you’ll have to go and turn it on yourself). It’s called Rear Sync, and what it basically does is changes when the flash actually fires. Usually, your flash fires the moment you press the shutter button, right? So it does freeze any action in the scene, but it also generally makes everything solid black behind your subject (like you see in most snapshots). Changing to Rear Sync makes the flash fire at the end of the exposure (rather than the beginning), which lets the camera expose for the natural background light in the room first, and then at the very last second, it fires the flash to freeze your subject. Now your background isn’t black—instead, it has color, depth, and detail (as seen above right), and this gives you a much more professional look all the way around. In the example above, the shot on the left is using the normal default flash setting (notice how dark the background is, and how washed out the flash makes him look). For the shot on the right, I only changed one single thing—I switched the flash to Rear Sync. Give it a try and you’ll see what I mean (just remember to keep the camera still when shooting in Rear Sync mode, because the shutter stays open longer—enough to expose for the background. This can create some cool effects if your subject is moving while your shutter is open, or it can create some irritating effects if they’re moving and you don’t want them to).
The Fourth Secret to Pro Flash Results
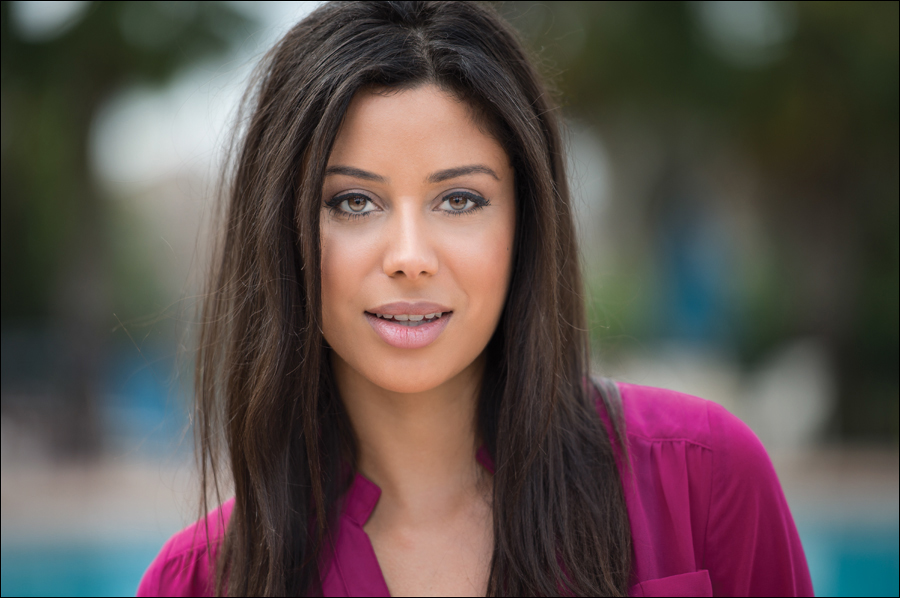
The fourth of the four pro flash tricks is one you can use to make your flash look like natural light. In fact, this trick works so well that if you do it right, most folks won’t be able to tell that you used a flash at all—you’ll just have glorious-looking, soft, natural light whenever and wherever you want it. Your goal is to create light from your flash that matches, and blends in with, the current lighting in the scene (the ambient light) and doesn’t overpower it. Here’s the trick: don’t change your f-stop or shutter speed—instead, just lower the power output of the flash until it matches the available light. To do that, first get the flash off the camera for directional light, and diffuse the light, then take a test shot. Chances are your flash will overpower the existing light. Now, go to your flash unit itself, lower the flash output power by one stop, and take another test shot. Look at the LCD panel on the back of your camera, and see if the light from your flash still looks obvious—like light from a flash. If it does, lower the power of your flash another ½ stop and shoot another test shot. Keep doing this (lowering the power and shooting a test shot) until you’re getting just enough flash to light your subject, and nothing more. That way, it looks real, directional, and natural, instead of looking like flash (like the shot above, lit with one flash). It might take you five or six test shots to dial in the right amount of power, but that’s the beauty of digital cameras: it doesn’t cost anything to do test shots—as many as you need—until you strike that perfect balance between ambient (existing) light and the light from your flash.
Using Gels (& Why You Need Them)
The light from your flash is always the same color—white. It’s nice, bright, white light, which is great in most circumstances, but what if you’re doing a portrait of someone in an office, or you’re shooting in a locker room, or in a meeting room? Well, that’s a problem, because the color of the light from your flash won’t match the color of the lighting in the room, which is exactly why some flashes (like the Nikon SB-910) actually come with pre-cut gels that slide right onto the flash to let you change the color of your flash’s light, so it matches the rest of the lighting in the room. (Note: If you have an older Canon flash or your flash doesn’t come with gels, you can buy a large sheet of Rosco CTO gel for around $6.50 from B&H Photo. You’ll have to cut it down in size so it fits over your flash head, but at least you’ll have a huge supply of them, whereas Nikon only gives you one. Or, check out Rosco’s Strobist 55-Piece Filter Kit, which comes with 55 pre-cut gels, for around $18.50.) Amateurs don’t worry about this because they’re going to just overpower the light in the room, right? But since you now know the pro tricks of how to balance the light from your flash with the ambient light already existing in the room, you’ll need to do this next step, but believe me, for the 20 seconds it takes to slide that gel into place, it’s worth it. You’d use a yellow gel for balancing your flash color with incandescent light (the standard light found in homes), and a green gel for balancing the light if you’re shooting under fluorescent lights, like the ones found in most office interiors (Rosco makes those, too). Just pop that tiny gel inside your diffusion dome, or tape it to your flash with some gaffer’s tape, and you’re ready to go!
Using Gels to Get That SI Look

There’s a very cool trick you can do using just a yellow gel that I learned from Sports Illustrated photographer Dave Black when he and I were teaching a class out in San Francisco. When you try it, you’ll see it has that SI look you see in a lot of outdoor sports portraits. It actually requires you to do two things: (1) First, you set the white balance on your camera to Tungsten (it’s one of your camera’s built-in white balance presets, and it makes your whole photo look very blue—well, at least it does if you’re shooting outdoors), then (2) pop a yellow gel onto your flash (see the tip on the previous page to find out if you already have them or where to get them). That’s it. Now, you want to shoot this near dusk, so the background sky is dark and moody. The Tungsten white balance setting makes the sky look moody and blue, but the yellow light (from the gel on your flash) hits your subject with a warm light. It’s a very clever combo that is easy to achieve, and lots of pros are using this style today because, well...it’s really cool (no pun intended, but I wish it had been).
If You Have to Use Pop-Up Flash, Do This
If you can’t get around it, and you are in a situation where you must use your camera’s pop-up flash, then at least do these two things: (1) set your flash to Rear Sync first, so you’ll pick up some of the ambient light in the room (we covered this back on page 24), and (2) do something—anything—to soften the harshness of the flash, and that can be as simple as shooting your pop-up flash through a white table napkin or cutting a rectangle-shaped diffuser out of the side of a plastic jug of milk and shooting through that. If you know in advance that you might have to shoot with your pop-up flash, then check out LumiQuest’s Soft Screen (shown above), which is designed to fit over your pop-up flash to spread and diffuse the light. Luckily, it’s very inexpensive (around $12), and well...if you have to use pop-up flash, this will at least make it bearable.
Two Tips for Getting Better Results from Your Pop-Up Flash
Another thing that will help you get better-looking images from your pop-up flash is to reduce the flash’s brightness (lower its power) or lower your flash exposure (using flash exposure compensation). Most DSLRs have a setting where you can lower the brightness of the flash, and that helps to not blow out your subject with harsh white light. You might also try taping a small warming gel (like a ¼-cut CTO gel from B&H Photo) over your flash and leaving it there all the time. This gives the cold flash a much warmer, more pleasing look. Thanks to flash guru David Hobby for sharing these tips.
Using a Second Flash
If you want to add a second wireless flash (maybe you want to use it as a hair light, or to light the background, or...whatever), it’s easy. When your first flash fires, it automatically triggers the second flash so they both fire at exactly the same time. Let’s say you want to add a flash to light your subject’s hair. First, position the flash behind your subject, but off to the right (if you’re holding your other flash in your left hand while you’re shooting or have it positioned to the left), as shown here. This is a perfect time to use one of those Justin Clamps I mentioned earlier, so you can clamp your second wireless flash to anything nearby, or you can position your second flash on a light stand—just make sure you don’t see the stand, or the flash unit itself, when you look through your camera’s viewfinder. Set your second flash to wireless mode (look back on page 12 for Nikon flashes or page 14 for Canon flashes). Best of all, you can control the brightness of this second flash wirelessly from on your camera (see the next page[s] to find out how).
Controlling a Second Flash (Nikon)

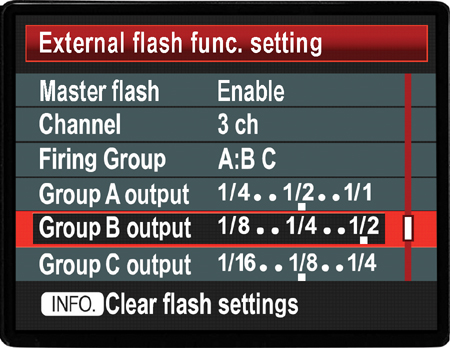
You will want to be able to control the brightness of each flash individually, so that way if the second flash is too bright, you can lower it without affecting the first flash or you can turn it off altogether. However, you want to be able to do all this right from your camera itself—without running around behind your subject, or running from flash unit to flash unit. On a higher-end Nikon camera, here’s how it’s done: On the back of the flash, set this second flash to Group B. That’s all you do on the flash itself. Now, you control the brightness of each flash by pressing the Menu button on the back of your camera, going to the Custom Settings menu, and choosing Bracketing/Flash. When the Bracketing/Flash menu appears, choose Built-in Flash, then scroll down and choose Commander Mode. Your first flash (the one you hold in your left hand, or near you on a light stand) is in Group A. You set your second flash to Group B, so the brightness control for your second flash is found in the Comp field to the far right of Group B. Scroll over to that field, and to lower the brightness by one stop, dial in –1.0 (as shown above). Now shoot a test shot, and if that second flash appears too bright, try lowering it to –1.3 and shoot another test shot, etc., until it looks right. To turn if off altogether, toggle over to the Mode field, and change the setting until it reads “--” which turns off your second flash. To control the brightness of your main off-camera flash, it’s controlled the same way, but in Group A. Just remember, for all of this to work, you have to have your pop-up flash up, because it triggers the flash (or you can use an SU-800 transmitter if your camera doesn’t have pop-up flash).
Controlling a Second Flash (Canon)
To add a second Canon Speedlite flash (one you’ll use for a hair light or to light the background), press the Wireless button on the back of the flash until you see the radio transmission icon or optical transmission icon and Slave. Now your first wireless flash and this second flash will fire simultaneously, which is good, but you want to be able to control the brightness of each flash individually, right from your camera (so you’re not running back behind your subject just to lower the brightness of the second flash. After all, what’s the good of wireless if you have to keep running over to the flash every time you need to make a small change, eh?). To do that, you’ll want to assign this second flash to a separate control group (Group B). To assign the second flash to Group B, while Menu 1 is showing, press function button 3 on the back of your Speedlite, and then select Group B. Now you can put this flash into place (behind the subject), and do a test shot. Both flashes should fire, but if the second flash (the one behind your subject) is too bright, then press the Menu button on the back of your camera, go to Shooting Menu 1, choose Flash Control, then choose External Flash Function Setting. Under Flash Mode, choose Manual Flash, then scroll down to Group B Output and set the ratio to 1/2 (one stop less bright), then do a test shot. If the second flash still looks too bright (when you look at the shot in your LCD monitor), then lower the brightness to 1/4 or 1/8 and shoot another test shot, and keep this up until the second flash looks balanced. If you want to control the brightness of the first flash, make sure it’s on Group A, and it’s controlled the same way.
How Far Back Can You Stand Using Flash?
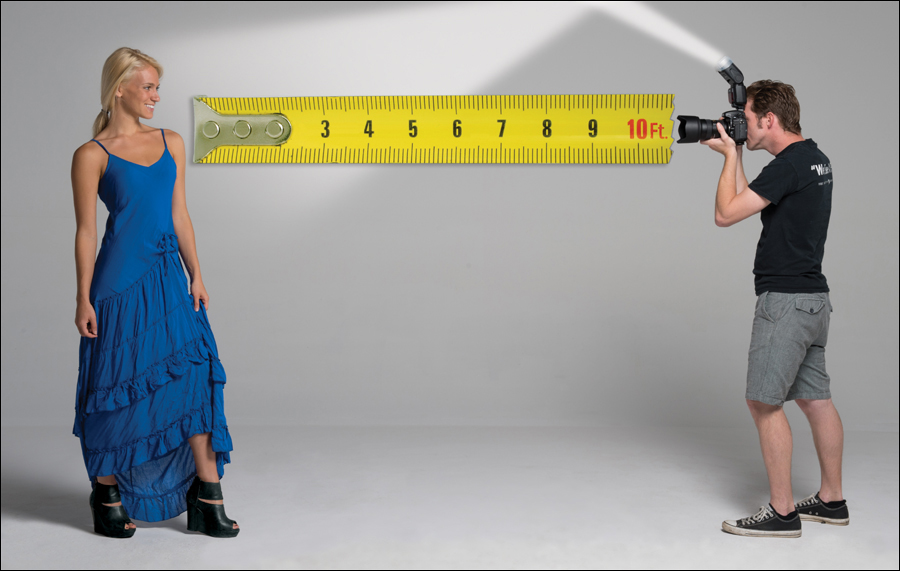
So, how far back can you stand from your subjects and still get pro-quality results from your flash? Well, if you’re using a flash with a diffusion dome, or you’re bouncing your flash, or you’re using some type of diffuser to soften the light (and you should be), as a general rule, you really don’t want to stand farther than about 10 feet back from your subjects. Unfortunately, any farther than that and your dedicated flash won’t have enough power to get the right amount of light all the way over to your subjects to light them properly.
How to Stand Back Even Farther
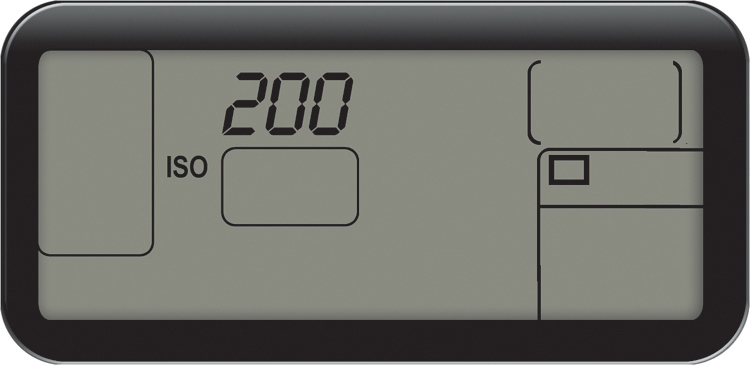
If you absolutely need to stand back more than 10 feet from your subject, then you can use this trick to extend the power and range of your flash: just raise your camera’s ISO setting (making the camera more sensitive to light). So, if you’re shooting at 100 ISO (it’s always our goal to shoot at the lowest possible ISO—more on this later), then if you increase your ISO to 200, you effectively double the power (and range) of your flash. So, if you need to be 20 feet back, try increasing your camera’s ISO to 200 or 400, and that should do the trick. Okay, well, there is one more thing you can try: if you don’t want to raise your ISO and you have to be back farther than 10 feet from your subject, then you’ll need to (gasp!) remove the diffuser cap from your flash, so your light has more power and reach (personally, I’d raise the ISO, but hey—that’s just me).
How to Get More Power from Your Flash at Long Distances
If you find yourself having to shoot pretty far back (maybe you do a lot of large group shots), you might want to buy another diffusion dome cap and cut out a little section of the top so some of that light reaches a bit farther.
Controlling Your Light to Add Drama
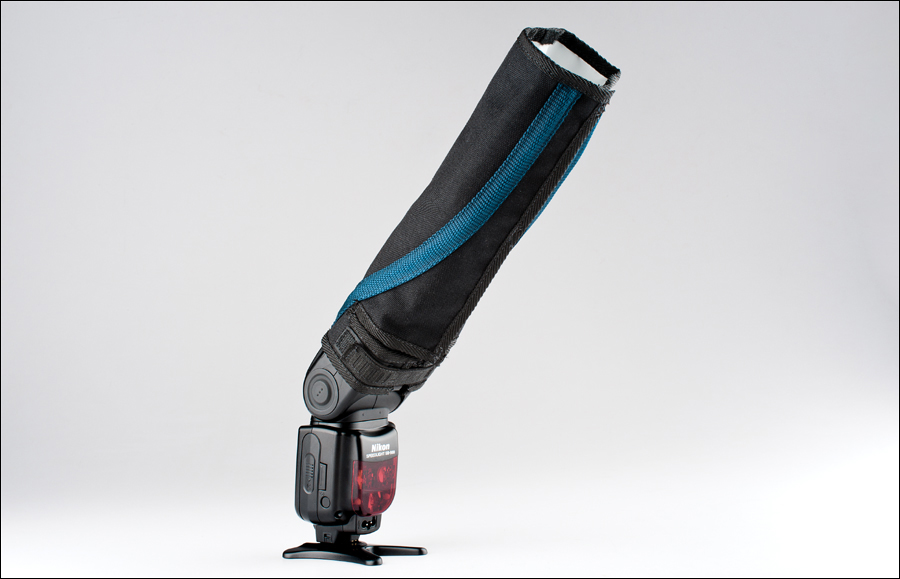
If you want to add some serious drama and interest to your flash images, one of the quickest ways to get there is to limit the amount and shape of the light that hits your subject. By lighting only part of your subject, it puts part of your subject into the shadows, and although this is a fairly common technique using full-blown studio lighting, ExpoImaging has come up with their own inexpensive, lightweight light modifiers for hot shoe flashes like the Nikon SB-910 and Canon 600EX-RT. They’re called Rogue FlashBenders and they’ve got a 10″ positionable reflector you can shape into a snoot (as seen above) that acts like a funnel for light—concentrating it in just one area. It fits right over your flash head and is secured with a little ring of velcro. The snoot sells for around $40 at B&H Photo.
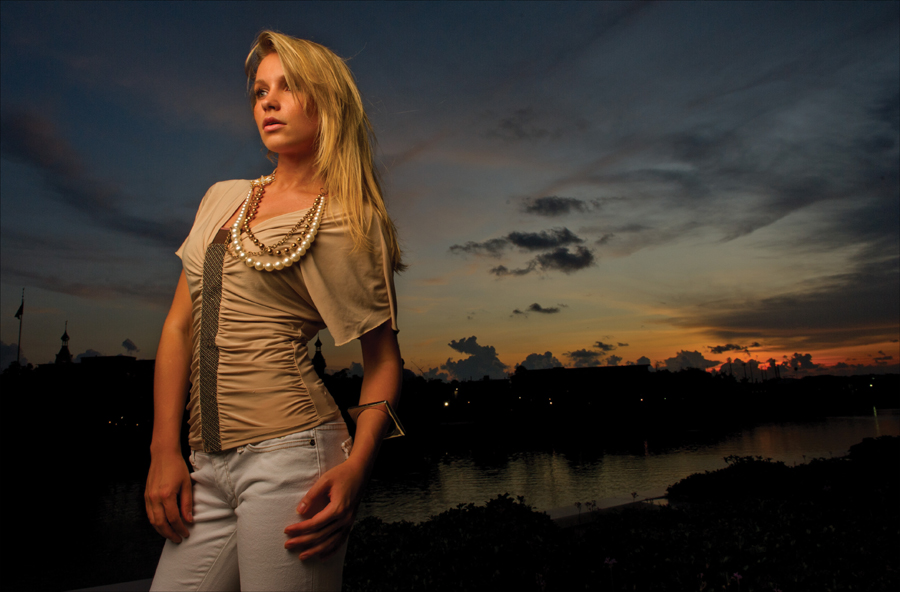
Shooting Sunset Portraits with Flash
First, turn off your flash, then switch your camera to shutter priority mode (S), and dial in 1/125 of a second (a good, safe sync speed for our flash). Now, aim up at the sky (but not directly at the sun itself), and press-and-hold your shutter button halfway down, so your camera takes a meter reading of the sky. While that button is still held down, look in your viewfinder to see the f-stop your camera chose, and remember that number (in the example above, it read f/5.6, so remember that f-stop). Now, switch your camera to manual mode, dial in 1/125 of a second for your shutter speed, and dial in that f-stop your camera chose in shutter priority mode (which, in this case, was f/5.6). Next, position your subject so the sun is behind them. Your job is to turn your subject into a silhouette against the sky. Luckily this is pretty easy—just raise the f-stop by a stop or two (our f-stop was f/5.6, so we’ll raise it to f/8) and take a test shot. If your subject isn’t a silhouette yet, raise it another stop to f/11, and take another test shot. Usually that’ll do it, but you might have to go as high as f/16 (or any one of those fractional f-stops in-between, like f/13). When you choose a darker f-stop, the sky will get much darker and richer, which is great. Once your subject is a silhouette against a beautiful, dark, rich-colored sky, turn your flash on (switch your flash to Manual mode and choose a low power setting, like ¼ power), and take a test shot. If the flash is too bright, try lowering the power to ⅛ power, then take another test shot. If the flash isn’t bright enough, raise the power to ½. Don’t change the camera settings—they’re set just right—instead lower (or raise, as the case may be) the power (brightness) of your flash to get a realistic mix between the sky and your subject. That’s the recipe for portraits at sunset.