
Chapter Eight. Pro Tips for Getting Better Photos
Tricks of the Trade for Making All Your Shots Look Better
SHUTTER SPEED: 1/4000 SEC F-STOP: F/2.8 ISO: 200 FOCAL LENGTH: 300MM PHOTOGRAPHER: SCOTT KELBY
 There are some tricks of the trade that just don’t fit under any of the existing chapters, because they’re not really just about getting better-looking portraits or more luscious-looking landscapes—they’re about being a better photographer and getting better shots. And getting better shots is what it’s all about, right? This is something we’re all very passionate about, and if we get to the point where we’re actually starting to sell our work (maybe as fine art prints, or through assignment work with a magazine), and are turning our passion into profits, then we’re really living the dream—doing something we truly love for a living. Speaking of dreams, I haven’t made a big deal about this on my daily blog (http://scottkelby.com) or in any of my live classes yet, because I don’t want it to come off like bragging, but I recently signed a year-long contract with National Geographic that I’m pretty psyched about. In the terms of this agreement, I get 12 monthly issues for only $15, which is 74% off the newsstand price, so as you might imagine, I’m very excited. Anyway, in this chapter, we’re going to focus on lots of those little tricks of the trade that you can apply to a wide range of photography to make everything you shoot look that much better. Now, one last thing: You might have heard I run with a dangerous crowd. We ain’t too pretty, we ain’t too proud. We might be laughing a bit too loud, but that never hurt no one. (I just wanted to see if you’re still reading this after that whole National Geographic scam I pulled on you above. Come on, you have to admit, I had you going there for just a second or two, didn’t I?)
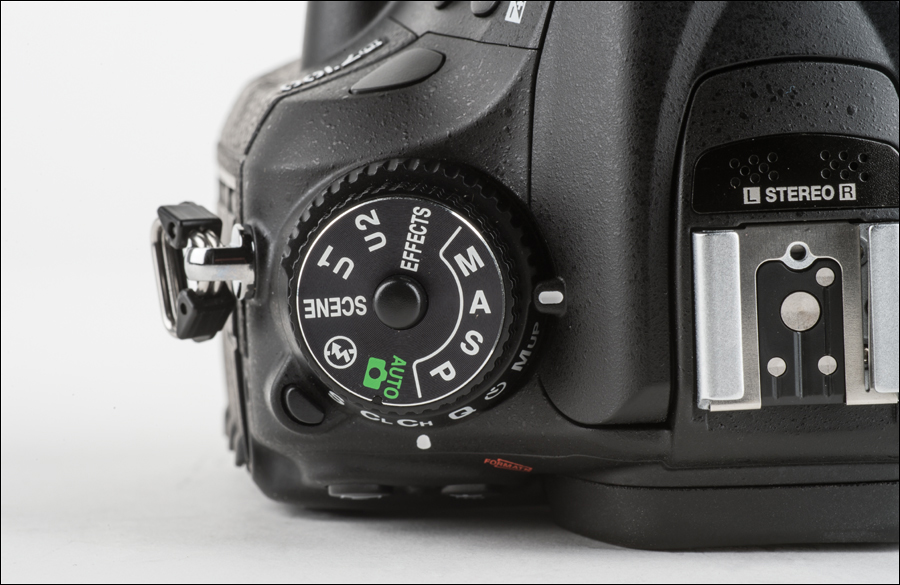
Aperture Priority (A or Av): I recommend this mode for both portrait photographers and landscape photographers, because it gives you control over your background. You get to choose whether you want your background out of focus (by choosing lower numbered f-stops, like f/4 or f/2.8) or totally in focus (by choosing higher f-stop numbers, like f/11, f/16, and higher), and no matter your choice, your camera will automatically choose the right shutter speed to give you a good exposure.
Shutter Priority (S or Tv): I recommend this mode if you’re shooting sports, where you generally need to freeze the action. This lets you choose to shoot with very high shutter speeds (provided you’re shooting in bright enough light—like daylight), and then your camera will automatically choose the right f-stop for you to give you a good exposure.
Manual (M): If you’re shooting with studio strobes, you need to shoot in manual mode, because in aperture priority or shutter priority, you won’t get a proper exposure, as they won’t take into account the fact that you’re using strobes.
Program (P): Shoot in this mode when you want to be in point-and-shoot mode, but don’t want the flash popping up. Perfect for when you need to quickly capture a moment and don’t want to mess with any settings.
Choosing the Right ISO

Our goal is to shoot with our digital cameras set to the lowest possible ISO (ideally 100 ISO) for one simple reason—it offers the lowest amount of noise (grain) and gives us the sharpest, cleanest images possible. The only reason to raise your ISO is to be able to handhold your camera in low-light situations. So, for regular daylight or brightly lit situations, we shoot at 100 ISO. If you raise your camera’s ISO setting to 200, it lets you handhold your camera in a little lower light and still get a sharp photo, but the trade-off is a tiny increase in visible noise. At 400 ISO, you can handhold in even lower light, but with more visible noise. At 800 ISO, you can handhold in the low light of a church, but with even more noise, and so on. It comes down to this: the higher the ISO, the lower light you can handhold your camera in, but the higher the ISO, the more noise you get, too. That’s why we try to use tripods as much as possible. When our camera is on a tripod, it’s perfectly still, so we can shoot at 100 ISO the whole time without worrying about getting blurry photos in low light.
Which Format to Shoot In (RAW, JPEG, or TIFF)
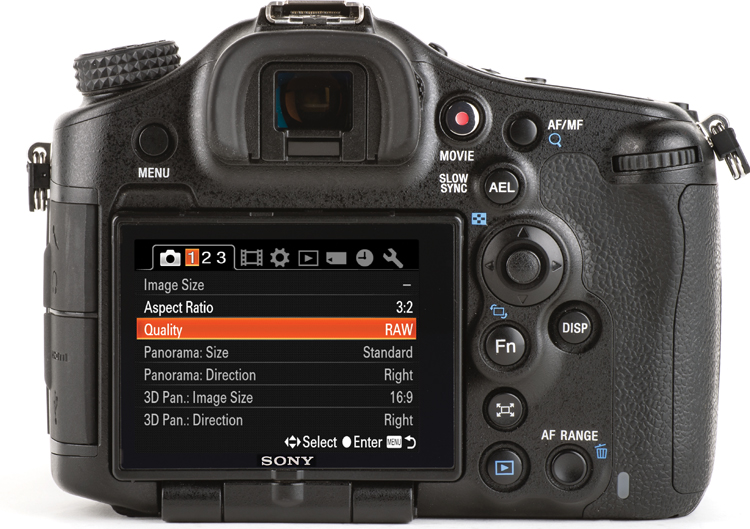
Most digital cameras these days (and all DSLRs) offer at least these three main file formats: RAW, JPEG, and TIFF. Here’s when to use each:
JPEG: Shoot in JPEG if you’re really good at nailing your exposure every time. If you’re dead on (or really close) on your exposure and white balance, and don’t think you’ll need to tweak it much later (or at all) in Photoshop, then JPEG is for you. The file sizes are dramatically smaller, so you’ll fit more on your memory card, and they’ll take up less space on your computer.
RAW: Shoot in RAW mode if you don’t nail the exposure and white balance most of the time, and think you might need to tweak your images later in Photoshop or Photoshop Lightroom. In RAW mode, you can control every aspect of the processing of your images, so if the image is underexposed, overexposed, or has a color problem—you can fix it easily. RAW offers the highest-quality original image, too, and offers maximum flexibility.
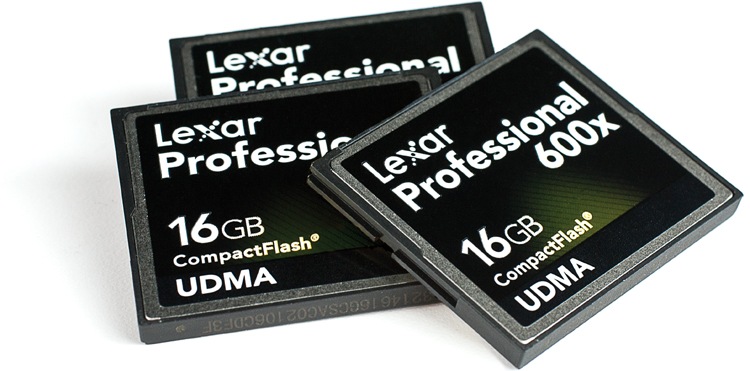
TIFF: Shoot in TIFF if you’re loose with money. This is a great format for people who have money to burn, people who shoot to huge 32-GB memory cards and have plenty of ‘em handy. TIFFs are also perfect for anyone who has lots of spare hard drive space and lots of spare time, because TIFF files are huge to deal with. Outside of that, I can’t think of any really compelling (or remotely reasonable) reason to shoot in TIFF format.
Which JPEG Size to Shoot In
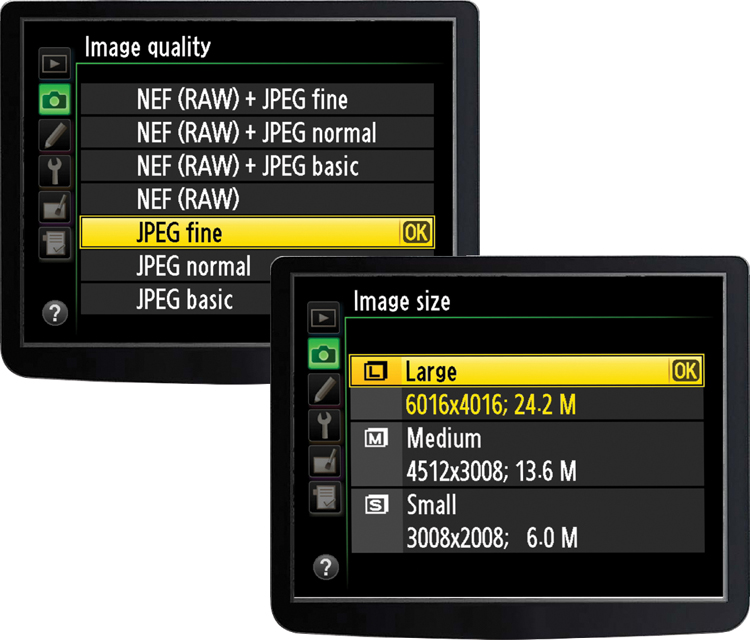
I recommend shooting at the largest size and highest quality setting that your camera will allow, so if you’re shooting in JPEG format, make sure you choose JPEG Fine and a size of Large, so you get the best-quality JPEG image possible. If you choose a lower size, or JPEG Norm (normal), you’re literally throwing away quality. The only trade-off is that JPEG Fine photos are a little larger in file size. Not staggeringly larger (those are TIFFs or RAW files)—they’re a little larger—but the increase in quality is worth it. If you’re serious about getting better-looking photos (and if you bought this book, you are), then set your image size to Large and your JPEG quality to Fine, and you’ll be shooting the exact same format many of today’s top pros swear by.
WHIMS Will Keep You Out of Trouble
Let’s say you’re going out shooting landscapes one morning. Do you know what your camera’s settings are? They’re whatever they were the last time you went shooting. So, if your last shoot was at night, chances are your ISO is set very high, and your white balance is set to whatever you used last. I’ve gotten burned by this so many times that I had to come up with an acronym to help me remember to check the critical settings on my camera, so I don’t mess up an entire shoot (I spent a whole morning in Monument Valley, Utah, shooting at 1600 ISO because I had been shooting a local band the night before). The acronym is WHIMS, which stands for:
W: White balance check
H: Highlight warning turned on
I: ISO check (make sure you’re using the right ISO for your surroundings)
M: Mode check (make sure you’re in aperture priority, program, or manual mode)
S: Size (check to make sure your image size and quality are set correctly)
Before you take your first shot that day, take 30 seconds and check your WHIMS, and you won’t wind up shooting important shots with your camera set to JPEG small (like I did when shooting one day in Taos, New Mexico).
How to Lock Focus
This is another one of those things that has snuck by a lot of people, and that is how to lock your focus. For example, let’s say you’re lying down, shooting a landscape through some tall grass, and you want the blades of grass in front of you to remain in focus, but when you lift the camera up to get the rest of the scene, the camera refocuses on the background. You can force the camera to keep its focus locked onto those blades of grass by simply holding the shutter button down halfway. While that shutter button is held down, your focus is locked, so now you can recompose the image without your camera trying to refocus on something else. I use this a lot on photos of people who may not be in the center of the frame (it keeps me from having to move the autofocus dot—I just point at the person, hold the shutter button halfway down to lock the focus, then recompose the shot the way I want it. When it looks good, I just press the shutter button down the rest of the way to take the shot).
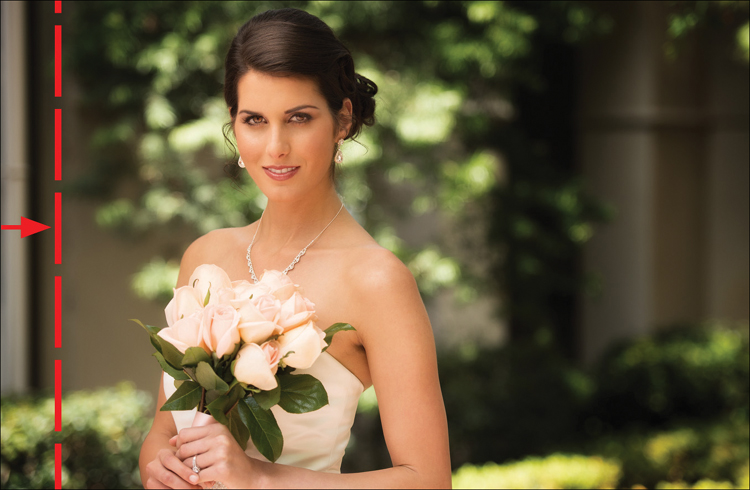
Moving Your Point of Focus
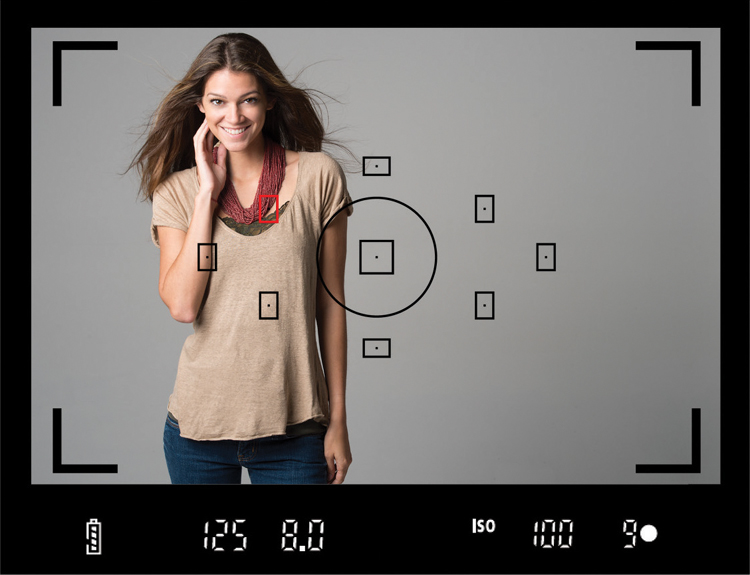
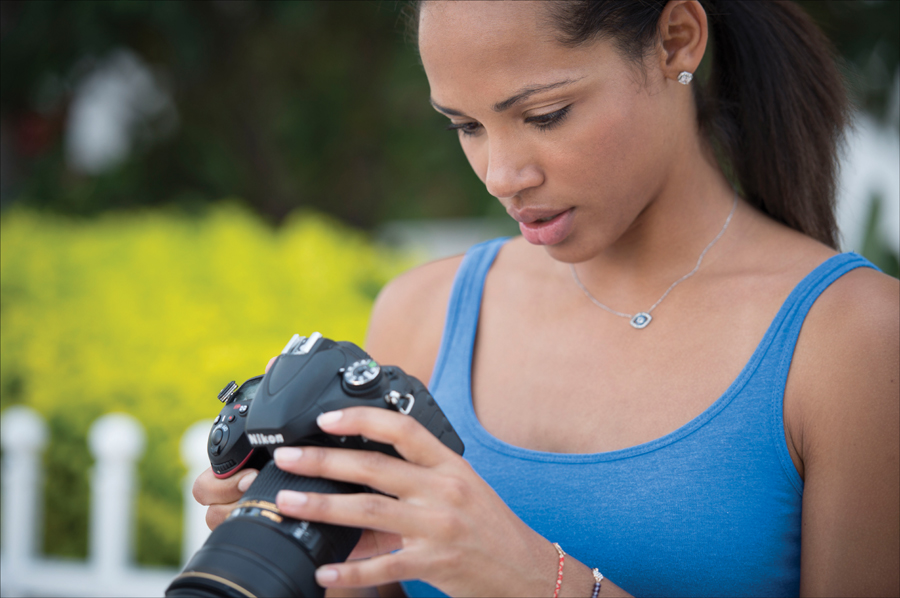
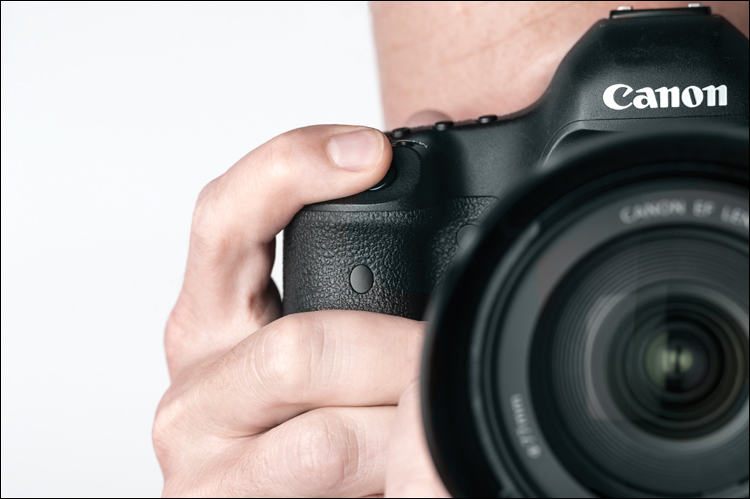
You know how you look through your viewfinder and, in the center of your viewfinder, there’s a red circle or a red rectangle? That’s your camera’s autofocus (AF) point, and what that point hits winds up being what’s in focus. Well, something a lot of people don’t realize is that most cameras let you move that focus point up or down, left or right. That way, if you’ve composed a shot where your subject is standing over to the left side of your frame, you can move the AF point over, right on them, so they wind up being perfectly in focus. On Canon cameras, you move your AF point by using the tiny multi-controller joystick or the dial on the back of the camera. On Nikon cameras, you move the AF point by using the multi-selector on the back of the camera.
Zooming in Close? Fast Shutter Speeds Help
If you’re using a long zoom lens, like a 200mm lens, there’s something you should know to help you make sure you get sharp photos, and that is: the closer in you zoom, the more any tiny little movement of your lens is exaggerated. So, if you’re handholding your camera, and you’re shooting zoomed in to 200mm, any little movement on your part and you’re going to have some blurry photos. Now, if it’s a bright sunny day, you’ll probably be shooting at some very fast shutter speeds, which will pretty much neutralize your movement, so you can sidestep that problem. However, if you’re shooting in the shade, or really in anything where your shutter speed falls below 1/250 of a second, the best remedy is to put your camera on a tripod (even though it’s during the day) or raise your camera’s ISO enough to raise your shutter speed to at least 1/250 of a second. That way, you can shoot out at 200mm all day long and not worry about some tiny movement on your part causing a serious loss of sharpness in your shots.
When It’s Okay to Erase Your Memory Card
If you only have one memory card, it won’t be long before you have to erase that memory card so you can get back to shooting. I have a pretty simple rule I use to know when it’s actually okay to erase a memory card, and that is I erase it when I know I have two backup copies of the images that are on it. In other words, I have one set that I copied onto my computer, and then I copied that folder of images over to an external hard drive, so I have two copies. Then, and only then, I feel comfortable erasing that card and shooting again. Remember, when you have just one copy, you’re working on the negatives. If your computer’s hard drive crashes, those images are gone. Forever. That’s why you gotta make a second backup copy, because I’ve seen people lose their work again and again, year after year, because they didn’t make that second backup copy, but don’t let that happen to you—back up twice, then erase that card!
Don’t Just Delete Your Photos, Reformat the Card
You’ve probably heard horror stories of people who have done an entire shoot, only to have the memory card go bad and they lose all their shots (if you haven’t heard this story, I’ve got dozens). Anyway, one thing you can do to avoid problems is to not just delete the images on the card (once you’ve backed up twice), but to format the card in the camera, which erases all the files in the process. Yes, it’s that important.
Why You Need to Get in Really Close

This is probably the single simplest tip in the whole book, and the one that has the potential to make your photography the best, but it’s also the one people will resist the most. The tip is: move in close to your subject. Really close. Way closer than you’d think. If you search the Internet, you’ll find dozens of references and quotes about how much you can improve your photography by simply getting in closer to your subject. You’ll find the famous quote (I’m not sure who it’s attributed to) that says (I’m paraphrasing here), “Get your shot set up to where you think you’re close enough—then take two steps closer.” Or my favorite quote, which I think really sums it up nicely, from famous photographer Robert Capa, who once said, “If your pictures aren’t good enough, you’re not close enough.” The pros know this, practice this, have embraced it, and have passed it on to their students for who knows how long, and yet your average photographer still tries to get “the big picture.” Don’t be an average photographer, who gets average shots. Take two steps closer, and you’ll be two steps closer to better-looking photos.
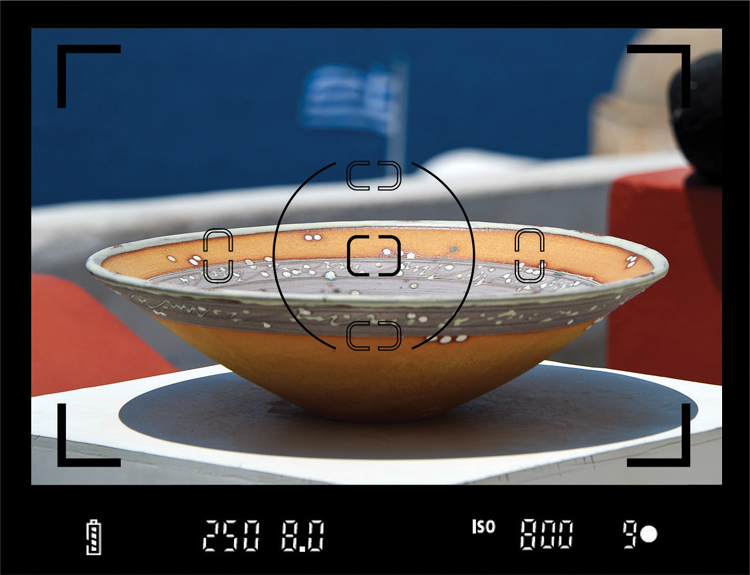
What to Use Your Histogram For
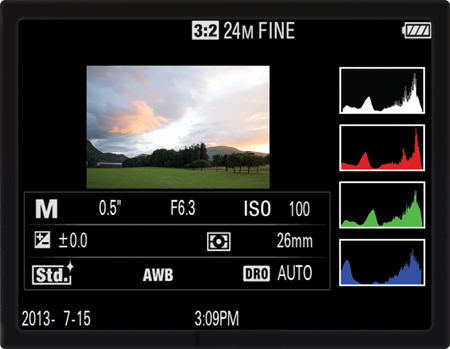
Today’s DSLRs can display a histogram (which is a graphical reading of the tonal range of your photo) right there on the camera’s LCD monitor, but if you don’t know how to read one (or didn’t know it’s there), it doesn’t do you much good. I only use my camera’s histogram for one thing, and that’s to make sure I haven’t clipped off any important detail in my highlights. So, what am I looking for when I look at my histogram? Two things: (1) I don’t want to see the histogram’s graph touch the far right wall. If any of that graph hits the far right wall, I’m losing detail. So, what I’m really hoping to see is (2) a small gap between the end of the histogram and that far right wall (as shown above). If I see that gap, I know I’m okay, and that I’m not clipping any highlights. I can look at my histogram and immediately see if this has happened, and if I have clipped off important highlight information, I will generally use the exposure compensation control on my camera to override what my camera read, and lower the exposure by 1/3 of a stop, then I take the shot again and check my histogram. If I’m still clipping, I lower the exposure compensation to –0.7 and then shoot again, and check again. I keep doing that until my clipping problem goes away. Now, the histogram can only help so much, because what if there’s a direct shot of the sun in my photo? That sun will clip big time, and there will be no gap, but that’s okay, because the surface of the sun doesn’t have any important detail (well, at least as far as I know). So the histogram can help, but it’s not the bottom line—you still have to make the call if the area that’s clipping is (here’s the key phrase) important detail, so don’t get hung up on histograms—at the end of the day, you have to make the call, and the histogram is just a helper, not your master.
Leave Your Lens Cap Off
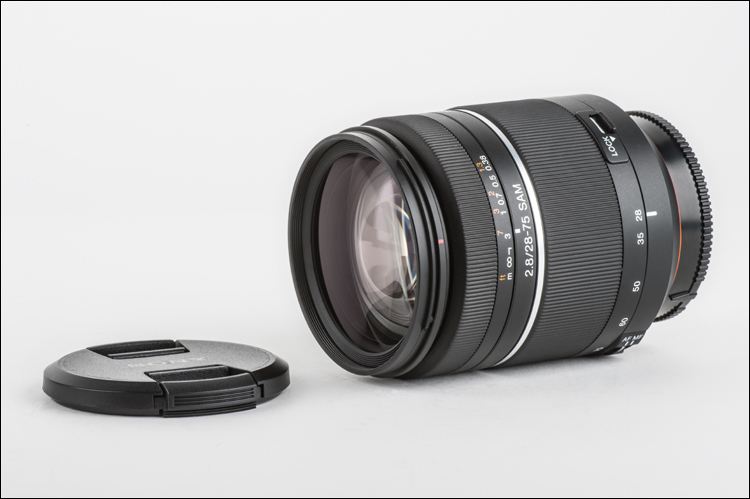
My buddy Vinny calls your lens cap “The Never Ready Cap,” because whenever that magical once-in-a-lifetime moment happens while you’re out shooting, don’t worry—it will be long gone by the time you stop and take your lens cap off. I definitely recommend putting your lens cap on when you’re storing your gear back in your camera bag, but if your camera is out of that bag, your lens cap needs to be off your camera. If you’re worried about scratching your lens, then buy a lens hood (or use the lens hood that came with your lens), but keep that cap off once that camera comes out of your bag.
Removing Spots and Specks After the Fact
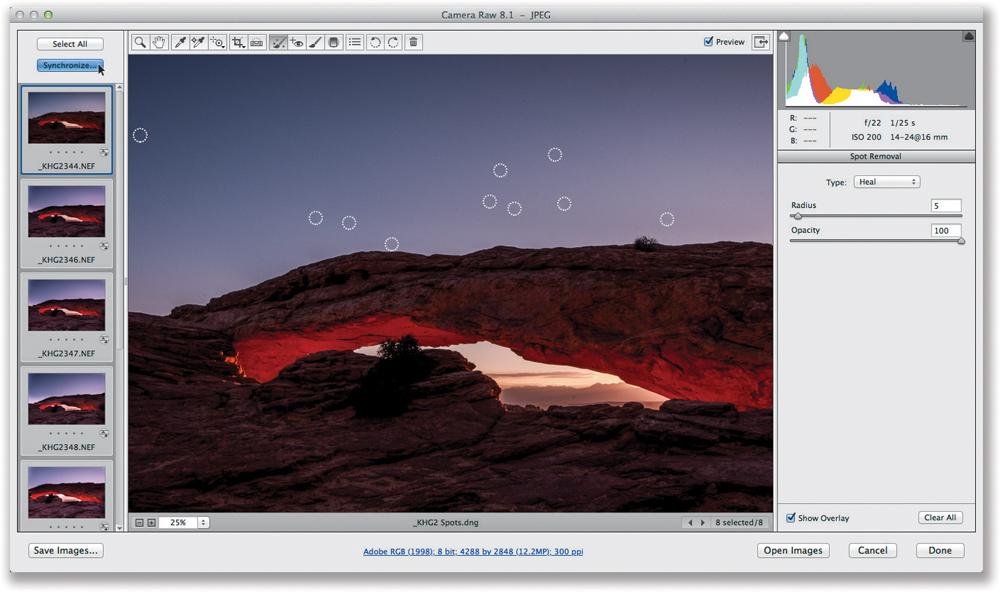
If you have a dust spot, smudge, or speck on either your lens or your camera’s sensor, you’re going to see that spot (or smudge or speck) again and again once you open your photos in Photoshop (or Lightroom, or Elements, etc.). If you want a quick way to get rid of that junk, try Photoshop’s (or Elements’) Spot Healing Brush tool. All you do is choose it from the Toolbox, then click it once over any spot or speck, and it’s gone. That’s all there is to it. Now, if you have Photoshop, you can fix a bunch of spots all at once (because, after all, if you have a spot on your lens, every shot from your shoot will have that same spot in that exact same location, right?). So, here’s what you do: STEP ONE: Select all the photos that are in the same orientation (for example, select all your horizontal shots) and open them in Adobe Camera Raw. STEP TWO: Get Camera Raw’s Spot Removal tool (from the toolbar up top) and click it once right over the spot. This removes that spot from your current photo. STEP THREE: Press the Select All button (on the top left) to select all your other photos, then click the Synchronize button. STEP FOUR: When the dialog appears, from the Synchronize pop-up menu up top, choose Spot Removal, and then click OK. This removes that spot from all your other selected photos automatically. Click Done to save your retouch. STEP FIVE: Open all the photos you took with a tall orientation and do the same thing. Now, all your spots are gone from all your photos in less than two minutes. If you shot 300 or 400 photos—that’s sayin’ something!
What Looks Good in Black & White
Some subjects just look great when you convert them from color to black and white, so when you’re out shooting, keep an eye out for anything with lots of texture, like the peeling paint on the side of an old building, rusty old machinery, anything with an interesting shape or lots of contrast (because you don’t have the crutch of color, you have to look for other things to lead the eye), objects with a lot of metal, old barns, old cars, old abandoned factories, and also consider cloudy days with dark menacing skies a perfect subject for black and white. In fact, any gray nasty day can wind up being a field day for black and white because you don’t have to worry about avoiding the sky since it’s not a nice, blue, sunny day. In black and white—it’s all gray.
Recompose, Don’t “Fix It” in Photoshop
I love Photoshop. I think it totally rocks, and I’ve written around 35 books on Photoshop. That being said, it’s much faster and easier to get it right in the camera than it is to fix it later in Photoshop. If you see something distracting in your viewfinder, like a telephone line or a road sign, that’s ruining your shot, you certainly could remove either one later in Photoshop. It probably wouldn’t take you more than 10 minutes or so to remove that telephone line or road sign in Photoshop. But it probably wouldn’t take you more than 10 seconds to move one foot in either direction to recompose your shot so you don’t see the telephone wires (or the road sign) at all. Getting it right in the camera is just so much faster, and besides—you want to save your time in Photoshop for finishing your photos, not fixing them. Do yourself a favor, and compose so those distracting elements aren’t in your frame, and you’ll spend a lot more time shooting and having fun, and a lot less time on tedious cloning and repairing in Photoshop.
Want to Be Taken Seriously? Start Editing
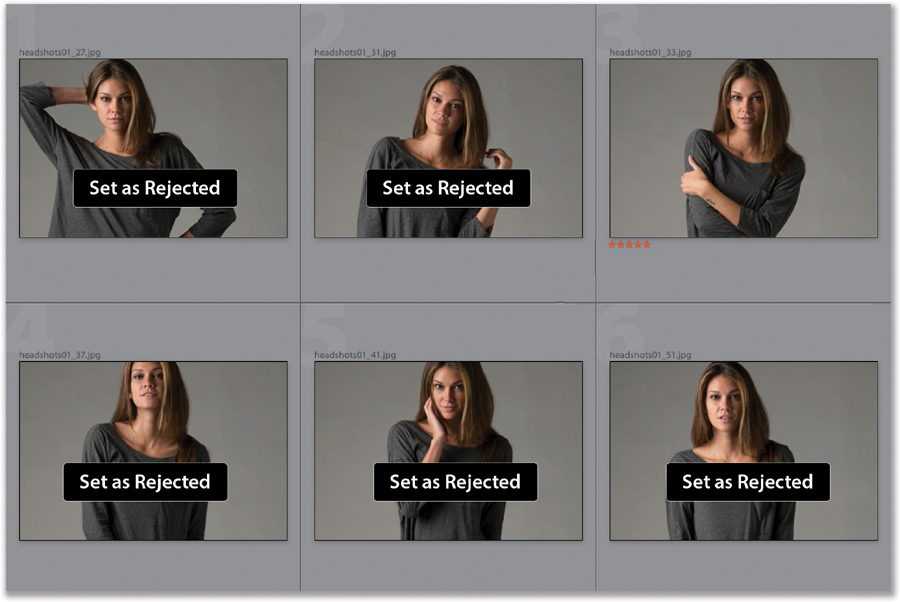
If you want to be taken seriously as a photographer and you want people to start to view you as a pro-quality photographer, then take a tip from the working pros, which is: only show your very best work. Period. One thing that makes a pro a pro is they’re really good photo editors—they’re really good at picking, and only showing, their very best stuff. You don’t see their so-so shots or the shots that would have been great, if only.... You also don’t see them showing seven or eight similar shots of the same subject. Only show your best of the best. That means if you went on a trip and you took 970 shots, you don’t come home and show a slide show of 226 images. If you want people to think you’re good, show your best 30. If you want people to think you’re great, show just your best 10. Think about it: If you took 970 shots, maybe 400 are decent. Out of those decent shots, maybe 80 are pretty good. Out of those 80, maybe 30 are really good. Out of those 30, maybe 10 are outstanding. Now, just show those 10—and blow people away. (Just ask yourself what you would rather see—80 pretty good shots, or 10 outstanding shots.)
How to Be a Great Photo Editor of Your Own Work
Your shots have to stand on their own, without you telling a story about why you like the shot. If you have to explain to someone why you chose it or why you think it’s special, it doesn’t belong in your portfolio.
Label Your Memory Cards
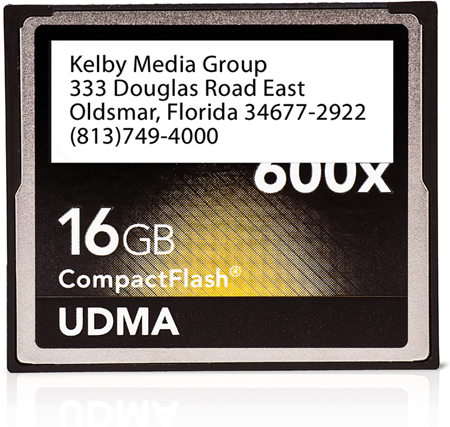
This is another tip I picked up from Derrick Story, and he tells the true story of how he left a memory card in a taxi cab, but because he always puts a sticker on his cards with his name and address, he was able to get that card returned to him with all the photos still intact. That’s right, he lost his memory card in a taxi and got it back. This obviously didn’t happen in New York. (I’m totally kidding. You knew that—right?)
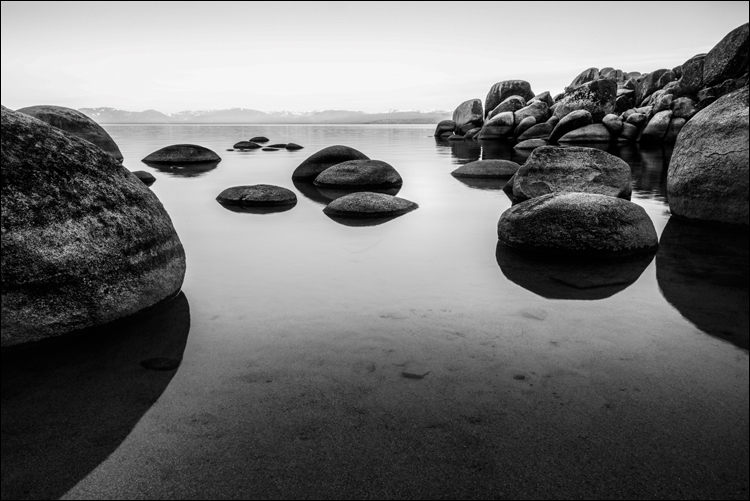
Go Square
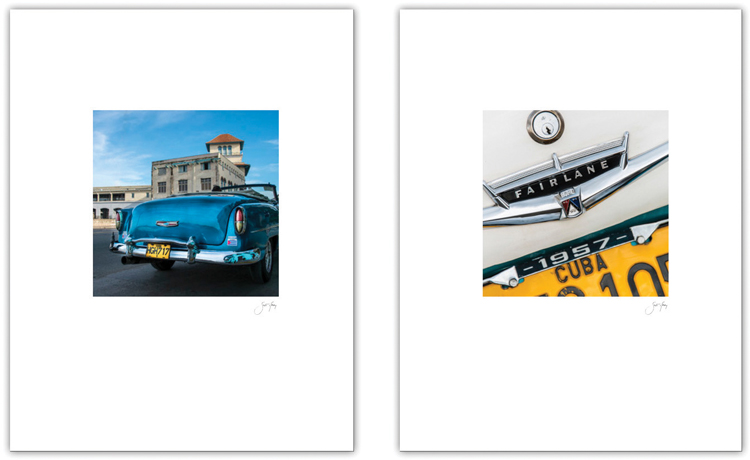
Today’s digital cameras all produce an image that is rectangular, so no matter whose photo you see, it’s either a tall rectangle or a wide rectangle. Want to make your photo stand out from the pack and have more of a “fine art” look when you print it? Then “Go square!” That’s right—just crop your photo to a perfect square (as seen above), and then position that perfect square with plenty of nice white space around it, for a nice fine art, gallery look, like the layout you see here. It’s a simple little thing, but they’re all little things, right?
Tip for Shooting at Night (Long Exposure Noise)
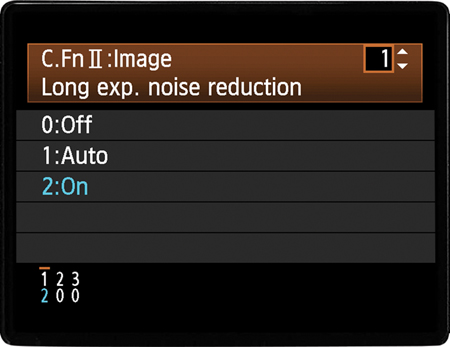
If you’re shooting at night, your shutter is going to wind up staying open long enough for you to make a good exposure, and depending on how dark it is where you’re shooting, it could open for ¼ of a second, 4 seconds, or 40 seconds. If you start to have long exposures, like 40 seconds, chances are you’re going to start to get some serious noise in your photo (even if you were shooting at 100 ISO). One thing you can do to help is to turn on your camera’s Long Exposure Noise Reduction feature (Nikon, Canon, and Sony DSLRs all have this feature). This kicks in your camera’s built-in noise reduction to combat the kind of noise that shows up in long exposures like these, and they actually do a surprisingly decent job, so they’re worth turning on (just in these long exposure instances—this is not for everyday use).
The Very Next Book You Should Get
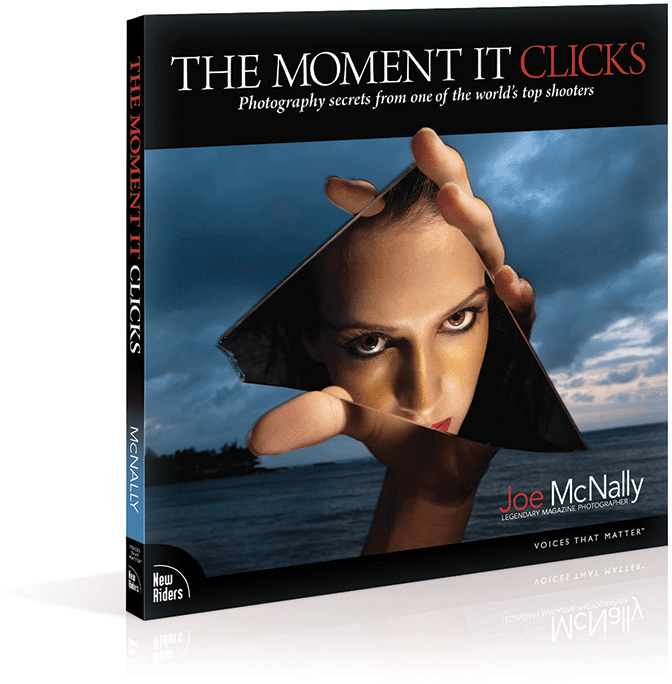
You’ve heard me mention legendary assignment photographer Joe McNally here in the book, and Joe has a book that I truly believe is the most important photography book in many years. It’s called The Moment It Clicks: Photography Secrets from One of the World’s Top Shooters (from New Riders), and what makes the book so unique is Joe’s three-pronged “triangle of learning” where (1) Joe distills the concept down to one brief sentence (it usually starts with something along the lines of, “An editor at National Geographic once told me...” and then he shares one of those hard-earned tricks of the trade that you only get from spending a lifetime behind the lens). Then, (2) on the facing page is one of Joe’s brilliant images that perfectly illustrates the technique (you’ll recognize many of his photos from the covers of your favorite magazines), and (3) you get the inside story of how that shot was taken, including which equipment he used (lens, f-stop, lighting and accessories, etc.) and how to set up a shot like that of your own. There’s just never been a book like it. The photography is so captivating, you could buy it just for the amazing images (think, coffee-table book), but his insights on equipment, technique, and the fascinating backstory behind the shot let the book totally stand on its own as a photographic education tool. This book combines those elements as it inspires, challenges, and informs, but perhaps most importantly, it will help you understand photography and the art of making great photos at a level you never thought possible. I worked as an editor on the book, and I have to tell you—it blew me away. It will blow you away, too!