In the previous chapter, we got Dojo and Dijit up and running. In this chapter, we’ll work with two fundamental Dijits: buttons and text boxes. Working with these two basic Dijits will help you build your foundation of Dijit skills.
Both buttons and text boxes have many variations in Dojo: for example, in addition to the standard TextBox Dijit that you saw in Chapter 1, you can insert ValidationTextBox Dijits, which let you build in validation that checks what a user enters, as the user enters it. You can also insert date and time controls that descend from text boxes, number spinners that let users click up and down arrows to select numbers, and more.
In Chapter 1, we created our Dijits with HTML <input> elements. However, you can also create Dijits entirely using JavaScript. You can also connect JavaScript functions to Dijits using <script> elements instead of the connect method, add debugging displays to your pages, submit pages to Web servers, and more.
All of these topics are coming up in this chapter.
In Chapter 1, we created our Dijits with HTML elements, like this, which creates a TextBox Dijit:
<input id="text" type="text"
  maxlength="25"
  dojoType="dijit.form.TextBox">
</input>
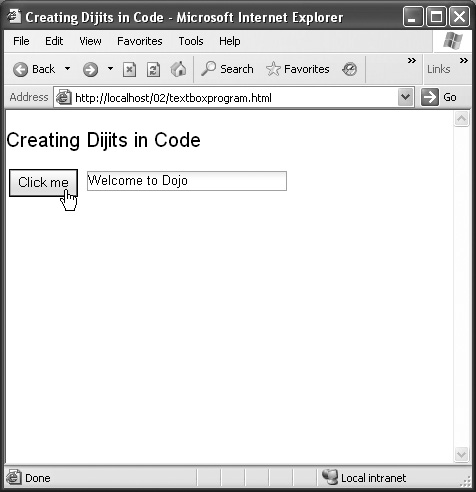
But in Dojo, you can also create Dijits using JavaScript. To do that, you use the fully qualified name of the Dijit (such as dijit.form.TextBox) as a constructor, passing it an associative array of parameters (that is, a comma-separated list of name: value pairs, enclosed in curly braces) and the ID (as a text string) of the existing HTML element you want to replace. We’ll look at an example, textbox-program.html, now.
Procedure 2.1. To create Dijits in code:
Open your Web page, such as textbox-program.html, in a text editor.
Create a TextBox Dijit to replace the HTML
<input>element with the ID"text", passing the new TextBox parameters that give it the length of 25 characters and the ID"text2"by entering the code shown in Script 2.1.Example 2.1. Creating Dijits in code.
1   <html>
2     <head>
3      <title>Creating Dijits in Code</title>
4
5       <link rel="stylesheet"
6         type="text/css"
7         href="http://o.aolcdn.com/
8         dojo/1.1/dojo/
9         resources/dojo.css" />
10
11      <link rel="stylesheet"
12        type="text/css"
13        href="http://o.aolcdn.com/dojo/
14        1.1/dijit/
15        themes/tundra/tundra.css" />
16
17      <script
18        djConfig="parseOnLoad:true"
19        type="text/javascript"
20        src="http://o.aolcdn.com/dojo/1.1/
21          dojo/dojo.xd.js">
22      </script>
23
24      <script type="text/javascript">
25        dojo.require("dojo.parser");
26        dojo.require("dijit.form.Button");
27        dojo.require("dijit.form.TextBox");
28
29        dojo.addOnLoad(function( ) {
30          var t = new dijit.form.TextBox({
31            length : 25,
32            id : "text2"},
33            "text");
34
35         dojo.connect(dijit.byId("button"),
36           "onClick", function(evt) {
37           dijit.byId("text2").setValue(
38            "Welcome to Dojo");
39          });
40        });
41      </script>
42    <head>
43
44    <body class="tundra">
45      <h1>Creating Dijits in Code</h1>
46      <br>
47      <button id="button"
48      dojoType="dijit.form.Button">Click me
49      </button>
50      <input id="text"></input>
51    </body>
52  </html>
Save your file.
Navigate to your file in a browser. You should see a button and a text box.
Click the button. The message should appear in the text box (Figure 2.1).
In Chapter 1, we connected buttons to the JavaScript code that used the connect method. Here’s what that looked like when we connected a button’s onClick event to an anonymous function that displayed a message in a text box:
dojo.connect(dijit.byId("button"),
"onClick", function(evt) {
dijit.byId("text2").setValue(
"Welcome to Dojo");
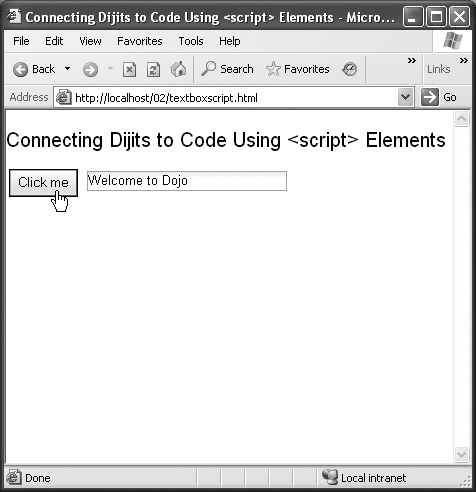
});However, with Dojo you can also connect JavaScript code to Dijits using <script> elements—no connect method needed. We’ll look at how that works in an example named textboxscript.html.
Procedure 2.2. To connect JavaScript to Dijits using <script> elements:
Open your Web page, such as textboxscript.html, in a text editor.
Embed a
<script>element inside a<button>element, setting thetypeattribute to"dojo/method", theeventattribute to"onClick", and theargsattribute to"evt"(this is the argument that will be passed to the enclosed JavaScript—a DojoEventobject in this case).Enclose the JavaScript you want run when the button is clicked inside the
<script>element. In this case, that JavaScript will display a message in a text box.Script 2.2 shows what your page should look like after you make the additions.
Example 2.2. Connecting JavaScript to Dijits using
<script>elements.1 <html> 2 <head> 3 <title>Connecting Dijits to Code 4 Using <script> 5 Elements</title> 6 7 <link rel="stylesheet" 8 type="text/css" 9 href="http://o.aolcdn.com/ 10 dojo/1.1/dojo/ 11 resources/dojo.css" /> 12 13 <link rel="stylesheet" 14 type="text/css" 15 href="http://o.aolcdn.com/dojo/ 16 1.1/dijit/ 17 themes/tundra/tundra.css" /> 18 19 <script 20 djConfig="parseOnLoad:true" 21 type="text/javascript" 22 src="http://o.aolcdn.com/dojo/1.1/ 23 dojo/dojo.xd.js"> 24 </script> 25 26 <script type="text/javascript"> 27 dojo.require("dojo.parser"); 28 dojo.require("dijit.form.Button"); 29 dojo.require("dijit.form.TextBox"); 30 31 dojo.addOnLoad(function( ) { 32 var t = new dijit.form.TextBox({ 33 length : 25, 34 id : "text" 35 }, "text"); 36 }); 37 </script> 38 <head> 39 40 <body class="tundra"> 41 <h1>Connecting Dijits to Code Using 42 <script> Elements</h1> 43 <br> 44 <button id="button" 45 dojoType="dijit.form.Button"> 46 Click me 47 <script type="dojo/method" 48 event="onClick" args="evt"> 49 dijit.byId("text").setValue( 50 "Welcome to Dojo"); 51 </script> 52 </button> 53 <input id="text"></input> 54 </body> 55 </html>
Save your file.
Navigate to your file in a browser. You should see a button and a text box.
Click the button, which should make the message appear in the text box (Figure 2.2).
So far, the Dijit examples you’ve seen have all been contained in the same page. You click a button, and a message appears in a text box. However, Web pages with controls such as buttons and text boxes often communicate with programs online.
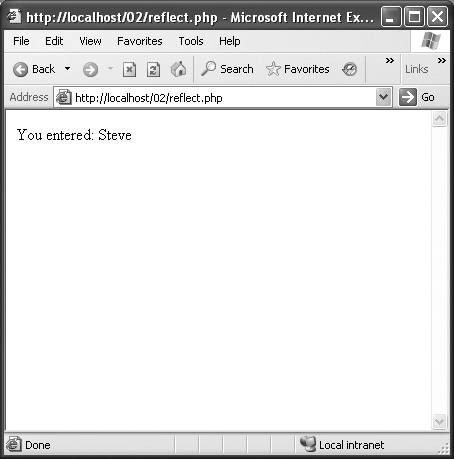
Using the example textboxsubmit.html, you’ll submit the data that a user has entered in controls in a Dojo-enabled page. You’ll send the data to a script reflect.php, written in the PHP scripting language, which will echo the data it receives (you don’t have to know PHP to use this example).
Procedure 2.3. To send data to a Web site from a Dojo-enabled page:
Open your Web page, such as textboxsubmit.html, in a text editor.
Add a new
<form>element with themethodattribute set to"POST", thedojoTypeattribute set to"dijit.form.Form"(it’s not necessary to make the form a Dijit form, but doing so allows you to use Dijit methods on the form if you want to), and theactionattribute"http://localhost/02/reflect.php"so the form will send data to reflect.php (substitute the actual URL for reflect.php here).Add a
dojo.requirestatement to require dojo.form.Form.Give a button in the form the
dojoTypeattribute"dijit.form.Button"and thetypeattribute"submit".Script 2.3 shows what your page should look like after you make the additions.
Example 2.3. Sending data to a Web site from a Dojo-enabled page.
1   <html>
2     <head>
3       <title>Submitting data online</title>
(4–18)  . . .
19      <script type="text/javascript">
20        dojo.require("dojo.parser");
21        dojo.require("dijit.form.TextBox");
22        dojo.require("dijit.form.Button");
23        dojo.require("dijit.form.Form");
24       </script>
25    </head>
26
27    <body class="tundra">
28      <h1>Submitting data online</h1>
29             <br>
30      <form
31        dojoType="dijit.form.Form"
32        method="POST"
33        action =
34        "http://localhost/02/reflect.php">
35        Enter your name:
36        <input
37          dojoType="dijit.form.TextBox"
38          name="text"
39          id="text">
40        </input>
41
42        <button
43          type="submit"
44          dojoType="dijit.form.Button">
45          Submit
46        </button>
47      </form>
48    </body>
49  </html>
Save your file.
Create a new file, reflect.php, at a URL that your browser can access (the same location pointed to by the
actionattribute of the form) in an environment (such as an ISP) that can run PHP.Give reflect.php these contents:
<?php
echo "You entered: " . $_
REQUEST["text"];
?>
Save reflect.php.
Navigate to the HTML file in a browser. You should see a button and a text box.
Enter your name in the text box (Figure 2.3).
Click the button. Your name should appear, displayed by reflect.php (Figure 2.4).

Debugging JavaScript can be difficult. Dojo can come to the rescue with its own useful debugging facilities. To enable these facilities, set the Dojo djconfig configuration attribute isDebug to true.
The example textboxdebug.html shows how to turn on Dojo debugging. This example then deliberately causes an error—an attempt to access a nonexistent text box with the ID "text2"—so you can see how the Dojo debugging facilities take over.
Procedure 2.4. To turn on debugging in Dojo:
Open your Web page, such as textboxdebug.html, in a text editor.
In the
<script>element that loads dojo.js, assign thedjconfigattribute the value"isDebug:true, parseOnLoad:true".Create a deliberate error in your code, such as having your code attempt to work with a nonexistent text box with the ID
"text2".Script 2.4 shows what your page should look like after you make the additions.
Example 2.4. Turning on debugging in Dojo.
1   <html>
2     <head>
3       <title>Debugging Dojo</title>
4       <link rel="stylesheet"
5         type="text/css"
6         href="http://o.aolcdn.com/
7         dojo/1.1/dojo/
8         resources/dojo.css" />
9
10      <link rel="stylesheet"
11        type="text/css"
12        href="http://o.aolcdn.com/dojo/
13        1.1/dijit/
14        themes/tundra/tundra.css" />
15
16      <script
17        djConfig="isDebug:true,
18          parseOnLoad:true"
19        type="text/javascript"
20        src="http://o.aolcdn.com/dojo/1.1/
21          dojo/dojo.xd.js">
22      </script>
23
24      <script type="text/javascript">
25        dojo.require("dojo.parser");
26        dojo.require("dijit.form.Button");
27        dojo.require("dijit.form.TextBox");
28
29        dojo.addOnLoad(function( ) {
30         dojo.connect(dijit.byId("button"),
31         "onClick", function(evt) {
32           dijit.byId("text2").setValue(
33           "Welcome to Dojo");
34         });
35        });
36      </script>
37    <head>
38
39    <body class="tundra">
40      <h1>Debugging Dojo</h1>
41      <br>
42      <button
43        id="button"
44        dojoType="dijit.form.Button">
45        Click me
46      </button>
47
48      <input id="text" type="text"
49        name="text"
50        maxlength="25"
51        dojoType="dijit.form.TextBox">
52      </input>
53      <br>
54    </body>
55  </html>
Save your file.
Navigate to your file in a browser. You should see a button and a text box.
Click the button. JavaScript will try to access the nonexistent text box, which makes Dojo cause an error and explain it to you as shown in Figure 2.5.

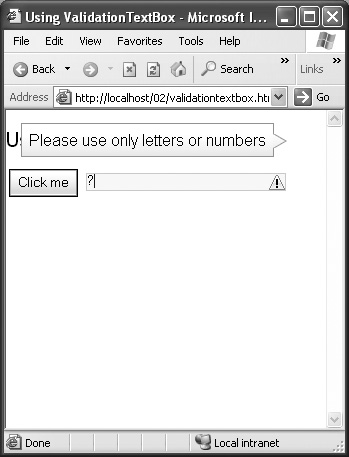
A big concern in JavaScript is validating what the user has entered before it is sent to the server. Dojo tackles this task with the ValidationTextBox, which lets you specify a regular expression that the entered text must match.
The next example, validationtextbox.html, uses Dojo validation with a simple regular expression that demands the user enter only alphabetical (“word”) characters (that is, no characters such as?, &, and so on).
Procedure 2.5. To turn on validation in Dojo:
Open your Web page, such as validationtextbox.html, in a text editor.
Add the statement
dojo.require("dijit.form.ValidationTextBox");to your code.Create a new text box with the
dojoTypeattribute set to"dijit.form.ValidationTextBox", thepromptMessageattribute (appears when the cursor enters the text box) set to"Enter only letters or numbers", theinvalidMessageattribute (the error message) set to"Please use only letters or numbers", and theregExpattribute (contains the regular expression you want to match) set to"[w]+"(for “words”).Script 2.5 shows what your page should look like after you make the additions.
Example 2.5. Turning on validation in Dojo.
1   <html>
2     <head>
3       <title>Using
4         ValidationTextBox</title>
5       <link rel="stylesheet"
6         type="text/css"
7         href="http://o.aolcdn.com/
8         dojo/1.1/dojo/
9         resources/dojo.css" />
10      <link rel="stylesheet"
11        type="text/css"
12        href="http://o.aolcdn.com/dojo/
13        1.1/dijit/
14        themes/tundra/tundra.css" />
15
16      <script
17        djConfig="parseOnLoad:true"
18        type="text/javascript"
19        src="http://o.aolcdn.com/dojo/1.1/
20          dojo/dojo.xd.js">
21      </script>
22
23      <script type="text/javascript">
24        dojo.require("dojo.parser");
25        dojo.require("dijit.form.Button");
26        dojo.require(
27          "dijit.form.ValidationTextBox");
28      </script>
29    <head>
30
31    <body class="tundra">
32      <h1>Using ValidationTextBox</h1>
33      <br>
34      <form id="registration_form"
35         method="POST"
36         action=
37         "http://localhost/02/reflect.php">
38
39        <button
40          id="button"
41          type="submit"
42          dojoType="dijit.form.Button">
43          Click me
44        </button>
45
46        <input id="text"
47          type="text"
48          name="text"
49          maxlength="25"
50          promptMessage=
51          "Enter only letters or numbers"
52          invalidMessage="Please use only
53          letters or numbers"
54          regExp="[w]+"
55          dojoType=
56            "dijit.form.ValidationTextBox">
57        </input>
58      <br>
59      </form>
60    </body>
61  </html>
Save your file.
Navigate to your file in a browser. You should see a button and a text box.
Try entering an invalid character such as a question mark (?). An error message should appear (Figure 2.6).
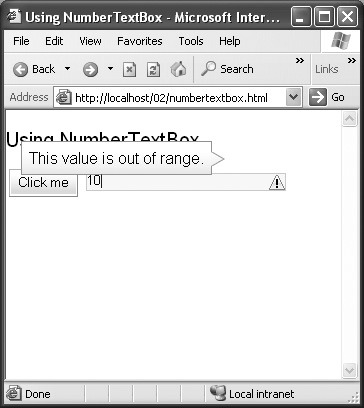
If you only want numbers in a certain range to be accepted in a text box, NumberTextBox is your ticket. It works much like ValidationTextBox, but you can also add min and max constraints to the allowed values. Like ValidationTextBox, NumberTextBox supports the invalidMessage and promptMessage attributes.
The example numbertextbox.html accepts only numbers in the format #.##, with a minimum possible value of 0.00 and a maximum of 9.99.
Procedure 2.6. To perform numeric validation in Dojo:
Open your Web page, such as numbertextbox.html, in a text editor.
Add the statement
dojo.require("dijit.form.NumberTextBox");to your code.Create a new text box with the
dojoTypeattribute set to"dijit.form.NumberTextBox"and theconstraintsattribute set to"{pattern: '#.##', min: '0.00', max: '9.99'}".Script 2.6 shows what your page should look like after you make the additions.
Example 2.6. Performing numeric validation in Dojo.
1   <html>
2     <head>
3       <title>Using NumberTextBox</title>
4
5       <link rel="stylesheet"
6         type="text/css"
7         href="http://o.aolcdn.com/
8         dojo/1.1/dojo/
9         resources/dojo.css" />
10      <link rel="stylesheet"
11        type="text/css"
12        href="http://o.aolcdn.com/dojo/
13        1.1/dijit/
14        themes/tundra/tundra.css" />
15
16      <script
17        djConfig="parseOnLoad:true"
18        type="text/javascript"
19        src="http://o.aolcdn.com/dojo/1.1/
20          dojo/dojo.xd.js">
21      </script>
22
23      <script type="text/javascript">
24        dojo.require("dojo.parser");
25        dojo.require("dijit.form.Button");
26        dojo.require(
27          "dijit.form.NumberTextBox");
28
29        dojo.addOnLoad(function(){
30         dojo.connect(dijit.byId("button"),
31           "onClick", function(evt) {
32            alert("You entered: " +
33            dijit.byId("text").getValue());
34          });
35        });
36      </script>
37    <head>
38
39    <body class="tundra">
40      <h1>Using NumberTextBox</h1>
41      <br>
42      <button
43        id="button"
44        dojoType="dijit.form.Button">
45        Click me
46      </button>
47
48      <input id="text"
49        constraints="{pattern: '#.##', min:
50        '0.00', max: '9.99'}"
51         dojoType=
52         "dijit.form.NumberTextBox">
53      </input>
54      <br>
55    </body>
56  </html>
Save your file.
Navigate to your file in a browser. You should see a button and a text box.
Try entering an invalid, out-of-range number such as 10. An error message should appear (Figure 2.7).
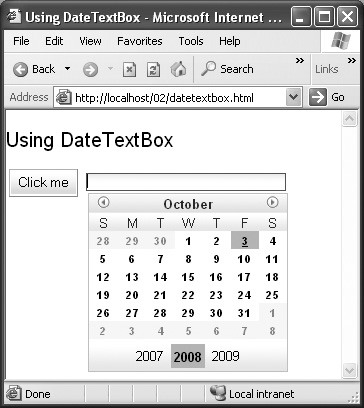
Dojo has a handy control that displays a calendar and lets the user select a date: DateTextBox. The calendar appears only when the text box has been clicked. In this control, the getValue method returns a JavaScript Date object; if you want the date as a string, you use the getDisplayedValue method.
The example datetextbox.html accepts dates from the user with a clickable Dojo calendar.
Procedure 2.7. To let the user select dates from a clickable calendar:
Open your Web page, such as datetextbox.html, in a text editor.
Add the statement
dojo.requiret("dijit.form.DateTextBox");to your code.Create a new text box with the
dojoTypeattribute set to"dijit.form.DateTextBox"and connect a JavaScript function to a button in the page that displays the calendar’s date in a JavaScript alert box using thegetDisplayedValuemethod.Script 2.7 shows what your page should look like after you make the additions.
Example 2.7. Letting the user select dates from a clickable calendar.
1   <html>
2     <head>
3       <title>Using DateTextBox</title>
4
5       <link rel="stylesheet"
6         type="text/css"
7         href="http://o.aolcdn.com/
8         dojo/1.1/dojo/
9         resources/dojo.css" />
10      <link rel="stylesheet"
11        type="text/css"
12        href="http://o.aolcdn.com/dojo/
13        1.1/dijit/
14        themes/tundra/tundra.css" />
15
16      <script
17        djConfig="parseOnLoad:true"
18        type="text/javascript"
19        src="http://o.aolcdn.com/dojo/1.1/
20          dojo/dojo.xd.js">
21      </script>
22
23      <script type="text/javascript">
24        dojo.require("dojo.parser");
25        dojo.require("dijit.form.Button");
26        dojo.require(
27          "dijit.form.DateTextBox");
28
29        dojo.addOnLoad(function(){
30         dojo.connect(dijit.byId("button"),
31           "onClick", function(evt) {
32            alert("Date: " +
33            dijit.byId("date")
34           .getDisplayedValue());
35          });
36        });
37
38      </script>
39    <head>
40
41    <body class="tundra">
42      <h1>Using DateTextBox</h1>
43      <br>
44      <form>
45
46        <button
47          id="button"
48          dojoType="dijit.form.Button">
49          Click me
50        </button>
51
52        <input id="date"
53          type="text"
54          dojoType=
55            "dijit.form.DateTextBox">
56        </input>
57      <br>
58      </form>
59    </body>
60  </html>
Save your file.
Navigate to your file in a browser. You should see a button and a text box.
Click the text box to display the calendar (Figure 2.8).
Click a date in the calendar to select a date.
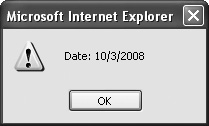
Click the button to display the selected date in an alert box (Figure 2.9).
Dojo has a control that lets the user choose a time of day: TimeTextBox. This Dijit displays an accordion-like control when its text box is clicked. The control that appears lets the user click times in 15-minute increments, and the user can also edit the time in the text box for more precision. As with DateTextBox, the getValue method returns a JavaScript Date object; if you want the date as a string, you use the getDisplayedValue method.
The example timetextbox.html accepts times from the user with a clickable Dojo control.
Procedure 2.8. To let the user select times from a clickable control:
Open your Web page, such as timetextbox.html, in a text editor.
Add the statement
dojo.require("dijit.form.TimeTextBox");to your code.Create a new text box with the
dojoTypeattribute set to"dijit.form.TimeTextBox"and connect a JavaScript function to a button in the page that displays the control’s time using a JavaScript alert box and thegetDisplayedValuemethod.Script 2.8 shows what your page should look like after you make the additions.
Example 2.8. Letting the user select times from a clickable control.
1   <html>
2     <head>
3       <title>Using TimeTextbox</title>
4       <link rel="stylesheet"
5         type="text/css"
6         href="http://o.aolcdn.com/
7         dojo/1.1/dojo/
8         resources/dojo.css" />
9       <link rel="stylesheet"
10        type="text/css"
11        href="http://o.aolcdn.com/dojo/
12        1.1/dijit/
13        themes/tundra/tundra.css" />
14
15      <script
16        djConfig="parseOnLoad:true"
17        type="text/javascript"
18        src="http://o.aolcdn.com/dojo/1.1/
19          dojo/dojo.xd.js">
20      </script>
21
22      <script type="text/javascript">
23        dojo.require("dojo.parser");
24        dojo.require("dijit.form.Button");
25        dojo.require(
26          "dijit.form.TimeTextBox");
27
28        dojo.addOnLoad(function(){
29         dojo.connect(dijit.byId("button"),
30         "onClick", function(evt) {
31           alert("Time: " +
32             dijit.byId("time")
33             .getDisplayedValue());
34          });
35        });
36      </script>
37    <head>
38
39    <body class="tundra">
40      <h1>Using TimeTextbox</h1>
41      <br>
42      <form>
43
44        <button
45          id="button"
46          dojoType="dijit.form.Button">
47          Click me
48        </button>
49
50        <input id="time"
51          type="text"
52          dojoType=
53            "dijit.form.TimeTextBox">
54        </input>
55      <br>
56      </form>
57    </body>
58  </html>
Save your file.
Navigate to your file in a browser. You should see a button and a text box.
Click the text box to display the time control (Figure 2.10).
Click the time control to select a time.
Click the button to display the selected time in an alert box (Figure 2.11).

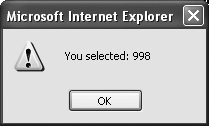
Dojo also supports another variation on the standard text box: the NumberSpinner control. This control is like a text box, but it displays up and down arrows to let the user select numbers. You set the original value displayed with the value attribute, and you set the minimum and maximum allowable values with the min and max constraints.
The example numberspinner.html lets the user select numbers with a number spinner.
Procedure 2.9. To let the user select numbers with a number spinner:
Open your Web page, such as numberspinner.html, in a text editor.
Add the statement
dojo.require("dijit.form.NumberSpinner");to your code.Create a new text box with the
dojoTypeattribute set to"dijit.form.NumberSpinner", theconstraintsattribute set to"{min:0, max:10000}", thevalueattribute set to"1000", and theIDattribute set to"number".Connect a JavaScript function to a button in the page that displays the control’s value using a JavaScript alert box and the
getValuemethod.Script 2.9 shows what your page should look like after you make the additions.
Example 2.9. Letting the user select numbers with a number spinner.
1   <html>
2     <head>
3       <title>Using Number Spinner</title>
4       <link rel="stylesheet"
5         type="text/css"
6         href="http://o.aolcdn.com/
7         dojo/1.1/dojo/
8         resources/dojo.css" />
9       <link rel="stylesheet"
10        type="text/css"
11        href="http://o.aolcdn.com/dojo/
12        1.1/dijit/
13        themes/tundra/tundra.css" />
14      <script
15        djConfig="parseOnLoad:true"
16        type="text/javascript"
17        src="http://o.aolcdn.com/dojo/1.1/
18          dojo/dojo.xd.js">
19      </script>
20
21      <script type="text/javascript">
22        dojo.require("dojo.parser");
23        dojo.require("dijit.form.Button");
24        dojo.require(
25          "dijit.form.NumberSpinner");
26
27        dojo.addOnLoad(function( ){
28         dojo.connect(dijit.byId("button"),
29           "onClick", function(evt) {
30           alert("You selected: " +
31             dijit.byId(
32               "number").getValue());
33          });
34        });
35      </script>
36    <head>
37
38    <body class="tundra">
39      <h1>Using NumberSpinner</h1>
40      <br>
41      <input
42        dojoType="dijit.form.NumberSpinner"
43        constraints="{min:0, max:10000}"
44        value="1000"
45        id="number"
46      ></input>
47
48      <button
49        id="button"
50        dojoType="dijit.form.Button">
51        Click me
52      </button>
53    </body>
54  </html>
Save your file.
Navigate to your file in a browser. You should see a button and number spinner.
Click the number spinner to select a number (Figure 2.12).
Click the time control to select a number.
Click the button to display the selected number in an alert box (Figure 2.13).