
Dojo is the premier JavaScript toolkit for use in Web pages. It gives you just about all the power you can squeeze out of JavaScript, providing powerful new controls (colorpickers, text box validation, menus, dialog boxes, calendars, and more).
Dojo also smoothes out the differences between browsers, eliminating all the annoying differences between browsers that JavaScript programmers have to deal with otherwise. You can use it in many different types of browsers without changing your code—that’s a major attraction of Dojo.
We’ll start with an overview of Dojo to get oriented. As this book progresses, we’ll look at the controls Dijit offers and then move up to Ajax, animation, and more.
Dojo consists of several parts.
Dojo’s Core and Base packages together handle such popular features as animation, dragging and dropping, cookies, and Asynchronous JavaScript and XML (Ajax). Ajax allows you to interact with the Web server without causing a screen refresh in the browser, which gives Web applications a desktop application feel. Dojo is emerging as the standard tool for working with Ajax.
Dijit is Dojo’s extremely popular library of widgets, offering Web page controls for the user to interact with. The Dojo widgets can be styled, and they augment what comes standard in a browser.
We’ll see all these and more in this book. After Ajax, Dijits are the most popular reason for using Dojo.
The Dojo Extensions, or Dojox, package is where you’ll find the cutting-edge features (and more are being added all the time), such as controls that let you graph your data in grids and charts (which are integrated with the Dojo Data package for true database power). Dojox also includes tools to take your Web page offline and still keep it working, as well as to perform 2D and 3D drawing.
Dojo’s Util package provides dozens of utility functions that augment JavaScript, such as functions that work on strings and XML.
That’s what Dojo looks like from 20,000 feet. Now we’ll start digging into it to see what it actually offers us.
You don’t need to download Dojo to run the examples in this book (our Web pages will pick up Dojo online)—or even to use Dojo (you can use the same trick as we do in this book). However, most users do download and install Dojo. You can then upload it to your Internet service provider (ISP).
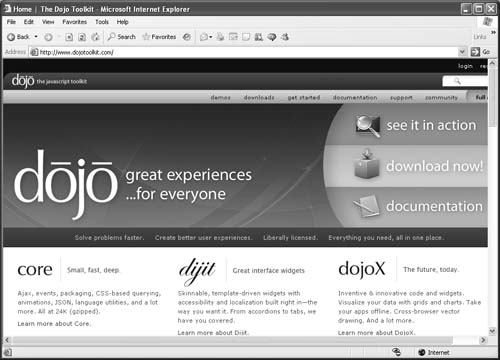
You can download Dojo for free at http://www.dojotoolkit.com/ (Figure 1.1).
Procedure 1.1. To get and install Dojo:
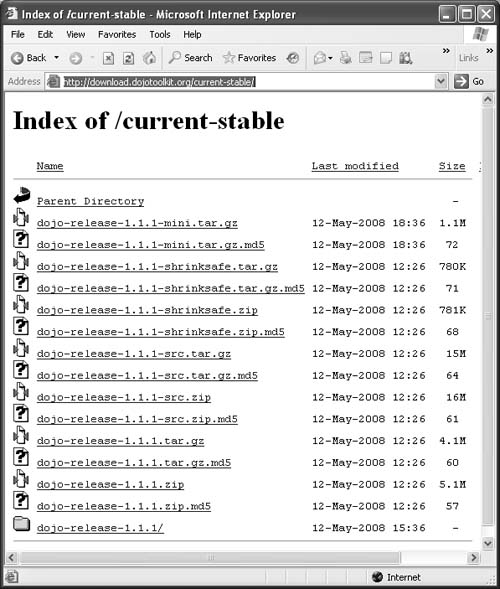
In your browser, navigate to http://download.dojotoolkit.org/current-stable/ (Figure 1.2).
Right-click the compressed Dojo release file right for your system: dojo-release-1.1.1.zip if you can use .zip files or dojo-release-1.1.1.tar.gz if you can handle .tar.gz files (use the most current version). Then click Save Target As (Internet Explorer) or Save Link As (Firefox) in the menu that appears.
In the dialog box that opens, click Save to save the compressed file to your hard disk.
Uncompress the compressed file.
This creates a new folder named dojo-release-x.y.z (x.y.z will be the version number, such as 1.1.1) that contains four subfolders: dojo (for Base and Core), dijit, dojox, and util.
Upload the dojo-release-x.y.z folder and all its contents to your ISP, to the folder where your Web pages will be stored.
If, for example, you store your Web pages in a folder named home, this step creates a new folder, home/dojo-release-x.y.z. If you don’t store your Web pages in a folder but instead in the root directory, this step creates a new folder named dojo-release-x.y.z in your root directory.
Dojo is now installed and accessible to your Web pages.
You can load the main Dojo JavaScript file (where Dojo is concentrated), dojo.js, using a <script> element like this (substitute the current version number, such as 1.1.1, for x.y.z):
<script
  type="text/javascript"
  src="dojo-release-x.y.z/dojo/dojo.js">
</script>
If you’ve renamed the dojo-release-x.y.z folder javascript, the code should look like this:
<script
  type="text/javascript"
  src="javascript/dojo/dojo.js">
</script>
We’ll put this code to work in a few pages.
If you’ve installed Dojo as described in the previous section, you can load it into your Web pages (so you can access Dojo using JavaScript).
However, you can also access Dojo without having to download it at all: you can get it from the AOL Content Delivery Network (CDN).
Getting dojo.js from the AOL content network has one big advantage: you don’t have to install Dojo on your ISP to use it. This book does not assume that you’ve installed Dojo—most examples use the AOL CDN so they run immediately, no Dojo installation necessary.
Procedure 1.2. To get Dojo from the AOL CDN:
If you don’t want to download Dojo yourself, you can get Dojo into your page using this URL in a
<script>element:<script type="text/javascript" src="http://o.aolcdn.com/ dojo/1.1/dojo/dojo.xd.js"> </script>
✓ Tips
The main Dojo JavaScript file, dojo.js, is called dojo.xd.js (xd stands for cross-domain) in the AOL CDN.
The URL for dojo.xd.js, http://o.aolcdn.com/dojo/1.1/dojo/dojo.xd.js, is broken onto two lines in this book, but make sure it’s on one line in your code.
The URL for dojo.xd.js references Dojo version 1.1, but the current version is actually 1.1.1. That’s OK—referencing the current version’s major and minor numbers (1.1) gives you the latest update version (1.1.1 in this case).
We’ll start our tour of Dojo with Dijit. You’ll add the Dojo JavaScript libraries to a Web page and place two Dijits on that page. After you have the page Dojo enabled and a few Dijits working, you can use that page as a template for other Dojo-enabled pages.
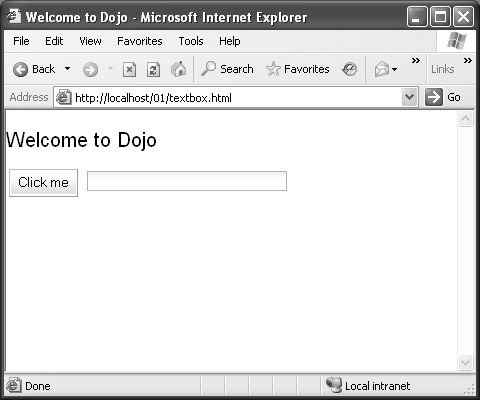
Our goal in this chapter is shown in Figure 1.3. That’s a Dojo-enabled page, textbox.html, with two Dijits: a button and a text box (although the HTML text control is called a text field, in Dojo it is a text box).
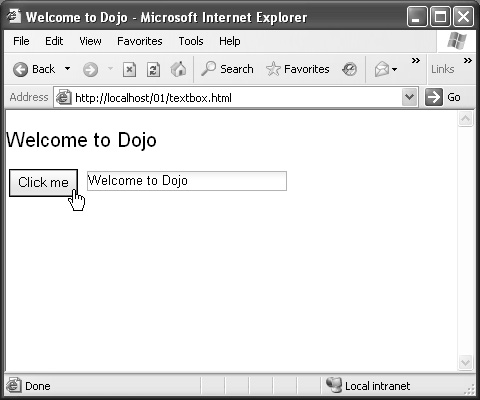
To prove that the Web page is functional, when you click the button, the message “Welcome to Dojo” appears in the text box (Figure 1.4).
We’ll start putting together the page shown in Figure 1.4: the simple Dojo page that has a button and a text box.
Procedure 1.3. To begin a Dojo page:
Open a text editor (such as Microsoft WordPad) to create your Web page. We’ll use the example textbox.html here.
Enter your code.
Enter the code for textbox.html, shown in Script 1.1. The highlighted code is what’s essential to load Dojo in the page.
Example 1.1. Beginning a Dojo page.
1   <html>
2     <head>
3       <title>Welcome to Dojo</title>
4       <script
5         type="text/javascript"
6         src="http://o.aolcdn.com/dojo/1.1/
7           dojo/dojo.xd.js">
8       </script>
9     <head>
10    <body>
11      <h1>Welcome to Dojo</h1>
12      <br>
13      <button
14        id="button"
15        Click me
16      </button>
17      <input
18        id="text"
19        type="text"
20      </input>
21      <br>
22    </body>
23  </html>
If you’ve installed Dojo yourself, enter the
<script>element as shown in Script 1.2 (replacex.y.zwith the current version).
Save the file.
Dojo specializes in snappy-looking Web pages, and they get to be snappy by using the Dojo style sheets, such as dojo.css. Three style themes come with Dojo:
Tundra: Mostly light gray and light blue.
Soria: Mostly light blue on blue; Dijits have a glossy look.
Nihilo: Mostly white with light gray outlines.
Procedure 1.4. To use a Dojo theme:
Open your Web page, such as textbox.html, in a text editor.
To use a Dojo theme such as Tundra, include dojo.css on your page as well as the theme-specific CSS file: tundra.css in this case. Then assign the style attribute in the page’s
<body>element to the theme’s name ("tundra"in this case).Enter the highlighted code shown in Script 1.3 for textbox.html.
Example 1.3. Using a Dojo theme.
1   <html>
2     <head>
3       <title>Welcome to Dojo</title>
4
5       <link rel="stylesheet"
6         type="text/css"
7         href="http://o.aolcdn.com/
8         dojo/1.1/dojo/
9         resources/dojo.css" />
10
11      <link rel="stylesheet"
12        type="text/css"
13        href="http://o.aolcdn.com/dojo/
14        1.1/dijit/
15        themes/tundra/tundra.css" />
16
17      <script
18        djConfig="parseOnLoad:true"
19        type="text/javascript"
20        src="http://o.aolcdn.com/dojo/1.1/
21          dojo/dojo.xd.js">
22      </script>
23    <head>
24
25    <body class="tundra">
26      <h1>Welcome to Dojo</h1>
27      <br>
28      <button
29        id="button"
30        Click me
31      </button>
32
33      <input
34        id="text"
35        type="text"
36        maxlength="25"
37      </input>
38      <br>
39    </body>
40  </html>
If you’ve installed Dojo yourself, enter the
<link>elements as shown in Script 1.4 (replacex.y.zwith the current version).
Save your file.
Now the Dijits you create in the page will use the Tundra theme.
To use Dojo Dijits, you have to make sure that Dojo parses (that is, reads) your Web page so it knows about those Dijits. If you don’t parse the Web page, the Dijits will act as only normal HTML controls at best, because Dojo won’t know about them. So in every Dojo-enabled page that uses Dijits, you must load the Dojo parser and indicate that you want to parse the page.
Procedure 1.5. To connect Dijits to Dojo:
Open your Web page, such as textbox.html, in a text editor.
To include the Dojo parser in the Web page, add the JavaScript
dojo.require("dojo.parser"). to a<script>element in your page.In the opening tag of the
<script>element where you load dojo.js or dojo.xd.js, include the attributedjconfigand set it totrueto make Dojo parse the page.Script 1.5 shows what your page should look like after you enter the highlighted code.
Example 1.5. Connecting Dijits to Dojo.
1   <html>
2     <head>
3       <title>Welcome to Dojo</title>
4
5       <link rel="stylesheet"
6         type="text/css"
7         href="http://o.aolcdn.com/
8         dojo/1.1/dojo/
9         resources/dojo.css" />
10
11      <link rel="stylesheet"
12        type="text/css"
13        href="http://o.aolcdn.com/dojo/
14        1.1/dijit/
15        themes/tundra/tundra.css" />
16
17      <script
18        djConfig="parseOnLoad:true"
19        type="text/javascript"
20        src="http://o.aolcdn.com/dojo/1.1/
21          dojo/dojo.xd.js">
22      </script>
23
24      <script type="text/javascript">
25        dojo.require("dojo.parser");
26      </script>
27    <head>
28
29    <body class="tundra">
30      <h1>Welcome to Dojo</h1>
31      <br>
32      <button
33        id="button"
34        Click me
35      </button>
36
37      <input
38        id="text"
39        type="text"
40        name="text"
41        maxlength="25"
42      </input>
43      <br>
44    </body>
45  </html>
Save your file.
✓ Tips
The
djconfigattribute means “Dojo configuration,” and this is our first use of it. We’ll use it throughout the book to configure Dojo in other ways as well.The
dojo.requirestatement is what you use to include the various Dojo modules in your code. Requiring a module adds it to your page and makes it accessible in JavaScript.
Dijits are based on HTML elements, and you tell Dojo that you want a particular HTML element to be a Dijit by using the dojoType attribute. In this task, you’ll see how to convert an HTML button to a Dijit button.
Procedure 1.6. To create a Dojo button:
Open your Web page, such as textbox.html, in a text editor.
Modify any buttons in your Web page so their opening tag contains the attribute
dojoType="dijit.form.Button".Use the
dojo.requirestatement to include the Dojo module"dijit.form.Button", which contains the JavaScript support for button Dijits.Script 1.6 shows what your page should look like after you enter the highlighted code.
Example 1.6. Creating a Dojo button.
1   <html>
2     <head>
3       <title>Welcome to Dojo</title>
4
5       <link rel="stylesheet"
6         type="text/css"
7         href="http://o.aolcdn.com/
8         dojo/1.1/dojo/
9         resources/dojo.css" />
10
11      <link rel="stylesheet"
12        type="text/css"
13        href="http://o.aolcdn.com/dojo/
14        1.1/dijit/
15        themes/tundra/tundra.css" />
16
17      <script
18        djConfig="parseOnLoad:true"
19        type="text/javascript"
20        src="http://o.aolcdn.com/dojo/1.1/
21          dojo/dojo.xd.js">
22      </script>
23
24      <script type="text/javascript">
25        dojo.require("dojo.parser");
26        dojo.require("dijit.form.Button");
27
28      </script>
29    <head>
30
31    <body class="tundra">
32      <h1>Welcome to Dojo</h1>
33      <br>
34    <button
35         id="button"
36         dojoType="dijit.form.Button">
37         Click me
38       </button>
39
40       <input
41         id="text"
42         type="text"
43         name="text"
44         maxlength="25"
45       </input>
46       <br>
47    </body>
48  </html>
Save your file.
Now when Dojo parses the page, it will replace that HTML button with the Dijit version automatically.
You can add a Dijit text box converting an existing HTML text box into a TextBox Dijit. Here, we’ll convert the text box in textbox.html into a TextBox Dijit.
Procedure 1.7. To create a Dojo text box:
Open your Web page, such as textbox.html, in a text editor.
Modify any text boxes in your Web page so their opening tag contains the attribute
dojoType="dijit.form.TextBox".Use the
dojo.requirestatement to include the Dojo module"dijit.form.TextBox", which contains the JavaScript support for Dijit text boxes.Script 1.7 shows how your page should look after you enter the highlighted code.
Example 1.7. Creating a Dojo text box.
1   <html>
2     <head>
3       <title>Welcome to Dojo</title>
4
5       <link rel="stylesheet"
6         type="text/css"
7         href="http://o.aolcdn.com/
8         dojo/1.1/dojo/
9         resources/dojo.css" />
10
11      <link rel="stylesheet"
12        type="text/css"
13        href="http://o.aolcdn.com/dojo/
14        1.1/dijit/
15        themes/tundra/tundra.css" />
16
17      <script
18        djConfig="parseOnLoad:true"
19        type="text/javascript"
20        src="http://o.aolcdn.com/dojo/1.1/
21          dojo/dojo.xd.js">
22      </script>
23
24      <script type="text/javascript">
25        dojo.require("dojo.parser");
26        dojo.require("dijit.form.Button");
27        dojo.require("dijit.form.TextBox");
28
29      </script>
30    <head>
31
32    <body class="tundra">
33      <h1>Welcome to Dojo</h1>
34      <br>
35      <button
36        id="button"
37        dojoType="dijit.form.Button">
38        Click me
39      </button>
40
41      <input id="text" type="text"
42        name="text"
43        maxlength="25"
44        dojoType="dijit.form.TextBox">
45      </input>
46      <br>
47    </body>
48  </html>
Save your file.
You’ve converted the HTML text box in the page to a TextBox Dijit.
You can respond to Dijit events, such as a button click, by connecting the event to a JavaScript function.
The trick is that you need to wait until the page is fully loaded before you start accessing Dijits in code. If you try to work with a Dijit in code before it’s fully loaded, the browser will not see the Dijit you want to work with and cause an error. To wait until the page is fully loaded before working with the Dijits in the page, you use the Dojo method dojo.addOnLoad; you pass that method a JavaScript function to call when the page is fully loaded.
To actually connect a Dijit to JavaScript code to respond to events such as button clicks, you use the dojo.connect method.
Procedure 1.8. To handle Dijit events:
Open your Web page, such as textbox.html, in a text editor.
Pass an anonymous JavaScript function to
dojo.addOnLoad, causing that function to be executed when the page is fully loaded.Use the
dojo.connectmethod to start the process of connecting a Dijit to JavaScript code that should execute when one of the Dijit’s events occurs.To the
dojo.connectmethod, you pass the Dijit whose event you want to connect, the event to be connected, and the function that should be called when the event occurs.Script 1.8 shows what your page should look like after you enter the highlighted code (note that the items in italics are placeholders; you’ll see how to replace them with actual code in the next section).
Example 1.8. Handling Dijit events.
1   <html>
2     <head>
3       <title>Welcome to Dojo</title>
4

5       <link rel="stylesheet"
6         type="text/css"
7         href="http://o.aolcdn.com/
8         dojo/1.1/dojo/
9         resources/dojo.css" />
10

11      <link rel="stylesheet"
12        type="text/css"
13        href="http://o.aolcdn.com/dojo/
14        1.1/dijit/
15        themes/tundra/tundra.css" />
16

17      <script
18        djConfig="parseOnLoad:true"
19        type="text/javascript"
20        src="http://o.aolcdn.com/dojo/1.1/
21          dojo/dojo.xd.js">
22      </script>
23

24      <script type="text/javascript">
25        dojo.require("dojo.parser");
26        dojo.require("dijit.form.Button");
27        dojo.require("dijit.form.TextBox");
28

29        dojo.addOnLoad(function(){
30          dojo.connect(
31          Dijit.
32          Event
33          Function
34          );
35        });
36      </script>
37    <head>
38

39    <body class="tundra">
40      <h1>Welcome to Dojo</h1>
41      <br>
42      <button
43        id="button"
44        dojoType="dijit.form.Button">
45        Click me
46      </button>
47

48      <input id="text" type="text"
49        name="text"
50        maxlength="25"
51        dojoType="dijit.form.TextBox">
52      </input>
53      <br>
54    </body>
55  </html>
Save your file.
In the next section, we’ll see an example of the dojo.connect method in action.
To display text in a Dijit text box when a button is clicked, you can connect the button to the text box with the dojo.connect method. You get Dijit objects corresponding to the button and text box using the dojo.byId method. You pass this method the ID of a Dijit, and it returns an object corresponding to the Dijit. You set the text in a text box with the setValue method.
Procedure 1.9. To place text in a text box when the user clicks a button:
Open your Web page, such as textbox.html, in a text editor.
You need to pass the
dojo.connectmethod an object corresponding to the button, the event you want to handle, and the function you want to execute when that event occurs.The ID of the button is
"button", so use the expressiondojo.byId("button")to pass thedojo.connectmethod an object corresponding to the button.Pass the
dojo.connectmethod the string"onClick"to indicate that you want to handle theonClickevent.Pass the
dojo.connectmethod an anonymous JavaScript function that uses the text box’ssetValuemethod to set the text box’s text to “Welcome to Dojo.” The anonymous function will be passed a Dijit Event object (covered in detail in the next chapter), which we won’t use here.Script 1.9 shows how your page should look after you enter the highlighted code.
Example 1.9. Placing text in a text box when the user clicks a button.
1   <html>
2     <head>
3       <title>Welcome to Dojo</title>
4

5       <link rel="stylesheet"
6         type="text/css"
7         href="http://o.aolcdn.com/
8         dojo/1.1/dojo/
9         resources/dojo.css" />
10

11      <link rel="stylesheet"
12        type="text/css"
13        href="http://o.aolcdn.com/dojo/
14        1.1/dijit/
15        themes/tundra/tundra.css" />
16

17      <script
18        djConfig="parseOnLoad:true"
19        type="text/javascript"
20        src="http://o.aolcdn.com/dojo/1.1/
21          dojo/dojo.xd.js">
22      </script>
23

24      <script type="text/javascript">
25        dojo.require("dojo.parser");
26        dojo.require("dijit.form.Button");
27        dojo.require("dijit.form.TextBox");
28

29        dojo.addOnLoad(function(){
30          dojo.connect(
31            dijit.byId("button"),
32            "onClick", function(evt) {
33            dijit.byId(
34              "text").setValue(
35              "Welcome to Dojo");
36          });
37        });
38      </script>
39    <head>
40

41    <body class="tundra">
42      <h1>Welcome to Dojo</h1>
43      <br>
44      <button
45        id="button"
46        dojoType="dijit.form.Button">
47        Click me
48      </button>
49

50      <input id="text" type="text"
51        name="text"
52        maxlength="25"
53        dojoType="dijit.form.TextBox">
54      </input>
55      <br>
56    </body>
57  </html>
Save your file.
You’ve completed textbox.html. Running it is easy—just open it in a browser.
Procedure 1.10. To run textbox.html in a browser:
Save textbox.html on your hard disk or ISP.
Open your browser and navigate to textbox.html.
If textbox.html is on your hard disk, choose File > Open (in Internet Explorer) or File > Open File (in Firefox).
If the file is on your ISP, enter the appropriate URL in your browser’s address box.
If you’re opening textbox.html from your hard disk and are using Internet Explorer, a warning security bar may appear at the top of the browser window with a message similar to this: “To help protect your security, Internet Explorer has restricted this file from showing active content that could access your computer. Click here for options.” Click the bar and from the menu select Allow Blocked Content; then click Yes in the dialog box that opens to enable JavaScript in this example.
Click the Click Me button.
You should see the “Welcome to Dojo” message appear in the text box, as shown in Figure 1.4.
Congratulations—you’ve created a fully functional Dojo page.
✓ Tip
If you can’t get this example to work correctly, verify that the
<script>and<link>elements are accessing Dojo (for example, if you’ve installed Dojo, make sure that it was installed at the location where you’re telling your browser to look for it). Another common error is to save textbox.html in RTF format inadvertently, because that’s the default format of Windows WordPad. When you save the file, make sure you select Text Document in the Save as Type dialog box.