3
The First Principle of Effective Interviewing—Say No
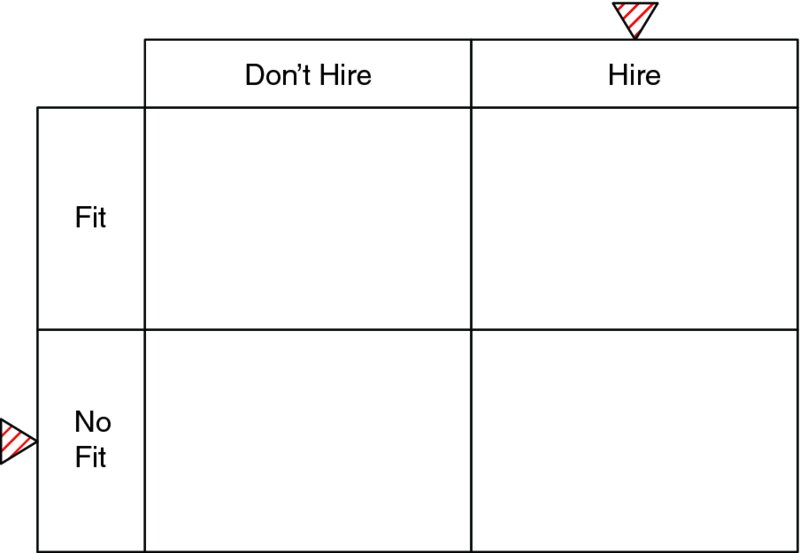
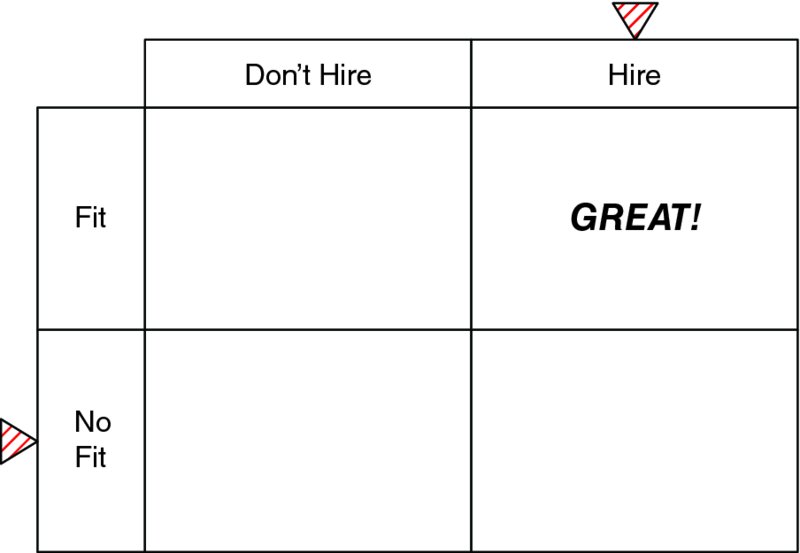
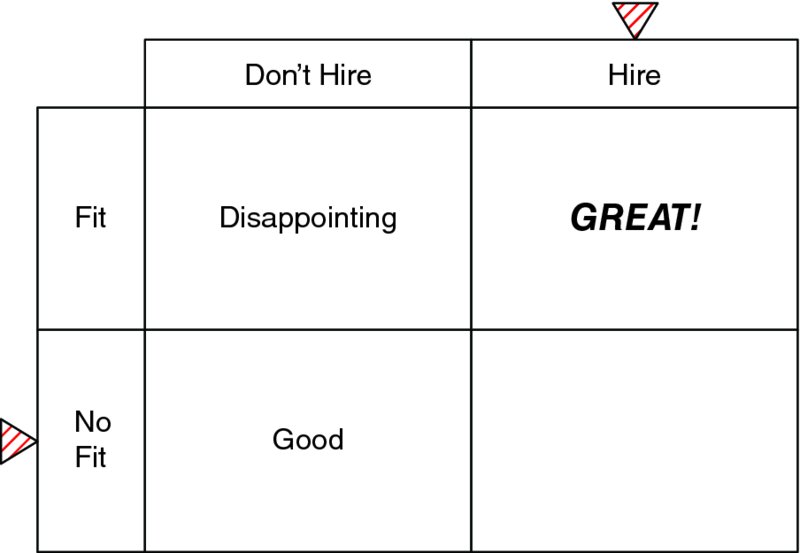
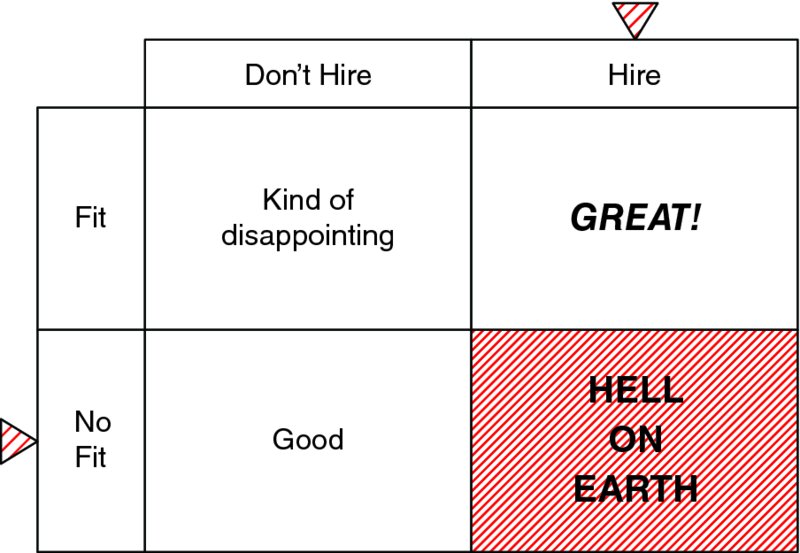
So we’ve determined that we have to hire, after figuring out ways to prioritize work among remaining staff. And we’ve committed to setting a high bar. As we move to the interviewing phase of the hiring process, our guiding principle is simple: Look for reasons to say no. The best way to demonstrate the rationale for this is by using a matrix that we popularized at the Manager Tools Effective Hiring Manager Conferences (Figure 3.1). We conduct these publicly all over the United States and overseas, and privately for clients as well. Figure 3.1 Hiring Matrix The matrix is a classic 2x2, showing the choices we have in interviewing and the possible outcomes. Our decisions are shown as two columns—either we hire, the rightmost column, or we don’t—the left column. The outcomes are shown as rows. A good fit—someone who turns out to be a good hire once he’s on board—is the top row. And a bad fit—someone who turns out poorly—in the bottom row. The first lesson in the matrix is a simple one: it’s not necessarily true that someone is a fit just because we hire her. We only know whether someone is a good hire after she has been performing in the role. Most managers mistakenly conflate “saying yes” with a good fit: “If I like him, then he’s right.” But that’s not always true. This leads us to important hiring guidance: effective hiring is based on outcomes, and not on decisions. You’ll notice the red arrow above the right, “Hire” column. That’s where most managers are focused during the process. They want to hire. That opening needs to be filled. You’ve probably felt this way yourself—we have. That right column “hire” mindset is important to understanding why the purpose of an effective interview is to find reasons to say no. Let’s just walk through the matrix’s various outcomes to further understand manager decisions and hiring outcomes. Obviously, what we want is to hire someone who is a fit: the top right cell (Figure 3.2). This is what is known as a “true positive.” Our decision to hire ends up being supported by good performance once the candidate is part of our team. Figure 3.2 A true positive outcome Figure 3.3 A false negative outcome That desire makes it easy to think that our job in interviewing is to “hire.” It may be more accurate to think of our decision as “offer” as opposed to “hire.” Whether our offer is accepted or not is out of our control. It would be a little weird to hope to say yes to someone in an interview and then not hire him. We have to assume while we’re interviewing that any offer will mean a hire. The next possible outcome is that someone is a fit, but we say no, and decide not to make an offer. This is the outcome in the top left cell (see Figure 3.3). An outcome like this is called a “false negative.” [We said no, but the person “should” have been a “yes.”] It’s disappointing or worse to a manager who is thinking of hiring. “We missed a good candidate! As desperate as we are, we can’t afford that!” This is the kind of thinking that leads to lax hiring standards, which often comes as a direct result of thinking that the purpose of interviewing is to find reasons to hire. Fortunately for our sanity, most of us don’t track candidates’ success in other roles after we turn them down. If we interview someone and choose not to make an offer, and the person would not have been a good fit, that’s what is known as a “true negative” (Figure 3.4). It’s represented in the bottom left cell. That’s a good outcome—we did our job and didn’t hire someone who wasn’t right. Figure 3.4 A true negative outcome But now we come to the most important cell in the matrix: the bottom right. This is the case where we have decided to offer/hire someone, and the person ends up not becoming effective. He or she does not turn out to be a good performer. This is what is known as a “false positive” (Figure 3.5). We said yes, but we should have said no. Figure 3.5 A false positive outcome Manager Tools affectionately calls this outcome, “Hell on Earth.” The “Hell on Earth” hire is the employee who performs poorly or tears down your team. [There are two reasons to fire someone: failure to perform and not working well with others.] This hire will take too much of your time to manage. He will drag down the performance of your team. Hiring him will reflect poorly on you. One of the primary goals of this book is to help you avoid, at all costs, “Hell on Earth.” If you’re going through your first hiring experience as a manager, remember what we said earlier: Ask any manager who has ever made a bad hire. They’ll tell you: never again. Consider again the red arrow at the top right of the matrix. It highlights the “Hire” column. Because we want to “hire,” we focus on “finding someone.” We start looking for positives. And most candidates who have reached the final stages of interviewing clearly have characteristics to recommend them. When we combine our desire to hire with confirmation bias, our focus on our decision increases the chances of a Hell on Earth hire. What we’re trying to do—hire—increases what we definitely do not want. Now reconsider the red arrow at the bottom left of the matrix. It highlights the “No Fit” row. This is the right approach to hiring: Eliminate any possibility of a bad outcome. If we wipe those possibilities out (Figure 3.6), all we’re left with is either the great outcome of a true positive hire, or the disappointing outcome of a false negative. Figure 3.6 Eliminate the possibility of a bad outcome So, I repeat: the purpose of any interview is to find a reason to say no. To eliminate all candidates who would not be a fit. What we’re left with is either exactly what we want, or a small disappointment. When effective hiring managers interview, they’re looking for problems. They’re not looking for strengths. If you start looking for strengths, you’ll find them. Everybody has them, including the Hell on Earth hire. The default answer when interviewing must be “no.” If “no” is our default, then that’s what you say if you have doubts at the end of an interview. If your team conducts interviews of candidates (who want to become their peer), and they express doubts, say no to that candidate. [There are exceptions to this, which we’ll talk about later.] If you think more interviewing might reveal more positives to “balance out” the negatives, it’s time to say no. If you finish interviewing and find no problems, then and only then have you eliminated a bad fit. Then you can start thinking about hiring.