3. Customizing Your Camera
One thing that sets the Flip Mino camcorders apart from other camcorders—small or large—is the case, which you can customize. (And yes, this applies to the Mino only; you can’t customize a Flip Ultra’s case.) Although you can purchase a Flip from a retail store or online outfit such as Amazon.com and receive a Mino with a black, white, or chrome case, if you purchase the camera directly from Pure Digital’s Web site, you can have the camcorder’s case emblazoned with just about any design you like. No, I’m not talking about a little plastic sleeve or polymer case that you wrap around your camera: Your design is actually embedded in the camera’s plastic case. Like that large tattoo of Boyz II Men that seemed like such a good idea when you were 18, this design is permanent.
In this chapter, I show you the ways you can personalize your Flip Mino.
Trying out the Options
As I said, you can purchase a customized case only from Pure Digital directly. To begin your journey, visit the Flip Video Store at www.theflip.com/store. On the left side of the screen, you see a column that lists the available Flip models, along with links to gift cards and accessories. For the purposes of this chapter, you’re interested only in the Flip Mino and Flip MinoHD links.
Go ahead and click the link for the Flip Mino. In the resulting page, you see four purchase options: Design Gallery, Use Your Own Image, Use the Pattern Generator, and either Black or White (if you’ve chosen a Flip Mino) or Chrome or Black (if you’ve chosen a Flip MinoHD). The four options break out this way.
Design Gallery
Design Gallery is very much what it sounds like—a repository for premade designs. Some of the designs come from Pure Digital’s Flip Studio; others are from such designers as Beth Weintraub, Astro Studios, Elemental8, and Santa Cruz Skateboards.
When you first click Design Gallery, you’re presented with a screen full of the best-selling designs (Figure 3.1). Best sellers are marked with an icon of a red box with a white star inside.
Figure 3.1 The Flip Video Store’s Design Gallery offers plenty of compelling case designs.
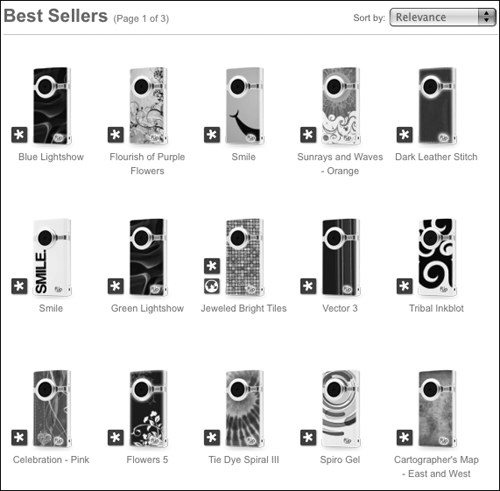
Along the left side of the page, you see a Browse Designs by Category heading, followed by a series of categories including Flip Staff Picks, Hello Kitty & Friends (yep, you can have Sanrio’s designs applied to your Mino), Tattoos, Textures & Patterns, and Flip for Good.
Note
This last category is worth pointing out. If you purchase a Mino with a Flip for Good design, $10 of the purchase price goes to a charitable organization associated with that design. Organizations that benefit include Feeding America, Kiva, Witness, and World Food Programme. Each of these designs is marked with a green Earth icon.
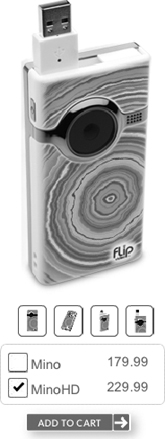
On each category page, you can sort the designs by Relevance, Best Selling (within that category), Recently Added, and Flip Picks. (Flip Picks are designs that Pure Digital’s staff particularly likes.) If you’d like to learn more about a design, just hover your pointer over the designed Mino. A pop-up bubble tells you who created the design and how much the cameras cost (as I write this chapter, $179.99 for the original Mino and $229.99 for the MinoHD), and also provides a short description of the design and designer.
To get a closer look at a Mino with the design applied to it, just click the thumbnail image. A new page opens, showing you the face of the camera life-size. Four thumbnail images appear below this larger image. Hover your pointer over each of these thumbnails to see the large image from a different angle. Also on this page, you can choose whether to order a Mino or a MinoHD.
Click the Add to Cart button, and as promised, you’re taken to the Shopping Cart page, where you can change the number of Flips you want to purchase as well as add any accessory items.
When you’re ready to buy, just click Checkout. You’ll be walked through a series of screens where you create an account at the Flip Video Store and eventually pay for your item. Your order is relayed to CafePress (the outfit tasked with applying the design to the Mino’s case; see the “Going Direct” sidebar at the end of this chapter), and you’ll have the designed Mino in a couple of days.
Use Your Own Image
If you’ve ever used an online photo service such as Flickr or Snapfish, you’re on your way to slathering a picture of your own onto a white Flip Mino (yes, only a white one; you can’t add an image to a black or chrome Mino). Click the Use Your Own Image option, and you’re taken to the Upload an Image page. Click the Choose File button, and—just like Flickr and Snapfish—the Flip Video Store prompts you to select a digital photo stored on your computer.
Specifically, when you click Choose File, a small window appears. In this window, click the Browse (Windows) or Choose File (Mac) button to open a window (Windows) or sheet (Mac) that you use to navigate to an image you’d like to use.
Tip
If you’re using a Mac along with Apple’s iPhoto to store your pictures, you don’t have a direct way to access those images from this window. To use one of your iPhoto images, open iPhoto, select the image you want, and drag it to the Mac’s Desktop. The image is converted to a full-size JPEG file (if it wasn’t one already). At that point, you can select it with the Choose File command.
When you’ve found an image you like, click Open (Windows) or Choose (Mac), and the name of the chosen image appears in the Upload window. At the bottom of this window is a check box that, when checked, indicates that you have the right to use the image you’re uploading. Check that check box and then click the Upload button.
Note
That image must be in either the JPEG or PNG graphics format and must be no larger than 10 MB. You don’t want it to be a really tiny, low-resolution image either, of course. If you try to use such a low-quality image, you’ll see a warning message. The better the image, the better the results are likely to be.
A new window appears, where you can manipulate your image. On the left side of this window, you see the outline of a Flip Mino camera and your image below that outline (Figure 3.2). Below your image are five buttons labeled Position, Rotate, Scale, Auto-Fit, and Replace Image. On the right side of the window is a full-size preview of the Mino with your image applied.
Figure 3.2 You have a lot of control over the way your image is placed on the Mino.

The first three buttons allow you to place the image exactly where you want it on the camera. Position lets you click and drag the image to move it around. Click Rotate, and a slider appears that lets you rotate the image left or right up to 180 degrees. And clicking Scale lets you shrink or expand the image.
When you click Auto-Fit, the window provides three views:
• Horizontal, with the image in its original orientation and filling the camera from top to bottom
• Vertical, with the image rotated 90 degrees to the right and filling the camera from top to bottom
• A below-lens-divider view, with the image in its original orientation but filling only the area below the lens divider (the bar on either side of the lens that covers the microphone)
If you’re unhappy with the image you’ve chosen, click Replace Image, and the Upload window appears again.
Use the Pattern Generator
OK, so none of the cameras in the Design Gallery thrills you, and you don’t have any images of your own that you find compelling enough to plant on your Mino. You have one other choice, and that choice is Flip’s Pattern Generator: a tool for creating patterns based on a few conditions you set within a window. It works this way:
1. Click the Get Started link below the Use the Pattern Generator item.
The resulting page tells you that you’re about to have the opportunity to create a one-of-a-kind pattern for your Mino.
2. Click Get Started again.
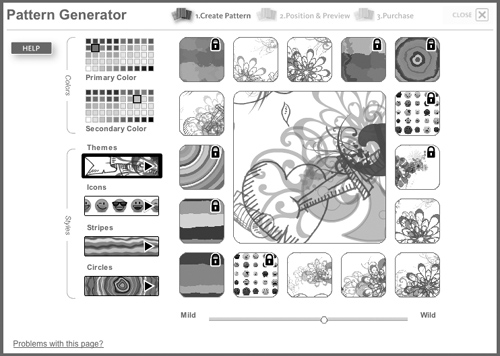
In the Pattern Generator window that pops up, you can play with colors and styles.
3. Experiment with primary and secondary colors in the Colors palettes in the top-left corner of the window.
4. Experiment with the options in the Styles palettes:
• Themes. Choose one of four themes (which I’ll describe as flowers, brush strokes, shapes, and paisley).
• Icons. Choose one of five icons (smileys, 3D smileys, cupcakes, dingbats, and circles).
• Stripes. Choose one of five stripe patterns (bold horizontal, waves, bold vertical, madras, and wavy madras).
• Circles. Choose one of six circle patterns (round, distorted, large, large distorted, mirrored, and distorted mirrored).
5. Select two colors and one style.
The large display on the right side of the window creates a moving pattern using these elements (Figure 3.3).
Figure 3.3 The Pattern Generator.
6. Experiment with the Mild/Wild slider below the Pattern Generator display.
The closer to Mild the slider is, the stricter the generator is about its results. If you’ve chosen the round Circles pattern in navy blue and turquoise, for example, that’s pretty much what you’ll get. Slide all the way to Wild, and you’ll see a far broader range of colors and distorted patterns.
7. When you find a pattern that intrigues you, click the Pause button in the middle of the generator.
The generator creates 16 patterns based on the original and arrays them around the central display. To get a closer look at one of these patterns, just click it; it appears in the center of the generator. To save one of the 16 patterns, click it and then click the Lock icon to save that pattern in its current position.
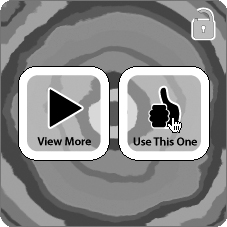
When you click the central generator display, you’ll see two options: View More and Use This One (Figure 3.4). Click View More, and the generator starts up again, using the currently selected colors and style. (You’re welcome to change both the colors and style.) Click the Pause button again, and yet another pack of variations is arrayed around the generator (with the exception of locked patterns, which aren’t replaced).
Figure 3.4 You can ask the Pattern Generator to continue creating patterns or apply the selected pattern to your Mino.
Note
It’s easy to be underwhelmed by the Pattern Generator until you actually preview a pattern applied to a Mino. The thumbnails and even the larger view within the central generator don’t give you a good idea of how cool some of these patterns really are. Apply and try, and you may very well buy.
8. When you have just the pattern you want, click the central display and then click the Use This One option.
You’re taken to a screen where the final pattern is applied to a Mino (Figure 3.5). In this screen, you’ll find the same sharing (discussed next), view, and purchase options that you see when creating your own design.
Figure 3.5 There’s the Mino with your pattern applied.
Just as you can with the designs you create (refer to “Use Your Own Image” earlier in this chapter), you can continue to adjust the position, rotation, and scale of the pattern, as well as autofit or replace the pattern. Should you click Replace Pattern, you return to the Pattern Generator, where you can take another stab at creating a pattern.
Black, White, or Chrome
You have the option to purchase a plain ol’ black or white Flip Mino, of course (or a black or chrome MinoHD, as those are the choices offered in the high-definition model).
Tip
Honestly, if that’s what you’d like to do, I urge you to direct your browser to www.amazon.com or visit your local Costco. You’ll find the Flip Minos more affordable at those retailers.
Sharing Your Designs
In each of the design screens, you’ll see a Share This Flip Design link. Click this link, and a Share This Flip Design window eventually appears. (It can take a minute or two to show up, depending on the speed of your Internet connection.) Within this four-tabbed window, you can choose to send an e-mail message about your design; add an announcement about it to a Facebook, MySpace, or Bebo profile; post that same announcement to a Blogger, TypePad, or WordPress blog; and choose a badge style (horizontal or vertical) for your designed Mino.
What’s the point of sharing your designs? Bragging rights, certainly, but there’s more to it.
After you’ve designed a Mino and purchased it, you’ll be invited to share your design with others. You can choose to do this for free or offer the design for sale. When you choose to share your design for free, you name the design, give it a description, and agree to the terms of use.
If you’d like to sell your design, you’re prompted to set up an account with CafePress.com (the company that custom-paints the Mino) after you’ve purchased your Mino. When you do, any designs that you create at the Flip Video Store are uploaded to CafePress automatically and added to your store. Flip.com reviews all these designs, and if the staff likes one of yours, it’ll be displayed on the Flip site.
Regardless of whether people purchase your designed Mino directly from CafePress or from the Flip Video Store, you earn $10 per camcorder.