CHAPTER TWOWearables
Your Cricut can create so much more than just decals and shirts. Within this chapter you can learn how to make stencils out of freezer-paper, different types of earrings, custom tote bags, headbands with faux leather bows, even a pair of crafty shoes! So many options of things to create … your imagination is your only limit. I truly hope the projects and tips in this chapter spark new ideas for you with what you have the ability and creativity to create.
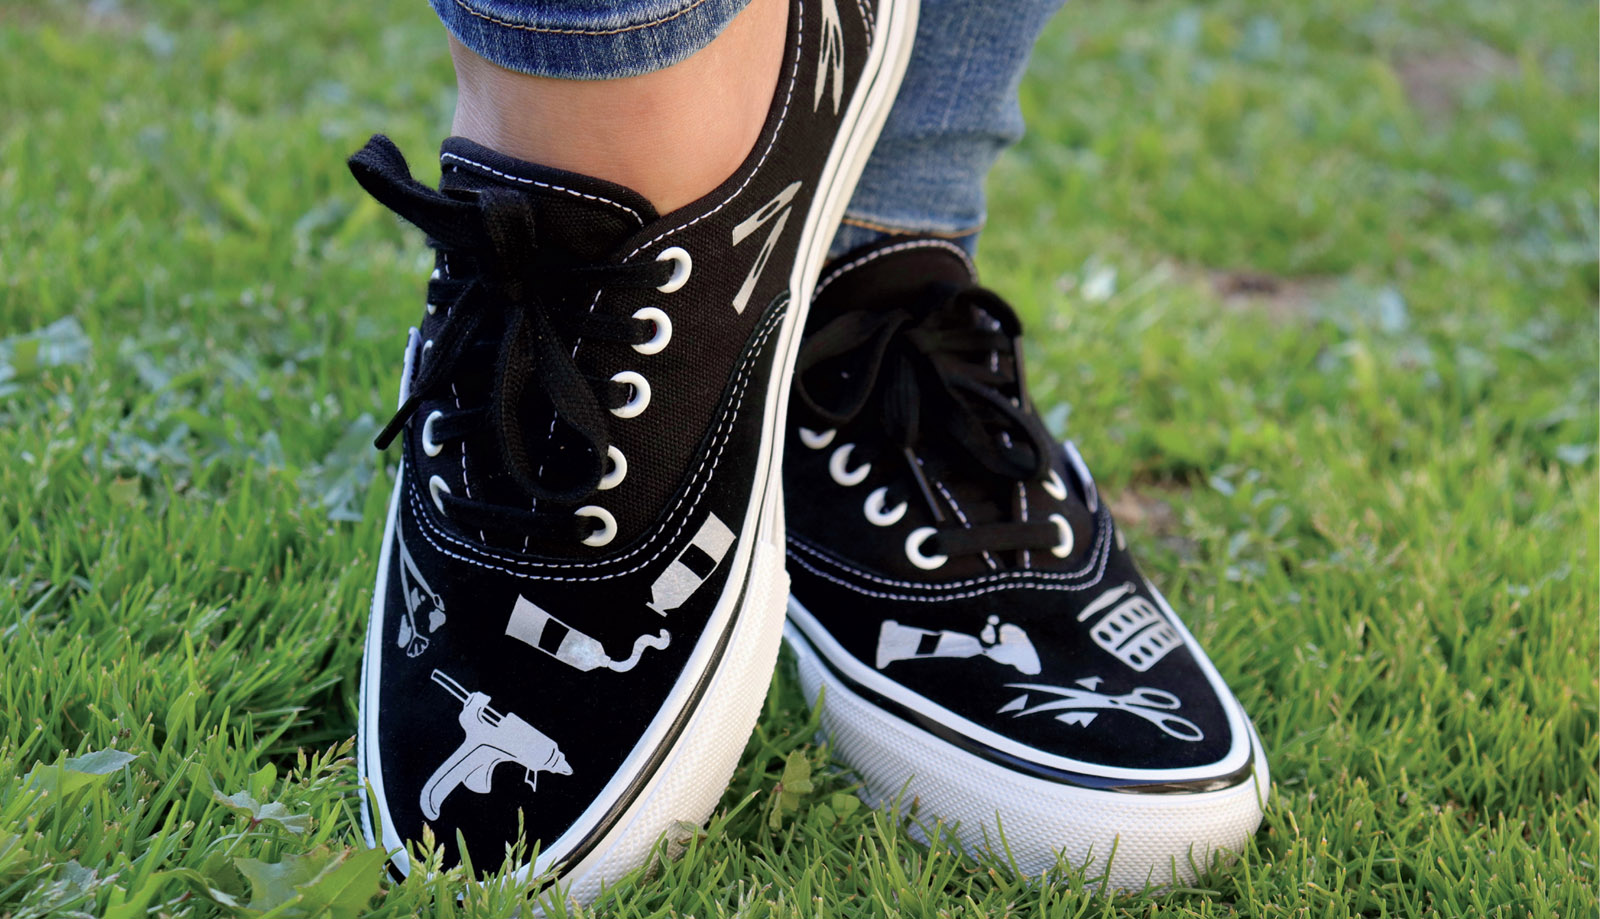
Custom Crafty Shoes
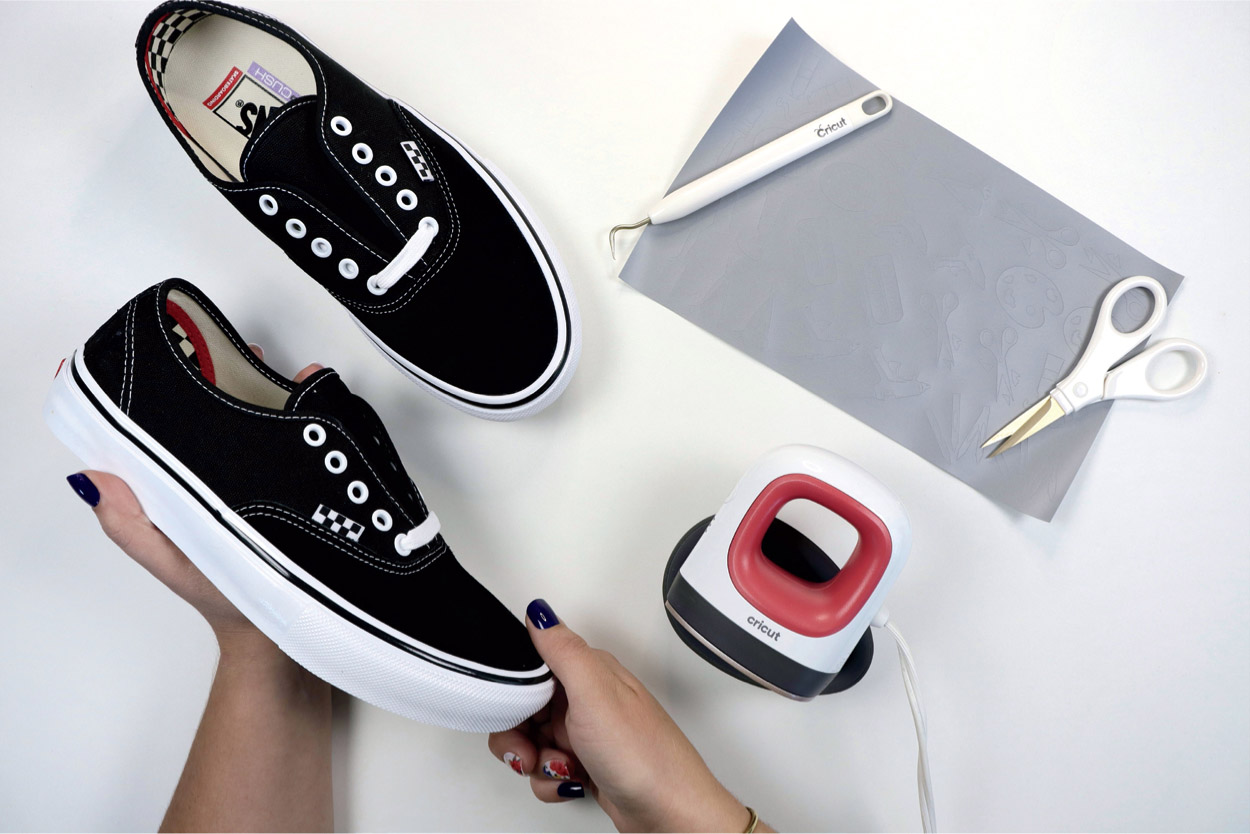
Shoes are a great way to show off your unique style. With a little iron-on material and a handheld heat press you can create a pair of custom kicks for yourself, your friends, and your family.
Materials Needed
Shoes
Iron-on material (also known as heat transfer vinyl)
Weeding tool
Scissors/craft blade
Small/handheld heat press
Machine Compatibility
Any Cricut machine
Images Used
Paint Palette #M26273F27
Watercolor Paint #M2627FDB1
Crayons #M2627FD7B
Acrylic Paint Tube #M2627FDB8
Paint Brushes #M26273F24
Paint Brushes #M2627FD90
Scissors #M2627FDA7
Paint Tubes #M2627FD99
Glue Gun #M2627FD7E
DESIGN IT
You can customize your shoes with any design or pattern you can think up! For these shoes I am using the craft-themed images listed previously. Keep in mind when selecting your designs, they will need to be small as any fine details may be difficult to weed. You’ll want to add all of your images to your canvas and then size them to be able to fit on your shoes. For these particular shoes I’ve sized each of the images to be no larger than 1.5” x 1.5”.

If your image has small details, the Contour tool is a great option for eliminating some of the unnecessary tiny cuts from your design. Clicking on the small sections removes them from the image.

You’ll be left with a design that still has the same outline shape and major details, but those fine details have been eliminated. This leaves a perfect image to be used on your shoes. In the image here, you can see the Glue Gun image on the left has had a small cut removed from the nozzle as well as the handle. The image on the right is the original file from Design Space. When this image is sized at 1.5” across, the cuts that have been contoured out would be very intricate.
If you’d like to add variety to your design, you can duplicate the images and make them slightly larger or smaller.
MAKE IT
When on the Make It screen, double-check that you toggle the Mirror option, especially if your images have text. I would also suggest increasing the copies of your images on the Make It screen. This will allow you to cover your shoes with the designs and play with the layout.
When placing your material on the mat, put the shiny side down. There are a few instances where this isn’t the case, but the majority of iron-on material is cut with the shiny side (carrier sheet) down. This will allow your machine to cut the material while keeping it attached to the clear carrier sheet.

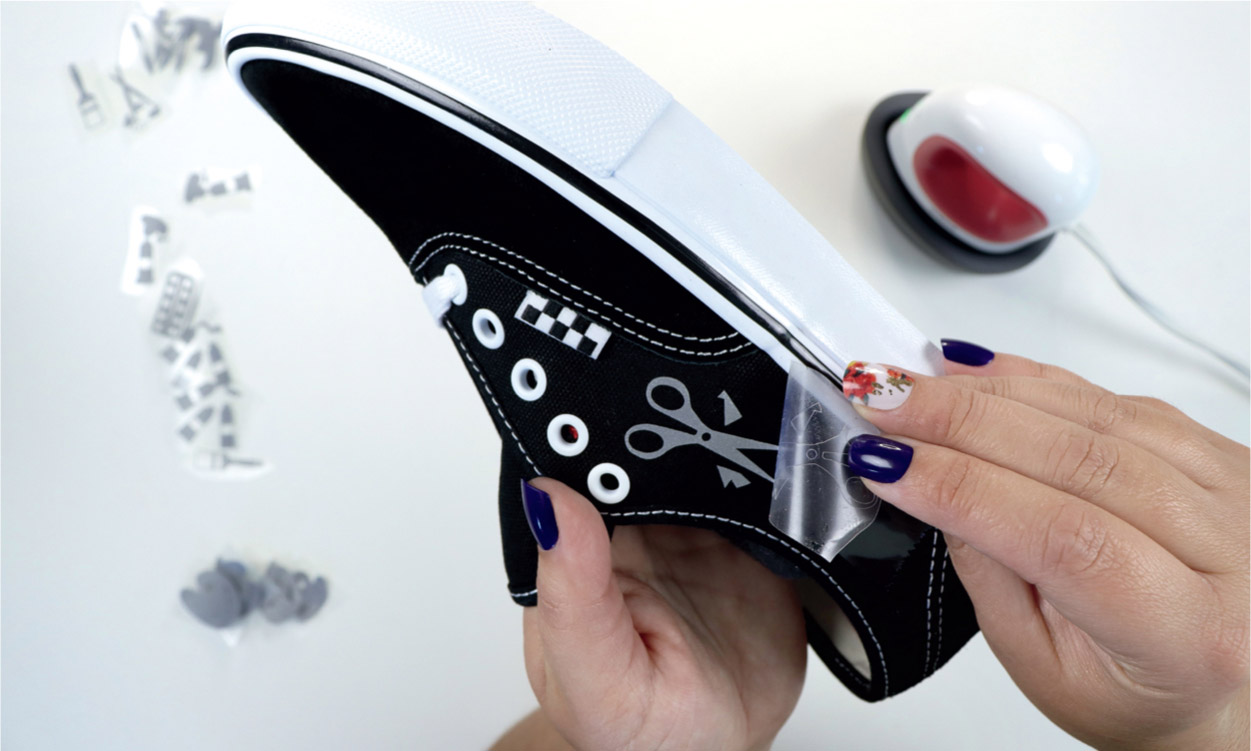
Once your images are cut, slowly remove all the excess material around your design. I chose a reflective material for these shoes, just for fun!
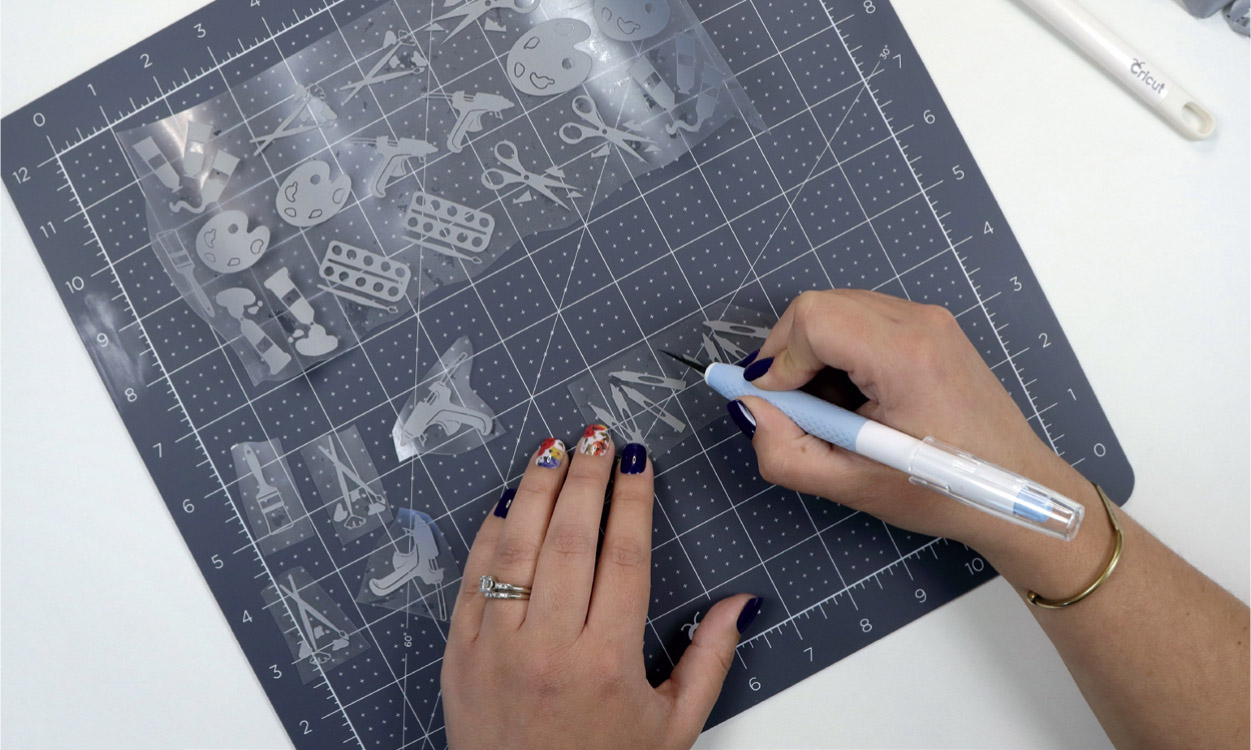
When you’ve completed weeding it’s a good idea to separate your designs, which will make applying them much easier. I used a craft blade for this part and it was quite a bit easier on the hands than using scissors.
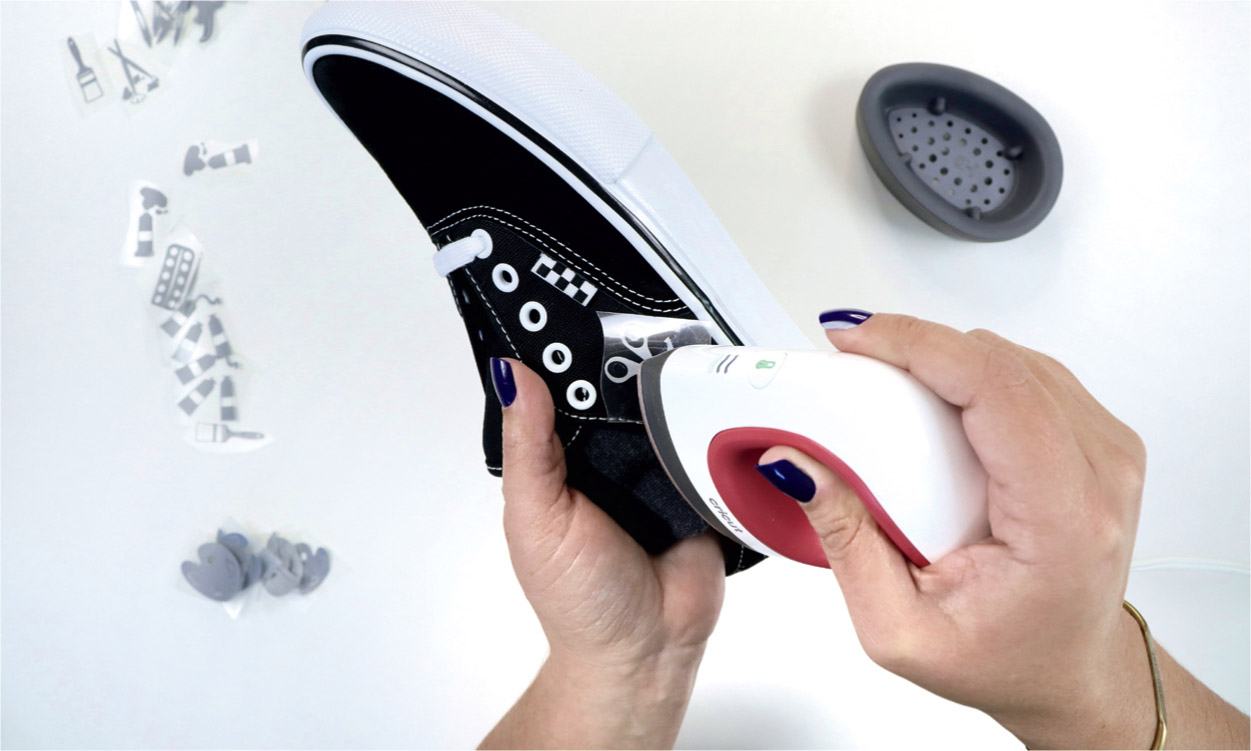
Now that your images are separated, you can place them on your shoes however you like. Position them all on to make sure you like the layout before you set them with the heat press.
Check the instructions on your iron-on material to see if you should peel away the carrier sheet while it’s still hot or if you should allow it to cool first. Peel as instructed.

Continue placing your designs on your shoes as shown here. If your designs are close together, as these are, press one at a time but wait to remove the carrier sheets until the whole area has been pressed.
MAKE IT EXTRA
Whether you’re layering designs or incorporating specialty iron-on materials, you can be as creative as you’d like to show off your unique style. Using reflective iron-on, like I did, can add an element of safety to your shoes if you like to exercise or play during dusk or dawn. Another idea is to divide a larger image into two halves, and then place the right side of the design on one shoe and the left side of the design on the other shoe so that together, the two halves create a single design. This can assist children to learn which shoe goes on which foot and it can create a cool design for adults, too!

Earrings with Faux Leather
You’re about to become hooked on making faux leather earrings! Faux leather earrings can be made using the techniques in this section and they can be customized to fit your personal aesthetic by using different shapes and colors. The best part is that faux leather is a lightweight material, making these earrings not only fun to wear but easy on the ears as well!
Materials Needed
Faux leather
Earring findings (jump rings and hooks)
Pliers
Jump ring opener tool
Machine Compatibility
Any Cricut machine
DESIGN IT
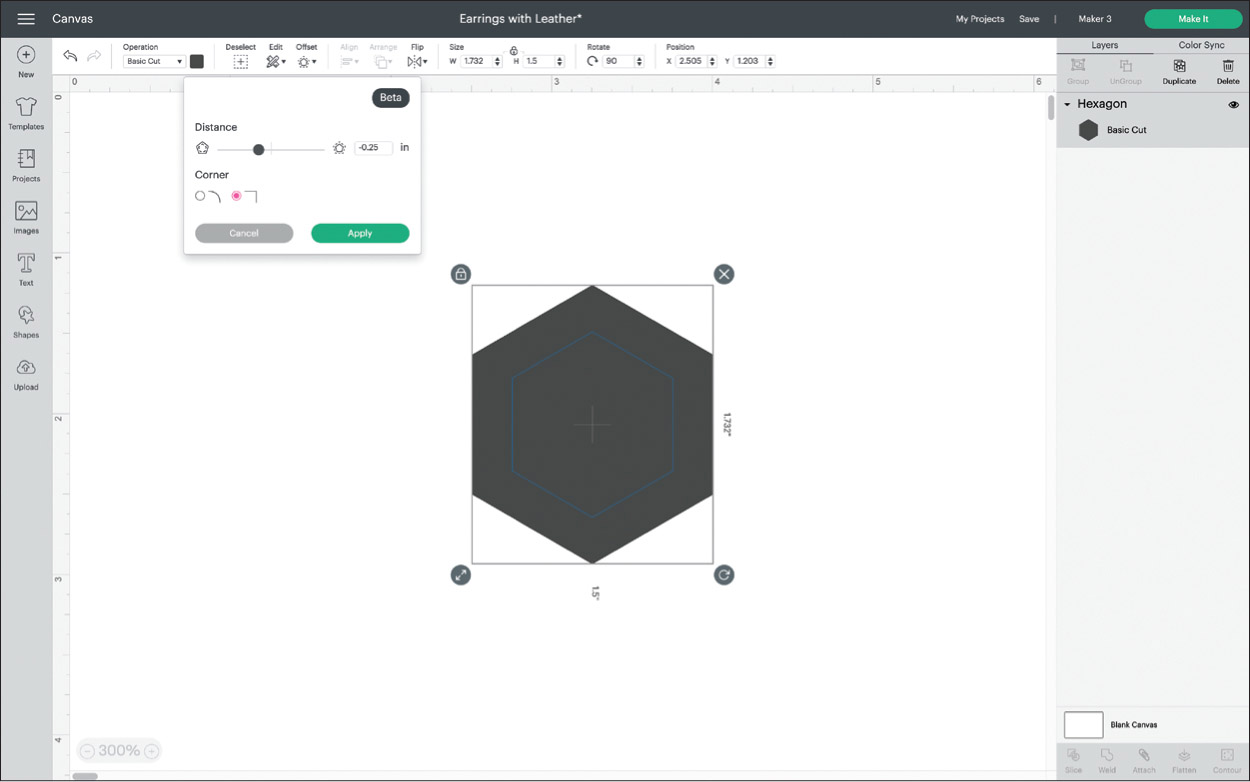
Begin with your basic shape on your canvas. For these earrings I went with a geometrical theme, so I started with a hexagon. I rotated the hexagon so that a corner would be at the top when assembled. Next, you will create an Inset, using the Offset tool. Enter -0.25” into the designated box (as shown here) and select squared corners, not rounded. Then select Apply.

For the next step, you will select the original shape as well as the new inset layer and then click on Slice. This will create several layers we don’t need on the canvas. The image here shows the two layers that need to be deleted.

To create a level of fun and complexity I added a heart to these earrings, sized to float within the hollow hexagon. Also, two small circles sized .08” have been added, which will be the holes for the jewelry hardware.
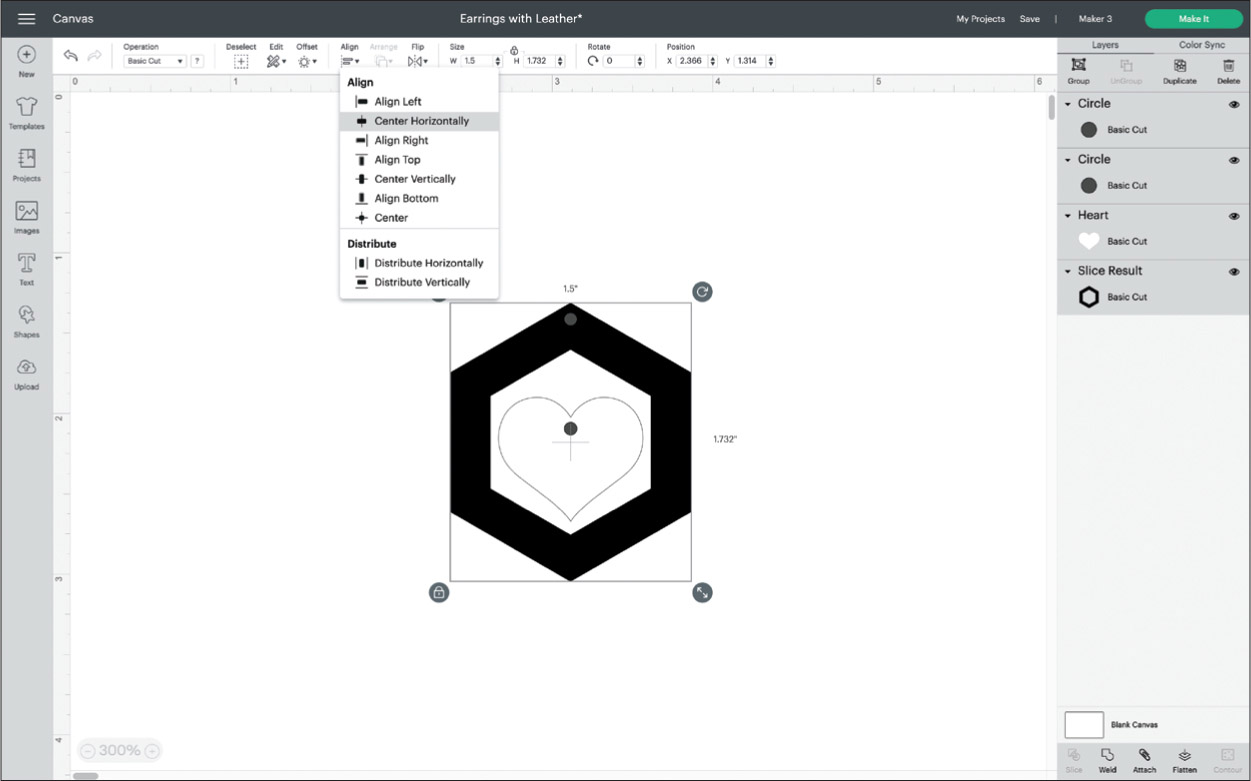
Drag these small circles onto the hexagon frame as well as the heart (or whatever shapes you’ve created). To make these perfectly centered, select all the layers and then click on Align > Center Horizontally, as shown here.

Select each shape and its corresponding small circle and then Slice. You’ll then repeat this for your inner shape as well. Then remove any unwanted layers like the extra small circles that were created when sliced. Select all the layers and duplicate to make two earrings. Your canvas should resemble the image here. Now you’re ready to click the green Make It button and cut your earrings.
MAKE IT
If your leather has a smooth side and a fuzzy side, place the smooth side against the mat. This will give you the cleanest cuts. Use a brayer to make sure the leather material is adhered well to your mat. I prefer to use a green mat for heavy materials like leather. On your machine, move the white star wheels on the metal bar to the far right, out of the way of your leather. Make small test cuts using different cut settings to ensure you have the right setting before cutting your whole project. Each type of leather has a different thickness/weight. I like to start with the Faux Leather setting which calls for the Fine-Point (normal blade), and you can add more pressure if necessary. If this setting, doesn’t seem to be cutting through your leather, switch to the Genuine Leather setting and try various pressures until you find one that cuts cleanly through your material. The Genuine Leather setting calls for a Deep-Point Blade.

Once your material is cut, start opening your jump rings. I find it helpful to use two sets of pliers for this part, as shown here. You can also use a jump ring opener tool if you have one.

For these particular earrings, I used a large jump ring for the top hole in the hexagon. Through that same hole I inserted the earring hook. In the image here you can see that I added another smaller jump ring, which will connect to the small jump ring on the heart.
MAKE IT EXTRA
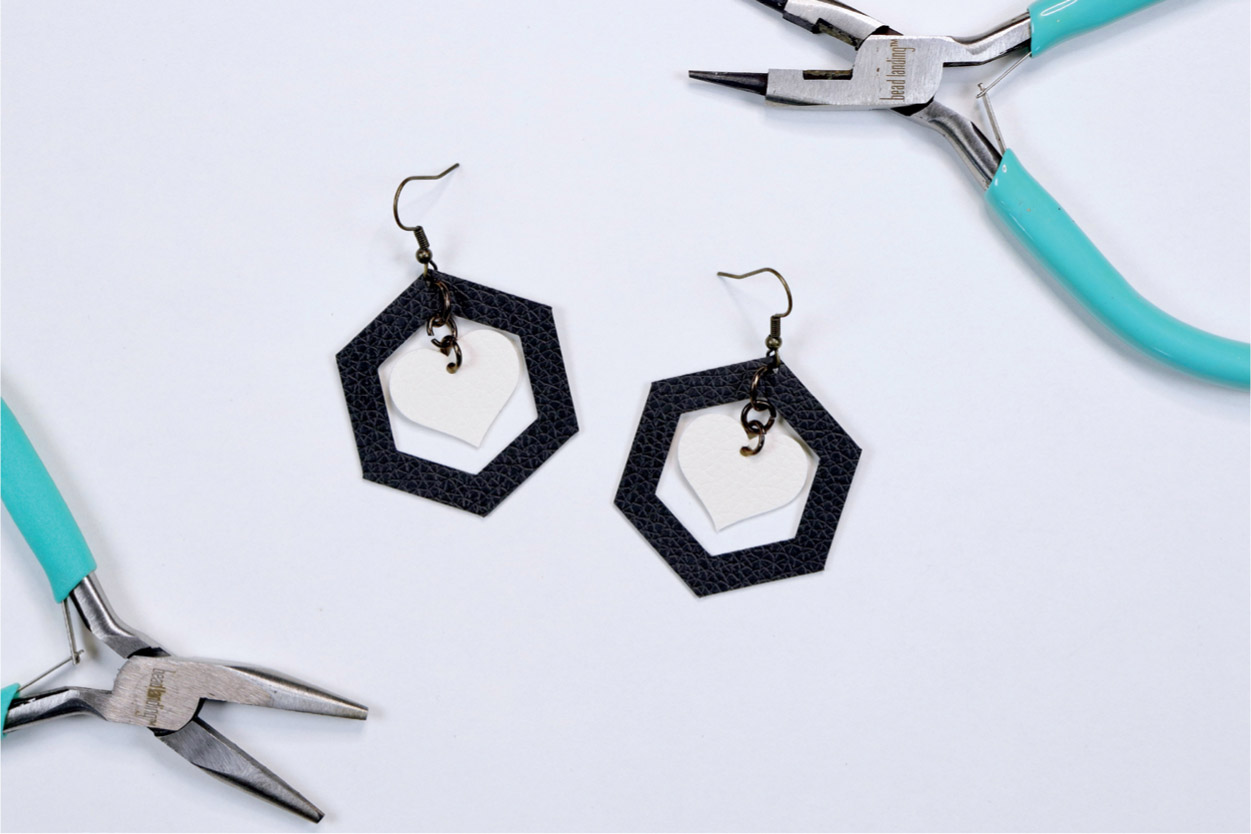
These earrings look great from any angle! The hearts float and swing inside the outer hexagon, which is already extra, but you could go further. These shapes could be swapped out to create a variety of styles. Adding additional jump rings is the key here. You could create even more elements by adding circles on the bottom of your shape and attaching more rings and shapes.

Earrings with Shrink Plastic
These unique earrings are a fun way to use shrink plastic, better known as Shrinky Dinks. You can create tons of custom earrings for yourself, your friends, or even to sell. These make great gifts when made with custom images and sayings.
Materials Needed
Shrink plastic/Shrinky Dink material
Color printer
Heat source (embossing gun or oven)
Earring findings (jump rings and hooks)
Pliers
Jump ring opener tool
Machine Compatibility
Maker or Explore series
Image Used
Heart Patch #MB6C10DC
DESIGN IT
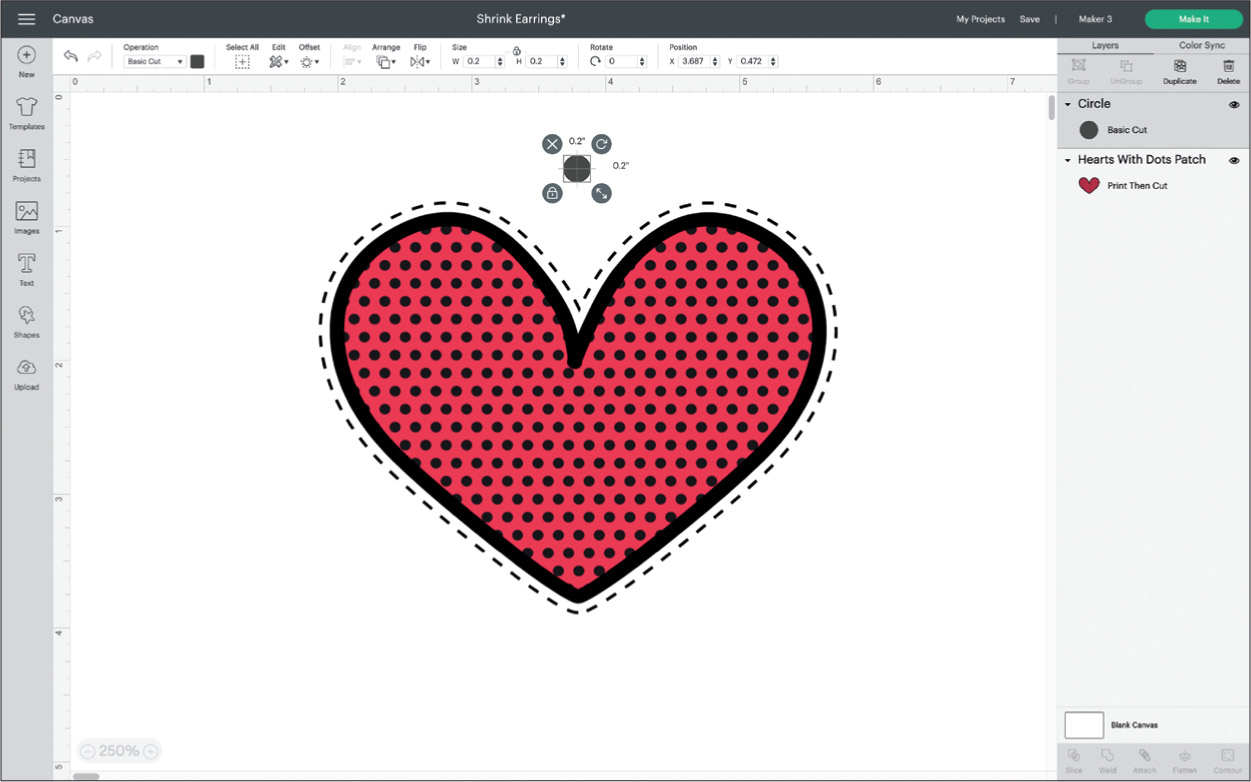
Start by selecting an image you’d like to turn into earrings and bringing it onto your canvas. Also add a small circle on your canvas, which will serve as the hole for the earring hook. Keep in mind that when using shrink materials your design will shrink roughly 300%. I sized these earrings to be 4” when printed and they will be between 1.5” and 1.75” after heat is applied.
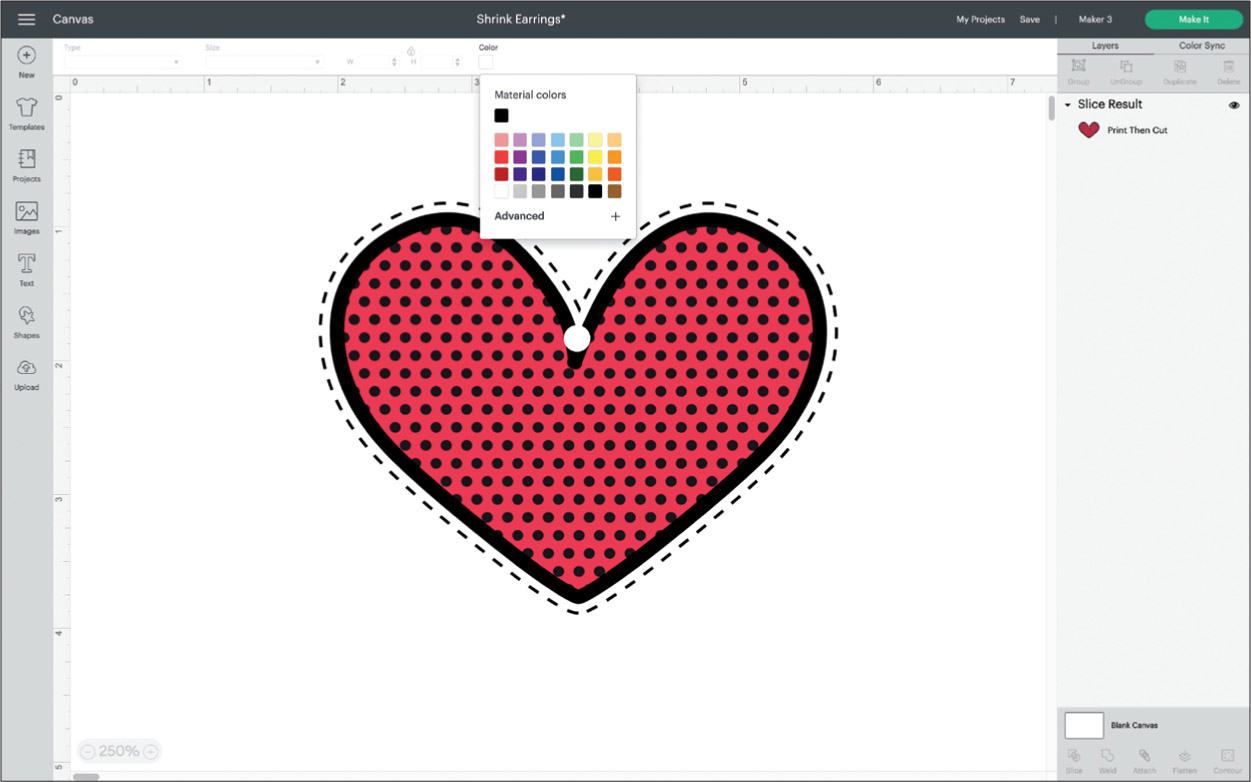
Next, move the small circle to the middle of your design, just a bit below the top edge. Select the small circle and your image layer and Slice. Then remove any extra small circle layers that have been created. You will keep just the main image that now has a hole in it.

Duplicate your image and then click on Flip if you’d like your designs to be symmetrical. To make the best use of the material, I selected both layers and rotated 90°, and then I clicked on Attach. Make sure the combined width of your design does not exceed 6.75”, or a height of 9.25”, as this is the maximum Print Then Cut area.
MAKE IT
Send your design to your printer and print it on the shrink material. Then allow the printed shrink material to dry for several minutes before you place it onto your mat. The green mat is a great mat to use for shrink material. Use a brayer to make sure your shrink material is well adhered to your mat. The Acetate cut setting with More Pressure works for the shrink materials I have used, but to be sure it will work for your material too, do a small test cut before you begin cutting your whole project.
Once your cuts are finished remove any paper backing if your shrink material has any.
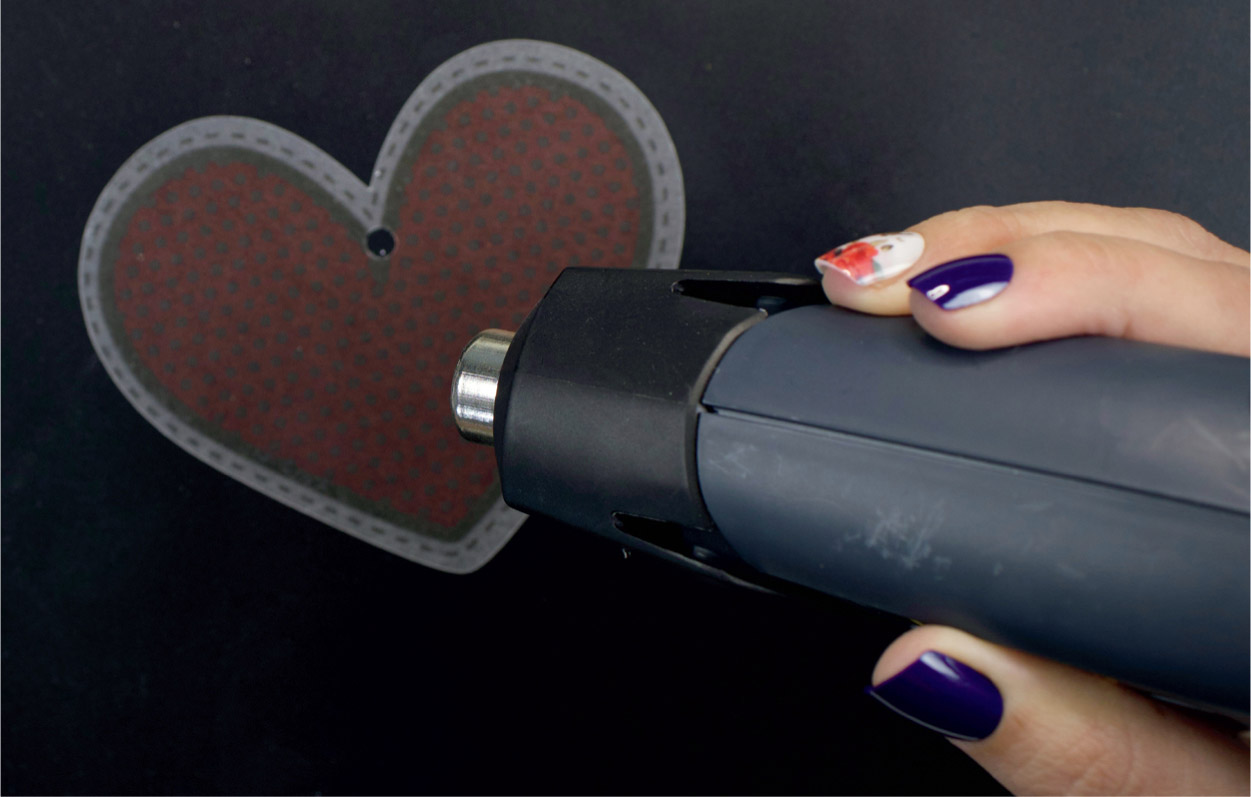
Now you’re ready for the shrinking process, which can be done in an oven or with a heat gun. Check the instructions on your particular brand of shrinking material for heat time and temperature if you’re using an oven. I used a heat gun for this project. Make sure your work surface is protected with heat safe materials.
Begin by swirling the heat gun around the surface of the shrink plastic.
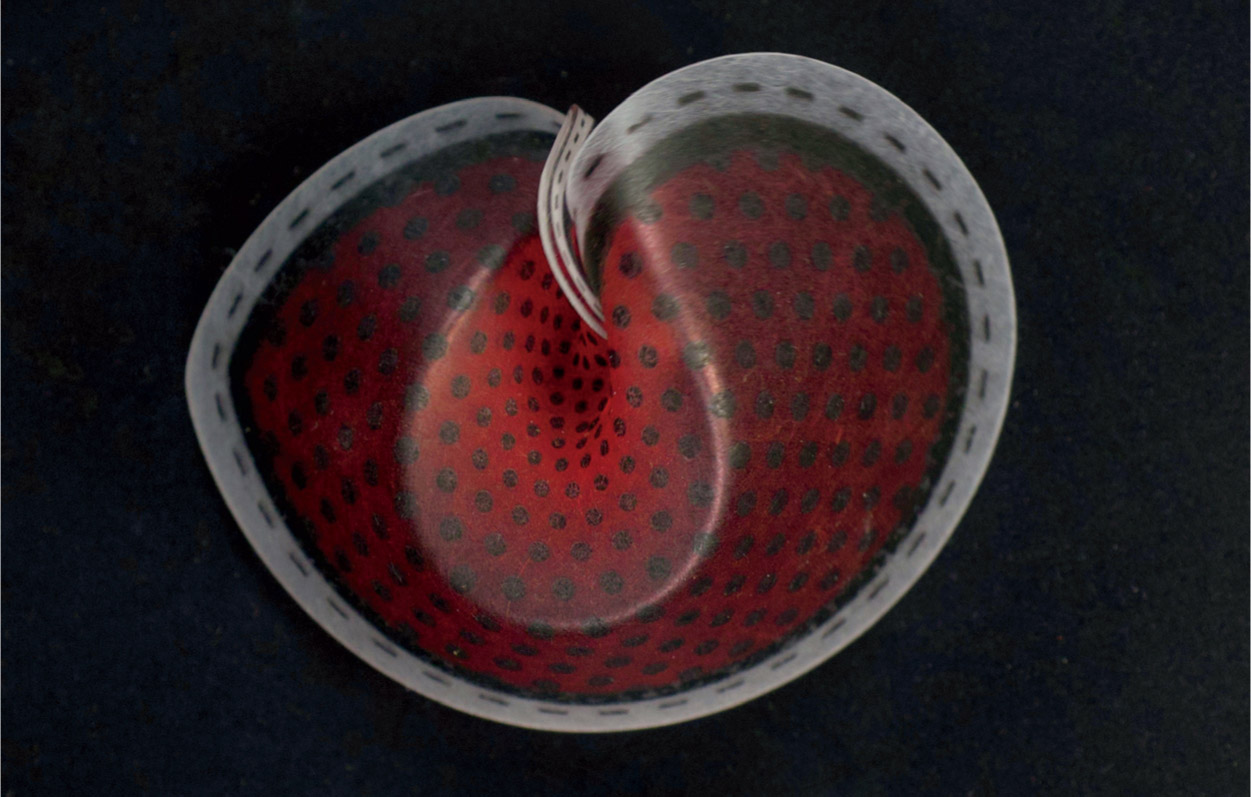
You will see the plastic start to melt and morph, which is a pretty cool process! Look at this picture here taken midway through the heating process. Don’t worry; it will go back to being flat. If it doesn’t, you can use tweezers or a heat safe tool to manipulate the material.

Toward the end of the process, you might need to help the material flatten completely as it cools. I use a little metal spatula to flatten the material, as shown here.
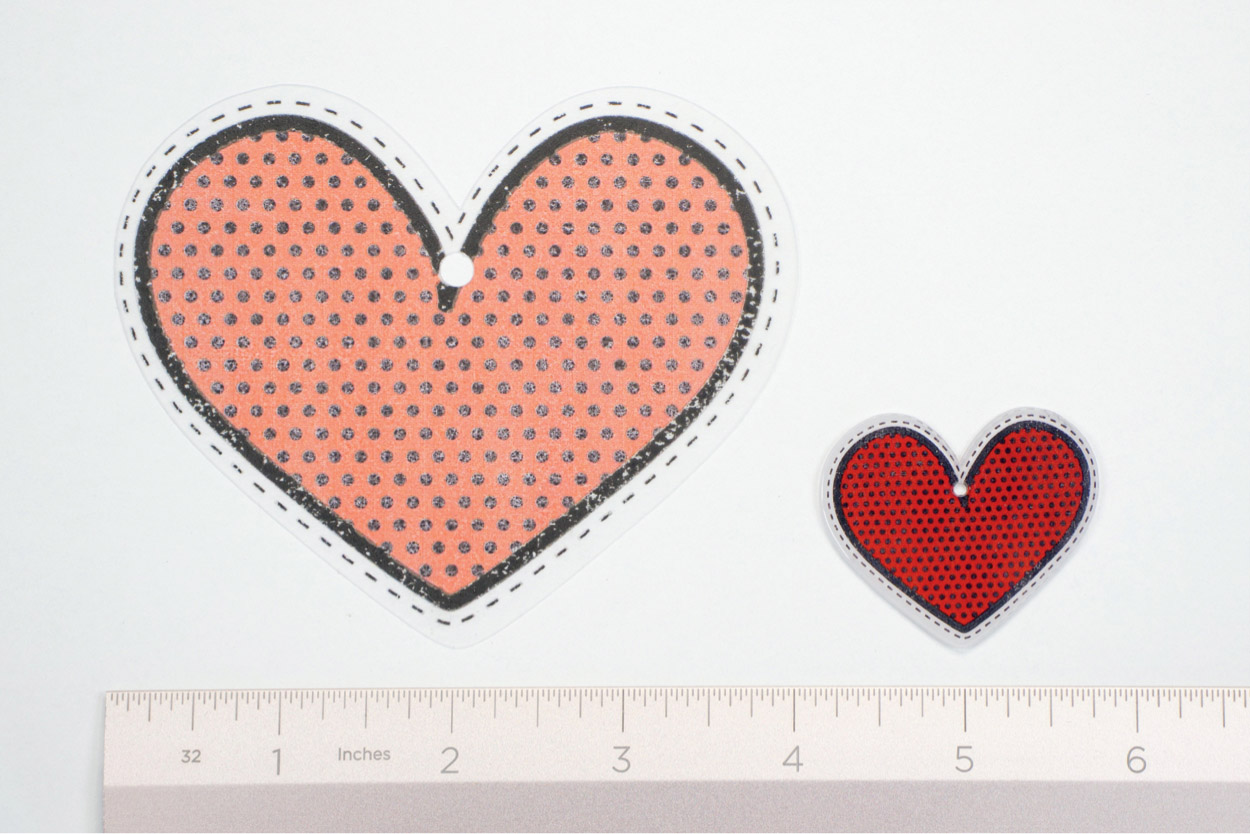
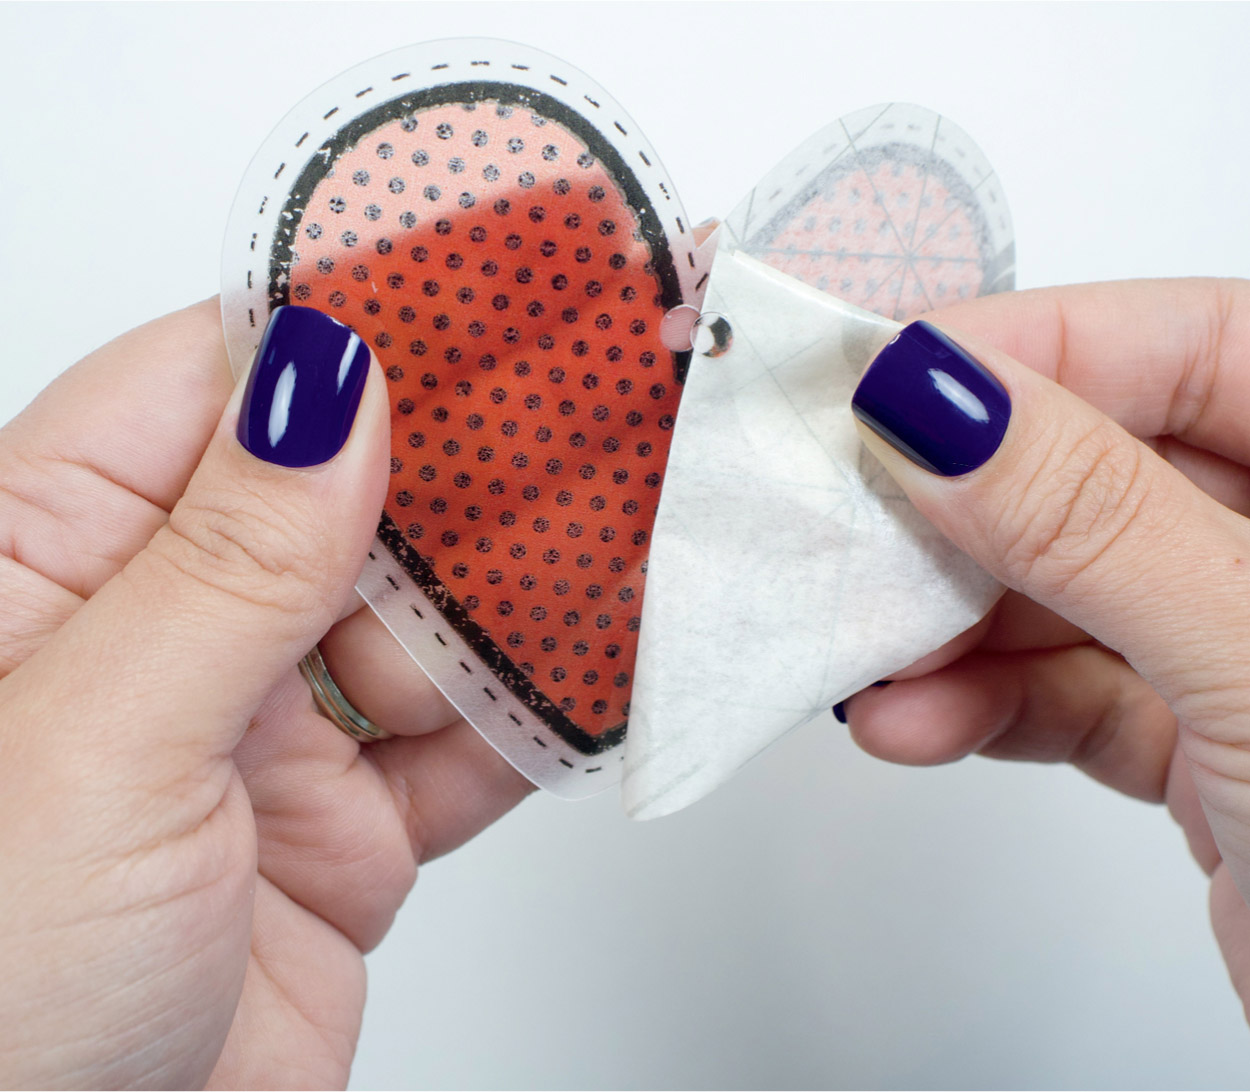
Here is a before and after photo. On the left the shrink material is 4” wide; on the right it is roughly 1.5” wide. After heating, the colors became more vibrant and the thickness of the material is about nine times thicker.
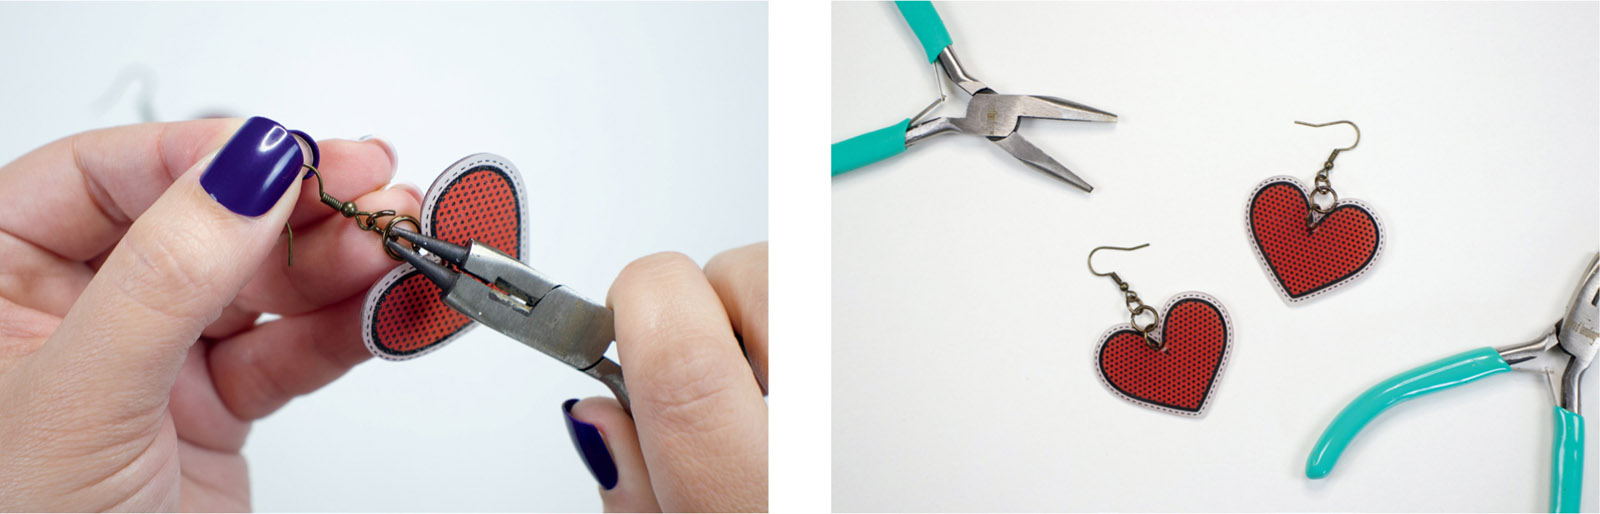
After your shrink material has cooled, grab your pliers and earring hardware to begin assembling your earrings. I used three jump rings for each earring, starting with the larger one closest to the heart. Feel free to make your earrings as long as you like or add any particular hardware you prefer.
MAKE IT EXTRA
Shrink material can be used in many different applications. You can use the techniques covered in this project to create charms for bracelets, necklaces, or even shoes! Attach a number of shrink designs on one earring just by creating more holes in the main shape and adding more jump rings. If you prefer the matte or shiny side of the earring facing out, and you’re adding text, you can mirror the design so it prints backwards.

Headband with Faux Leather Bow
Create headbands for yourself or for the cuties in your life! This bow is a great beginner project, but it’s impressive enough that your friends and family will exclaim, “You made that?” These bows can be sized for children or adults, and can be added to barrettes, earrings, keychains, or on a headband as taught in this section.
Materials Needed
Faux leather
Headband
Glue/adhesive (glue gun)
Machine Compatibility
Any Cricut machine
Image Used
Bow #M101F4A2C
DESIGN IT

This is a quick and easy project and these bows can be used for many different applications. I started with image #M101F4A2C in Design Space, which is a basic two-layer bow with a middle piece to fasten it together.
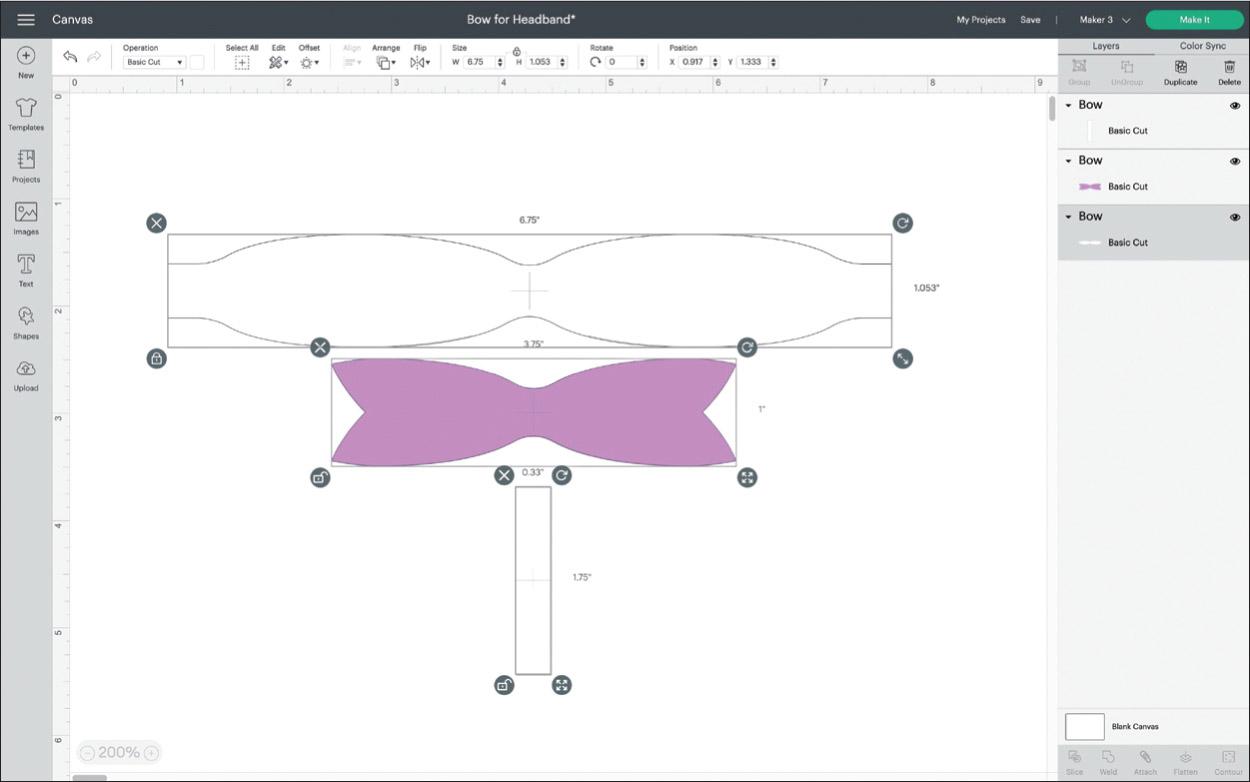
Feel free to adjust the size of the design to suit your creation. The dimensions for the bow that will be used within this project are shown here. When you’ve got your bow sized, click the green Make It button and read on to the next page.
MAKE IT

When cutting faux leather or genuine leather, place the material on the mat with the pattern/smooth surface facing down, as shown here.
When prompted by Design Space to select your material, make sure to select Faux Leather. If you do not see it displayed, you can “Browse All Materials” (written in green) and select it from the list. For the standard Faux Leather setting, you will only need the Fine-Point Blade your machine came with.
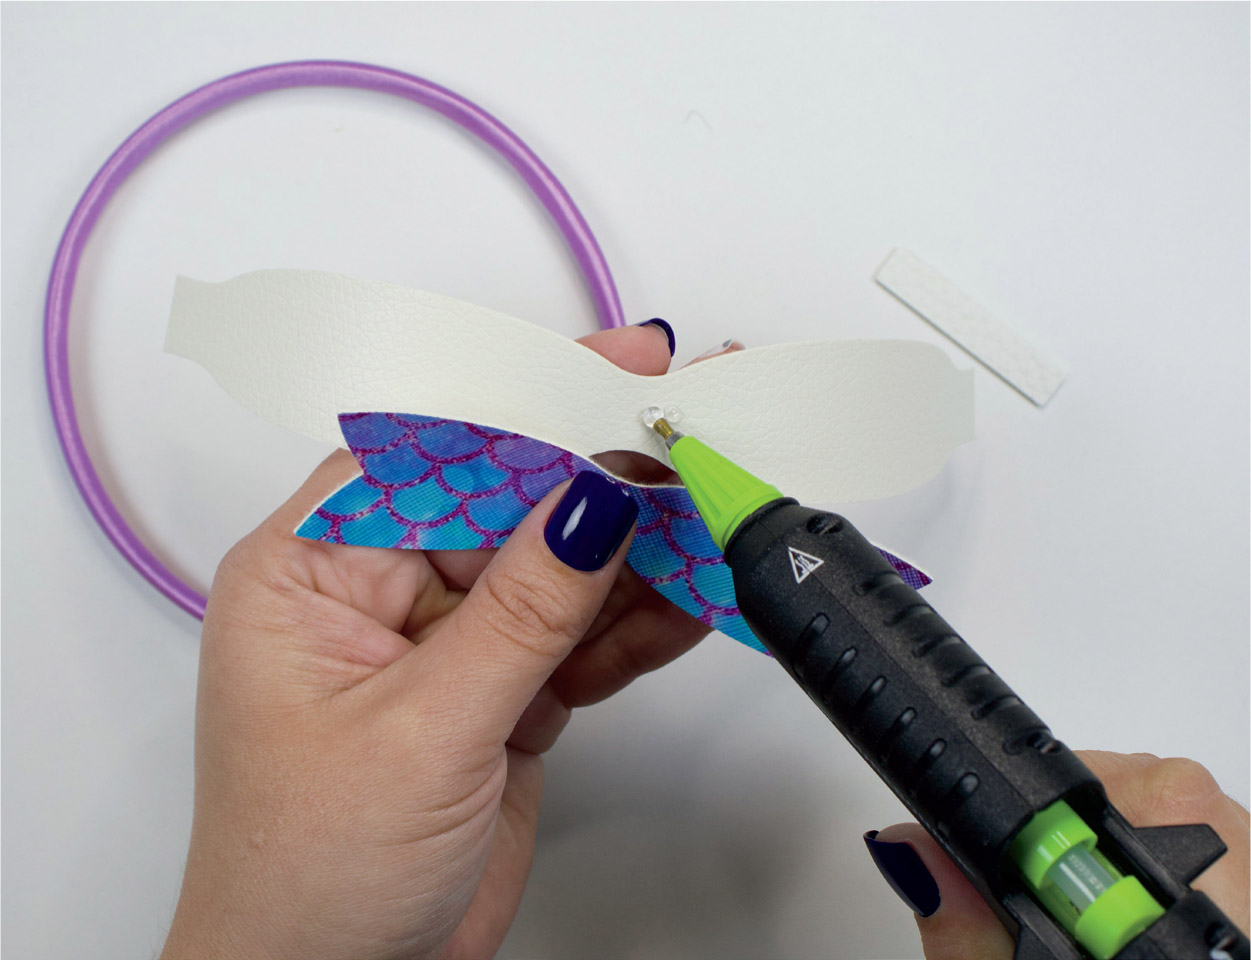
Once you have your material cut, begin assembling your bow starting with the two larger pieces. A glue gun is a great option for assembling these bows.
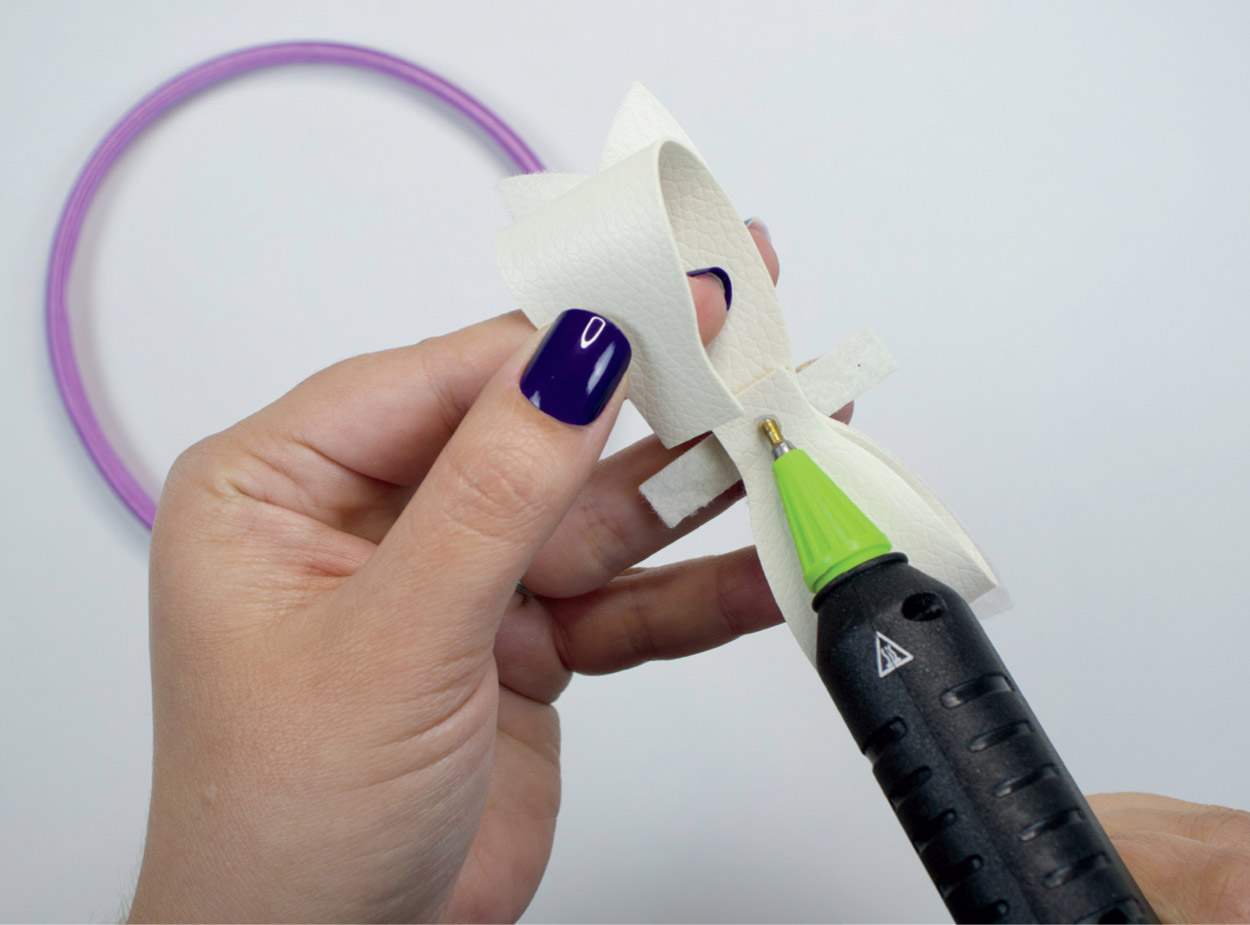
Once the two main pieces have been glued together, flip it over to glue the underside of the bow.
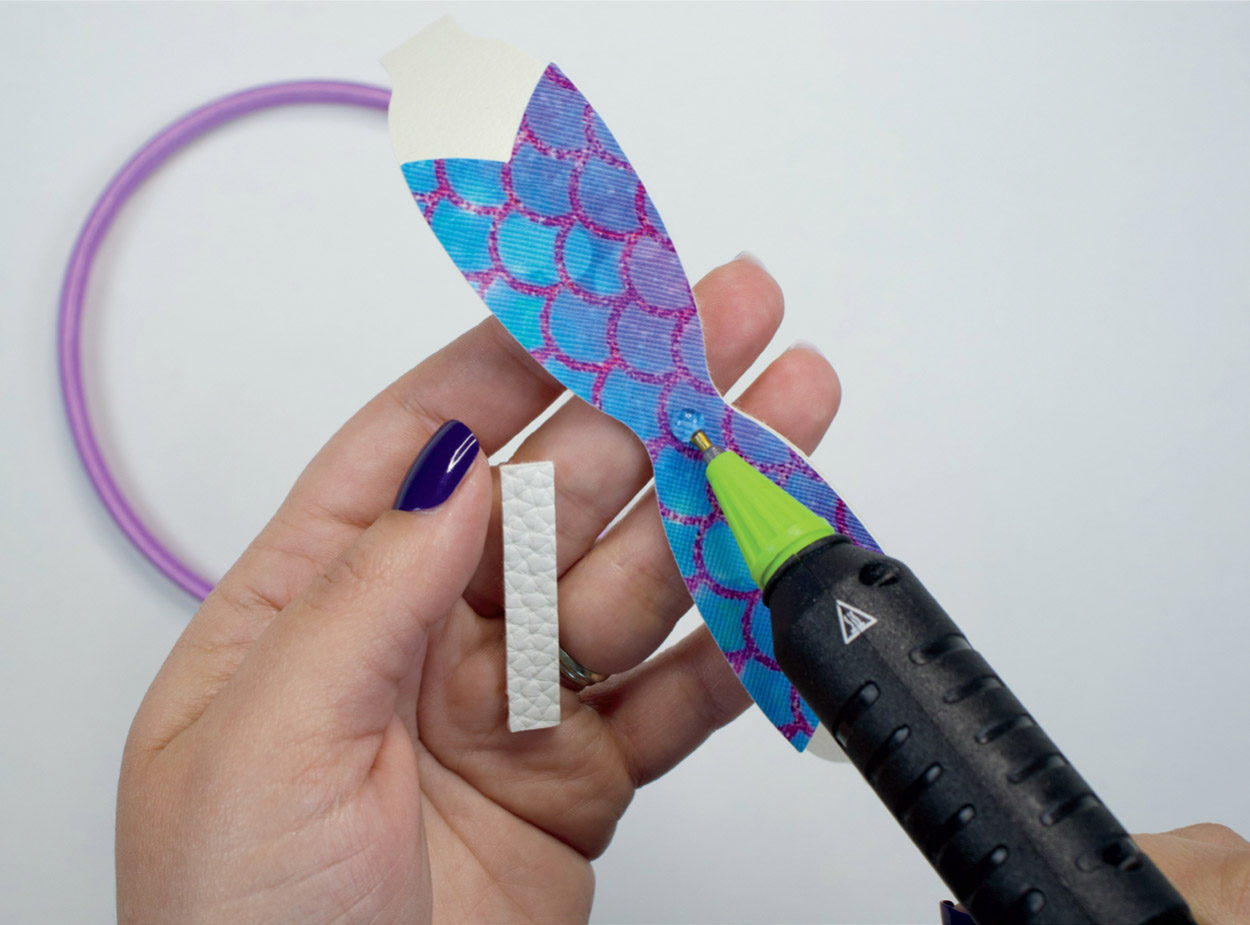
Now it’s time to add the piece that will wrap around the center of the bow and the headband. Start by centering it and gluing it to the top of the bow.

Continue to glue this piece around the bow and then wrap the pieces underneath the headband. Glue the ends to the headband, making sure everything is secure.
MAKE IT EXTRA
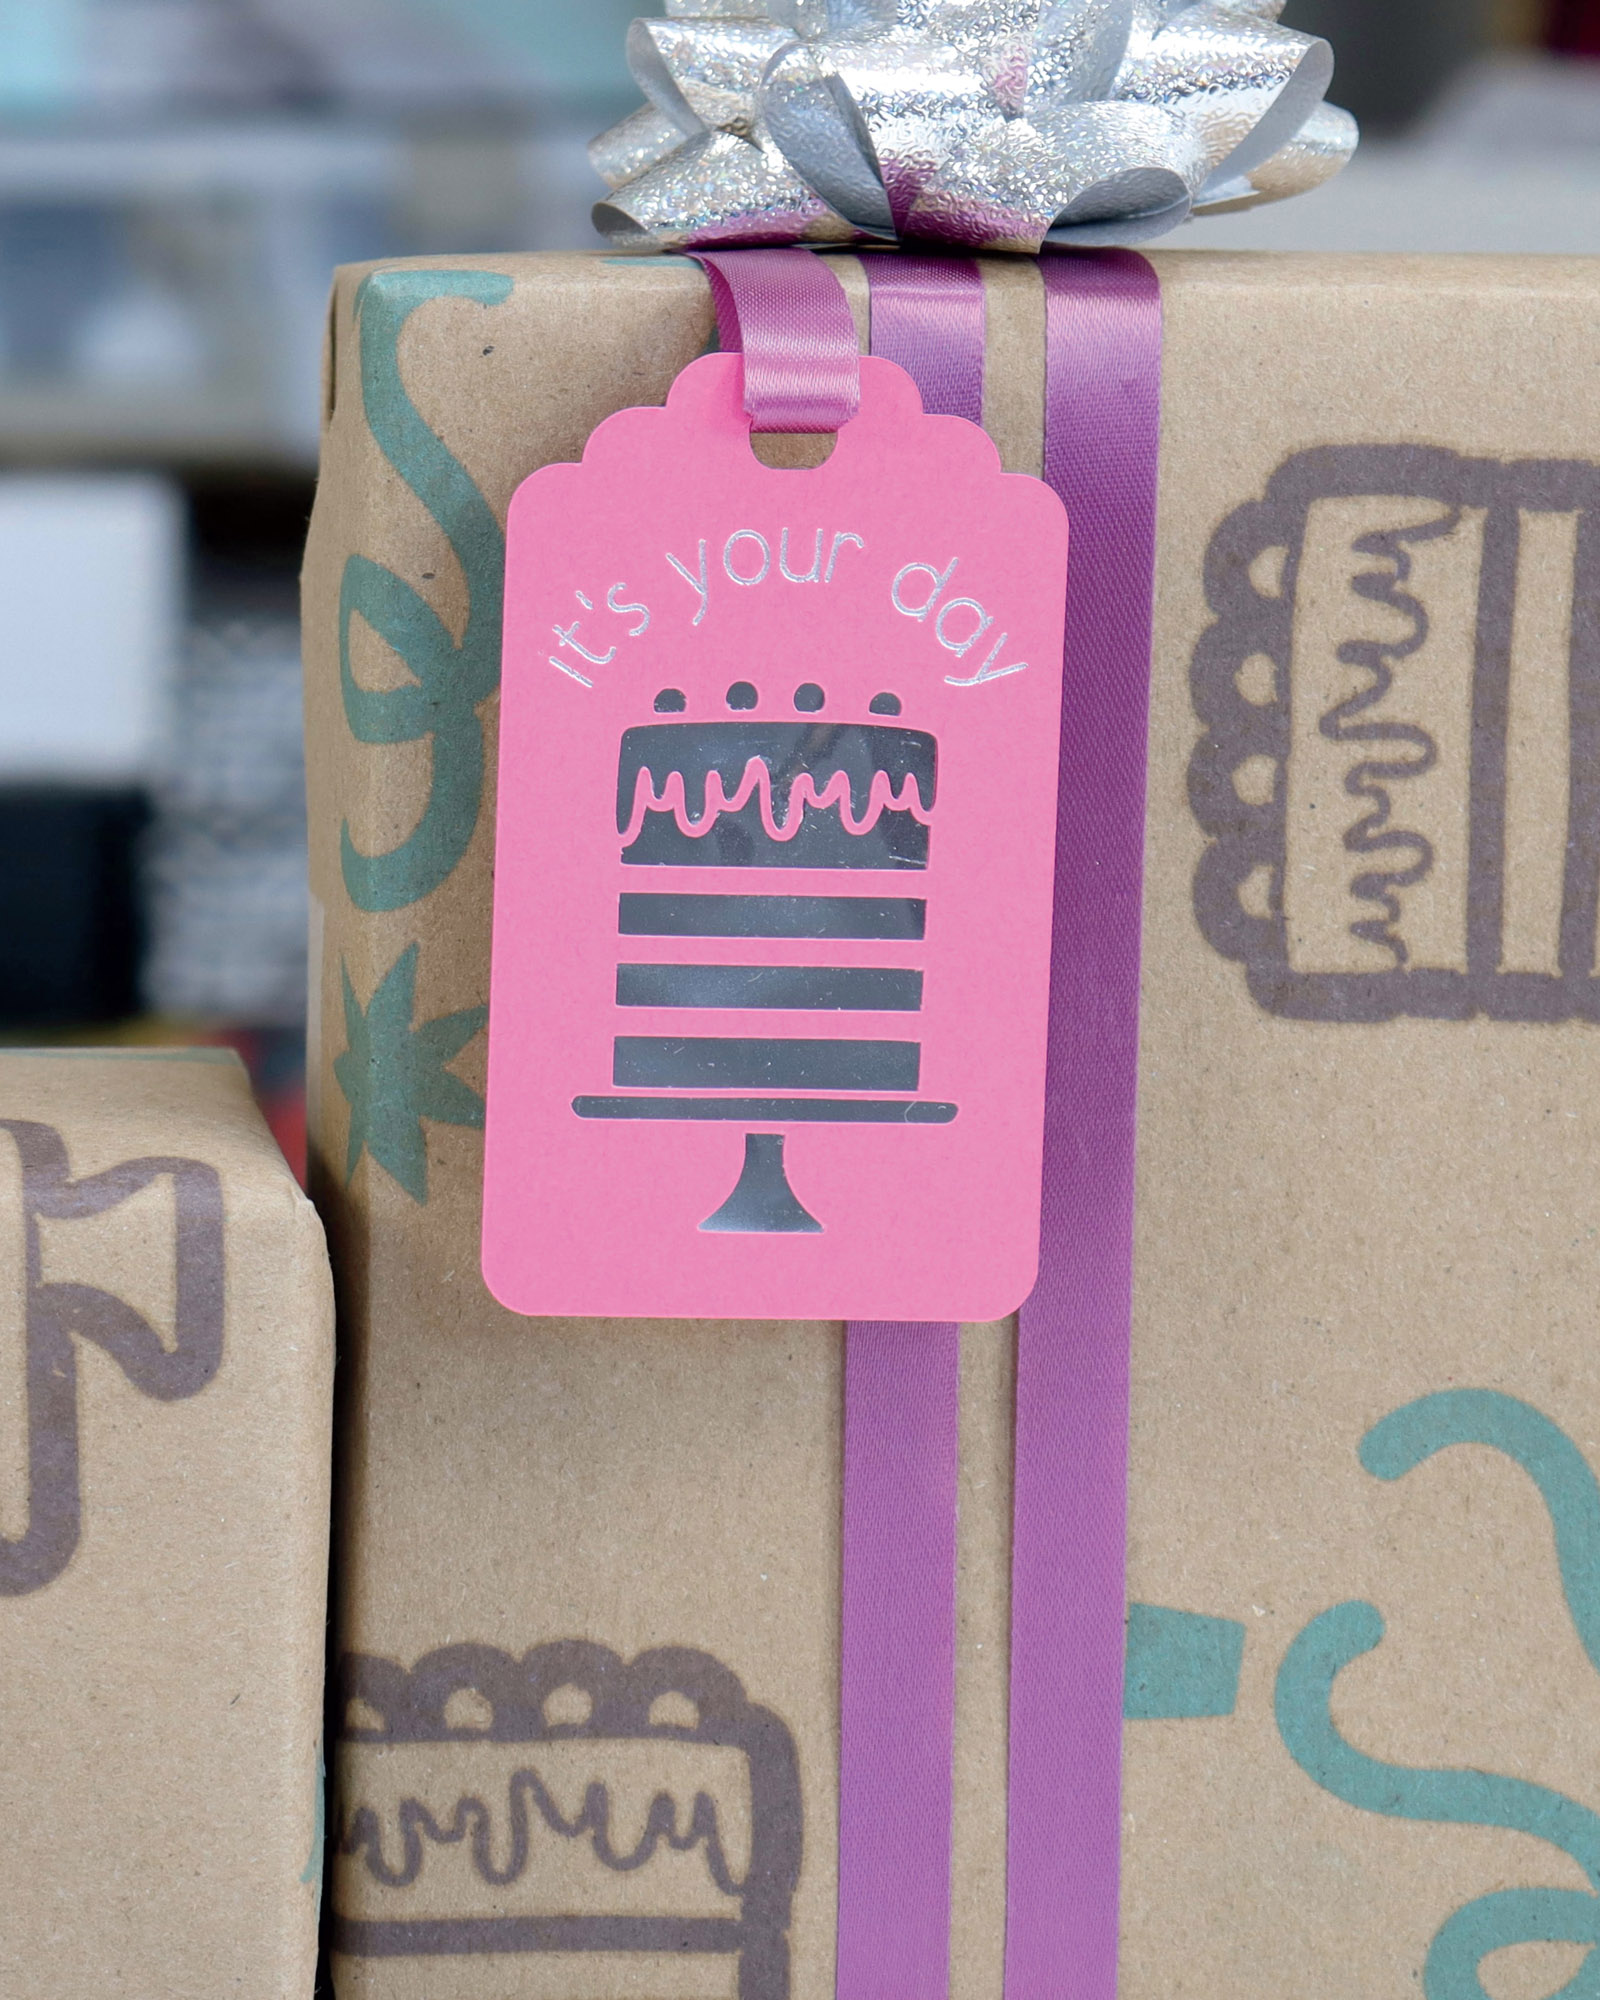
Now that you’ve made it once you can create bows for any occasion, in any size, and with any material. These bows would be adorable made of cardstock and put on top of a gift. You could also create larger bows and add them to a wreath or a sign. The options are endless!

Leather Keychain with Iron-On
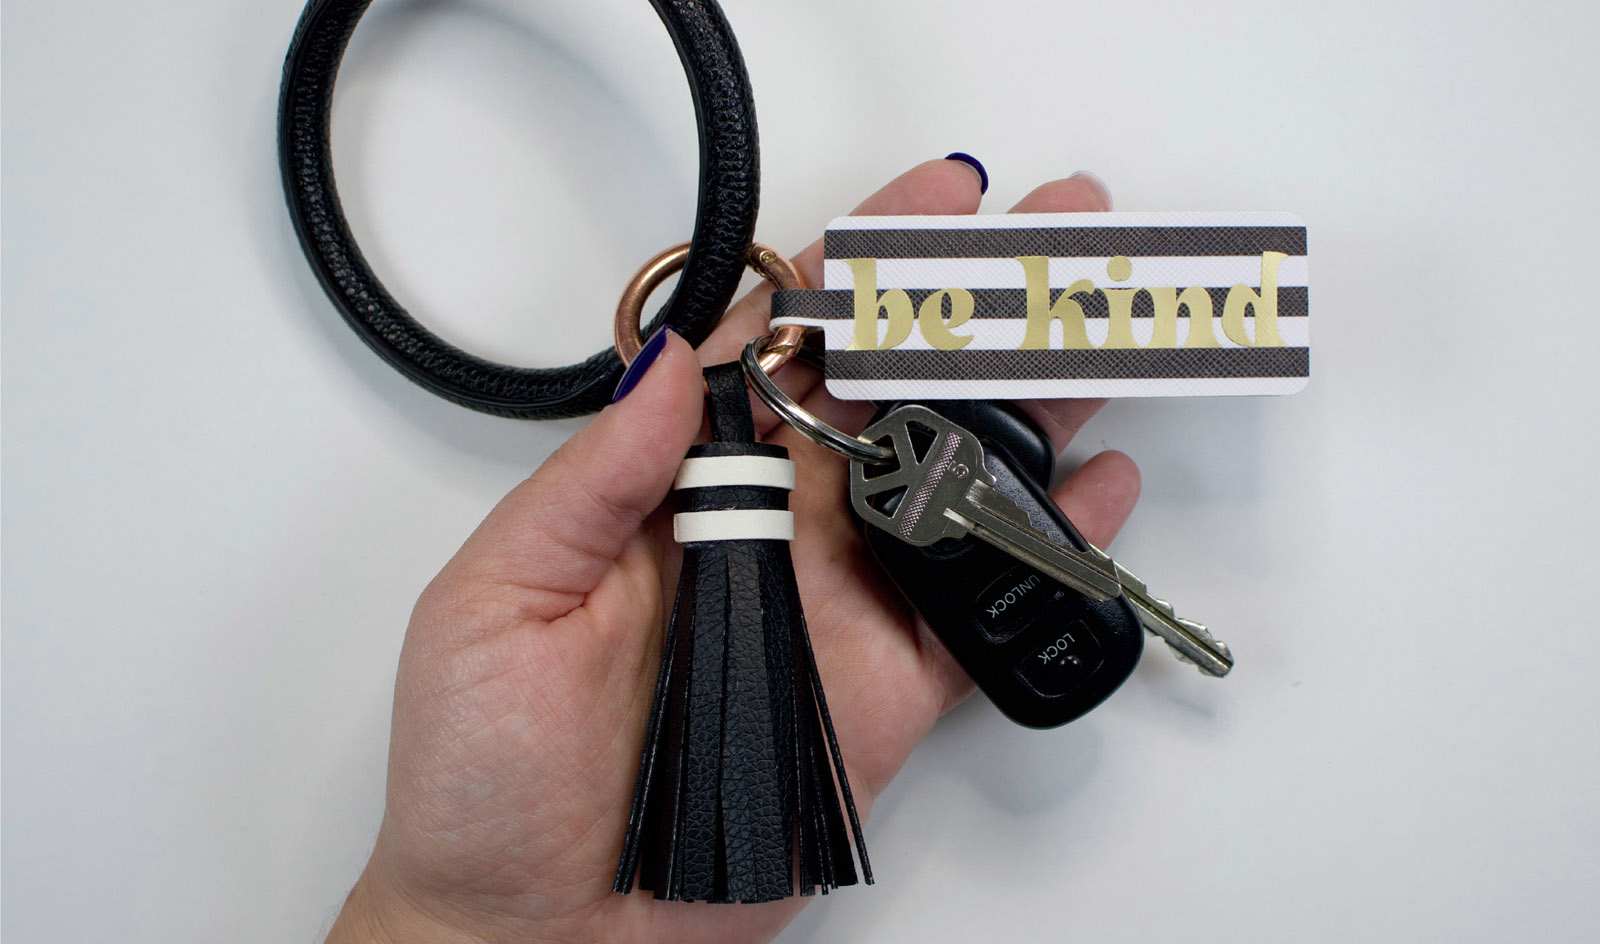
A custom keychain can be a great gift for a loved one or make one (or more) for yourself! For this project I made a gentle reminder to “be kind” on the road. These creations can be customized using different patterns of faux leather and can be adorned with your favorite iron-on material.
Materials Needed
Faux or genuine leather
Iron-on material
Heat source (iron or heat press)
Keychain hardware
Machine Compatibility
Any Cricut machine
Image Used
Rectangular Label #M38719
DESIGN IT
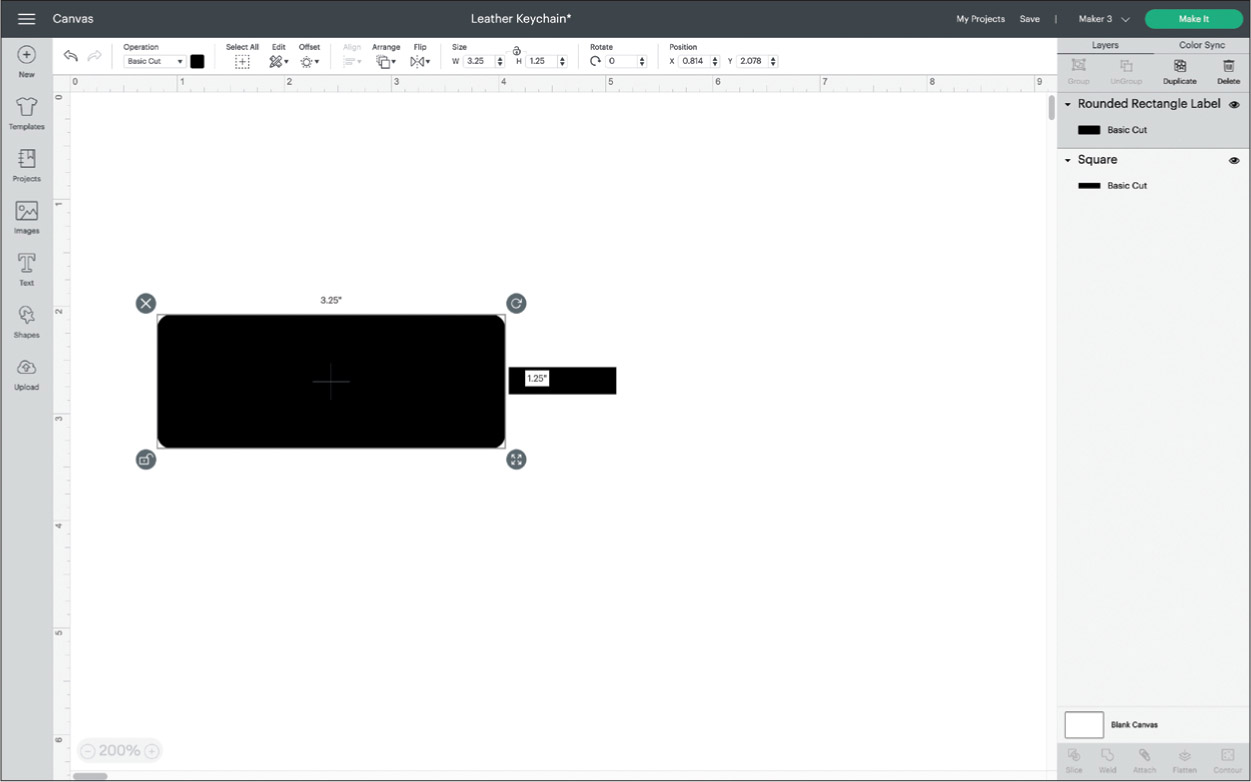
For this leather keychain, start by selecting basic shapes and bringing them onto your canvas. This Rounded Rectangle image makes for a great universal shape. Also add a normal rectangle sized 1” x .25”, which will be the connector piece between the front and back of the keychain. See the image here and compare it to your canvas.

Duplicate the larger rectangle and space them out with all the ends touching. Select all the layers and then select Align > Center Vertically. When your shapes are aligned, make sure everything is still selected and click Weld. Your canvas should look similar to the image here.

Add any text or additional images you’d like on your keychain. Size proportionally and change the colors of the layers so your machine will recognize that you are cutting different materials. In the image here, the black layers will be cut from faux leather and the yellow layer will be cut from a metallic iron-on material.
MAKE IT

When cutting your materials, you can choose a different cut setting for each mat. Reminder: Toggle the Mirror setting for any iron-on images and text. When you cut iron-on material, you almost always cut with the shiny side facing the mat. There are instances, like patterned iron-on, where you don’t do it that way, but best practice is to place the shiny side down and mirror your designs. You will also place your leather with the pattern/ smooth side facing the mat, as shown here.

After all your pieces are cut, you need to weed your iron-on. Remove every piece of material, except for your final design. Remember to check the insides of your letters or images.
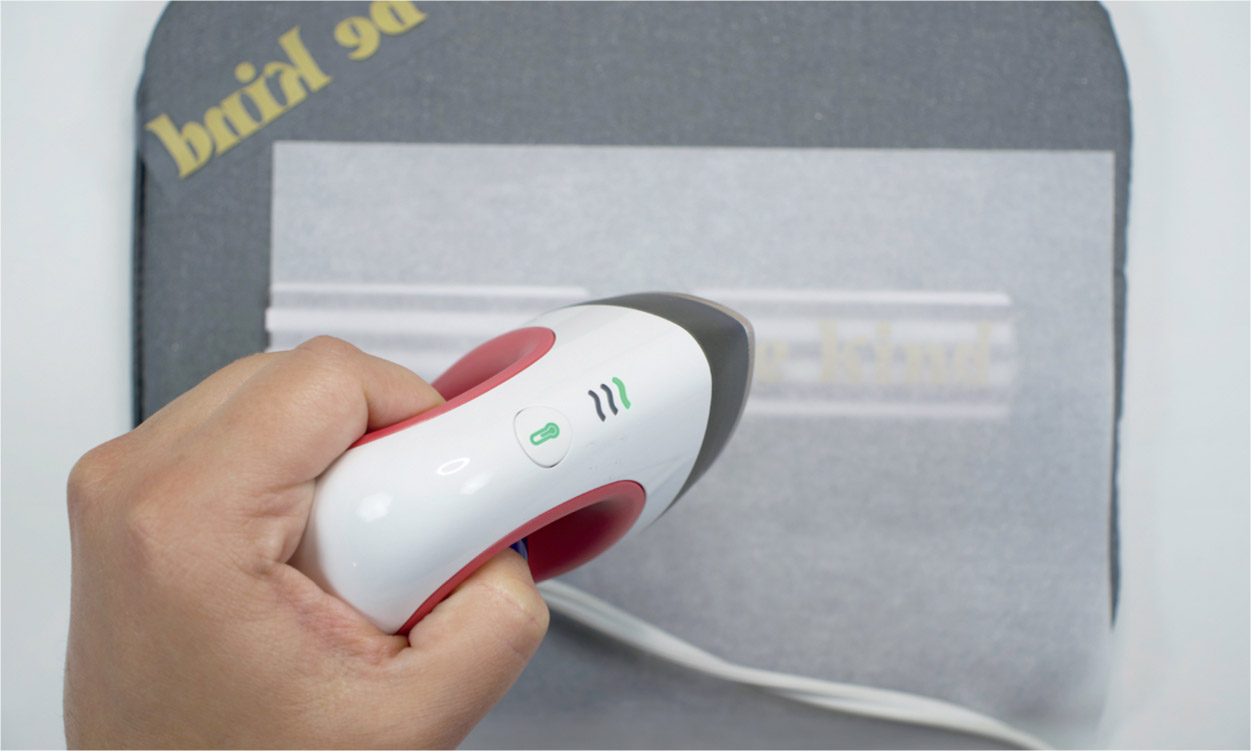
The Cricut EasyPress Mini is a great tool to use for tiny applications like this keychain. Be sure to check your material’s instructions for specific temperature and time.
It’s a good idea to protect your faux leather with parchment paper or a Teflon sheet as you heat press.

After you’ve heat pressed your keychain, it’s time to remove the carrier sheet. Each material is different, and some suggest peeling the carrier sheet while it’s still warm, while others suggest a cool peel. If you peel at the wrong time, it could lift your iron-on material and ruin your design. Be patient if you have a cool peel material—you’ll be glad you were!
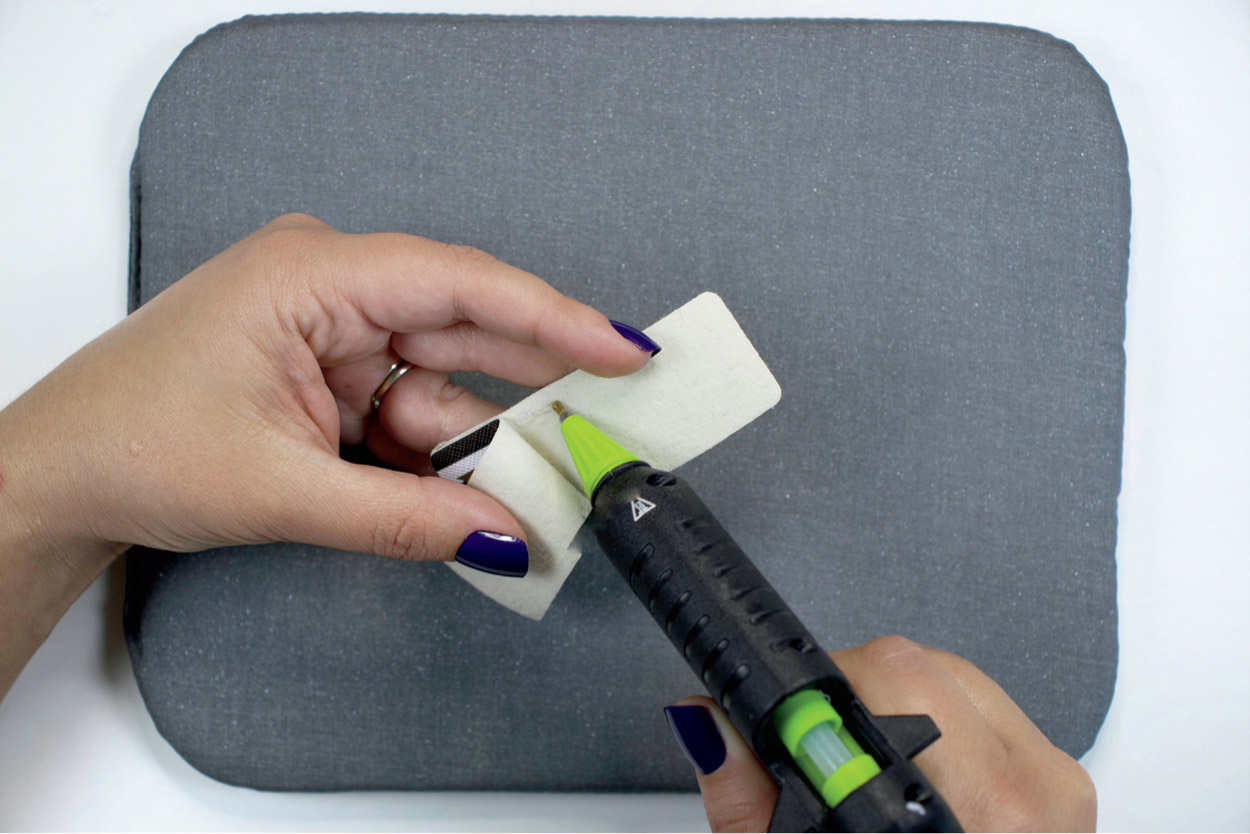
Now it’s time to fold your keychain in half and glue it together. You can use your favorite fabric glue or even a glue gun using glue sticks made especially for fabric. If you’re working with a glue gun, keep in mind the glue will be warm and tacky for only a few seconds, so work in small sections.
If you’re using a glue gun, you won’t have to wait long for your glue to dry. If you’re using liquid glue, you might want to use binder clips to hold your leather in place as it dries.
MAKE IT EXTRA

You can mix and and match different iron-on materials and faux leather colors, patterns and shapes to create a wide variety of custom keychains. So many options! You could even enlarge this design and make tags for Christmas stockings or make them small for gift tags. I paired my keychain with a matching leather tassel. If you’d like to do the same, you can find the full instructions in the following section.
Leather Tassel for Keychain
This easy-to-make tassel is a fun addition to your keychain but can be used for so much more! I’ve listed several out-of-the box ideas in the “Make It Extra” section of this project. Have fun with different color combinations and faux leather patterns. I put my tassel on my keychain and I love it!
Materials Needed
Faux leather or genuine leather
Glue/adhesive
Keychain hardware
Machine Compatibility
Any Cricut machine (if using faux leather)
Ready to Make Project
Leather Tassel Keychain
DESIGN IT

These tassels make a fun addition to a keychain or zipper pull, just to name a few possible applications. In Design Space, click the Projects tab and search for the project “Leather Tassel Keychain” and select Customize. Here you can change the size and colors of your desired keychain. The image here shows the sizes used for this project.
You can design your tassel to have a longer or shorter fringe. Just select the layer you’d like to resize and click the Unlock icon in the lower-left corner of the image. Now you can freely adjust the proportions and size of your shape.
MAKE IT

Whether you’re using faux leather or genuine leather, you’ll want the smooth side of your material to face down on the mat. Use a brayer to make sure your material is well adhered.
After your materials are cut, run your fingers through the fringe to make sure they are all separated.
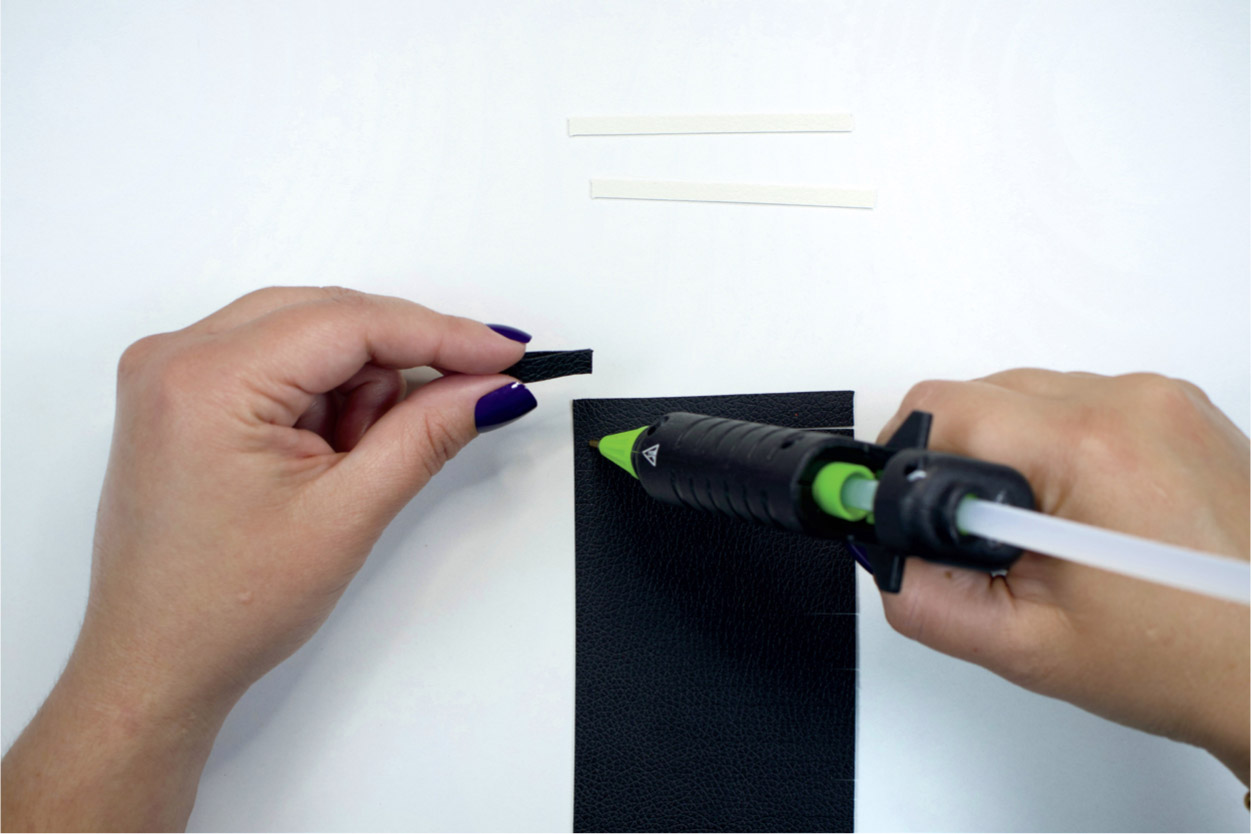
First, glue the small rectangle to the larger piece of faux leather. This will be the loop that attaches your tassel to your keychain. Fold the rectangle in half and glue near the edge of your larger piece of material, as shown here.
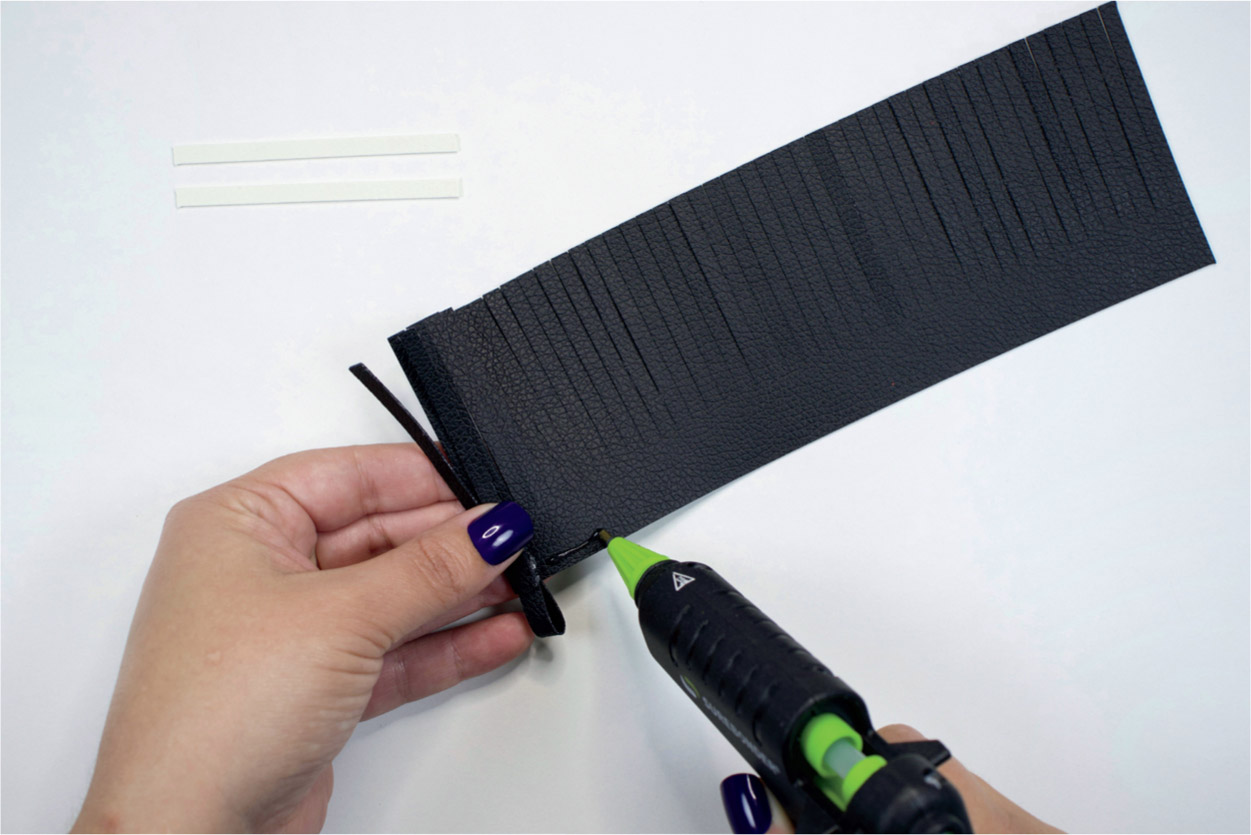
Roll the material lengthwise and glue in small sections as you wrap.
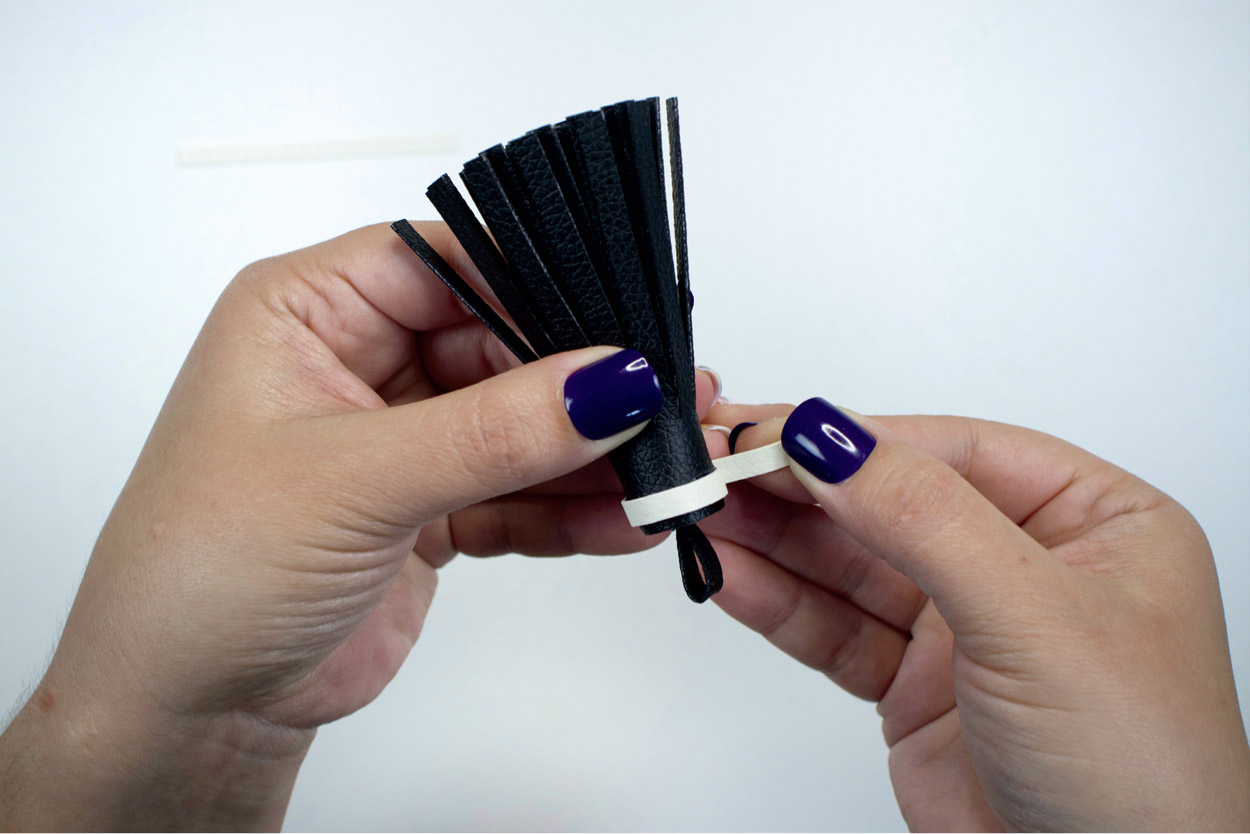
After you’ve completed rolling and gluing the tassel, glue the smaller accent strips to the top of the tassel. While this step isn’t necessary, it sure does add a bit of fun to your handmade tassel.
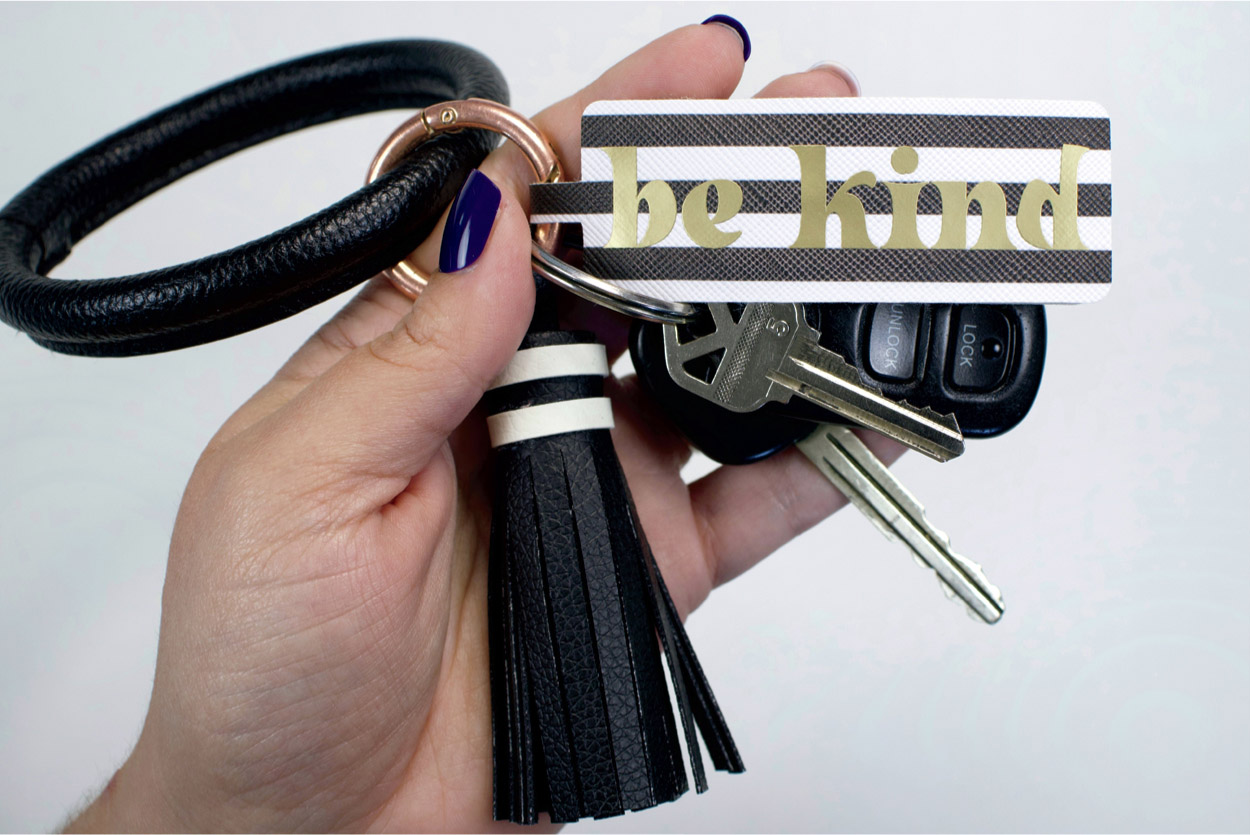
This tassel can simply be added to your keychain or paired with another handmade keychain. Instructions for this matching “Be Kind” keychain can be found in the previous section.
MAKE IT EXTRA
These tassels are so versatile. They can be used not only as a keychain, but they can be added to a purse, backpack, or sweatshirt. You could even resize them and use them as home décor for a ceiling fan chain, light pulls, or dresser drawer handles. Have fun with different sizes, patterns, and colors!
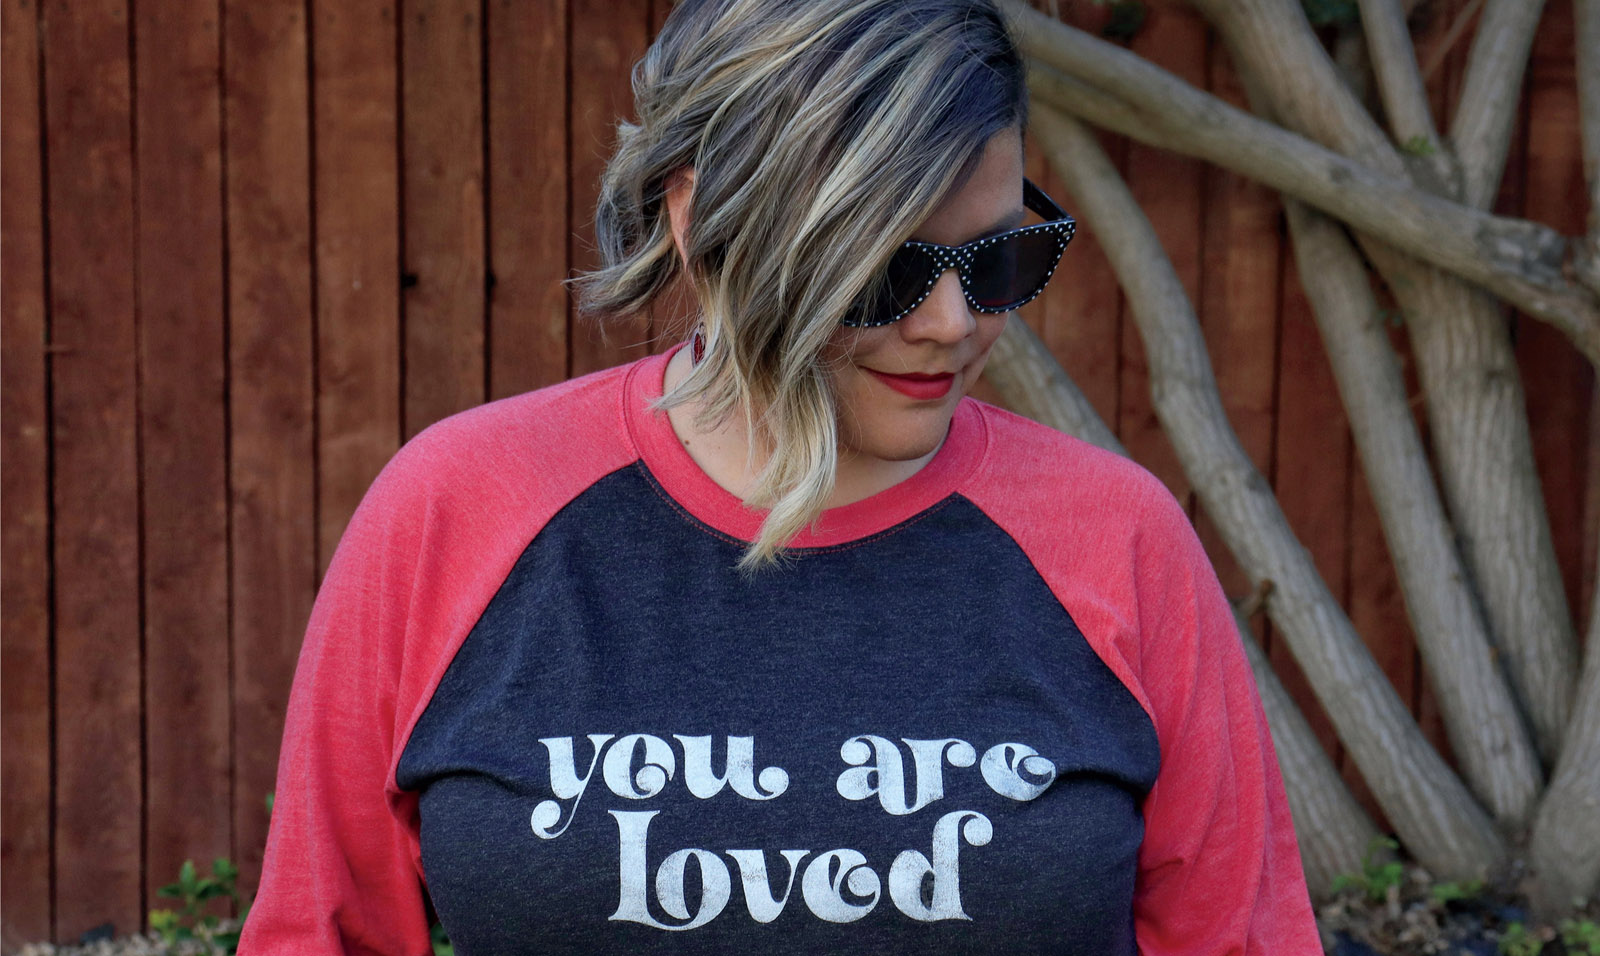
Shirt with Freezer Paper Stencil
Create a new custom shirt with a vintage feel! For this project, freezer paper and an upcycled carrier sheet are the heroes. A carrier sheet is the clear backing you peel when working with traditional iron-on. Don’t throw those out! You can reuse them for projects like this and more.
Materials Needed
Freezer paper
Used carrier sheet (clear backing from previous iron-on project)
Brayer
Sponge or foam brush
Acrylic paint or screen-printing ink
Paint tray/palette
Heat source (iron or heat press)
Machine Compatibility
Maker or Explore series
DESIGN IT

The magic in this project is all about the technique! It will work best if you keep your design and/or font simple. See here for an example of a flourished font, but still keeping it simple.

Adjusting the layout and the spacing (kerning) of the font is a great way to take simple text and turn it into a design. The image here is an example of what a little adjustment can do. When your image is exactly how you want it to be on your shirt, select all the layers and then click Attach. This will communicate to your Cricut that everything will be cut on one layer, just as it is shown on your canvas.
MAKE IT
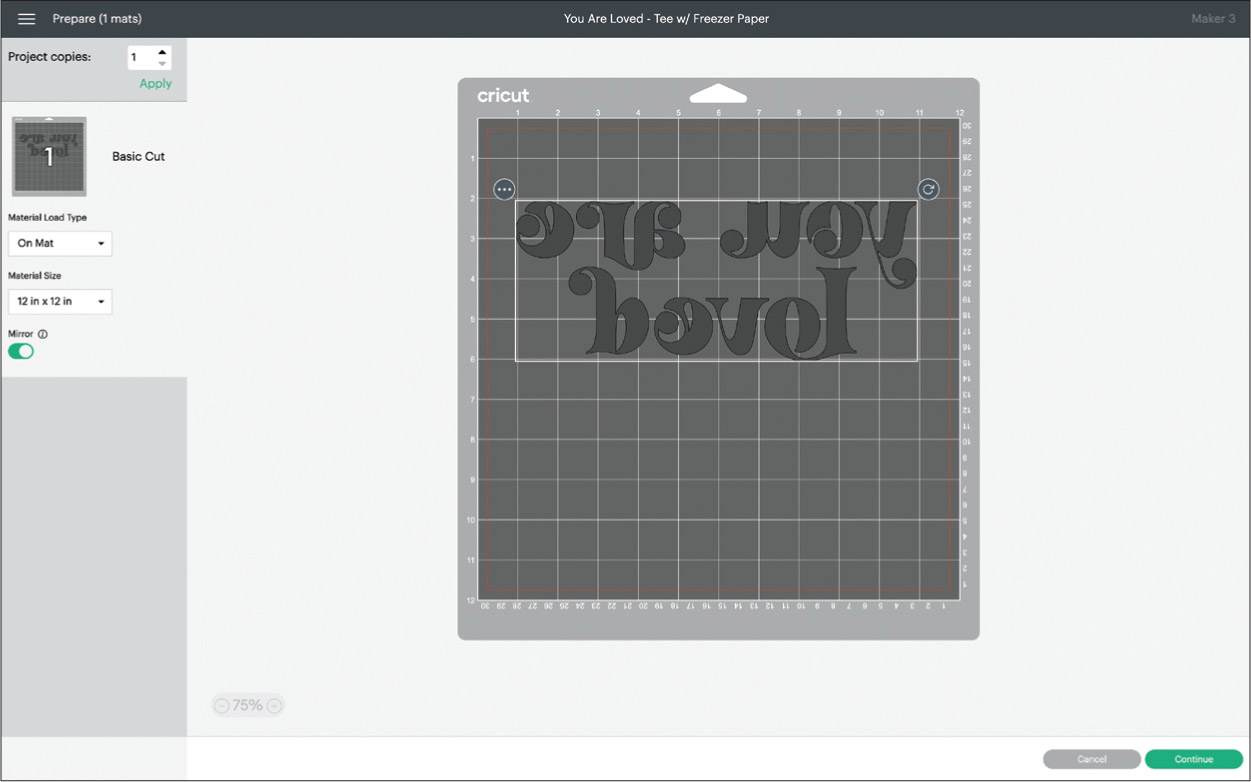
When you are on the Make It screen, Mirror your image/text and also drag your image to the center of the mat. This will create a border for your stencil, as shown here.

You can repurpose/reuse an old carrier sheet for this project (the clear plastic backing from iron-on material). Whenever I complete a large iron-on design, I save the carrier sheet and have collected a small stash of them for projects just like this.
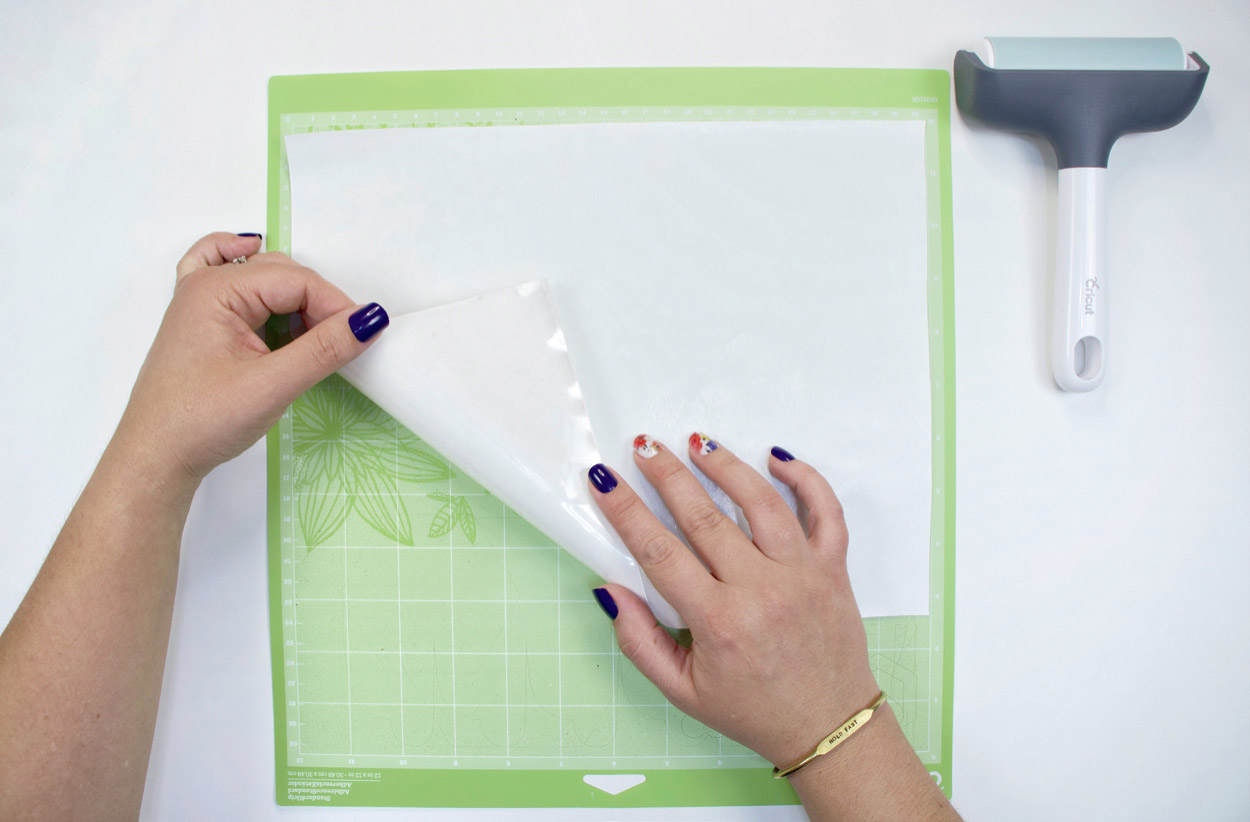
Tear off a piece of freezer paper approximately the same size as your carrier sheet (which should be a little bit bigger than your final design). Use a brayer and roll the freezer paper onto the carrier sheet, making sure the shiny side of the freezer paper is facing up. The brayer will help remove any bubbles between the carrier sheet and freezer paper; you may need to roll over it several times. Trim off any excess freezer paper.
Now, take the freezer paper attached to the carrier sheet and place it onto the mat with the carrier sheet facing down (on the mat). The brayer will come in handy again to roll the materials onto the mat to eliminate any air pockets between your materials and the mat.
When cutting this material, you can select the Iron-On setting and you should get clean cuts. If your cuts are not coming out clean, you can play with some custom pressure settings.
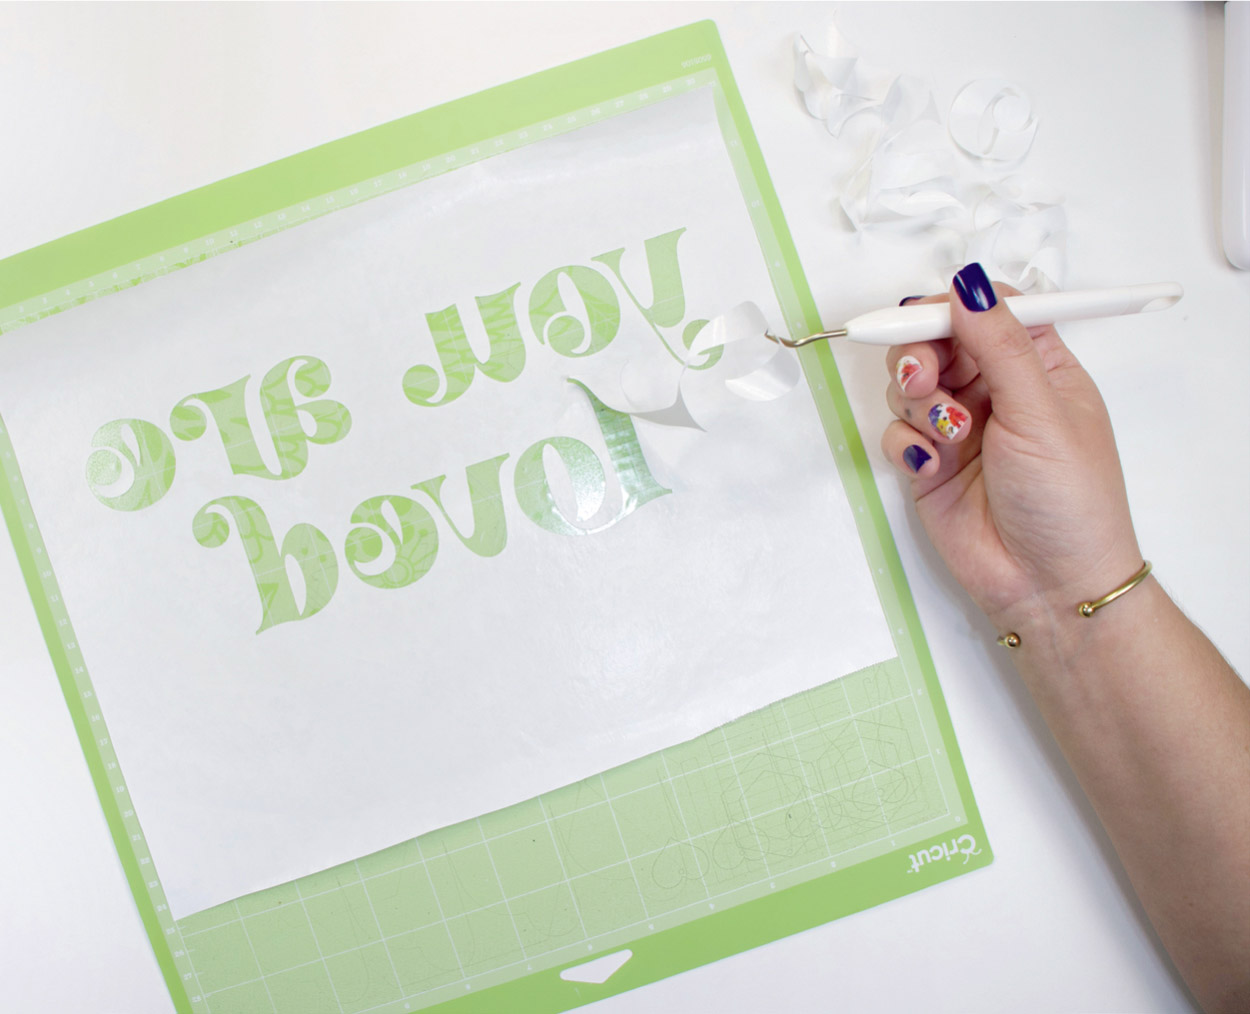
While your design is still on the mat, weed away your design, like the image here. Usually, you would weed away all the material around your design, but for stencils, you instead remove only the actual design and leave the surrounding material. The reason for leaving your material on the mat is it might curl and loosen if you remove it before weeding.


Now, this is when the carrier sheet comes in handy. Instead of having to place your freezer paper piece by piece onto your shirt, you can just place the whole sheet where you want your design. To turn this into a paintable stencil, you will heat press your design and carrier sheet at 310° for 5 seconds, slowly moving the heat press around your design to make sure every spot has been evenly heated. When the carrier sheet has cooled, peel it back to uncover your freezer paper stencil. If there are sections of your freezer paper that haven’t adhered to your shirt, you can heat it again for a few seconds.
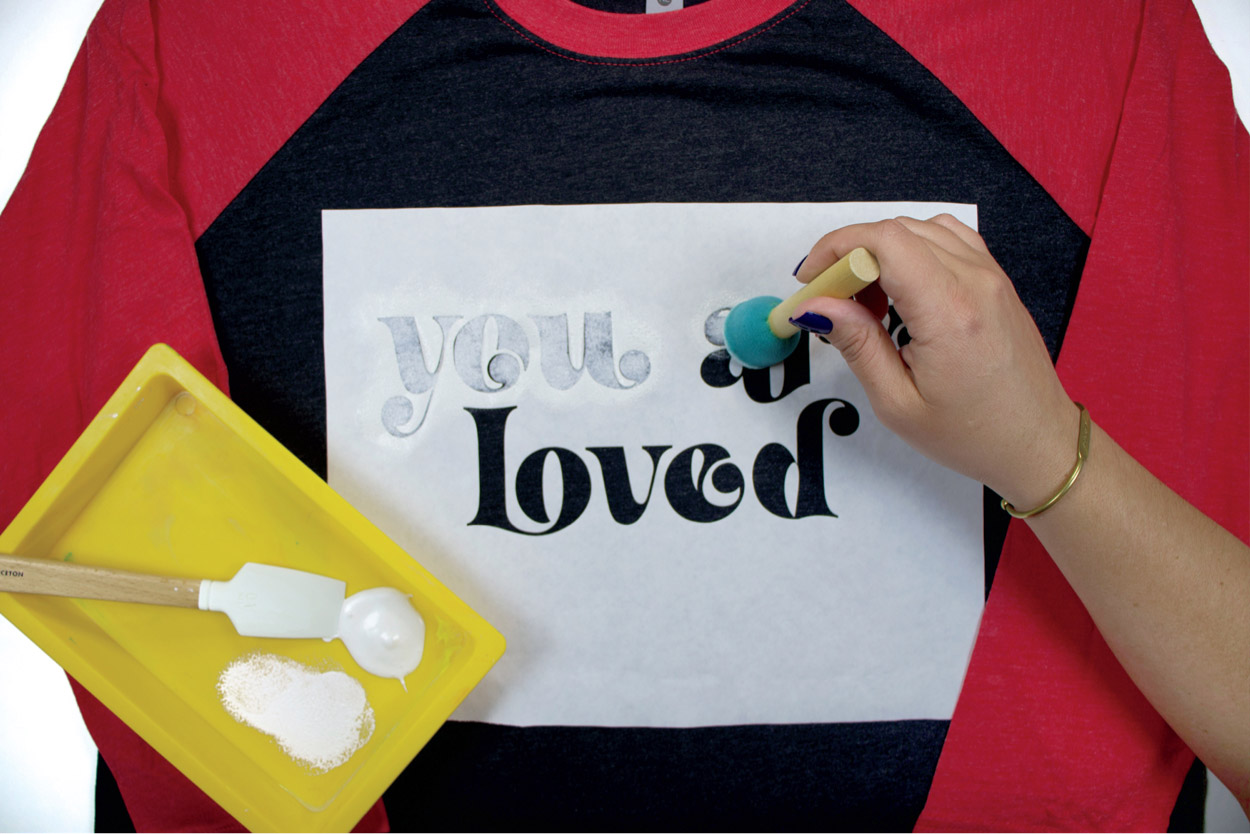
Use acrylic paint or screen-printing ink to fill your design. A gentle pouncing motion with a foam brush or sponge will give the best result. Avoid moving the brush side to side, as it will lift the freezer paper.

When your paint/ink has dried, peel back the freezer paper to reveal your design, like the image here. Tweezers come in handy when removing small pieces.

Allow your design to dry overnight and then heat-set it. You can use an iron or a heat press to do this. If using a heat press, set it to 320° for 40 seconds. This will help your design to maintain permanence wash after wash.
MAKE IT EXTRA

The main difference between this technique and using iron-on material is the effect you get by sponging on the paint, which gives a vintage look. You can use as many paint/ink colors as you like. An ombre or rainbow colors would make your design really pop! Small sponges can be used to create fine detail for different parts of your designs. You could also create a design that would normally use several colors of iron-on but cut them as a single layer, and then hand-paint the design. So many options are possible with this technique. I’d love to see what you create! The next time you do an iron-on project, don’t throw out your carrier sheet. Reduce, reuse, re … craft!
Tote Bag with Iron-On
Can you ever have too many bags? Whether you are going to the beach or park, or you’re grocery shopping with reusable bags, a custom tote is always useful! Tote bags can be easily customized, and they make for a great keepsake for a girls’ weekend, bridal party, or just because!
Materials Needed
Iron-on material (also known as heat transfer vinyl)
Blank tote bag
Weeding tool
Heat press
Machine Compatibility
Any Cricut machine (depending on the design size)
Image Used
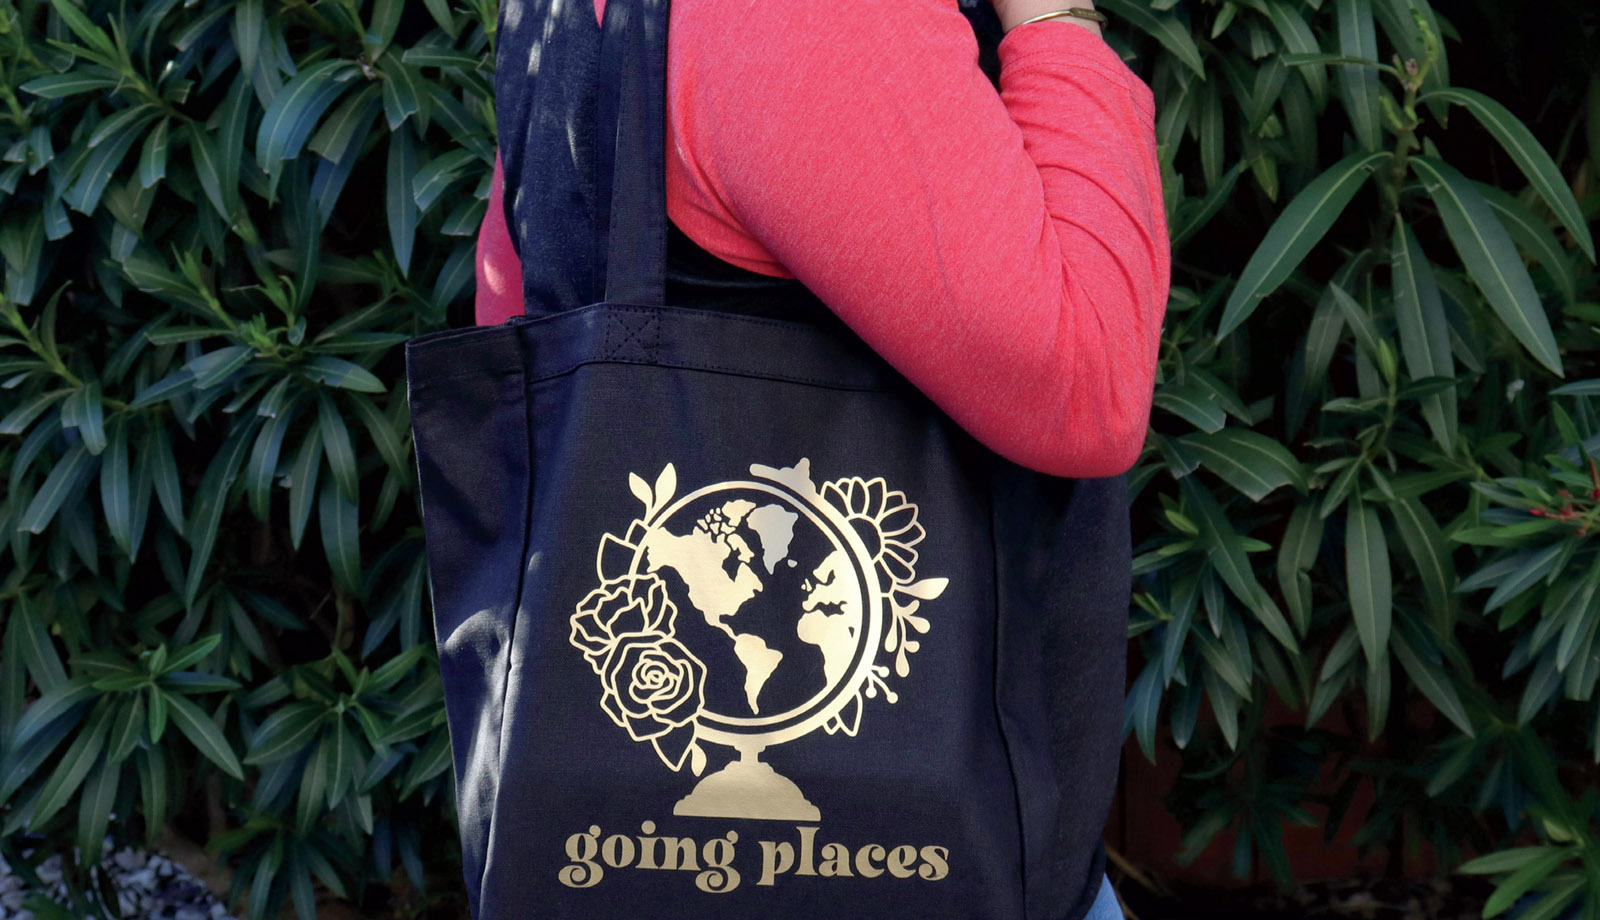
Globe with Flowers #M27FB59AC
DESIGN IT

Start by adding your chosen design to your canvas. I used this gorgeous globe.

Add a bit of text to your design to personalize it. Select both layers and then select Align > Center Horizontally, as shown here. When your image is how you want it to look on your tote bag, select all the layers and click on Attach. This will keep your designs in place when you cut them.
MAKE IT
When you cut iron-on material, you will need to Mirror your design on the Make It screen. Make sure your material is placed with the shiny side facing down on your mat. There are exceptions to this rule, but shiny side down is almost always the case.
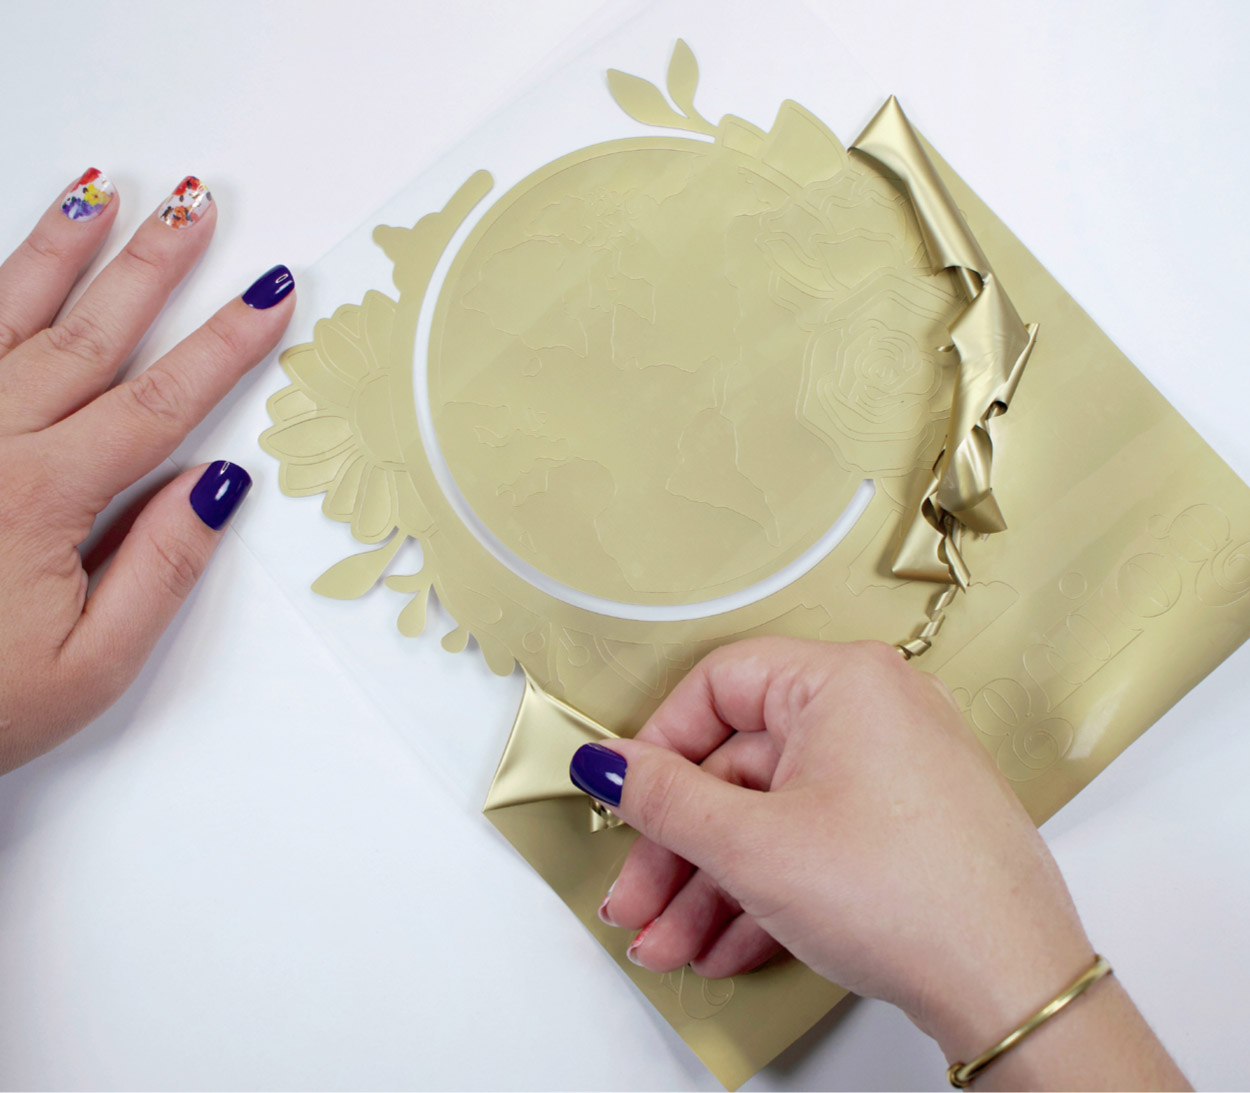
After you have completed cutting your design, remove from the mat and weed away any material that is not part of your design. I like to start with the larger pieces, like the background, and work my way toward the center; but the more you weed, you will find your groove and can go with what is most practical to you.
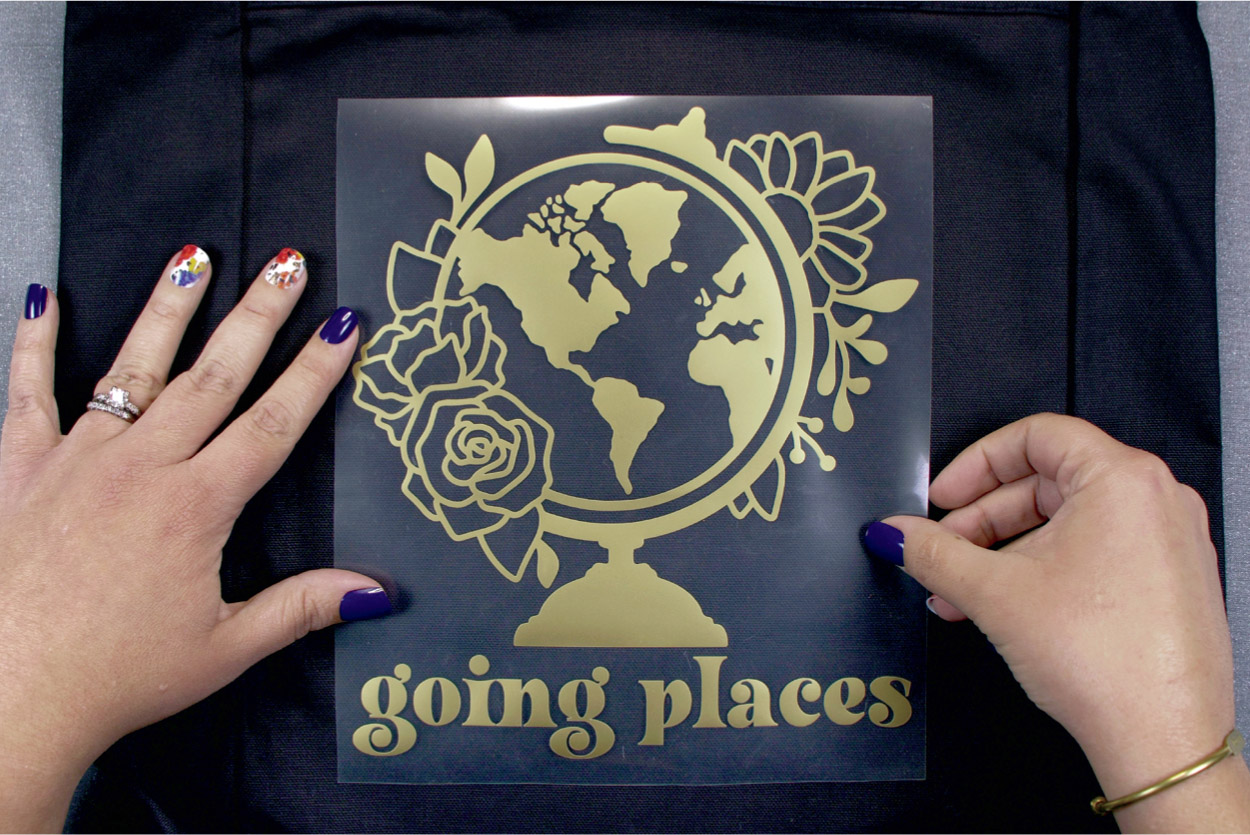
Center your weeded design on your tote bag. You can eyeball it or use a ruler to make sure it’s just right.
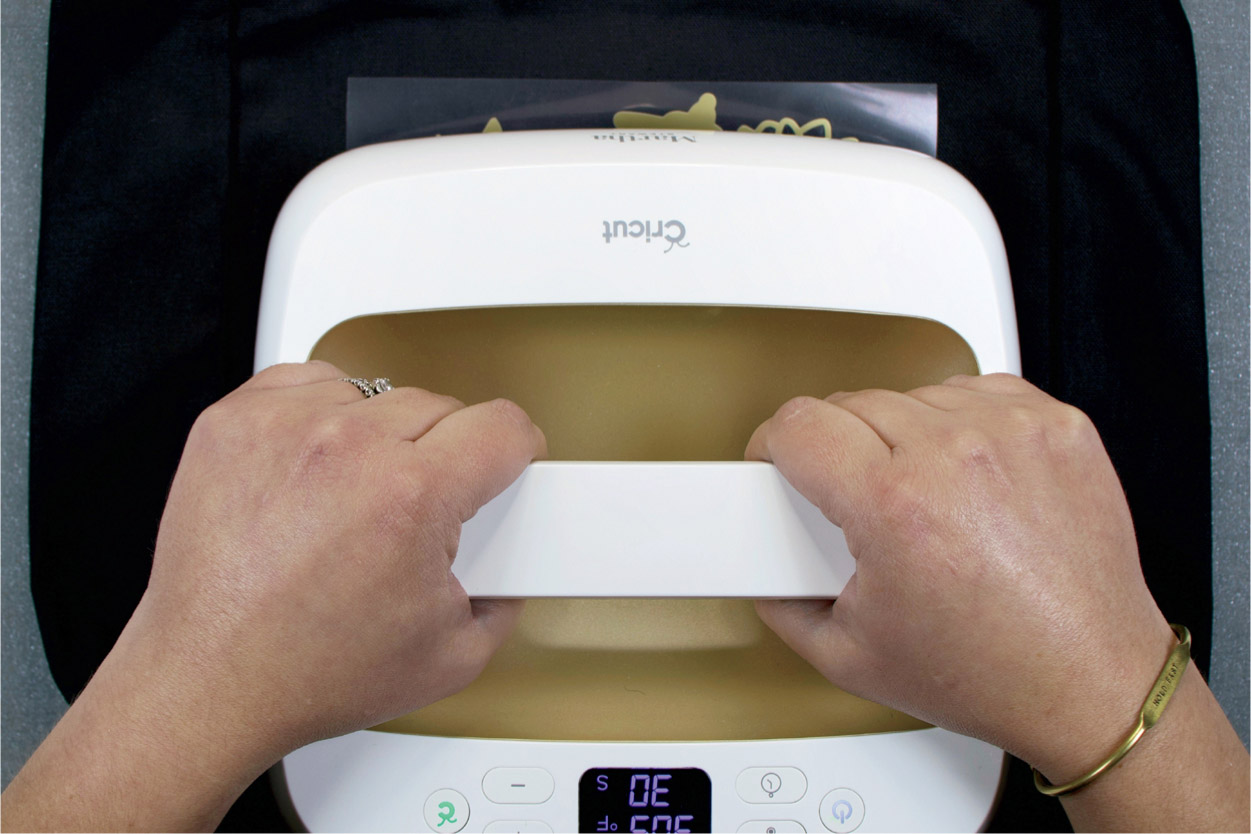
Once your image is placed exactly where you want it, it’s time to use the heat press. Find the heat temperature and time instructions for the particular material you are using. Not all materials are created equal. For this material, I’ll be heat pressing at 305° for 30 seconds.

The material used here calls for a cool peel. Most materials will specify if it’s a warm or cool peel so be sure to check your directions: This part does matter! If you peel too soon, your design might lift with the carrier sheet, ruining your design. The peeling part may be the most satisfying step of this whole process.
MAKE IT EXTRA
Iron-on can be used on a variety of items. Typically, iron-on material is used for apparel, but did you know you can also use iron-on with wood, leather, canvas, and ceramic? Part of the fun is experimenting with your craft. Adding layers and different styles of iron-on can make any project extra fancy. Adding elements of glitter, foil, holographic finishes, mosaic patterns, or any number of iron-on materials can take your project to the next level.