CHAPTER 3
STORIES

You can make your own stories with ScratchJr by adding dialogue and new scenes to your animations. Invent new characters who talk to each other and travel to new places, just like in a storybook. With ScratchJr, you can make these stories come to life and play out before your eyes like a movie!
In the six activities in this chapter, you’ll learn how to make your characters talk, how to move them through scenes, and how to control the speed and timing in your project.
Lastly, we’ll create a “Tortoise and the Hare” story project that uses all of these features.
ACTIVITY 6: FIND YOUR VOICE!
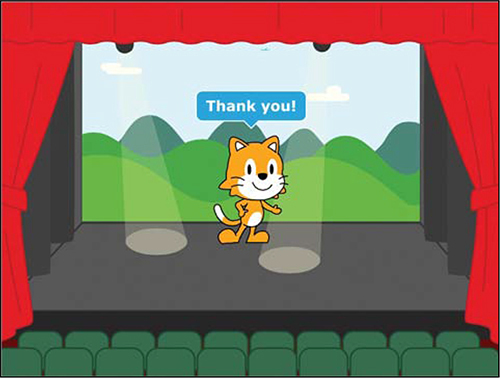
Have the cat perform a show with words and sounds! You can record a song or sound for the cat to perform and write words in speech bubbles for the cat to say.
WHAT YOU’LL LEARN
In this activity, you will learn how to record sounds for your character and how to make speech bubbles that show your character talking.
HOW TO MAKE IT
1. Select the theatre background. Then, start the cat’s script with a Start on Green Flag block.
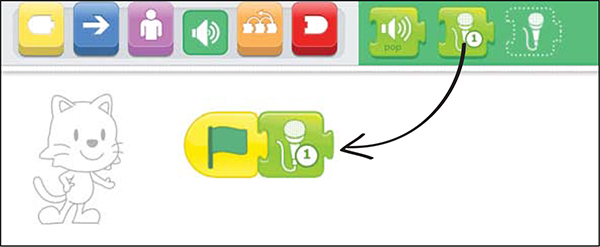
2. Tap the green blocks category to show the sound blocks in the palette. Tap the Microphone button to go into the ScratchJr recording studio.

3. Here you can tap the Record button to record a sound, tap the Stop button to stop recording, and tap the Play button to play the sound you recorded.
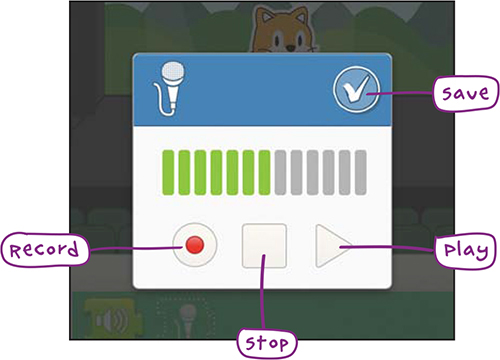
The green sound bars show you how loud the sounds are while you’re recording them. More green bars mean a louder sound recording.
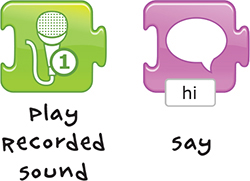
4. When you are happy with your sound, tap the check mark to save it. Your sound will be saved as a new Play Recorded Sound block that you can add to your script.
5. You can also have your characters talk with speech bubbles. Tap the purple blocks category to reveal the looks blocks in the palette. Drag the Say block to the programming area and snap it onto the end of your script.
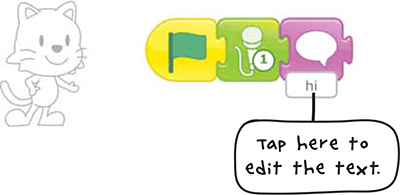
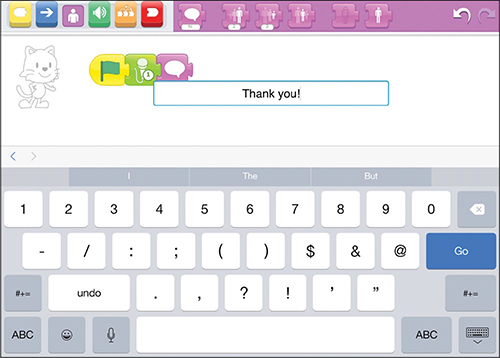
6. Tap the white box under the speech bubble and delete the text there by tapping the backspace key. Now type what you want the cat to say and tap Go. If you type a longer speech for your character to say, the speech bubble will appear on the stage for longer so that you have time to read it all.
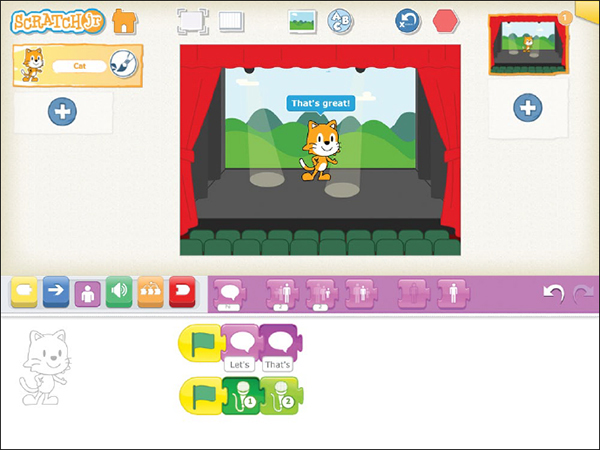
7. When you’re ready, tap the Green Flag button at the top of the screen to see the show!
HINTS
Before you have saved your recording, you can play it back to hear it. If you don’t like it, simply press the Record button again to record another sound.
Play Recorded Sound blocks appear in the green palette only after you have recorded a sound and saved it. You can keep up to five sounds for each character on each page of a project. (You’ll learn how to add multiple pages in “Activity 7: Turn the Page!” on page 58.)
If you want to delete a sound, press and hold (long-press) the Play Recorded Sound block.

You will see a red X appear. Tap the X to delete the sound.
LOOKING FOR A CHALLENGE?
Can you make sounds and speech bubbles play at the same time? Make two scripts for the same character. Put both scripts in the character’s programming area and begin both scripts with a Start on Green Flag block, but don’t connect them together!
Hint: one script should have only Play Recorded Sound blocks.
ACTIVITY 7: TURN THE PAGE!
Let’s make a story about your school! So far, all of the action in your story has happened in one place. In this activity, you will see how you can set different backgrounds for different scenes in your story, like turning pages in a book.

You can show a character traveling through your school by making a new page in ScratchJr for each part of your school that your character will visit.
WHAT YOU’LL LEARN
In this activity, you will learn how to create multiple pages in ScratchJr. After you create the new pages and add backgrounds and characters to them, you’ll learn how to use the Go to Page block to tell your story from beginning to end without stopping.

HOW TO MAKE IT
In this example, we will use three different rooms from a school: a classroom, a gym, and one more room that you can choose.
1. Start by selecting the classroom background, and pick a character to tell the story.

2. Cats are not allowed at school, so press and hold the cat character on the left, and then tap the red X to delete the cat.
3. Give your character something to do in this scene. For now, we will just have her move across the classroom when we tap the Green Flag button.

4. When you are ready to add a new page, tap the plus sign on the right side of the screen.

Now you have a whole new space to add the next part of your story!
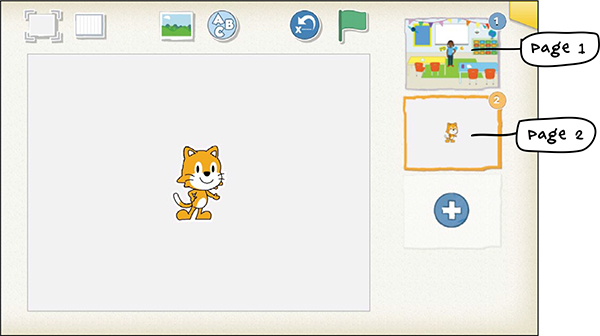
It looks like you have started a whole new project, but you can see that your classroom scene is in the list of pages on the right side of the screen. You have only turned the page.
5. Pick a background for page 2. This time, let’s choose the gym.

6. We want the same character from page 1 to be on this page, so add the girl as you did before and delete the cat.
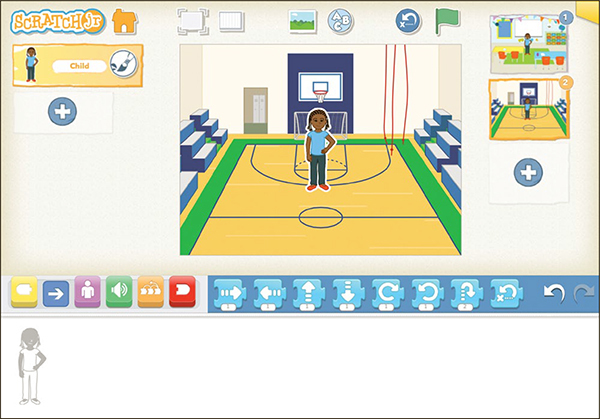
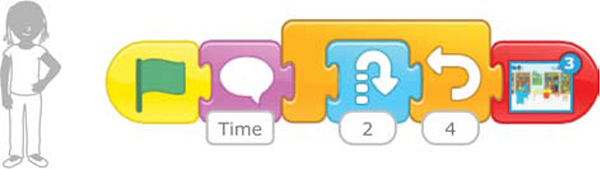
7. In the gym, let’s have the girl say “Time to exercise!” and jump up and down a few times.

8. Now add a third page with a background that looks like another room in your school. We’ve chosen the library. Add the girl, delete the cat, and decide on an action that your character should take.

In our example, the girl walks over to a stool, climbs onto it, and says “I can stand on this stool to reach the books!”
9. When all of your pages are complete, it is time to connect them so that the action flows from one page to the next. Tap the first page in the list to go back to it.
10. Now tap the red blocks category to reveal the end blocks. Each new page you create makes a new Go to Page block with a small picture of your new page (called a thumbnail) in it.

11. Use the Go to Page 2 block at the end of your character’s script on the first page.

When this script finishes, it will “turn the page” and go to the second page of your story.
12. Now tap the second page, and add the Go to Page 3 block to the end of the script there.
13. Tap the first page to return to it. Now when you tap the Green Flag button at the top of the screen, the action will flow through the pages without stopping. Every time a new page starts, all of its scripts that begin with a Start on Green Flag block will run automatically.
HINTS
As you add characters and pages, ScratchJr will keep track of them for you on the screen. The characters appear on the left, and the pages appear on the right. You can delete a character or a page from these lists by pressing and holding it and then tapping the red X that appears. You can change the order of the pages in the list by dragging them before or after other pages.
You can copy a character and its scripts from one page to another by dragging the character from the character area to the page thumbnail.
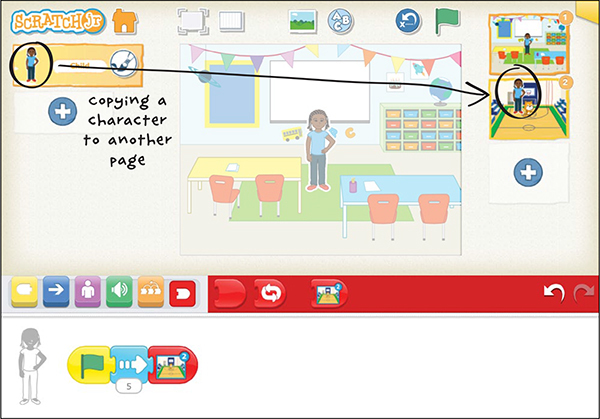
You can then change the script of the character on the new page, and it will not affect the script of that character on the original page.
LOOKING FOR A CHALLENGE?
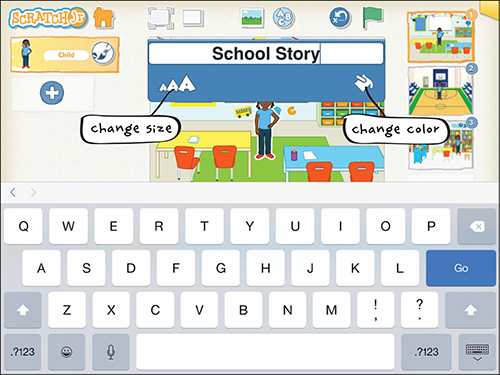
Does your story have a title? Let’s add one to the stage! Tap the Add Text button at the top and type the title of your tale.

You can change the size of your title by tapping the Change Size button, which looks like three A’s. You can also change the color of your title by tapping the Change Color button, which looks like a paint bucket. Try it!
You can move the text around the page by dragging it, just like you can with a character. You could even write something on the whiteboard in the classroom!

ACTIVITY 8: CHANGE THE PACE!
Make two characters race each other! Who will win? You decide!

WHAT YOU’LL LEARN
In this activity, you will learn how to use the Set Speed block to tell each character how fast to move.

HOW TO MAKE IT
1. For this race, we’ll choose the savannah background.
2. Delete the cat, and add the zebra and the monkey.
3. Let’s make a script for the zebra first. Begin your script with a Start on Green Flag block.
4. Now, tap the orange blocks category to show the control blocks. You can use the Set Speed block to make characters go slowly or quickly.

When you tap the arrow at the bottom of the Set Speed block, it gives you three options: Slow, Medium, and Fast.

This changes the speed of any action block you put in the script after the Set Speed block.
Your characters will all move at medium speed unless you use the Set Speed block to make them go slower or quicker.
5. In this activity, we want the zebra to go slower . . .

. . . and the monkey to go faster.

6. Tap the Green Flag button at the top and watch them race! Can you change the race to have a different winner? Can you make it a tie?

HINTS
Since the scripts for the zebra and the monkey are so similar, we can take a shortcut. After making the zebra’s script, copy it to the monkey by dragging it from the zebra’s programming area over to the monkey in the character area on the left side of the stage.
Now choose the monkey and just change the speed in the Set Speed block in the script that you copied.

LOOKING FOR A CHALLENGE?
Now that you have used the Set Speed block to make your characters race, try to see how else you can use it. Can you make a character shrink slowly or grow quickly? Can you make a character disappear in the blink of an eye or fade away slowly?

You can use more than one Set Speed block in one script. Can you make your character move slowly at first and then very fast? Or run really fast and then slow down? Try different combinations to see how your character can move.

Remember that the Set Speed block affects all the action blocks that come after it.
Use the Add Text button at the top of the stage to create an announcement that the race is beginning! After the race is over, add a second page to your story and type an announcement about who won (monkey or zebra) at the top of that page.
Hint: go back to “Activity 7: Turn the Page!” on page 58 if you need a reminder of how to move from page 1 to page 2.
Keep time! Count how many seconds it takes the monkey to complete the race and how many seconds it takes the zebra. Compare the numbers. Which number is larger? Which animal had the fastest time?
It can help to explain the different speeds as “Walk, Jog, and Run” instead of “Slow, Medium, and Fast.”
When you drag a script to another character to copy it over, you should see the script return to the programming area of the first character. If the script disappears entirely, then it’s possible that you did not actually reach the target character before letting go of the script that you were dragging. In that case, ScratchJr will think that you are deleting the script. If this happens, just tap the Undo button on the blocks palette, and the script should reappear.
Note that when you set the speed of a character in a script, the character will keep moving at that speed until you set a new speed. For example, the first time you run the following script, the character will move down at normal speed and then move up quickly. But when you run the script a second time, the character will move down quickly and up quickly because it is still set to Fast.

To avoid this, you can set speeds at the beginning or end of the script to reset the character to its initial speed.

ACTIVITY 9: STOP AND LOOK!
Help the cat cross the street safely by pausing first at the sidewalk!
WHAT YOU’LL LEARN
In this activity, you will use a Wait block to make the action pause for a few seconds.

HOW TO MAKE IT
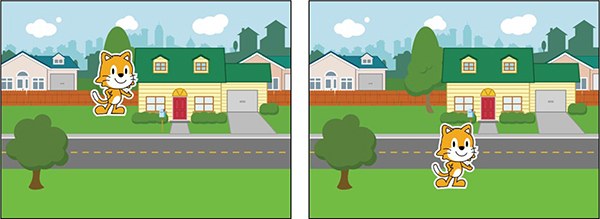
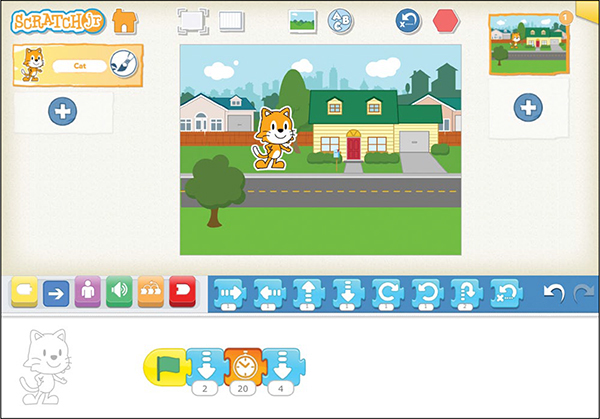
1. Select the suburbs background and position your cat at the top of the grass next to the house.
2. Start your script with a Start on Green Flag block, and then use the Move Down block to have the cat take two steps toward the sidewalk.

Make sure the cat isn’t already in the road! If two steps are too many, have the cat take one step instead.
3. Now, tap the orange blocks category to show the control blocks, and then drag the Wait block to your script.

4. You can tap the number input at the bottom of the Wait block to change the amount of time you want the cat to wait. The number is given in tenths of a second. Let’s change the number to 20 so that the cat will wait 2 seconds before crossing the street.

5. After waiting at the side of the street, the cat can safely cross, so have it move down another four steps to reach the other side of the street.

6. When you run the script by tapping the Green Flag button at the top of the screen, the script will pause when it reaches the Wait block, and then it will continue with the last block. This makes the cat move from the grass to the edge of the road, pause, and then cross the street.
LOOKING FOR A CHALLENGE?
Try to program a car that crosses the road in front of the cat. Time the car so that it goes along the road while the cat is waiting. Can you make the cat wait long enough so that it crosses safely after the car has passed?
ACTIVITY 10: WAIT YOUR TURN!
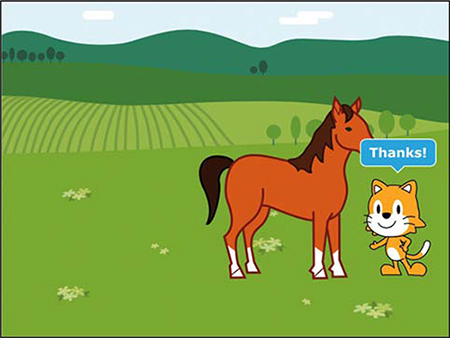
You can use the Wait block to control how two characters interact with each other. In this activity, the horse agrees to give the cat a ride and they gallop off together!
WHAT YOU’LL LEARN
The Wait block can pause the action for a character long enough to let another character say or do something.
HOW TO MAKE IT
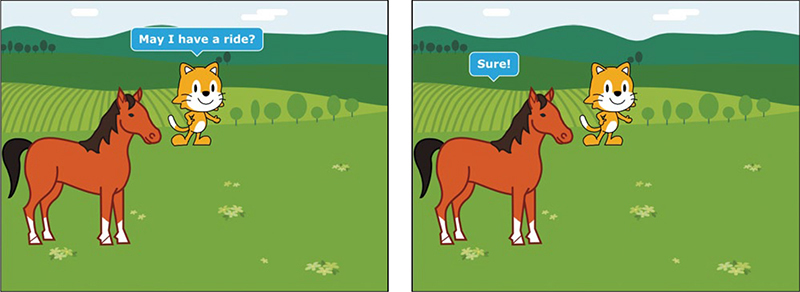
1. First, choose the farm background, and then add the horse. You can leave the cat where it is, but you need to move the horse to the left edge of the stage, as in the pictures shown here. We want to arrange the cat and the horse so that they move together.
2. Let’s make a script for the cat first. Use a Say block to have the cat say, “May I have a ride?”
3. Add a Wait block to have the cat wait for 2 seconds (20 tenths of a second) while the horse answers and walks over to it.
4. Then move the cat forward 6 steps with the horse.

5. Now tap the horse to make its script. First, add a Wait block set to 2 seconds (20 tenths of a second) to give the cat time to ask for a ride. Then, add a Say block to have the horse reply, “Sure!” Then move the horse forward 11 steps.

6. Now when you tap the Green Flag button at the top, the cat and the horse will speak, and then the horse will give the cat a ride to the end of the field!

HINTS
Try to build your scripts so that the cat and the horse move together at the same time. It may take a few tries to get the cat and horse positioned just right so that it looks like the cat is riding on the horse’s back when they move forward.
LOOKING FOR A CHALLENGE?
After the horse says “Sure!” see if you can have the cat answer “Thanks!” You will have to add another Wait block for the horse so that it waits for the cat to respond before moving forward. Try to figure out how much time you need to add for this.
Can you also time it so that the cat gets off the horse and says “Thanks!” again when the ride is over?
ACTIVITY 11: BUILD A SNOWMAN!
ScratchJr includes a powerful paint editor that you can use to draw and change characters and backgrounds. For example, you can build your own snowman to live in the arctic!

WHAT YOU’LL LEARN
In this activity, you will learn how to use the paint editor to make your own characters! You can also change other characters and backgrounds using the paint editor. Whenever you see the paint editor button, it means you can edit that object or create your own object.

HOW TO MAKE IT
1. Start your project by choosing the arctic background.
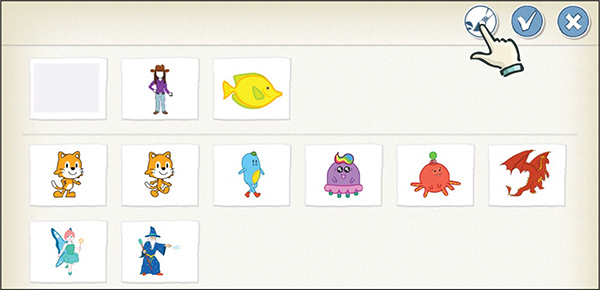
2. To draw a character, tap the plus sign on the left side of the screen as if you were going to add a new character.

3. Without actually selecting a character, tap the Paintbrush button to open the paint editor.
4. Now, to make a snowman, you will need three circles of different sizes. To make a circle, tap the Circle tool.

5. Next, drag your finger on the drawing grid (or canvas) in a diagonal line, and you will see a circle appear. When you get the size and shape that you want for the snowman’s base, lift your finger off the grid. Make another circle for the snowman’s middle. Don’t worry about where it is on the grid, because you can move it.
6. Tap the Drag tool, and then drag the circle where you want it.

If you tap on the drawing instead of dragging it, little circles will appear on the lines that let you change the shape. We want our snowman to have round snowballs, so be careful not to drag one of these little circles, or you might accidentally change the round shape.

7. Make a third circle for the snowman’s head and drag it into place too.
8. Now you need to make the eyes with two much smaller circles. Using the Circle tool, draw a small circle, or just tap the screen to create a round dot. You can make sure your eye circles are the same size by using the Duplicate tool, which makes a copy of the shape you choose. Tap the Duplicate tool (which looks like a stamp), and then tap the eye circle that you want to copy.
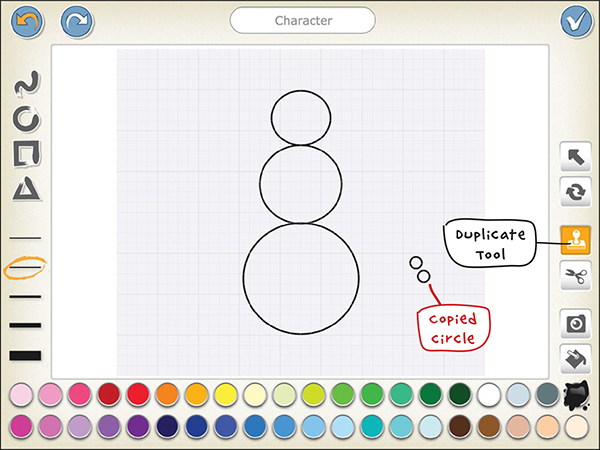
The Duplicate tool makes a copy of the shape that appears just to the side of the original, so you need to drag them apart carefully. Drag these eyes into place on the snowman’s head.
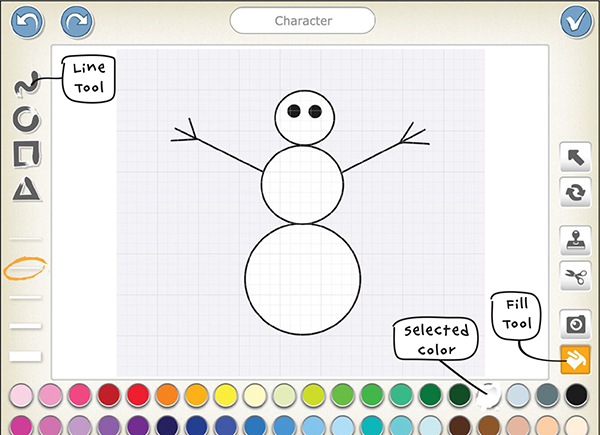
9. Tap the Line tool and draw two arms for the snowman. Next, we need to fill in the snowballs with white paint. Tap the Fill tool (which looks like a paint bucket) and select white from the color palette. Then tap each snowball, and the shape will fill with the color that you chose. Select black and color the eyes.
10. To make a carrot for the nose, change the color to orange and tap the Triangle tool. Drag your finger diagonally anywhere on the canvas until you have a carrot-shaped triangle. Then, using the Fill tool, paint the carrot orange.
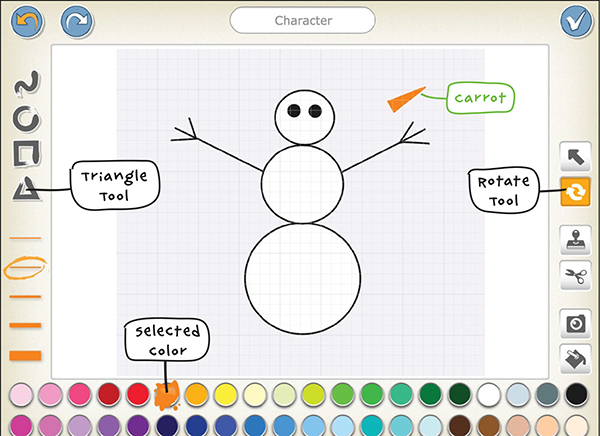
11. The Rotate tool turns items around, and you can use it to arrange the carrot like a nose. To do so, tap the Rotate tool, and then press and hold the carrot. Keep your finger on the screen and move it up or down or side to side to turn the carrot. Use the Drag tool to drag the carrot into place on the snowman’s face.
Ta-da! You’ve created your own unique character! Don’t forget that you can give your snowman a name with the text bar at the top. You can also add more features to your snowman, such as a hat, a smile, or some buttons. Tap the check mark at the top right when you are satisfied with your snowman, and it will appear in your arctic scene.

Now you can give your snowman and the cat a script to tell your winter story!
HINTS
If you tap a character before tapping the Paintbrush button, the paint editor will open with that character on the canvas instead of with a blank canvas. This allows you to edit existing characters with the paint editor. Your modified character is saved as a new character—it won’t replace the original character. So go ahead and make a blue cat or a pig with polka dots! Any new or modified characters that you make will be saved in your character menu so you can use them in all of your projects.
If you make a mistake with your character, you can use the Undo button at the top. If you want to delete something in particular, you can use the Cut tool (which looks like a pair of scissors).
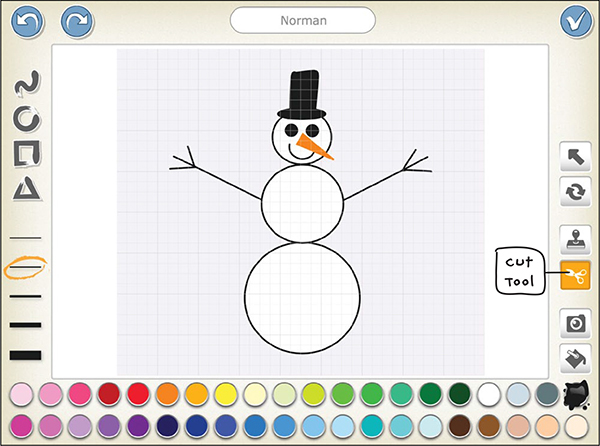
Just tap the Cut tool, and then tap what you want to delete. Make sure you tap a different button afterward to continue painting, or you’ll end up cutting everything out!
LOOKING FOR A CHALLENGE?
See if you can figure out how to edit the arctic background.
Write a script to show the cat building a snowman by making a new page for each step of the snowman building. So on page 1 have the cat build the bottom snowball, on page 2 have the cat add the middle snowball, and on page 3 have the cat put on the snowman’s head and arms.
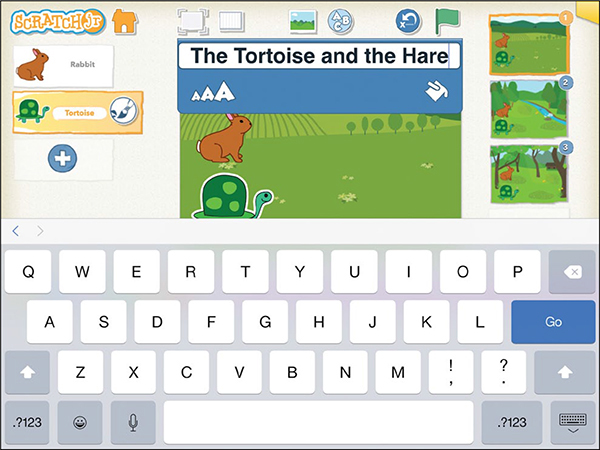
PROJECT TIME! THE TORTOISE AND THE HARE
Now you can use all of the skills you’ve just learned to make a full story! This story is about a race between a patient tortoise and a boastful hare. To create the scene, you first have to make a tortoise with the paint editor. Then, you can use the Set Speed block to make the hare move faster than the tortoise and to help the tortoise win! You will also use what you learned about making characters talk to each other and about turning story pages.

HOW TO MAKE IT
1. Choose the farm background, delete the cat, and add the rabbit character.
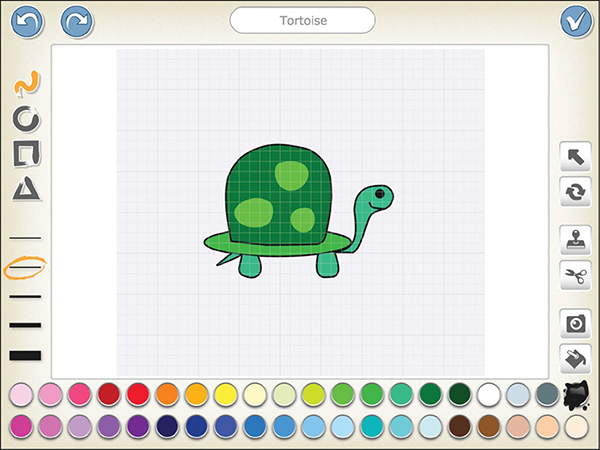
2. We don’t have a tortoise character already made, so we’ll use the paint editor to make one. Make sure you paint the tortoise quite big! It will look smaller when it appears in the scene than it does in the paint editor.
3. The race will go over the farm, past a river, and through an orchard. For this we need to make two new pages. Add the river background to the second page and then add the spring background to the third page.
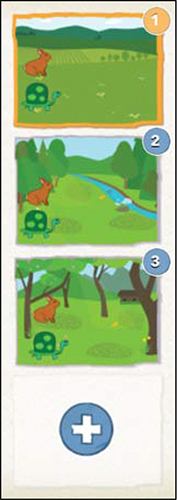
4. Let’s add the tortoise and the hare to the two new pages too. Drag the rabbit character from page 1 to page 2 to copy it over, and then drag the tortoise from page 1 to page 2. Don’t forget to copy the characters to page 3 too.
5. You can use the Add Text button to add words of different sizes and colors to your page. Larger words look more like a title, and smaller words might be the main part of your story that you can read aloud. Select page 1 and tap the Add Text button to give your story a title.
6. Now comes the action. On page 1, the tortoise and the hare talk about the race they want to have.
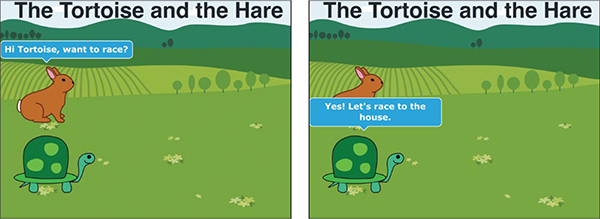
7. We’ll start you off with the script to begin the race. Then, can you write the scripts to show what happens next in your story?

Here are some tricks you may need:
• You don’t want your hare to look like it’s waiting if it gets to the end of the page first! You can use the Set Speed block (set to Fast) and the Hide block to make the hare run to the end of the page and disappear. Use this trick to keep characters off the page when you don’t need them! Make sure to reset the speed of your character if you want it to slow down once it reappears.
• You can record sounds to add excitement to your story!
• Fables like “The Tortoise and the Hare” usually have a moral at the end—a sentence explaining what the characters learned. You can use the Add Text button to display a moral at the end of your story. Use the Change Size button to adjust the size of the words to fit your page.
HINTS
Remember, the Set Speed block does not slow down or speed up the timing of Wait blocks.
When you have more than one character, you need to add the Go to Page block to the script of only one of the characters to turn the page. But be careful about which script ends with the Go to Page block. Some scripts will finish sooner than others, and the page may turn before all the characters have finished their scripts. You want to add the Go to Page block to the script that takes the longest to finish.
LOOKING FOR A CHALLENGE?
Try recording yourself telling the story by using multiple Play Recorded Sound blocks. Can you time the recorded sounds with the actions on the screen?
