


Before we dive into the goodness that is layer masks, brushes, and blend modes, I thought it would be a good idea to go over some of the basics of Photoshop, just in case you click on something you didn’t mean to or press a number of keys in quick succession that causes Photoshop to throw a hissy fit (as I have done more times than I care to remember).
We’ll take a quick tour of the Photoshop workspace and discuss how you can rearrange and organize it to suit how you work. We’ll also go through how you can tidy up and put everything back into place quickly and easily, should you need to. But first, we’ll take a look at the basics of layers: what they are, how to use them, and what working non-destructively is all about.
If you’re a seasoned Photoshop user who understands layers and already knows how to organize the Photoshop workspace, then feel free to skip past this bit and dive straight into chapter 2 and beyond.
Right, let’s get going . . .
LAYER BASICS
The best explanation of layers I’ve ever read came from my friend Matt Kloskowski in his aptly named book Layers, which was published in 2008, but is still as relevant today as it was then. (Thanks, Matt, for giving me the “all clear” to cover layers in this book the way you did in yours.)
Think of layers like this: Imagine you have a very special photograph. You’d never in a million years think of drawing on it with a Sharpie and then later trying to erase what you’d done, would you? Well, that’s exactly what you would be doing if you didn’t use layers in Photoshop, and instead made all of your adjustments to the original image.
If you were going to draw over your photograph, you’d probably create a copy first, or better yet, use some clear acetate sheets and draw on those. That way the original photograph would remain safe and intact. Let me show you what I mean.
- 1. So here we are with a photograph of my best mate, Dave Clayton, and just for giggles we’ll give him a moustache, blacken out a front tooth, and color in one of the lenses of his glasses (Figure 1.1).
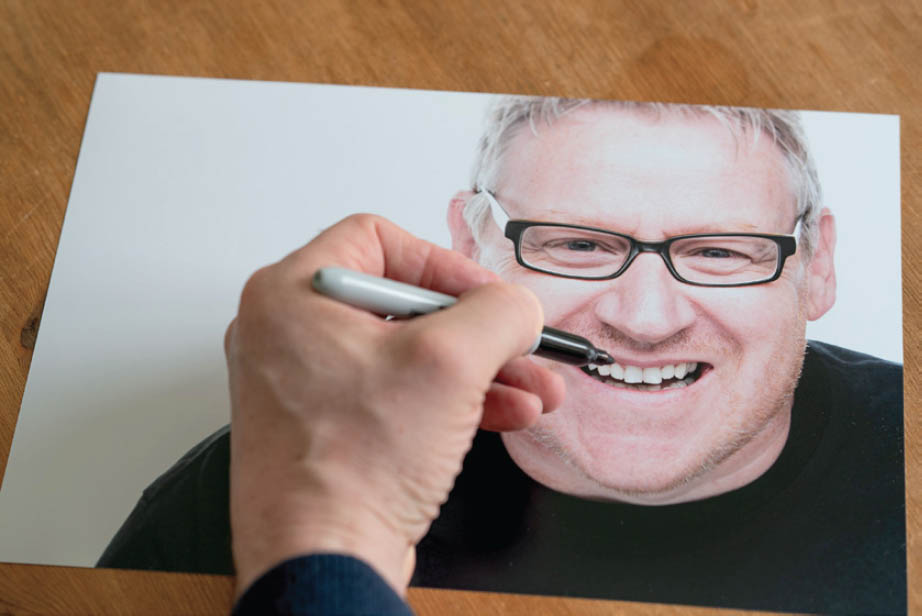
FIGURE 1.1
- 2. So what do we do now if we want to change or maybe even erase the black ink we’ve just used to draw on the photograph? It certainly won’t be easy. We might start rubbing on it with a cloth, but that’s dangerous because we may end up erasing not only the ink, but some of the photograph, too. Yep, at this point we’re pretty much stuck with it (Figure 1.2).
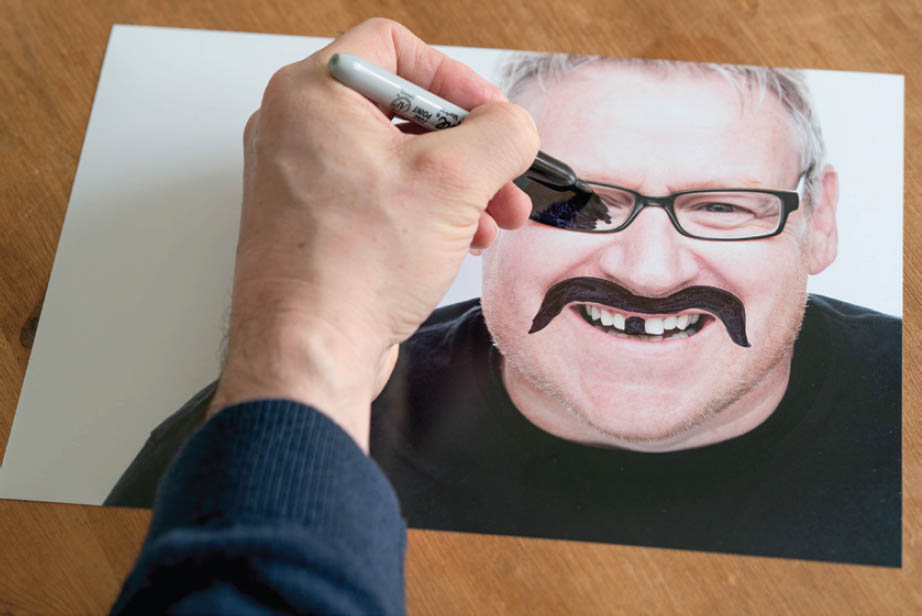
FIGURE 1.2
- 3. Okay, let’s rewind and do this again, but this time we won’t mess up the original photo. Let’s say we still want to draw on the picture for a giggle, but this time we’ll do it with a piece of clear acetate (Figure 1.3).

FIGURE 1.3
- 4. Now instead of drawing directly onto the photograph, we’ll place the clear acetate on top of it so that we can still see the picture beneath and draw on the acetate instead. Everything still looks the same, right (Figure 1.4)?
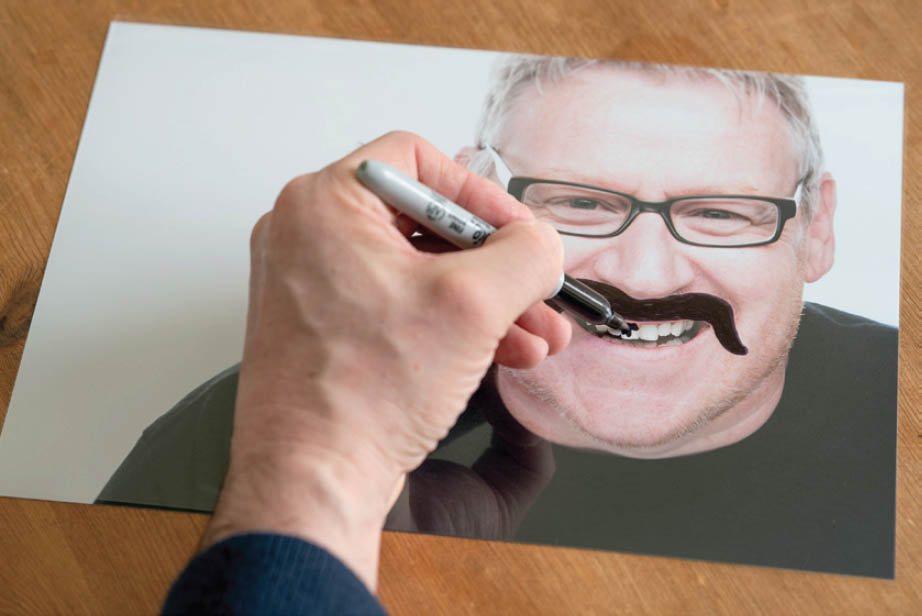
FIGURE 1.4
- 5. Now let’s imagine that we want to erase what we just drew. Well, that’s easy—we can just remove the sheet of acetate we drew on, and the picture below is untouched and intact (Figure 1.5). By drawing on the acetate on top of the photograph, we’ve achieved the same result, but we used a much more flexible method that allows us change it later if we want to. Does that make sense?

FIGURE 1.5
Let’s compare this process to using Photoshop:
- 1. Open the dave.jpg file in Photoshop and choose the Brush Tool (B) from the toolbar (Figure 1.6). Click on the brush size drop-down in the options bar at the top of the screen to open the Brush Preset picker, and select a round, hard-edged brush (Figure 1.7). Press D to set your foreground and background colors to their defaults of black and white (press X to swap foreground and background colors if needed), and then draw directly on the Background layer just like we did before (Figure 1.8).

FIGURE 1.6
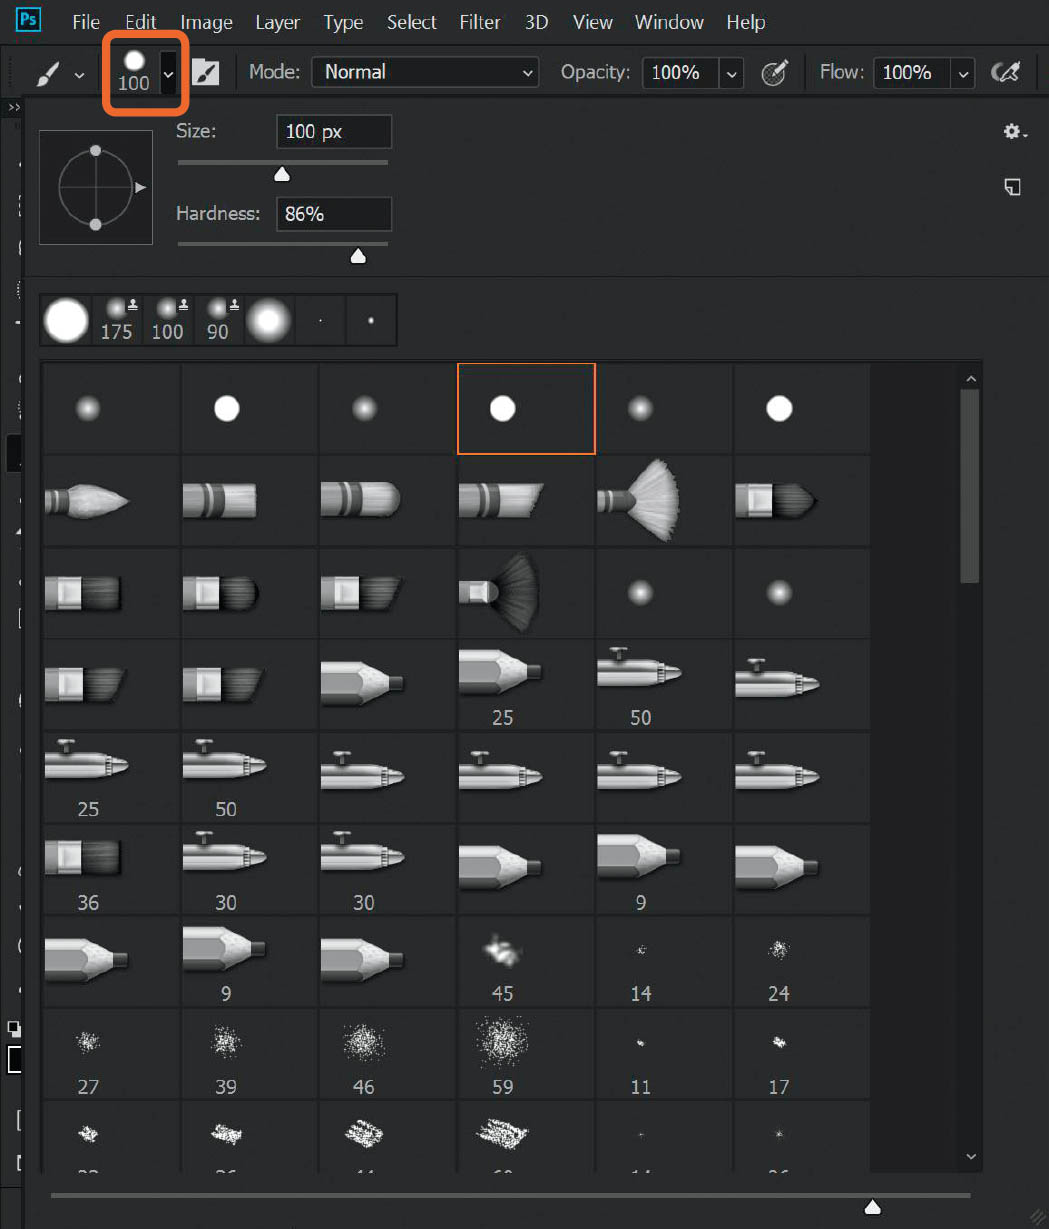
FIGURE 1.7
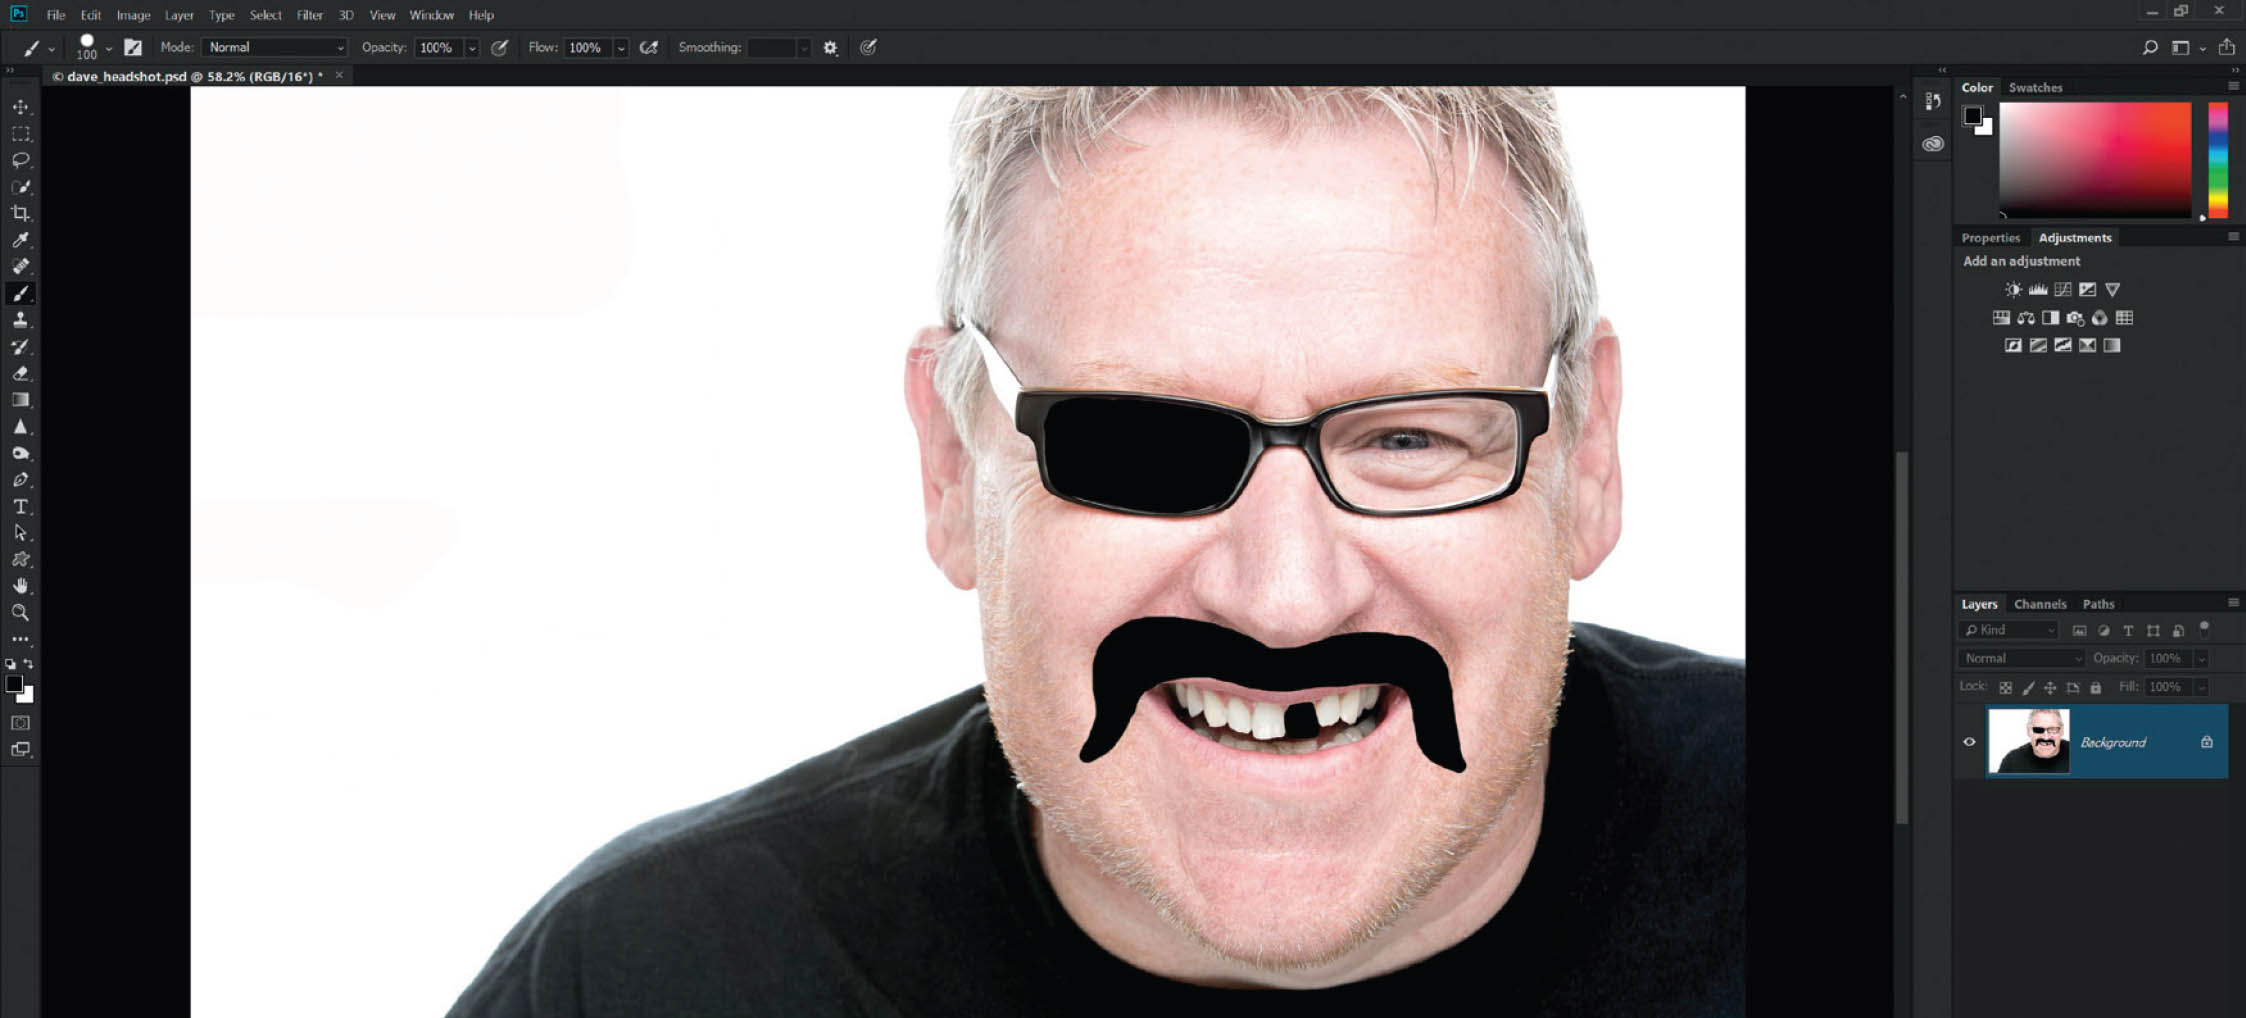
FIGURE 1.8

Download all the files you need to follow along step-by-step at: http://rockynook.com/pstoolbox
- 2. So now you’ve drawn over Dave’s face, and let’s just say you’ve changed your mind and don’t want him to have a moustache after all. Grab the Eraser Tool (E) from the toolbar and start brushing directly onto the picture to erase the parts you don’t want. The trouble here is that you end up erasing not only the moustache, but parts of the picture as well (Figure 1.9—you see white here because the background color in the toolbar is set to white). Obviously, this isn’t a good way to work, so how can we use Photoshop like we did before with the clear acetate? Close this image (making sure not to save what you’ve just done), and let’s look at a better way to work in Photoshop.

FIGURE 1.9
- 3. Open the clean picture of Dave in Photoshop one more time. This time, before using the Brush Tool, click on the Add New Layer icon (which looks like a sheet of paper with a folded corner) at the bottom of the Layers panel to add a new blank layer (Figure 1.10). This new layer, which is labeled Layer 1, will be positioned on top of the picture of Dave in the Layers panel. This gives us the same setup as the photograph of Dave with the clear acetate on top of it, but this time it’s in digital form.

FIGURE 1.10
NOTEYou can change the name of the new layer by double-clicking on the words Layer 1 in the Layers panel and typing in a new name.
- 4. Make sure Layer 1 is selected in the Layers panel, and then use the black, round, hard-edged brush to draw over Dave’s face in the main workspace once again. Whatever you draw with the brush will appear on the Layer 1 thumbnail over in the Layers panel (Figures 1.11 and 1.12).
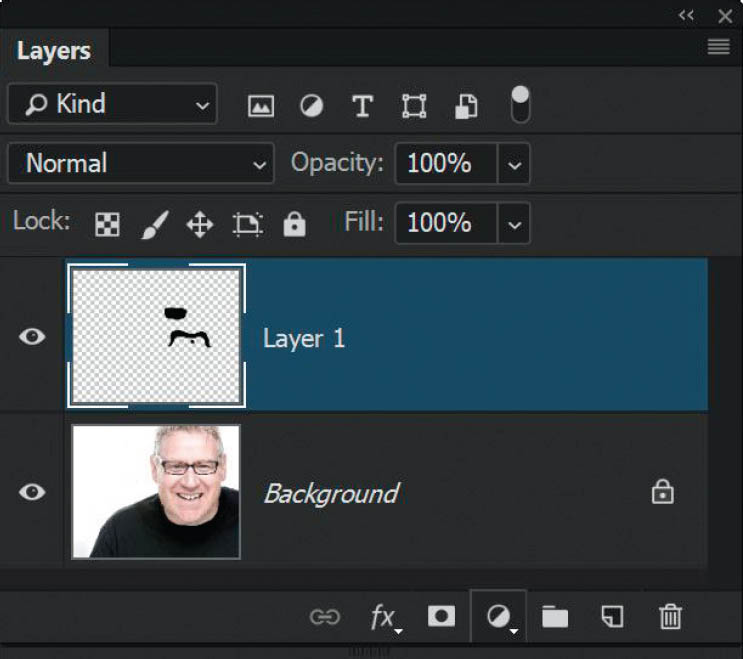
FIGURE 1.11
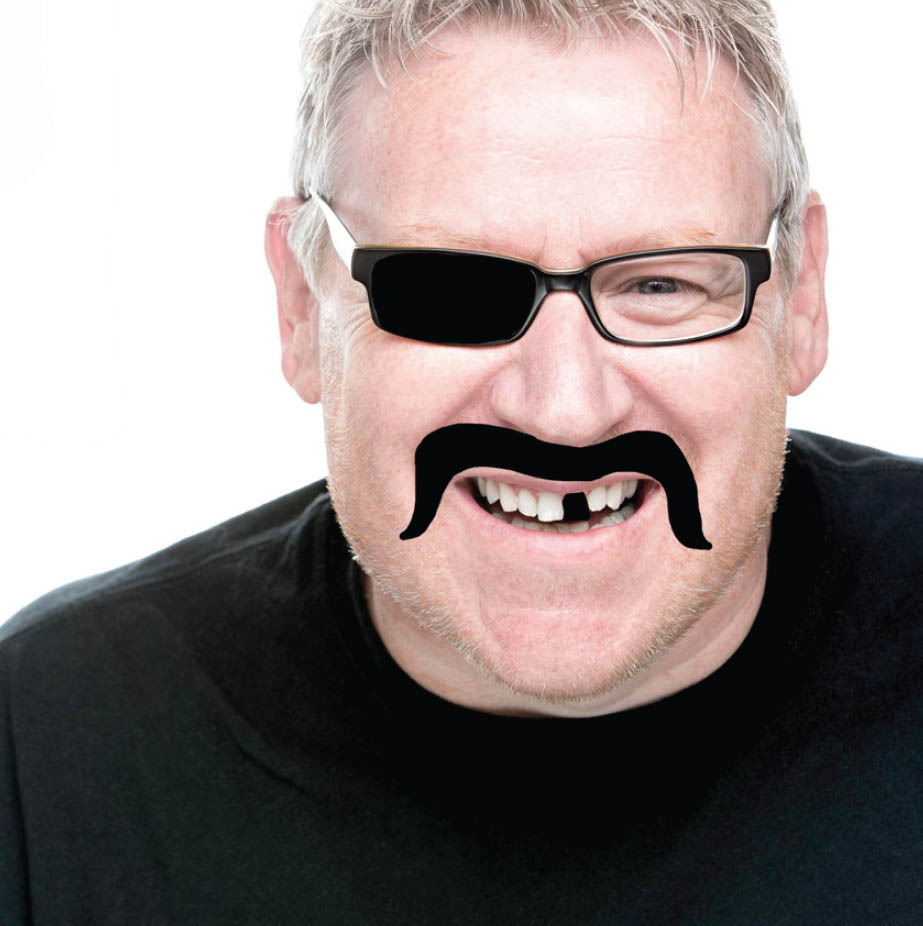
FIGURE 1.12
NOTEYou need to click on a layer in the Layers panel to select it and make it active. You can tell when a Layer is selected because it will be highlighted in a different color (e.g., gray, blue, etc.).
- 5. Now comes the magic of using layers. Make sure Layer 1 is still active and, just as before, select the Eraser Tool and brush over the moustache to erase it (Figure 1.13). Notice that this time only the black brushstrokes are being erased, and the original picture of Dave stays intact.

FIGURE 1.13
This is what is commonly known as nondestructive retouching. The original image is completely safe and untouched, and when you save the file with all the layers intact, you can make changes at any time in the future. Cool, huh?!
LAYER GROUPS
Now that we’ve covered the principle of layers, let’s look at one more thing before we move on to the Photoshop workspace and dive into the really cool stuff.
When you’re working in Photoshop it can be very easy to generate a lot of layers—so many that it becomes difficult to know what each layer does. For example, while working on Figure 1.14, you can see that I created six different layers to colorize the picture (Figure 1.15). This is where it really helps to be organized, and the way to do that is to use layer groups.

FIGURE 1.14

FIGURE 1.15
It makes sense to keep layers that are related to one another in groups so that they are easier to find. Grouping layers also allows you to do other cool stuff like use layer masks and blend modes on all of the layers in the group at once. We’ll cover this later in the book. For now, let’s walk through how to create a group.
Use the following steps to put related layers into a group:
- 1. Click on the first layer that you want to add to a group, hold down the Shift key, and then click on the last layer. This will highlight the first and last layers as well as all the layers in between (Figure 1.16).
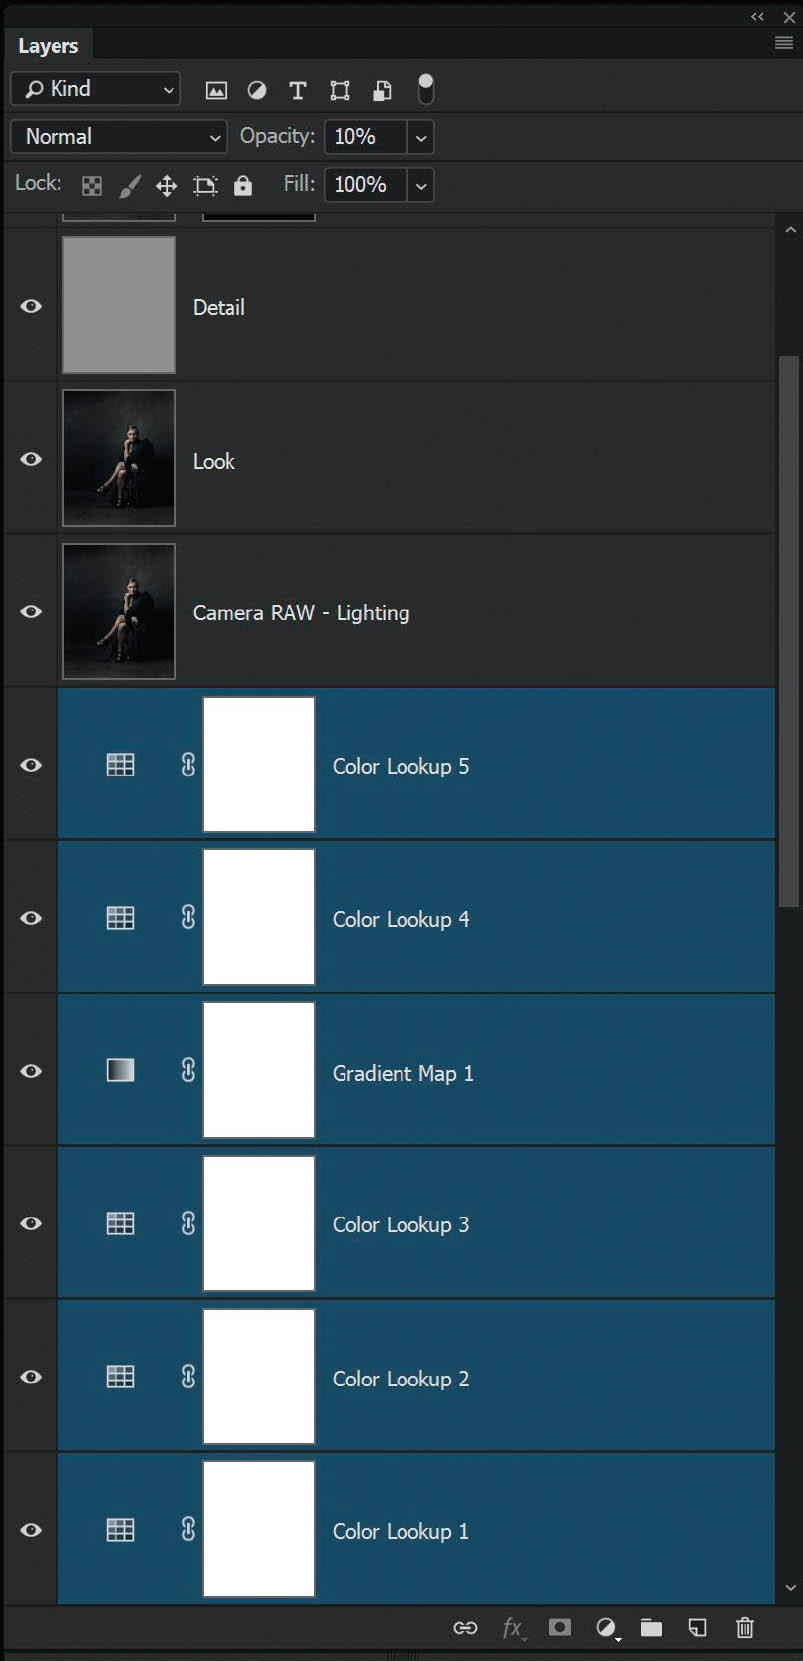
FIGURE 1.16
- 2. With all the layers highlighted, go to Layer > New > Group from Layers, and in the New Group from Layers properties, give the group a name. In my example, I’ve named the group color (Figure 1.17). Click OK.

FIGURE 1.17
- 3. Notice in Figure 1.18 that all the layers I selected have been placed into the color group in the Layers panel. To open and close the group, simply click on the small arrowhead icon to the left of the group folder.
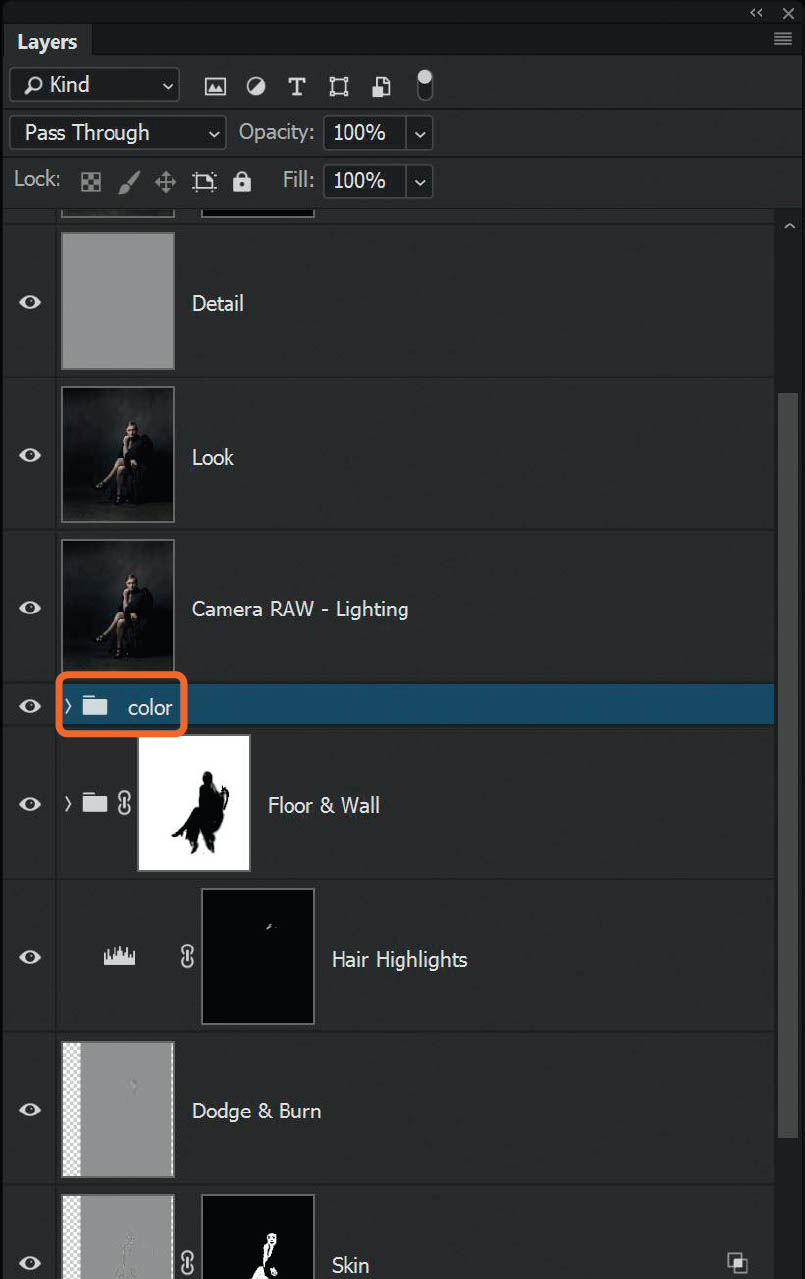
FIGURE 1.18
WORKSPACE
Just in case you’re not completely familiar with the Photoshop workspace, I thought I’d point out where you’ll find stuff and what’s what. I’ll cover the default layout of Photoshop, but seeing as how Photoshop is your personal toolbox, you can rearrange everything to suit your own way of working.
The Start Screen Workspace
When you first open Photoshop (CC) you’re presented with the Start workspace (Figure 1.19). This screen also appears when you create a new document. From here you have a choice of creating a new document, choosing a new document from premade templates, or opening a previous document. Depending on your subscription status, you may also be able to search Adobe Stock and check out a Photoshop learning area that gives an overview of tools and other features.
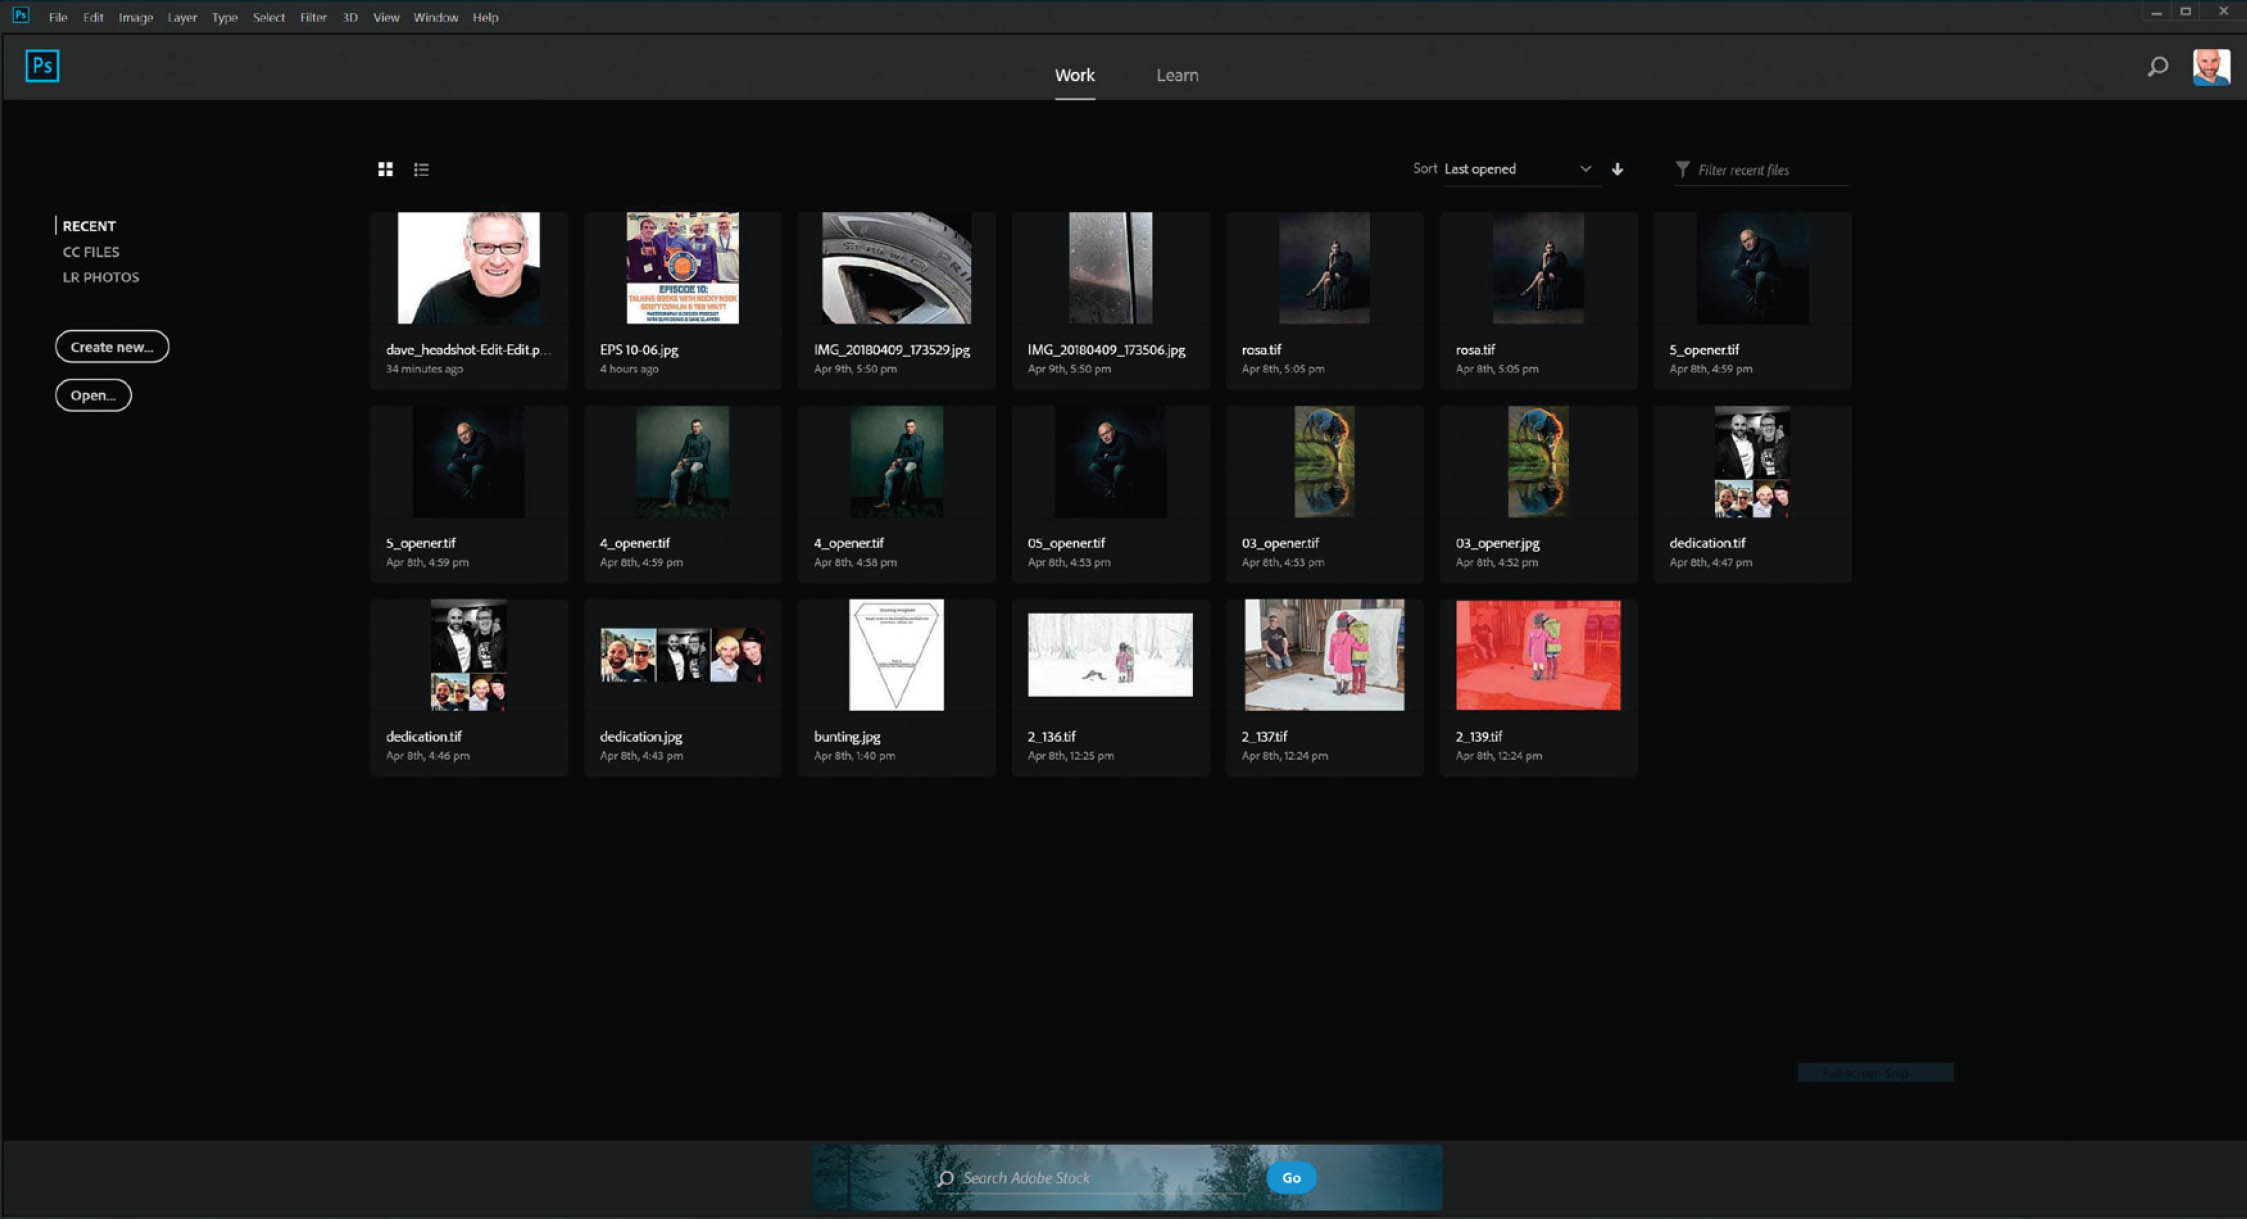
FIGURE 1.19The Photoshop Start workspace
|
TIPYou can customize how many recent files are visible in the Start workspace by going to Photoshop CC > Preferences > File Handling and typing any number from 0 to 100 into the Recent File List Contains field at the bottom of the Preferences dialog. |
If you’d rather not see the Start workspace every time you open Photoshop, you can disable it by going to Photoshop CC > Preferences > General and removing the check mark next to the box that says Show “Start” Workspace When No Documents Are Open.
THE PHOTOSHOP WORKSPACE
Figure 1.20 shows the default Photoshop workspace.
I’ve marked up the areas I’ll refer to throughout the book.
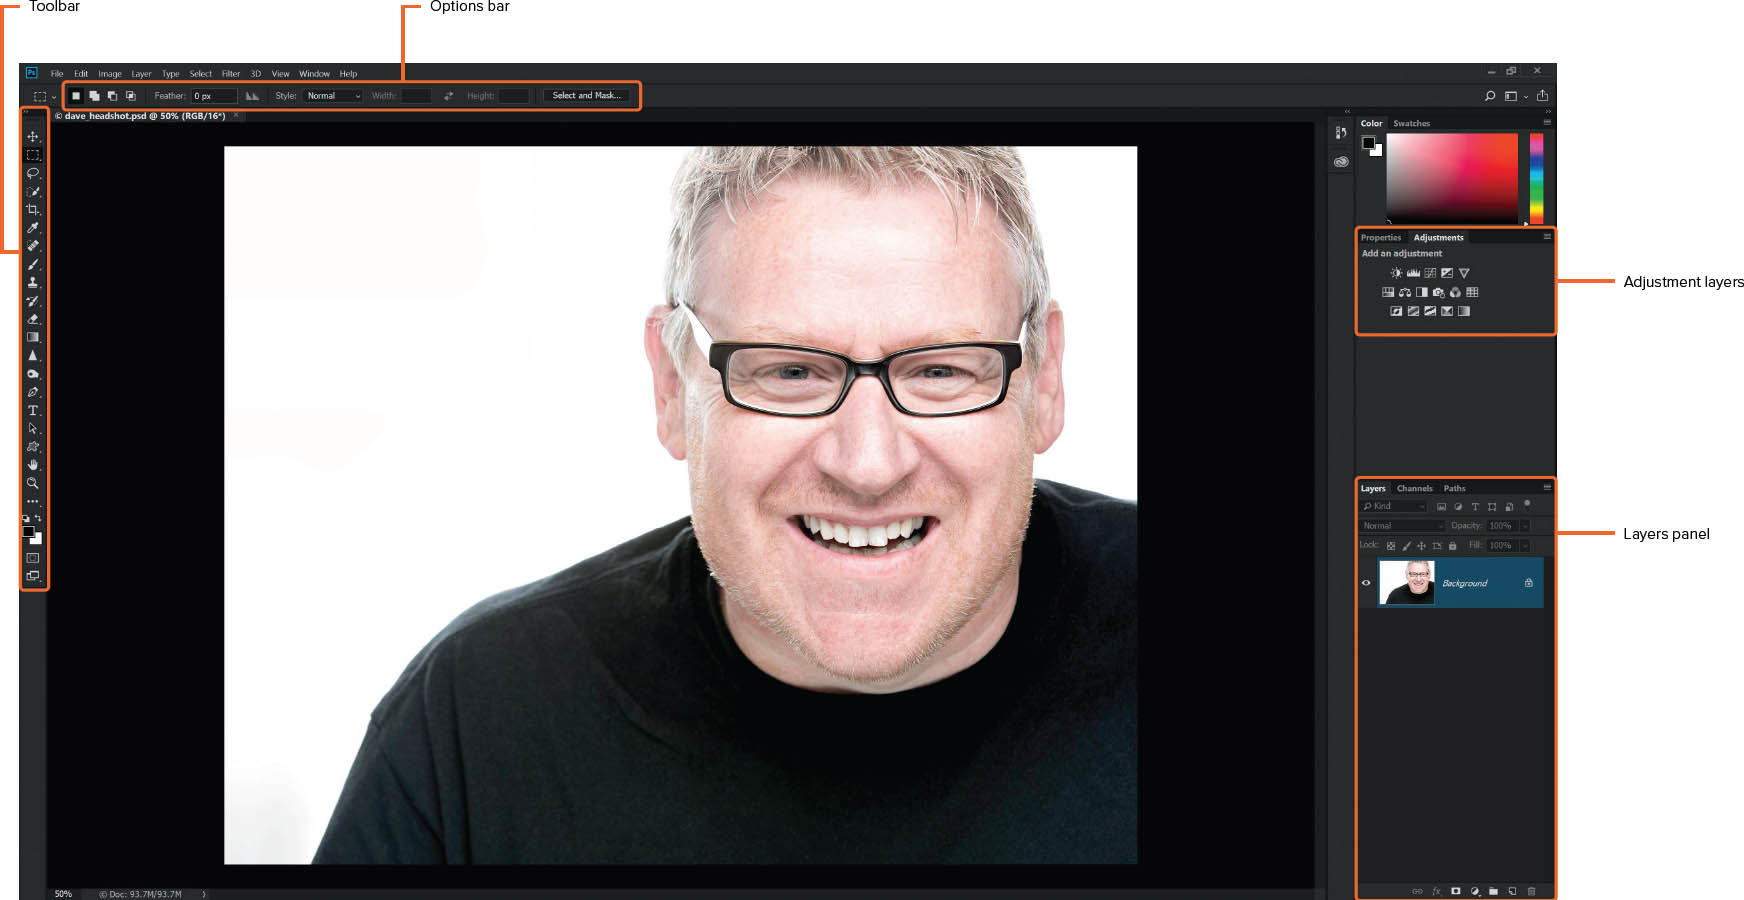
FIGURE 1.20
Customizing the Photoshop Workspace
As we’ve discussed, Photoshop is your toolbox, so you can arrange it however you’d like, and there’s so much more you can do than simply putting tools in different places.
MOVING PANELSIf you click on the name of a panel you can drag it to a different location in the workspace (Figure 1.21). You can also place it among other panels in the workspace by dragging it on top of another panel. Once you see a blue outline where you want the panel to be located (Figure 1.22), release the mouse to drop the panel into place. To minimize the panel, simply double-click on its name (Figure 1.23).

FIGURE 1.21
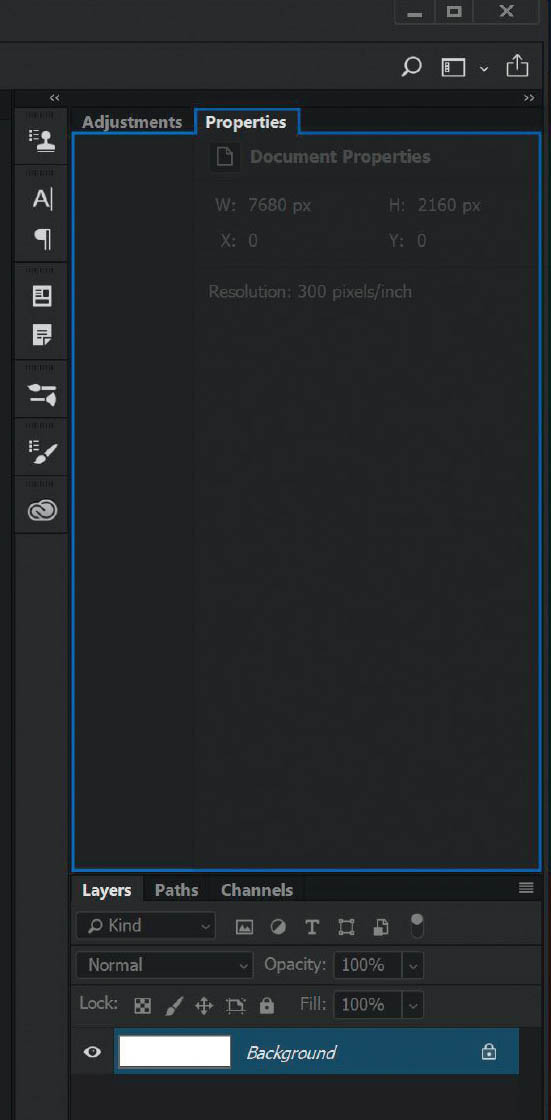
FIGURE 1.22Blue outline showing where Properties panel will be relocated
FIGURE 1.23Properties panel repositioned and minimized
CLOSING PANELSTo close a panel, right-click on panel name and choose Close from the context menu (Figure 1.24).

FIGURE 1.24Closing a panel
OPENING PANELSThere may be times when you can’t see a certain panel that you need. If this is the case, all you need to do is go to the Window menu at the top of your screen and click on the name of the panel you want to add to your workspace (Figure 1.25). The panel names with check marks next to them are already visible in the Photoshop workspace, so clicking on them in the Window menu will close them.

FIGURE 1.25
PRESET WORKSPACESThere are a number of preset workspaces from which you can choose, which Adobe has set up with what they consider to be the relevant panels for specific types of work. These include Essentials (Default), 3D, Graphic and Web, Motion, Painting, and Photography. To choose one of these workspaces, go to Window > Workspace and click on your preferred choice (Figure 1.26).

FIGURE 1.26
SAVING A CUSTOM WORKSPACEYou can also save your own custom workspace with any of the panels, keyboard shortcuts, menu items, and toolbar items that you have arranged to suit your needs. To do this, once you have rearranged the workspace, go to Window > Workspace > New Workspace (Figure 1.27). In the dialog box, give your workspace a name and select whether you would like to save any keyboard shortcuts, menus, or the toolbar configuration (panel locations are always saved). Click Save, and your custom workspace will now be available for selection in the Window > Workspace menu.
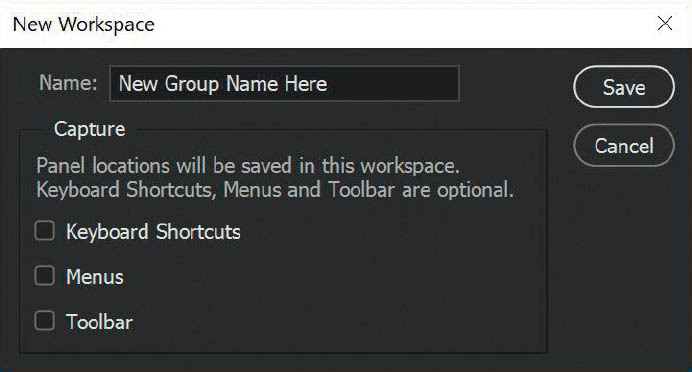
FIGURE 1.27
RESETTING THE WORKSPACEFinally, if you’ve moved stuff around in a particular workspace and decide you just want everything back in its original configuration, you can reset the workspace by going to Window > Workspace > Reset (followed by the name of the workspace you are currently using) (Figure 1.28).
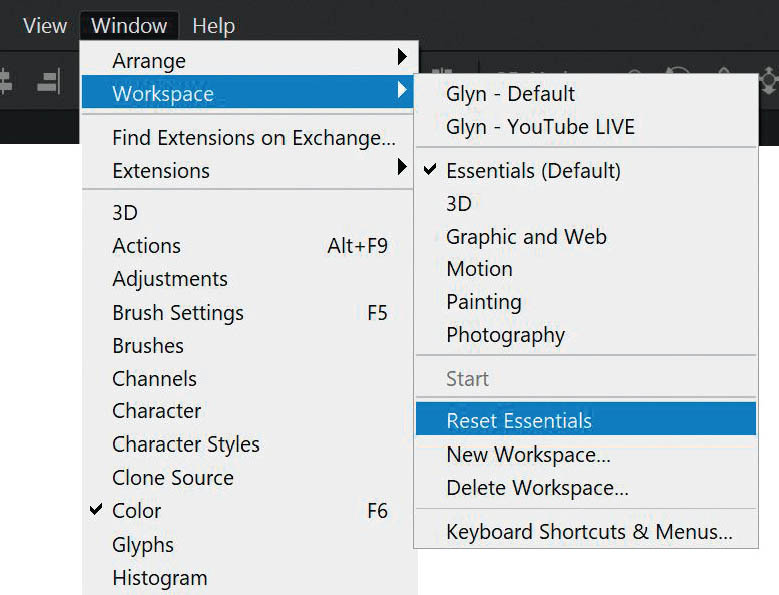
FIGURE 1.28
There’s so much more you can do with the Photoshop workspace; in fact, I could probably write a book on that topic alone. However, that’s not my intention here. I just wanted to give you an idea as to where you can find areas I’ll be referring to, how to rearrange them to suit your preferences, and most importantly, what to do if it all starts to look a bit strange.
I highly recommend you check out the following webpage, where Adobe has covered workspace customization in much more detail: https://adobe.ly/2v7tG78.