
In this chapter, we’ll be looking at ways to help you better capture the most significant events in life: weddings, baptisms, birthdays, family reunions, and holidays.
Unless you’re in the wrong place at the wrong time, you probably won’t be asked to be the official wedding photographer. However, don’t put your camera away. The pictures you get of the wedding party, the wedding itself, and the reception will be a welcome addition to the photos the professionals take.
Whether you’re a member of the wedding party or just a guest, there are plenty of opportunities to get great photos before the ceremony starts.
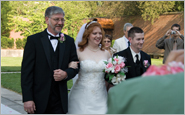
Whether the wedding will be in a church, outdoors, or at a special destination, get some photos of the location before the wedding starts (see Figures 8.1 through 8.3).
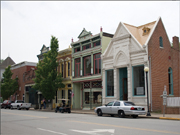
To shoot on a sunny or partly cloudy day, use ISO 200–400 and the appropriate white balance (sunny or cloudy). For architectural shots like these, use Aperture Priority and select a moderate (f/5.6 or narrower) aperture. Scene-based cameras can use Auto mode.
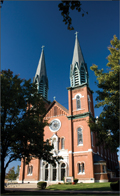
If the wedding will be in a tall building, avoid using a wide-angle lens (1x–2x) at close range for exterior photos because tilting the camera results in distortion, as shown in Figure 8.2.
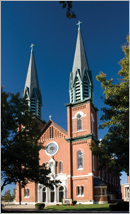
Some image editors, such as Photoshop Elements 6 and later now include a distortion control feature that can straighten converging lines for even better results after the fact (refer to Figure 8.3).
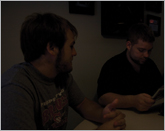
If you’ve been taking pictures outdoors and then move indoors, be sure to change camera settings such as ISO and white balance as needed; otherwise, your indoor shots might be very dark and off-color (compare Figures 8.4 and 8.5).
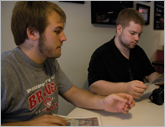
You can make the most of wedding ceremony preparations by using 1x–4x zoom range. For indoor shots without flash (Figures 8.6 and 8.7), use ISO 400–1600 and the appropriate incandescent or fluorescent white balance settings to capture special moments. With scene-based settings, use Hi ISO and choose an indoor shooting mode that provides good white balance.
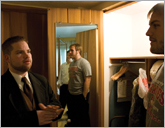
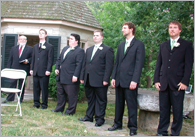
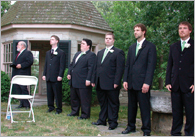
For the best pictures of the procession and the ceremony, get yourself an aisle seat. However, even then, watch out for obstructions (compare Figures 8.8 and 8.9).
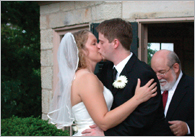
If you’re shooting without flash, watch out for exposure problems that can be caused by the background being much brighter or darker than the subject (compare Figures 8.10 and 8.11).
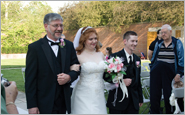
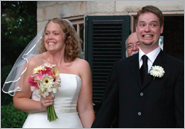
Be ready for both the events you expect (Figure 8.12) and the reaction you might not be expecting (Figure 8.13).
Tip

Most weddings (unlike the examples here) take place indoors. Most built-in flash units can’t recharge fast enough to capture sequences. If you must use flash and you have a camera with a hot shoe for flash, consider buying an add-on electronic flash. They can shoot much faster than built-in flash units, use interchangeable batteries, and provide you with more range.
There are even more opportunities for photos at the reception. The professional photographer will handle events such as the cake cutting and the first dance, so why not shoot something different, such as unusual dance partners (Figure 8.14) or other special moments (Figure 8.15)?

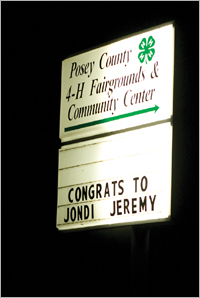
If the reception’s at a public hall, getting a photo of the “Congrats” sign is a nice addition to the album. You can use Auto mode to shoot the sign in the daytime, but at night (see Figure 8.16), you’ll probably need to use Manual exposure and try several different settings because Auto will overexpose the text.
If you want to get better photos of the fun, don’t stick yourself in a corner unless you like pictures of the backs of family and friends. Instead, position yourself so the action surrounds you. If you’re getting flash shots like Figure 8.17 when you use 3x or 4x zoom, increase your camera’s ISO to 400 and you’ll do better (see Figure 8.18).
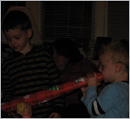
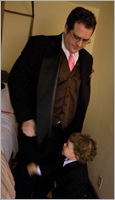
For photos of children, low-angle shots help capture a child’s eye view of the wonders of the occasion (see Figure 8.19).

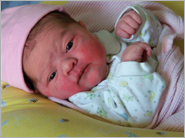
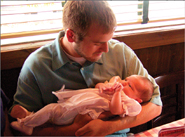
There are plenty of milestones in the life of a new baby, but when they’re new, it can sometimes be hard to get good photos (see Figure 8.20).
If you’d like a break from the usual “hugging the newborn” photos, try using a firm support, use a 3x or 4x zoom, and watch for some intriguing faces (see Figure 8.21).
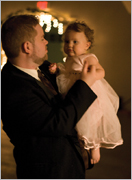
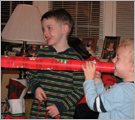
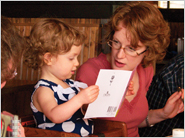
If the new baby has older siblings, watch for special moments between them (see Figure 8.22). Using available light rather than flash helps you avoid interrupting them, so you can take several photos until you get the best one.

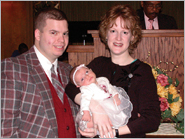
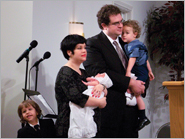
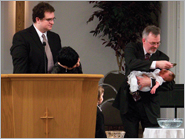
As you remember this special moment, remember that this is a worship experience—meaning that it’s time to turn off the flash until after the service is over. To get good photos without flash, get into the front row, change white balance to incandescent or fluorescent as needed, boost the ISO to 400 or above, and be ready to shoot (see Figures 8.23 and 8.24).
Anytime the extended family or friends get together, whether after a wedding, christening, baptism, graduation, or for the holidays, it’s a great time to take pictures—after all, you’ll never know the next time you’ll see those out-of-town friends or relatives.
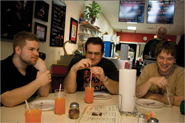
Most people don’t like to see photos of the way they eat, so save the camera for before or after the meal itself. If you’re getting together in the daytime and the location offers good window light, use it along with Auto white balance (see Figure 8.25) so you don’t need to worry about harsh shadows and running down your battery prematurely.
However, if you’re shooting photos of the people next to the window, be sure to boost exposure by +0.7–1.0 EV or so to prevent the backlighting from making the picture too dark (see Figure 8.26).
Wide-angle (1x) shots like Figure 8.27 help you remember the scene and the people in it. Frame your shots to combine the group (you might need multiple shots to get everyone) and the location.
Tip
Having a hard time keeping the camera straight? Use your camera’s focusing frames or optional grid display to help shoot straighter shots (Figure 8.27 could use a bit of straightening).
If you’re eating after dark, or the restaurant doesn’t have good window light, use flash if necessary. If you can’t shoot at a 90-degree angle to your subjects, make sure the angle is not too extreme (see Figure 8.28) so the lighting will be fairly even.