
Auto mode makes taking pictures point-and-click simple. If it’s daylight, if the light’s falling on the front or side of your subject, or if you’re using a flash within 10 feet of your subject, you can use Auto mode to get very nice photos.
To select Auto mode on most cameras:
Turn on the camera.
Turn the selector dial on top of the camera to the Auto selection. Many cameras mark this setting with a green label or a green icon (see Figure 4.1).
Point and shoot.

Here’s what you can control in Auto mode:
Where you point the camera
When to take the picture
That’s it! The camera takes care of everything else. So, what assumptions does the camera make? Typical Auto mode settings include
Auto white balance—. The camera attempts to select a setting that produces accurate colors.
Auto ISO—. The camera adjusts the ISO between a range of ISO 64–80 on the low side to 200–320 on the high side (it varies by camera). These ISO settings are appropriate for bright or hazy sunshine or electronic flash. In fact, Auto mode fires the flash if it determines there’s not enough light for a hand-holdable shot.
Shutter speed and aperture—. These values are selected to enable the average user to get sharp hand-held shots. When the flash is fired, the camera uses the largest available aperture for the best possible exposure in limited light.
Unfortunately, the settings used by Auto mode aren’t always the best ones for every photo. In the next sections, you’ll see the kinds of photos Auto mode does well, as well as the kinds of pictures where Auto mode just isn’t the best choice.

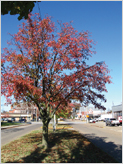
Auto mode does a great job on typical sunny days like the ones in Figures 4.2 and 4.3.

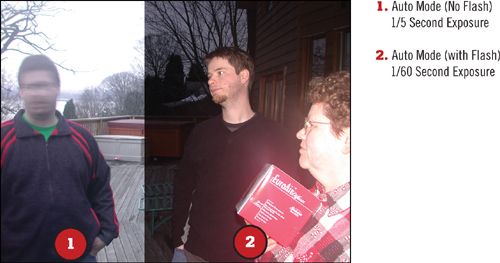
Even if the background is much lighter than the foreground, you can use Focus and Exposure Lock to make sure you get the subject exposed just right (see Figure 4.4).

→ | To learn more about using Exposure Lock, see Chapter 10, “Improving Exposure.” To learn more about Focus Lock, see Chapter 14, “Controlling What’s in Focus.” |
Auto mode also works with indoor subjects just a few feet from the camera, as it automatically uses your camera’s electronic flash (see Figure 4.5).

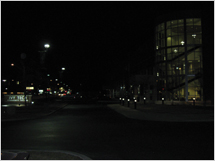
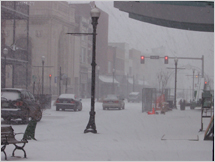
Unfortunately, Auto mode has problems with night scenes (Figure 4.6), fast action (Figure 4.7), snowy days (Figure 4.8), and cloudy days (Figure 4.9), to name just a few less-than-perfect situations.

One of the great advantages of digital photography is the capability to see your photos as soon as you take them. Digital cameras automatically display your photo for a few moments after it is taken. Afterward, use the Playback or Review button on the back of your camera to display your photos. Use the twoway or four-way control pad on the back of your camera to scroll through your photos.
When Auto mode doesn’t do the job, what next? Depending on your camera, you can use one or both of the following methods to get better photos under a wider range of conditions:
Scene modes—. Scene modes provide special combinations of settings for a variety of situations. They can be selected from the control dial on some cameras, the shooting menu, or sometimes in both places. See Chapter 5, “Using Scenes,” for details.
Advanced exposure options—. Select your own settings or help the camera choose better settings. See Chapter 9 to get started.