 Travel Photography Accessories
Those Extra Little Gadgets That Can Really Make a Difference
You’ve probably already realized that I’m a big proponent of traveling light, but that’s only because I’ve done so much of the opposite—I’ve flown to the ends of the earth carrying so much gear it would make Diana Ross say, “Okay, now that’s too much stuff!” See, that’s funny because Diana Ross is famous for traveling with a ton of outfits and bags upon bags, but I kinda get it when you’re talking about Diana Ross because she is a living legend. If you get to Diana Ross’s stature and you can’t carry a ton of bags when you travel, what’s the good of getting to that stature? She’s got to “Go big or go home!” (a catch phrase my sports photography buddy Dave Black uses), but of course, that’s easy for her to say (although I’m not 100% certain she ever said it) because she is an international superstar and I can’t imagine that Diana Ross ever moves any of those bags herself. She probably has staff to carry all her bags for her, because if she had to move them herself, she’d probably say something like, “Okay, now that’s too much stuff.” However, if I were Diana Ross, not only would I have staff to help me move all those bags, I would have a special assistant just to hold my purse and stand near me at all times, similar to the military aide who accompanies the US president and holds a bag referred to as the “football,” which was thought to contain the nuclear launch codes. In reality, the launch codes are on a laminated card carried by the president himself. The “football” is simply used to verify that the president is the real president, in case we are attacked and the president has to launch a retaliatory strike. As I was researching this, I ran across a great article in Smithsonian magazine talking about how one of the actual “football” bags is on display at the Smithsonian museum in Washington, DC, and when it was gifted to the museum and they opened it, they were shocked to find it packed with 10-stop ND filters, a cable release, a bunch of SD cards, and a lens cleaning cloth. True story.
Traveling Light Wins the Day!
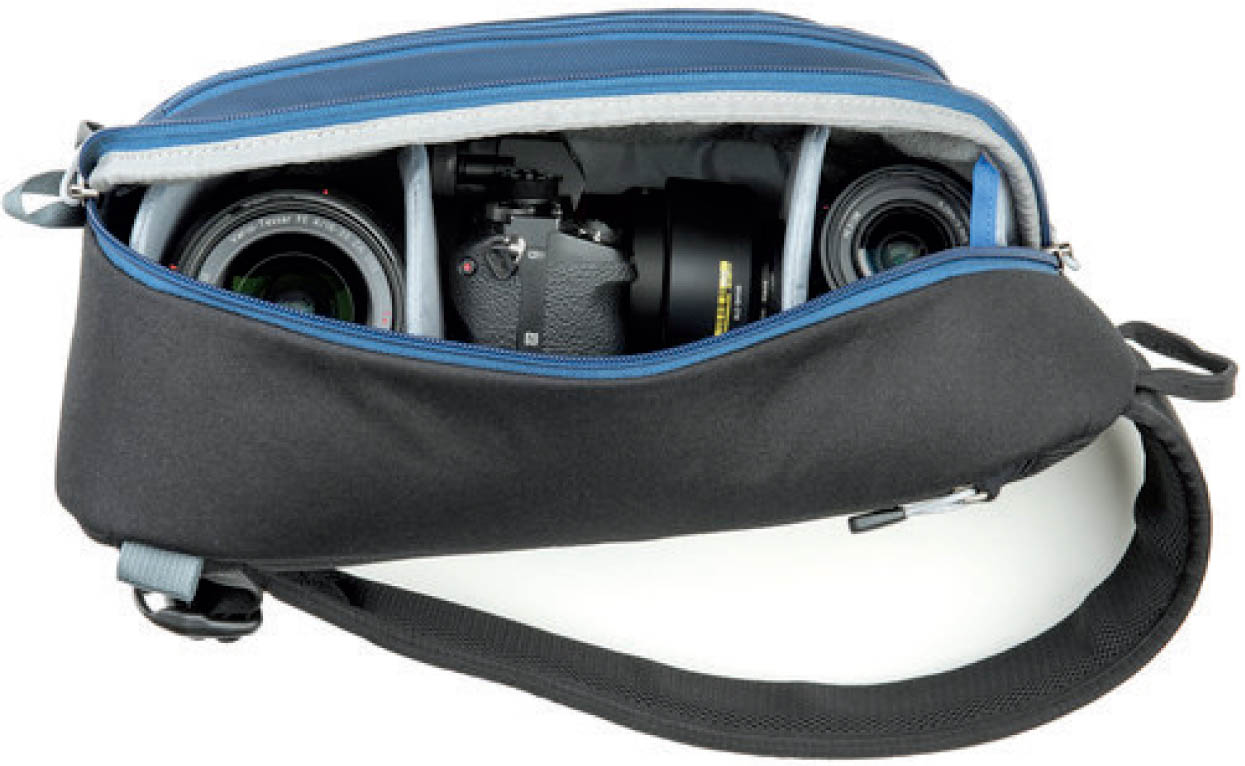
I used to lug large rolling bags of gear with me on trips, until I realized it wasn’t actually making my photography any better—it was making my vacations worse. When I started traveling really light, I not only enjoyed the vacation more, I enjoyed the photography more because I wasn’t lugging a bunch of junk everywhere (and worrying about keeping it safe). If I’m in a situation where I need to have a second lens with me, I carry a small sling bag, like the one you see above, which is the Think Tank Photo TurnStyle 10 Sling Camera Bag. It was made for making changing lenses easy—you swivel the bag in front of you, zip open the main pouch, and you can swap out your lenses easily. It has a number of pockets and it holds way more than you might think. In mine, I carry that second lens (up to a 70–200mm f/2.8), a Platypod Ultra and a ballhead, two ND filters, a cleaning cloth, and four backup batteries. That’s all I really need. Plus, the bag slings safely across your body—kind of like a seat belt—not over your shoulder, so it’s safer than a regular over-the-shoulder bag, which a thief can pull right off you as they run past (dislocating your shoulder in the process). It’s really well made and cleverly designed all the way around. I love it!
Backing Up Your Images While You Travel
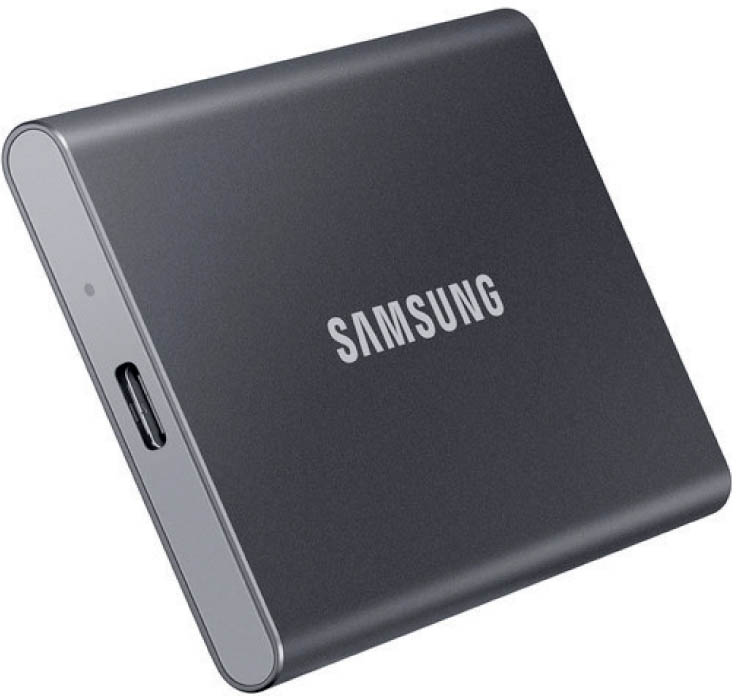
Can you imagine how heartbreaking it would be to travel to one of those “once-in-a-lifetime” destinations, take lots of great photos, and wind up losing them all? Your camera gets stolen or seriously damaged, or something technical goes way wrong, and all your shots are gone forever. I’ve heard sad story after sad story about folks who’ve lost most or all of their shots from a trip—they’re just heartbreaking. That’s why I’m pretty serious about my travel photography backup routine. Here’s what I do: Every night, no matter how tired I am, I back up my images from my camera to an external hard drive, without fail. I also don’t erase my memory cards because they act as a second backup for me (so I have one set of images on the external hard drive, and a second backup on the card). I take a lot of cards with me when I travel, but today’s memory cards are so inexpensive (I just looked at B&H Photo and they have 32GB SD memory cards for $12). The good news is: external hard drives are so incredibly small and lightweight now (like the size of a pack of Dentyne gum), and you can get the same one I’ve been using for a few years now, the Samsung 500GB T7 Portable SSD for $79. It plugs into your laptop (yes, I take my laptop with me on trips, but it stays safely locked in my room safe), and it’s very fast. Now, if you don’t want to take a laptop, you can buy a hard drive with a built-in SD slot that can automatically back up your images for you (which I’ve done on several occasions). You just pop your card in it and it backs up the card’s contents onto the drive, and you can even see the images using a wireless app on your phone (pretty cool, but the images display kinda slowish). I use the WD 500GB My Passport Wireless SSD mobile storage external drive. It’s not as fast or as inexpensive as the Samsung I mentioned earlier, but at least you don’t have to haul around your laptop.
If You Absolutely Need to Take More “Stuff”
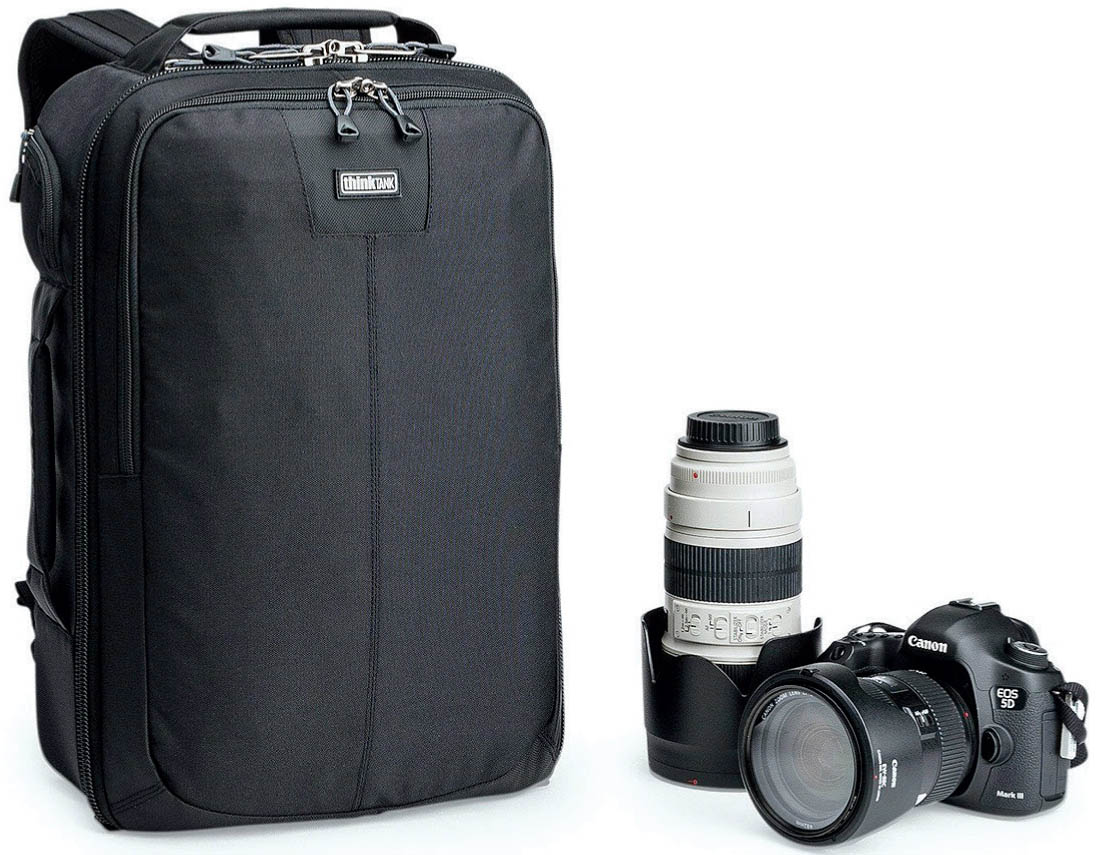
If you feel you just can’t get down to a tiny sling bag for your trip, the next bag up in size I would recommend would be a small (key word here: small) backpack-style camera bag. I have the Think Tank Photo Airport Essentials Backpack, and it’s not nearly as big as it looks in the photo above. It’s actually quite small for a camera backpack, and it holds a bunch of stuff despite its relatively small size. It also fits in the overhead bins of even small commuter planes, so you won’t have to worry about gate checking it in most cases. The only thing to look out for is that with a backpack, it’s possible for a thief to walk behind you, open your backpack, and steal your gear, so make sure you keep a lock on it if you’re in a sketchy area, any heavy tourist areas, or Barcelona (sorry, I had to say it). Outside of that (any time you carry a camera bag, you have to really keep a super-close eye out), it’s the right size for those times when you don’t mind messing up your vacation by carrying way more camera gear than you actually need (sorry, had to say that one, too).
You Might Want a Photo Vest
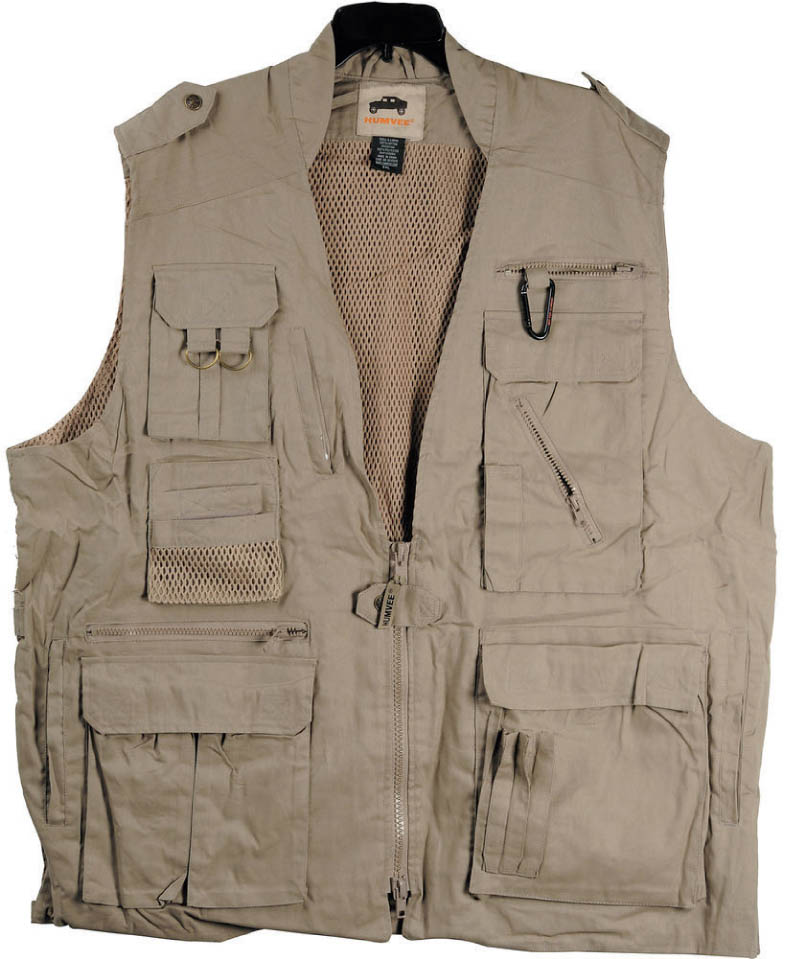
If you don’t want to carry a camera bag, but need to keep a number of accessories with you when you’re out shooting, like filters and cleaning cloths, batteries and memory cards, etc., you might want to consider a shooting vest. They have a ton of pockets with so much carrying room for stuff that the biggest issue you’ll have is remembering which pockets you put your stuff in. They’re fairly lightweight and comfortable, and they come in khaki, black (mine is black), and camo (don’t get the camo for travel). Some of the most popular photo vests are from the Humvee line from Campco (they’re around $50), so think of it as a camera bag without the bag.
Bring Spare Batteries
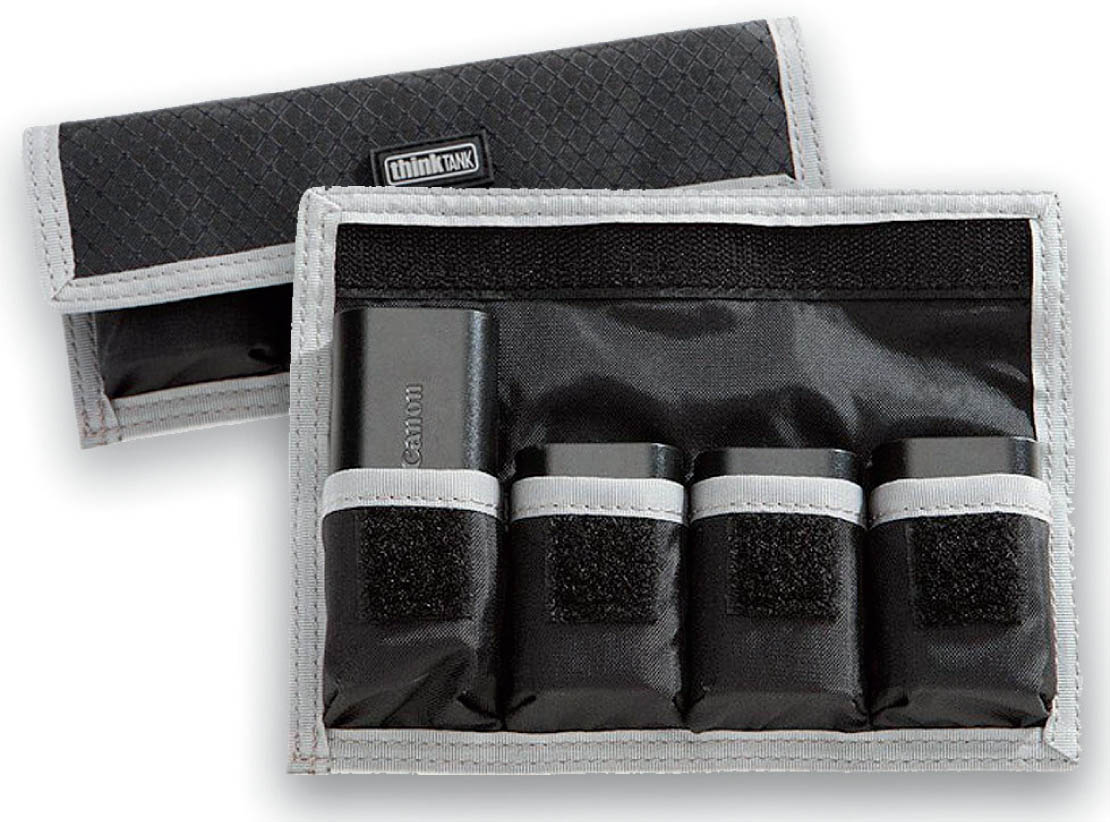
If you’re off gallivanting (there’s a word you don’t get to use everyday) in some foreign land and your battery runs out, two things are likely to happen: (1) you’ll spend the rest of the day searching for a camera battery that works with your camera, and (2) when you finally find one, the price will render you temporarily unconscious for two to three minutes. I’ve had to do this, and believe me, the throbbing pain in your head at the checkout counter will be something you’ll always remember. So, take more batteries than you think you’ll need (because batteries are now cheap too!). I travel with five camera batteries: one in the camera and four in a nifty little battery wallet, like the one you see above from Think Tank Photo (I know I sound like I’m sponsored by them or something, but I’m not—I’m just a big fan and have been using their gear for many years and swear by it), which is only $17 at B&H Photo. However, you can find a similar style battery wallet for around $8 online. Just sayin’. Anyway, I use the same method for managing batteries that you’re about to learn on the facing page for managing memory cards, but the important thing is, don’t run out of batteries (by the way, you can find rechargeable third-party batteries for most major cameras online for literally around $12 a battery, versus $60 or $70 each from the camera manufacturer. And, yes, they work fine—never had a problem).
Memory Cards (and How to Organize Them)
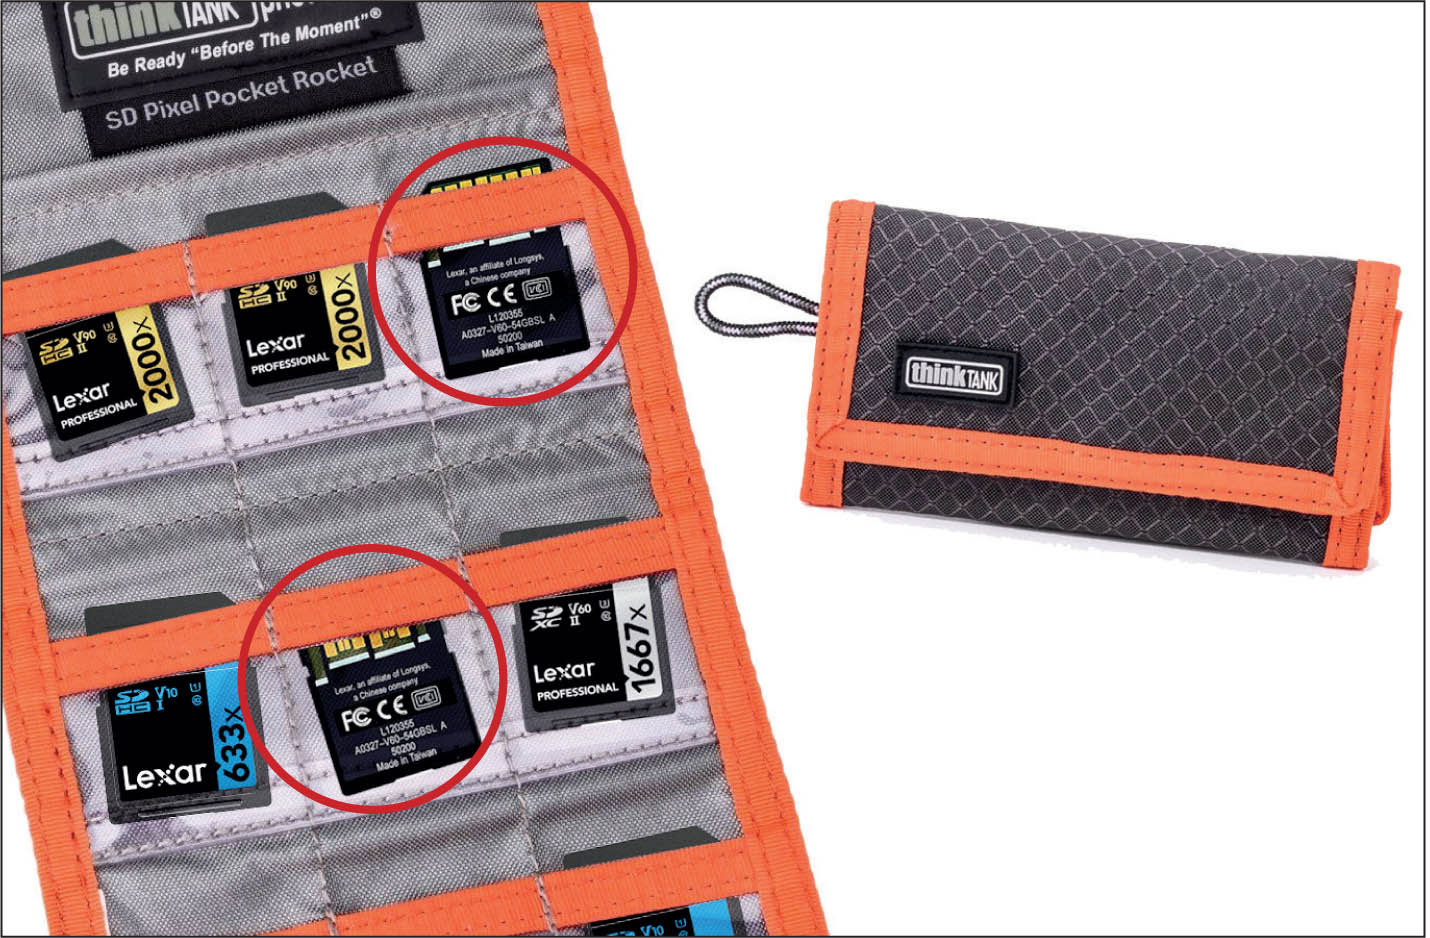
First, how many memory cards do you think you might need for a trip? I figure probably one 16GB to 32GB card a day. It depends on how much you shoot on an average day, and whether you’re shooting in RAW or JPEG. A JPEG file is about 1MB in size and a RAW file is around 20MB to 30MB, so shooting in RAW will fill up memory cards faster. So, if you do shoot in RAW and you feel like you shoot a lot (1,000+ images per day), you might want to shoot on 64GB memory cards. The one thing you don’t want to happen is the same thing you don’t want to happen with batteries—you don’t want to run out at the worst possible time and spend the day searching for expensive replacements. Memory cards are cheap now, so buy a bunch of them so you can use a new, fresh one every day (and leave the ones you’ve shot on untouched as backups of your images). There’s a simple technique I use for keeping my memory cards sorted, so I know which ones are empty and which ones already have images on them that I don’t want to accidentally erase. When I take a card out of the camera and put it in my card wallet (I use the Think Tank Photo SD Pixel Pocket Rocket memory card wallet seen above), I turn the card backward, so I can’t see the label (as seen circled above) and know at a glance that card has been used, and not to use or erase it on the trip. I do the same thing with my camera batteries—I put used batteries in the wallet backward, so I know which ones are used, and which ones are fresh. Both of these help tremendously when you’re racing to switch batteries or memory cards when something really cool is happening in front of you (by the way, memory cards and batteries have a way of going out when you need them most. I think they sense fear). Anyway, having a card wallet like this is more helpful than you’d imagine (this one is $16.75, but again, you can search online and find much cheaper alternatives that look and work pretty much the same).
My Go-To Camera Strap for Travel

I use (and dearly love) the Black Rapid 10-Year Anniversary Edition Classic Retro RS-4 Camera Strap. It’s my favorite camera strap ever (it’s $64, but worth it) and one reason is safety. It goes across your body, like a seat belt, so someone can’t just run by and rip your camera off your shoulder (it happens more often than you’d think) because well…you’d be going right along with them. But, there’s another reason I love an across-the-body strap: your camera sits right at your side, so if you see something you need to shoot quickly, you just reach down and bring it straight to your eye. No having to take it off your shoulder first before you can shoot—it’s awesome for never missing the shot. Plus, it has a little zipper pocket where you can keep extra memory cards or a battery (I put a battery in mine). Another benefit of this strap is how it distributes the weight across your body, so your shoulder doesn’t get sore. It’s a great strap—you’ll super-dig it!
A Travel Tripod

There are five times you really need a travel tripod: (1) When you’re shooting at dawn or dusk, which are the ultimate times to get great shots of a city—the whole city is still sleeping and you’re getting to shoot it bathed in beautiful light. However, that light isn’t bright (which is one reason it’s so beautiful), so you’ll need something (a tripod) to keep your camera perfectly still in those low-light situations. (2) You’re shooting an HDR image using exposure bracketing (see page 117). While you, technically, can hand-hold an HDR shot in some certain bright-light situations, it’s much better if you’re on a tripod to have the shots perfectly aligned with one another when they’re combined. (3) You’re shooting a long exposure, and your camera can’t move—not a bit—while that shutter is open or it will trash your shot. (4) Almost anytime you’re shooting indoors—this is a biggie—a palace, theater, museum, cathedral, small chapel, opera house, etc. And, (5) group shots where you want to be in the shot. Now, you can pretty much use any tripod for travel, but I recommend actually getting a travel tripod, which means it’s super-small and lightweight (if it’s not lightweight, after a day or so, you’ll get tired of lugging it around, and it’ll end up sitting in your room). The one I use is from British company 3-Legged Thing, and it’s their lightweight, aluminum model, the Travis. It folds up really small, it’s lightweight, and it comes with a pretty nice ballhead. They actually make a smaller one called the “Corey,” which folds up even smaller and weighs less, but it doesn’t extend as high as the Travis, which extends up to 65”, so I went with that one. These are very popular, cleverly designed, and well-built, but the brand you get doesn’t matter as much as having one, and having a lightweight one that folds up small. Some other popular travel tripods are from MeFOTO, Oben’s AT-3586 tripod with BZ-226T ballhead, and Manfrotto’s Befree GT travel tripod, which is nice, but pricey.
Or Take a Platypod Instead of a Tripod
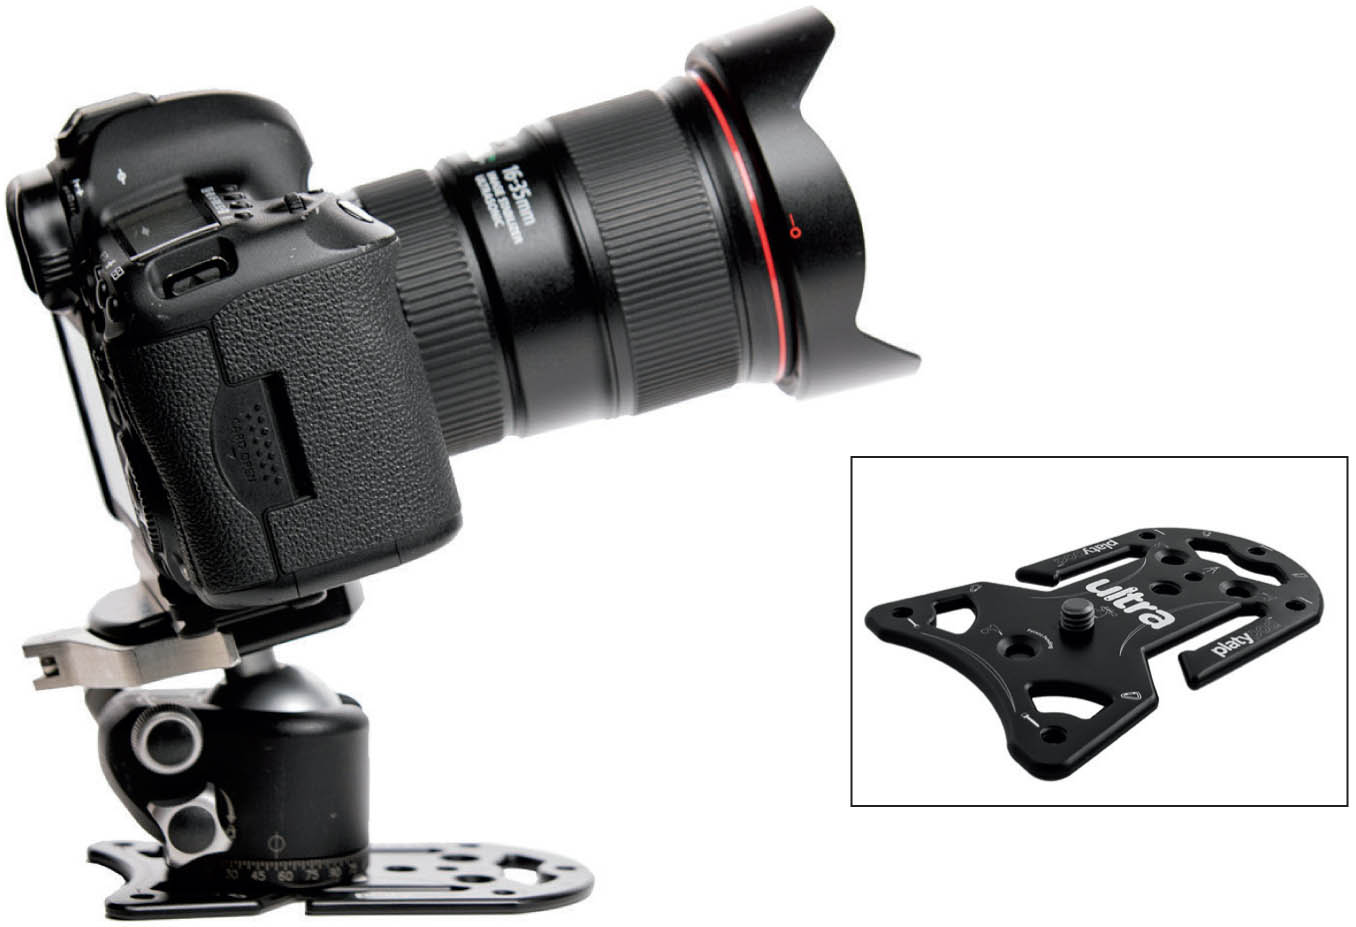
One of the big downsides to tripods is that in more and more places, they’re simply not allowed (especially indoors). A number of monuments and attractions post “No tripods” signs all over and even if they don’t expressly say it, when you set yours up, a lot of times, a security guard will come over and tell you they’re not allowed. That’s one reason why, for the past few years, my secret weapon has been the Platypod Ultra. It’s kind of a tripod without legs because it’s a super-solid base that holds your camera very, very still, so you can use it for long exposures and shooting indoors where tripods aren’t allowed (in all these years, I’ve only been stopped a single time using one of these indoors. Security guards look at it and just walk right by). It’s made of commercial aircraft aluminum, it’s super-lightweight, but crazy sturdy (I’ve used it with my 70–200mm f/2.8 hundreds of times), and it’s so small you can literally fit it in your shirt or jacket pocket. When you take it out, you screw a ballhead into the plate, put your camera on the ballhead, and now you can put your rig on the floor (which I do often, especially in cathedrals or palaces where I can use my wide-angle lens, since seeing the ceiling is important). It comes with metal spikes, in case you want to put it on some rocks or another unlevel surface, and it’s made so you can strap it to a railing or a pole (I did this in Hallstatt, Austria, and it worked amazingly). You can not only use it in places where tripods aren’t allowed, but you can use it in places tripods can’t fit. Full disclosure: Platypod is one of the sponsors of my weekly photography podcast, The Grid, and I’ve become friends with its inventor Larry, who is a pediatrician and avid photographer. I don’t get a kickback or a fee or anything if you buy one, but I can tell you they have fans all over the world who dearly love their Platypods like I do, for the same reasons I love it. You’ll dig it, too.
Using a Tripod? You’re Gonna Need a Ballhead
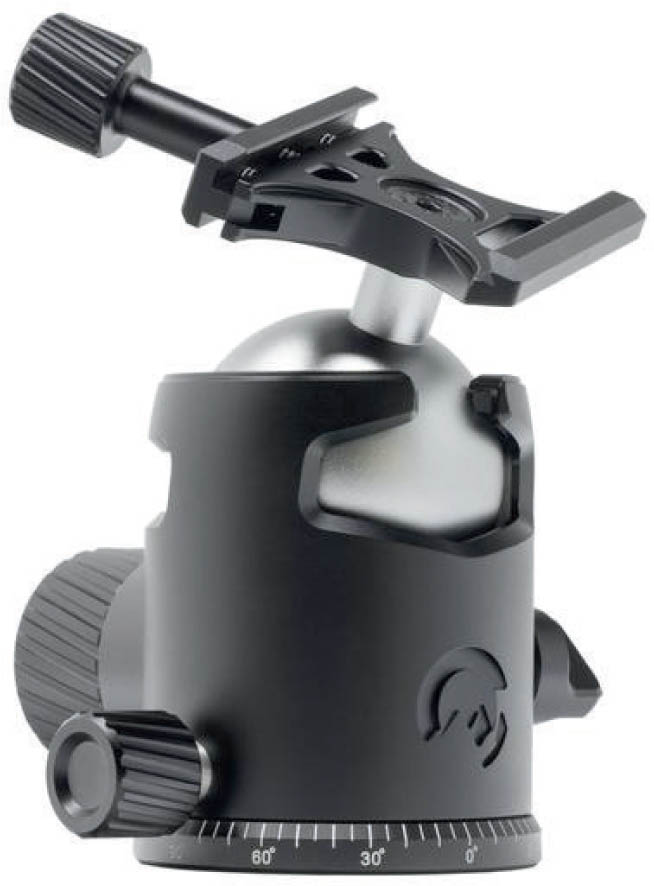
A ballhead goes on top of a tripod. It’s the thing that goes between the tripod and your camera. Your camera attaches to it, and it’s what you use to aim your camera. Without a ballhead, your camera would just aim straight ahead. You wouldn’t be able to tilt it up and down—you’d screw it onto the top of the tripod and it would stay stuck there, so ballheads are an important part of this whole “keeping your camera steady” scenario. If you’re buying your first travel tripod, you can find lots that come with a ballhead as part of the package price (like 3-Legged Thing’s travel tripods), but if you don’t get one included with your tripod…well…you’re going to need to buy one. I have a number of different ballheads I’ve picked up over the years (some came with the tripods I bought). The one I’m using right now is really nice—it’s from the Colorado Tripod Company, and it’s their Highline ballhead. It works great on my tripod or on my Platypod Ultra, it’s light, and it’s really well made (especially for the price—around $129, which is pretty reasonable for a nice, quality ballhead because you can spend $650 on a ballhead without breaking a sweat. Well, I’d be sweating that my wife would find out I spent $650 on a ballhead, but you know what I mean).
Some Kind of Cable Release

The whole idea behind a tripod or a Platypod Ultra is that it holds your camera absolutely, perfectly still. Any little movement, any minor bit of shaking while the shutter is open, and you’ll wind up with a soft or blurry photo. You know what causes your camera to shake a little when it’s on a tripod or Platypod? Your finger. When you press the shutter button, it literally shakes the camera a tiny bit—just enough to make sure you don’t get a super-sharp shot. How do you get around this? You don’t touch the camera. You use either a wireless shutter release or a cable release, which attaches with a cable to your camera, so you don’t actually touch the camera, but instead, you touch the shutter button on the end of a cable that takes the picture for you without you ever touching the camera body itself. It’s a must, must, must if you’re going to use a tripod or Platypod. You can get name brand ones, like Canon or Sony or Nikon, but they cost a lot, or you can do what I do, which is buy a simple release—no fancy LED readouts, no long list of features, just a cable and button. Plus, it’s small and super-lightweight, which gets lots of points in my book. The one you see above is the Canon version (for around $21), but most major brands make their own cable releases, and you can spend nearly $100 if you want. However, unless you have a particular need for more features (like you want to do time lapses and that feature isn’t built into your camera), just keep it simple (and cheap). Also, besides releases that attach with a cable, there are also wireless remotes that are small and very lightweight, but make sure the one you buy works with your exact make and model of camera.
Shooting with an App Instead
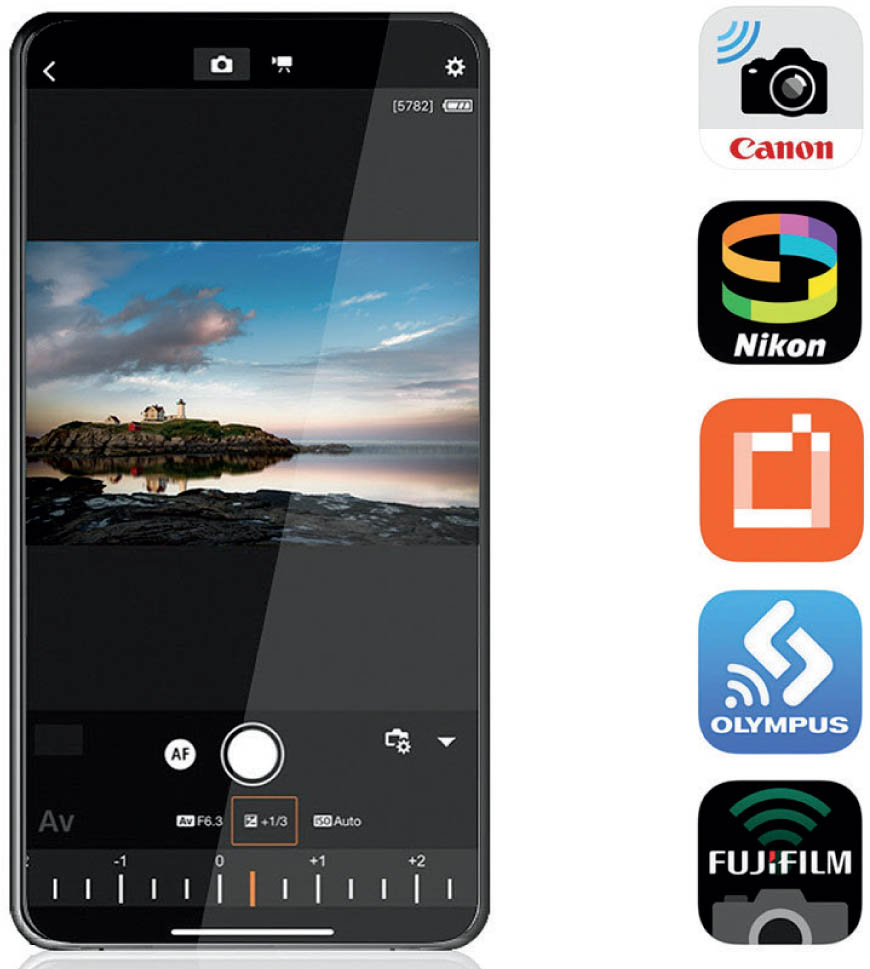
If your camera has built-in wireless and Bluetooth (most cameras these days do), here’s something you might consider instead of using a cable release, as it has its own distinct advantages, one of them being it’s free. That’s right—F, R, double-E, free! You simply download the free app from your camera manufacturer onto your phone (a few are shown above), connect it to your camera, and now you can not only fire your shutter button wirelessly without touching your camera, you can change your camera’s settings and even see a preview of what the camera’s seeing right from within the app. Download them where fine apps are sold (or, well…given away in this case).
Why You Might Want a Polarizer
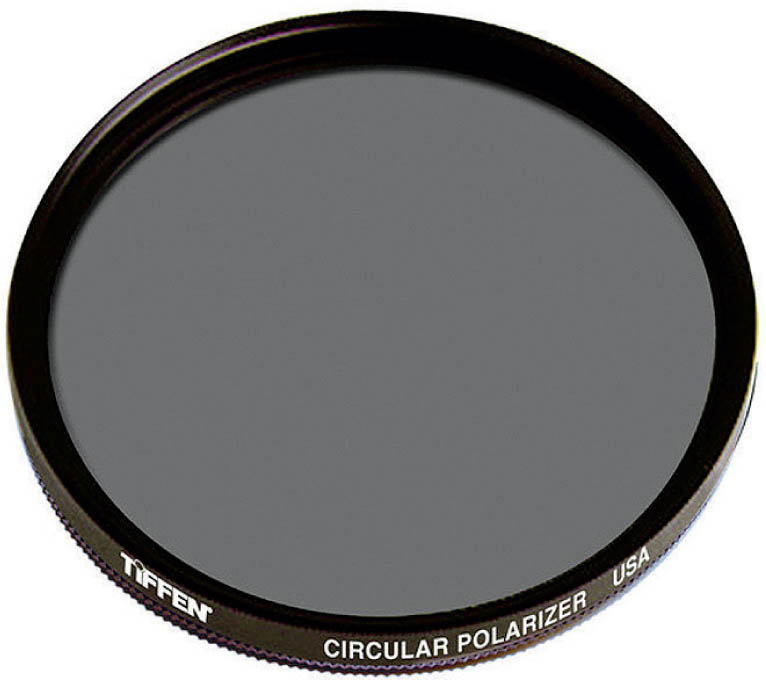
You might be wondering why you’d need to bring a circular polarizing filter on a trip if you’re not going to be shooting landscapes. Say you’re going to Berlin or Prague or Toyko, and you’re thinking you’re going to leave yours at home because you won’t be shooting that many scenes with big skies, right? That’s probably true—you won’t be doing a lot of landscape-type shots (unless you head out to the countryside)—but that’s because you’re thinking of a polarizer as a filter that makes your skies bluer, instead of what it does for travel photographers, which is cuts reflections. It’s brilliant at it, in fact—it cuts reflections in windows (including shop, store, restaurant, and car and bus windows), in water and metal, anything that reflects the sun, and it can come in really handy in so many instances. They’re small, lightweight, they screw right onto your lens, and you don’t need some crazy expensive one (you can get ‘em for around $28 at B&H Photo). So, toss one in your bag because hey, ya never know, you might wind up shooting one of those big sky landscape images, and then you’ll have a polarizer with you anyway.
An ND Filter for Taking Long Exposures

I’ve fallen madly in love with long exposures for travel. I used to just think of them for waterfalls and streams, or for streaking car lights in a city, but there are so many wonderful things you can do with them—from getting rid of tourists (see page 187), to creating wonderfully streaky skies, to making choppy water in a lake or harbor smooth as silk. To get your camera to keep its shutter open long enough to make a long exposure without overexposing your shot to death, we use a neutral density filter (I use Breakthrough Photography’s, seen above. They’re fantastic quality!). Now, we don’t call them “neutral density” filters because we don’t have time to say such a fancy name—we’re too busy charging batteries and backing up images. We call them “ND” filters. These ND filters are super-dark, like tinted-windows-on-a-limo dark, and that’s all they do—screw it on the end of your lens and it makes everything really, really dark. Because your camera sees the scene is now so dark, you can leave your shutter open for a long time before creating a proper exposure (in short, before the images look bright enough). ND filters come in different darkness levels. For example, a 3-stop filter makes things a little darker, so it’d be fine to use on an overcast or really cloudy day to get a longer exposure, but I prefer a 10-stop filter when shooting in the day, so you can keep your shutter open longer even in bright sunlight. I have both filters—a 3-stop and a 10-stop—so I can use the right one based on how bright, or not bright, it is outside. But, there’s another advantage: you can screw the 3-stop on top of the 10-stop and it has a multiplier effect where I’ve been able to leave my shutter open, in the middle of the day, for 14 minutes (crazy, I know). An ND filter is one of those “must have” filters for travel and once you start using one, it opens a whole new world (well, at least a new world of sitting there waiting for your long exposure to be finished anyway).
The PhotoPills App

If there is one app that every photographer on the planet needs, it’s the PhotoPills app. It’s not for shooting on your phone—it’s for helping you make better images with your DSLR or mirrorless camera, and it has so much information packed into it, it’s insane. It does everything from telling you exactly where the Milky Way is going to be in the sky on any given night (now, or in the future), so you can plan out your shots in advance (along with an Augmented Reality overlay of the Milky Way on your current scene. It’s crazy!), to timers for taking long exposures, to all the exact info for sunrise, sunset, blue hour, and twilight every day, to a calculator for doing time lapse photography. But, it’s so much more than that—it’s just packed with so much stuff, it’s like having a really smart photo assistant right there with you (except it won’t lift heavy stuff like a real assistant).
You’re Gonna Need a Cleaning Cloth

This is such an overlooked thing, but it’s so important, and I have photographers show me shots where I can tell they haven’t cleaned their lens in a long time (maybe ever). The whole image just looks a bit soft, and they think something’s wrong with their lens. There is. It’s dirty. And, it’s not just the front of the lens that gets dirty and needs cleaning—it’s the rear element (that small, round glass area inside the tube that fits into your camera body) that needs cleaning. You need to carry a microfiber cleaning cloth with you. Keep it in your back pocket or sling bag or purse or photo vest—just have it on you. The Sensei Microfiber Lens Cleaning Cloth is 5 bucks at B&H Photo. Get two because you’ll probably lose one. Well, I did.