 Other Cool Stuff to Shoot
Well, That Headline Kind of Kills the Need for Me to Write a Subhead. Still Did, Though
When it comes to shooting travel, there are the obvious topics (monuments, tourist attractions, palaces, etc.) that you’re definitely going to wind up shooting (you don’t need a book to tell you that), but then there are the less obvious things, things you might not have thought of, and features on your camera that allow you to do things—especially as they relate to travel—that maybe you haven’t tried. One feature that is found in more of today’s mirrorless cameras is MMM, which is an acronym for “Make More Magical,” and which essentially adds kind of a “fairy dust” overlay effect on your photo. Now, at first you might be thinking, “Well, that’s kind of dumb” and “When am I going to use something like that?” But think about it: when Tinkerbell appeared onscreen and tapped her magic wand (I’m not certain why Tinkerbell had a wand in the first place, but let’s not focus on that), and it added a bunch of fairy dust over the image of Sleeping Beauty’s castle, did you ever stop to think, “Wow, that makes the shot look really bad!”? I bet that never crossed your mind, and the main reason is: “fairy dust makes everything better,” which is probably why Sony first introduced this feature in their a7 II full-frame mirrorless back in 2014. Of course, it wasn’t long before Canon introduced their version in the EOS 5D Mark II, which they called “Pixie Dust,” followed by Nikon, who named their version “Sensor Dust,” which really didn’t catch on the way they thought it would. It’s a shame, too, because they had the best implementation of a fairy dust overlay I’ve ever seen. Well, with the possible exception of Fuji, who released a version called “Grated Cheese.” In the launch’s press briefing, they said they chose the name because “like real grated cheese, anything you sprinkle it on is made better.” It was removed from Fuji cameras, starting with the Fujiflim X-A2, and the company rep who came up with the name was subsequently fired and now owns a Chem-Dry Carpet Cleaning franchise in Sun Valley, Idaho.
Shooting a Time Lapse

Time-lapse photography is awesome for combining movement with the passage of time, and a popular example would be setting up your camera on your hotel balcony and letting the time lapse run from sunset to sunrise. Your camera takes a photo at certain intervals, and it does this unattended, so you start it and let it run for the amount of time you choose (like one shot every 10 minutes, or one shot every minute, etc.). Once it’s done, you compile your time-lapse images together so they display rapidly (usually no longer than 30 seconds), then save it as a video (you can do this right within Lightroom, or do it all on your phone, which can automatically compile the images into a video for you—see page 128), and you get this amazing movement over time which has a real documentary-style feel to it (it’s easy to get hooked on doing these. They look awesome and some of the most amazing time lapses I’ve seen have been travel-based time lapses). Many cameras these days have a built-in time-lapse feature (though sometimes it’s called “interval” shooting in the menus), and you essentially choose how many shots you want to take in total, over what period of time, and then put your camera on a tripod or another sturdy surface and let it do its thing. If your camera doesn’t have this feature, you can buy a cable release that has an intervalometer (time-lapse) feature built right into it (they’re around $45, but it’s both a time-lapse controller and a cable release all in one, so that’s a little easier to swallow).
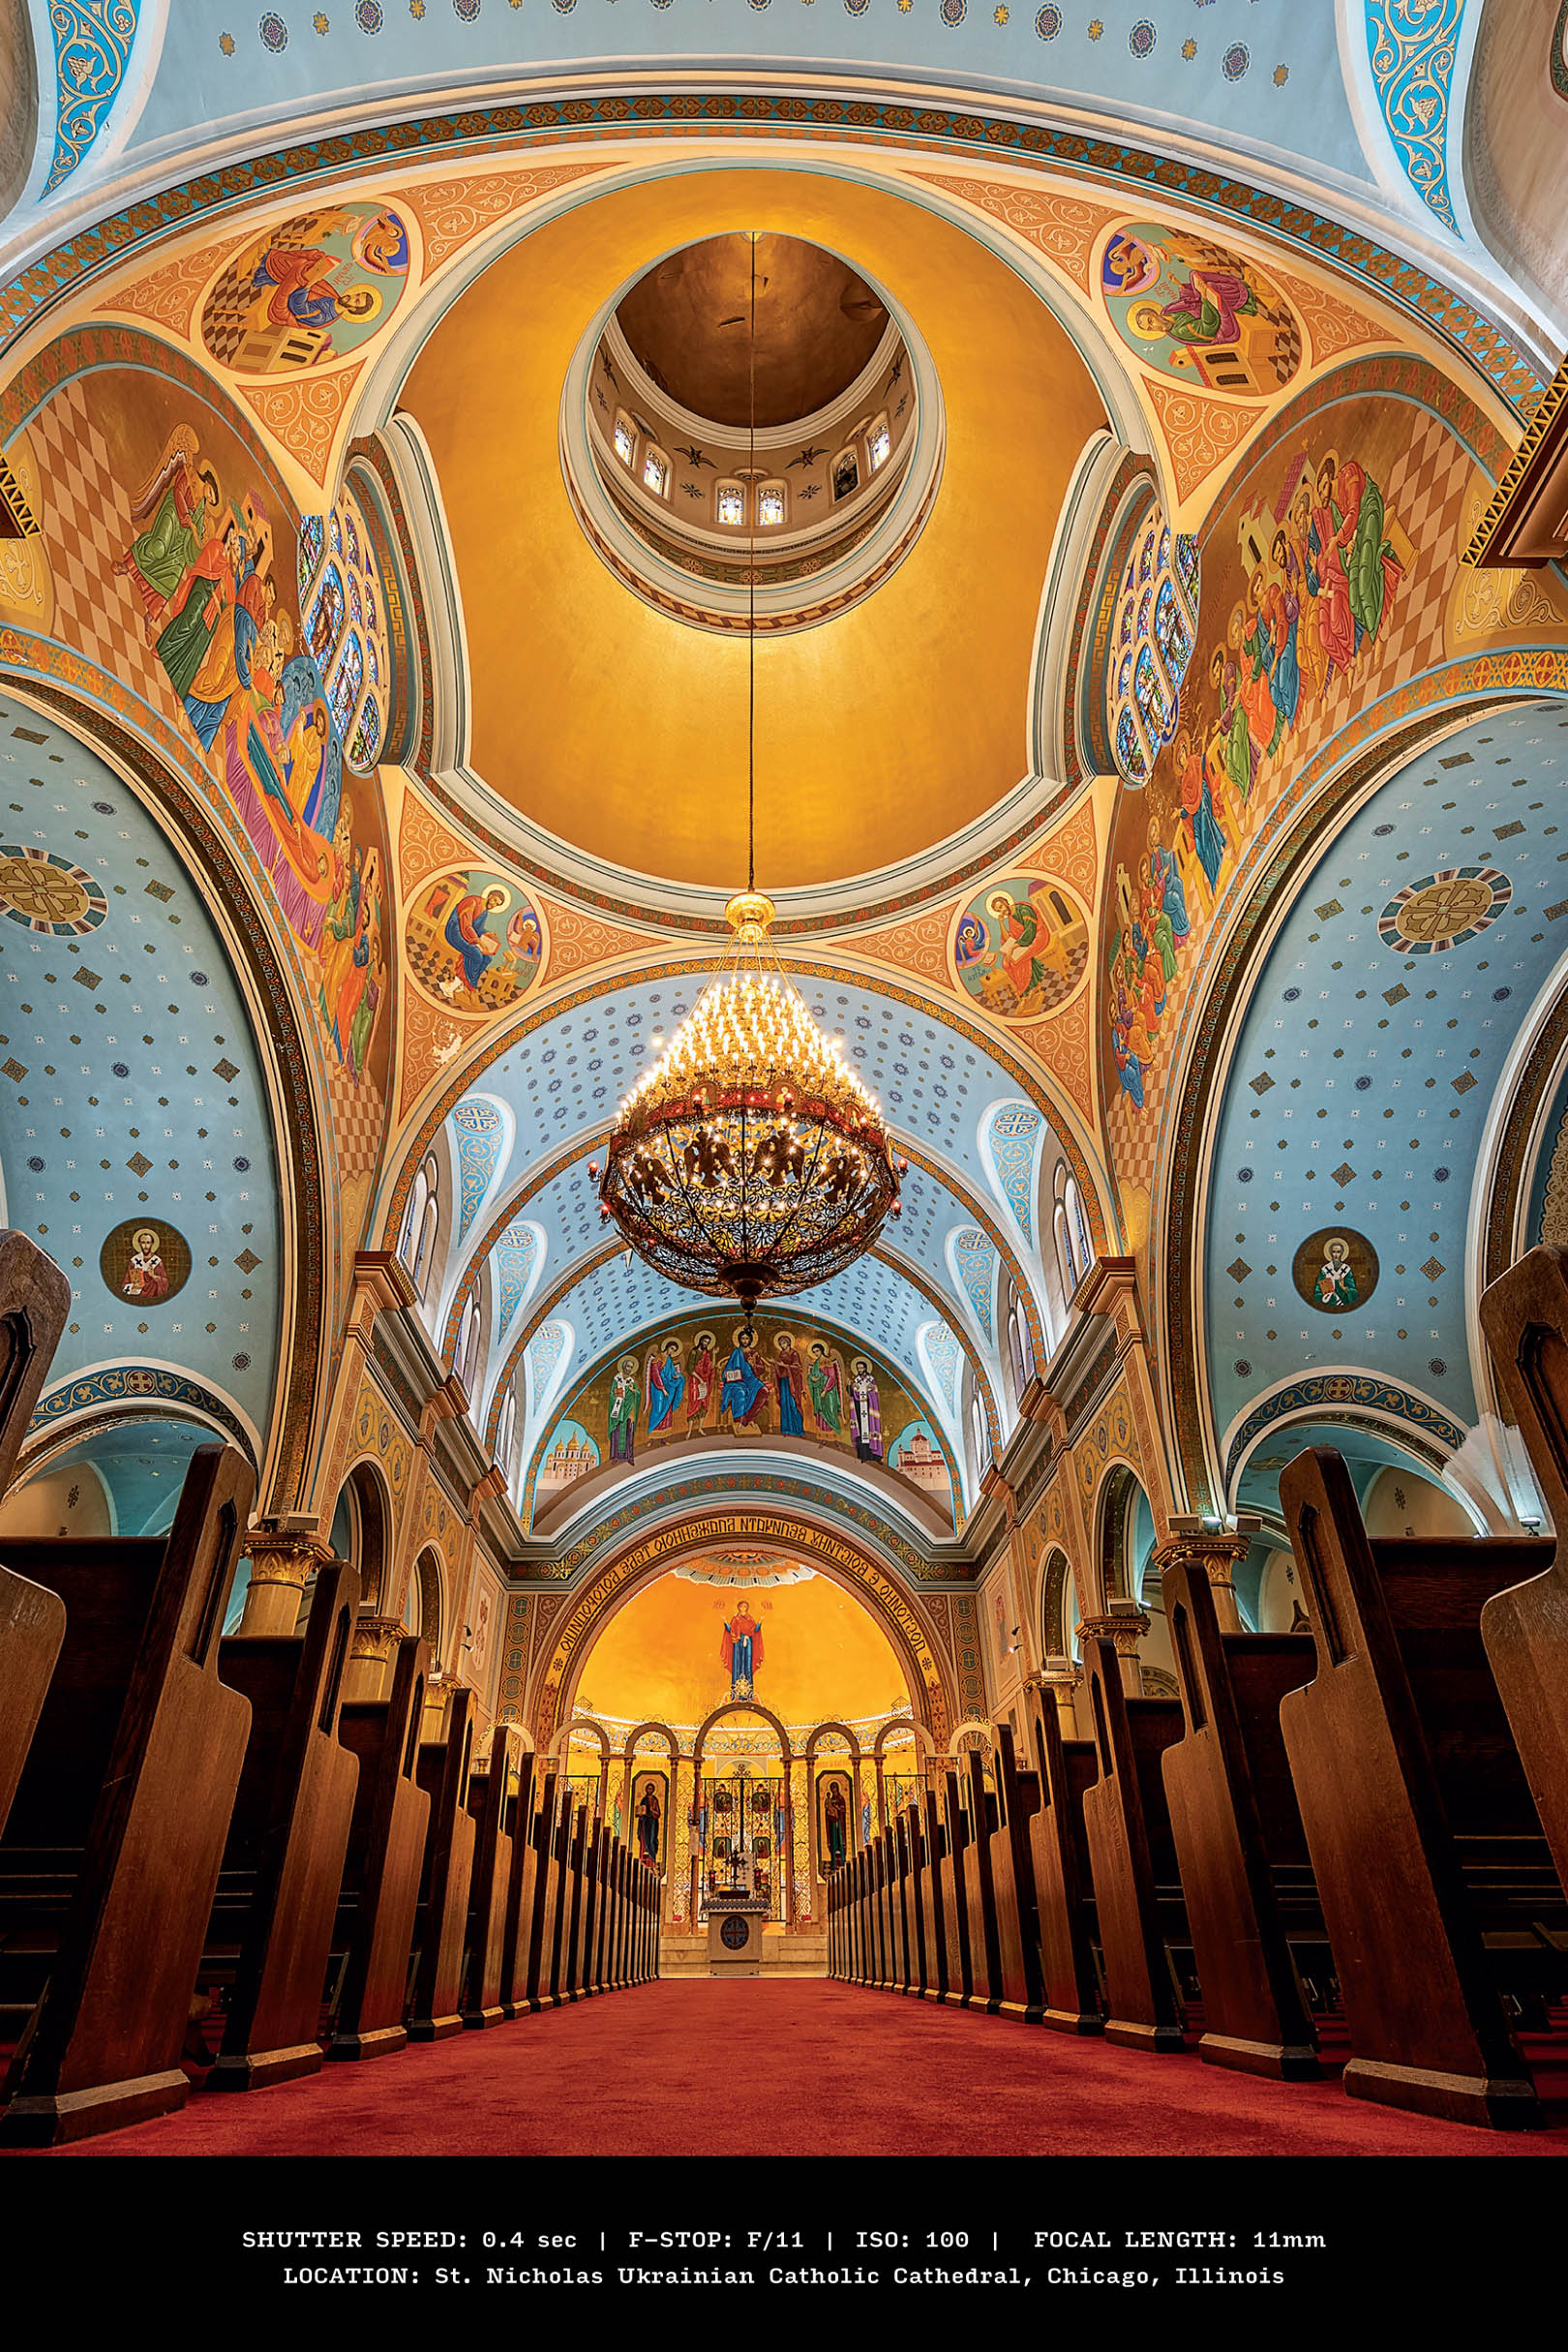
Shooting Long Exposures
A long exposure with a neutral density (ND) filter is wonderful for showing movement. What probably comes to mind first is how awesome it looks on water—think fountains and waterfalls that are smooth and silky instead of frozen, or a lake that’s smooth and misty instead of choppy—or on clouds. I also use it for getting rid of tourists (see page 187). There are so many great things you can do with one that an ND is usually the only filter I have when shooting travel. Using a high-numbered f-stop, like f/22, will force your shutter to stay open longer, but unless it’s a cloudy, overcast day, or nearly sunset, that alone won’t be enough. You’ll need an ND filter (see page 71), which goes over your lens, darkening the scene to force your shutter open for long periods of time (from a few seconds to 10 or 15 minutes), so you can get that water really silky, or those clouds streaking across the sky. Using an ND filter is easier if you’re shooting mirrorless. Just screw it on, and if you think your exposure is going to be longer than 30 seconds, switch to Bulb mode, which lets you keep your shutter open as long as you hold the shutter button down. Then, using a cable or wireless shutter release (see page 68), lock that button in place for as long as you need to make a proper exposure. How long do you need to keep that shutter open? There are apps that’ll do the math for you. I use NDTimer (for iOS or ND Filter Timer for Android) and PhotoPills can also do this (see page 72). They’re awesome. Tell the app what your shutter speed was before you screwed on the filter, then tell it how dark a filter you’re using, and it tells you exactly how long, in minutes and/or seconds, you’ll need to keep that shutter open. If you shoot DSLR, there are two extra things to do: (1) Set your focus before you screw the filter on, and switch the Auto Focus button on your lens off, so it doesn’t try to refocus. Then, (2) cover your viewfinder with a piece of black tape, so light doesn’t leak in and ruin your photo.
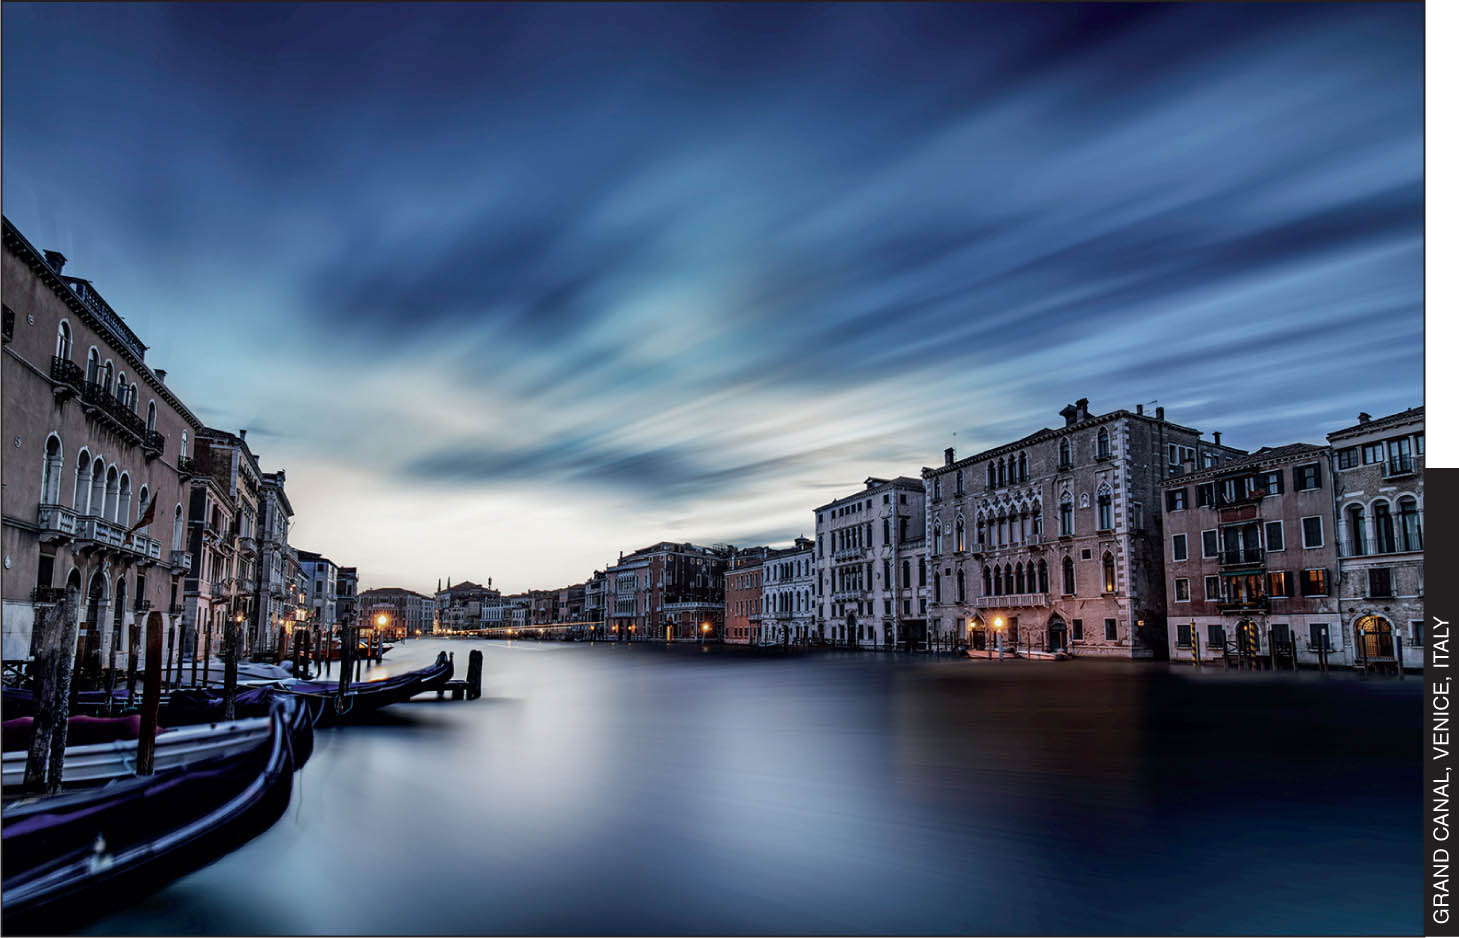
Shooting Panoramas

I shoot a lot of hand-held panoramic shots (called “panos,” for short) when I’m traveling, and not only is it easy to shoot a pano, Lightroom or Photoshop will do all the work of putting it together for you. It really couldn’t be easier. First, the camera part. There are only two things to do setting-wise: (1) Set your focus on the scene, and then turn the Auto Focus button off (it’s right on the side of your lens). (2) Set your f-stop at f/11, so everything’s in focus, and then let the camera choose your shutter speed. Then, look in the viewfinder and make note of the shutter speed it chose for you. Now, switch your shooting mode to manual, and then dial in f/11 for your aperture, along with whatever shutter speed you just saw in your viewfinder. Doing this ensures that neither your focus nor your exposure will change while you’re making your pano. (Note: All that is not always necessary. I’ve shot literally 100+ panos where I didn’t change either of those on my camera and they came out fine. But, if you want to be really serious about panos, technically, you should do those steps for the best results.) Now that your settings are in place, as far as shooting goes, just make sure each frame overlaps the previous frame by around 30%. That’s it. That’s all Lightroom or Photoshop needs to make the magic happen (I go into exactly what to do in Lightroom or Photoshop to combine these multiple images into a single panoramic image on page 228).
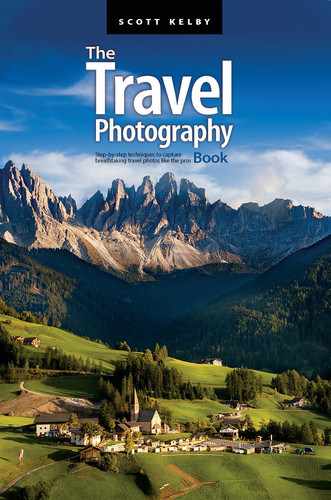
Shooting High Dynamic Range (HDR) Images

The human eye can see an incredible range of tones, from really dark areas to super-bright areas, and it automatically adjusts so we see everything. It’s really remarkable. For example, let’s say you’re in a beautiful city, inside a towering Gothic cathedral with tall, stained glass windows on either side. You see everything perfectly as you’re standing there, but when you take a picture, the stained glass windows are totally blown out—no detail, no color, no nuthin’. That’s because your camera doesn’t have nearly the range of the human eye—it can’t handle that huge change in tones, so it either makes the windows blown out, or if you darken the exposure enough so the stained glass looks okay, then the cathedral is so dark you’ve lost all the detail. That’s where HDR (high dynamic range) comes in. Your camera takes a series of shots with different exposures (for example, one normal, one two stops darker, and one two stops brighter), and then you combine them in Lightroom or Photoshop into one image with an incredible amount of range—more than any sensor can capture on its own. You turn this feature on by enabling Exposure Bracketing on your camera, and then you turn on the camera’s self-timer, set to 2 seconds, press the shutter button once, and it takes all three photos for you (if you’re in a low-light situation, like shooting in a cathedral, you’ll get the best results if you shoot on a tripod). That’s the camera part—I’ll show you how to combine those three images into one HDR image on page 229 in the post-processing chapter.
Shooting HDR Panos
Okay, if you’re feeling really adventurous, you can not only create a pano or an HDR, but you can have both all in one. Lightroom and Photoshop can both combine the multiple HDR frames into single HDR frames, and then take all the resulting frames and combine them into a single RAW image. But, before we get to the post-processing part (I cover that on page 228, and I also created a video for you, which you can find on the book’s companion website mentioned on page xiii), here’s what you need to do to get the shots you’ll combine: (1) Turn on Exposure Bracketing in your camera (so it takes three shots: the normal exposure, one that’s two stops darker, and one that’s two stops brighter). And, (2) take your first set of three photos (see the previous page for how to shoot an HDR), then aim to the right a bit, making sure this second frame will overlap the first one by around 30%, and then take all three bracketed exposures. You keep repeating this process of aiming your camera to the right a bit, still overlapping by 30%, and then taking all three shots, before moving to the right again to repeat it. When you’re done, you’ll have a lot of frames, but you’ll have a super-high-resolution image with an incredible tonal range.
Shooting the Milky Way

If you’re somewhere far away from the lights of a city (known as “light pollution” in astrophotography circles), and it’s a clear, cloudless night, you might have an opportunity to capture a stunning shot of the Milky Way. There are a few things you’re going to need to make this happen: First and foremost, a tripod and some kind of cable release or wireless shutter release (see pages 65 and 68). Next, you’ll need a wide-angle lens, preferably one that can shoot using a very low-numbered f-stop (like the Rokinon 14mm f/2.8 that I mentioned in Chapter 3. It’s inexpensive and very popular with astrophotographers), because while you see the Milky Way looking very bright in photos, it’s really not that bright in real life, and you’ll need to get as much light into the camera as possible (that’s why the low-numbered f-stop helps). You’re still going to have to majorly crank up your ISO, but not as much if you have an f/2.8 lens. Okay, that’s the gear part (and one of the camera settings—you’ll shoot at f/2.8). Your shutter speed will probably be around 15 seconds (if it goes too much longer, all your stars will be blurry because of the rotation of the earth. You may be able to go a little longer, but not more than 30 seconds). As I mentioned, you’ll have to crank up that ISO, probably to around 6,400 to get the stars bright enough, but don’t freak out—on a solid black night sky, you won’t see the noise like you normally would (just give it a try and you’ll see). Also, you’ll either focus your lens to Infinity (it’s that little sideways 8 thing on your lens), or you can use your camera’s Live View (on the back of your camera), and if your camera has a focus peaking feature, turn that on. So, the settings are simple. The “make it or break it” of whether you get a great Milky Way shot will be how clear the sky is at your location, and how far away you are from any light pollution from a city, or a gas station, or other cars.
Shooting at Night
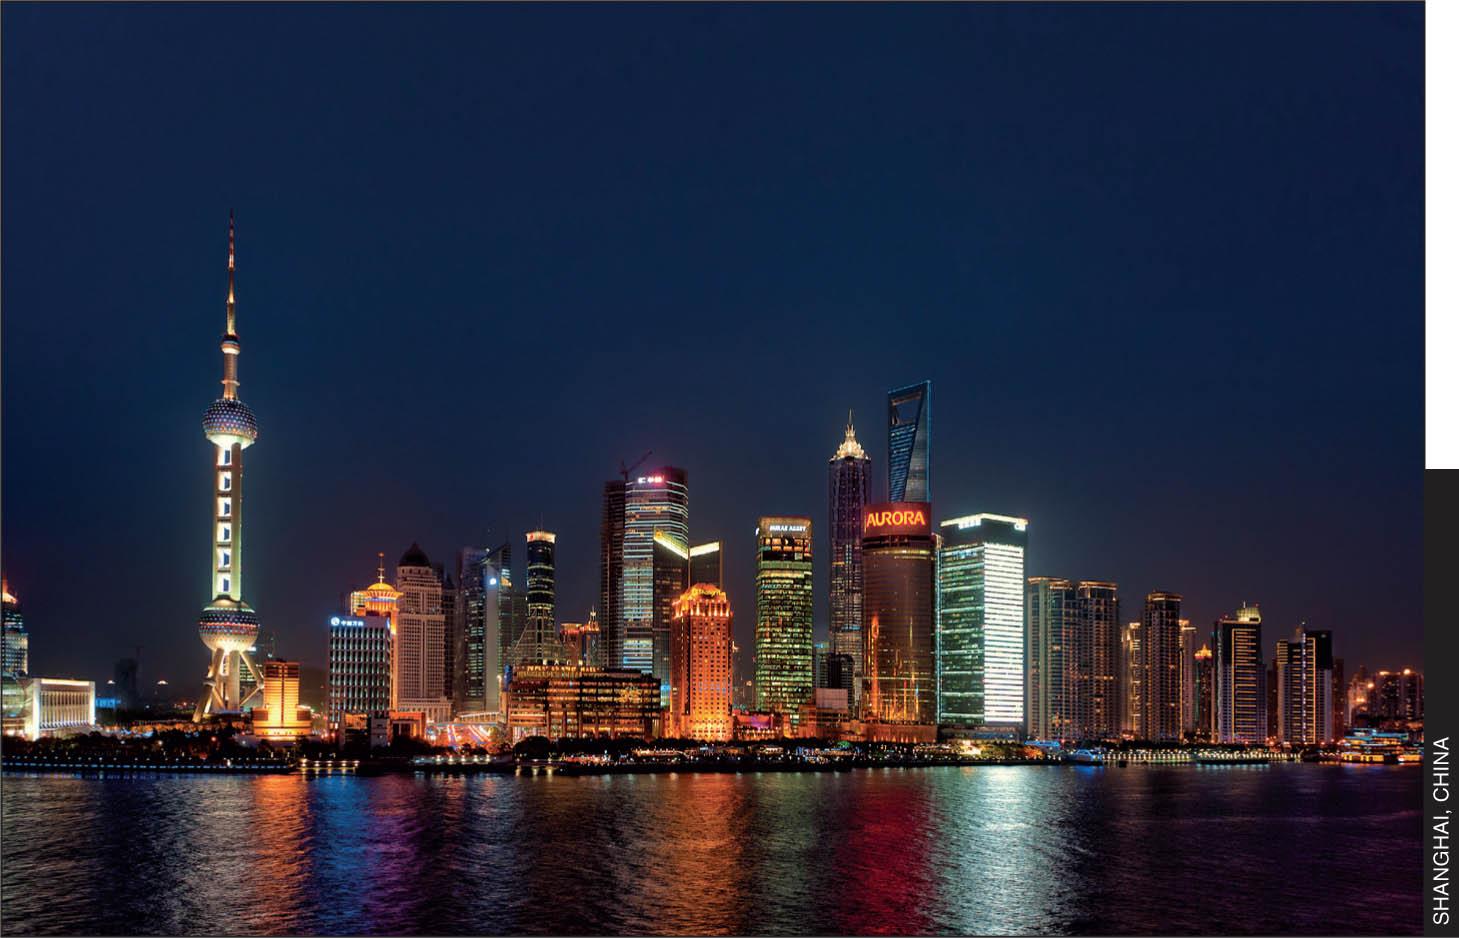
I have two tips for shooting travel at night, and the first one goes against something I’ve been saying in this whole book, which is to shoot in aperture priority mode, which almost always works great until it comes to shooting at night. The problem with shooting in aperture priority at night is that your camera tries to make a balanced exposure. When it sees a dark sky and dark scene overall, it thinks it needs to make things brighter, and…well, it usually overexposes the night sky and the shot looks kind of funky. That’s why, when it comes to nighttime shots, I switch to manual mode. If that freaks you out, don’t let it because we’re going to use a trick to make this easy. Start in aperture priority mode and look at the settings it chose (knowing they’re going to be a little too bright). Remember those settings, switch to manual mode, and dial in the same f-stop and shutter speed. Now, you know it’s too bright, right? So, just darken the scene by choosing a higher-numbered f-stop. So, for example, if we know it’s a little too bright with the f-stop set at f/5.6 and the shutter speed the camera chose, then try f/8 or f/11 and the whole scene gets darker. Just pick the f-stop that looks good to you (and looks like a normal night shot). The other tip is to try some of the different White Balance settings. In particular, try a cooler (blue) white balance and it’ll make your black look a bit blue, giving kind of a futuristic look to the city at night. Give those two things a try—they’ll make a difference.
Shooting Reflections

The secret to getting beautiful mirror-like reflections doesn’t happen in your camera. There’s no special technique for it. The secret happens in your alarm clock because the time of day that you’re most likely to find glassy, still water like this is right around dawn. It’s this calm time before the wind starts up and the water gets choppy that you can get these reflections on lakes and ponds and harbors. An hour after dawn and it’s already too late, so set that alarm early to get those perfect glassy reflections. Note: This shot was taken in Norway’s Lofoten Islands at a time of year when the sun actually never sets, so you get hours and hours of beautiful light (and in this case, still water) even though this was taken in the middle of the night.
A Twist on the Standard Vacation Photo

When we usually include someone from our group in a shot (a friend, family member, boyfriend/girlfriend, etc.) they’re facing directly toward the camera, smiling, and essentially, posing in front of the scene. It’s one of those, “Look I’m in London” type of shots we take, and while we do want to capture these types of shots (they’re perfect for sharing on Facebook), they’re not designed to capture the moment or feeling—they are essentially “vacation photos” (and there’s nothing whatsoever wrong with that. I take them on every trip). However, there’s a different type of shot that’s very popular on Instagram right now, and that is to include someone from your group in the shot, but have them not look at the camera. Instead, they’re part of scene, and you’re seeing them enjoying the location (like you see above), rather than just posing in front of it. You get an entirely different feeling from these shots that often showcase the joy of travel in a way that just posing in front of the camera can’t do. Give some of these a try next time and see what you think. I think you’ll wind up doing them more often.
Showing Movement
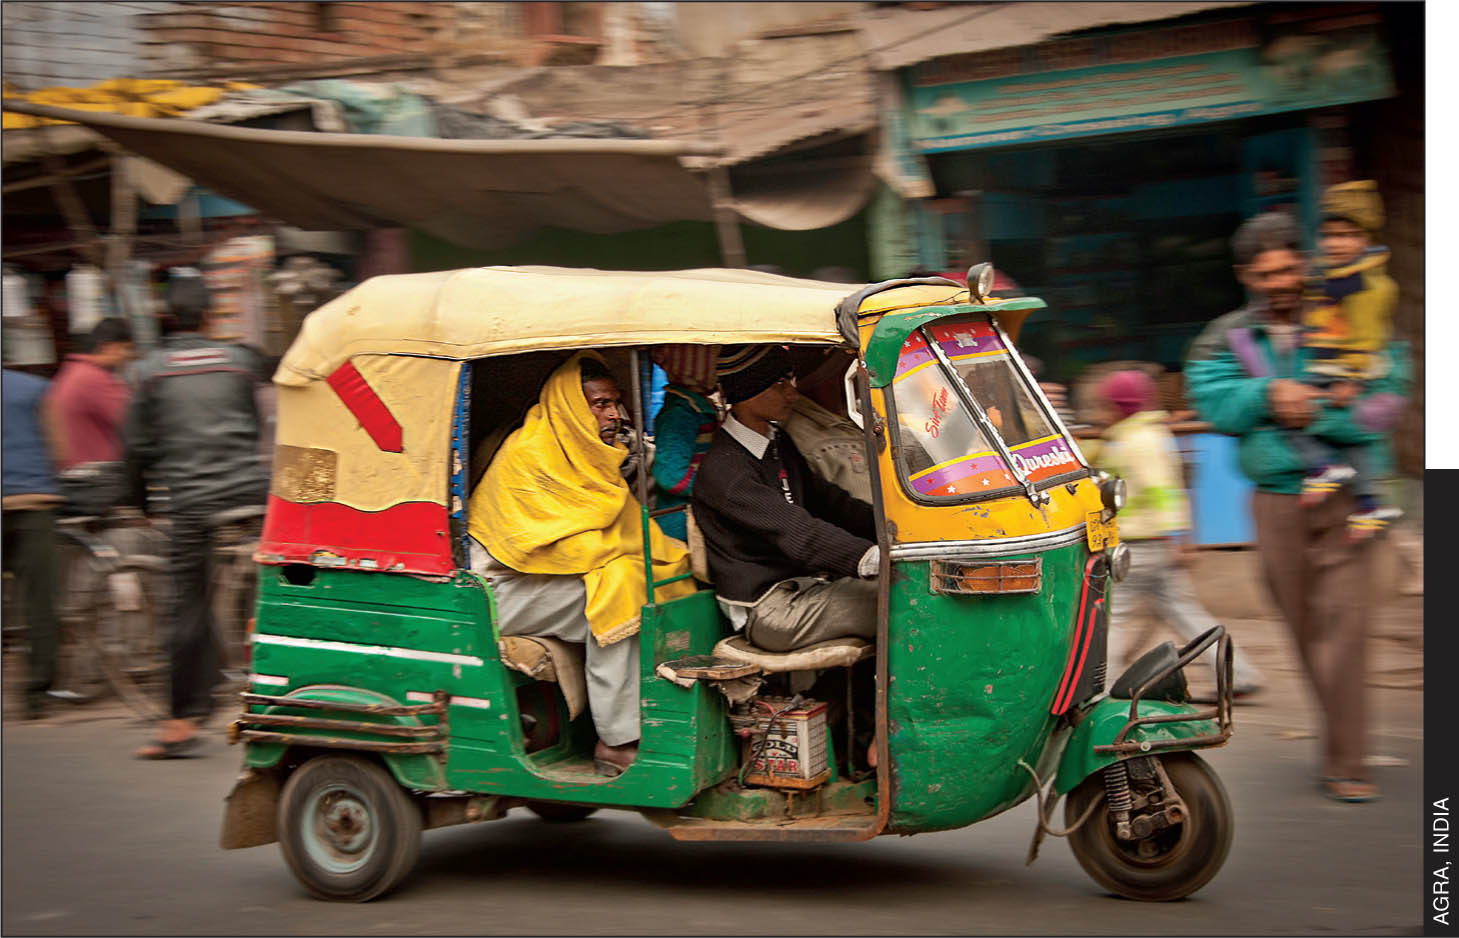
Generally, with travel photography, we’re freezing everything (it’s that whole “freezing a moment in time” thing), but there are times when not freezing everything and showing motion brings a photo to life (and shows a different view than we normally see). There are two camera techniques that work together to create this sense of motion: First, keep your shutter open longer than normal. Really fast shutter speeds (like you get on a sunny day) freeze motion, but slower shutter speeds blur anything moving (and the longer your shutter stays open, the blurrier it gets). The easiest way to get this motion effect is to shoot on a tripod (so it’s perfectly still) on either a very cloudy day, or some place very shady, or sometime late in the day when your shutter, with less light, would have to stay open longer. You can also choose a high-numbered aperture, like f/16 or f/22, which will make it stay open longer if you’re shooting in aperture priority mode. The darker it is where you’re shooting, the longer that shutter will stay open to make a proper exposure, so you don’t want direct sunlight (unless you have an ND filter—see page 71). Another technique is the one I used above where I switched to shutter priority mode (you choose the shutter speed and the camera picks your f-stop for you. It’s usually an “S” on your camera’s mode dial), chose a slow shutter speed (like 1/60 of a second, or even slower) and panned (followed along) with the moving object. The goal is to try to move at the same speed as the moving object, which keeps it mostly sharp and in focus, but the wheels will look like they’re spinning, and the background will have blurry movement, too. This panning technique takes a bit of practice, so don’t be surprised if you wind up with a lot of blurry shots. Within that bunch of blurry shots, you’ll probably have one or two nice, sharp shots (I mean, how many shots are you going to show of a three-wheeled rickshaw driving by?).
Fine Art Style
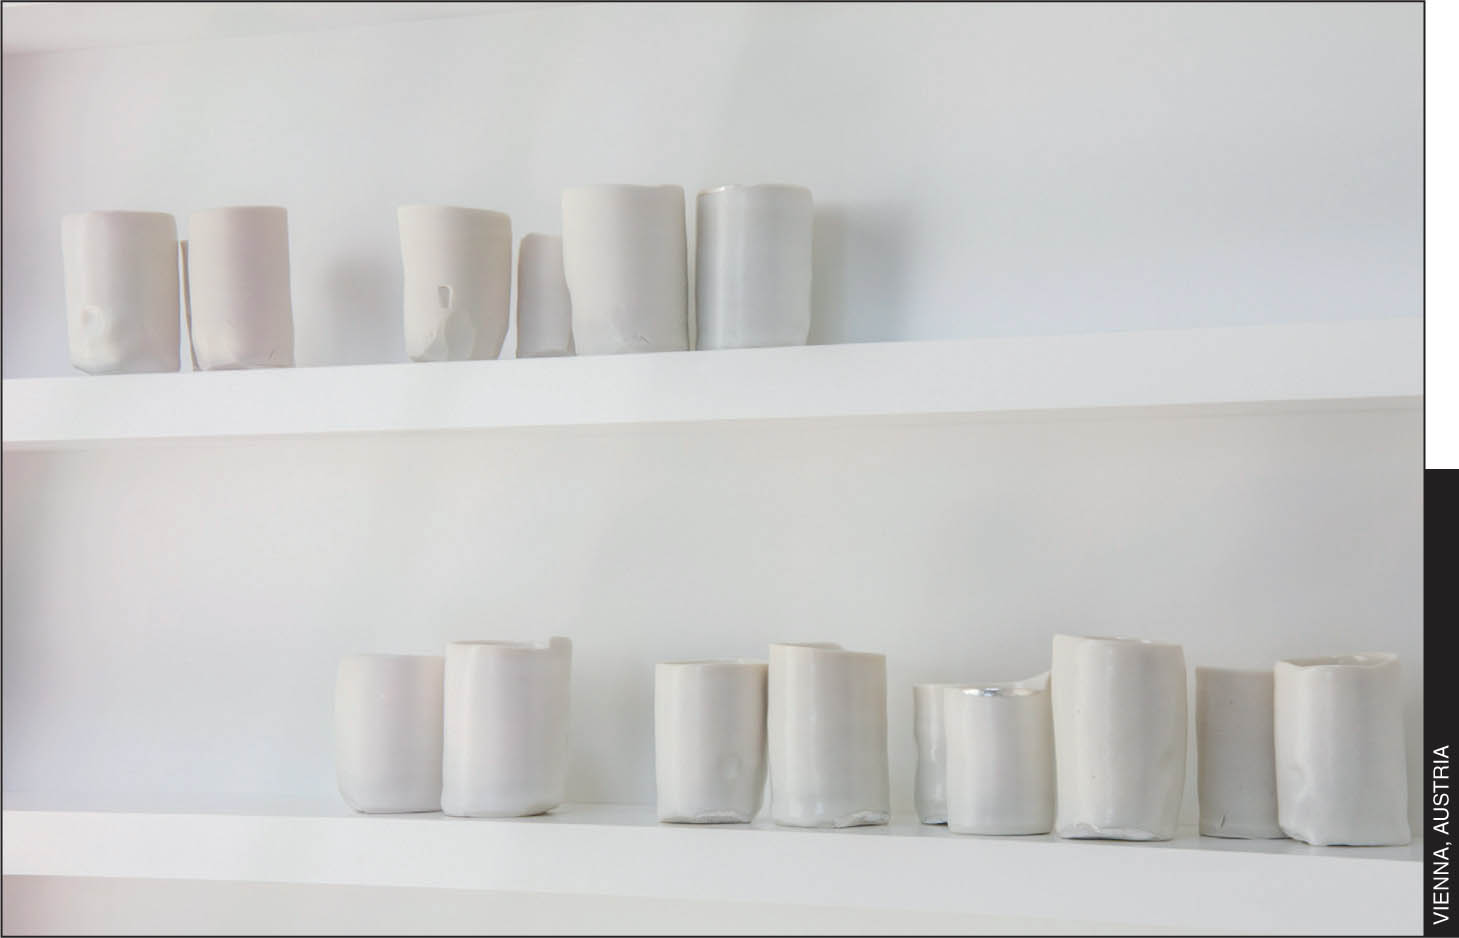
I always joke that if you can’t really describe what’s in the picture, then it’s “fine art,” but if I had to describe fine art travel photography, it’s a particular style where you see something interesting and you capture it in a creative way. You’re expressing more of an idea or a feeling than you are showing a place or a monument. You’re not trying to show a scene or an object for what it is—you’re interpreting that scene in an artistic way. All of this is why it’s so hard to pinpoint what fine art is (but you’ll know it when you see it). The image you see above was taken in Vienna, Austria, and I’m not certain where I saw it, but it really intrigued me, and I wanted to capture it in a way that made it interesting. But, at the end of the day, it’s just a shelf with some white glasses (I’m not even sure they’re glasses. Maybe they’re mugs. Maybe they’re made of clay. I can’t really nail down what they are, so—boom—must be fine art). Keep an eye out for opportunities like this to step aside from the standard things we shoot in our travels and try something different.
Give Yourself a Magazine Assignment
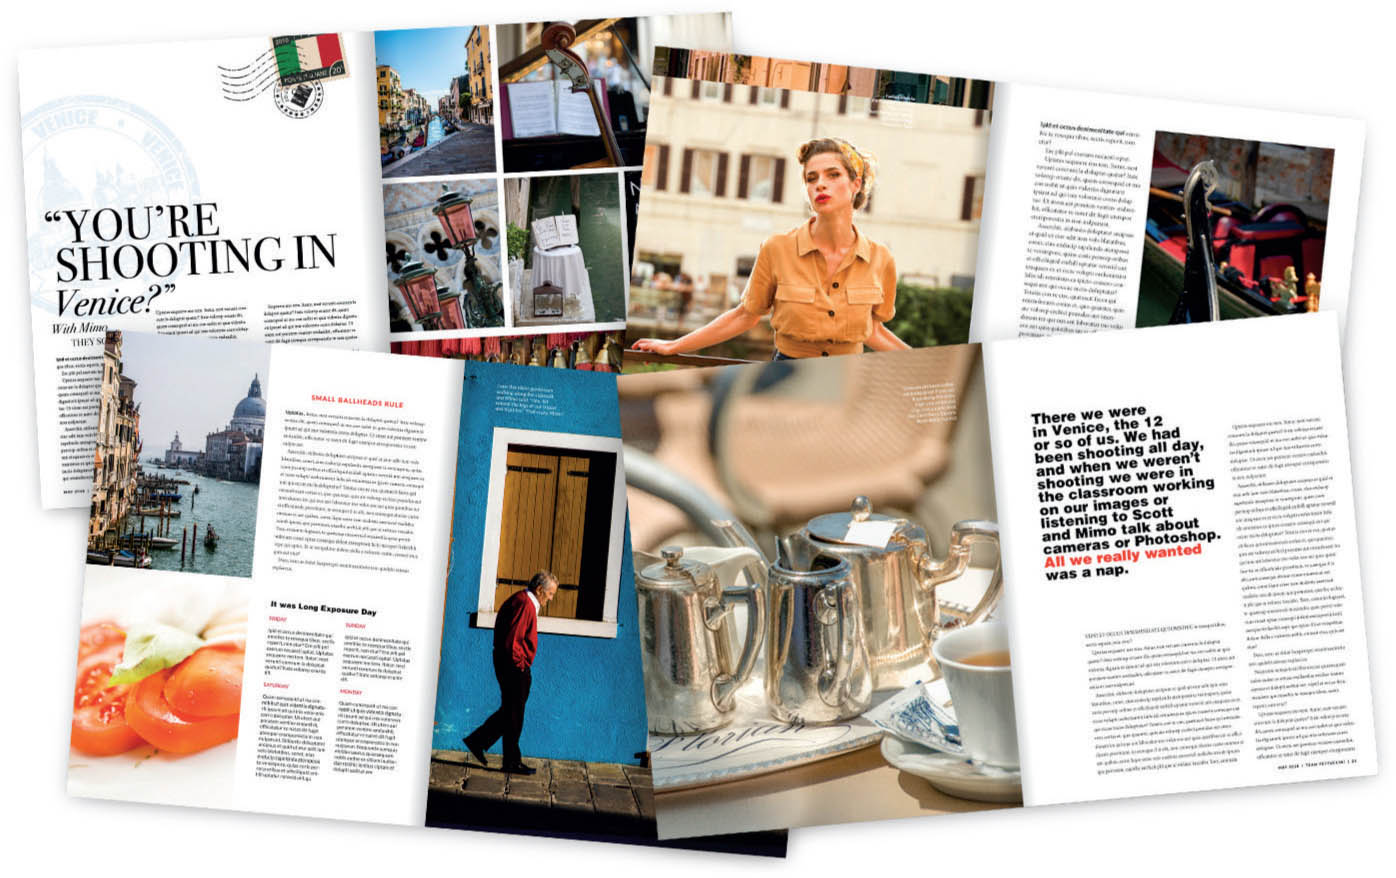
If you get to a city and you’re stuck—you’re not sure what to shoot, or you feel you’re not coming away with the type of images you wanted—try this: imagine that you’ve been sent to this city on assignment for a magazine, and you have to come back with photos that make people want to visit that city. First, it makes you stop and think about the story you want to tell. What is this city famous for? Is it the food? The architecture? A particular monument? The fashion? Really give it some thought and it will give you a starting place and a game plan to keep you moving forward. This is a lot more fun than it sounds, and it will pull a different perspective out of you that you’ll see in your images. When I do a hands-on workshop in a city, on one of the days, I send my students out for two hours on an assignment just like this for a fictional magazine. They choose their best images from those two hours, and then I lay them out travel-magazine style (like you see above), so they can see how their images work, and we’re all always surprised at how great the shots come out. When you have a clear goal, and you have to deliver on time, it pushes you in a very creative and fun way.