INTRODUCTION
There is light on everything we see. The color and quality of that light and how it interacts with our surroundings deeply affects our relationship with the world around us, and thus how we choose to portray it in our sketches. Learning how to accurately replicate different lighting circumstances can give sketches a better sense of realism. Mastering lighting can also help with decisions outside of reality, to help you sketch what you wish you saw, or manipulate the mood of a scene. Capturing the light can be a challenge; it often changes faster than we can sketch! Painting the sunlight dappled through a tree is hard enough without an inopportune cloud getting in the way.
I hope this book inspires you to try some new tips and tricks in your own work. The objective is to strengthen our observation skills and learn how to translate those onto the page. While urban sketches absolutely do not have to be realistic (and it would be boring if all of them were!), this book is more geared towards realism as we try to understand what the light in front of us is doing. The more we ask the question, “What do I see?” the more informed choices we can make about replicating it on the page, whether we are aiming for accuracy or decisively choosing to sketch what we wish were in front of us. Some of the most interesting sketches skew reality and make something new entirely. The secret lies in taking nothing in front of us for granted, not assuming we—know—what anything looks like, and taking the time to really see.
If you put two sketchers next to each other with the same materials, their sketches will never be identical. Every artist views a scene from a unique perspective and tells a story in their own way. Sharpening our observation skills gives us more options and opportunities in ways to tell that story. You are in charge of how you choose to record what you are seeing. You get to choose if you want to aim for an accurate portrayal of the light in front of you, or heighten the contrast or atmosphere, or make another choice. You get to choose how much you want to plan ahead or whether you just wing it! Sketches are guided by what our eyes focus on and what we choose to portray. Every sketch begins with an observation, a scene hits the eye and is filtered through a mind and a hand until it appears on the page as something a third party can view.

KATIE WOODWARD
Chicago Theatre, Chicago, Illinois
6" x 8" | 15.2 x 20.3 cm; watercolor, graphite pencil, white Uni-ball Signo gel pen
TOOLS
Before we can dive into the waters of understanding light, what tools do we use? Where do we begin?
Pencils, pens, pastel, and paints! There are so many tool options out there. For the urban sketcher, one thing is always the most important: portability. What do you want to carry with you? For some this may be a plein air easel with a full oil paint setup, for others it may be a ballpoint pen and a small sketchbook that can be stowed in a pocket. It requires some testing of materials to decide what you’re interested in working with, and what you want to be troubled to drag along with you. Luckily, urban sketching is a perfect time to experiment with new things! You can experiment with however many materials you want, and you never have to pick just one.
When choosing your tools, think about how you’ll be using them out in the world. Do you need to bring a small stool to sit on? How will you balance everything? Do you need a board to clip materials to? Something to keep your water from spilling? What type of case or pouch do you need hold everything when your tools aren’t in use? Figuring out your setup is just as important as the tools themselves. Time spent figuring it out at home is time saved when you are starting to sketch on-site. Remembering to include things like sunscreen and a big hat to keep the sun out of your eyes can improve your sketching experience.
- • sketchboard
- • water cup
- • 0.3 mechanical pencil
- • assorted Pigma Micron pens
- • watercolor brushes
- • portable watercolor palette
- • portable stool
- • binder clips
- • folder with loose watercolor paper
- • battery-powered clip light (for nighttime sketches and dark museums)

KEY TERMS
The following vocabulary is used throughout the book and can be useful for talking about light in our sketches.
Cast Shadow: The shadow of one object falling on another object.
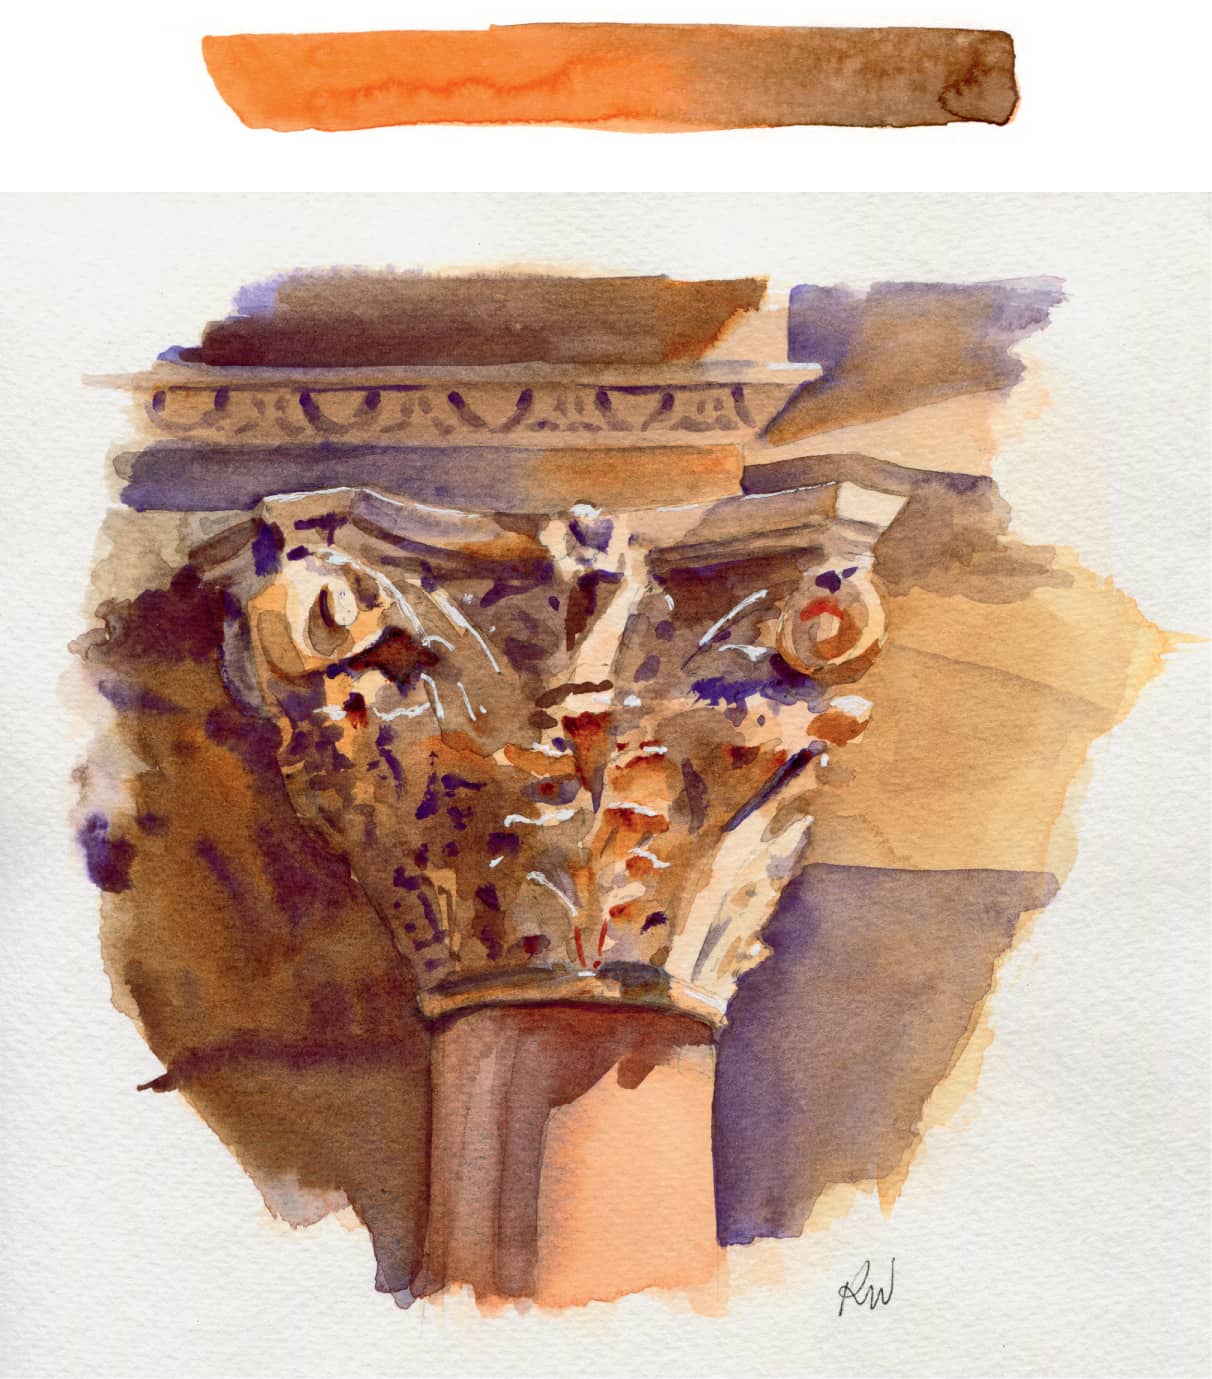
Chroma: How much saturation a color has. A high-chroma color will be vibrant and saturated with pigment, while a low-chroma color will be more neutral (more gray or brown). The stripe starts by being a high-chroma orange, and by mixing with its complement, a blue, it becomes a low-chroma brown.
Complementary Colors: Colors that appear across from each other on the color wheel (red and green, blue and orange, purple and yellow). Mixing these together can make browns and grays.
Contrast: The difference between two or more elements. Black and white are an example of high contrast, while similar tones would be lower in contrast.
Form Shadow: A shadow created by the object itself blocking the light.
Highlight: The area where the most light hits an object.
Hue: Another word for color.
Local Color: The color of an object as it appears in bright, colorless light.
Occlusion Shadow: A shadow that falls in the tiny nook between two objects that are close together.
Reflected Light: When light bounces off one object and hits another, often filling in a shadow.
Value: How light or dark something is.


KATIE WOODWARD
Column Capital, New York City
8" x 8" | 20.3 x 20.3 cm; graphite pencil, watercolor, white Signo gel pen
