
KEY III
SKIES AND ATMOSPHERE
We have all seen work that has an incredible sense of atmosphere. Maybe it feels like the subject is glowing or encased in fog. The mood of a sketch can be even more captivating than the subject. Before we can create such a work, we must explore what give us that feeling in work when we see it. Is it the changes in value? The color choices? The mix of soft and hard edges? The dramatic clouds? This section explores some specific lighting circumstances that can give any sketch a “wow” factor.

BHUPINDER SINGH
December Frost, Saskatchewan, Canada
15" x 22" | 38.1 x 55.9 cm; watercolors, pencil, white gouache; 3 hours
ATMOSPHERIC PERSPECTIVE
Atmospheric perspective is the effect the atmosphere has on subjects viewed from a distance. This can be best observed on far-off mountains or hills, or in layers of buildings in a skyline. Often far-off objects become lighter and similar in color to the sky, while closer objects remain their true local color and value. As sketchers, we can use this to our advantage not only by replicating it when we see it, but by including it when we don’t. You can use this gradation to help create depth in a sketch, whether objects are separated from one another by miles or by inches. By making the choice to keep objects closer to you a little warmer and ones farther away cooler (or vice versa), it helps the eye move back through the sketch and separate out elements that otherwise would have the same local color. If you aren’t working in color, just make the far-off subject lighter in value. This shift in value is helpful when working in color as well. Give it a try!

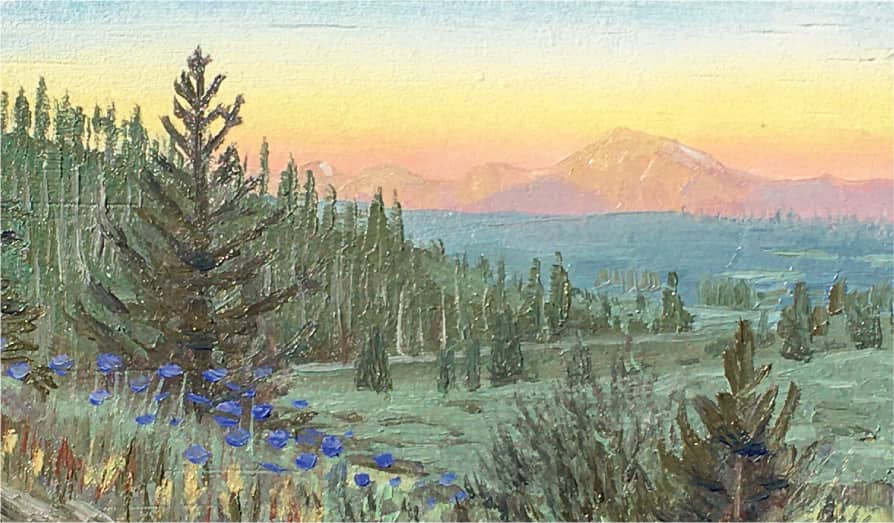
REMINGTON ROBINSON
Sunrise Over Byers Peak, Grand County, Colorado
1⅞" x 3⅛" | 4.64 x 7.64 cm; oil on wood panel
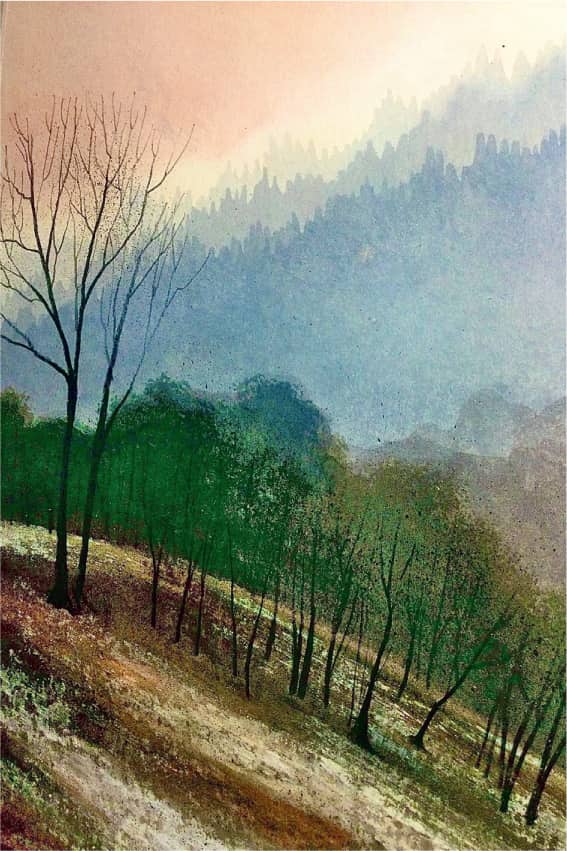
DAVID LOWTHER
Trees at Fernilee, Derbyshire, United Kingdom
8" x 11" | 20.3 x 27.9 cm; gouache and pastel
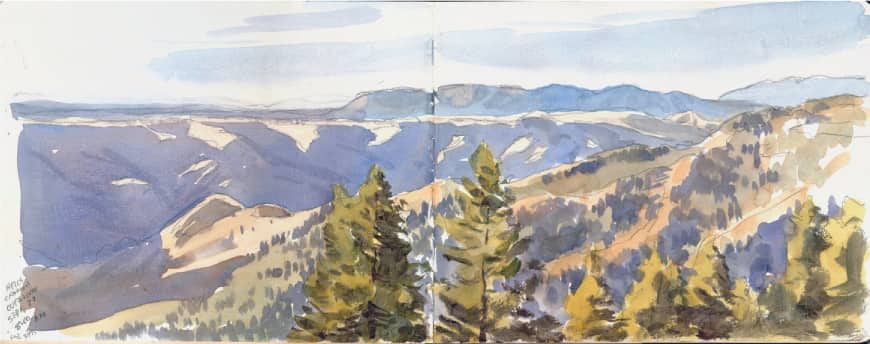
MIKE KOWALSKI
Hell’s Canyon Dawn, Wallowa County, Oregon
7" x 20" | 17.8 x 50.8 cm; Pentalic watercolor sketchbook and watercolor; 45 minutes

DOUG RUSSELL
Cannaregio, Venice, Italy
8" x 11½" | Black Copic Multiliner pen in a Moleskine watercolor sketchbook; 45 minutes
Atmospheric perspective can mean a color and value shift as objects recede into the distance, but you can also consider keeping the foreground higher in contrast. You may also blur edges as they recede. All of these techniques can be used to both show atmosphere and to direct the viewer’s eye to what you want them to focus on.
FOG
When urban sketchers think about air affecting our sketches, it’s usually in terms of temperature or humidity: “how fast will my paint dry?” But there are other ways air can affect our work! Is there dust, pollen, or smoke in the air? These elements can change a scene and add a level of drama to a view, and our sketches.
When looking at a scene, pay attention to where objects and elements meet. Whenever any particles are hanging in the air, light bounces off and things can seem a little hazier; edges may appear softer, the color of the subject may be a little grayer. An extreme example of this is fog, which can fully obscure parts of your view. Look how the fog in this sketch from Porto hides the bridge: you may see hints of it through the fog, but the edges aren’t defined. As shapes emerge from the fog, the edges become sharper and more clear. By taking these things into account as we sketch, it can transport the viewer, giving them a better sense of the conditions the artist was experiencing, which helps define the mood of a sketch.

KATIE WOODWARD
Porto Fog, Porto, Portugal
4" x 6" | 10.2 x 15.2 cm; watercolor and graphite pencil

KATIE WOODWARD
Big Sur, Big Sur, California
6" x 6" | 15.2 x 15.2 cm; watercolor and graphite pencil
Similarly, in this sketch you can see the fog encroaching from the left side, obscuring the hill behind it. By generally softening the edges and reducing contrast, it gives the impression of a gray, misty day, rather than one with bright sunlight.

TINA KOYAMA
Foggy Christmas Morning, Seattle, Washington
5½" x 8½" | 14 x 21.6 cm; graphite pencil; 10 minutes
USING SOFT EDGES
Pay attention to your edges—are they hard or soft? Where two objects meet, which is darker? Even if there is no fog, you can still experiment with using soft edges to convey atmosphere and mood. Try softening edges in your work to play with effects. You can soften your edges in any medium; in watercolor this may mean adding water over the corner of a recently finished shape, in graphite it may mean smudging an edge.

TINE KLEIN
The Reading Room, Basel, Switzerland
12" x 16⅓" | 30.8 x 41.3 cm; graphite powder, pencil, kneaded eraser, masking tape, fingers; 20 minutes (plus 20 minutes to clean up the graphite powder)
This sketch uses soft edges to conjure bright light in a dusty reading room.
“I discovered the room and started a quick simple pen sketch. But that was not what I wanted. I wanted to sketch the light. That is why I started to use graphite powder. The sketch was nearly finished in 10 minutes and another 10 minutes for modelling the light into the right mud. Happily, I sketched with my fingers. But then I was dirty like an urchin. I needed the same time, about 20 minutes, to clean myself and the table discreetly without creating a scandal.”
—Tine Klein
OVERCAST DAYS
On overcast days, shadows are practically nonexistent. The view before us has less contrast and everything flattens. You may still see atmospheric perspective and reflections, but shadows and reflected light won’t be as prominent, if visible at all. This can be a great time to practice imagining light on an object or taking advantage of the consistent lighting to really get invested in architectural details.
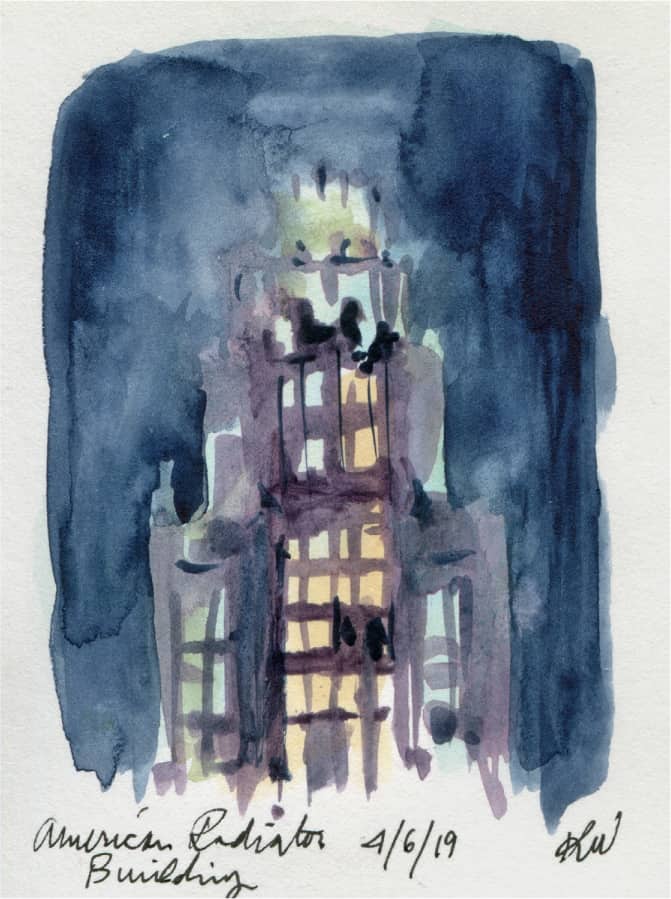
KATIE WOODWARD
American Radiator Building, New York City
3" x 4" | 7.6 x 10.2 cm; watercolor, graphite pencil; 30 minutes

KATIE WOODWARD
Angel in the Rain, Central Park, New York City
5" x 7" | 12.7 x 17.8 cm; watercolor, graphite pencil; 30 minutes
CLOUDS
Let’s talk about an important part of many skies: clouds! Whether big, fluffy cumulus clouds or wispy cirrus, clouds can add interest and gravitas to the skies of your sketches. It is worth noting that although clouds may appear as large, flat white shapes in the sky, they are three-dimensional. They can (and often do) have shadow. As they are composed of water droplets, and, depending on their density, some may be more translucent. Light on any translucent object (human skin, foliage, etc.) will behave less predictably than it will on an opaque, matte surface, so it is important to come back to observation.
Because clouds are hanging way up in the air, the sunlight will be hitting them differently than it hits buildings and objects on the ground. During sunset and sunrise, for example, it is not uncommon for clouds to have shadows on their tops, while the undersides may be a glowing orange or pink color (sometimes silhouetted on a still-blue sky.). At noon, clouds overhead may be backlit by midday sun. You may see them being harshly backlit, with edge lighting all around but with darker middles. As with atmospheric perspective, you may find that clouds in the distance, closer to the horizon, start to blend into the sky while the ones closer stand out and have more contrast. We tend to fall into the trap of believing the sky is always blue and clouds are always white, and sometimes that is exactly what a sketch calls for! Skies don’t always need to be really complex. But by taking the time to give it a little more observation, you may find that adding in some quick shadows or giving extra attention to color can give your sketch an added sense of depth.

MIKE KOWALSKI
State Line Silo, Merrill, Oregon
7" x 9" | 17.8 x 22.9 cm; watercolor; 1 hour
Observation Checklist
 Which is darker, the sky or the clouds?
- What percentage of the sky is covered by clouds? Are they concentrated in one area, or over most of the sky?
- Is the sun in front of the clouds, or behind them?
- Do you see shadows on the clouds? If yes, are they on the top, bottom, or in the middle?
- What color are the shadows? What colors are the clouds where they are being hit by light?
- What color is the sky above your head? What color is it closer to the horizon?
- What are the cloud shapes you see? Thin and wispy? Big and fluffy?
- Look at the clouds’ edges; are they hard or soft?
- Do you see any light coming through the cloud?

KATIE WOODWARD
Lake Pontoosuc, Pittsfield, Massachusetts
5" x 7" | 12.7 x 17.8 cm; watercolor, graphite pencil; 20 minutes
Gallery: Clouds

VIRGINIA HEIN
Mojave Desert Clouds, Twentynine Palms, California
10" x 14" | 25.4 x 35.6 cm; pencil, watercolor, and gouache on gray toned paper; 1½ hours

BHUPINDER SINGH
Pense Clouds, Saskatchewan, Canada
6½" x 10" | 16.5 x 25.4 cm; acrylics on cellulose paper; 45 minutes
If you’re working in watercolor, you may consider making a plan for your clouds. Often, this is going to be preserving the white of the paper, whether that means not putting water on those areas at all, or putting in your sky color and using a dry brush or sponge to pull the wet paint back up. Depending on the color of the clouds, you may drop other colors onto them when the sky itself is dry. Experiment with techniques and see how the edges of the clouds differ. Different effects may be better for different skies. Likewise with graphite or vine charcoal, you can preserve the paper or erase your whites back out.

BHUPINDER SINGH
White Bear Lake, Saskatchewan, Canada
11" x 16" | 27.9 x 40.6 cm; watercolor on rag paper; 30 minutes
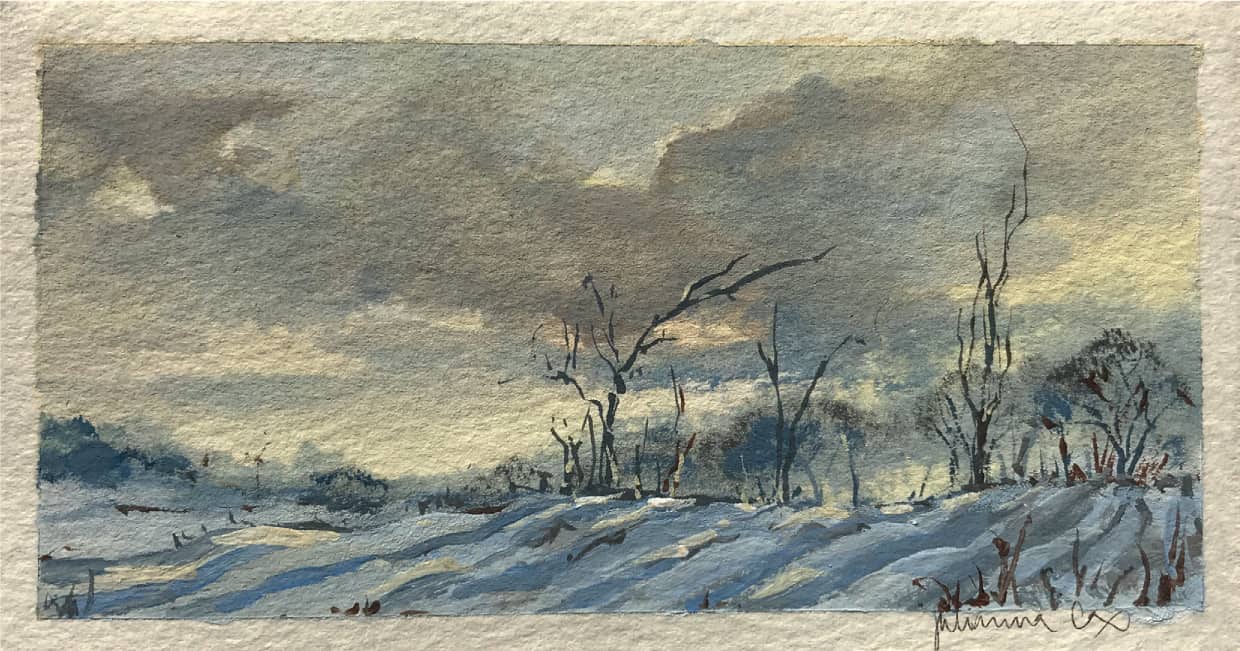
JULIANNA COX
January, Belwood, Ontario, Canada
2" x 3½" | 5 x 8.6 cm; Acryla Gouache
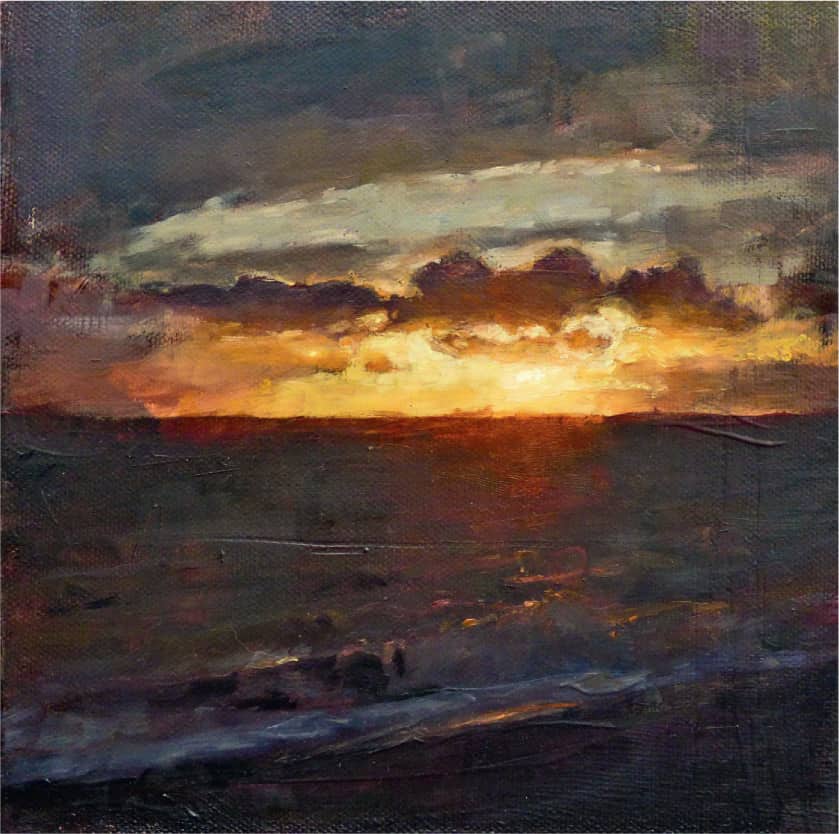
SUNRISES AND SUNSETS
When the sun rises and falls, blue skies can be replaced with a riot of color, as lighting situations change quickly and dramatically. Whether the sky is more muted or more colorful, it will likely appear warmer than usual. Compare the color of the sky at the horizon in the direction of the sun to the color of the sky directly above, and to the color along the horizon behind you. It will likely be a gradient in both value and color that can change depending on the weather. If the sun is below the horizon line, the horizon will likely appear warmer and lighter than the rest of the sky. Even during the day with a blue sky, the color and value varies if you are seeing the sky overhead versus the sky visible closer to the horizon. The most important part of sketching a sunrise or sunset? Work fast. The light is going to change on you minute by minute, so making quick choices and sticking to them is key.

KATIE WOODWARD
The New Ideal, Birmingham, Alabama
6" x 6" | 15.2 x 15.2 cm; watercolor, graphite pencil, white Uni-ball Signo gel pen; 45 minutes

KATIE WOODWARD
Goodspeed, East Haddam, Connecticut
6" x 8" | 15.2 x 20.3 cm; watercolor, graphite pencil
MAX WHITE
Dusk over Godstone, United Kingdom
3" x 6" | 7.6 x 15.2 cm; oil on card; 20 minutes
Sunsets and sunrises have a lot in common. A similar color scheme and similar lighting conditions. In both, the sun is casting long shadows of anything in its path. Light tends to be more colorful, ranging from lavender to pink or orange, versus the white light of midday, which can affect the look of your subject and the colors filling the shadows it casts. You are more likely to see the sun in your field of vision when it is lower in the sky. You may see a halo or “corona” around the sun. Should your sketch include the sun itself; do you see a corona around it? Consider if you see the edge of the sun and if it appears as a defined circle, or if it is obscured by blinding light and you see a soft glow of light radiating out instead. Lightening or using warmer colors in the area around the sun helps give the impression of that glow. Coronas can appear around any light source, whether it is the sun, moon, or a lamp.
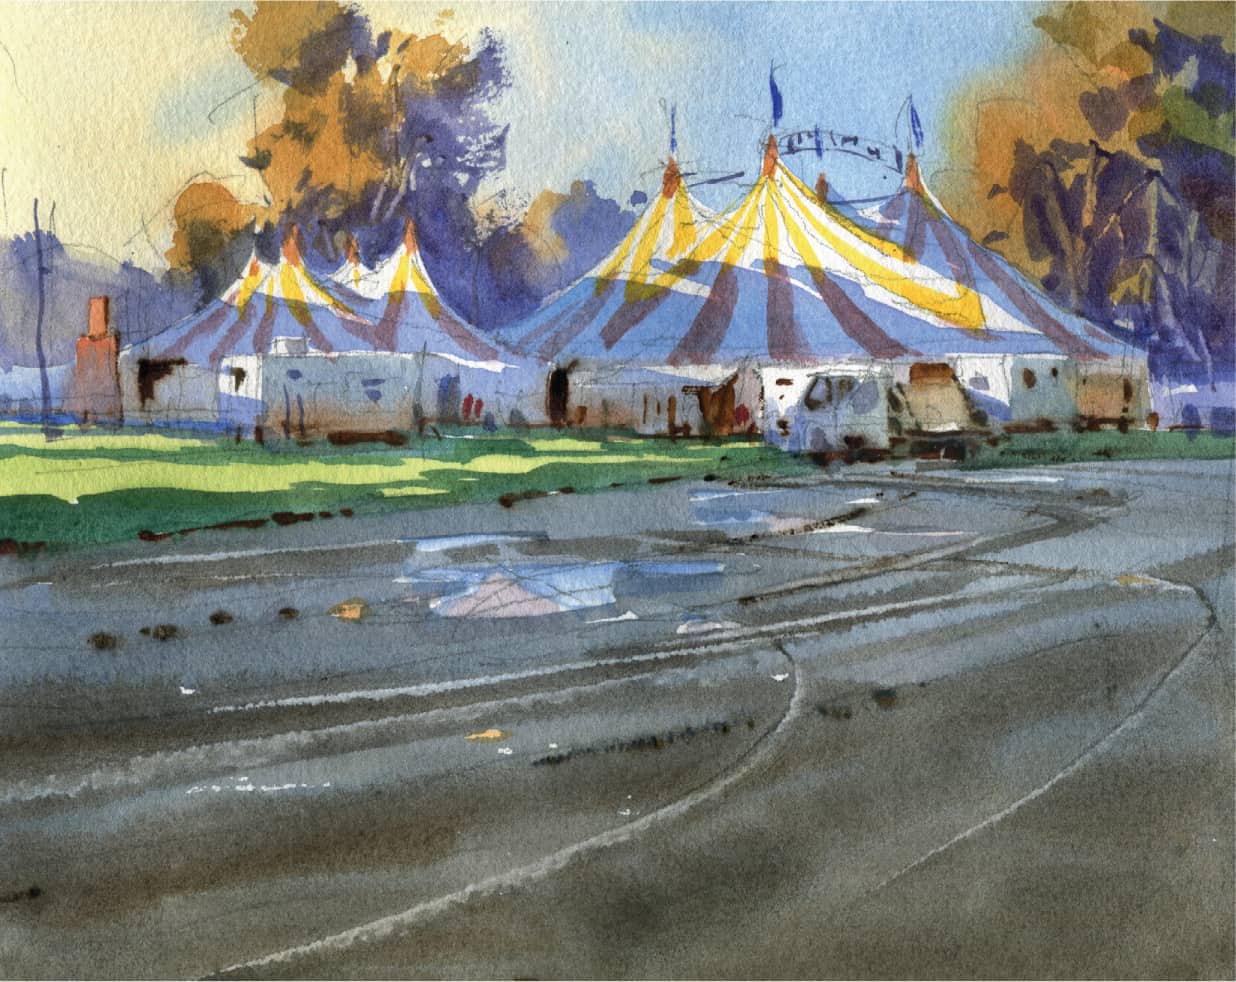
MIKE KOWALSKI
Silver Circus Sunrise, Melbourne, Australia
7" x 9" | 17.8 x 22.9 cm; watercolors; 45 minutes
Long shadows cast at sunrise and sunset may extend up and onto vertical surfaces opposite the object casting the shadow, as seen on these circus tents. The tops of the tents are catching the early sun, and as it rises the shadow will fall down the side of the tent until the whole thing is bathed in light.
MAX WHITE
Sunset Over Brighton, United Kingdom
8" x 8" | 20.3 x 20.3 cm; oil on canvas; 3 hours (split into three 1-hour sessions in the same location)
The corona may extend over land or objects; by adding orange to the land underneath the sun, it helps intensify the look of the corona.

MAX WHITE
Moonlight Over Surrey, United Kingdom
4" x 5" | 10.2 x 12.7 cm; oil on card; 20 minutes
BACK LIGHT
Especially in the early morning or late in the afternoon, when the sun is low in the sky, we can sometimes see objects being backlit by the sun. This creates a dramatic lighting scheme, which can call for a dramatic sketch! Sometimes you may see edge lighting—when the light hitting the opposite side of the object is so bright, the edge of the object glows, while the rest of what you see is in shadow. Often you will see long cast shadows on the ground, as well.


REMINGTON ROBINSON
Snow-Covered House on Mapleton, Boulder, Colorado
1⅞" x 3⅛" | 4.64 x 7.94 cm; oil on wood panel

MIKE KOWALSKI
The Boys of Broadway Hill, Seattle, Washington
7" x 10" | 17.8 x 25.4 cm; watercolor; 45 minutes
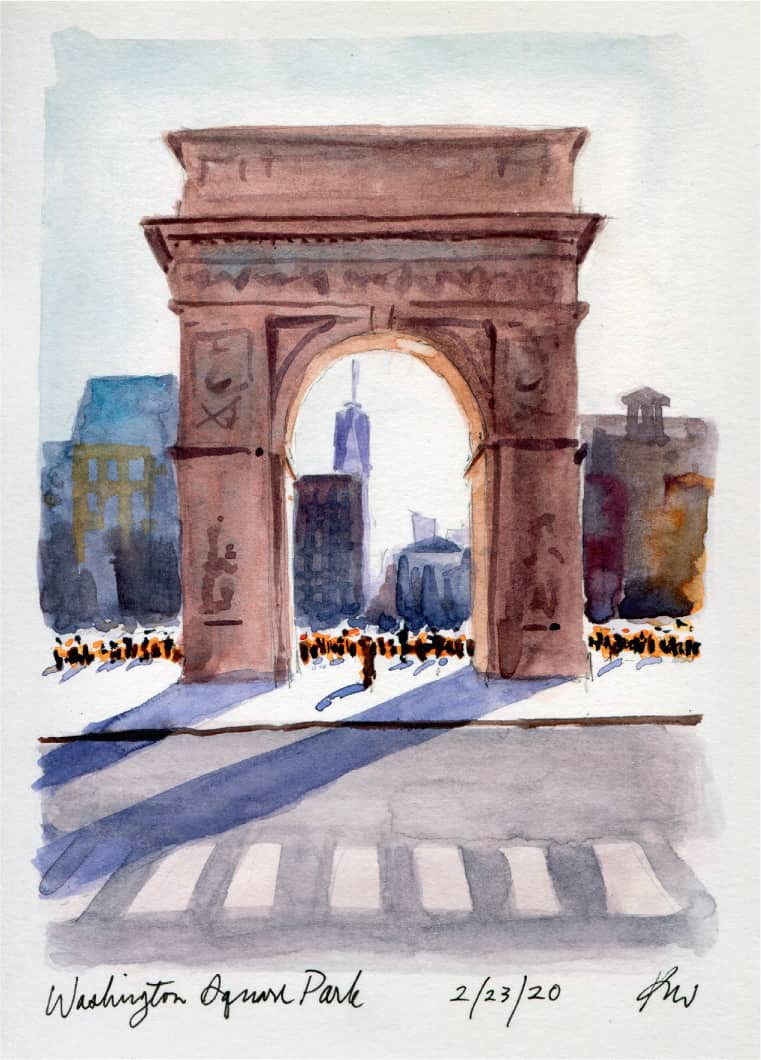
KATIE WOODWARD
Washington Square Park, New York City
5" x 7" | 12.7 x 17.8 cm; watercolor, graphite pencil

KATIE WOODWARD
Bryant Park Fountain, New York City
6" x 8" | 15.2 x 20.3 cm; watercolor, graphite pencil, white Uni-ball Signo gel pen
Water that’s backlit can sparkle and glow. Here you can also see reflected light hitting the bottom of the upper basin.