

11 Biology
Exploring the Arm and Ankle Model
Tinkering with biology may bring to mind the unpleasantness of Dr. Frankenstein, cloning, or plastic surgery. But in the end, to learn the way things work, you do need to tinker with them, and this is certainly true with our own bodies. Throughout history, people have had to go great lengths to get permission or get around laws and tinker with dead people. To the extent that they were able to do this tinkering, real knowledge about body systems was slowly amassed.
Today you can easily leave your dead body to science, and in many cases it will be dissected by medical students. You won’t find a surgeon who got her qualifications without completely tearing apart a corpse and observing each organ and tissue. If I ever go under the surgeon’s knife, I’m going to hope I’m not the first hunk of meat the surgeon has ever chopped into.
Dissections are great ways to tinker with biology, and many great dissections are possible with nothing more than a trip to the supermarket or meat or fish shop, a razor blade, and a piece of cardboard for a dissection tray. Search the Internet or texts for a labeled photo of what you’re dissecting and start slicing.
Another way to tinker with the way bodies work is to build models of body parts. If you get the model working similar to the real one, you’ll gain insight into how the real one works. Our endo-skeletons have muscles pulling on each bone. Tendons connect the muscles to the bones and ligaments link the bones to one another. Though all these parts are made of cells, the difference between these types of tissue is as large as the difference between string and bamboo. Making models of limbs brings out this point effortlessly. Dissections can be done together with building these models. After building them, taking apart a complete chicken wing or leg or foot will nicely demonstrate the way things work with real tissue.
Make: Arm Model

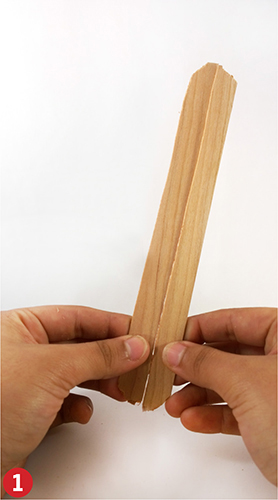
Figure 11-2. The arm model in action
Gather Stuff
• Three bamboo skewers
• Kite string
• Masking tape
• A bit of cardboard
• Toothpicks
• Straws
• Skinny rubber band
Gather Tools
• Scissors
• Side cutters
Tinker
Step 1
Grab two of the skewers together in parallel and wrap a rubber band around them, medium tightly, near the nonpointy end.

Step 2
Skewer the wrapped rubber band with the pointy end of the third skewer. Make it slide down on one side of the two skewers together (not between them).

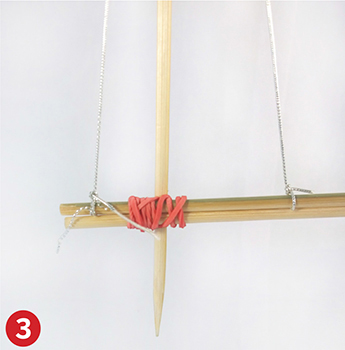
Step 3
Tie one end of two lengths of kite string around the top one of the two parallel skewers. Slide the knot so that it’s positioned near the rubber band.
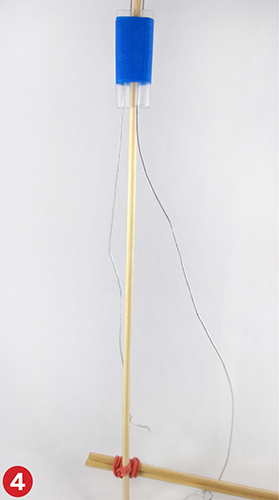
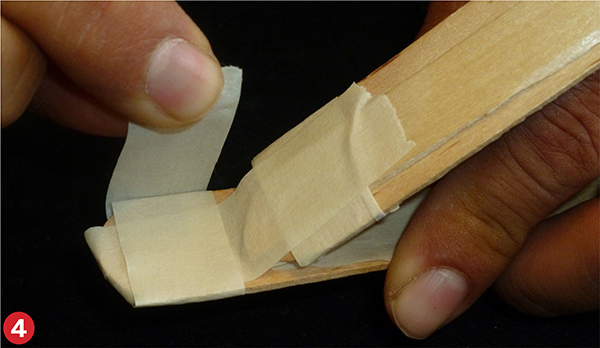
Step 4
Cut two short lengths of straw and tape them as shown near the top of the single skewer. Run the strings through them.
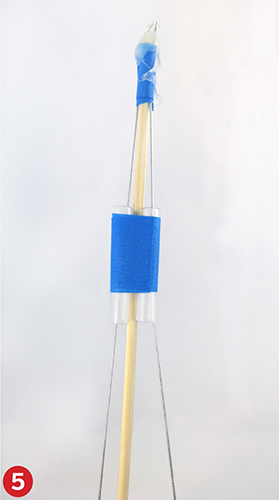
Step 5
Tape the two strings as tightly as possible to the top of the single skewer. You’re going to be pulling on them, and you don’t want them to come loose. This photo shows how we even hot glued them.
Step 6
Form a hand with the cardboard. The fingers could even be toothpicks. It’s nice to slide the skewers into the corrugations of the cardboard and then leave them loose, not glued together, so as to allow arm-like motion.

Step 7
There is your arm. When you tweak the front string, the arm raises, as in the first photo of this section (Figure 11-2).

Step 8
Tweak the back string, and the arm will move downward.

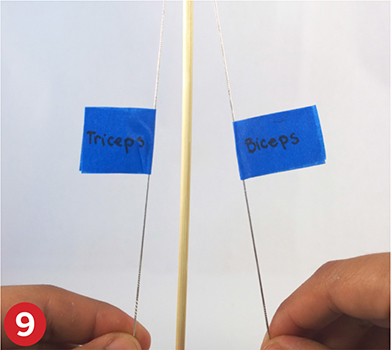
Step 9
Label the two strings if you want.
Make: Foot and Ankle Model

Figure 11-3. The model in motion
Gather More Stuff
• Three tongue depressors
Tinker
Step 1
Crack one of the tongue depressors the long way.
Step 2
Hot glue one of the cracked halves to the center of a whole one. These are the two bones in the shin part of the leg.

Step 3
Tape the end of the two glued pieces to the third one, near the end. When the glued pieces are standing upright, the cracked piece should face the short end of the third stick, as shown. Tape it front and back such that it makes a little hinge.

Step 4
Tape the tape hinge around the tongue depressor so that it is solid.
Step 5
Tape on a piece of string as shown. Put a knot in the end of the string so it doesn’t easily slip out.

Step 6
Do the same in front as shown.

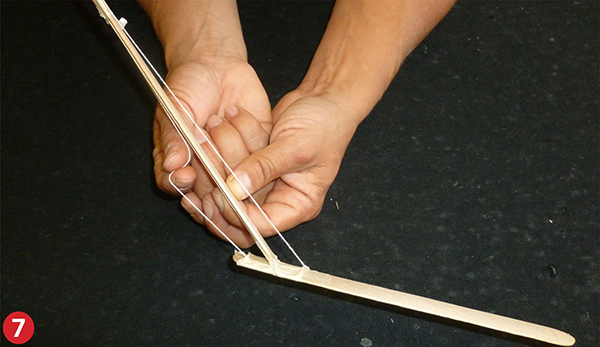
Step 7
There’s your ankle. When you tweak the front string, the foot will rise as shown in the first photo of this section, Figure 11-3. When you tweak the back string, the foot will go down, pushing off the ground.
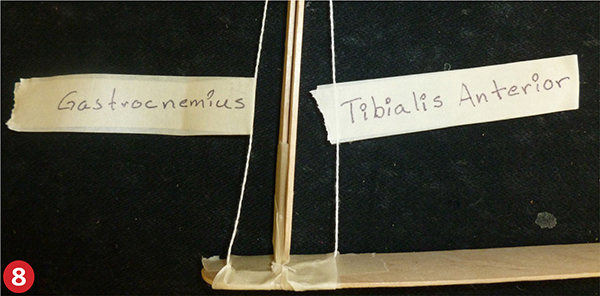
Step 8
Add labels if you want.
What’s Going On?
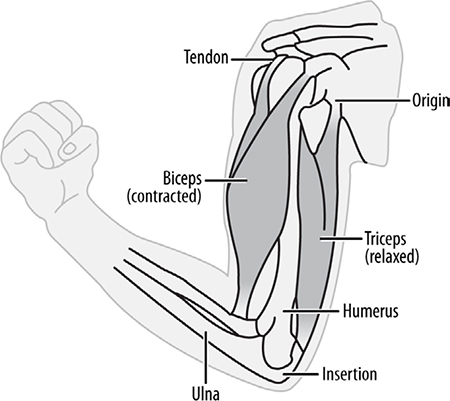
With a few exceptions (eye lids, tongues, hearts, and esophagi), our body moves by muscles pulling on tendons attached to bones bending at joints. The bones are levers, each with three parts: fulcrum (where it pivots), resistance arm (span between fulcrum and what you’re lifting), and effort arm (span between fulcrum and where your muscle is pulling on it). How much force you give and how much force your muscle needs to provide is determined by the relative lengths of these arms. It’s called kinesiology, baby!
Can you see where your muscles are hooked to your arm bones? Tense them up and follow them with your fingers. Try to work out which muscles pull which bones. In theory, you should be able to tense up each muscle separately, but since you don’t usually use them that way, they may all tense up together.
Levers come in three types (Figure 11-4), one with the fulcrum in the center, and two with the fulcrum at the end. Most of our muscle-bone configurations are of the first and third types. It can be fun to explore the differences between these three types of levers, but it’s not so critical. The key issue is that due to these lever arrangements, our muscles generally have to give more force than the weight of what we’re lifting. The benefit is that we can move things farther than the distance the muscle actually moves, which is usually a very short distance. In physics, there are many trade-offs like this, and in the end you never get something for nothing. You’ll never find a lever, for example, that multiplies both force and distance.

Figure 11-4. Three classes of lever
Did you find that when you tweak the string of the models a short distance, the result is a longer motion of the sticks? Can you see that this is the same thing happening in your arm and ankle?
Muscles are amazing. They’re physio-chemical motion-makers in the biological world. When a muscle pulls (and they always pull, never push) millions of molecules, smaller than microscopic, are changing shape, cocking their heads in a very real manner, which results in the shortening of the entire tissue. This is what gives the force that can lift everything from a fork to a refrigerator: the changing shape of molecules and their bonds.
Watch one of your main arm muscles contract when you lift something. What do you figure is the total distance the muscle shrinks?
The strings in the arm model represent the biceps (front) and triceps (back) and the tendons that attach them to the bones. In the forearm, there are two bones, and the biceps muscle is attached to the one called the radius, more or less on top. The fulcrum of this lever is at the end and the effort in the middle, so this is a class 3 lever. According to physics, you should be able to lift twice as much when you lift a weight hanging from halfway down your forearm. Also, short arms will be able to lift more with the same muscle force. Of course, in both these situations, you won’t be able to lift as far.
Try to lift a heavy bag first grasping the handle with your hand palm up in the “curl” motion. Then hang the bag halfway up your forearm and try lifting it again. Can you feel the difference?
The string in back is the triceps and pulls on the stubby elbow end of the other bone, the ulna, more or less on the bottom. Now the fulcrum is the middle and the effort is at the end, so it’s a class 1 lever. We use our triceps to press down on the table or to push something forward. Most people are weaker with their triceps. Usually we lift things with our biceps, so they may get a more regular workout.
Put your arm up over your head and lift a heavy bag behind your back using your triceps. Body builders call this the French curl.
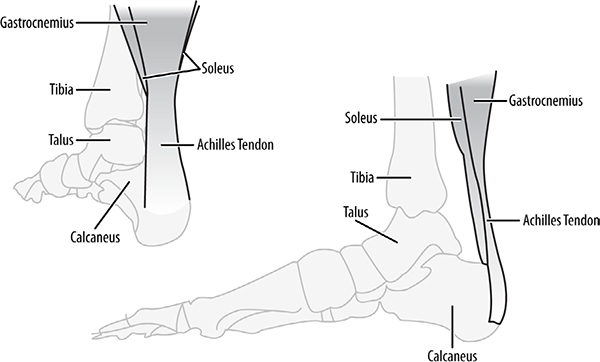
Many muscles of the body come in pairs, with one acting as the retractor and the other the power stroke. The biceps and triceps are an example, as are the gastrocnemius and tibialis anterior (see the diagram below). Sometimes the two are nowhere near the same size, since one does all the work. The gastrocnemius (the word comes from stomach, since your calf muscle looks like the belly of your leg) gives the power stroke for running, pulling up on the heel with a class 1 lever arrangement that pushes down hard on the ball of the foot.
Push yourself up on your tip-toes and let yourself back down. Do it 25 times. The pain you feel is your gastrocnemius!
Deer, cats, and dogs have a much larger distance between the fulcrum and the point of connection of the gastrocnemius. (The more I say that word, the better I like it.) This changes the mechanical advantage of their ankle lever, and puts considerably more spring in their step, so to speak. Just another reason you should not count on outrunning a jaguar or a hyena. These models can be made more realistic by adding a skin-like cover, perhaps a small sock or cloth tube from a scrunchy.
Arm:
Ankle:
Dog’s leg:

Cat’s leg:

Keep On
We can make various other models related to the human body: Figure 11-5 shows a finger. The string is tendon, bits of tongue depressors are bones, tubes are carpel tunnels, and your pull is the muscle. This one is made with a drinking straw as the tubing.
The straw on the back springs it back into open position. In a real finger, there is another tendon back there (Figure 11-6).


Figure 11-6. Check out the tendon
Figure 11-7 shows an eye model built around a mailing tube. The lens is adjustable—back and forth—so that you can focus on things at different distances (Figure 11-8). The retina in back is wax paper. The black paper is to keep other light from washing out the image on the wax paper.

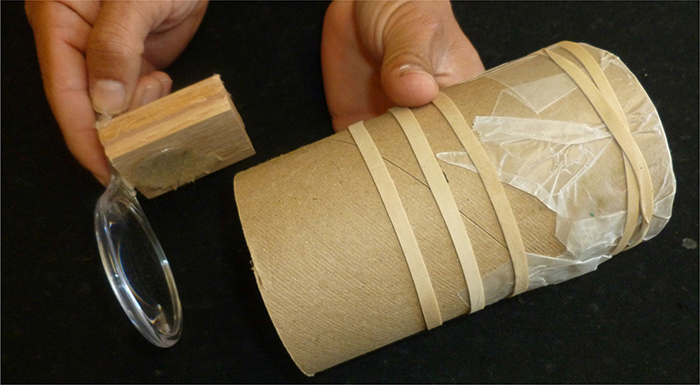
Figure 11-8. The lense and the retina
Finally, Figure 11-9 shows an ultra-simple version of the classic balloon-in-the-bottle lung model. That’s a half-balloon acting as a diaphragm muscle, taped around the chopped-off bottom of the bottle, and another balloon stuck in the neck as a lung. (Take the balloon out of the neck, and you’ve got an air gun.)
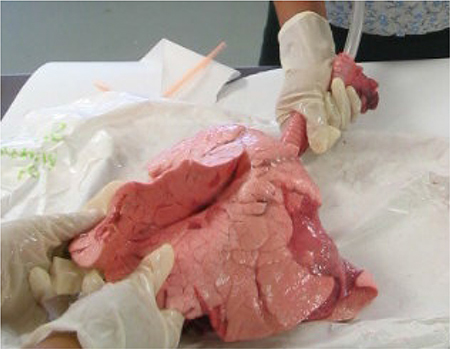
If you tinker with a cow or pig lung (Figure 11-10), you’ll find thousands of little balloons that you can blow up with a straw.

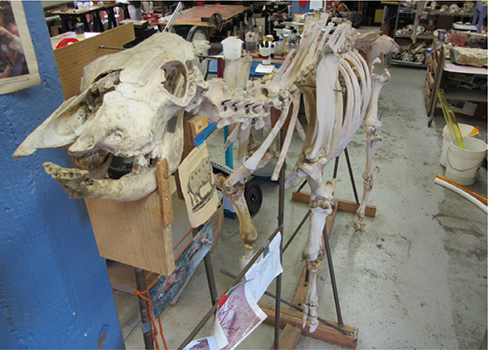
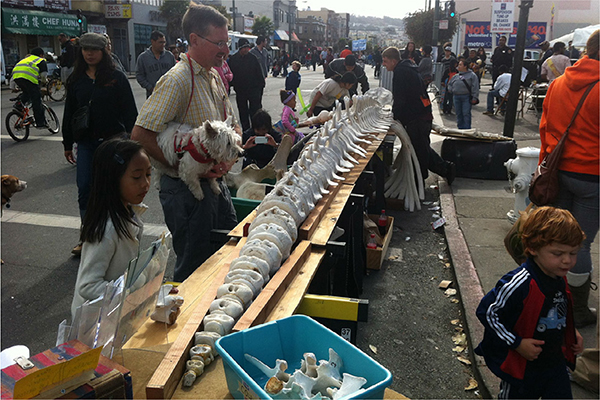
Dan Sudran of the Mission Science Workshop in San Francisco has gone a bit nuts about bones over the last 10 years. He’s collected and prepared hundreds of them, small as a mouse and large as a blue whale. He’s got class sets of gopher skeleton puzzles. He’s got a panel of femurs from mammals of all sizes. He’s got entire ostrich and entire cow skeletons. Dan and I and several dozen of our nearest, dearest friends collected an entire baby gray whale skeleton off the beach near his house, and he got permission from the marine mammal authorities to put it on display for educational purposes. Dan’s vision was this: if you put up a perfectly articulated whale skeleton, some people may come to be impressed by it. If on the other hand you pack it into tubs in the back of a delivery truck to be taken out and put together like a puzzle by groups of kids all around the area, much more real education will happen. He did the latter. Thousands of kids have taken part in the baby gray whale puzzle.
Vertabra puzzle:

The weasel puzzle:

The articulated cow he found in a buddy’s pasture:
Baby gray whale spine being put together:

Internet Connections
• Search “tree art” or “tree sculpture” to see how you can (with patience) tinker with plants.
• Check out the Exploratorium’s Mold Terrarium activity, and images of others, to see how you can tinker with fungus. http://www.exploratorium.edu/complexity/exhibit/mold. html shows an exhibit that was once on the floor of the Exploratorium showing mold and other microbes spreading across a vast landscape under Plexiglas.
• You can watch many great videos under the topic of “squirrel obstacle course.” This, like helping a hamster work its way through a maze, is tinkering with animal behavior.
Standards Topic Links
• Anatomy, human biology, body systems, organs, muscles, bones, and kinesiology
More Tinkering with Biology
• Karen Kalumuck, Human Body Explorations (Exploratorium Store, 2000; handson investigations on what makes us tick)
• Theo Jansen, The Strandbeest Kit (Gakken, 2011; Jansen is an artist-physicist who made a mechanical creature that moves like it’s alive)
• Robert Bruce Thompson, Barbara Fritchman Thompson, Illustrated Guide to Home Biology Experiments: All Lab, No Lecture (Make:, 2012; brace yourself—this one’s serious)