
Controlling Access
As alluded to in Chapter 2, Swift takes an innovative and broad-based approach to access control. This is especially evident when compared with Objective-C, where true access control is limited to instance variables—of which usage has been discouraged in favor of properties for several years. This chapter will provide an example of how circumventing intentional access control can be achieved, followed by an in-depth explanation of access control in Swift, aided by examples to help demonstrate each use case.
Access Control Compared
In Objective-C, stored value access control is limited to instance variables declared in @implementation, and method access control is truly not possible. Use of categories can help to hide methods that are intended to be private. However, if the name of a method defined only in a class extension or a category’s @implementation is correctly guessed, -[NSObject performSelector:] (or variations) can successfully be used to call the method. This includes accessors to get or set the value of a property declared only in a class extension. And access to an instance variable declared in @implementation can still be achieved if there is a private method that accesses that instance variable. The following example demonstrates this:
// In CustomClass.h
@import Foundation;
@interface CustomClass : NSObject
- (void)someMethodThatAccessesAPrivateInstanceVariable;
@end
// In CustomClass.m
#import "CustomClass.h"
@interface CustomClass ()
@property (copy, nonatomic) NSString *privatePropertyString;
@end
@implementation CustomClass
{
  NSString *_privateInstanceVariableString;
}
- (instancetype)init
{
  if (self = [super init]) {
    _privatePropertyString = @"Private property string";
    _privateInstanceVariableString = @"Private instance variable string";
  }
  return self;
}
- (void)printPrivatePropertyString
{
  NSLog(@"%@", self.privatePropertyString);
}
- (void)someMethodThatAccessesAPrivateInstanceVariable
{
  NSLog(@"%@", _privateInstanceVariableString);
}
@end
// In CustomClass+Additions.h
#import "CustomClass.h"
@interface CustomClass (Additions)
@end
// In CustomClass+Additions.m
#import "CustomClass+Additions.h"
@implementation CustomClass (Additions)
- (void)printCategoryPrivateString
{
  NSLog(@"Private string in category");
}
@end
// In –[SomeOtherClass someMethod] in SomeOtherClass.m that only imports "CustomClass.h"
CustomClass *customClass = [CustomClass new];
[customClass performSelector:@selector(printPrivatePropertyString)];
[customClass performSelector:@selector(setPrivatePropertyString:) withObject:@"New private property string"];
NSLog(@"%@", [customClass performSelector:@selector(privatePropertyString)]);
[customClass someMethodThatAccessesAPrivateInstanceVariable];
[customClass performSelector:@selector(printCategoryPrivateString)];
/* Prints:
Private property string
New private property string
Private instance variable string
Private string in category
*/
In Swift, access is controlled at the source file and module scopes. A source file typically may contain a single type definition, but it also can contain multiple type definitions as well as independent stored values and functions that are global within the file scope. A module is a single unit of code distribution, such as a build target or framework that can be imported into another module via the import keyword. There are three levels of access control to which code may be explicitly marked:
- Public—code is available throughout the module in which it is defined, and to any other source file in another module that imports the defining module
- Internal—code is available throughout the module in which it is defined but may not be imported into another source file in another module
- Private—code is available only within the source file in which it is defined
Public provides for the highest level of accessibility, typically suitable for use in the public-facing interface (i.e., the application programming interface, or API) of a framework. Internal is the default access control, implicitly assigned to most types unless explicit access control is specified; exceptions will be noted shortly. Private is the most restrictive level of access control, intended for use in hiding internal implementation.
Generally speaking, a piece of code cannot be marked with a higher level of accessibility than code that it interacts with in any way. For example, a property of a type that is marked internal can only be marked itself as internal or private. A function that takes private values as parameters or returns private values can only be marked itself as private.
Assigning Access Levels
The syntax to explicitly assign an access control level is to write the access modifier public, internal, or private before the declaration or definition of the entity—except for accessors, which will be covered in this section. The following rules apply to implicit, automatic, and explicit assignment of access levels.
A tuple’s type can be explicitly assigned, and in the case of a tuple defined in an imported module, the tuple itself must be explicitly assigned public access in order to be accessible within the importing module; doing so overrides whatever explicit access control has been assigned to its elements. This behavior is similar to the way mutability is inherited (see Chapter 3 for details).
Enumeration cases are implicitly assigned the same access level as the enumeration itself, and cannot be explicitly assigned another access level. Enumeration associated values cannot have an access level that is more restrictive than the enumeration’s access level. See Chapter 7 for coverage of enumeration associated values.
A stored value cannot be assigned a higher access level than its type, and a stored value must be explicitly marked private if its underlying type is private.
A function is implicitly assigned an access level equal to its most restrictive parameter or return value access level. A function can be explicitly assigned an access level equal to or more restrictive than its most restrictive parameter or return value access level.
Initializers may be explicitly assigned an access level equal to or more restrictive than the underlying type’s access level, except a required initializer must always be of the same access level as the underlying class. The parameters of an initializer cannot be more restrictive than the intitializer itself. A default initializer is automatically assigned the same type as its underlying type’s access level, with two exceptions (see Chapter 7 for coverage of default initializers):
- For a type defined as public, the default initializer will automatically be assigned internal, and in order to enable an importing module to utilize a default initializer with no parameters, a no-parameter initializer must be defined and explicitly assigned public access.
- The default memberwise initializer for a structure will automatically be private if any of the structure’s stored properties are private, and in order to enable an importing module to utilize a public structure’s memberwise initializer, that memberwise initializer must be explicitly defined and assigned as public.
Accessors are implicitly assigned the same access level as underlying type’s access level, however, an accessor can be assigned a more restrictive level. The syntax for explicitly assigning a more restrictive access level to an accessor is to write the access level immediately followed by the accessor type keyword in parentheses at the beginning of the declaration or definition, such as private(set) var someProperty to restrict access to someProperty’s setter to the source file in which it is defined.
A subclass cannot be less restrictive than its superclass; however, it can override a property or method of its superclass and make that entity less restrictive than its superclass.
A nested type is implicitly assigned an access level equal to its enclosing type’s access level. Apple’s Swift language guide currently states an exception, “If you want a nested type within a public type to be publicly available, you must explicitly declare the nested type as public.” However, as demonstrated in exercise 15 in the Suggested Exercises section, assigning the public modifier to a nesting type without explicitly assigning the public modifier to a type nested within that nesting type does not pose an issue. A nested type may be explicitly assigned a more restrictive access level than that of its enclosing type.
A type can adopt and conform to a protocol that is more restrictive than the type’s access level; however, the conforming portion of that type’s implementation will be restricted to the access level of the protocol. Individual declarations in a procotol inherit the access level of the protocol itself and cannot be explicitly assigned an access level. A protocol that inherits from one or more protocols cannot be less restrictive than any of the protocols from which it inherits.
Any properties or methods added to a type via an extension will by default have the same default access level as members have by default in the original type, or an extension can be explicitly assigned an access level to set a new default for all newly added properties and methods within that extension. Those members can also individually be explicitly assigned an access level, including one that is less restrictive than the extension itself.
Type aliases are treated as independent types with regards to access control, and can be assigned an access level equal to or more restrictive than the underlying type being aliased.
All other value types, reference types, protocols, and extensions may be explicitly assigned an access level, or will otherwise be implicitly assigned an access level of internal by default.
Table 10-1 provides examples of access control scenarios presented in the preceding text. In order to follow along with these examples, it is necessary to create an Xcode project with two build targets. To do so, launch Xcode from your /Applications folder and select File ![]() New
New ![]() Project... from the menu. In the window that opens select Application under the iOS section in the left sidebar, select the Single View Application template, and click Next, as shown in Figure 10-1.
Project... from the menu. In the window that opens select Application under the iOS section in the left sidebar, select the Single View Application template, and click Next, as shown in Figure 10-1.
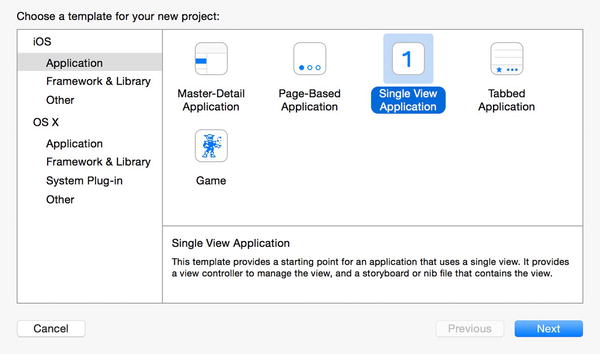
Figure 10-1. Choose a template for your new project
Enter Transitioning for the product name, enter an organization name and identifier, select Swift for the language, iPhone for the device, leave Use Core Data unchecked, and click Next; Figure 10-2 shows example inputs.
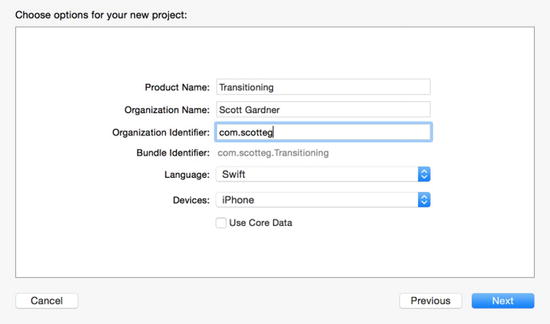
Figure 10-2. Choose options for your new project
Leave Create Git repository on unchecked, select a convenient location such as your ~/Documents folder, and click Create to save the project, as shown in Figure 10-3.
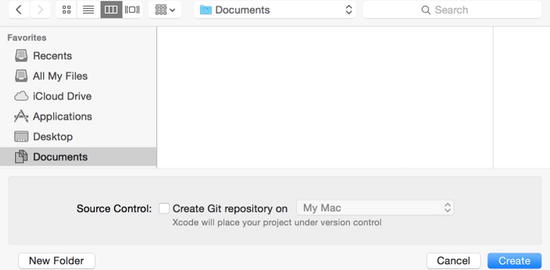
Figure 10-3. Save new Xcode project
Every new Xcode project is created with a main and test target, for example, Transitioning and TransitioningTests, as shown in Figure 10-4.
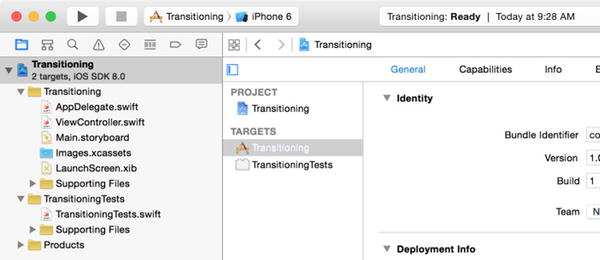
Figure 10-4. Initial Xcode project
The TransitioningTests target is intended for use with unit testing, and although unit testing is a highly encouraged practice, its coverage is beyond the scope of this book. So we will create an additional target in order to demonstrate access control across separate modules. In this case, we’ll create a simple framework. Select File ![]() New
New ![]() Target..., and in the dropdown sheet that appears, select Cocoa Touch Framework from the iOS Framework & Library template list items, and click Next, as shown in Figure 10-5.
Target..., and in the dropdown sheet that appears, select Cocoa Touch Framework from the iOS Framework & Library template list items, and click Next, as shown in Figure 10-5.
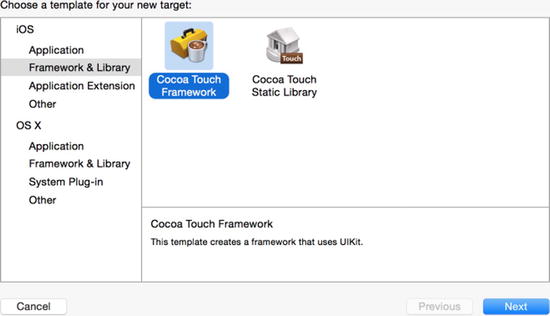
Figure 10-5. Choose a template for your new target
Enter CustomFramework for the product name. The other input values should be prefilled with the values entered when the project was created, and click Finish. Figure 10-6 demonstrates this.
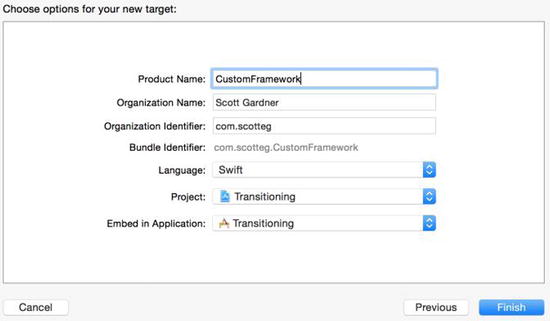
Figure 10-6. Choose options for your new target
Figure 10-7 shows the Xcode project with the newly added target. The circled group folders will be referenced in the following steps.
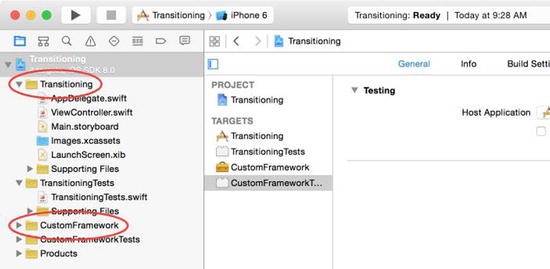
Figure 10-7. Xcode project with added target
Next, we’ll add sample Swift source files to the Transitioning and CustomFramework targets. Select the yellow Transitioning group folder and select File ![]() New
New ![]() File... from the menu. In the dropdown sheet that appears, select Swift File from the iOS Source template list items and click Next.
File... from the menu. In the dropdown sheet that appears, select Swift File from the iOS Source template list items and click Next.
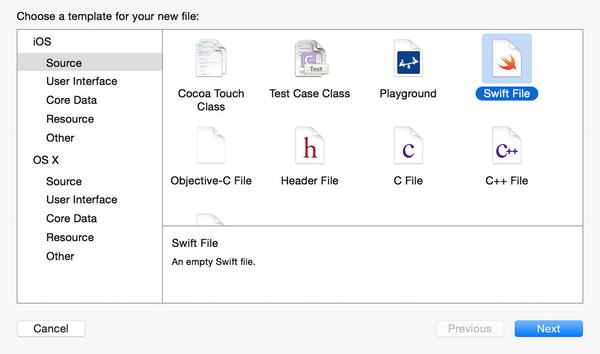
Figure 10-8. Choose a template for your new file
Enter CustomTypes for the filename, ensure that the Transitioning group and target are selected and checked, respectively, and click Create.
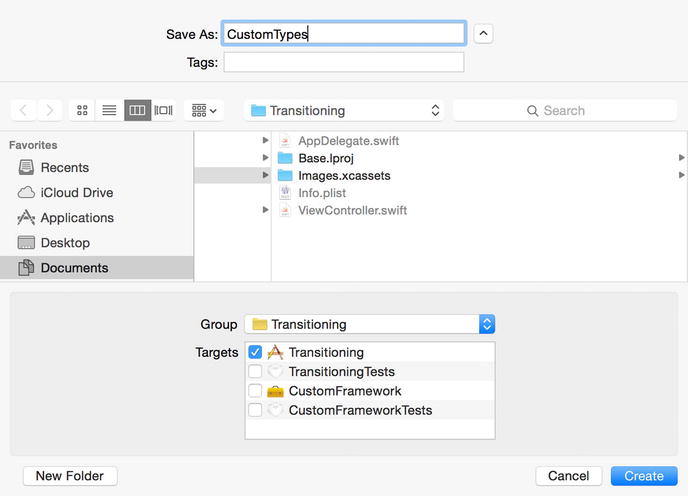
Figure 10-9. Xcode new file Save As
Repeat the last two steps as demonstrated in Figures 10-8 and 10-9, this time selecting the CustomFramework group folder in the Project Navigator (circled in Figure 10-7), select File ![]() New
New ![]() File... from the menu, select Swift File from the iOS Source template list items, click Next, name the file CustomFrameworkTypes, ensure that the CustomFramework group and target are selected and checked, respectively, and click Create. Figure 10-10 shows the Xcode project with these new files added.
File... from the menu, select Swift File from the iOS Source template list items, click Next, name the file CustomFrameworkTypes, ensure that the CustomFramework group and target are selected and checked, respectively, and click Create. Figure 10-10 shows the Xcode project with these new files added.
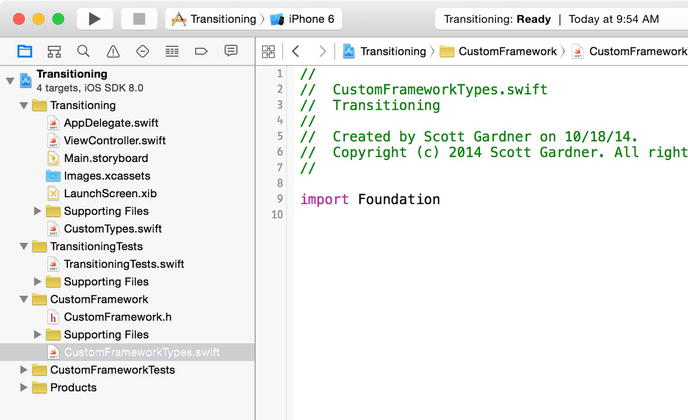
Figure 10-10. Xcode project with added files
With these preparations in place, Table 10-1 provides setup code and examples of each of the aforementioned access control scenarios. All example code is presumed to be entered within the viewDidLoad() method (after the setup code) in ViewController.swift, unless otherwise noted. Access control has been assigned to each entity to allow access in the example code, and the project will compile. Suggested exercises will be provided after Table 10-1.
Table 10-1. Examples of access control scenarios in Swift
// In CustomTypes.swift | ||
Tuple |
let customClass = CustomClass() |
|
Enumeration |
let customFrameworkEnum = CustomFrameworkEnum.TwoWithAssociatedValue(CustomFrameworkStruct()) |
|
Stored value |
let customStruct = CustomStruct() |
|
Function |
printGreeting("Hello", to: Person(name: "Charlotte")) |
|
Initializer |
let boston = City(name: "Boston") // Prints "Boston" |
|
Accessor |
let anotherStruct = AnotherStruct() // Prints "A New Subtitle" |
|
Subclass override |
var accessibleTitleSubclass = AccessibleTitleSubclass() |
|
Nested type |
let nestingStruct = NestingStruct() // Prints "NestedStruct" |
|
Protocol |
struct Media: HasSubtitle { |
|
Extension |
println(customClass.title) // Prints "CustomClass" |
|
Type alias |
let cfStruct = CFStruct() |
SUGGESTED EXERCISES
The following exercises will demonstrate each of the rules mentioned in the Assigning Access Levels section. For each of the exercises listed here, select Product ![]() Run from the menu to observe specified output, and be sure to undo changes after each exercise in order to restore the project to a compilable status and expected state for the next exercise. A build (Product
Run from the menu to observe specified output, and be sure to undo changes after each exercise in order to restore the project to a compilable status and expected state for the next exercise. A build (Product ![]() Build from the menu, or command + B) may be necessary to clear remnant compiler errors:
Build from the menu, or command + B) may be necessary to clear remnant compiler errors:
- Add the private modifier to the CustomClass definition in CustomTypes.swift. Observe the compiler warning: Use of unresolved identifier ‘CustomClass’
- Comment out import CustomFramework in ViewController.swift. Observe the multiple compiler errors including: Use of unresolved identifier ‘CustomFrameworkClass’
- Comment out the empty initializer in CustomFrameworkClass in CustomFrameworkTypes.swift. Observe the compiler error: ‘CustomFrameworkClass’ cannot be constructed because it has no accessible initializers
- Delete the public modifier from the tuple variable definition in CustomFrameworkClass in CustomFrameworkTypes.swift. Observe observe the multiple compiler errors: ‘CustomFrameworkClass’ does not have a member named ‘tuple’
- Change the access level modifier of the CustomFrameworkStruct definition in CustomFrameworkTypes.swift to private. Observe the compiler error: Enum case in a public enum uses a private type
- Delete the public modifier from the title variable definition in CustomFrameworkStruct in CustomFrameworkTypes.swift. Observe the compiler error: ‘CustomFrameworkStruct’ does not have a member named ‘title’
- Add the public modifier to the title constant definition in CustomStruct in CustomTypes.swift. Observe the compiler warning: Declaring a public let for an internal struct
- In CustomTypes.swift, add the private modifier to the CustomStruct definition. Observe the compiler error on the customStruct constant in CustomTypes.swift: Constant must be declared private because its type ‘CustomStruct’ uses a private type
- Add the private modifier to the Person definition in CustomTypes.swift. Observe the compiler error on the printGreeting(_:to:) function: Function must be declared private because its parameter uses a private type
- Add a public modifier to the required init(name:) definition in City in CustomTypes.swift. Observe the compiler warning: Declaring a public initializer for an internal class
- Delete the public modifier from the init() method definition in CustomFrameworkStruct in CustomFrameworkTypes.swift. Observe the compiler error: ‘CustomFrameworkStruct’ cannot be constructed because it has no accessible initializers
- Add the private modifier to the name variable definition in Person in CustomTypes.swift. Observe the compiler error: ‘Person’ cannot be constructed because it has no accessible initializers
- Add the following line of code at the end of the viewDidLoad() method in ViewController.swift and observe the compiler error: Cannot assign to ‘subtitle’ in ‘customStruct’:
customStruct.subtitle = "A new subtitle" - Add the public modifier to the AccessibleTitleSubclass definition in CustomTypes.swift. Observe the compiler error: Class cannot be declared public because its superclass is internal
- Add the public modifier to the NestingStruct definition in CustomTypes.swift. Observe that no compliler error is thrown
- Add the public modifier to the NestedStruct definition in NestingStruct in CustomTypes.swift. Observe the compiler warning: declaring a public struct for an internal struct
- Add the private modifier to the nestedStruct constant in NestingStruct in CustomTypes.swift. Observe the compilier error on the println() function in ViewController.swift: ‘NestingStruct’ does not have a member named ‘nestedStruct’
- Add the private modifier to the HasSubtitle definition in CustomTypes.swift and observe the compiler error on the Media definition in ViewController.swift: Use of undeclared type ‘HasSubtitle’
- Add the public modifier to the HasSubtitle definition in CustomTypes.swift and observe the compiler error: Public protocol cannot refine an internal protocol
- Add the private modifier to the subtitle definition in HasSubtitle in CustomTypes.swift and observe the compiler error: ‘private’ modifier cannot be used in protocols
- Add the private modifier to the CustomClass extension definition in CustomTypes.swift and observe the compiler errors in ViewController.swift: ‘CustomClass’ does not have a member named ‘title’; and, ‘CustomClass’ does not have a member named ‘subtitle’
- In CustomTypes.swift, add the private modifier to the CustomClass extension definition, add the public modifier to the title definition within that extension, and add the internal modifier to the subtitle definition within that extension. Observe the compiler warnings on the title and subtitle definition, respectively: Declaring a public var in a private extension; and, Delcaring an internal var in a private extension. Yet also notice that there are no compiler errors on the println(customClass.title) and println(customClass.subtitle) code in ViewController.swift
- Delete the public modifier from the CFStruct definition in CustomFrameworkTypes.swift and observe the compiler error in ViewController.swift: Use of unresolved identifier ‘CFStruct’
These exercises explore a wide variety of access control scenarios that you may need to implement or will encounter in Swift. It would be worthwhile to go beyond these exercises and try changing, removing, or adding access control assignments to this or any other Swift code, and observe the results.
Summary
Access control in Swift enables managing the scope of nearly every type in Swift, while simultaneously alleviating the burdon of explicitly importing types throughout a project or cluttering up a prefix header file—in which one must also be concerned with order of imports. The rules of engagement for assigning access levels are as explicit as the control that they facilitate, and coming from Objective-C, access control in Swift may take some getting used to at first. However, with a dedicated effort to understanding and embracing these new capabilities, access control in Swift can prevent a multitude of issues resulting from the lack of it in Objective-C by ensuring that your code is consumed precisely as intended.