
5. Selection Tools and Techniques
If you really want to get things done in Photoshop, you have to be good at making selections. You might want to extract a subject from a photo or maybe change the sky to another shade of blue. Or, maybe the sweater in your advertisement needs to be orange instead of red, or you’d like to duplicate some of the background crowd so your photo doesn’t look so empty. In each case, you’ll need an accurate selection.
Why? You may be able to look at a digital image and clearly recognize that it’s a brown bear sitting on a rock ledge with some logs in the background. Unfortunately, your computer just sees a bunch of pixels. A little human intervention is necessary to distinguish which part of the image you want to manipulate or process. In Photoshop, this is called making a selection.
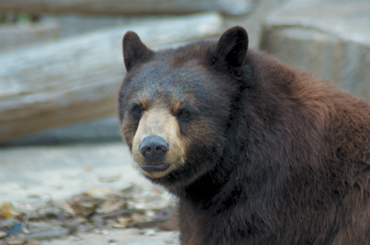
While your eye can easily distinguish between the bear and the background in this photo, Photoshop just recognizes pixels. It will take some human intervention to make an accurate selection of the bear.
While this means extra effort, it also means that most digital imaging tasks require a human brain (which means jobs for designers and artists). Accurate selections are important, and there are several techniques you can employ to get them just right. Some are easier than others, and some are more accurate. You may in fact need to combine multiple techniques to get the job done. Knowing several different methods lets you make an accurate selection no matter what your source image looks like.
Basic Selection Tools
Photoshop’s Tools panel contains three categories of tools that you can use to create a basic selection: Marquee tools, Lasso tools, and Wand tools. While these three are very useful, many users forget that they are only starting points. Learning to use them is important, but again, it’s just the beginning.
Marquee Tools
The Marquee tools allow you to click and drag to define a selection. The keyboard shortcut for selecting the Marquee tool is the letter M. To toggle between the Rectangular and Elliptical Marquee tool, press Shift+M. Descriptions of the Marquee tools follow:
• Rectangular Marquee tool. Use this tool to make a rectangular selection. Press the Shift key to draw a square.
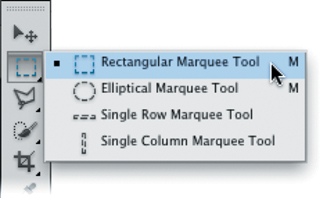
• Elliptical Marquee tool. Use this tool to make an elliptical selection. Press the Shift key to draw a circle.
• Single Row or Single Column Marquee tool. Creates a selection that is 1 pixel wide in the shape of a row or column. These two tools are not used often, which is why Adobe didn’t assign the keyboard shortcut M to trigger them.
Putting the Marquees into action
Let’s give the Rectangular and Elliptical Marquee tools a try and make some selections:
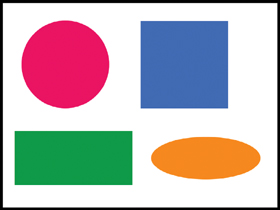
- Open the file Ch05_Marquee_Practice.tif from the Chapter 5 folder on the DVD.
- Practice selecting each of the four objects using both the Elliptical and Rectangular Marquee tools. Remember to use the Shift key to constrain proportions for the square and circle shapes. Don’t worry about perfection; you’ll learn lots of ways to tweak selections in the coming pages.
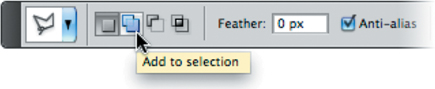
Selection options for Marquee tools
When using the Marquee tools, several options are available to you in the Options bar. These modifiers can improve or alter your selection.
![]()
The first four icons specify the kind of selection:
• New selection. Creates a new selection.
• Add to selection. After you create one selection, you can click this button so subsequent selections are combined with the existing selection. You can also hold down the Shift key to add to a selection.
• Subtract from selection. After you create one selection, you can click this button so subsequent selections are subtracted from the existing selection. You can also hold down the Option (Alt) key to subtract from a selection.
• Intersect with selection. Requires you to make a first selection. When you draw a second selection, Photoshop creates a new selection where the two selections overlap.
The following options modify the selection tool and must be chosen before making a selection:
• Feather. A normal selection has a crisp edge. Feathering a selection creates a gradual blend at the selection’s edges. Think of it as the difference between a line drawn with a pencil and one drawn with a felt-tip marker. Feathered selections are useful when you want to extract objects.
• Anti-alias. When working with the Elliptical Marquee tool, you can select Anti-alias to create a smoother edge for curved lines (especially if your image is at a low resolution).
• Style. For the Rectangular Marquee tool and Elliptical Marquee tool, you can choose from three styles in the Options bar:
• Normal. This is the default option. Click to draw your marquee freehand.
• Fixed Ratio. You can set a width-to-height ratio. For example, to draw a marquee three times as wide as it is high, enter 3 for the width and 1 for the height.
• Fixed Size. You can specify an exact size for the marquee’s height and width. You can enter the value in pixels (px), inches (in), or centimeters (cm).
Moving a selection
There are a few ways to reposition a selection:
• While drawing a selection (with the mouse button still depressed) you can hold down the spacebar and move the selection.
• With an active selection, move the tool’s cursor inside the selection border (marching ants). The icon changes to a triangle with a marquee border. You can then click inside and drag the selection to move it.
• To modify a selection using controls similar to the Free Transform command, choose Select > Transform Selection. All the options available to the Free Transform command can be applied to the selection border. For more on Free Transform, see Chapter 4, “Sizing Digital Images.”
Selection Lassos
The Lasso tools allow you to draw freeform segments with your mouse to create a selection border. The Lasso tools are most often used to create a rough selection (which can then be refined using techniques such as Quick Mask Mode; see the section “Quick Mask Mode” later in this chapter). The keyboard shortcut for selecting the Lasso tool is the letter L. To select the next Lasso tool, press Shift+L.
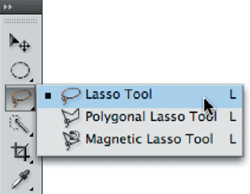
• Lasso tool. Use this tool to make a freehand selection. You must return to your starting point to close the selection loop.
• Polygonal Lasso tool. Use this tool to draw straight-edged segments for a selection border. With every click, a part of the segment is drawn. Continue clicking to set endpoints for additional segments. Click your starting point to close the loop and create an active selection. To constrain the tool to 45-degree angles, hold down the Shift key while drawing.
• Magnetic Lasso tool. When you use the Magnetic Lasso tool, Photoshop attempts to snap the border to the edges of the image. If the anchor point doesn’t snap accurately, click once to manually add a point.
Putting the Lasso tools into action
Let’s give these tools a try:
- Open the file Ch05_Boat.tif.
- Try using both the Polygonal and Magnetic Lasso tools to select the boat. Make multiple attempts at practicing the selection.

In the middle of making a selection with the Polygonal or Magnetic Lassos, you can press the Delete key to remove segments. Press and hold once, and then release and press subsequent times to remove segments (one per click). If you need to stop a selection, press the Esc key. If you need to deselect and start over, just press Command+D (Ctrl+D).
Selection options for Lasso tools
When using the Lasso tools, several options are available to you in the Options bar to improve or alter your selection. These modifiers are very similar to those for the Marquee tools, so I’ll just briefly mention them.
The first four icons specify the kind of selection:
• New selection
• Add to selection
• Subtract from selection
• Intersect with selection
The next two options create a smoother selection:
• Feather. This option creates a softer edge on your selection.
• Anti-alias. This option creates a smoother edge for curved lines.
Magnetic Lasso options
The Magnetic Lasso has a few additional options that mainly deal with its snapping behavior. You can change the following properties in the Options bar:
• Width. The width specifies how wide an area the Magnetic Lasso looks at when trying to detect edges. If you’d like to see the width area visually, activate the Caps Lock key before making a selection.
• Edge Contrast. This value (measured in percent) determines the lasso’s sensitivity to edges in the image. Higher values detect high-contrast edges, whereas lower values detect lower-contrast edges.
On an image with well-defined edges, you should use a higher width and edge contrast setting. For an image with soft edges, use a lower setting for both width and edge contrast.
• Frequency. The rate at which Photoshop adds anchor points is based on the Frequency setting. An anchor point is the point at which the lasso attaches, so you can move the selection border in another direction. You can enter a value between 0 and 100. Higher values add more anchor points to your selection border.
• Stylus Pressure. Click the Stylus Pressure icon if you have a tablet connected. This option allows you to use the pressure of the pen to affect edge width.
Wand Tools
The Quick Selection and Magic Wand tools (W is the keyboard shortcut) allow you to click an area of color to have Photoshop create a selection based on adjacent pixels and your Tolerance setting. The Magic Wand is a much older tool that works reasonably well on photos with large areas of similar color. The Quick Selection tool is a significant improvement over the Magic Wand tool, however, and has quickly become a favorite tool of Photoshop pros.

Quick Selection tool
The Quick Selection tool allows you to create a selection that quickly forms based on color and contrast.
- Open the file Ch05_Quick_Selection.tif from the Chapter 5 folder.
- Select the Quick Selection tool by pressing W.
- Press the right bracket key ] to make the selection brush larger; press the left bracket key [ to make it smaller.
- Click and drag in the flower to make an initial selection.
- To add to the selection, click and drag again. If too much of a selection is made, hold down the Option (Alt) key to subtract from the selection.
Selection options for the Magic Wand tool
When using the Magic Wand tool, several options are available to you in the Options bar that can improve or alter your selection. These modifiers are very similar to those for the Marquee and Lasso tools, so I’ll cover them briefly.
Tip: A Better Wand
The Magic Wand tool works best if you turn on the pixel-averaging option. But where is it? It doesn’t appear in the Options bar when the Magic Wand tool is selected. Instead, you must select the Eyedropper tool. Then in the Options bar you can change the Sample Size to a 5 by 5 Average (or 11 by 11 Average). The Magic Wand tool (as well as a few other tools) will then become less sensitive to erroneous clicks.
The first four icons specify the kind of selection:
• New selection
• Add to selection
• Subtract from selection
• Intersect with selection
The remaining settings allow you to refine your selection parameters:
• Tolerance. This setting determines how similar the pixels must be to your initial click in order to be selected. You can enter a value in pixels, ranging from 0 to 255. A higher value selects a broader range of colors.
• Anti-alias. This creates a smoother edge when you click.
• Contiguous. When Contiguous is selected, only adjacent areas with the same colors are selected. If deselected, all pixels in the entire image that use the same colors will be selected.
• Sample All Layers. If you have a multilayered document and want to select colors on all layers, select this check box.
Putting the Magic Wand into action
Let’s try out the Magic Wand tool:
- Open the file Ch05_Magic_Wand.tif from the Chapter 5 folder.

- Select the Magic Wand tool by pressing Shift+W for wand. You can press the keys multiple times to toggle between the Quick Selection and Magic Wand tools.
- Set the Tolerance to 20 and select the Anti-alias check box.
- Click the sky in the upper-left corner to make an initial selection.
- Part of the sky will be selected. Hold down the Shift key and click another area of the sky to add to the selection. Repeat as needed until the entire sky is selected.
Additional Selection Commands
A few more Selection commands are found on the Select menu or by choosing Select > Modify. For a sense of completion, let’s take a quick look:
• All. The All command selects everything on the active layer or in your flattened document within the edges of the canvas. The keyboard shortcut is Command+A (Ctrl+A) when the canvas window is selected.
• Deselect. The Deselect command removes the active selection. You may need to do this when you’re finished altering your selection to avoid accidentally modifying your image. The keyboard shortcut is Command+D (Ctrl+D) when the canvas window is selected.
• Reselect. The Reselect command is truly useful because it allows you to reactivate the last selection in your document. It only works with selections made since you’ve last opened the document. The keyboard shortcut is Shift+Command (Ctrl+D) when the canvas window is selected.
• Inverse. The concept of inverse is very important. It is often far easier to select what you don’t want, and then inverse the selection to get what you do want. The keyboard shortcut is Shift+Command (Ctrl+I) when the canvas window is selected.
• Grow. The Grow command selects adjacent pixels that fall within a certain tolerance range. To modify the range, adjust the Tolerance settings of the Magic Wand tool.
• Similar. The Similar command also selects pixels based on the Tolerance settings of the Magic Wand tool. However, the pixels do not need to be adjacent.
• Transform Selection. The Transform Selection command allows you to modify an existing selection. Invoking it gives you controls similar to the Free Transform command (see Chapter 4 for more on the Free Transform command).
The following commands appear on the Modify submenu:
• Border. If you have an existing selection, you can use the Border command. You can enter a value between 1 and 200 pixels. A new selection that frames the existing selection will be created.
• Smooth. The Smooth command simplifies the selection by adding more pixels to the selection to make it less jagged.
• Expand. The Expand command allows you to add pixels in an outward fashion to the selection. The border will get wider based on the number of pixels you add.
• Contract. The Contract command works the opposite of the Expand command. Specify the number of pixels that you want the selection to decrease.
• Feather. The Feather command blurs the edge of the selection. While this creates a loss of detail at the edges, it can be very useful to create a blending transition (such as when extracting an object with a soft edge, like fabric or hair). The feather becomes apparent when you move, copy, or fill the selection. If you feather the edges too much, you might lose the selection border (marching ants), which is only visible above a 50% threshold. The keyboard shortcut is Shift+F6 when you have an active selection.
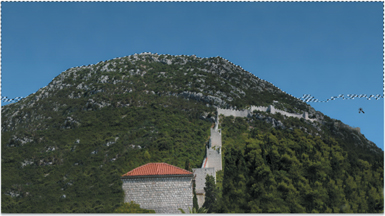
Let’s try out the concept of Inverse, as well as some of the other commands:
- Open the file Ch05_Inverse.tif from the Chapter 5 folder.
- Select the Magic Wand tool.
- Set the Tolerance to 32 and select the Anti-alias and Contiguous check boxes.
- Click the sky to make an initial selection.
- When most of the sky is active, choose Select > Grow. If needed, repeat the command.
- Choose Select > Inverse to capture the castle.
Intermediate Selection Techniques
Simply put, don’t stop now! Most Photoshop users develop an overdependence on the Magic Wand tool. While the basic selection techniques are important, they are not necessarily the best solution.
Color Range Command
If you liked the Magic Wand tool, then prepare to love the Color Range command. The Color Range command allows you to select a specified color within the document. You can then easily add to the selection to refine it. All of its speed and power is complemented by a very intuitive user interface.
Let’s experiment with the Color Range command:
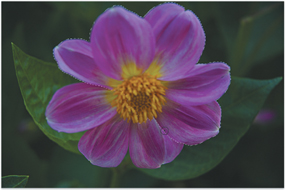
- Open the file Ch05_Color_Range.tif from the Chapter 5 folder.
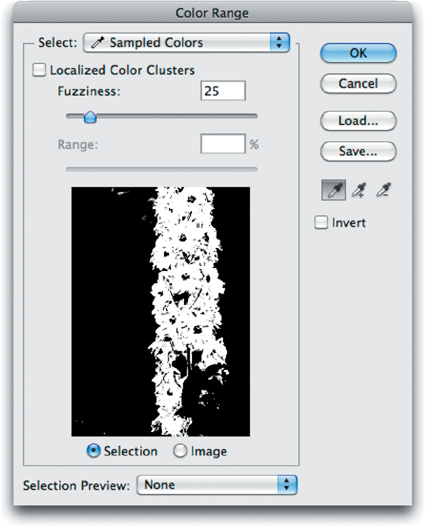
- Choose Select > Color Range. Set the Fuzziness to 25 to start and deselect Localized Color Clusters.
- With the eyedropper, click the purple flowers. You’ll see an initial selection created in the dialog box. A black and white matte is shown to preview the selection. The white areas indicate the selection you are creating.
- Hold down the Shift key and click more of the flowers to build a larger selection.
- Adjust the Fuzziness slider to your preference.
- If too much of the image is selected, you can hold down the Option (Alt) key to subtract from the selection. You can also select the Localized Color Clusters option to require similar pixels to be closer together.
- When you’re satisfied, click OK.
- Soften the selection further by choosing Select > Feather and entering a value of 5 pixels.
- Let’s use the selection to make an isolated image adjustment. One way to do this nondestructively is with an adjustment layer. Choose Layer > New Adjustment Layer > Hue/Saturation.
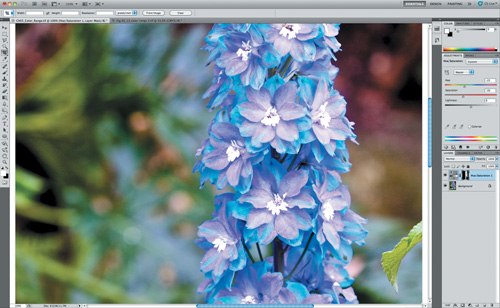
- Adjust the Hue slider to change the colors of the flowers (try a value of -25 to make the flowers bluer) and adjust the saturation to your preference.
- Click OK.
Adjustment layers are covered in greater detail throughout the rest of the book.
Quick Mask Mode
The Quick Mask mode can be a bit time-consuming, but its accuracy and flexibility make it worth using. The primary advantage of editing your selection as a quick mask is that you can use almost any Photoshop tool or filter to modify the mask. You can create a rough selection using a basic tool like the Magnetic Lasso, and then refine it with other tools such as the Brush or Blur tool.
Let’s give Quick Mask a try:
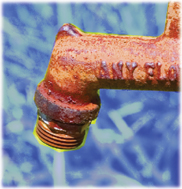
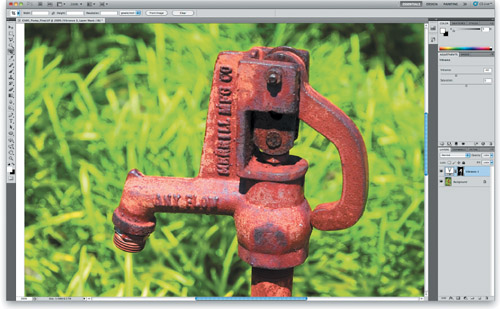
- Open the file Ch05_Pump.tif from the Chapter 5 folder. You’ll create an accurate selection around the water pump.
- Select the Polygonal Lasso tool from the Tools panel.
- Make an accurate selection around the pump, but don’t worry about perfection. Treat it as if you were cutting out the image with a pair of scissors. Remember, you must return to the starting point with the Lasso tool and click to close the loop.
- Click the Quick Mask icon (near the bottom of the Tools panel) or press Q. The shielded (tinted) areas will become the area outside the active selection when you exit Quick Mask mode.
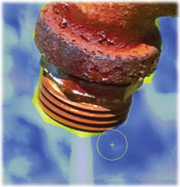
- The default Quick Mask color is red, set to 50%. In this case, another color may be more helpful. Double-click the Quick Mask icon to call up the Quick Mask Options window. Change the color to blue and set the opacity to 75%. You may want to revisit this window when masking to adjust your settings to improve visibility.
- Select the Brush tool from the Tools panel or press B. You’ll paint in the mask using brushes. However, you must first “adjust” the Brush tool, so it’s more accurate.
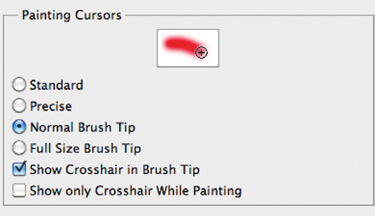
- Press Command+K (Ctrl+K) to call up the Preferences dialog box. Choose the Cursors category from the column to the left edge of the window. In the Painting Cursors area, click Normal Brush Tip (this will show you the size of your brush before clicking) and select Show Crosshair in Brush Tip. While in the Preferences dialog box, change the Other Cursors to Precise.
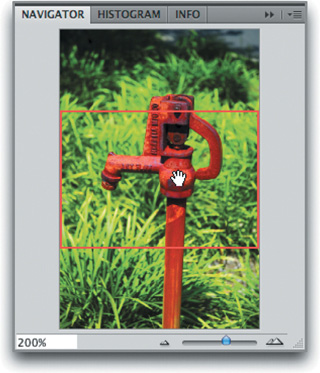
- Call up the Navigator panel. This useful panel makes it easy to zoom in and pan around your image. The slider changes your magnification level; the red box indicates your work area.
- Zoom in to a high magnification level (between 200–300%) to make it easier to paint in the rest of your selection.
- Examine your Brush options in the Options bar and Tools panel. Black adds to your mask; white subtracts from it.
• Pressing the D key loads the default black and white values.
• You can quickly adjust the size of your brush from the keyboard. Press the right bracket ] to enlarge the brush or the left bracket [ to reduce the size of the brush.
• You can soften your brush if you want a feathered edge. Shift+] makes the brush harder; Shift +[ makes the brush softer. A soft brush usually makes a more photorealistic edge.
- Click and paint in the remaining areas of the mask.
• Use smaller brushes to paint in tiny areas.
• Use larger brushes to paint in big areas.
• Use the keyboard shortcuts to quickly change the size of your brush as needed.
• If you have a long, straight run (like an edge), you can click once with a brush. Hold down the Shift key and click again farther away. Photoshop will “connect the dots.” This is the fastest way to fill in the mask.
• If you paint too close to the image, you can fix it. Press X to toggle from black to white. Painting with white subtracts from the mask (the color overlay is removed from areas painted with white). Painting with gray creates a semitransparent area, which is useful for feathering edges. (Semitransparent areas may not appear to be selected when you exit Quick Mask mode, but they are.)
- To pan around your image, you can move the red box in the Navigator panel. Alternately, hold down the spacebar and drag around in the document window.
- If you want to soften the edge of the quick mask, use the Smudge or Blur tool. The Smudge tool set to Darken mode works well. You can change the tool’s mode in the Options bar.
- Continue to paint in the mask. For an image of this complexity, it may take 5–20 minutes, but professional work takes time.
- When finished, press Q to exit Quick Mask mode. You should now have an active selection.
- Let’s test the selection by making an image adjustment. Choose Layer > New Adjustment Layer > Vibrance. Move the Vibrance slider left or right to see the intensity of the color of the pump change. Move the Saturation slider left to reduce the intensity of the color change. Click OK when you are done with the adjustment to apply it. Because you had an active selection, the adjustment is constrained to only the selected areas.
- Let’s make one more adjustment. Reload the selection by choosing Select > Reselect. Then reverse it by choosing Select > Inverse.
- You’ll now reduce the balance of the grass using the Levels command. Choose Layer > New Adjustment Layer > Levels. Move the middle (gray) input slider. Notice how the image gets darker? You adjusted the gamma or midtones of the image and changed its exposure. Click OK to apply the Levels change.

- You may now notice a slight red fringe around the pump. This is easy to fix. In the Layers panel, click the black and white mask icon (which looks like a silhouette of the pump) for the Vibrance adjustment layer.
- Click the Masks panel to select it.
- Adjust the Feather slider to blend the edges of the mask.
Tip: Saving and Reloading Selections
If you’d like to save your selection for later use, you need to create a channel. With an active selection made, choose Select > Save Selection. Name the selection and click OK to save the selection as an alpha channel. Alpha channels are simply saved selections that can be reloaded at a later time. They are also stored with your document when you close the file (unlike a quick mask, which is discarded when you exit the selection). Channels are covered in greater depth in Chapter 7, “Layer Masking.”
Was that quick and easy? Probably not, but with time and practice it gets significantly easier, so don’t give up. Accurate selections are extremely important as you begin to combine multiple images or need to make specialized image adjustments such as color correction. If you’d like more practice, use the images provided in the Quick Mask Practice folder in the Chapter 5 folder.
Creating a Path with the Pen Tool
You can use the Pen tool to create paths. Many users swear by the Pen tool, but be warned: It’s not the easiest tool to use. The Pen tool allows you to click around the image, adding anchor points. Photoshop then connects those points with vector lines, which can be adjusted or resized. Those users coming to Photoshop from Adobe Illustrator generally find the Pen tool relatively easy to use.
Let’s give the Pen tool a try:
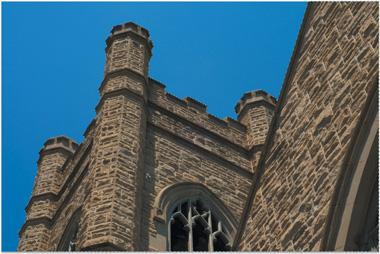
- Open the file Ch05_Paths.tif from the Chapter 5 folder.
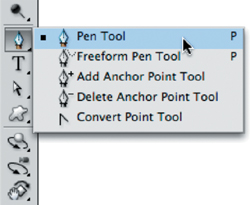
- Choose the Pen tool from the Tools panel or press the keyboard shortcut P.
- Choose the following options from the Options bar:
• Choose Shape Layer from the first three buttons to put a solid color over your image and make it easier to see if you are accurately tracing the object.
• Select Auto Add/Delete so anchor points will automatically be added when you click a line segment. Likewise, Photoshop will automatically delete a previous anchor point if you click directly on the anchor point with the Pen tool.
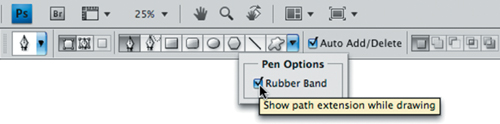
• Click the inverted arrow next to the shape buttons in the Options bar to access the submenu. Select the Rubber Band option to make it easier to preview path segments while drawing.
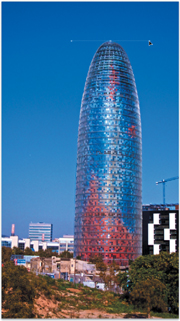
- Position the Pen tool in the lower-left corner of the tower and click. An initial anchor point is added.
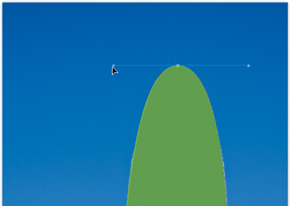
- You’ll now need to draw curved paths. When you click at the top of the tower to add a new point, keep the mouse button depressed. You can drag to create the curve: Remember that clicking adds a point, whereas click-and-drag produces a curve.
• Drag toward the curve for the first point. Drag in the opposite direction for the second point.
• Dragging both direction points in the same direction will create an S-shaped curve.
• Try to minimize the number of anchor points added. Move forward along the object and pull to form the curve.
- When you reach the end of your path, click to close the shape. As with the Polygonal Lasso tool, you must click your starting point to close the path. The path for this photo can be created with only three points.
- To end an open path, Command-click (Ctrl-click) away from the path.
- You can adjust the path by using the Direct Selection tool (A). This allows you to click an anchor point, or handle, and adjust the position or shape.
- When satisfied, Command-click (Ctrl-click) on the path’s thumbnail in the Layers panel. You will see the marching ants, which indicate an active selection has been made.
And that is how paths work. Either you found that enjoyable (and if so, keep practicing—it gets easier) or you disliked it. Like many features in Photoshop, paths are optional and don’t have to be part of your Photoshop workflow. They are worth learning, though, because they make it easier to select curved objects.
Refine Edge Command
Even though the Select menu offers several options, there is always room for improvement. Photoshop provides a powerful option for refining an existing selection—the Refine Edge command, which can be accessed in two ways. It is available in the Options bar for all selection tools. You can also access it by choosing Select > Refine Edge. This command is very intuitive, and its sliders provide quick feedback as you refine a selection. Let’s try it out:
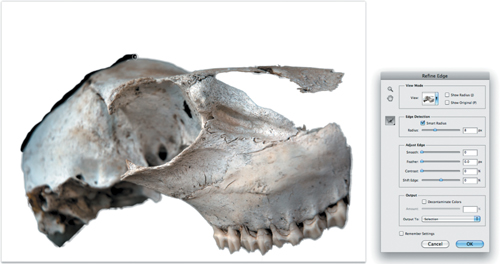
- Open the file Ch05_Refine Edge.tif from the Chapter 5 folder.
- Make an initial selection using a tool of your choice (the Quick Selection tool works well).
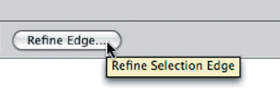
- Click the Refine Edge button in the Options bar. A new dialog box opens with additional controls.
- Click the View button to change the viewing mode for how the selection is displayed (or use the corresponding keyboard shortcut). Try the different modes to see the results:
Tip: Change Your Refined View
To cycle through the different viewing modes in the Refine Edge dialog box, just press the F key repeatedly. If you’d like to temporarily disable the view, press the X key.
• Marching Ants (M). Shows the selection with the started dashed line.
• Overlay (V). Behaves similarly to the Quick Mask mode.
• On Black (B). Previews the layer over black, which is good for light edges.
• On White (W). Shows the selected region over a white background.
• Black & White (K). Simulates a channel view where the selection displays as a black (transparent) and white (opaque) layer (with gray indicating partial transparency).
• On Layers (L). Composites the image over any other layers (or transparency if single-layer image).
• Reveal Layer (R). Shows the entire, original layer contents.
- Next you can use Edge Detection to clean up the edges further. These controls work best for areas of partial transparency. For this image, try to clean up some of the dark fringe and any of the holes in the skull that should be partially see-through:
Tip: Smarter Refinements
You can select the Show Radius or Show Original check box to make it easier to see the changes created with the Edge Detection options.
• Radius. Drag to refine the selection edge. Try a value of 8 for this image.
• Smart Radius. This option automatically evaluates contrast in the edges and attempts to correct for better transitions. If your object lacks uniform hardness and softness, use this option. Select this option for this image (and in most cases).
• Refine Radius tool. Use this brush-style tool to paint over any edges that need additional refinement. You can also hold the Option (Alt) key to switch to an erase mode to undo any unwanted refinements. Paint over the left edge of the skull.
- The next group of sliders allows you to adjust the edge globally. Experiment with the following sliders:
• Smooth. Removes any jagged edges.
• Feather. Softens the edge of the selection.
• Contrast. Increases the contrast of a selection’s edge. You’ll get better results in most cases with the Smart Radius and refinement tools.
• Shift Edge. Grows or shrinks a selection. This is a quick way to tighten a rough selection and remove color spill.
- The last category, output, determines how the processed selection is treated.
• Decontaminate Colors. Applies color correction to remove any color spill from the background onto the selected object.
- Finally, you’ll need to determine what Photoshop does with the new selection. The choices are many (and useful):
• Selection. Creates an active selection.
• Layer Mask. Creates a nondestructive mask that produces transparency in the highlighted layer.
• New Layer. Creates a new layer with only the selected area.
• New Layer with Layer Mask. Creates a new layer with only the selected area masked. This is the most flexible option. Choose this option for this document.
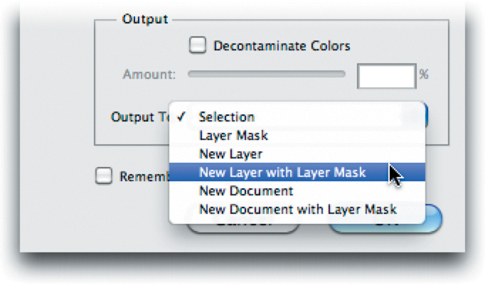
• New Document. Creates a new document with only the selected area.
• New Document with Layer Mask. Creates a new document with the selected area masked.
- Click OK to create the selection and masked image.
Advanced Selection Techniques
Two additional selection techniques—channels and Calculations—are advanced (in that they utilize channels). Remember, channels represent the components of color. The brighter the area in the individual channel, the more coverage there is for that color. By harnessing the black and white details of one (or more) channel you can create a mask. These two techniques won’t be appropriate to use every time (they are image dependent), but they are pretty easy to use and should be part of your skill set.
Using a Channel
In many images, there is often high contrast between the different elements. For example, a person framed by a bright blue sky may clearly stand out, since there are a lot of red values in skin and a lot of blue in the sky. You can make a quick decision whether the channel selection technique will work by looking at the Channels panel. Look for a single channel that is high contrast. It doesn’t need to be perfect; you can use the Paintbrush tool to touch up the channel to make a more accurate selection.
Let’s use the channel selection techniques to select and modify a logo on the side of a building. By isolating the logo, you can make a targeted selection to improve its appearance:
- Open the image Ch05_Hotel.tif from the Chapter 5 folder.
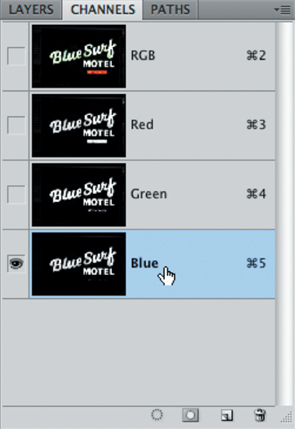
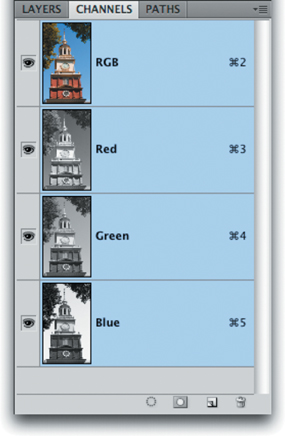
- Open the Channels panel. Click the Channels panel submenu (the triangle in the upper-right corner). Choose Palette Options and set the thumbnail to the largest size.
- In the Channels panel, click on the word Red to view just the red channel. Examine the channel for contrast detail. Repeat for the green and blue channels. Look for the channel with the cleanest separation of the motel’s name. The blue channel should appear the cleanest.
- Right-click (Ctrl-click) on the blue channel and choose Duplicate Channel. Name it Selection and click OK to create a new (alpha) channel.
- The new channel should automatically be selected.
- Press Command+L (Ctrl+L) to invoke a Levels adjustment. This will allow you to adjust contrast on the mask. Make sure the Preview check box is selected.
- Move the Black Input Levels slider to the right to increase contrast in the black areas.
- Move the White Input Levels slider to the left to increase contrast in the white areas.
- Move the middle (gray) input slider to the right to touch up the spotty areas.
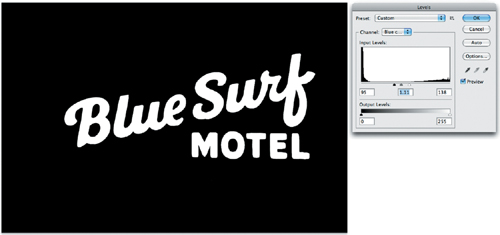
- Click OK to apply the adjustment to the channel.
- To soften the edges of the channel, choose Filter > Blur > Gaussian Blur. Apply the filter with a value of 2 or 3 pixels to soften the edge.
- To load the selection, Command-click (Ctrl-click) the Selection channel to create an active selection. By selecting the logo, you can make a controlled adjustment.
You now have a great selection that’s ready to use for image adjustments or layer masking.
Calculations Command
You can use the Calculations command to create a new selection based on the details in an image’s channels. This technique is hit or miss, because it won’t work with every image. But when it succeeds, it’s a big success. The Calculations command works well when there is high contrast between the subject and the background. You should look at each channel independently until you find those with the highest contrast. Depending on the source photo, the selection you can generate will be anything from a great start to perfect.
Note: Calming Math Fear
The word calculations can be scary, because math is not the most popular subject for many people. But don’t worry: The computer will do all the calculations for you as it combines two channels to create a new selection.
Let’s put the Calculations command into action to create an active selection and a saved alpha channel. You will first create a new channel based on the existing channels:
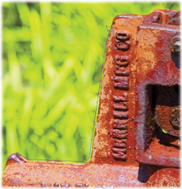
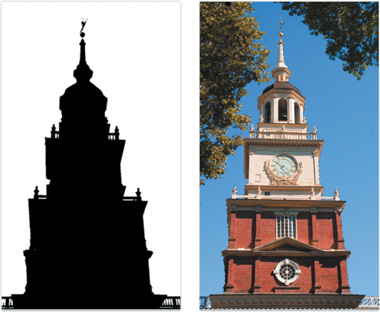
- Open the file Independence Ch05_Independence_Hall.tif from the Chapter 5 folder.
- Bring up the Channels panel (Windows > Channels) and look for the highest contrasting channels. Because you want to remove the background, look for the contrast between the foreground and background. The blue channel should stand out the most.
- Choose Image > Calculations and make sure the Preview check box is selected. You’ll now combine two of the color channels to create a new alpha channel. An alpha channel is simply a saved selection. You can Command-click (Ctrl-click) it to turn it into an active selection.
- In the Source 1 area, set the Channel to Blue.
- In the Source 2 area, you’ll experiment to find the right combination. The red channel is a good place to start, because it looks very different than the blue channel. It’s also a good idea to experiment by clicking the Invert button to reverse the channel. Calculations is all about trial and error, but since it works so well, taking a little time to experiment is worth it.
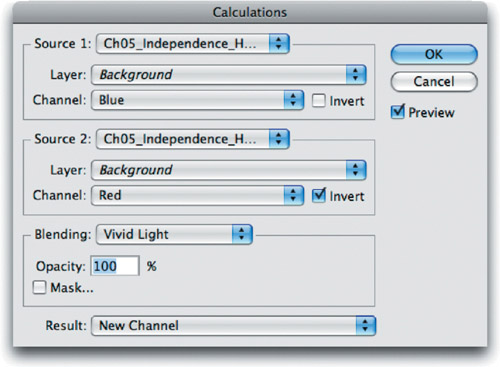
- Combine the red and blue channels by using Blending. From the Blending menu, try different blending modes. Blending modes control how two different images or channels blend together based on their color and luminance values (for more on blending modes see Chapter 9, “Using Blending Modes”). Different source images will need different modes. Experiment by clicking through each mode on the list. You may also want to try deselecting the Invert check box when working with other images. In the Independence Hall image, the blue and red (inverted) channels combine most effectively using the Vivid Light blending mode. This will create a new channel that has a clean separation between the building and sky.
- Click OK to create a new channel. The channel, called Alpha 1, should be selected in the Channels panel. Photoshop turned off the RGB channels for now.
- Choose the Brush tool and set the foreground color to white.
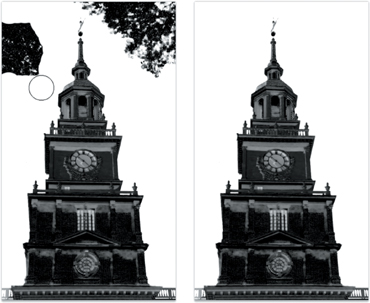
- Paint over the trees so the sky becomes pure white.
- Run a Levels adjustment on the channel to adjust the contrast between black and white. Choose Image > Adjust > Levels or press Command+L (Ctrl+L). Move the Black Input Levels slider to the right to darken the gray areas to black. Move the White Input Levels slider to the left to brighten the whites in the image. Move the gray (gamma) input slider to the right to close up gray areas.
- Click the OK button to apply the Levels adjustment.
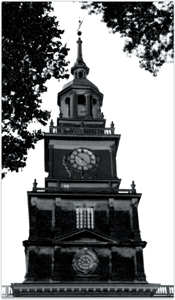
- Zoom in to 100% magnification to look for gaps in the alpha channel. You should see a few in the tower. With your Paintbrush set to black, paint out the spotting. You can also run a 1 pixel Gaussian Blur on the channel with the Filter command.
- Command-click (Ctrl-click) on the alpha channel thumbnail to load the selection. You will need to choose Select > Inverse to choose Independence Hall.

- Click the visibility icon next to the RGB composite channel to enable it.
- Click the visibility icon next to the alpha channel to disable it.
Look closely at the selection; it should be pretty impressive. At this point, you could copy the image and add it to a different composite image, or run a filter or image processing command on the building. With a little bit of experimentation, you can generate a perfect alpha channel and turn it into a layer mask (you’ll try this in Chapter 7). Calculations won’t work every time, but it’s a great solution that’s worth a try when you have high-contrast channels.
Advice on Selections
No single technique is ideal for making the perfect selections. Every image is unique and will require you to analyze it. Knowing multiple techniques is very important, because it expands your options. Get comfortable with all the techniques in this chapter and be sure to practice. Practice really does make perfect.