
Chapter 6: Building a Vacation Booking App with the PrimeVue UI Framework
In Chapter 5, Building a Multipurpose Calculator Mobile App with Ionic, we built a mobile app with the Ionic mobile app framework, which is built upon Vue.js. However, so far in this book, we have not built any web apps using the UI libraries or frameworks that are based on Vue.js. Additionally, we have not built anything that has its own backend. A backend is definitely something that is required in most systems because we need somewhere to store our data, authenticate users, run background tasks, and more. In this chapter, we will build a vacation booking application with the PrimeVue UI framework.
We will be using the Vue 3 frontend for administration and another frontend for users to add their bookings. We will also include a simple backend to authenticate any administrators before they carry out tasks that can only be done by them. To keep the project as simple as possible, the frontend for the general public won't require authentication.
In this chapter, we will focus on the following topics:
- Building a frontend with the PrimeVue UI framework
- Building a simple backend with Express for authentication
- Persisting data in the backend with SQLite
- Using Vue Router for authentication on the frontend
- Form validation with Vee-Validate and Yup
Technical requirements
The code for this chapter is located at https://github.com/PacktPublishing/-Vue.js-3-By-Example/tree/master/Chapter06.
PrimeVue is a UI framework based on Vue 3. This means we can use it for Vue 3 apps. Frameworks that are based on Vue 2 cannot be used by Vue 3 apps because the API has gone through significant changes. The underlying code of Vue 3 is also different from Vue 2. PrimeVue includes a number of common components that we use in web apps, such as text inputs, buttons, menu bars, tables, and more. It is very comprehensive in terms of what is included. Additionally, it comes with styles for items in the form of themes. This means that we can use the built-in components right away. Since PrimeVue is made for Vue 3, we can simply register the components, import the CSS, and use the components in our code. We can also register them either locally or globally depending on which components we need for the given components.
Understanding PrimeVue
PrimeVue comes with styles for the inputs and various kinds of text, such as validation errors and buttons. It also comes with flexbox helpers, which we can use to set the spacing for the components easily. This is very useful because we can simply use the CSS classes that PrimeVue comes with to set the position and spacing of our components.
So far in this book, we have not used any libraries to make form validation more convenient. Form validation is something that we have to do a lot for most web apps.
Understanding Vee-Validate and Yup
Vee-Validate 4 is a form validation library that is compatible with Vue 3. With it, we can add components that will add validation to our forms on the frontend. We will use it with the Yup data validation library to create the form validation schema, which Vee-Validate can use for validation. With the Form component, we can add a form that enables us to do form validation with Vee-Validate 4. Then, the Field component can be used to validate the form control components that come with PrimeVue. It does this by wrapping around them and passing the slot props that come with the Field components as props to the input components.
The Yup library will be used with Vee-Validate to let us validate form values easily without writing all the code from scratch. It lets us create form validation schema objects that we can pass into forms created with Vee-Validate to add form validation.
Understanding Express
To create a simple backend to store data, we use the Express framework. This is a very simple Node.js backend framework, which allows us to create a simple backend quickly. To store data, we will use an SQLite database to keep the project simple. We will use the Express framework to create an API to enable the frontend to make HTTP requests to it. We let them make requests by exposing the API endpoint, which the frontend can use by adding routes into it. Each route has a handler function that handles the data submitted by the frontend. We get request data from the HTTP requests made by the frontend, which includes the headers and the body, and we use them in the route handlers to get and store the data the way we want.
Connecting the frontend and the backend
To make the frontend app communicate with the backend app, we'll need to enable cross-domain communication on the backend so that the traffic from the frontend can go through to the backend. This can easily be done with the Cross-Origin Resource Sharing (CORS) middleware that we will add to our Express app.
To work with SQLite databases, we use the sqlite3 library, which lets us manipulate the SQLite database within the Node.js apps. We can make queries and run SQL commands to insert or remove data from our database.
Additionally, we will have simple authentication for the admin frontend. We will check the username and password for the admin login, and if it's valid, we can issue a token and send it to the frontend. Then, the frontend will use the token, which is stored in the header, to check whether the request can be made from the frontend. We add authentication for the admin-only routes only, so we only need to check the token for the routes that requires authentication before loading them.
To create and check the token, we use the jsonwebtoken library. This allows us to create a token and sign it with a secret string. It also enables us to check the token with a secret to see whether it is valid. We put the jsonwebtoken library inside a middleware that is run before the route handler to do the check.
If the token is valid, then we call a function to proceed to the route handler. Otherwise, we send a 401 status back to the client.
Now, we are going to build the project.
Creating the vacation booking project
To create the vacation booking application, we need to create subprojects for the frontend, the admin frontend, and the backend. To create the frontend and admin frontend project scaffolds, we use the Vue CLI. To create the backend folder, we use the Express Generator global package.
Follow these steps to set up the project:
- First, create the travel-booking-app folder to house all of the projects.
- Next, create the admin-frontend, frontend, and backend folders inside the main folder.
- Go into the admin-frontend folder and run the following command:
npx vue create
This will add the scaffolding code for the Vue project inside the admin-frontend folder.
- If you are asked to create the project in the current folder, select Y. Then, when you're asked to choose the Vue version of the project, choose Vue 3.
Likewise, run the Vue CLI in the same way for the frontend folder.
- To create an Express project, run the Express application generator app. To do this, go into the backend folder and run the following command:
npx express-generator
The preceding command will add all of the files required for our project inside the backend folder. If you get an error, then try running express-generator as an administrator.
Now that we have created the project scaffold files and folders, we are ready to start working on the backend.
Creating the backend
Now that we have created the project folders with the scaffolding code, we can start working on the project code. We will start with the backend since we need it for both frontends.
To get started, let's add a few libraries that are needed to manipulate the SQLite database and add authentication to our app. Additionally, we need the library to add CORS to our app.
To install all of them, run the following command:
npm i cors jsonwebtoken sqlite3
After installing the packages, we are ready to work on the code.
Adding authentication middleware
First, we add our middleware which we will use to check the token. We can do this easily with the jsonwebtoken library. This has the verify method to check the token.
To add the middleware, create the middlewares folder in the backend folder, and then add the verify-token.js file. Next, add the following code for the middleware:
const jwt = require('jsonwebtoken');
module.exports = (req, res, next) => {
const token = req.get('x-token')
try {
jwt.verify(token, 'secret');
next()
} catch (err) {
res.status(401)
}
}
Here, we get the x-token request header with the req.get method. Then, we call jwt.verify with the returned token and secret, to verify that the token is valid. Then, we call next if it is valid. If it is not valid, an error will be thrown, and the catch block will be run. res.status with 401 is run to return the 401 response to the frontend since the token isn't valid in this scenario.
The module.exports property is set to the middleware function as the value, which we are exporting. Exporting the function makes it available in the other modules in our backend app.
Add routes to handle requests
Next, we will add the router modules with the routes. First, add the routes to manipulate the bookings. To do this, add the bookings.js file to the routes folder. Inside the file, write the following code:
const express = require('express');
const sqlite3 = require('sqlite3').verbose();
const router = express.Router();
const verifyToken = require('../middlewares/verify-token')
router.get('/', (req, res, next) => {
const db = new sqlite3.Database('./db.sqlite');
db.serialize(() => {
db.all(`
SELECT
bookings.*,
catalog_items.name AS catalog_item_name,
catalog_items.description AS catalog_item_description
FROM bookings
INNER JOIN catalog_items ON catalog_items.id =
bookings.catalog_item_id
`,
[],
(err, rows = []) => {
res.json(rows)
});
})
db.close();
});
...
Here, we import the required modules including the verify-token middleware file that we just created.
The router.get method allows us to create a GET request API endpoint. The path is in the first argument. It is the path for the route and it is relative to the path of the router. So, the router's route path is the first segment, and the path in the first argument of router.get forms the rest of the URL.
The second argument of the router.get method is the route handler. The req parameter is an object that has the request data. The res parameter is an object that lets us send various kinds of responses to the frontend. We get the database with the sqlite3.Database constructor with the path to the database file.
Next, we call the db.serialize function so that we can run the code inside the callback in sequence.
The db.all method gets all the results returned from the query. The string is the SQL command that retrieves all the data from the bookings table, which we will create with our own SQL code. The bookings table is joined with the catalog_items table so that the vacation package data is associated with the booking.
The second argument of db.all is the extra parameters that we want to pass in, which we ignore by passing in an empty array. Then, in the final argument, we have the function with the err parameter with the errors in object form. The rows parameter has the results from the query. In the callback, we call res.json to return the JSON response with the rows parameter data.
Then, we call db.close to close the database connection once the required operation is done.
Next, we will create a POST route. This will allows us to run an INSERT SQL command to insert an entry into the bookings table. Add the following code:
...
router.post('/', (req, res) => {
const db = new sqlite3.Database('./db.sqlite');
const { catalogItemId, name, address, startDate, endDate } =
req.body
db.serialize(() => {
const stmt = db.prepare(`
INSERT INTO bookings (
catalog_item_id,
name,
address,
start_date,
end_date
) VALUES (?, ?, ?, ?, ?)
`);
stmt.run(catalogItemId, name, address, startDate, endDate)
stmt.finalize();
res.json({ catalogItemId, name, address, startDate,
endDate })
})
db.close();
});
...
Here, we get the body properties with the req.body property. We get all the properties we want to insert into the entry. Next, we create a prepared statement with the INSERT statement. The values at the end are question marks; this means they are placeholders where we can place our own values when we run the stmt.run method.
Prepared statements are useful because they enable us to pass in values to our SQL commands securely. The values are all sanitized so that malicious code cannot run inside the code. We run stmt.run to run the prepared statement with the values we want to replace the placeholder with. We then call stmt.finalize to finalize the operation by writing the data. Next, we call res.json to return the JSON response to the frontend as a response. Then, we call db.close to close the database connection again.
Next, we will create a DELETE endpoint with the router.delete method. To do this, write the following code:
...
router.delete('/:id', verifyToken, (req, res) => {
const db = new sqlite3.Database('./db.sqlite');
const { id } = req.params
db.serialize(() => {
const stmt = db.prepare("DELETE FROM bookings WHERE id = (?)");
stmt.run(id)
stmt.finalize();
res.json({ status: 'success' })
})
db.close();
});
...
Here, we have the /:id path. :id is the URL parameter placeholder for the route. We also have the verifyToken middleware that we imported at the top of the booking.js file. We can use this to verify the token before proceeding to run the code for the route handler. This means that this route is an authenticated route that requires a token in the header for the API endpoint call to succeed.
In the route handler, we get the id URL parameter from the req.params property. Then, we call db.serialize, as we did with the previous route. In the callback, we have the prepared statement, so we can issue a DELETE SQL command with the id value that we set in the stmt.run method. Then, we call stmt.finalize, res.json, and db.close just as we did in the other routes.
Finally, at the end of the booking.js file, let's add the following:
module.exports= = router;
Adding the preceding statement allows us to import it into another file to register the router. Registering the router will make it accessible.
Next, we will create the catalog.js file in the routes folder. This file is a router module with API endpoints to add our vacation packages. First, we start as follows:
const express = require('express');
const router = express.Router();
const sqlite3 = require('sqlite3').verbose();
const verifyToken = require('../middlewares/verify-token')
router.get('/', (req, res,) => {
const db = new sqlite3.Database('./db.sqlite');
db.serialize(() => {
db.all("SELECT * FROM catalog_items", [], (err, rows = [])
=> {
res.json(rows)
});
})
db.close();
});
...
This is almost the same as the GET route in bookings.js; however, here, we retrieve all of the items from the catalog_items table.
Next, let's add a POST route to add an entry into the catalog_items table. Write the following code:
...
router.post('/', verifyToken, (req, res,) => {
const { name, description, imageUrl } = req.body
const db = new sqlite3.Database('./db.sqlite');
db.serialize(() => {
const stmt = db.prepare(`
INSERT INTO catalog_items (
name,
description,
image_url
) VALUES (?, ?, ?)
`
);
stmt.run(name, description, imageUrl)
stmt.finalize();
res.json({ status: 'success' })
})
db.close();
});
...
Here, we have verifyToken in the second argument to check the token in this route before running the route handler in the third argument.
Next, we add a route that enables us to delete a catalog_items entry. We do this using the following code:
...
router.delete('/:id', verifyToken, (req, res,) => {
const { id } = req.params
const db = new sqlite3.Database('./db.sqlite');
db.serialize(() => {
const stmt = db.prepare("DELETE FROM catalog_items WHERE
id = (?)");
stmt.run(id)
stmt.finalize();
res.json({status:'success'})
db.close();
});
...
Finally, we export the router:
module.exports = router;
This module isn't much different from booking.js.
Next, we delete the content of the routes/users.js file or create it if it doesn't exist. Then, we add the following code:
const express = require('express');
const jwt = require('jsonwebtoken');
const router = express.Router();
router.post('/login', (req, res) => {
const { username, password } = req.body
if (username === 'admin' && password === 'password') {
res.json({ token: jwt.sign({ username }, 'secret') })
}
res.status(401)
});
module.exports= = router;
This is where we check whether the username and password for the admin user are valid. We only have one user to check here to keep the project simple. We get the username and password from the req.body object, which has the JSON request object. Then, we check for the username and password with the if statement, and if the expression in if returns true, we call jwt.sign to create a token with the token data in the first argument and secret in the second argument. Then, we return the response with the authentication token with res.json.
Otherwise, we call res.status with 401 to return a 401 response, as the username or password are not valid.
Next, we register our router modules and global middleware in app.js. To do this, we write the following code:
...
const indexRouter = require('./routes/index');
const usersRouter = require('./routes/users');
const catalogRouter = require('./routes/catalog');
const bookingsRouter = require('./routes/bookings');
const app = express();
const cors = require('cors')
...
app.use('/users', usersRouter);
app.use('/catalog', catalogRouter);
app.use('/bookings', bookingsRouter);
We import the router modules that we exported earlier with the last line of the router files using require. Then, we import the cors module:
const cors = require('cors')
We call app.use to add the cors middleware and then the router modules. In the last three lines, we pass in path as the first argument and the router module as the second argument. This allows us to access the endpoints that we created earlier. With the cors module, we can enable cross-domain communication in our Express app.
Next, let's create our SQL script so that we can drop and create the tables easily. To do this, create the db.sql file in the backend folder and write the following code:
DROP TABLE IF EXISTS bookings;
DROP TABLE IF EXISTS catalog_items;
CREATE TABLE catalog_items (
id INTEGER NOT NULL PRIMARY KEY,
name TEXT NOT NULL,
description TEXT NOT NULL,
image_url TEXT NOT NULL
);
CREATE TABLE bookings (
id INTEGER NOT NULL PRIMARY KEY,
catalog_item_id INTEGER NOT NULL,
name TEXT NOT NULL,
address TEXT NOT NULL,
start_date TEXT NOT NULL,
end_date TEXT NOT NULL,
FOREIGN KEY (catalog_item_id) REFERENCES catalog_items(id)
);
Here, we have created the bookings and catalog_items tables. Each of these tables has various fields. TEXT creates a text column. NOT NULL makes the column non-nullable. PRIMARY KEY indicates that the column is a primary key column. FOREIGN KEY indicates that one column is a foreign key for another column.
We can run the SQL code by installing the DB Browser for the SQLite program, which can be downloaded at https://sqlitebrowser.org/, and then creating db.sqlite in the backend folder. Then, we can go to the Execute SQL tab and paste the code into the text input. Following this, we can select all the text and press F5 to run the code. This will drop any existing bookings and catalog_items tables and create them again. For changes for the database to be written to disk, you have to save them. To do this, click on the File menu and then click on Write Changes. We can also press the Ctrl + S keyboard combination to save the changes.
Finally, to make our app run and restart automatically when we change the code, we can install the nodemon package globally. To do this, run the following command:
npm i -g nodemon
Then, in the package.json file, change the script.start property's value to the following code:
{
...
"scripts": {
"start": "nodemon ./bin/www"
},
...
}
We can run npm start with nodemon instead of the regular node executable, which means the app will restart automatically when we change any code file and save it.
Now that we have created a basic backend for the frontends to consume, we can move on to create our frontend apps with PrimeVue and Vue 3.
Creating the admin frontend
Now that the backend app is complete, we can move on to work on the admin frontend. We already created the Vue 3 project for the admin frontend in the admin-frontend folder earlier, so we just need to install packages that we require and work on the code. We will need the PrimeVue packages – that is, the Vee-Validate, Vue Router, Axios, and Yup packages.
To install them, run the following command in the admin-frontend folder:
npm i axios primeflex primeicons primevue@^3.1.1 vee-validate@next vue-router@4 yup
Axios allows us to make HTTP requests to the backend. Vue Router lets us map URLs to the page components. Vee-Validate and Yup allow us to easily add form validation to our forms, and the remaining packages are the PrimeVue packages.
Creating the admin frontend pages
After installing the packages, we can start working on the code. First, we will work on the components. In the components folders, add the CatalogForm.vue file and write the following code:
<template>
<Form @submit="onSubmit" :validation-schema="schema">
<Field v-slot="{ field, errors }" v-model="name"
name="name">
<div class="p-col-12">
<div class="p-inputgroup">
<InputText
placeholder="Name"
:class="{ 'p-invalid': errors.length > 0 }"
v-bind="field"
/>
</div>
<small class="p-error" v-if="errors.length > 0">
Name is invalid.
</small>
</div>
</Field>
...
</Form>
</template>
Here, we have the Form component from the Vee-Validate package to add a form with form validation. The submit event is only emitted when all of the form values are valid. We will register the Form component later. The validation-schema prop is set to the validation schema object created by Yup.
Inside the Form component, we have a Field component, which is also provided by the Vee-Validate package. We will also register this component globally later so that we can use it. Inside the Field component, we have the InputText component to add an input field into our app. To enable form validation for the InputText component, we pass in the field object to the slot props and pass the whole thing as the value of the v-bind directive. The v-bind directive allows Vee-Validate to handle the form values and add validation to our form field. The errors array gives us any validation errors that might have occurred.
The p-col-12 class is provided by PrimeVue's PrimeFlex package. It lets us set the width of a div tag to full width, which means it takes 12 columns out of 12 on the page. With the p-inputgroup class, we can create an input group. The p-error class styles the text color to red so that we can show form validation messages in a way that is easy for the user to see. The p-invalid class makes the edge of the input red. We only change it to red if the error's length is bigger than 0 since this means there are validation errors, and we only show the smaller element when the error's length is bigger than 0.
The Field component has a v-model directive to bind the inputted value to the corresponding reactive properties. We also have a name attribute that is also used as the property name of the value parameter for the submit event handler, which has the inputted values. These values are always valid since the submit handler is only run when all of the form values are valid.
With the name field, we can enter the name of the vacation package.
Next, we need to add a text area to allow users to enter a description for the vacation package. To do this, write the following code:
<template>
<Form @submit="onSubmit" :validation-schema="schema">
...
<Field v-slot="{ field, errors }" v-model="description"
name="description">
<div class="p-col-12">
<div class="p-inputgroup">
<Textarea
placeholder="Description"
:class="{ 'p-invalid': errors.length > 0 }"
v-bind="field"
/>
</div>
<small class="p-error" v-if="errors.length > 0">
Description is invalid
</small>
</div>
</Field>
...
</Form>
</template>
This is almost the same as the name field; however, in this scenario, we switch out the InputText component for the Textarea component. We also change the v-model and name values. The Textarea component is from the PrimeVue package, which renders into a textarea element with its own styles.
Next, we add the image URL field so that we can add an image URL for the vacation package. We just let the user enter the image URL to make our project simpler. To add the field to the Form component, write the following code:
<template>
<Form @submit="onSubmit" :validation-schema="schema">
...
<Field v-slot="{ field, errors }" v-model="imageUrl"
name="imageUrl">
<div class="p-col-12">
<div class="p-inputgroup">
<InputText
placeholder="Image URL"
:class="{ 'p-invalid': errors.length > 0 }"
v-bind="field"
/>
</div>
<small class="p-error" v-if="errors.length > 0">
Image URL is invalid.
</small>
</div>
</Field>
...
</Form>
</template>
This is just another text input with a different name and v-model value. Finally, let's add a submit button to the form using the following code:
<template>
<Form @submit="onSubmit" :validation-schema="schema">
...
<div class="p-col-12">
<Button label="Add" type="submit" />
</div>
</Form>
</template>
The Button component is from the PrimeVue package, which we will register globally later to make it available everywhere.
Next, we add the component options object. We use the component options API to create our components. First, we import everything and create the form validation schema with the Yup library. To add the code, write the following in components/CatalogForm.vue:
<script>
import * as yup from "yup";
import axios from "axios";
import { APIURL } from "@/constants";
const schema = yup.object().shape({
name: yup.string().required(),
description: yup.string().required(),
imageUrl: yup.string().url().required(),
});
export default {
name: "BookingForm",
data() {
return {
name: "",
description: "",
imageUrl: "",
schema,
};
},
...
};
</script>
Here, we create the schema object with the yup.object method, which allows us to validate an object with some properties. The validation schema is separate from the v-model binding. The property of the object that we pass into the shape method has to match the name attribute's value of the Field component.
To validate the value of the field with name set to name, we set the name property to yup.string().required() to ensure that the name field is a string and has a value. We set the same value for description. The imageUrl value is set to yup.string().url().required() to ensure that the inputted value is a URL and that it is filled in.
The data method returns the schema so that we can use the validation-schema prop of the Form component.
To finish the component, we add the onSubmit method, which is called when the submit event is emitted by the Form component:
<script>
...
export default {
...
methods: {
async onSubmit(value) {
const { name, description, imageUrl } = value;
await axios.post(`${APIURL}/catalog`, {
name,
description,
imageUrl,
});
this.$emit("catalog-form-close");
},
},
};
</script>
Here, we simply take the property values from the value parameter, which has the valid form field values. Then, we make a POST request to the catalog endpoint with the JSON payload passed into the second argument. Following this, we call the this.$emit method to emit the catalog-form-close event to signal to the dialog component that this form will be housed in to close.
Add a top bar and menu bar
Next, we will add a top bar component into our app. To do this, create TopBar.vue in the src/components folder. Then, add the following template code into the file:
<template>
<Menubar :model="items">
<template #start>
<b>Admin Frontend</b>
</template>
</Menubar>
</template>
The Menubar component is provided by the PrimeVue component. We can use it to add a menu bar with some items that we can click on to navigate to different pages. The model prop is set to the items reactive property, which is an array of menu item objects that we will add shortly. The start slot lets us add items to the left-hand side of the menu bar. We can put some bold text into the slot and it'll be displayed on the left-hand side.
Next, we can add a component object for the component. To add it, write the following code:
<script>
export default {
name: "TopBar",
props: {
title: String,
},
data() {
return {
items: [
{
label: "Manage Bookings",
command: () => {
this.$router.push("/bookings");
},
},
...
methods: {
logOut() {
localStorage.clear();
this.$router.push("/");
},
},
beforeMount() {
document.title= = this.title;
},
};
</script>
Here, we register the title prop, which we use to set the document.title value. The document.title property sets the title on the top bar. In the data method, we return an object with the item's reactive property. This is set to an object with the label and command properties. The label property is shown in the menu bar item for the user. The item is shown as a link. The command method is run when we click on the item.
With the this.$router.push method, we can navigate to the page that is mapped to the given URL. The logOut method navigates back to the page mapped to the / path, which is the login page that we will discuss later. Additionally, we clear the local storage so that we can clear the authentication token.
In the beforeMount hook, we set the document.title property to the value of the title prop.
Add shared code to deal with requests
Next, let's write the code for the Axios request interceptor to let us add the authentication token to the x-token request header of all requests aside from when we make requests to the /login endpoint. To do this, create the src/plugins folder and add axios.js to it. Then, inside this file, write the following code:
import axios from 'axios'
import { APIURL } from '@/constants'
axios.interceptors.request.use((config) => {
if (config.url.includes(APIURL)
&& !config.url.includes('login')) {
config.headers['x-token'] = localStorage.getItem('token')
return config
}
return config
}, (error) => {
return Promise.reject(error)
})
Here, we check the URL that the request is being made to by retrieving the URL with the config.url property. Then, if we make any requests to an endpoint other than /login, we set the x-token request header:
config.headers['x-token'] = localStorage.getItem('token')
Note that we get the token from local storage and set it to the value of config.headers['x-token']. The config.headers property is an object with the request headers. The second argument is the request error handler. Here, we simply return a rejected promise with Promise.reject so that we can handle the error.
Next, we add Vue Router routes to our routes. We stay in the src/plugins folder and create a vue-router.js file. Then, we add the following code to the file:
import { createWebHashHistory, createRouter } from 'vue-
router'
import Login from '../views/Login.vue'
import Bookings from '../views/Bookings.vue'
import Catalog from '../views/Catalog.vue'
const beforeEnter = (to, from, next) => {
try {
const token = localStorage.getItem('token')
if (to.fullPath !== '/' && !token) {
return next({ fullPath: '/' })
}
return next()
} catch (error) {
return next({ fullPath: '/' })
}
}
const routes = [
{ path: '/', component: Login },
{ path: '/bookings', component: Bookings, beforeEnter },
{ path: '/catalog', component: Catalog, beforeEnter },
]
const router = createRouter({
history: createWebHashHistory(),
routes,
})
export default router
We add the beforeEnter function to check for the token if we go to any page on the frontend other than the home page. We can check the path that the user tries to go to with the to.fullPath property. If it is anything other than '/' and there is no token in local storage, then we call next with an object, and the fullPath property set to '/' to go to the login page. Otherwise, we call next with no argument to go to the page we are supposed to go to. If we have an error, then we also go to the login page, as you can see from the code in the catch block.
Next, we have the routes array with the route definitions. This has the route path in the path property, and component is the component that the path maps to. The beforeEnter property is added to the last two route objects so that we can only go there once we are logged in.
Then, to create the router object, we call createRouter with an object with the history property set to the object returned by the createWebHashHistory function; this is so that we can keep the hash between the hostname and the rest of the URL. We set the routes property to the routes array in order to register the routes. This is so we can see the right component when we go to the routes.
Finally, we export the router object as a default export so that we can add the router object to our app later with app.use.
Next, we create the views folder inside the src folder. This means we can add the pages that users can go to. Now, let's add a page to allow the admins to manage any bookings by adding the Bookings.vue file to the src/views folder. We open the file and add the following template to the component. This is so that we can add the TopBar component that we created earlier:
<template>
<TopBar title="Manage Bookings" />
<div class="p-col-12">
<h1>Manage Bookings</h1>
</div>
<div class="p-col-12">
<Card v-for="b of bookings" :key="b.id">
<template #title>{{ b.name }} </template>
<template #content>
<p>Address: {{ b.address }}</p>
<p>Description: {{ b.description }}</p>
<p>Start Date: {{ b.start_date }}</p>
<p>End Date: {{ b.end_date }}</p>
</template>
<template #footer>
<Button
icon="pi pi-times"
label="Cancel"
class="p-button-secondary"
@click="deleteBooking(b.id)"
/>
</template>
</Card>
</div>
</template>
Note that we add the heading for the page using the h1 element. Then, we add the Card component to display the bookings to the admin. The Card component is provided by PrimeVue, and we will register it later. We use the v-for directive to render the bookings array into multiple Card components. The key prop is set to a unique ID so that Vue 3 can distinguish each item properly.
We populate the title, content, and footer slots with different content. The footer slot has a Button component that runs the deleteBooking function when we click on the button. The icon prop allows us to set the icon on the left-hand side of the button. The label prop has the button text on the right-hand side of the icon. With the p-button-secondary class, we can set the color of the button.
Next, we can add the component options object with the getBooking and deleteBooking methods to retrieve bookings and delete bookings via the backend API, respectively. To add them, write the following code:
<script>
import axios from "axios";
import { APIURL } from "@/constants";
import TopBar from "@/components/TopBar";
export default {
name: "Bookings",
components: {
TopBar,
},
data() {
return {
bookings: [],
};
},
...
beforeMount() {
this.getBookings();
},
};
</script>
We also register the TopBar component in the components property. The getBookings method calls axios.get to make a GET request and sets the value of the this.bookings reactive property to the response object.
bookings is stored inside the data property of the object that is returned as the resolved value of the returned promise.
Likewise, we call axios.delete inside the deleteBooking method to make a DELETE request to delete the items. Then, we call this.getBookings to get the data again. We also call this.getBookings in the beforeMount hook to get the data when the page loads.
Next, we add a page to allow admins to manage the vacation package items. To do this, let's add the Catalog.vue file to the src/views folder. Then, inside the file, write the following:
<template>
<TopBar title="Manage Vacation Packages" />
<div class="p-col-12">
<h1>Manage Vacation Packages</h1>
</div>
<div class="p-col-12">
<Button label="Add Vacation Package"
@click="displayCatalog= = true" />
<Dialog header="Add Vacation Package" v-
model:visible="displayCatalog">
<CatalogForm
@catalog-form-close="
displayCatalog= = false;
getCatalog();
"
/>
</Dialog>
</div>
...
</template>
Here, we add the TopBar component to display the top bar; h1 displays a heading. Next, we add a button that will let us show the dialog by setting displayCatalog to true. Then, we display the Dialog component by setting the v-model directive with the visible modifier to the displayCatalog value. Using this, we can control when the Dialog component is displayed. The Dialog component displays a dialog box, and this component is provided by PrimeVue.
The header prop sets the header text for the dialog box. We use CatalogForm as the content, and we listen to the catalog-form-close event emitted by the CatalogForm component. When it is emitted, we set displayCatalog to false and call getCatalog to get the data again:
<template>
...
<div class="p-col-12">
<Card v-for="c of catalog" :key="c.id">
<template #header>
<img :alt="c.description" :src="c.image_url" />
</template>
<template #title> {{ c.name }} </template>
<template #content>
{{ c.description }}
</template>
<template #footer>
<Button
icon="pi pi-times"
label="Delete"
class="p-button-secondary"
@click="deleteCatalogItem(c.id)"
/>
</template>
</Card>
</div>
</template>
Next, we add the Card components that are rendered from the catalog reactive property with the v-for directive to render the catalog entries. The remaining code is similar to what we had in the Bookings.vue file, but now the render properties are different, and Button calls a different method when we click on it.
Following this, we add the component object by adding the following code to src/views/Catalog.vue:
<script>
import axios from "axios";
import { APIURL } from "@/constants";
import TopBar from "@/components/TopBar";
import CatalogForm from "@/components/CatalogForm";
...
methods: {
async getCatalog() {
const{ { data } = await axios.get(`${APIURL}/catalog`);
this.catalog = data;
async deleteCatalogItem(id) {
await axios.delete(`${APIURL}/catalog/${id}`);
this.getCatalog();
},
},
beforeMount() {
this.getCatalog();
},
};
</script>
Here, the code is similar to what we had in src/views/Bookings.vue except that, here, we make requests to the catalog endpoints to get and delete the data.
Then, we create the last page in the admin frontend app, which is the login page. To add the login page, we add the Login.vue file to the src/views folder. Then, inside the file, we add the form and the username field using the following code:
<template>
<Form @submit="onSubmit" :validation-schema="schema">
<div class="p-col-12">
<h1>Admin Log In</h1>
</div>
<Field v-slot="{ field, errors }" v-model="username"
name="username">
<div class="p-col-12">
<div class="p-inputgroup">
<InputText
placeholder="Username"
:class="{ 'p-invalid': errors.length > 0 }"
v-bind="field"
/>
</div>
<small class="p-error" v-if="errors.length > 0">
Username is invalid.
</small>
</div>
</Field>
...
</Form>
</template>
The username field is similar to all of the other fields that we have added before. Next, we add the password input and button using the following code:
<template>
<Form @submit="onSubmit" :validation-schema="schema">
...
<Field v-slot="{ field, errors }" v-model="password"
name="password">
<div class="p-col-12">
<div class="p-inputgroup">
<InputText
placeholder="Password"
type="password"
:class="{ 'p-invalid': errors.length > 0 }"
v-bind="field"
/>
</div>
<small class="p-error" v-if="errors.length > 0">
Password is invalid
</small>
</div>
</Field>
<div class="p-col-12">
<Button label="Log In" type="submit" />
</div>
</Form>
</template>
We set the type prop to password to make the field a password input. The button's type prop is set to submit so that we can trigger the submit event when we click on it and all of the form values remain valid.
Next, we add the component object portion of the Login.vue file, which has the onSubmit method to make the login request:
<script>
import * as yup from "yup";
import axios from "axios";
import { APIURL } from "@/constants";
const schema = yup.object().shape({
username: yup.string().required(),
password: yup.string().required(),
});
export default {
name: "Login",
data() {
return {
username: "",
password: "",
schema,
};
},
methods: {
async onSubmit(values) {
const { username, password } = values;
try {
const {
data: { token },
} = await axios.post(`${APIURL}/users/login`, {
username,
password,
});
localStorage.setItem("token", token);
this.$router.push("/bookings");
} catch (error) {
alert("Login failed");
}
},
},
};
</script>
We create the schema object with the validation schema, which is similar to the other schemas we have used previously. Then, we add that to the object we returned in the data method. The onSubmit method takes the username and password properties from the value parameter so that we can use it to make the POST request to the /users/login endpoint.
Once we have done that, we get a token from the response if the request is successful along with the localStorage.setItem method. Next, we call the this.$router.push method to redirect to the /bookings URL. If there are any errors, we show an alert with the "Login failed" message.
Next, we add the router-view component provided by Vue Router to App.vue. This is so we can show the page that we created in the routes object. To add it, write the admin frontend:shared code, adding to deal with requests" following code:
<template>
<router-view></router-view>
</template>
<script>
export default {
name: "App",
};
</script>
<style>
body {
background-color: #ffffff;
font-family: -apple-system, BlinkMacSystemFont, Segoe UI,
Roboto, Helvetica,
Arial, sans-serif, Apple Color Emoji, Segoe UI Emoji,
Segoe UI Symbol;
font-weight: normal;
color: #495057;
-webkit-font-smoothing: antialiased;
-moz-osx-font-smoothing: grayscale;
margin: 0px;
}
</style>
We also have a style tag to set the font family and set the margin of the body to 0px, so there is no white space between the elements and the edge of the page.
Next, we add constants.js to the src folder and then add APIURL to it:
export const APIURL = 'http://localhost:3000'
In main.js, we register all of the global components along with the router object we created earlier. We also import the global styles provided by PrimeVue, so everything looks good:
import { createApp } from 'vue'
import App from './App.vue'
import PrimeVue from 'primevue/config';
import InputText from "primevue/inputtext";
import Button from "primevue/button";
import Card from 'primevue/card';
import Toolbar from 'primevue/toolbar';
import router from './plugins/vue-router'
import Textarea from 'primevue/textarea';
import Dialog from 'primevue/dialog';
import Menubar from 'primevue/menubar';
import { Form, Field } from "vee-validate";
import "primeflex/primeflex.css";
import 'primevue/resources/themes/bootstrap4-light-blue/theme.css'
import "primevue/resources/primevue.min.css";
import "primeicons/primeicons.css";
import './plugins/axios'
...
app.component("Form", Form);
app.component("Field", Field);
app.use(PrimeVue);
app.use(router)
app.mount('#app')
In package.json, we change the port that the development server runs on by changing the script.serve property to the following:
{
...
"scripts": {
"serve": "vue-cli-service serve --port 8082",
"build": "vue-cli-service build",
"lint": "vue-cli-service lint"
},
...
}
Now, when we run npm run serve, we get the following screenshot:
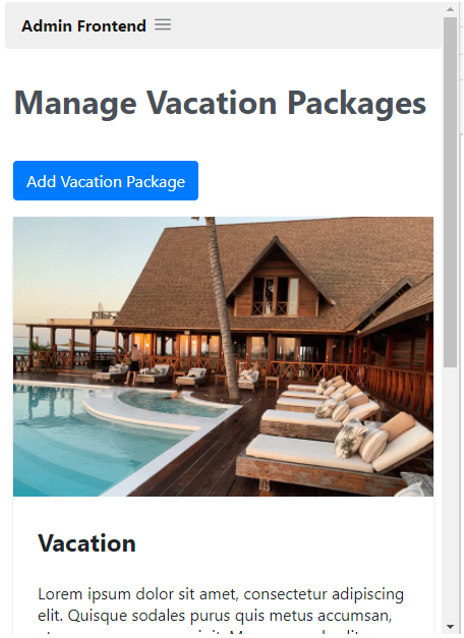
Figure 6.1 – Admin Frontend
Now that we have created the admin frontend app, all we have left to add is the user frontend.
Creating the user frontend
Now that we have finished with the admin frontend, we will complete this chapter's project by creating the user's frontend. The user frontend is similar to the admin frontend; however, in this case, there is no authentication required to use it.
We will start by installing the same packages that we installed for the admin frontend. Navigate to the frontend folder and run the following command:
npm i axios primeflex primeicons primevue@^3.1.1 vee-validate@next vue-router@4 yup
Next, create the src/components folder, if it doesn't exist. Then, create the BookingForm.vue file inside of src/components so that users can add their bookings.
Add the form and name fields to allow users to enter their name:
<template>
<Form @submit="onSubmit" :validation-schema="schema">
<Field v-slot="{ field, errors }" v-model="name"
name="name">
<div class="p-col-12">
<div class="p-inputgroup">
<InputText
placeholder="Name"
:class="{ 'p-invalid': errors.length > 0 }"
v-bind="field"
/>
</div>
<small class="p-error" v-if="errors.length > 0">Name
is invalid </small>
</div>
</Field>
...
</Form>
</template>
This is very similar to the other text input fields that we added earlier. Then, add the address field using the following code:
<template>
<Form @submit="onSubmit" :validation-schema="schema">
...
<Field v-slot="{ field, errors }" v-model="address"
name="address">
<div class="p-col-12">
<div class="p-inputgroup">
<InputText
placeholder="Address"
:class="{ 'p-invalid': errors.length > 0 }"
v-bind="field"
/>
</div>
<small class="p-error" v-if="errors.length > 0"
>Address is invalid</small
>
</div>
</Field>
...
</Form>
</template>
Now, let's add the Calendar component that is provided by PrimeVue, which we have not used before in this project. The Calendar component lets users pick a date. We can add the Start Date field to allow the user to pick the start date of their vacation:
<template>
<Form @submit="onSubmit" :validation-schema="schema">
...
<Field v-slot="{ field, errors }" v-model="startDate" name="startDate">
<div class="p-col-12">
<label>Start Date</label>
<div class="p-inputgroup">
<Calendar
inline
placeholder="Start Date"
:class="{ 'p-invalid': errors.length > 0 }"
:minDate="new Date()"
v-bind="field"
v-model="startDate"
/>
</div>
<small class="p-error" v-if="errors.length > 0">
Start date is invalid
</small>
</div>
</Field>
...
</Form>
</template>
Here, we have the minDate prop, which sets the earliest date that the user can pick. The inline prop will make the date picker display on the form instead of in a popup. Likewise, we can add the End Date field using the following code:
<template>
<Form @submit="onSubmit" :validation-schema="schema">
...
<Field v-slot="{ field, errors }" v-model="endDate" name="endDate">
<div class="p-col-12">
<label>End Date</label>
<div class="p-inputgroup">
<Calendar
inline
placeholder="End Date"
:class="{ 'p-invalid': errors.length > 0 }"
v-bind="field"
v-model="endDate"
:minDate="new Date(+startDate + 24 * 3600 * 1000)"
/>
</div>
<small class="p-error" v-if="errors.length > 0"
>End date is invalid</small
>
</div>
</Field>
...
</Form>
</template>
Here, we set the minDate prop to a day after startDate. 24 * 3600 * 1000 milliseconds is equivalent to one day. Finally, we add the submit button just as we did in our other forms:
<template>
<Form @submit="onSubmit" :validation-schema="schema">
...
<div class="p-col-12">
<Button label="Book" type="submit" />
</div>
...
</Form>
</template>
Next, we create schema by writing the following:
<script>
import { Form, Field } from "vee-validate";
import * as yup from "yup";
import axios from "axios";
import { APIURL } from "@/constants";
const schema = yup.object().shape({
name: yup.string().required(),
address: yup.string().required(),
startDate: yup.date().required().min(new Date()),
endDate: yup
.date()
.required()
.when(
"startDate",
(startDate, schema) => startDate &&
schema.min(startDate)
),
});
...
</script>
To validate endDate, we call the when method with the field name that we want to check against. Then, we call schema.min to make sure that the endDate is later than the startDate.
Next, we add the component object to register the selectedCatalogId prop and add the onSubmit method. We write the following code:
<script>
...
export default {
name: "BookingForm",
components: {
Form,
Field,
},
props: {
...
methods: {
async onSubmit(values) {
const { name, address, startDate, endDate } = values;
await axios.post(`${APIURL}/bookings`, {
name,
address,
startDate,
endDate,
catalogItemId: this.selectedCatalogId,
});
this.$emit("booking-form-close");
},
},
};
</script>
The onSubmit method gets the form field values from the values parameter and makes a POST request to the bookings endpoint to add a booking. We use selectedCatalogId to add the booking. Then, we emit the booking-form-close event to emit an event to the parent to signal the form to close.
Next, we add Vue Router to our app by adding vue-router.js to the src/plugins folder:
import { createWebHashHistory, createRouter } from 'vue-router'
import Catalog from '../views/Catalog.vue'
const routes = [
{ path:'/', component: Catalog },
]
const router = createRouter({
history: createWebHashHistory(),
routes,
})
export default router
This is very similar to what we had in the admin frontend.
Next, we create a page to show all of the vacation packages to the user by adding the src/views/Catalog.vue file and then adding the following template code:
<template>
<Card v-for="c of catalog" :key="c.id">
<template #header>
<img :alt="c.description" :src="c.image_url" />
</template>
<template #title> {{ c.name }} </template>
<template #content>
{{ c.description }}
</template>
<template #footer>
<Button
icon="pi pi-check"
label="Book"
class="p-button-secondary"
@click="book(c.id)"
/>
...
:selectedCatalogId="selectedCatalogId"
/>
</Dialog>
</template>
</Card>
</template>
Here, we simply render a form from the catalog array. We have a Dialog component with the BookingForm component inside. We listen to the booking-form-close event emitted by it to close the Dialog component by setting displayBookingForm to false and calling displayMessage to display the alert. We pass in selectedCatalogId as the value of the prop with the same name.
The remainder of the template code is almost the same as what we had previously, except for the property names displayed and the addition of the image inside the header slot.
Next, we add the component options object to the same file by writing the following code:
<script>
import axios from "axios";
import { APIURL } from "@/constants";
import BookingForm from "../components/BookingForm.vue";
export default {
name: "Catalog",
components: {
BookingForm,
},
data() {
return {
selectedCatalogId: undefined,
displayBookingForm: false,
...
displayMessage() {
alert("Booking successful");
},
},
beforeMount() {
this.getCatalog();
},
};
</script>
We register the BookingForm component within the components property. The getCatalog function gets the vacation package catalog items from the API. The booking function sets displayBookingForm to true to open the Dialog component, and selectedCatalogId is also set there. The beforeMount hook calls getCatalog to retrieve the catalog data.
Adding the router view and entry point code
In App.vue, we write the following code to add router-view and set the same styles that we did in the admin frontend:
<template>
<router-view></router-view>
</template>
<script>
export default {
name: "App",
};
</script>
<style>
body {
background-color: #ffffff;
font-family: -apple-system, BlinkMacSystemFont, Segoe UI,
Roboto, Helvetica, Arial, sans-serif, Apple Color Emoji,
Segoe UI Emoji, Segoe UI Symbol;
font-weight: normal;
color: #495057;
-webkit-font-smoothing: antialiased;
-moz-osx-font-smoothing: grayscale;
margin: 0px;
}
</style>
Then, we create constants.js in the src folder and add the following line to add APIURL:
export const APIURL = 'http://localhost:3000'
Then, in main.js, we replace the contents of the file with the following code to register the components and the router globally. We also import the styles provided by PrimeVue to make our app look good:
import { createApp } from 'vue'
import App from './App.vue'
import PrimeVue from 'primevue/config';
import InputText from "primevue/inputtext";
import Button from "primevue/button";
import Card from 'primevue/card';
import Toolbar from 'primevue/toolbar';
import Calendar from 'primevue/calendar';
import Dialog from 'primevue/dialog';
import router from './plugins/vue-router'
import "primeflex/primeflex.css";
import 'primevue/resources/themes/bootstrap4-light-blue/theme.css'
import "primevue/resources/primevue.min.css";
import "primeicons/primeicons.css";
const app = createApp(App)
app.component("InputText", InputText);
app.component("Button", Button);
app.component("Card", Card);
app.component("Toolbar", Toolbar);
app.component("Calendar", Calendar);
app.component("Dialog", Dialog);
app.use(PrimeVue);
app.use(router)
app.mount('#app')
In package.json, we change the port that the development server runs on by changing the script.serve property to the following:
{
...
"scripts": {
"serve": "vue-cli-service serve --port 8082",
"build": "vue-cli-service build",
"lint": "vue-cli-service lint"
},
...
}
Now, when we run npm run serve, we get the following screenshot:
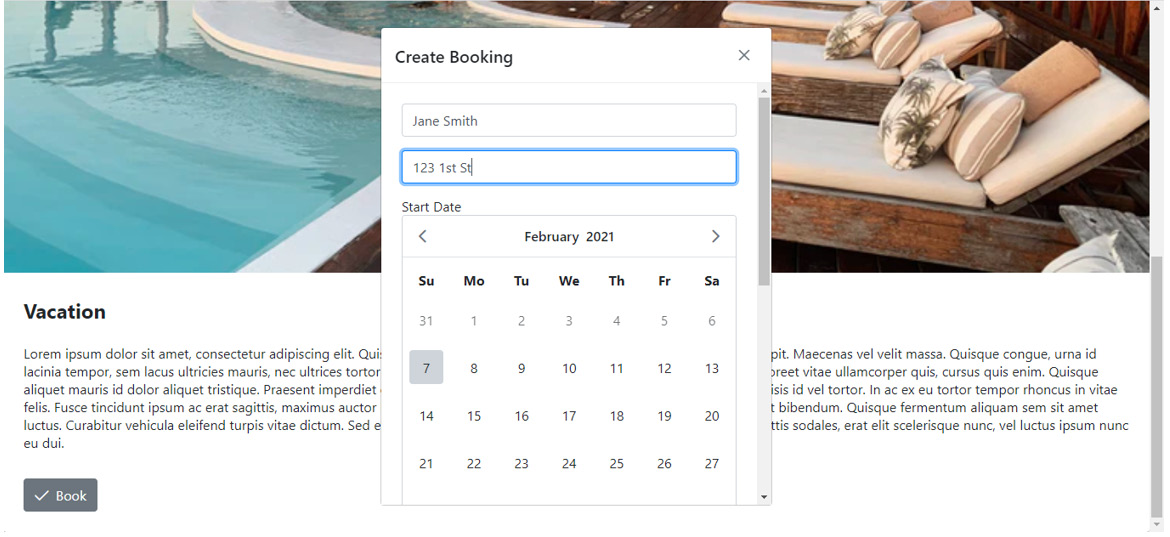
Figure 6.2 – The user frontend
With the user frontend created, the vacation booking system is now complete.
Summary
In this chapter, we learned how to use PrimeVue effectively to build a vacation booking application. With PrimeVue, we can create good-looking Vue 3 web apps easily. PrimeVue comes with many useful components that we can add to create our web apps, such as inputs, text areas, tables, dialog boxes, date pickers, and more. It also comes with styles built-in, so we don't have to add any styles from scratch ourselves. Additionally, we can add the PrimeFlex package that is also provided by PrimeVue; with flexbox, we can change the spacing and positions of elements and components easily.
Vee-Validate and Yup allow us to add form validation into our Vue 3 app. This integrates easily with the input components provided by PrimeVue. These two libraries make a lot of the form validation work easy, as we don't have to write all the form validation code ourselves.
To make a simple backend, we used Express to create a simple API to interact with the frontend. We also used the sqlite3 package to manipulate data with the SQLite databases in our API. Express comes with many add-ons that we can use to add a lot of functionality, such as cross-domain communication. We can also easily add JSON Web Token authentication to our Express app via the jsonwebtoken library.
In the next chapter, we will learn how to build a storefront with GraphQL and Vue 3.