
Chapter 6
Android Wear Platform
6.1 Android Wear
Android Wear is the official Wearable flavor of the Android OS from Google, Inc. designed for smart watches and similar devices. Android Wear was formally announced in March 2014 and released soon after. Many major hardware vendors, chip makers, and jewelry designers announced their support, and some of them released Android Wear devices to the consumer market shortly thereafter. The numerous Android Wear partners include Samsung, Motorola, LG, HTC, ASUS, Broadcom, Qualcomm, Intel, Fossil, Inc., MediaTek, and Imagination Technologies, and the list is growing.
The open nature of the Android platform makes it possible for hobbyists, enthusiasts, and businesses to port and extend the Android OS to a wider range of devices over and above those supported officially. There are innumerable such efforts and one such endeavor was the WIMM One smart watch from WIMM Labs, which was released in 2011.
The WIMM One was based on the Android OS version 2.1 code base. Figure 6-1 shows a WIMM One watch from WIMM Labs, circa 2011. Google, Inc. acquired WIMM Labs sometime in 2012. Thus, the Android Wear platform appears to have its origins in the WIMM One smart watch.

Figure 6-1 WIMM One Android-based smart watch from WIMM Labs, circa 2011.
Attribution: Wikipedia user Bostwickenator, under Creative Commons Sharealike license 3.0.
6.2 Android Wear Platform: Android Wear OS, Wear Devices, and Wear API
The Android Wear platform consists of the Wear OS, the Wear devices, and the APIs that support writing Wear Apps. Wear devices are available in a variety of models from numerous manufacturers.
6.2.1 Android Wear OS
The Android Wear OS, at the time of writing, runs on ARM and Intel x86 (Atom) family CPUs. The Android Wear OS is constrained to be lightweight and subsets the standard Android OS and application runtime environment—meaning that a few of the standard Android APIs are not available on Android Wear.
6.2.2 Android Wear Devices
Android Wear devices run a full-fledged OS—the Android Wear OS. Wear devices have the ability to execute Wear Apps directly on them. Android Wear devices have two standard shapes: square or round.
Figures 6-2A and 6-2B show a square Android Wear device displaying boot animation and the Android Wear logo while booting up. Android Wear emphasizes simple computer–human interaction and interfaces, based on touch and voice. Android Wear supports voice-based interactions. “OK Google” is the “hot word” that triggers voice-based interaction. It tells your device that you are ready to issue a voice-based command. There are several system commands such as “Take a Note,” “Set an Alarm,” and “Take a Picture.” You can also perform a voice-based search using your Android Wear device.

Figure 6-2A Square Android Wear device, booting up.

Figure 6-2B Square Android Wear device, showing Wear logo while booting up.
Due to the small form factor and limited real estate, interactions are constrained to be extremely simple, requiring minimal human input. They are also intended to be minimally intrusive to the user’s attention. Additionally, Android Wear aims to align with fitness, workout, and health metrics.
6.2.3 Android Wear API and Wear Apps
Android Wear Apps need to be targeted specifically for and run exclusively on the Android Wear platform (API level 20). Wear Apps have the ability to access the hardware, sensors, GPU, and services available on the Wear device. Android Wear Apps can access a large subset of the standard Android API. Particularly, a few packages are unavailable to Wear Apps, as listed below:
- android.webkit
- android.appwidget
- android.print
- android.app.backup
- android.hardware.usb
This may at first seem like a limitation, but fortunately, Wear devices are typically tethered to handheld Android devices, and since all Wear Apps released via the Google Play Store have a corresponding “companion” App on the handheld device, some limitations can often be bridged by leveraging the companion handheld App.
6.3 Android Notifications and Android Wear
Notifications were introduced minimally in Android version 3 (Honeycomb) and have had major upgrades in both Android 4.1 (Jellybean) and Android version 5 (Lollipop). Notifications are now a very important part of the Android platform and aligned with the Suggest paradigm. There is a close association between Notifications and Android Wear.
Notifications are a mechanism by which Apps that are not currently in the foreground can inform the user that some new information has arrived or that some event has occurred. Notifications are managed by the Android OS and the system UI. An App makes the request to the Android platform to display a Notification, and the Android OS issues the Notification that the user sees in the system-wide Notification status bar. In order to see details of the Notification, the user needs to open the Notification drawer. Both the Notification area and the Notification drawer are managed by the system. After a user receives a Notification, it can also serve as an entry point directly into an App’s user interfaces, typically to display finer details about the new information and offer actions on that information via the App’s user interfaces. This makes Notifications a strategic entry point into your App and an effective mechanism for user engagement—if leveraged properly.
Notifications include timely reminders and suggestions based on the user’s current context. Android users are familiar with the Notification area in the status bar, which is typically located on the top left of their device’s screen. A missed call, a newly arrived email, and an upcoming calendar appointment are some examples of Notifications that users are accustomed to seeing. The Notification system allows users to keep up to date with information that they are likely to find of interest. Notifications are closely related to the Suggest model of user interaction. The user may optionally perform actions via the user interfaces presented by the Notification’s details; therefore, the latter and optional aspect of the Notification flow can take the user into the Demand model of interaction.
Notifications have various Priority flags in the API—such as default, minimum, and maximum—that the originating App can set in the application code. The use of the Priority PRIORITY_MIN flag results in the system UI showing the Notification within the expanded Notification drawer only whenever the user happens to open it. This approach is an “opportunistic” and less intrusive flavor of Notifications—wherein nothing is displayed in the status bar and information is displayed only within the Notification drawer, whenever the user happens to opens it. In addition to Priority, a Notification has several attributes such as a message, an associated icon, an expanded message, and also optionally an action that takes the user into the App’s user interface. Other attributes include flags for indicating whether the Notification is to be on a onetime alert basis or as an ongoing event.
6.3.1 Android 5.0 (Lollipop) Notifications
The arrival of Android Wear into the Android ecosystem coincides approximately with the release of the Android 5.0 (Lollipop) platform, which has added new features that help the user control Notifications and Interruptions. One of the goals of Android Wear is to enable the user to engage in their real-world activities better and reduce the overheads and Interruptions associated with keeping up with the online world. Coincidentally, the core Android platform itself has embraced the principle of giving users more control over Notifications and Interruptions. Notifications have undergone significant changes, and these changes in functionality, user interface, and structure of Notifications represent somewhat of a departure in design with respect to earlier versions of Android.
Notifications have become more accessible and configurable. The user can choose to receive Notifications through the device screen lock, with control over whether sensitive content may or may not be displayed through the locked screen. Heads-up Notification is a new format for receiving high-priority Notifications via a small floating window while some other Apps are in active use.
Users can receive, dismiss, or act on a heads-up Notification without leaving the App they were using. You have likely noticed the heads-up Notification’s small floating window, when receiving an incoming call while using any random App on your Android 5 device. Figure 6-3 shows such a heads-up Notification about an incoming phone call, which can be handled without having to leave the App that you are using.

Figure 6-3 Heads-up Notification.
Cloud-synced Notifications are a mechanism for dismissing a Notification on all devices after the user has dismissed the Notification on one device.
The visual design has undergone changes consistent with the new material design theme.
Android 5.0 Notifications also introduce Wearable extensions for Android Wear, which we will be covering shortly. You will also notice that Notifications for ongoing events and running services are displayed persistently in the Notification drawer for the duration of the event. It is very useful for the user to remain aware of both the ongoing events and running services on their devices, such as an ongoing phone call.
Figure 6-4 shows a Notification drawer on my handheld device with several ongoing Notifications such as USB debugging and an Android Wear service listening on a TCP port.

Figure 6-4 Android 5 Notification drawer showing ongoing events or running services.
6.4 Notification Settings and Control
The intricate configurations and control that users have over Notifications affect the behavior of Apps on their handheld devices as well as on the tethered Wear devices. Most Notifications that are shown on your handheld device will also be shown on your tethered Wear device. When you dismiss a Notification on your watch, it is also dismissed from your handheld device. Your handheld device and Wear device can be “muted” independently. It is possible for your Wear device to receive Notifications while your phone is “muted,” depending on the per App Notification Settings that are configurable by the user.
6.4.1 Sound and Notification and Priority Notification
You have likely noticed that Sound and Notifications have been grouped together in the OS Settings. You will also have noticed that touching the volume control button on your handheld Android device shows a Sound and Notification control widget.
Figure 6-5 shows the Sound and Notification quick control widget with the default settings. The volume control slider controls the volume for Notification alerts. The volume slider responds both to the hardware volume +/− control buttons as well as to touch. The Notification control includes the Notification level options: NONE, PRIORITY, and ALL. The default setting is ALL (seen in Figure 6-5), which results in the Android OS providing ALL Notifications to the user while applying the volume level per the setting in the slider. The volume control works in conjunction with, but is secondary to, the Notification level that is set by the user—this will become clearer in just a moment.
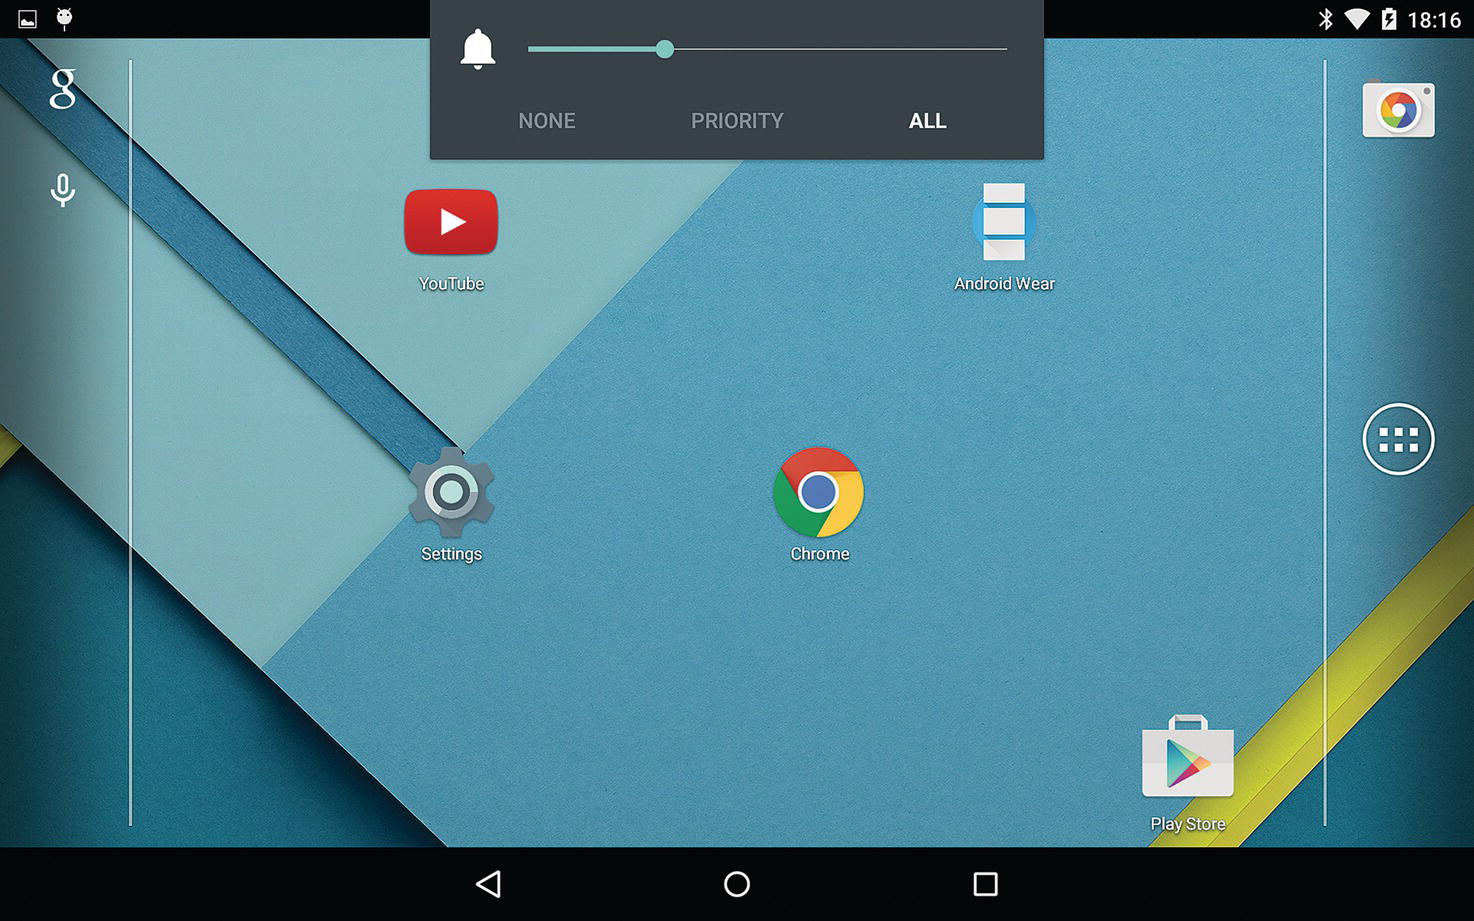
Figure 6-5 Sound and Notification, quick control widget—default Notification level ALL.
Figure 6-6A shows the Notification filter set at NONE, which tells the Android OS that the user does not want any Notifications for the specified duration. You will notice that the volume slider has become invisible; this is because—with the Notification level set at NONE, the user will not receive any Notifications, alerts, phone calls, and calendar reminders—the volume level is rendered irrelevant.

Figure 6-6A Sound and Notification, quick control widget—Priority level NONE.
The icon associated with the Notification level of NONE is a circle with a diagonal line across it, which is shown on the status bar indicator during the interval that this mode is set for. This indicator makes the user aware of the current Notification Priority setting.
Figure 6-6B shows the icon for Notification level NONE in the status bar.
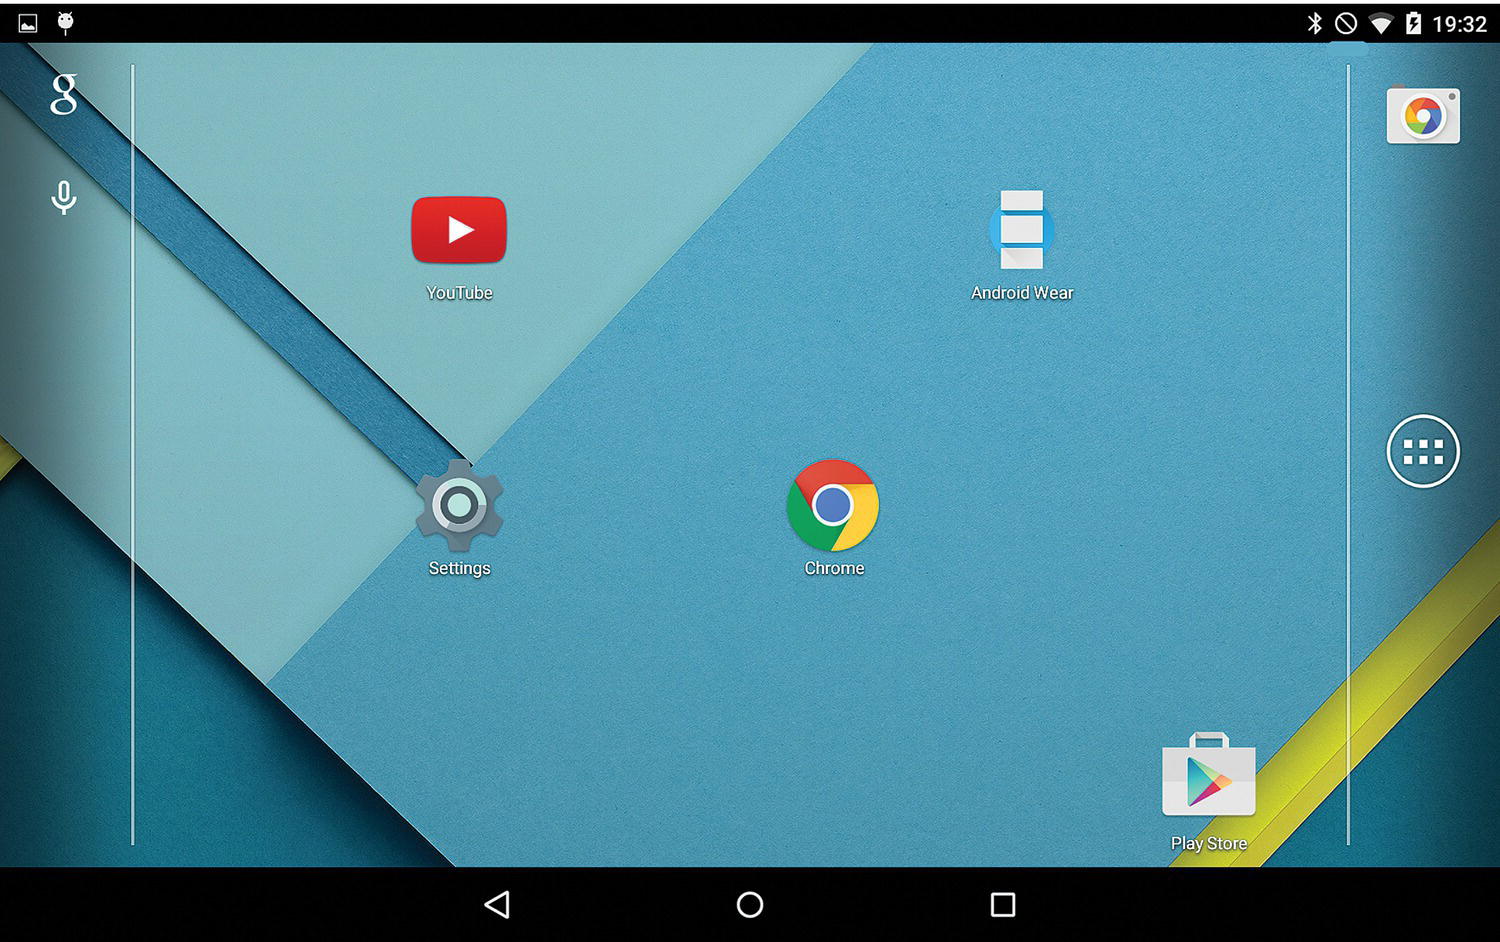
Figure 6-6B Sound and Notification, status indicator for Notification level NONE.
Probably the most useful Notification level is the PRIORITY setting. Users who desire not to be interrupted with routine Notifications can set the Notification level at PRIORITY along with the desired time duration. This setting tells the Android OS that only those Notifications set with the Priority flag in the originating App’s application code (and/or applications and contacts whose Notifications have been marked as Priority in the Settings—as we will see in the next sections) will get through to the user during the specified interval while applying the volume level as set in the slider.
Figure 6-7A shows the widget setting at PRIORITY with the duration set at 4 hours—during which period, only the highest-priority Notifications will get through to the user.

Figure 6-7A Sound and Notification, Notification level PRIORITY.
Also, the five-pointed star—used as the visual indicator for Priority mode—is displayed in a Toast and also included in the status bar at the top right of the device.
Figure 6-7B shows the icon for Notification level PRIORITY in the status bar.
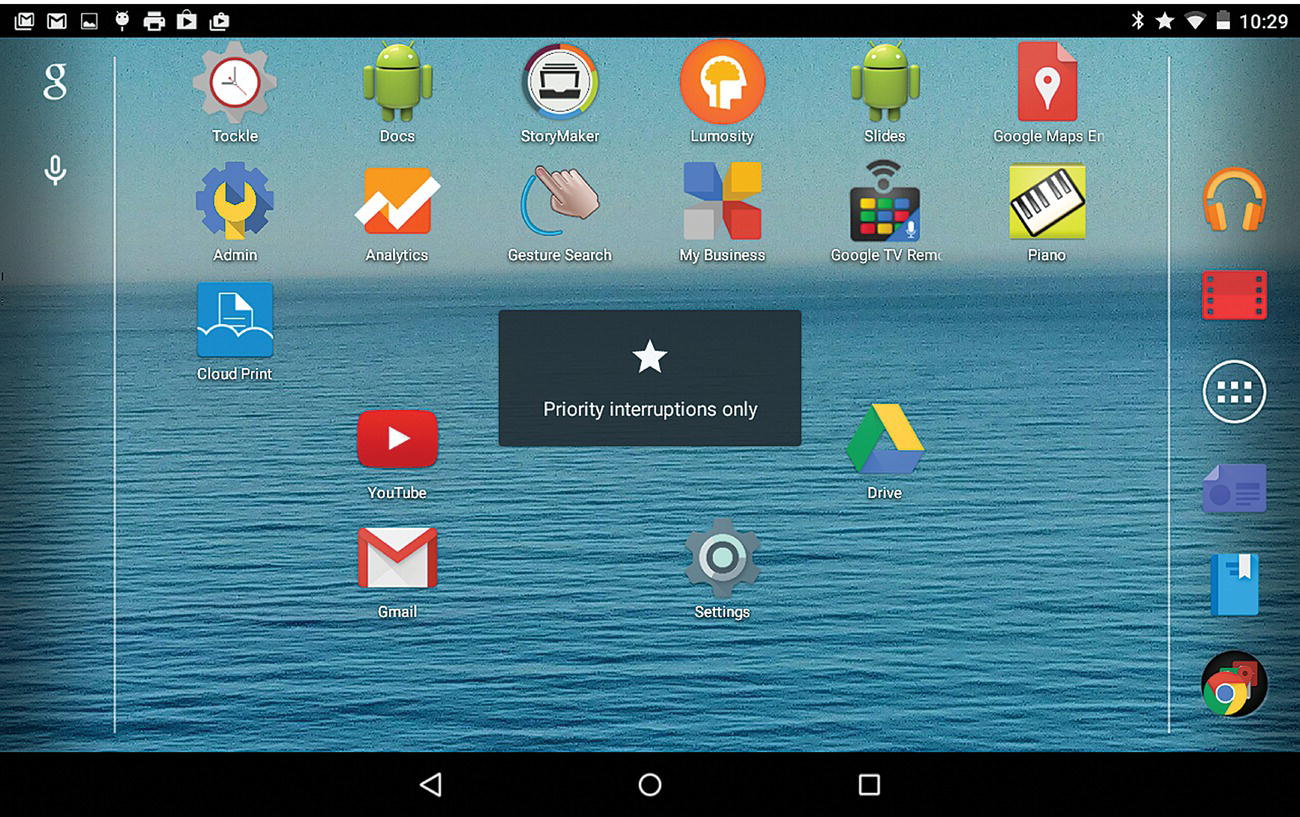
Figure 6-7B Sound and Notification, status bar indicator for PRIORITY.
6.4.2 Notification Configuration and Control
Besides this quick Notification control widget we have just covered, you will find that the OS/Device Settings have an item, Sound and Notification, that provides access to a wide range of configuration and control.
Figure 6-8 shows both the Sound and Notification item in Device Settings.

Figure 6-8 Sound and Notification in OS Settings.
Within Sound and Notifications, there are several subitems of which Notifications and Interruptions are of special interest. Figure 6-9 shows the subitems under Sound and Settings. The boolean Pulse Notification Light setting enables the blinking of your device’s LED when a Notification is received during a time when your devices is idle/sleeping. The blinking light helps indicate to the user that some new Notification has arrived such as calendar appointment, email, a missed call, etc.

Figure 6-9 Notifications and Interruptions in Sound and Notification.
6.4.3 Locked Screen and Notifications
In general, users can protect their privacy using the options such as a screen lock—available under Screen Security in the Security Settings. Related to the screen lock, the item When Device is Locked under Notifications helps users control the behavior of Notification delivery while the screen is locked.
Figure 6-10 shows the lock screen privacy options—a user can choose either not to have any Notifications shown past the locked screen or to have them shown—with or without display of sensitive content. In case of a Notification about a missed call, the details of the caller and/or the contents of the voice message are examples of sensitive content.

Figure 6-10 Notification privacy control options, when device is locked.
Also, right after users set up their Screen Lock under Security → Settings, they are presented with Notification-related options.
Figure 6-11 shows the Notification options offered right after users set up their screen lock under security, thus giving users complete control of Notification behavior past the screen lock.

Figure 6-11 Postscreen lock setup, Notification options.
App Notifications is another sub-item under Notifications and of special interest to us, because it governs the behavior of any App's Notification on the user’s Wear device. Under App Notifications, you will find a listing of all the Apps on your device.
Figure 6-12A shows the App Notifications’ listing of all Apps on my device, organized alphabetically. The user can access any particular App and exercise complete control over that App's Notifications.

Figure 6-12A App Notifications—listing of Apps on your device.
Figure 6-12B shows the Notification control options available on a per App basis. Most significantly, the users have the ability to completely Block Notifications originating from a particular App. They can also mark the Notifications originating from an App as Priority. The Priority setting will allow Notifications from the App to flow through when the user has a Notification level set for their device at Priority. The user can set whether sensitive content from the App’s Notifications can be displayed through the locked screen. You will notice on your device that all the App Notification settings have a reasonable, good faith-based, neutral setting that allows Apps to send Notifications. Users can control these default settings in either direction relative to that, per their needs.

Figure 6-12B Notification control on a per App basis.
Your Wear device will display Notifications based on the individual App’s setting. So even if your handheld device is set at Notification level NONE (effectively muted), your Wear device can still vibrate if it has not been muted. Effectively, your handheld device and your Wear device can be muted independently.
Also, while developing and debugging Wear Apps, you will need to ensure that you do not inadvertently Block the Android Wear App (Figure 6-12C).

Figure 6-12C Notification control settings on the Android Wear App.
6.4.3.1 Notification Access
Another subitem under Notifications is Notification Access, which is distinct from App Notifications. Notification Access helps the user control which Apps can access Notifications posted by the system or by other Apps. Under Notification Access, you will see a listing of Apps that can potentially access Notifications; this is not a list of all Apps installed on your device, as was the case for App Notifications covered in the previous section.
Figure 6-13A shows the list of such Apps on my device, which happens to be the Android Wear App. You probably enabled Notification Access for the Android Wear App, when running it for the first time. If you toggle this setting, you will see the kind of notice dialog that pops up. This is obviously a very powerful setting because the App can access all Notifications—from all other Apps as well as the Android OS. Users will do well to grant this access only to Apps that they trust.

Figure 6-13A Notification Access—list of Apps with enabled/disabled status.
Figure 6-13B shows the dialog that reveals the intricacies of allowing Notification Access for any App. Your App too can access Notification info if it has a good reason to, by implementing the NotificationListenerService, which resides in the android.service.notification package.
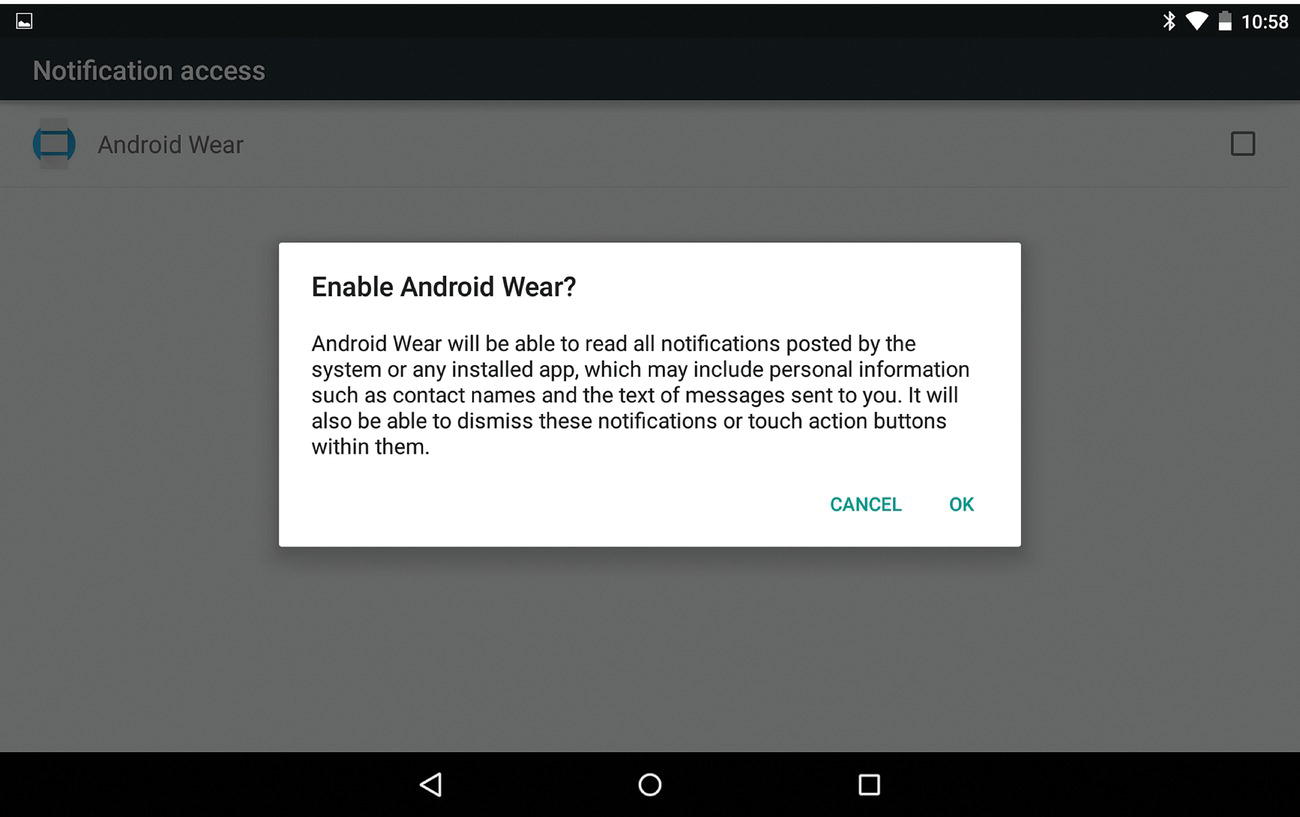
Figure 6-13B Notification Access—list of Apps.
6.4.4 Interruptions
Another item of relevance to us as developers is the Interruptions item under Sound and Notification. Interruptions is another layer of control that users can exercise over the intrusive aspect that is inherent to Notifications. Users can indicate their downtime days and times—during which only Priority Interruptions will reach them.
Figure 6-14A shows the various subitems under Interruptions.

Figure 6-14A Interruptions, subitems.
Figure 6-14B shows the options under the item When a Notification arrives, namely, Always Interrupt, Allow Only Priority Interruptions, and Don’t Interrupt.

Figure 6-14B Interruptions—When a Notification arrives.
The user also has the ability to toggle whether Events and reminders and Messages are to be included in Priority Interruptions.
Figure 6-14C shows the options under Calls/Messages from, namely, Anyone, Starred contacts only, and Contacts only.
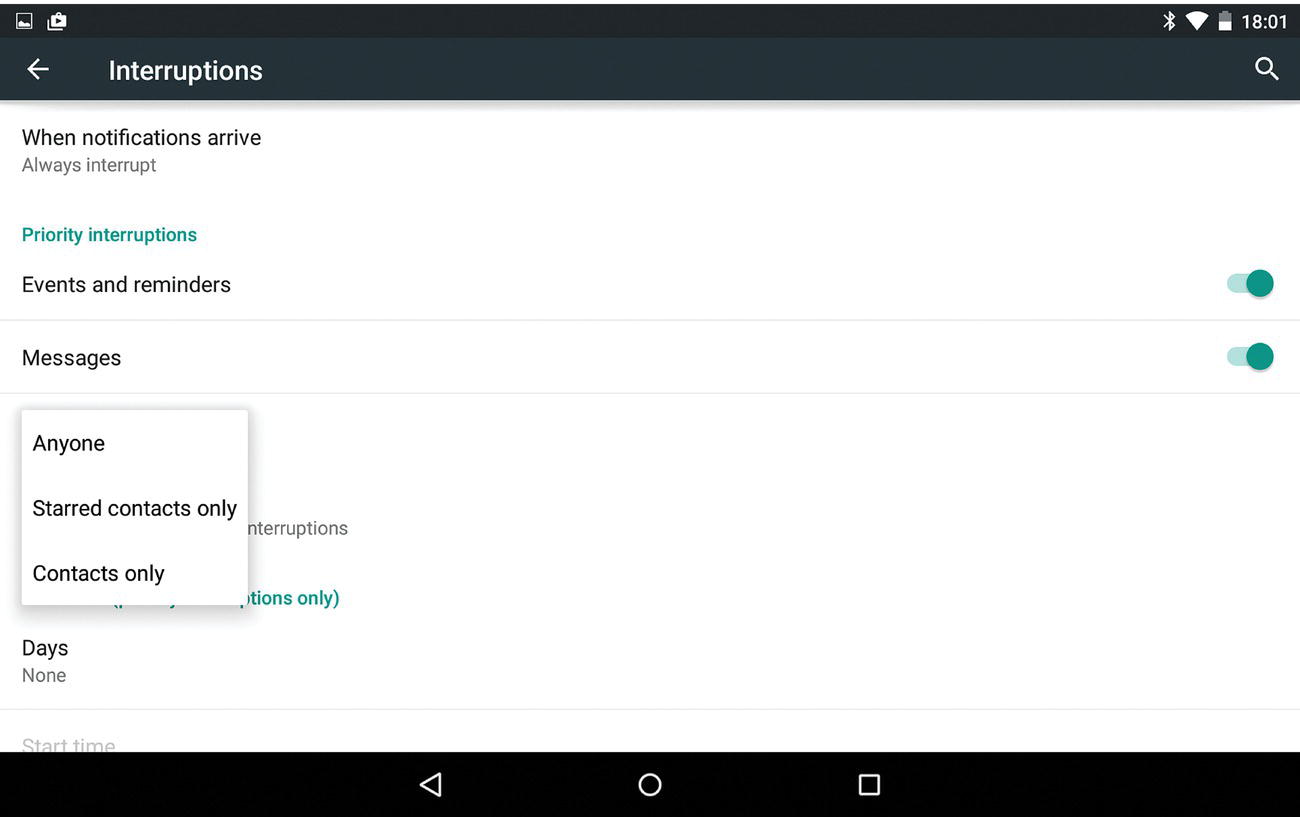
Figure 6-14C Interruptions—Calls/Messages from.
Figure 6-14D shows the item Downtime days, which helps users pick their downtime days as well as the start time and end time.

Figure 6-14D Interruptions—Downtime days.
6.5 App Notification Strategy
It behooves any App developer to avoid the casual and frequent use of Notifications. If an App comes across as being too “aggressive” or “noisy” with regard to Notifications, the user may find it bothersome and therefore decide to avail of the ability to turn Notifications off for that App or even uninstall the App altogether. The best strategy with regard to Notifications is for Apps to use a conservative approach, possibly coupled with an adaptive and gradual, “back off” or “accelerate” approach based on analyzing the usage metrics. If a user has been dismissing an App’s Notification without consuming it, by entering the App, that’s a sign that the Notification was likely not interesting enough or welcome. Using such a data- and evidence-based approach can personalize and align the Notification threshold at the level of positive user engagement. Apps can also present users with the option to turn Notifications off from within the App so that they do not originate them in the first place if the user is not interested in them. Oftentimes, it’s a matter not of having Notifications on or off, but about finding the right quality, level, and category of Notifications that engages the user positively.
6.6 Google Now and Android Wear
Google Now is an intelligent personal agent or assistant from Google that works in the background to bring you relevant contextual information, where and when you are most likely to need it. Google Now emphasizes a voice-based and hands-free experience. Google Now organizes information in the form of simple Info Cards on weather, next appointments, commute times, parking places, traffic information, boarding passes, stocks quotes, sports scores, and more.
Google Now emphasizes the Suggest paradigm by making timely and contextually relevant suggestions to the user while also making the Demand-based voice search and user input lightweight and convenient. There are strong overlaps of purpose between the Android Wear platform and Google Now.
Based on the context of where you are, such as an airport, and based on the information that is available with Google, such as an airline ticket in your recent email, Google Now provides you a Notification/suggestion card with your boarding pass at the right time and place—without you having to search for it in your email.
Android Wear includes the Google Now functionality. Android Wear aims to make contextually relevant information readily available as you get on with your day, move around from place to place, and engage in your schedule and various activities. Information can become relevant based on where you are and what you are engaged in, and these can change moment to moment.
6.7 Android Wear Devices: Getting Started
It’s always exciting to get new hardware setup, connected and ready for development. We will now engage in some hands-on setup of Android Wear devices for development.
6.7.1 Android SDK Wear Platform updates
Some readers may already have had an existing Android SDK setup in their environment, and if so, it is important to ensure that both the Android Wear platform (API level 20) and the Android 5.0/Lollipop (API level 21) are available in your local Android SDK environment. Android Wear requires Android 4.3 and above; however, this book targets the Android 5.0/Lollipop (API level 21) for all the examples and sample code (Figure 6-15).
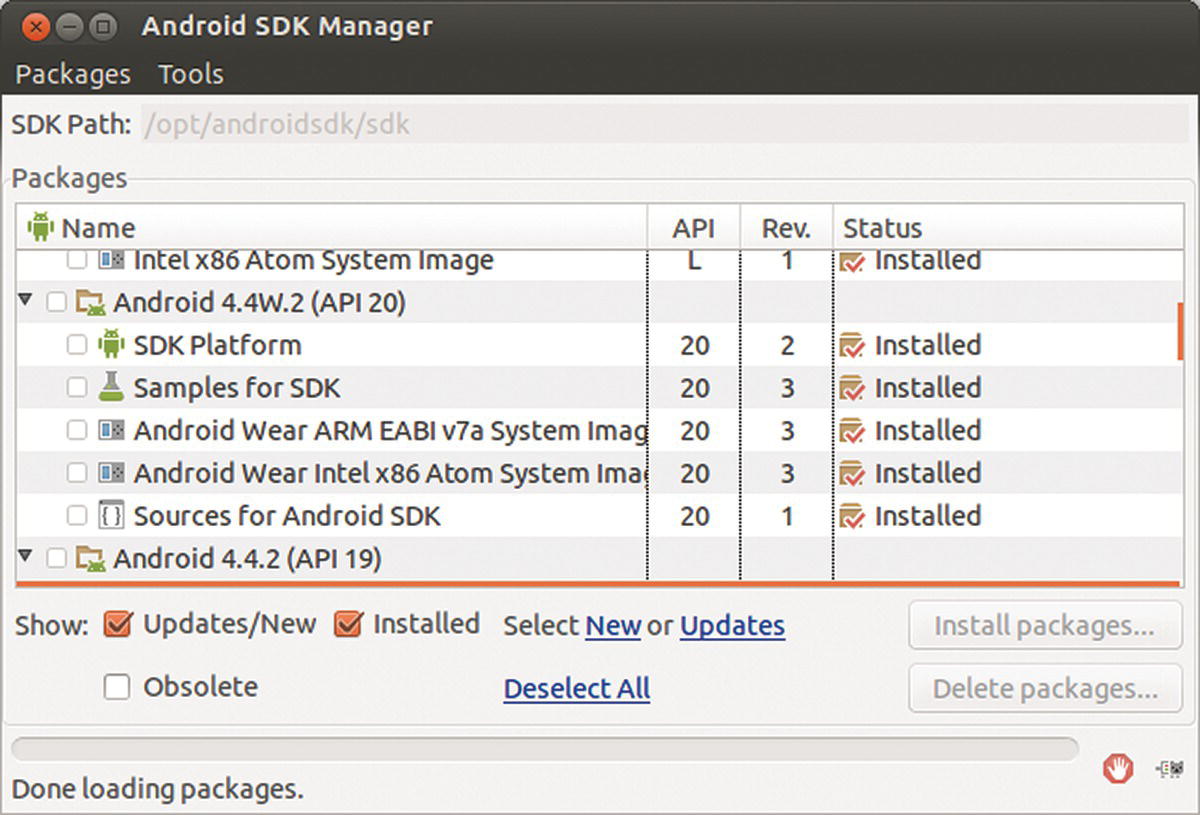
Figure 6-15 Android SDK Manager, Wear platform API level 20.
Running the command android list targets is another way to verify that you have the Android Wear platform in your Android SDK environment. The output of the command should show content that includes the Android Wear platform/API level, as shown in the snippet below:
6.7.2 Procuring an Android Wear device
There are several Android Wear device models available on the Google Play Store: https://play.google.com. Figure 6-16 shows several Android Wear devices from ASUS, LG, Sony, Motorola, and Samsung. The prices, at the time of writing, start at the $199 price point. Over time, it is likely that the prices will reduce. The product reviews and ratings on the Play Store may also be useful for choosing a device to purchase.
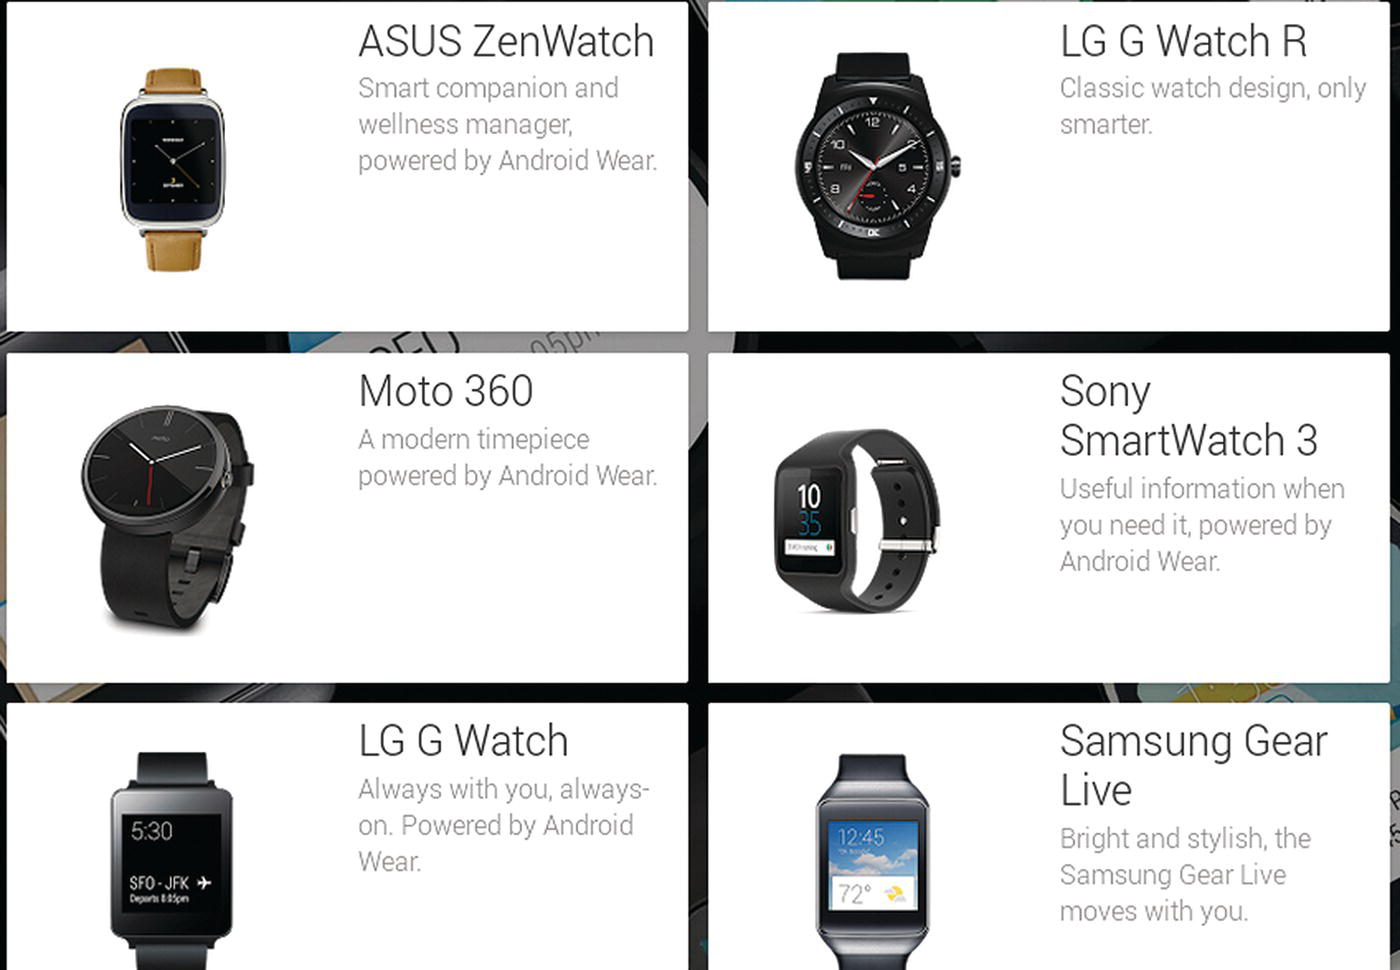
Figure 6-16 Android Wear devices available on Google Play Store.
The following sections cover the steps involved in readying your Android Wear device for software development.
6.7.2.1 Using Android Emulator with Wear AVD
Running the Android Wear Android Virtual Device (AVD) in the Emulator can be useful in case you do not have a Wear device.
One way to start the Android SDK Manager is by running the android command from your command line. Once the Android SDK Manager is started, you can access the Tools menu under which you will find the Manage AVDs item. Clicking on the Manage AVD will take you to the Android AVD Manager.
Figure 6-17A shows the AVD Manager screen. Clicking on the Create button on the right will take you to the Create New AVD screen.
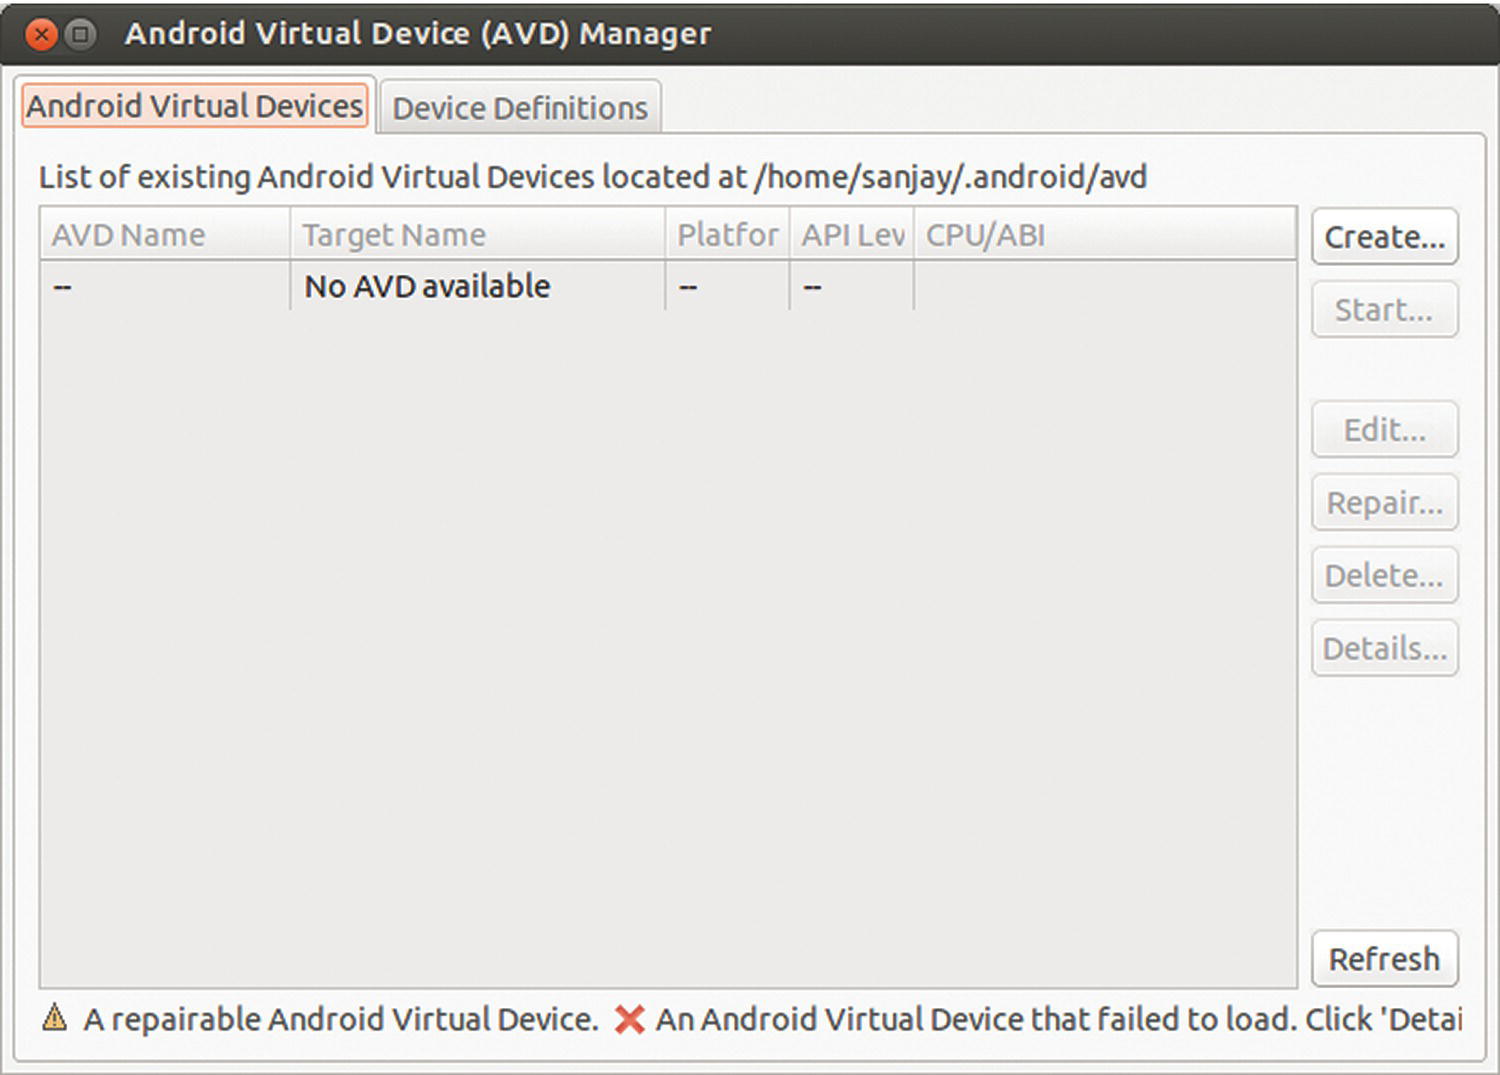
Figure 6-17A Android Virtual Device (AVD) Manager.
Figure 6-17B shows the Create New AVD screen. You can choose a name of your choice. You will need to select various options as indicated in the figure. The target will need to be a current Wear platform—Android Wear 4.4w.2 (API level 20) at the time of writing. After filling in all the fields, clicking on next will get you to the “result” screen.

Figure 6-17B Create a new Wear AVD.
Figure 6-17C shows the output result summary info of the AVD creation step. Clicking on OK will take you back to the AVD Manager main screen. You should see your recently created Wear AVD.
Figure 6-17C Wear AVD creation result.
Figure 6-17D shows the recently created AVD listed. You can select it and click on the Start button toward the right.

Figure 6-17D Start your Wear AVD.
Figure 6-17E shows the screen indicating a starting emulator. It may take some time to progress.

Figure 6-17E Starting your Wear AVD.
Figure 6-17F shows the launch options presented. You may simply go with the default and click the Launch button.

Figure 6-17F Wear AVD launch options.
Figure 6-17G shows the Wear AVD starting. It may take some more time to progress.
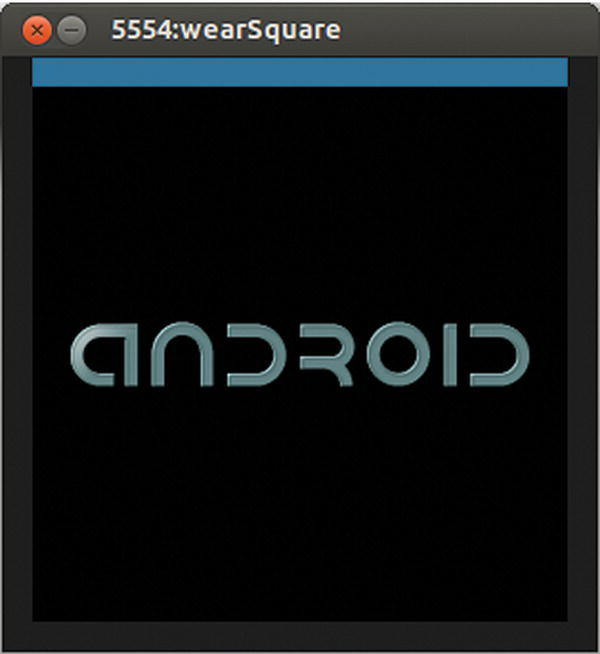
Figure 6-17G Wear AVD screen during boot.
Figure 6-17H shows the Wear AVD make further progress toward completing startup.

Figure 6-17H Wear AVD nearly started.
Figure 6-17I shows the successfully started Wear AVD.

Figure 6-17I Wear AVD running.
Figure 6-17J shows the step of pairing your handheld device with your running Android Wear AVD.

Figure 6-17J Pairing with running emulator.
6.7.3 Pairing and Enabling Developer Mode
Any new Wear device will typically need to be paired with a handheld device. As developers, we will need to also get our Wear device set up for development and debugging. This section covers the steps for pairing and enabling developer mode from scratch.
6.7.3.1 Unboxing your Wear device
In case you have already paired and enabled Developer mode on you Wear device, you may skip this section:
- Unbox your Android Wear device and perform the initial charging and/or other steps per the manufacturer’s instructions.
- Power up your Android Wear device for the first time, per the manufacturer’s instruction set. After you boot your Wear device for the first time, you will be presented with a home screen.
Figure 6-18 shows a home screen watch face with status indicator icons for Notification Sync status, Pairing status, and the battery level. You will likely observe that if your watch is idle, the screen dims. Wear devices enter a low-power, ambient mode when not being used—in order to conserve battery power. Tapping anywhere on a dim screen will wake up your watch.

Figure 6-18 Android Wear device watch face, postboot.
6.7.3.2 Pairing your Handheld device with your Wear device
Once the Android Wear device boots successfully, you will need to pair the Android Wear device with your handheld Android phone or tablet device. This can be accomplished by installing and running Google’s Android Wear App, which is available on the Google Play Store, on your handheld mobile Android phone or tablet device. A search for keyword “Wear” on the Google Play App Store should get you results that include the App named Android Wear by Google, Inc. The link to the Android Wear app is https://play.google.com/store/apps/details?id=com.google.android.wearable.app.
Once you have installed the Android Wear App, you will need to run it while keeping both your handheld device and mobile device close together. Bluetooth will need to be turned on in the handheld device via the OS Settings in order to complete the detection and pairing steps.
Figure 6-19A shows the Android Wear App on its first run.

Figure 6-19A Android Wear App, running on a handheld Android device.
Several introductory screens will guide you through the steps of detecting your Wear device and pairing with it from your handheld device (Figure 6-19B).
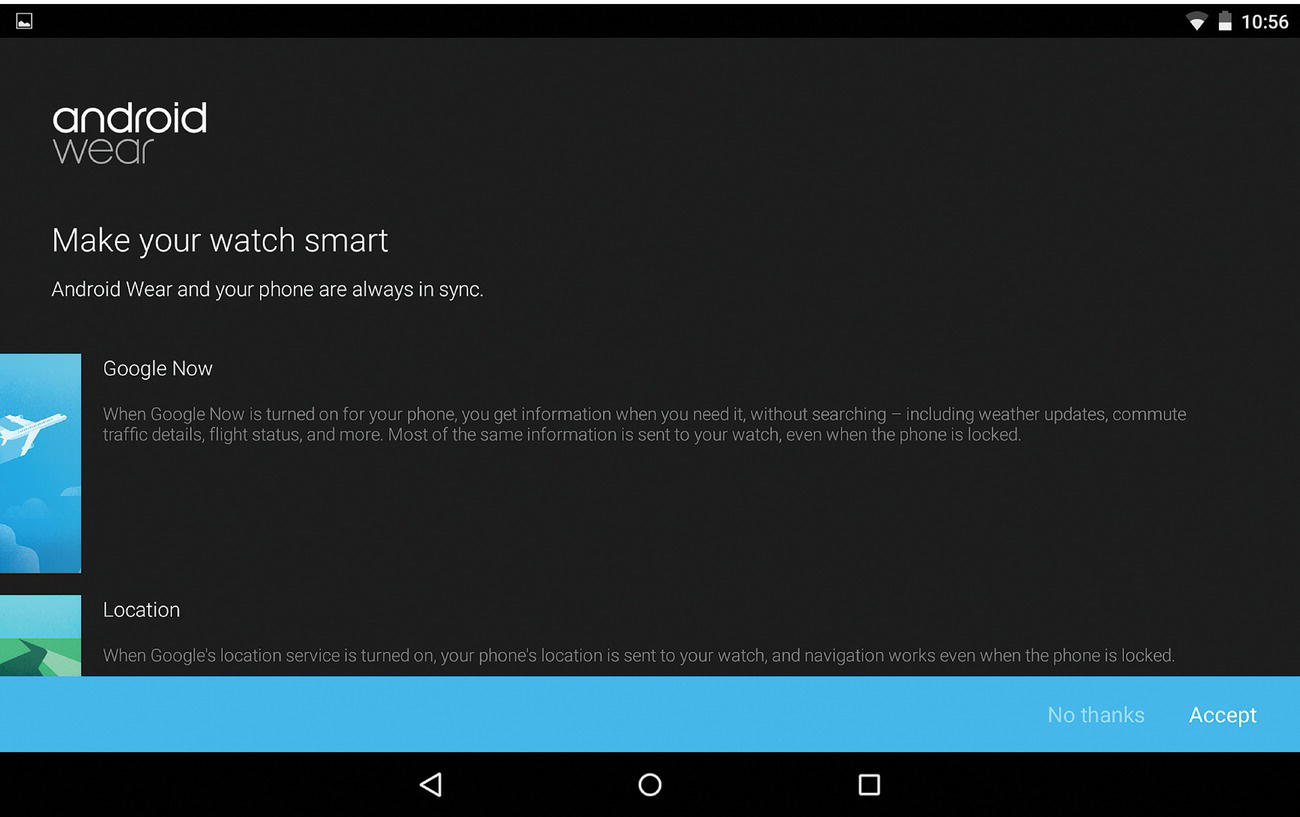
Figure 6-19B Android Wear App, introductory screens.
You will notice that Google Now and Google Fit can be integrated with the Android Wear experience (Figure 6-19C).
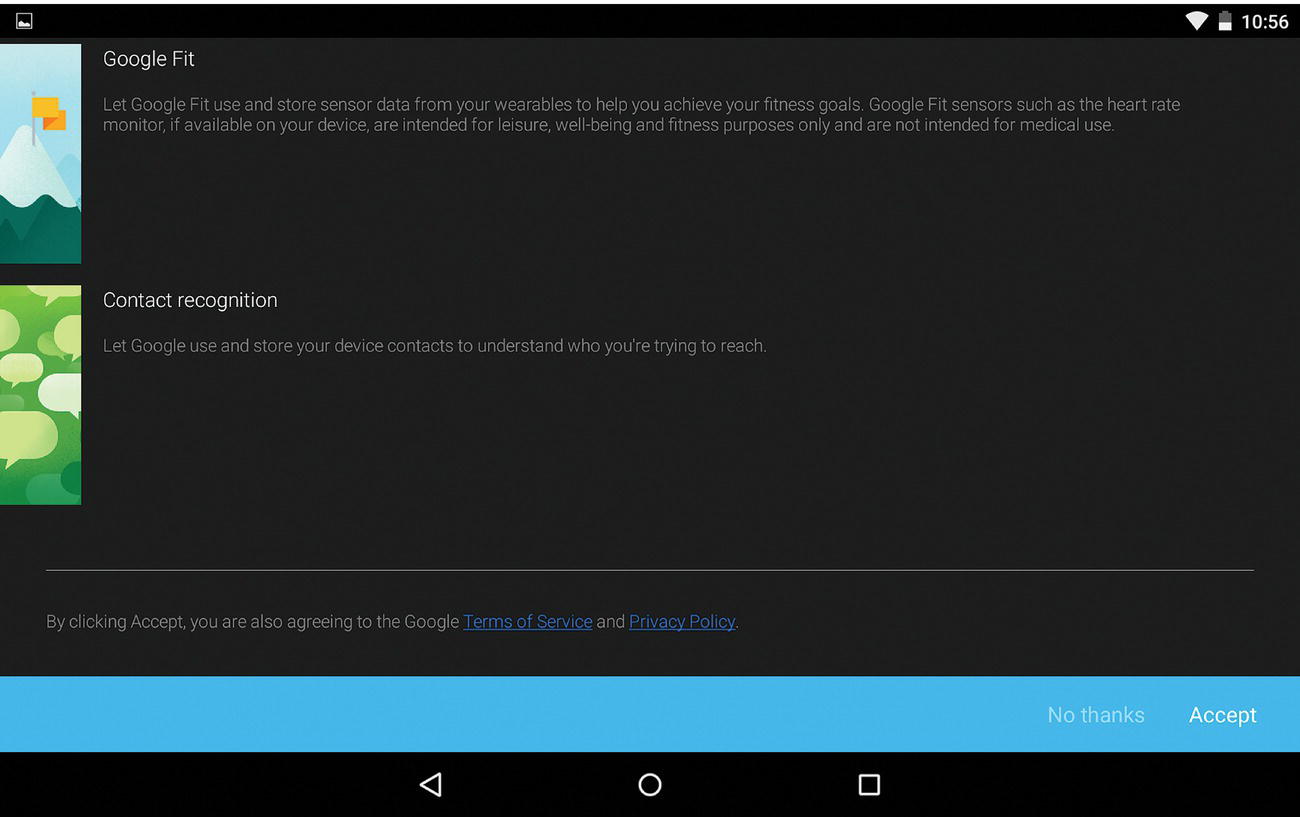
Figure 6-19C Android Wear App, several introductory screens.
It may take a moment for your handheld device to detect your Wear device over Bluetooth (Figure 6-19D).
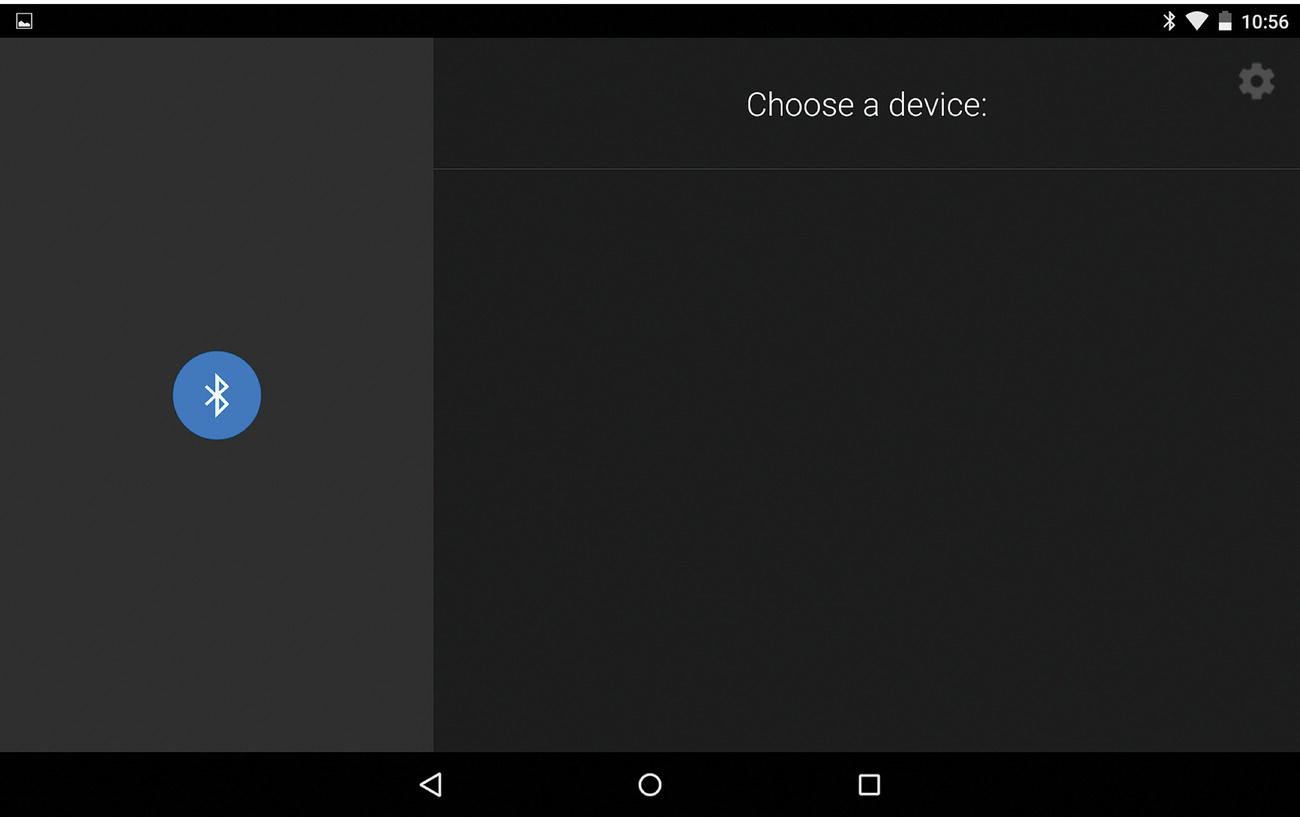
Figure 6-19D Android Wear App, device scan.
Once your Wear device is detected and listed, as shown in Figure 6-19E, you can tap on the Wear device model (such as Gear Live 772A seen in the figure) in order to initiate connectivity. You should also keep an eye on your Wear device screen for any changes or display of information.
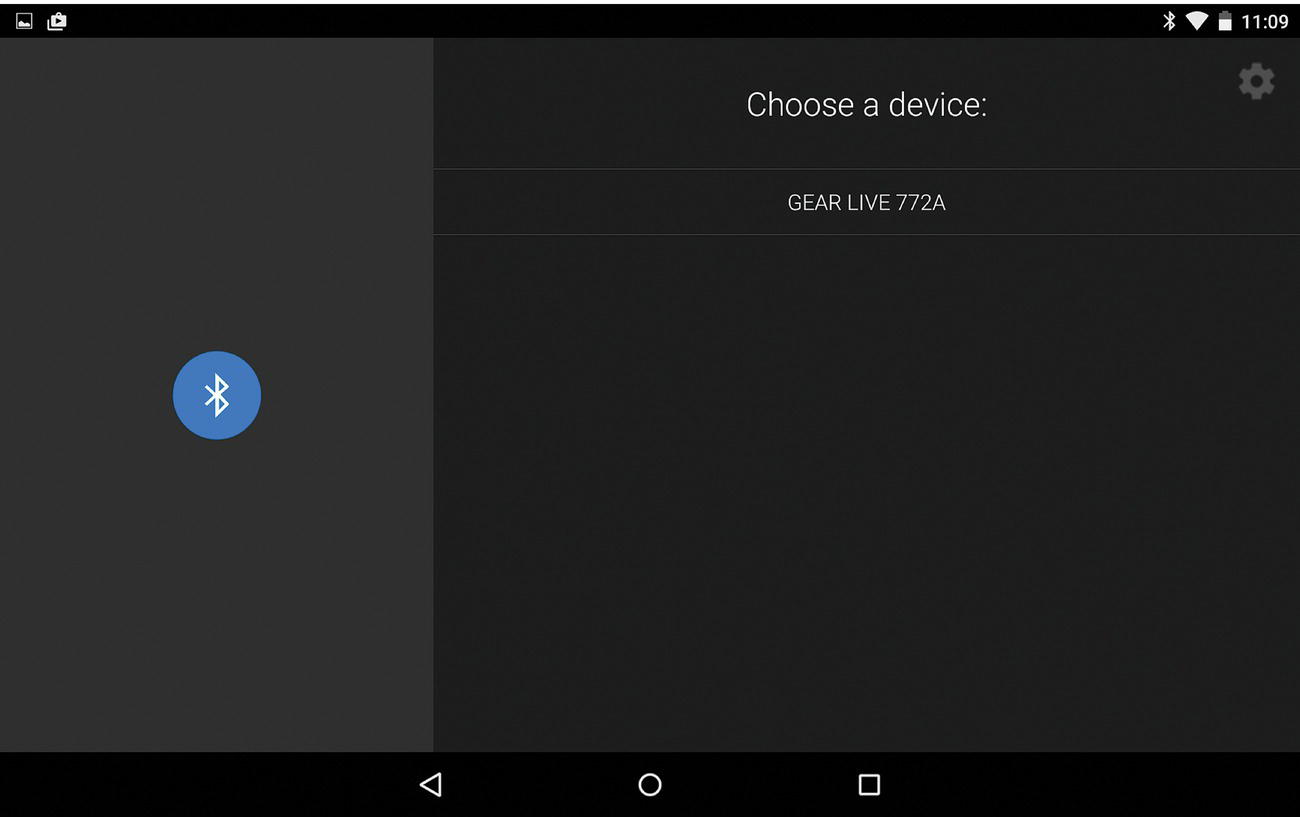
Figure 6-19E Android Wear App, device scan contd.
Figures 6-19F and 6-19G show the progressive screens that you will see during this process.
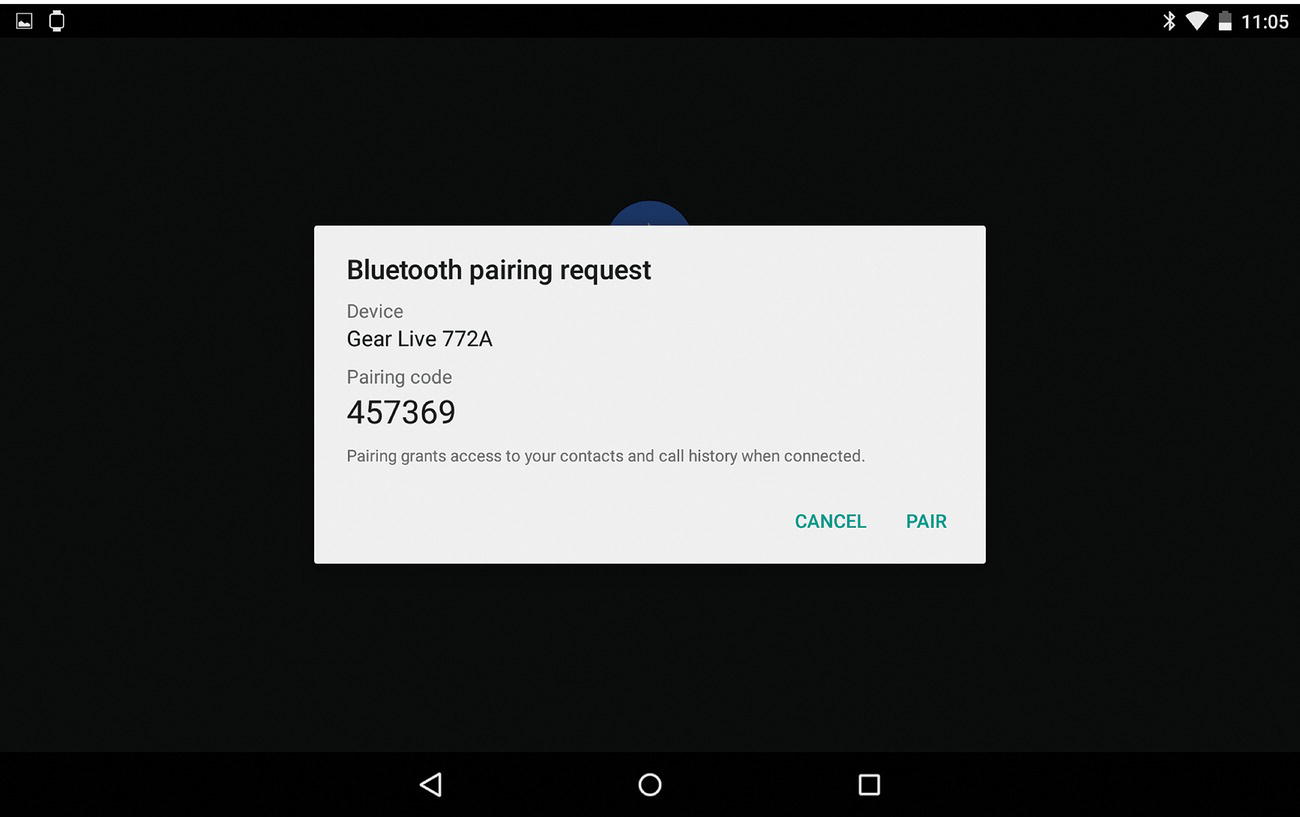
Figure 6-19F Android Wear App, Bluetooth pairing request, pairing code.

Figure 6-19G Android Wear App, connecting to your Wear device.
Figure 6-19H shows the screen that indicates successful pairing.
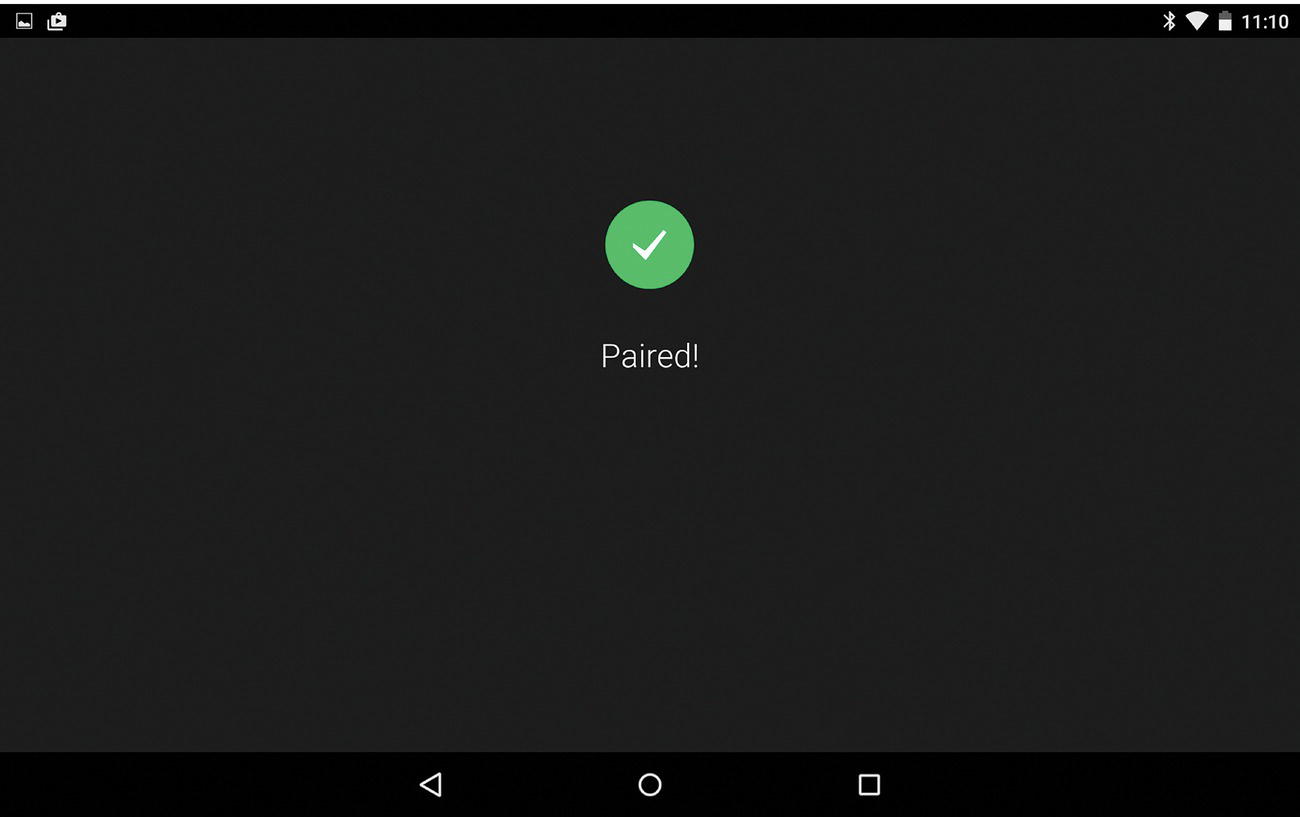
Figure 6-19H Android Wear App, paired and connected.
Figure 6-19I shows the connected status with my Gear Live device on the top left.
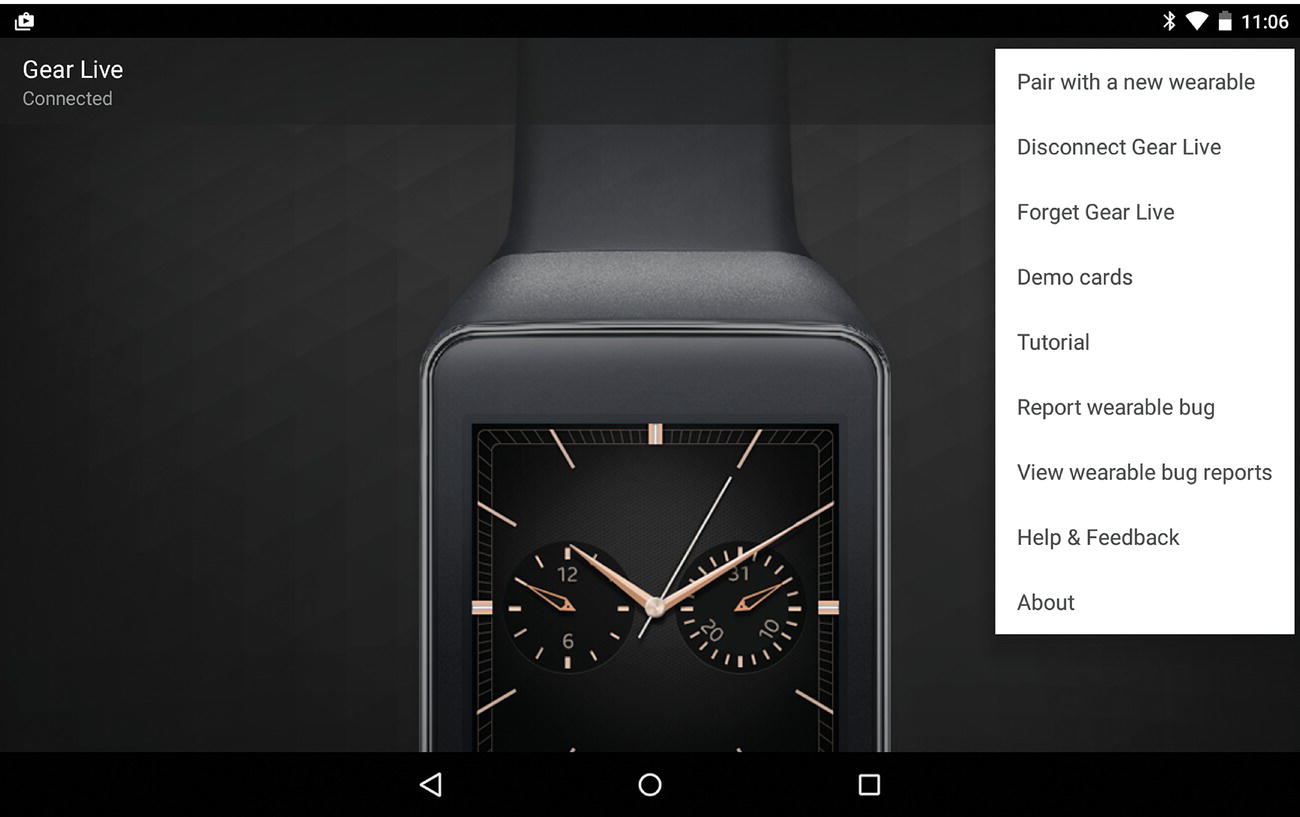
Figure 6-19I Android Wear App, successful pairing.
You will also find a gears icon on the top right of the action bar as well as the overflow menu item on the action bar. The options within the overflow menu are shown in Figure 6-19I. There are tutorials and demos available here, as well as the ability to disconnect from the connected Wear device and so on.
You can only pair your watch with one handheld device at a time. If you have one Wear device and multiple phones, you can pair your Wear device with a different handheld by running the Wear App on your handheld, disconnecting from any current Wear device and using the option: Pair to a new wearable. If you have one Wear device and multiple phones, you may need to reset your Wear device to the factory settings first based on your device’s instruction manual, after which you will be able to pair it with a different handheld device.
6.7.3.3 Enabling Developer Mode and Debugging Settings on your Wear device
Once you have paired the handheld device with your Wear device, the next useful step is enabling the Developer mode and Debugging Settings on your Wear device; this section covers the steps to accomplish this. Some specifics may vary depending on your Wear device model. We will also cover some basics of navigation and interaction with the Wear device that we will be needing to navigate the user interface in order to get debugging setup.
You will likely notice that the indicator denoting lack of tethered connectivity (cloud icon, with a line across it) disappears immediately after the successful pairing of the Wear device with your handheld device. Tapping on the home screen tells your Android Wear device that the user wishes to “Demand” something and takes you to the Cue Card, which is very appropriately named—the users are cuing or indicating to the device the specifics of their demand; the Wear device is seeking a cue or indication about the users’ specific demand or needs.
Figure 6-20A shows the Cue Card with the voice interface, at the bottom of which lies an expansion icon—an upward pointing arrow. In the absence of any voice input for about 5 seconds, the Cue Card displays the options in this expanded list. You can also touch the expansion arrow icon to get to the expanded list of actions.

Figure 6-20A Cue Card, initial display of voice interface.
Figure 6-20B shows the expanded list of actions; you will notice that swiping downward will display more actions. The Settings action, which is of great interest for our needs, lies toward the bottom of this list of actions. Typically, you do not expect users to visit Settings very often. Part of good interaction design is to keep actions that are expected to be used most often more easily accessible, and vice versa.
Figure 6-20B Cue Card, with various options in expanded list.
Figure 6-20C shows the Settings action item. Tapping on Settings will take you to a list of subitems within Settings.

Figure 6-20C Accessing Settings.
Figure 6-20D shows a few of the Settings’ sublist of options. As you swipe upward and traverse down the list, you will see the various Settings items such as Adjust Brightness, Bluetooth Devices, Always-On Screen, Airplane Mode, Restart, Reset Device, Change Watch face, and About. The exact ordering and even some of the items may vary slightly based on your Wear device model.

Figure 6-20D Inside Settings.
Figure 6-20E shows the About item at the bottom and one more upward swipe will select and highlight the About item. Touching the About item will take you into the About subitems.
Figure 6-20E Settings, About item.
Figure 6-20F shows the subitems under About within Settings, such as Model, Software Version, Serial number, Build Number, and so on. They represent system-level information about the device and are of interest to us as developers. Tapping on the Build Number seven times will enable developer mode on your Wear device.
Figure 6-20F Build number in About Settings.
Figure 6-20G shows the effect of commencing tapping on the Build Number item on my device (for which Developer mode already happens to already be enabled). If you are doing this on a new device, you should see an appropriate message indicating that developer mode just got enabled based on your tapping seven times on the Build Number. As it turns out, enabling Developer Mode/options by tapping on the Build Number is a onetime step on a given device. Thereafter, you will have Developer options showing up on your device under Settings; you can always disable or enable it anytime by using a toggle switch within Developer options.

Figure 6-20G Tapping on the Build number in About Settings.
You must have observed by now that swiping to the right clears the current screen from the stack and gets you back to the previous screen. You can exit the About screen by swiping to the right.
Figure 6-20H shows the items under Settings, which now include the newly added Developer options item—after enabling Developer mode.

Figure 6-20H Developer options—item was added after enabling Developer mode.
6.7.3.4 Enabling Wear ADB Debugging and Debug over Bluetooth
Accessing the Developer options item will provide you with the options for enabling ADB debugging and Debug over Bluetooth.
Figure 6-20I shows the various items under Developer options. The most significant of these are the ADB Debugging and Debug over Bluetooth items, both of which need to be enabled for development/debugging purposes.
Figure 6-20I Developer options.
Figure 6-20J shows that the items ADB Debugging and Debug over Bluetooth have been enabled.

Figure 6-20J Developer options—enabling ADB Debugging and Debugging over Bluetooth.
6.8 Wear Debugging and Android SDK
Now that you have enabled Developer mode, ADB debugging, and Debug over Bluetooth options on your Android Wear device, the next logical step is to get your development machine, which has the Android SDK environment installed, connected with your Android Wear device for debugging.
6.8.1 Wear Debugging via USB
Most Android Wear devices have a micro-USB port, and if your Wear device has one, you can easily connect your development machine to your Android Wear device using a micro USB cable—just like how we typically connect our Android phone or tablet devices to our development machines.
Once your Wear device is connected via USB, issuing the command adb devices on your development machine’s command line will help verify that your Wear device is detected by adb.
Figure 6-21A shows the output of the command adb devices, which shows the serial number of my Gear Live Wear device. The serial number should match the serial number of your Wear device listed under your device’s Settings.

Figure 6-21A adb devices—lists attached Android devices.
In case you do not see your Wear device listed, issuing the command adb kill-server will cause the adb server running on your development machine to stop. After that, the command adb devices will cause adb to start, with improved chances that you will see your Wear device listed. Figure 6-21B shows this sequence of commands.

Figure 6-21B adb devices—after adb “restart.”
In case adb does not detect your Wear device, unplug the USB cable from the development machine side and run the command tail -f /var/log/syslog /var/log/kern.log and then plug the USB cable back into your development machine’s USB port. Right after that, in a separate command window, run the dmesg command. You should see some output indicating the status of the USB connection.
The relevant output of the tail and dmesg commands are listed in the two snippets below:
Another Linux command that can be useful for USB-related debugging is the lsusb command, which lists the USB devices connected to your development machine. If ADB is unable to see your Wear device, you will need to determine whether it is detected at the lower/operating system level. This will help in pinpointing and resolving the issue. The same concept applies on any operating system, which has their specific low-level tools that help investigate any issues, should they arise.
Figure 6-21C shows the output of the lsusb command, with the listing of my Wear device highlighted. It shows up with vendor ID 18d1 and vendor name Google, Inc. This will likely be true for all Android Wear devices because it’s the adb driver that engages in order to manage the interface for the USB device. On Linux systems, the local file /usr/share/hwdata/usb.ids lists the known USB vendor and device, IDs, and names included therein. You should see an entry for 18d1 Google, Inc. in this file on your local Linux development machine. In case you are missing the lsusb command, the command sudo apt-get install usbutils will install USB utilities including the lsusb command.

Figure 6-21C lsusb command.
Once you have adb connectivity established, you will be also able to shell into your Wear device by using the command adb shell. Once you are logged on to your Wear device, you can check out the kernel version info by using the command cat/proc/version. You can also query the device’s size and density using the wm command (Figure 6-21D). The wm command can also be used to emulate a density and size that is different from its density and size. In this example, we are merely querying these properties.

Figure 6-21D wm command.
Figure 6-21E shows the commands executed (and their outputs) on the Wear device.

Figure 6-21E Adb shell session.
While you can adb shell into the device and execute commands after that, you might find it convenient at times to execute commands on the Wear device from your development machine using the syntax adb shell <command>. The output of the command will become available on your development machine for storage or processing in one shot.
Figure 6-21F shows a command executed using the adb shell <command> approach. uptime is a common Linux command that tells you how long a host/device has been up since booting up.

Figure 6-21F adb shell-based command executed directly from development machine.
You can also access the Android logging system using the adb logcat command.
Figure 6-21G shows the output of the adb logcat command.

Figure 6-21G adb logcat.
Thus, connecting your Wear device directly to your development machine via a USB cable is the simpler and easier way to get debugging setup on your device. The Bluetooth-based debugging option, which we will cover in the next section, happens to entail a USB cable-based connection with your handheld device and many more steps and effort to set up.
6.8.2 Wear Debugging via Bluetooth
Some Android Wear devices may come with wireless charging, and in any case, it is possible that some Android Wear device models lack a USB port. In case your Android Wear device lacks a USB port, getting debugging over Bluetooth will become essential. Because your Wear device is paired and tethered to your handheld Android device, you can debug your Wear device by connecting your development machine via USB to your handheld device and using your handheld device as an intermediary between your development machine and your Wear device.
First of all, if you had been successful or even attempted to get ADB working over USB directly between your development machine and your Wear device—covered in the earlier section—it would be best to reboot your Wear device and issue the command adb kill-server on your development machine. Because the following steps are quite elaborate and sensitive, it’s ideal to start form a clean slate of a freshly started adb instance.
You will need to ensure that your Wear device has ADB Debug and Debugging Bluetooth enabled within Settings → Developer options. (This should already be the case if you kept up with the steps as described in Section 6.7.3.3 “Enabling Developer Mode and Debugging Settings on your Wear device.”)
You will also need to ensure that your handheld device has Developer options and USB debugging enabled—this will likely already be the case, if you have been actively using your handheld Android device for development (Figure 6-22A).
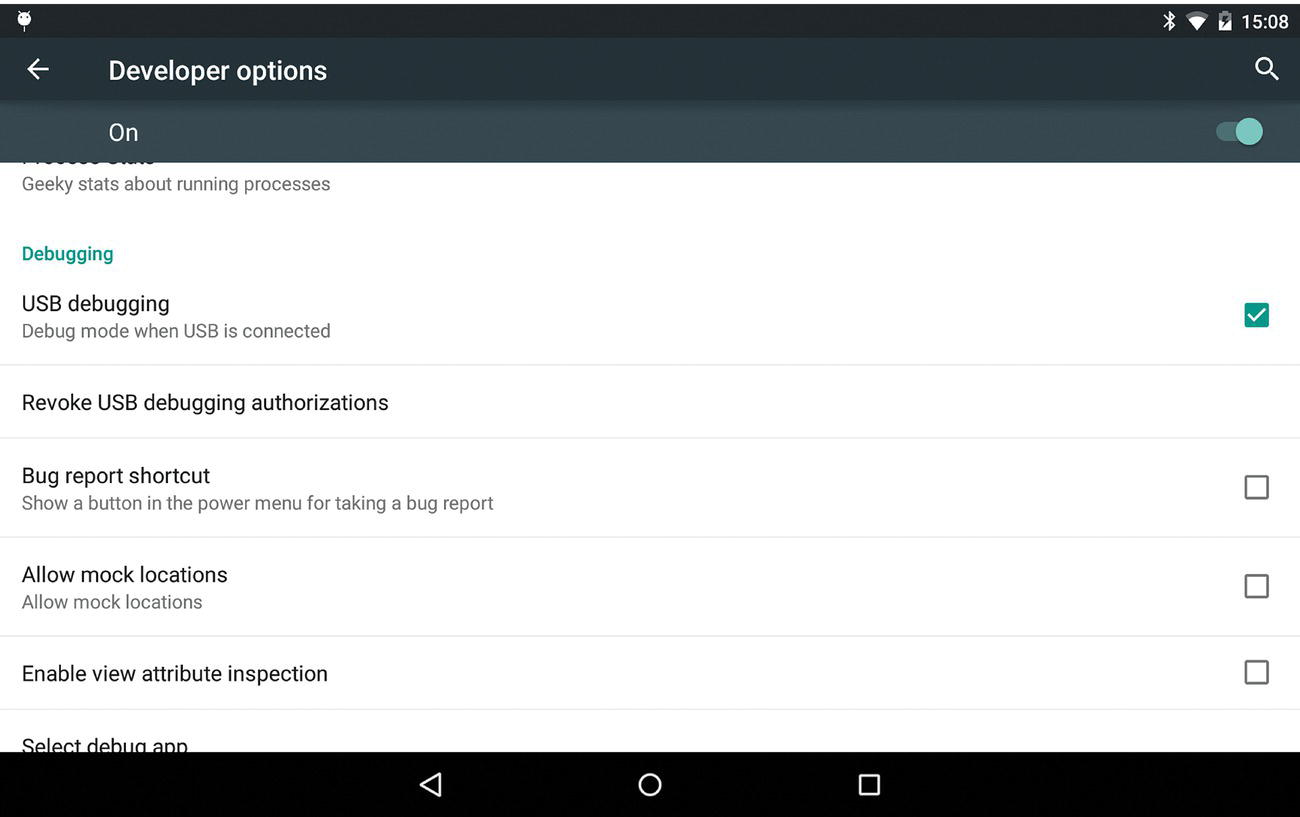
Figure 6-22A USB Debugging enabled on handheld device.
Next, you will need to verify that your handheld device is paired and tethered to your Wear device. You can do this by starting the Android Wear App on your handheld device and verifying that the Wear device is in a connected state.
Figure 6-22B shows the Android Wear App’s screen upon starting it. Firstly, you will need to confirm that your Android Wear device is in a connected state. The Wear device name and the state of the connection are displayed on the top left of the screen shown in the figure. Next, you will need to access this App’s Settings via the gear icons on the top right of the action bar.
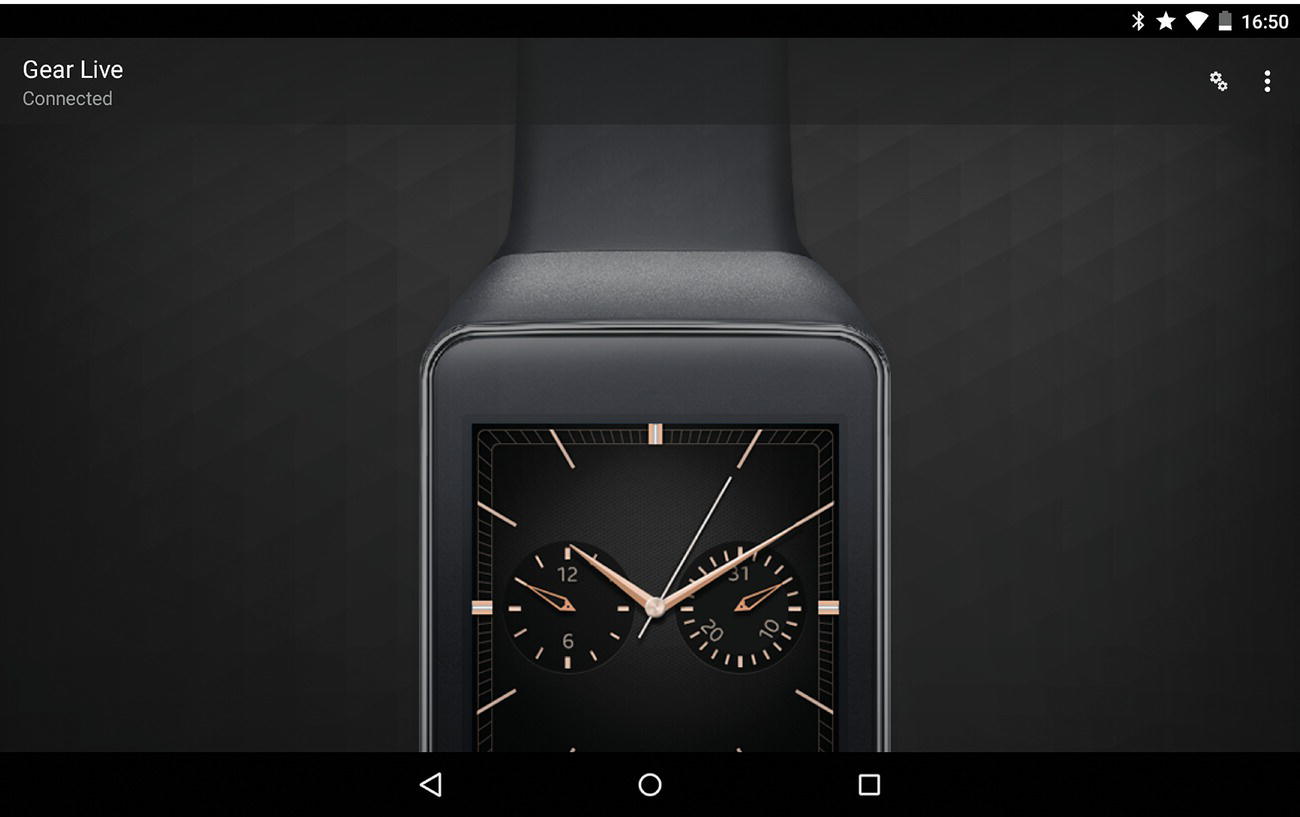
Figure 6-22B Android Wear App Settings, connected state.
Figure 6-22C shows the subitems under the Android Wear App’s Settings. You will find that the default state of Debugging over Bluetooth item at the bottom is in an off state. You will need to enable this option.

Figure 6-22C Android Wear App’s Settings, default state of Debugging over Bluetooth.
Figure 6-22D shows the Debugging over Bluetooth option—soon after turning this option on, you will find certain connectivity status about the Host and Target show up. The Target represents your Wear device, while the Host represents your development machine.

Figure 6-22D Android Wear App’s Settings, enabling Debugging over Bluetooth.
Finally, you will need to execute a few commands on the command-line shell on your development machine as shown below:
adb port forwarding is used to set up an arbitrary port on localhost that forward requests to an abstract endpoint. This sets up a TCP/IP listener port on the local development machine, which forward requests via the intermediate handheld device to the Wear device.
Figure 6-22E shows the sequence of commands that I used in order to get Bluetooth-based debugging setup.

Figure 6-22E adb commands to get Bluetooth debugging setup.
Once set up, you should be able to shell into your Wear device over adb.
Also, once Bluetooth forwarding is set up, you will see that both the Host and Target show the connected status in the Android Wear App Settings under Debugging over Bluetooth (Figure 6-22F).
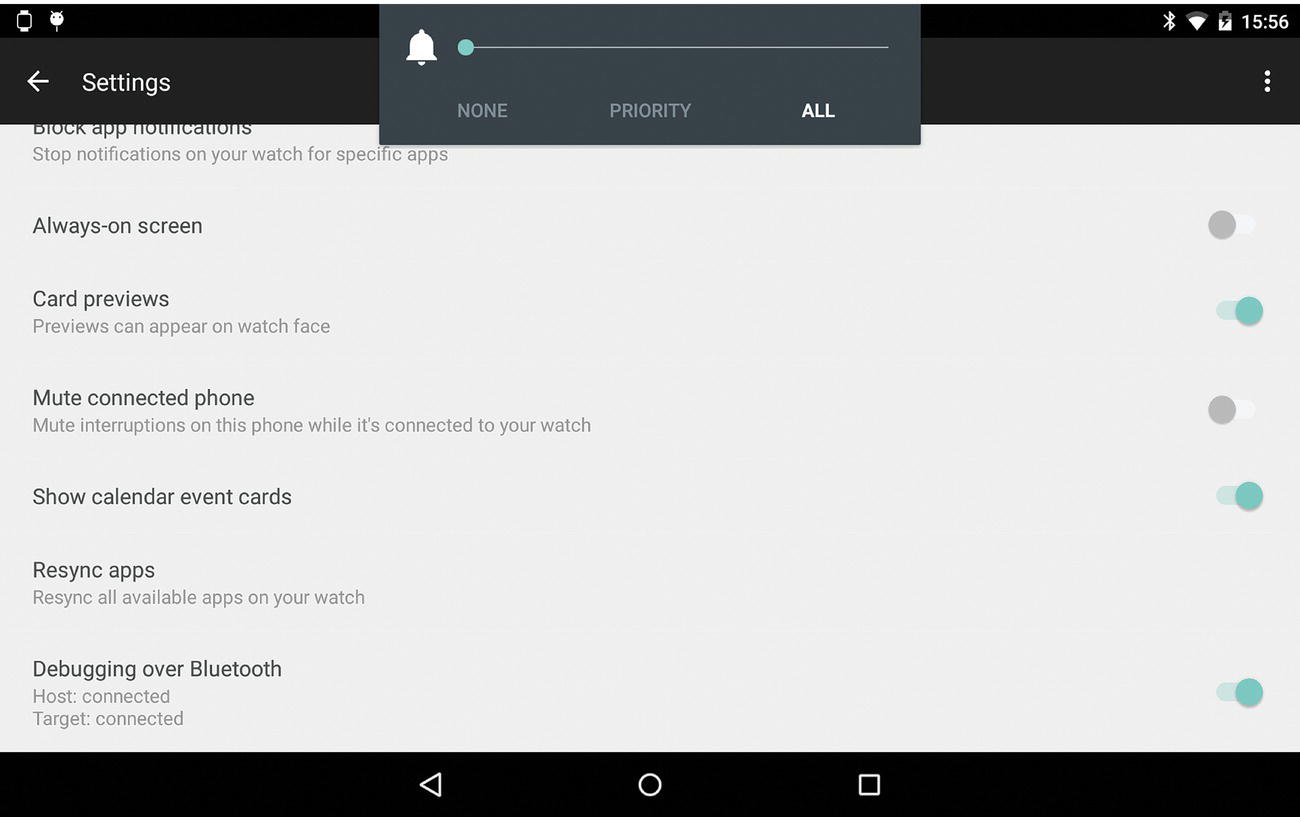
Figure 6-22F Host and Target both showing a connected status.
6.9 Peeking under the hood of your Wear Device
Now that we have been able to connect from the Development machine to the Wear device, let us take a quick peek under the covers.
Figure 6-23 shows the zygote and its child processes running on my Wear device. As we discussed in Chapter 3 on Android fundamentals, all Android Apps are run in virtual machine processes that are spawned by zygote. Therefore, taking a look at processes whose parent process ID is the zygote process’ process ID (PID 0) tells us what Apps are running on the device. I notice that there is an App running whose package name is com.google.android.wearable.app. This is the package identical to the Android Wear app that we installed from the Play Store earlier:
Figure 6-23 Wear device zygote child processes.
https://play.google.com/store/apps/details?id=com.google.android.wearable.app
This is consistent with the expected behavior wherein the handheld “companion” App pushes and installs the Wear version of the App onto the Wear device after pairing and tethering. I also notice that the Tockle App (com.texasgamer.tockle)—which I happened to have installed from the Play Store on my handheld device—shows up as a running App on my Wear device. The Tockle App enables control of your phone from your Wear device including toggling your Wi-Fi connectivity and other system settings.
6.10 Engaging your Android Wear device via Notifications
In the simplest scenario, the user can choose to sync Notifications to the Android Wear device so that Notifications that are displayed on the handheld device are also displayed on the Wear device over the tethered connection. Android version Lollipop (version 5) clears Notifications on all devices when the user clears it on one device. Thus, Notifications that are synched to Wear devices help engage users with their Wear device, and this represents the simplest entry-level engagement of users with their Wear devices. Depending on the needs of your App, you can engage your App with Wear devices in various ways, at different levels of engagement, and these have been covered in this section.
6.10.1 Engaging Android Wear via Notification Sync
Because Notifications can be synced between a user’s handheld device and Wear device, at the simplest level of engagement, Notifications are presented on the Wear device as well. This is the simplest form of engagement with Wear devices.
6.10.2 Wear Extended Notifications
The next progressive degree of engagement with Wear entails designing Apps that extend Notifications to exhibit Wear-specific user interfaces and behavior. The Android v4 support library provides the NotificationCompat.WearableExtender class, which supports adding Wear extensions to Notifications. Using the WearableExtender, you can provide actions that are specific to Wear. Thus, Notifications can have a different actions and user experience across the handheld and Wear platforms. On the Wear devices, we need to emphasize simplicity of interaction.
A quick review of the interaction flow, when receiving a Notification from the Gmail App, provides a good example of how you might design your App’s extended Notification.
Figure 6-24A shows the receipt of an email. Tapping on the Notification will display the content of an email (Figure 6-24B).
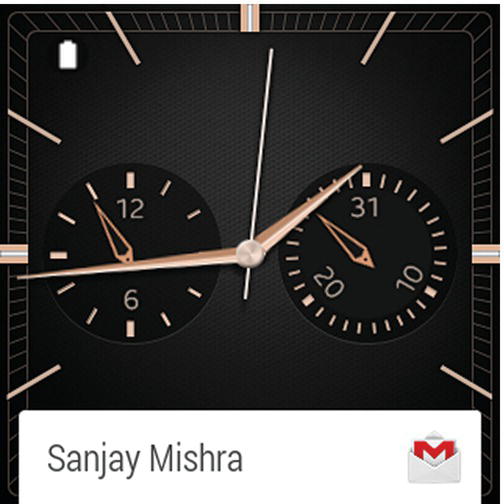
Figure 6-24A Gmail arrival Notification.
Figure 6-24B Gmail reading an email.
Figure 6-24B shows the display the content of an email. Swiping right will display the Archive action on the email item (Figure 6-24C).
Figure 6-24C Archive.
Figure 6-24C shows the Archive action, and swiping right offers other actions—Reply (Figure 6-24D).

Figure 6-24D Reply.
Figure 6-24D shows the Reply action, and swiping right offers the last action—Open on handheld device (Figure 6-24E).

Figure 6-24E Open on phone.
Figure 6-24E shows you the option to open the email item on your phone or handheld device.
Studying these above Wear-based user interfaces and interactions can provide you with ideas for designing your own Wear App.
6.11 Android Wear Targeted Apps
During initial development, Android Wear apps can be directly installed and executed on your development Android Wear device—your Wear App will need to be targeted specifically for the Android Wear platform whose API level is 20. An App that has been built for any of the handheld Android OS versions will but, naturally, fail to install onto an Android Wear device. In Development/Debug mode, you can directly build and install your Wear App’s apk onto your Wear device. However, Android Wear devices that do not have the ability to access the Play Store, particularly the Play Store App, has been excluded from the Android Wear software stack. Therefore, for purposes of distribution—in order to release a production Wear App to consumers—you will need to build an Android handheld companion App and embed your Wear App within its res/raw directory. This is an intricacy that Android Studio handles for you when you select the target form factor to handheld devices as well as Android Wear (API level 20).
6.12 Hello Wear World: Writing our first Wear App
We will now cover the subject of writing, installing, and executing a simple Wear App on a Wear device or suitable AVD. Writing your first and simple hello Wear App is fairly easy once you have your environment set up and working properly. We will be using Android Studio to do so in this section. Once you open up Android Studio, you will need to create or Start a new Android Studio project.
Figure 6-25A shows the new project screen, which requires you to enter the name of your application, the company domain name (or package name in reverse order), and the project location in your local file system. The next screen helps you select and target the device form factor.
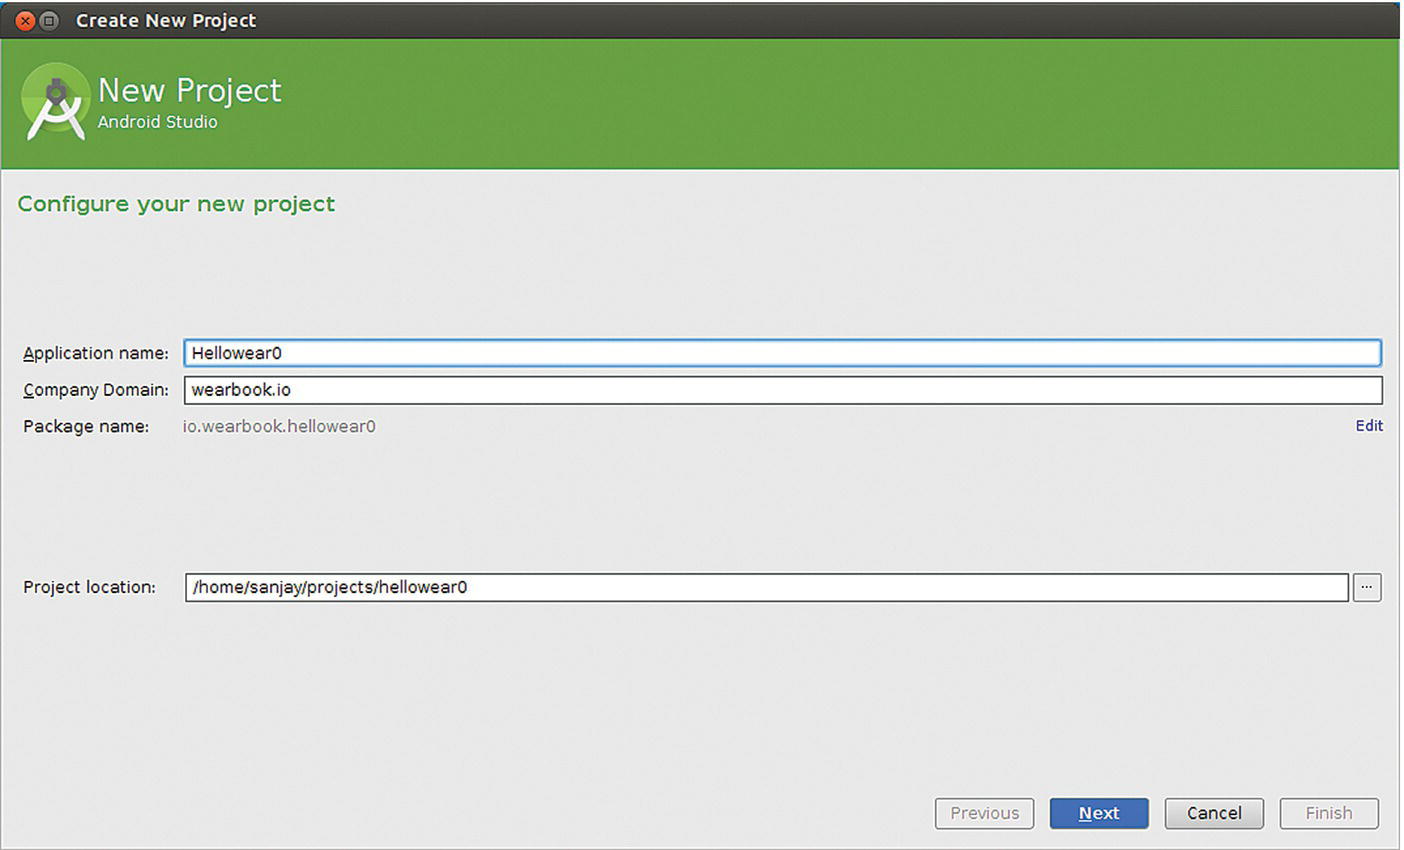
Figure 6-25A Android Wear new project.
Figure 6-25B shows the new project’s Form Factor selection screen, which helps you choose the form factors that the App is intended to run on. In this case, I selected solely Android Wear platform, because I intend this to be a Wear App, in development mode.
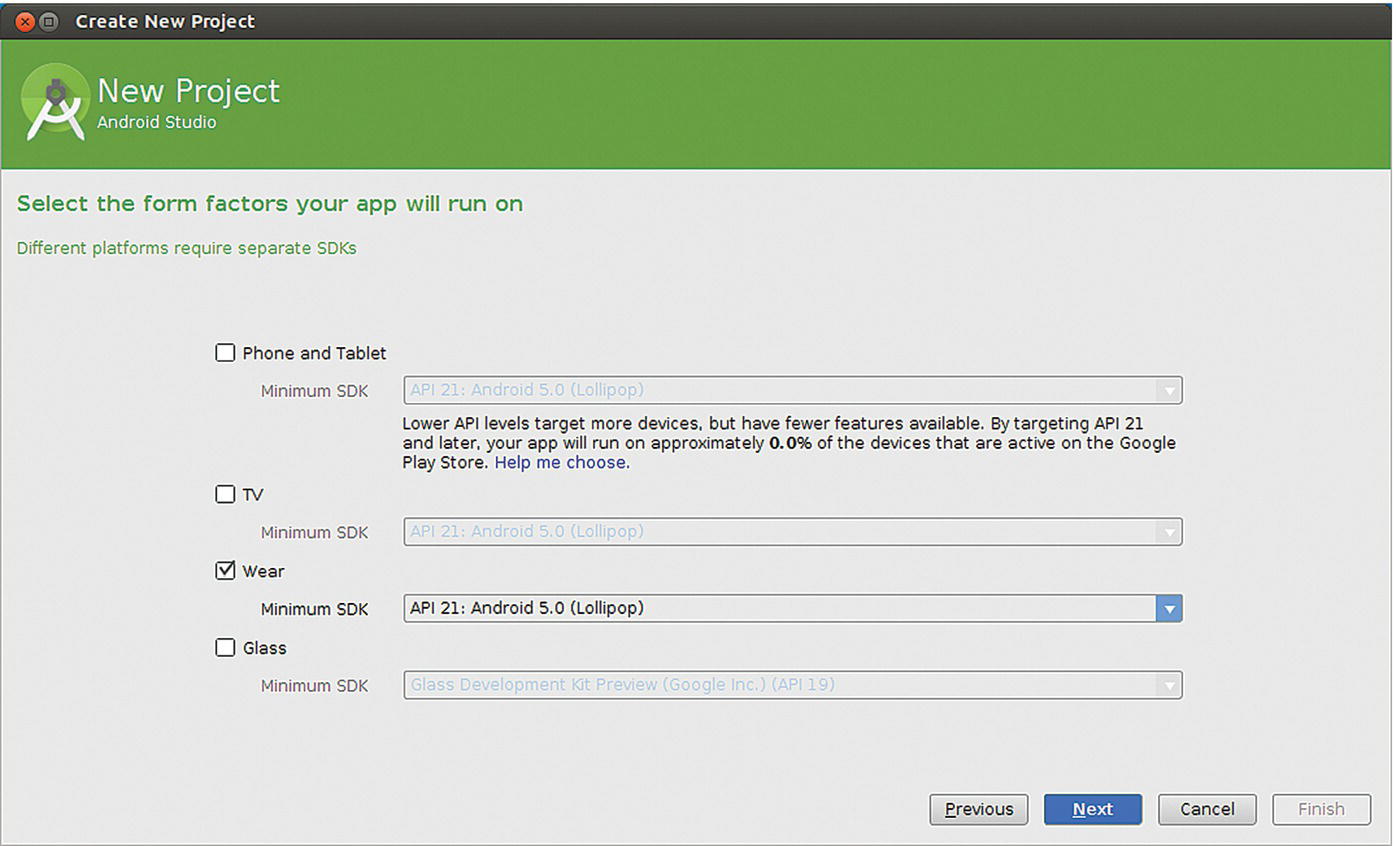
Figure 6-25B Android App, selecting form factor.
Figure 6-25C shows the new Wear project’s code artifacts, which you can browse and edit.
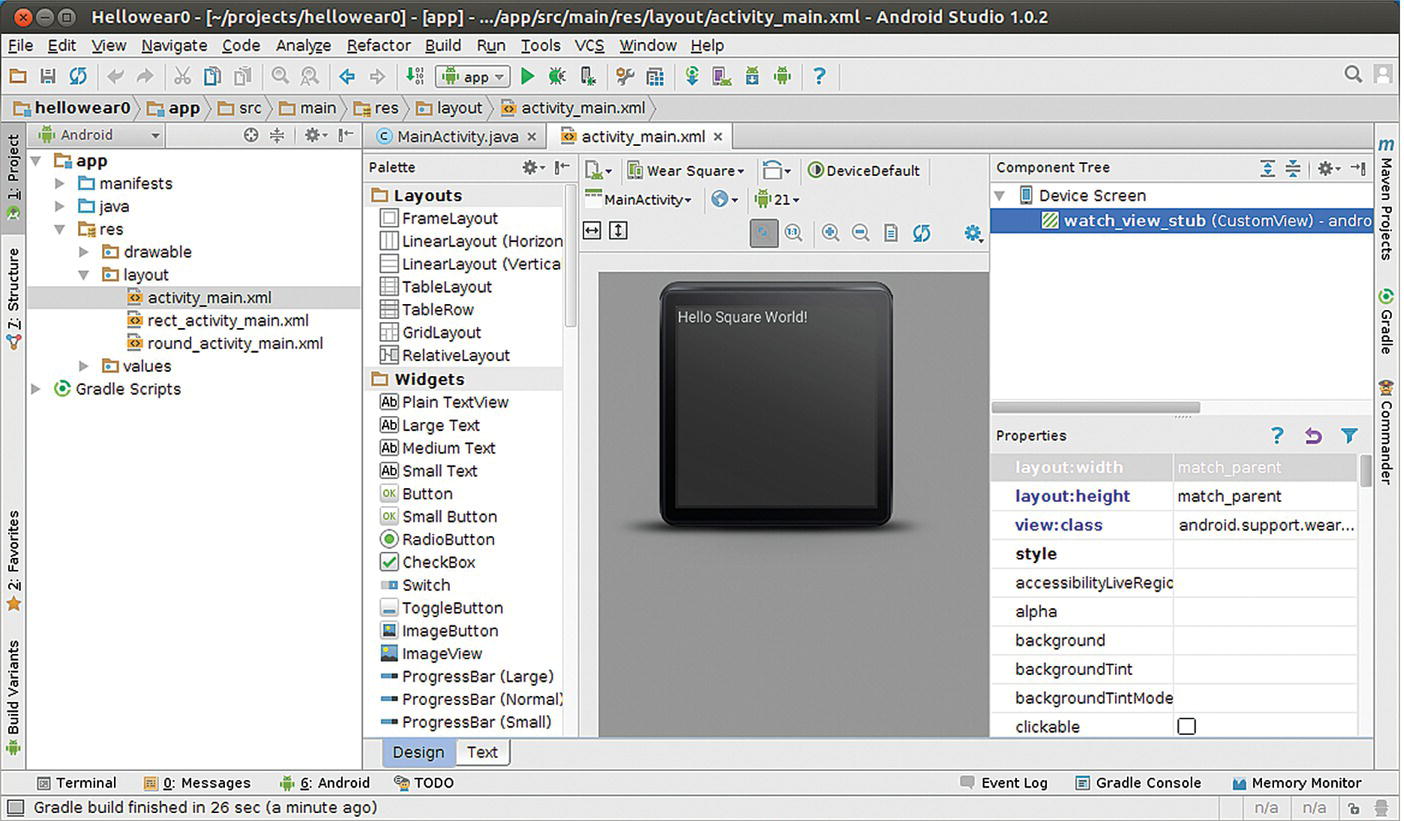
Figure 6-25C Android Wear project code artifacts.
Figure 6-25D shows some trivial editing of the Wear project’s code artifacts.
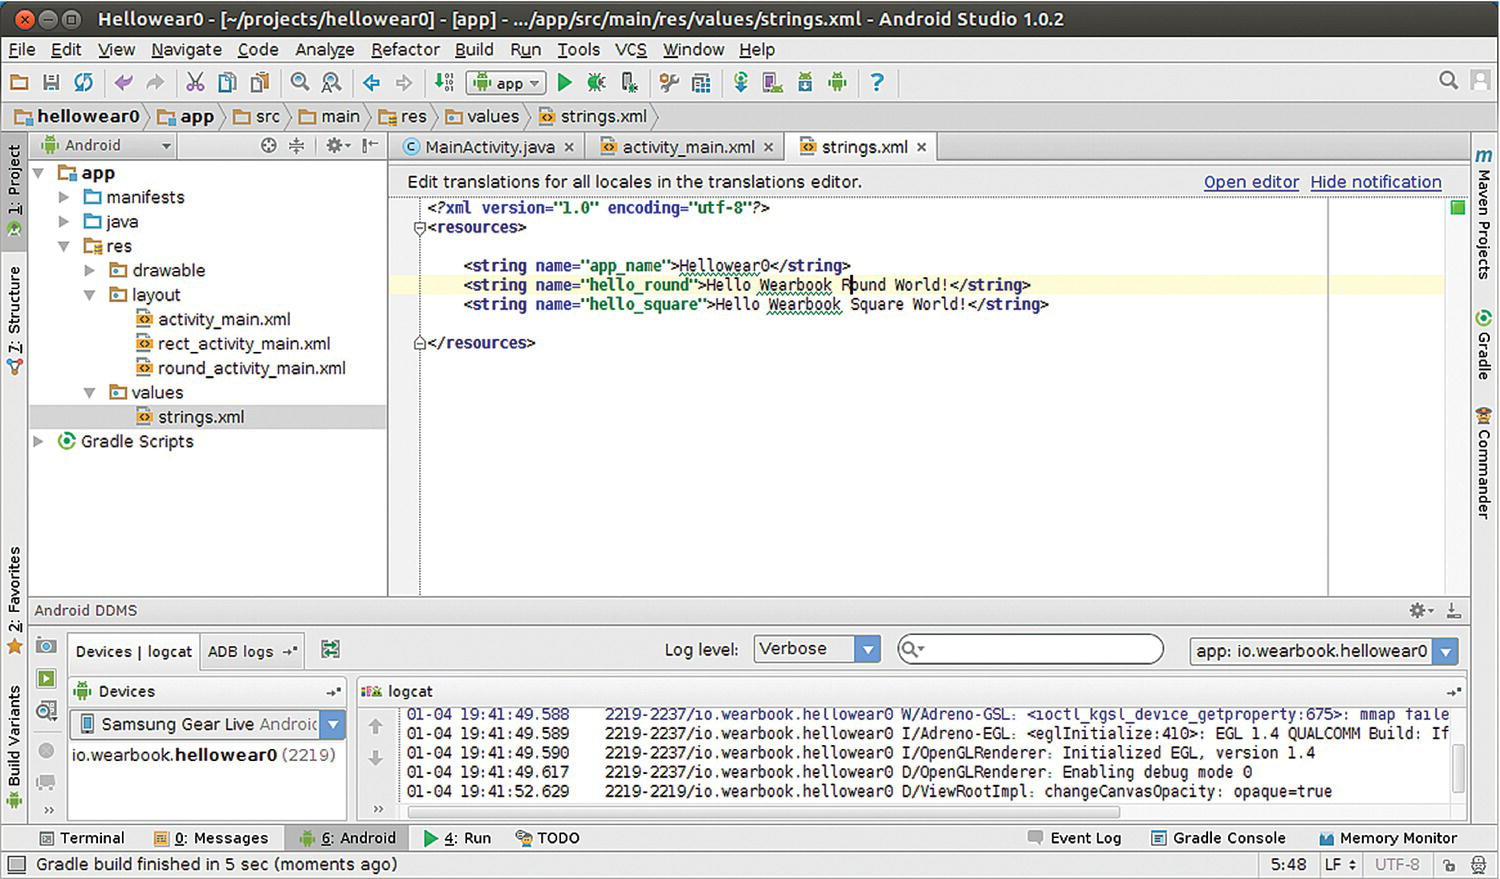
Figure 6-25D Android Wear, editing project code artifacts.
Figure 6-25E the step of building your first Wear App by clicking on the green “play” button.

Figure 6-25E Android Wear, building App.
If you have your Android Wear device connected, you will be prompted to choose the device that your App will be installed on—as shown in Figure 6-25F.

Figure 6-25F Android Wear, choose device.
Figure 6-25G shows the Hello App running on the Android Wear device.

Figure 6-25G Hello Wear App running on Android Wear device.
You may browse though the source tree of your first Wear App and get familiar with its project’s artifacts.
References and Further Reading
- http://en.wikipedia.org/wiki/WIMM_One
- http://en.wikipedia.org/wiki/Android_Wear
- http://www.android.com/wear
- https://developer.android.com/training/building-wearables.html
- https://developer.android.com/reference/packages-wearable-support.html
- https://support.google.com/androidwear/answer/6056843?hl=en