
Chapter 5. WebSocket Compatibility
The technology behind WebSocket is to allow bidirectional communication between client and server. A native WebSocket implementation minimizes server resource usage and provides a consistent method of communicating between client and server. As with the adoption of HTML5 in client browsers, the landscape of support is relegated to modern browsers. That means no support for any user with Internet Explorer less than 10, and mobile browser support less than iOS Safari 6 and Chrome for Android.
Here are just some of the versions with RFC 6455 WebSocket support:
-
Internet Explorer 10
-
Firefox 6
-
Chrome 14
-
Safari 6.0
-
Opera 12.1
-
iOS Safari 6.0
-
Chrome for Android 27.0
This chapter outlines options for supporting older browsers that predate the WebSocket RFC 6455 spec when you want to take advantage of bidirectional communication in your application. The platforms you’ll look at solve compatibility issues with older client browsers, and add a layer of organization for your messages.
SockJS
SockJS is a JavaScript library that provides a WebSocket-like object in the browser. The library is compatible with many more browsers due to its conditional use of multiple browser transports. It will use WebSocket if the option is available as a first choice. If a native connection is not available, it can fall back to streaming, and finally polling if that is also unavailable. This provides nearly full browser and restrictive proxy support, as shown in Table 5-1.
| Browser | WebSockets | Streaming | Polling |
|---|---|---|---|
IE 6, 7 |
No |
No |
jsonp-polling |
IE 8, 9 (cookies=no) |
No |
xdr-streaming |
xdr-polling |
IE 8, 9 (cookies=yes) |
No |
iframe-htmlfile |
iframe-xhr-polling |
IE 10 |
rfc6455 |
xhr-streaming |
xhr-polling |
Chrome 6-13 |
hixie-76 |
xhr-streaming |
xhr-polling |
Chrome 14+ |
hybi-10 / rfc6455 |
xhr-streaming |
xhr-polling |
Firefox <10 |
No |
xhr-streaming |
xhr-polling |
Firefox 10+ |
hybi-10 / rfc6455 |
xhr-streaming |
xhr-polling |
Safari 5 |
hixie-76 |
xhr-streaming |
xhr-polling |
Opera 10.70+ |
No |
iframe-eventsource |
iframe-xhr-polling |
Konqueror |
No |
No |
jsonp-polling |
To fully use the SockJS library, you need a server counterpart. The library has several options for the server counterpart, with more being written all the time. Following is a sampling of some of the server libraries available:
-
SockJS-node
-
SockJS-erlang
-
SockJS-tornado
-
SockJS-twisted
-
SockJS-ruby
-
SockJS-netty
-
SockJS-gevent (SockJS-gevent fork)
-
SockJS-go
For our needs, we’re going to stick with an all-JavaScript solution.
SockJS Chat Server
You’re going to revisit your chat application and make changes to use the SockJS libraries for server and client.
As mentioned, in order to fully use the SockJS client library on the browser, you require a valid server component:
varexpress=require('express');varhttp=require('http');varsockjs=require('sockjs');varuuid=require('uuid');
Your list of new libraries now includes SockJS, http from the standard Node.js library, and Express.
Note
Node.js has a fully developed package manager with npm. They are usually installed together, and a simple call to npm install [package] will pull down the latest revision. The install will create a node_modules directory if it does not exist, and place the modules inside. If you’d like to install the module globally, you can use the -g flag. For more information, check out the docs.
These dependencies will not be available in Node.js by default, so run the following commands to install them:
npm install sockjs
npm install express
Next, you’ll create a SockJS object and listen for the connection event. The events used with SockJS-node are slightly different than similar ones from the WebSocket clients:
-
connection -
data(equivalent tomessagewith WebSocket) -
close -
error
Express does something interesting with its library by exporting a function as the interface to its module. This is used to create a new Express application and can be written a couple of ways:
varapp=express();
Or the much more terse:
varexpress=require('express')();
This creates an Express application and allows you to assign it to the variable right away. Behind the scenes, there’s some JavaScript magic happening by assigning the function to module.exports:
exports=module.exports=createApplication;...functioncreateApplication(){...}
Now you can create your new SockJS server by initializing express, creating an httpServer with the express application, and finally, creating a SockJS server that listens for the connection event:
varapp=express();varhttpServer=http.createServer(app);varsockServer=sockjs.createServer();sockServer.on('connection',function(conn){...conn.on('message',function(message){if(message.indexOf('/nick')===0){varnickname_array=message.split(' ');if(nickname_array.length>=2){varold_nickname=nickname;nickname=nickname_array[1];varnickname_message="Client "+old_nickname+" changed to "+nickname;wsSend("nick_update",client_uuid,nickname,nickname_message);}}else{wsSend("message",client_uuid,nickname,message);}});...}
The only change to the event handling from your previous code is listening for an event called data instead of message. In addition, you make a slight adjustment to your wsSend method to account for differences with the SockJS API:
varCONNECTING=0;varOPEN=1;varCLOSING=2;varCLOSED=3;functionwsSend(type,client_uuid,nickname,message){for(vari=0;i<clients.length;i++){varclientSocket=clients[i].connection;if(clientSocket.readyState===OPEN){clientSocket.write(JSON.stringify({"type":type,"id":client_uuid,"nickname":nickname,"message":message}));}}}
The WebSocket object you used previously had constants for the readyState property, but here you’ll define them in your client code (to avoid littering the code with integers). The SockJS connection object has the same readyState property, and you will check it against the OPEN constant, which has a value of 1. The other big change is the method for sending data back to the client, which is .write(message) instead of .send(message).
Now that you’ve converted everything from the WebSocket version to use the SockJS-specific code, you’ll initialize a new app with Express and bind the prefix /chat to your http.Server instance:
varapp=express();varhttpServer=http.createServer(app);sockServer.installHandlers(httpServer,{prefix:'/chat'});httpServer.listen(8181,'0.0.0.0');
The HTTP server will listen on port 8181 and respond to requests listening on any IP from the machine, as 0.0.0.0 denotes.
In the example from Chapter 3 you opened your HTML file without an HTTP server present. With SockJS and the other alternatives in this chapter, you’ll opt for serving the client and server from the same HTTP server. Here you set up your client.html and style.css to be sent back upon a request to http://localhost:8181/client.html:
express.get('/client.html',function(req,res){res.sendfile(__dirname+'/client.html');});express.get('/style.css',function(req,res){res.sendfile(__dirname+'/style.css');});
You have now successfully converted the plain WebSocket server to one that uses the SockJS library.
SockJS Chat Client
Let’s walk through how to convert the client to use the SockJS library. The first thing you’ll need at the beginning of any other JavaScript will be to include the SockJS library:
<scriptsrc="http://cdn.sockjs.org/sockjs-0.3.min.js"></script>
This library provides the SockJS object, which mimics the WebSocket library included in most modern browsers. The initialization also changes because you are not using the ws or wss protocol, but instead using http as the initial transport:
varsockjs=newSockJS("http://127.0.0.1:8181/chat");
For your WebSocket client code, you used the variable name ws. Here it seems more appropriate to rename it to sockjs. Find all instances of using ws in the code from Chapter 3, and replace them with sockjs. That is the extent of the changes required for the client. SockJS delivers nicely on an easy migration from native WebSocket to the SockJS library.
SockJS offers support for one or more streaming protocols for every major browser, which all work cross-domain and support cookies. Polling transports will be used in the event of older browsers and hosts with restrictive proxies as a viable fallback.
Next, you’ll take on changing your chat application to use the Socket.IO platform instead.
Socket.IO
Using WebSocket directly is an easy decision when you can control the clients that are using your system. With most organizations having to cater to a heterogeneous client environment, another alternative is Socket.IO. The development behind Socket.IO looks to make real-time apps possible regardless of browser.
The library is able to perform this feat by gracefully falling back to different technologies that perform similar things. The transports used in the event that WebSocket is not available in the client include the following:
-
Adobe Flash Socket
-
Ajax long polling
-
Ajax multipart streaming
-
Forever iframe
-
JSONP polling
Using the native WebSocket implementation would be akin to using TCP directly to communicate. It’s certainly possible to do so, and perhaps in most cases the right choice, but there’s no shame in using a framework to do some of the heavy lifting for you. By default, Socket.IO will use a native WebSocket connection if browser interrogation deems it possible.
Adobe Flash Socket
One of the alternative transports provided by Socket.IO is Adobe Flash Socket. This allows a WebSocket-like connection to be used over Adobe Flash in lieu of native support. This has the benefit of a socket connection, with very few drawbacks. However, one of the drawbacks is requiring another port to be open for the policy server. By default, Socket.IO will check port 10843 and attempt to use that if available.
Connecting
Connecting to a Socket.IO server is first achieved by grabbing the client libraries. If the client you’re using is JavaScript, the simplest method of getting this done is simply referencing the Socket.IO server and including the socket.io.js file:
<scriptsrc="http://localhost:8181/socket.io/socket.io.js"></script>
The easiest path of serving the client library is from the Socket.IO server itself. If your web server and Socket.IO are both being served by the same host and port, you can omit the host and port from the call and reference it like any other file served from the web server. To serve the Socket.IO client library on the same host and port, you’ll have to either configure your web server to forward requests to the Socket.IO server, or clone the socket.io-client repository and place the files whersever you’d like.
If you’d like to aggressively cache the Socket.IO client library, a further configuration you can do is include the version number in the request like so:
<scriptsrc="/socket.io/socket.io.v1.0.js"></script>
As we discussed in Chapter 2, WebSocket uses four events, or “control frames.” With Socket.IO, everything is a lot more open-ended in the events department. The following events are fired from the framework itself:
- connection
-
The initial connection from a client that supplies a
socketargument, which can be used for future communication with the client. - message
-
The event that emits when the client invokes
socket.send. - disconnect
-
The event that is fired whenever the client-server connection is closed.
- anything
-
Any event except for the reserved ones listed. The data argument is the data sent, and callback is used to send a reply.
First things first. After you include the JavaScript client library, you need to open a connection to the server:
varsocket=io.connect('http://localhost:8181');
Now that you have a Socket.IO connection, you can start listening for specific events that will be emitted from the server. Your client application can listen for any named event coming from the endpoint, and can also emit its own events to be listened to and reacted to from the server-side.
Socket.IO Chat Server
Let’s again revisit the chat example. Copy your code from SockJS mostly verbatim, and do initialization similar to the previous library:
varsocketio=require('socket.io');...varapp=express();varhttpServer=http.createServer(app);vario=socketio.listen(server);
Because Socket.IO uses open-ended naming for events, there is no need to shoehorn different incoming events within the same message construct. Therefore, with your Socket.IO code you split up messages and the nickname requests into separate events:
conn.on('message',function(data){wsSend("message",client_uuid,nickname,message);});...conn.on('nickname',function(nick){varold_nickname=nickname;nickname=nick.nickname;varnickname_message="Client "+old_nickname+" changed to "+nickname;wsSend('nickname',client_uuid,nickname,nickname_message);})
You’ve pushed the code for parsing a nickname request to the client, and can also listen for a separate event sent from the server for nickname-specific messages and logically process them differently if you choose.
Socket.IO Chat Client
When the client wants to communicate with the server, it performs the same API function, and emits a named event that the server can listen for. Due to the nature of serving the Socket.IO HTML on the same HTTP server, you are able to reference Socket.IO from the same domain without specifying:
<scriptsrc="/socket.io/socket.io.js"></script>
With SockJS, it closely maps the native WebSocket spec. With Socket.IO, the only similarity is listening for events and sending events back to the server. A number of events are fired from the Socket.IO framework, which should help keep you connected and knowledgeable about the connection and status:
- connect
-
Emitted when the connection with the server is successful
- connecting
-
Emitted when the connection is being attempted with the server
- disconnect
-
Emitted when the connection has been disconnected with the server
- connect_failed
-
Emitted when Socket.IO has failed to establish a connection with any and all transport mechanisms to fallback
- error
-
Emitted when an error occurs that isn’t handled by other event types
- message
-
Emitted when a message is received via a
socket.sendand callback is an optional acknowledgment function - reconnect_failed
-
Emitted when Socket.IO fails to reestablish a working connection after the connection drops
- reconnect
-
Emitted when Socket.IO successfully reconnects to the server.
- reconnecting
-
Emitted when Socket.IO is attempting to reconnect with the server
- anything
-
Any event except for the reserved ones listed. Data argument is the data sent, and callback is used to send a reply
Also, as we discussed earlier, the socket.io-client is available if you’d like to serve the library without using the regular mechanism.
In your new client code base, the size grows a bit to handle pushing the nickname command parsing to the frontend, and emitting your new event nickname:
functionsendMessage(){varmessageField=document.getElementById('message');varmessage=messageField.value;if(message.indexOf('/nick')===0){varnickname_array=message.split(' ');if(nickname_array.length>=2){socket.emit('nickname',{nickname:nickname_array[1]});}}else{socket.send(messageField.value);}messageField.value='';messageField.focus();}
As you can see, you’ve moved the code originally in the server over to the client end, and are using the socket.emit(channel, data) call from Socket.IO to send your nickname change on to the server.
Everything else on the client is pretty much the same. You use Socket.IO’s method on(channel, data) to listen for specific events (reserved or otherwise), and process them as usual.
Now that you’ve written your first Socket.IO project, you can look through the documentation and review the extra features it provides on top of WebSocket and what we’ve discussed.
Let’s move on to one more project, which is of a commercial nature and in the same camp as Socket.IO in terms of the added features and value it provides on top of the native WebSocket implementation.
Pusher.com
The final option you will look at is a layer that sits on top of WebSocket and offers the fallbacks you’ve seen in other solutions. The team behind Pusher has built out an impressive list of features to use with your application should you choose to use their service. In the same way as the other two solutions, Pusher has implemented a layer on top of WebSocket via its API along with a method of testing for acceptable fallback methods should the others fail.
The API is able to perform the fallbacks very similarly to Socket.IO by testing for WebSocket support, and in the event that fails, using the popular web-socket.js client, which substitutes a Flash object for in-browser WebSocket support. If Flash is not installed, or firewalls or proxies prevent a successful connection, the final fallback uses HTTP-based transports.
Similar to events that are on top of Socket.IO’s transport, the Pusher API has a few more tricks up its sleeve. It features channels as a public and private type, which allows you to filter and control communication to the server. A special type of channel is also available for presence, where the client can register member data to show online status.
The major difference here is that you’re including a third party in your communication between server and client. Your server will receive communication from client code most likely using a simple Ajax call from HTML, and based on that will in turn use the Pusher.com REST API to trigger events. The client will be connected to Pusher.com hopefully over WebSocket if it’s available within the browser, or one of the fallback methods, and receive events triggered against the app. Only with several constraints met can a client trigger events and pass them over the network without going through its own server API first.
Let’s go over some of the particular aspects of the Pusher.com API, because they are quite extensive.
Channels
Using native WebSocket is a perfect way to achieve bidirectional communication with the understanding that the clients must support the WebSocket protocol, that you can overcome any proxy issues, and that you’ll build out any infrastructure code necessary to make life easier on the backend. You’ll get a data stream from the text or binary message frame, and it’s up to you to parse, make sense of it, and pass it on to whatever handler you’ve set up in your code.
The Pusher API provides a fair bit of this for you. Channels are a common programming construct and used with this API for filtering data and controlling access. A channel comes into existence simply by having a client subscribe to it, and binding events to it.
Pusher has libraries for a lot of the major frameworks and languages that are popular today. We focus, as always, on JavaScript. Here you’ll see how to subscribe to a channel called channelName. Once you have your channel variable, you can use that to send and receive events.
With most of the channel operations, you can bind to an event that will notify you of the subscription success or failure—pusher:subscription_succeeded:
varchannel=pusher.subscribe(channelName);
In this way, you’ve created a public named channel that any client connecting to the server can subscribe to or unsubscribe from. And unsubscribing is also as simple as they could make it. Just provide the channelName, and the API will unsubscribe you from listening on that channel:
pusher.unsubscribe(channelName);
The API also provides for private channel subscription. Permission must be authorized via an HTTP requested authentication URL. All private channels are prefixed with private as a naming convention, as shown in the following code sample. The authentication can happen via Ajax or JSONP:
varprivateChannelName="private-mySensitiveChannelName";varprivateChannel=pusher.subscribe(privateChannelName);
One of the most needed features when using bidirectional communication is state management for member presence. Pusher provides for this with specialized calls for user presence along with events to listen for to ensure completeness.
The following events are ones you can listen for to ensure that expectations were met:
pusher:subscription_succeeded-
Common in all channel calls. Binding to this event lets you ensure that a subscription has succeeded.
pusher:subscription_error-
Bind to this event to be notified when a subscription has failed.
pusher:member_added-
This event gets triggered when a user joins a channel. This event fires only once per unique user, even if a user has joined multiple presence channels.
pusher:member_removed-
This event gets triggered when a user leaves a channel. Because a user can join multiple channels, this event fires only when the last channel is closed.
Events
Events in Pusher are the way that messages get passed back and forth from the server and the client. A channel, whether public or private, can hold events that pass this data down to the client. If you’re looking to filter messages in different buckets, events are not the way, but channels are. Events in Pusher are aptly named in the past tense because they are notifications of things that happened on the system.
If you have a channel called chat, you would want to be aware when new messages were occurring so you could paint that in the GUI:
varpusher=newPusher('APP_KEY');varchannel=pusher.subscribe('chat-websocket');channel.bind('new-message',function(data){// add any new messages to our collection});
Binding via a channel is not required. Just as easily as you bound to a channel firing events, you can do so using the root pusher variable:
varpusher=newPusher('APP_KEY');pusher.bind(eventName,function(data){// process eventName's data});
Obviously, the API for Pusher and usage patterns you can have are quite vast. The Pusher API is well designed and able to process an insane number of messages per day and number of simultaneous connections. In the next section you’ll perform the same exercise you did previously with Socket.IO and build out a small chat application using the Pusher API.
Pusher Chat Server
You’ve written a simple chat application using Socket.IO and SocksJS, and now it’s time to take the knowledge you’ve gained from Pusher.com’s API and way of doing things and rewrite the chat. The major difference is that sending your chat messages from the client will be done via an API you’ve cooked up on your server. All triggered events to Pusher.com happen via your server, and bound events on channels are passed from Pusher.com to the client using WebSocket or the fallback.
Let’s first outline your server, including a shell of the API calls and the dependencies you’ll need. First things first, you need to install your node dependencies using npm:
$npm install node-uuid$npm install pusher$npm install express$npm install body-parser
You’ve installed and used node-uuid in several other server examples. This section is obviously about the Pusher.com API, so you’re going to install its Node.js library. In order to listen for and parse the body of messages as JSON, you’re using express and body-parser.
Here’s a shell of what your server looks like:
varexpress=require('express');varhttp=require('http');varPusher=require('pusher');varuuid=require('node-uuid');varbodyParser=require('body-parser');varapp=express();app.use(bodyParser.json());varhttpServer=http.createServer(app);varpusher=newPusher({appId:'YOUR-APP-ID',key:'YOUR-APP-KEY',secret:'YOUR-APP-SECRET'});varclients={};varclientIndex=1;functionsendMessage(type,client_uuid,nickname,message){}app.post("/nickname",function(req,res){});app.post("/login",function(req,res){});app.post("/chat",function(req,res){});app.listen(8181);app.get('/client.html',function(req,res){res.sendfile(__dirname+'/client.html');});
As you can see, you’ve required and included your dependencies, spun up express with the body-parser, and gotten it to listen on port 8181 and serve your client template. Your API consists of the calls listed in Table 5-2.
| HTTP method | Endpoint | Description |
|---|---|---|
|
|
Update the client nickname and notify all connected clients |
|
|
Initial connection that assigns an anonymous nickname and a unique client ID |
|
|
Messages for the chat are passed along with the nickname and client ID |
The sendMessage call isn’t part of the API, but a convenience function used by several of the examples. It triggers an event of type on the channel chat, which you’ve bound when starting the server. The JSON you’re passing back for all messages includes the client id, nickname if applicable, and message:
functionsendMessage(type,client_uuid,nickname,message){pusher.trigger('chat',type,{"id":client_uuid,"nickname":nickname,"message":message});}
The first API call expected to be made by a client is to login. The client will receive a unique identifier in the form of a uuid and a unique indexed nickname:
app.post("/login",function(req,res){varclient_uuid=uuid.v4();varnickname="AnonymousUser"+clientIndex;clientIndex+=1;clients[client_uuid]={'id':client_uuid,'nickname':nickname};res.status(200).send(JSON.stringify(clients[client_uuid]));});
Your clients are likely to want their own nicknames represented in the chat application. A call to /nickname will make the requested change and trigger an event nickname to allow clients to show the change on the frontend:
app.post("/nickname",function(req,res){varold_nick=clients[req.body.id].nickname;varnickname=req.body.nickname;clients[req.body.id].nickname=nickname;sendMessage('nickname',req.body.id,nickname,old_nick+" changed nickname to "+nickname);res.status(200).send('');});
The simplest of them all is the chat message. You accept the client id, grab the nickname from your existing array, and use the message passed in the JSON and trigger a message event up to the chat Pusher.com channel:
app.post("/chat",function(req,res){sendMessage('message',req.body.id,clients[req.body.id].nickname,req.body.message);res.status(200).send('');});
Pusher Chat Client
Your server is now awaiting a client to connect. You’ll be using the same HTML template as in previous chapters, and using the chat HTML from Chapter 3 to make life simpler. Let’s outline what’s necessary to get your client synced up with Pusher.com.
First, you need to include the Pusher.com library in your HTML code:
<scriptsrc="http://js.pusher.com/2.1/pusher.min.js"></script>
Within your JavaScript code, you initialize your Pusher object with the app key given in the Pusher dashboard, and immediately subscribe to the chat channel:
varpusher=newPusher('YOUR-APP-KEY');varchannel=pusher.subscribe('chat');varid;pusher.connection.bind('connected',function(){$.ajax({url:'http://localhost:8181/login',type:'POST',dataType:'json',contentType:"application/json",complete:function(xhr,status){if(xhr.status===200){console.log("login successful.");}},success:function(result){appendLog('*',result.nickname+" connected");id=result.id;}})});pusher.connection.bind('disconnected',function(){appendLog('*','Connection closed');});functiondisconnect(){pusher.disconnect();}channel.bind('message',function(data){appendLog(data.nickname,data.message);});channel.bind('nickname',function(data){appendLog('*',data.message);});
The Pusher connection object will emit several events, and you’re concerned only with connected and disconnected. After subscribing to the chat channel, you bind to two specific events on that channel: message and nickname. For each of these, you’ll show notification messages on the client frontend. When you bind to and receive the connected event, you send your login request to the server API and receive back your client id to be passed in subsequent messages. Figure 5-1 is an example of the chat application using Pusher.com.
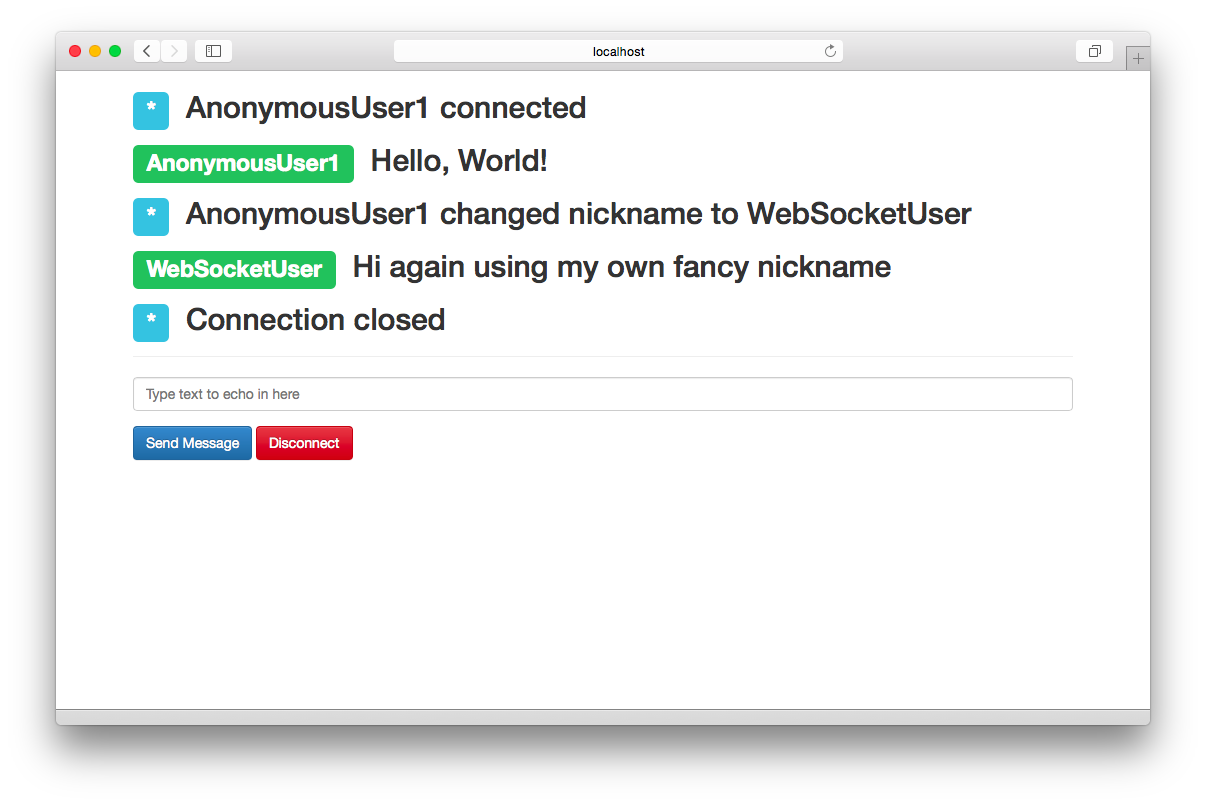
Figure 5-1. Pusher chat example
You’ve seen a concrete example of using the basics of the API available to you. The intention is to show what is possible with alternatives to WebSocket, and Pusher is definitely worthy of consideration as an alternative to pure WebSocket.
Don’t Forget: Pusher Is a Commercial Solution
Unlike WebSocket, Socket.IO, and SocksJS, this framework is a commercial service. Evaluation of the solution and the benefits it provides have to be made by your team. In general, the different pricing tiers are based on connections, messages, and whether or not the connection is protected via SSL encryption. For further evaluation, review Pusher’s pricing page.
Reverse Proxy
One of the things you’ll likely also be asked to do is proxy the WebSocket connection behind a web server. The two most common web servers are nginx and Apache. The setup for these is rather simple, with nginx having the functionality built into the server itself, and Apache using a module called proxy_wstunnel. Rather than go into a ton of detail on how to configure both of these servers to proxy the connections, here are two blog articles that discuss them:
Summary
This chapter presented three popular ways to harness the power of bidirectional communication while dealing with a higher-level API. These solutions give you the power of WebSocket in the event that your client is using a modern client browser, and fall back to Flash socket or other less-optimized solutions for older clients. In addition, the two latter frameworks add features that are not natively supported by WebSocket, limiting the amount of code you’ll have to write to support your applications’ communication. The next chapter looks at the methods of securing your WebSocket communication.