
Public IP, the creator of ZoneCD, gives hotspot operators a simple, highly versatile, free, open source Wi-Fi hotspot solution. All levels of free Wi-Fi providers, from experienced programmers to coffee shop owners, can use ZoneCD. Setting up a free Wi-Fi hotspot can be as easy as hooking up an access point, popping in a CD, and rebooting a computer.
The ZoneCD software is known as a LiveCD. The software does not install on your hard drive; it runs right from your CD-ROM. The software is what controls the hotspot access and provides all the hotspot features. ZoneCD is basically a mini operating system that starts when the CD is in the CD-ROM drive during the booting process of your computer. The software automatically detects the computer hardware and supports many graphics cards, sound cards, and other peripherals.
ZoneCD is in a Linux operating system format, but you do not have to know anything about Linux to use ZoneCD. You just need to know how to place a CD in a CD-ROM drive, turn on a computer, and go through the setup screens. This provides all the benefits of Linux, such as stability, configurability, and security, without your having to do anything with Linux. Keep in mind that you must dedicate a computer to run ZoneCD. You will not be able to use this computer for anything else. You can, however, use an older computer, because ZoneCD operating requirements are relatively low.
ZoneCD was designed for easy and secure connection to an existing private network. However, you do not have to have a private network to use ZoneCD.
The ZoneCD solution, as depicted in Figure 5-1, works by adding a PC (running the ZoneCD software) between an access point, or wireless router, which provides the public wireless access, and your private network (or Internet connection). You are not restricted in terms of which access point or wireless router you must use to provide the public access; the access point or router just needs to be Wi-Fi-compliant. The same is true of your private network router. It just needs to be a standard router.

If you want to put the computer between two network devices, as described, the computer must have two Ethernet network interface cards installed (depicted as Eth0 and Eth1 in Figure 5-1). A firewall is formed at ZoneCD, which protects the optional private network from public access.
As shown in Figure 5-1, hotspot users wirelessly connect to an access point or wireless router, which is physically connected to the computer that is running the ZoneCD software. When the hotspot user tries to access the Internet, the ZoneCD solution intervenes and might require him to register or log in, or it might redirect him to a web page before he can freely browse the web.
If you apply usage limits, the ZoneCD solution enforces them and takes action when needed. For example, you might limit users to one hour of hotspot use per day. The ZoneCD system keeps track of usage times and notifies a user before he reaches his time limit. When the user reaches the time limit, ZoneCD cuts off his Internet access.
Note
If you have specific questions on how the ZoneCD solution works, you can visit the Public IP website at http://www.publicip.net or http://www.publicip.com.
The overall steps to complete when setting up the ZoneCD solution are as follows:
The following sections guide you through each step.
ZoneCD can operate in two modes, which you designate later, during the initial setup:
Open
Closed
Note
The Open mode can always be used free of charge. When using Closed mode, you have the choice to use the free features (as discussed in this section) or purchase Public IP premium services (discussed in the section “Services Overview”) for even more features.
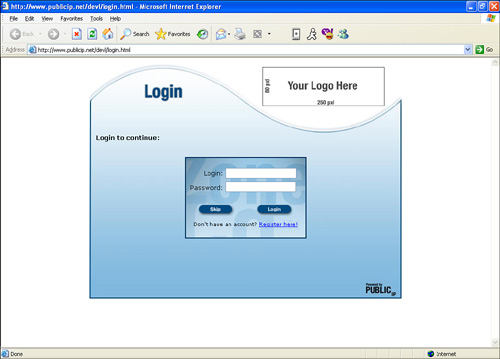
If you choose to run ZoneCD in Open mode, users are shown a simple splash page, as shown in Figure 5-2, the first time they access the Internet, and then they are allowed to freely browse the web. This mode gives your hotspot only basic features, such as these:
Home page redirection
ZoneCD splash screen
Content filtering (blocks inappropriate material)
Ability to customize firewall rules (protect your private network)

Running ZoneCD in Open mode is a good method to use if you are not concerned about keeping track of the number of users per day or requiring the user to log in to use the hotspot.
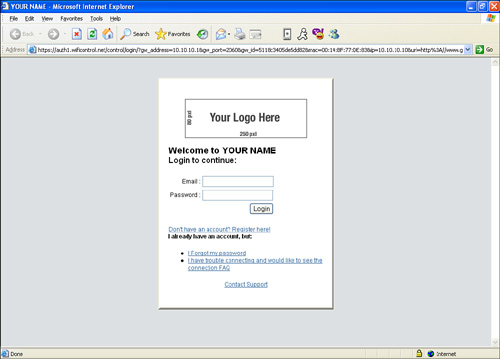
If you choose to run ZoneCD in Closed mode, you bring the full power of the remotely located Zone Control server into play. This mode provides many more features than Open mode does. Just like Open mode, in Closed mode users are shown a splash screen the first time they access the Internet; however, in Closed mode, users see the splash screen customized with your logo and name, as shown in Figure 5-3.
The features (available for free) that are provided in Closed mode are as follows:
Home page redirection
Customizable ZoneCD splash screen
Content filtering (blocks inappropriate material)
Customizable firewall rules (protect your private network)
User authentication/registration
Bandwidth throttling
Daily time limits
Daily download limits
Zone open and closed times
Blocking by MAC address
Configuration of end-user network permissions (classes)
Daily log e-mailer program
Branded “Terms of Use” template, or use of your own
Usage statistics
End-user reporting
With Closed mode, you can require users to log in or create an account via the splash screen before they can access the Internet. This mode is good if you want to limit the performance of the hotspot user, such as bandwidth and allowed IP ports. The Zone Control server keeps track of how long the user is on the system, the total uplink and downlink bandwidth used, and the MAC addresses of the device that the user used to connect to the wireless hotspot.
As shown in Table 5-1, Public IP offers many different services.
Table 5-1. Overview of the Hotspot Solution Features
FreeNet | FreeNet | Basic | Custom | On Spot | Premium | |
|---|---|---|---|---|---|---|
Mode | Open | Closed | Closed | Closed | Closed | Closed |
Monthly Cost | — | — | $7.95 | $10.95 | $12.95 | $15.95 |
Splash Screen | ✓ | ✓ | ✓ | ✓ | ✓ | ✓ |
Content Filtering | ✓ | ✓ | ✓ | ✓ | ✓ | ✓ |
User Classes | ✓ | ✓ | ✓ | ✓ | ✓ | |
Bandwidth Throttling | ✓ | ✓ | ✓ | ✓ | ✓ | |
Usage Limits | ✓ | ✓ | ✓ | ✓ | ✓ | |
Open/Close Hours | ✓ | ✓ | ✓ | ✓ | ✓ | |
Walled Garden | ✓ | ✓ | ✓ | ✓ | ✓ | |
Unauthenticated Access | ✓ | ✓ | ✓ | ✓ | ✓ | |
Firewall | ✓ | ✓ | ✓ | ✓ | ✓ | ✓ |
Usage Report | ✓ | ✓ | ✓ | ✓ | ✓ | |
Blocked User Report | ✓ | ✓ | ✓ | ✓ | ||
Content Filter Report | ✓ | ✓ | ✓ | ✓ | ||
Block P2P Software | ✓ | ✓ | ✓ | ✓ | ||
Registration Filters | ✓ | ✓ | ✓ | ✓ | ||
Configure DHCP | ✓ | ✓ | ✓ | ✓ | ||
Remote Restart/Reboot | ✓ | ✓ | ✓ | ✓ | ||
Content Filter Interface | ✓ | ✓ | ✓ | ✓ | ||
Ticket System | ✓ | ✓ | ✓ | ✓ | ||
Availability Hours | ✓ | ✓ | ✓ | ✓ | ||
Spot Check | ✓ | ✓ | ✓ | ✓ | ||
High Availability | ✓ | ✓ | ✓ | ✓ | ||
Custom Support E-Mails | ✓ | ✓ | ✓ | ✓ | ||
Hotspot Directory | ✓ | ✓ | ✓ | ✓ | ||
End-User FAQ | ✓ | ✓ | ✓ | ✓ | ||
Templates | ✓ | ✓ | ✓ | ✓ | ||
Change Eth1 IP | ✓ | ✓ | ✓ | ✓ | ||
Add LAN Printer | ✓ | ✓ | ✓ | ✓ | ||
Use Remote Proxy | ✓ | ✓ | ✓ | ✓ | ||
Remote SMTP | ✓ | ✓ | ✓ | ✓ | ||
Configuration Queue | ✓ | ✓ | ✓ | ✓ | ||
Encrypted Downloads | ✓ | ✓ | ✓ | ✓ | ||
Live End-User Support | ✓ | ✓ | ||||
Customize Templates | ✓ | ✓ |
The following sections describe the hotspot features so that you can get a better idea of what they offer.
The splash screen template can be branded with your company or organization logo (except in Open mode). The splash pages are available in Dutch, French, German, Spanish, and English. Figure 5-4 shows an example of a splash screen for hotspots using the premium services.
ZoneCD runs an unmodified version of Dansguardian, an open source content filter. Dansguardian is configurable inside Zone Control and is based on the user classes. The content filter configuration is downloaded to your ZoneCD system during boot or using the queue system. This feature is useful and is recommended for places such as libraries, schools, youth clubs, and any other organization that wants to block inappropriate content, such as foul language and pornography.
ZoneCD uses a user class system to assign special rights and privileges to users. All users in your zone, or hotspot, are members of a class or group. Four user classes exist:
Protected
Liberated
Trusted
Super
You can assign each user class a predefined limit for bandwidth, data transfer, and usage time. Protected or Liberated classes can be configured to use the content filter. The Protected user class default firewall rule is to block your defined open ports. The Liberated user class default firewall rule is to allow (you define ports to block). Trusted and Super user classes have no firewall rules; only (optional) time and transfer limits are applied to users in these classes. Super users are given special access to LAN resources. To determine new user classes, you define a default user class for new users to be added upon registration.
The user class feature is useful in any organization in which you want to provide certain privileges to different hotspot users. For example, you can assign the Super class to yourself and all your staff members so that you do not have limitations, such as speed, content, and private network access, while using the hotspot.
You can control the amount of bandwidth available to a user in each user class by setting the upload and download speeds for each user class. This comes in handy if you will share a single Internet connection between a private network and a public hotspot. You can limit the upload and download speeds that hotspot users receive so that they do not take up all the bandwidth or speed of the Internet connection. This allows users on the private network to have the performance they need.
You can configure data and time limits on a daily, weekly, or monthly basis. You can define usage limits by user class or for individual users. Temporary limits can increase a user’s usage limits for the remainder of the day without changing his or her permanent account settings.
This feature allows you to specify the times you would like your hotspot to be active. For example, you might not want to have the hotspot on while your business is closed.
You can add websites to a list that users can visit before they log in and register. For example, suppose that you want all users to register before they use the Internet; however, you want to give them easy access to your company website. Therefore, you would just add your company domain (yourcompany.com) to the walled garden list.
Use Public IP to configure the firewall rules to protect your network from malicious activities. Open and close ports as needed, and configure access to computers on your local network. ZoneCD allows you to configure your wireless signal to block or limit access to your wired network. By default, private (wired) LAN access is blocked from hotspot users. (However, the Super user class has access to the entire network.) You can also allow access to your entire wired network, or define a specific IP address and ports to allow access to a single or multiple computers on your network.
Many reports are available, such as usage, limits and blocks, and another for the content filter. You can apply date ranges and filter results by username, MAC address, or IP address. You can also group the data by username, MAC, or IP if you want to see more cumulative data. All reports also generate bar graphs and pie charts. You can also view summary reports for the number of logins per day and time-of-day usage for the past four weeks so that you can get an idea of your busy times.
A ticket system is available if you want to disable self-registration for the hotspot users and generate automatically chosen logins to be printed and distributed to visitors. The ticket has the network name, username, ticket valid date and time, and a brief message from you (optional).
This allows you to have more control over who uses the hotspot. Suppose you notice that some people are using the free hotspot but are not purchasing your products within your store. To remedy that, you can start giving hotspot access to only paying customers. You can set up the ticketing system and hand out the login information at the front counter or cash register.
Unlike the open/closed feature, the network availability function allows you to define when your hotspot is available for each hour of each day. This is a nice feature to keep users off your network during closed hours or busy times.
A Rich Site Summary (RSS) feed is available to monitor the usage and availability of your hotspot. While inside Zone Control, the same data is available from the status page from within a Flash object. Watch active user sessions and system loads to always be on top of your hotspot. If a gateway fails, you are notified via RSS or a message in the Flash object, and the system also e-mails the details of the crash to your hotspot’s support e-mail address. You are notified again upon recovery.
You can list your hotspot in the hotspot directory on the Public IP website. This provides additional marketing of your hotspot.
You can configure a shared network printer via Zone Control. If you provide an IP address of the printer, along with a small note to users, the printer (among other things such as available time, transfer, hours, and so on) will be displayed in the user’s Connection Properties window upon login.
Implementing some configuration changes on your ZoneCD might require restarting a service or rebooting the gateway. After you have made any configuration changes in Zone Control, you can approve the updates. The changes are then downloaded to your gateway. A broadcast message is sent to users if the action might affect connectivity (Windows XP and Windows 2000 users). The update is made on the gateway within 5 minutes. You receive an e-mail response at your support e-mail address when configuration is complete.
Choose a template that is designed by Public IP, or, if you want more control, design your own. The template system uses the Smarty Template engine. If you decide to subscribe to a service that allows you to customize your template, you should become familiar with the Smarty syntax.
Before beginning the installation, gather all the required items for the ZoneCD solution. The following sections discuss each item you need, and the last section lists the recommended products.
The following hardware is required with the ZoneCD solution:
A private wired or wireless router for the Internet connection/firewall
A wireless router or access point for the public wireless access
A computer with the following:
An Intel-compatible CPU
At least 128 MB of RAM
A bootable CD-ROM drive
A floppy drive or USB thumb/flash drive
Two Ethernet network interface cards (NICs)
The ZoneCD disc
When looking for the equipment for this solution, keep in mind that you should use the recommended products mentioned in this chapter.
Tip
Most of the equipment you need should be available at local consumer electronics stores. You can also try searching Internet stores, such as Amazon.com and Buy.com.
Figure 5-5 shows where the router is placed in the solution.

If you do not have an existing network at your location, you need to purchase a wireless or wired router. As pointed out in Figure 5-5, this router connects to your Internet modem and to the back of the ZoneCD computer.
No specific features are required for the wired or wireless router. You just need to use a standard wired router or a Wi-Fi-compliant wireless router.
This router enables you to easily create a private network, if desired. If you do decide to create a private network, take into account which router you should purchase. If you plan to have wireless coverage on the private network, use a wireless router. Otherwise, use a wired router. Keep in mind that you can use a wired router and later plug in access points to provide private wireless access. In addition, use a wired router if you do not plan to create a private network.
If you do have an existing network, and you have an available Ethernet port on the back of a wireless or wired router, you can plug into that instead of purchasing another one.
Figure 5-6 shows the recommended wired router, which typically costs between $40 and $90.
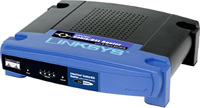
Figure 5-7 shows the recommended wireless router, which typically costs between $25 and $70.

Figure 5-8 shows where the wireless access point or router is placed in the solution.

This piece of equipment, as pointed out in Figure 5-8, provides the public wireless access for the hotspot solution. You can use either an access point or a wireless router.
No specific features are required for the access point or wireless router. They just need to be Wi-Fi-compliant.
Figure 5-9 shows the recommended wireless router, which typically costs between $25 and $70.

Figure 5-10 shows the recommended access point, which typically costs between $60 and $80.

Figure 5-11 shows where the dedicated PC is placed in the solution.

Make sure the computer you will use for the ZoneCD solution meets the requirements discussed earlier. The ZoneCD computer does not require an input/output device, such as a keyboard, mouse, or monitor, after the initial configuration is complete. To provide easier access when running headless (with no input/output devices), you can use Secure Shell (SSH) for remote administration of the system.
ZoneCD operates from a LiveCD; therefore, it cannot retain settings during a reboot. However, it has a system that saves the ZoneCD configuration and setting to a removable medium. Therefore, you need a floppy disk or a USB thumb/flash drive.
Figure 5-12 shows the recommended Ethernet NIC, which costs between $15 and $30.

Do not forget that you need the brains of this solution—the ZoneCD disc, which is included on this book’s companion CD-ROM.
Note
This book’s companion CD-ROM includes ZoneCD version 1.2-7.
If you download ZoneCD and burn your own CD, make a note of the version number. You’ll probably need to reference it later.
You can also download the CD image (ISO file) free of charge from the Public IP website (http://www.publicip.net/zonecd/download.php).
You need to burn the ZoneCD ISO file to a regular CD-R disc. You can find help on the Public IP website, under the Development & Support section, on how to burn the file using several well-known CD-writing software packages.
You can also order a ZoneCD CD disc from Public IP for $10. This is good if you do not have a CD burner available, or you are not sure how to burn the ISO file onto a disc with your particular CD-writing software.
Note
Follow the directions in this section if you will use the Closed mode and the free service; otherwise, disregard this section.
You need to create a few logins, or accounts, on the Public IP website. This allows you to use their Zone Control server. Creating these accounts also enables you to log into the web-based administration tools on the Public IP website.
First, you should create a master login. This lets you set up and create logins for your zones, or hotspots, each with a separate zone login. The zone login you create is required during the ZoneCD boot of that particular zone, or hotspot.
After you create and log into the master account, you complete a wizard that helps you configure and customize your zone. This wizard, called the Master Wizard, creates a template or “blueprint” that saves you the trouble of re-creating all the configuration options each time you add a new zone. If you have only one zone, or hotspot, to set up, this does not increase the time it takes to get set up. The wizard saves your answers and configurations in the Public IP database so that the Zone Wizard has these values when generating a new zone for you.
To start the process, create a master login:
In the Login dialog box, click the New Master Account link.
Enter your information and click the Create Master Login button.
You must activate the account by visiting the link contained in the confirmation e-mail.
After you log into the master account (see Figure 5-13 for an example), follow the Master Wizard. Then you need to create a zone by completing the Zone Wizard.

Note
Follow the directions in this section if you will use the Closed mode and purchase a premium service; otherwise, disregard this section.
First, you need to go to the Public IP website and sign up for a premium service by going to http://www.publicip.com/services.php.
After you complete the sign-up process and have activated your account, log on to the Zone Control. You might be taken automatically to the Zone Control login page after the account activation; however, you can log in by going to http://www.publicip.com and using the Login box in the upper-left corner of the website.
After you log in, complete the wizard, which serves as a template for setting up your zones, or hotspots. Then complete the wizard at the end to create a zone.
The procedure in this step depends on whether you are using a private or public access point/router, as described in the following sections.
If you do not already have an existing network (wired or wireless router), you should set up and configure your wired or wireless router after reading this section. See Figure 5-14 for a better idea of the piece of equipment being discussed. To set up your router, follow the manufacturer instructions that were included in the router product box. The instructions should have you connect the router to your Internet connection.

If you are setting up a wireless router (or a wired router and connecting access points) to provide wireless access for your private network, follow these steps to maximize your private network security:
Use an encryption method, such as Wi-Fi Protected Access (WPA) or at least Wired Equivalent Privacy (WEP).
Consider disabling Service Set Identifier (SSID) broadcasting, which helps hide your network from others.
Configure a channel that’s not being used by other nearby wireless networks, such as your Wi-Fi hotpsot. Software tools such as NetStumbler, which is included on the companion CD-ROM, or tools provided by some radio card manufacturers allow you to view information, such as channels, about your neighboring wireless networks. You should also try to use the nonoverlapping channels 1, 6, and 11. Try to avoid channel 6, however, because this is the default channel most wireless devices use; therefore, it’s likely the most congested channel.
Note

Even though channel 6 is mentioned as the most congested channel, keep in mind that other electronic devices, such as cordless phones and microwave ovens, cause Radio Frequency (RF) interference with Wi-Fi devices.
If you suspect your Wi-Fi hotspot is being affected by RF interference, try using each nonoverlapping channel. See if there is any difference in connectivity or performance, because the interference might influence only certain channels.
Make sure you set (or change the default) a password for your wireless router.
You might not want to use a descriptive SSID (network name), such as the address or business name. This makes it harder for hackers to lock in the location of your network.
You should set up and configure your access point or wireless router after reading this section. See Figure 5-15 for a better idea of the piece of equipment being discussed.

To set up your access point or wireless router, follow the manufacturer instructions that were included in the product box. However, the setup instructions for a wireless router usually have you connect it to the Internet connection. Do not connect the wireless router to the Internet modem; skip those steps. In addition, the setup instructions for access points might tell you to connect it to the network (via a router, switch, or hub); however, do not connect the access point to the network. The purpose of following the manufacturer instructions is just to set some initial settings, such as the network name and channel.
If you are using a wireless router, you must disable DHCP for your LAN before starting the installation. If you are using an access point for the public wireless access, do not worry about disabling DHCP, because access points do not have this feature; only routers do.
Tip
To disable DHCP, you probably have to access the router’s wireless web-based administration utility after you set the initial settings. You can find out how to access this utility by looking in the wireless router manual or other included documentation. Keep in mind that when you are looking for the DHCP settings in the web-based admin utility, you will see a DHCP feature for the Internet connection. Do not mess with that; you need to disable the DHCP feature for the LAN.
Note
DHCP is a feature that hands out IP addresses to devices (computers) that connect to the wireless router. Devices must have an IP address before they can access the Internet. Even though you disable DHCP on the wireless router, the user devices, such as laptops and PDAs, are assigned IP addresses from the ZoneCD system.
Either way you go (access point or wireless router), take into account a few things while configuring this piece of equipment:
Do not use security or encryption methods.
Use an SSID (network name) that describes the location and your intentions. For example, a café might use “Free Hotspot at Bob’s Café.” If the hotspot is being put in just for the local youth club, you might want to use “Youth Club Hotspot.”
Configure a channel that’s not being used by other nearby wireless networks. Software tools such as NetStumbler, which is included on the companion CD-ROM, or tools provided by some radio card manufacturers allow you to view information, such as channels, about your neighboring wireless networks. You should also try to use the nonoverlapping channels 1, 6, and 11. However, try to avoid channel 6, because this is the default channel most wireless devices use; therefore, it’s likely the most congested channel.
Note
Even though channel 6 is mentioned as the most congested channel, keep in mind that other electronic devices, such as cordless phones and microwave ovens, cause RF interference with Wi-Fi devices.
If you suspect your Wi-Fi hotspot is being affected by RF interference, try using each nonoverlapping channel. See if there is any difference in connectivity or performance, because the interference might influence only certain channels.
Use mixed mode so that users who are using either B or G wireless adapters can connect to your hotspot. This setting is chosen by default. So do not worry if you are not prompted to specify the mode.
To perform a physical installation, you need to complete the following steps:
If you have not already done so, you probably need to install at least one Ethernet NIC in your computer that will run the ZoneCD. Remember: You must have two Ethernet NICs installed in the computer, but the computer likely already has one. If it does not, you need to install two Ethernet NICs. To install the cards, follow the installation instructions that were included with the Ethernet NIC.
Connect an Ethernet cable to one of the Ethernet adapters on the back of the ZoneCD computer. (Refer to this as Eth1 for example purposes.) Then connect the other end of the cable to a LAN port on the back of the access point or wireless router, which will provide the public wireless access. Make sure you do not plug into the access point or wireless router WAN or Internet port.
Connect an Ethernet cable to the other Ethernet adapter on the back of the ZoneCD computer. (Refer to this as Eth0 for example purposes.) Then connect the other end of the cable to a LAN port on the back of your private wired or wireless router, which is connected to the Internet connection.
This router should be running a DHCP server. If it is not, the ZoneCD must be assigned a static IP address during the boot process. DHCP is usually enabled by default.
Make sure the routers or access points are plugged in and the status lights are lit. In addition, ensure that the ZoneCD computer is plugged in.
Now that you have connected the components, you need to go through the ZoneCD boot process and perform the initial configuration. If you have problems during the process, refer to the “Getting Help” section near the end of this chapter.
Tip
If you are not familiar with using interfaces like the one used during the boot process, it might take some getting used to. You can use your keyboard arrow keys to move the cursor around and use the spacebar to select options. To accept your selection and move to the next screen, press the Enter key.
The first task is to go through the boot process. The following steps let you know what should happen and what to expect during the ZoneCD boot.
Start your computer. After you have entered your operating system (such as Windows), insert the ZoneCD into the CD-ROM drive, and then restart the computer.
Just after the computer starts to boot back up, the CD should take over and start booting its software. You should see the boot splash screen with the ZoneCD logo, as shown in Figure 5-16.
During the boot, as shown in Figure 5-17, you will see messages going by on the screen.
Note
If you are using a USB flash/thumb drive to save your configuration and it is not properly formatted, or if the disk or drive has an error, you are notified.
Select Yes to have the ZoneCD automatically partition and format the drive. Formatting the drive erases all existing data there.
If you do not want to lose the data on the USB flash/thumb, copy the files to your computer before continuing. You can also just use a floppy disk instead; if so, select No.
When the system has found (probed for) all the hardware to determine what hardware drivers to load, it displays the license agreement screen. See Figure 5-18 for an example. The license is based on the GNU CopyLeft license, which has been around for many years for open source software. This appears only when an unconfigured system is booting or during the first boot.
If you select No, the software halts the setup.
If you select Yes, the system proceeds with the bootup sequence.
This is the preamble to the GNU General Public License. This appears only during the first boot.
Select Yes to continue.
The screen in Figure 5-19 shows up on every boot, and you have only 5 seconds to respond.
If this is your first boot, select Yes.
If this is not your first boot and you want to reconfigure the system, pop out the floppy disk that holds your saved configuration, and select Yes.
If this is not your first boot and you want to keep the saved configuration, just wait 5 seconds, and it will continue to boot.
If you do not select anything and it is your first boot, the ZoneCD automatically boots in Closed mode with DHCP enabled for your network configuration. If you did this by mistake, just restart the computer and start the process over again.
Select the mode, Open or Closed, that you want your ZoneCD to run in, as demonstrated in Figure 5-20.
If you choose Closed mode, the screen next prompts you to select which server, Free or Premium, you want to use.
Select how you want the ZoneCD to run after setup is complete from the screen illustrated in Figure 5-21.
LessX—. This starts only the X server and a single rxvt session—no window manager. This is done because the ZoneCD boots to runlevel 5; without the rxvt session, you get a broken shell (no job control).
GUI—. Non-Linux geeks will probably be the most comfortable with GUI. This gives you a basic desktop with a web browser within the Linux operating system.
NoX—. Use this if you plan to run the ZoneCD headless (no monitor, keyboard, mouse, and so on) after setup is complete.
Select the way you want to configure the network for the private side of the ZoneCD computer from the screen shown in Figure 5-22.
If the private wired or wireless router (which should be connected to the Internet) has DHCP enabled, select DHCP.
If you are not sure how the IP addresses are given out on the wired or wireless router, check with someone who knows. If you are not sure and you have not changed many settings on the router, you could probably guess that it has DHCP enabled, because this is set by factory default.
If the private wired or wireless router does not have DHCP enabled, select Static and follow these steps:
Enter an IP address to assign to the ZoneCD system.
Enter the subnet mask to use. Unless you have some special network setup, 255.255.255.0 should work.
Enter the IP address of the gateway. Most likely, this is the IP address of the private wired or wireless router (typically 192.168.1.1 or 192.168.0.1).
Enter the IP address of the primary name server. Again, this is probably the IP address of the private wired or wireless router (typically 192.168.1.1 or 192.168.0.1). You can also use the IP address of your ISP name server.
Enter the IP address of the secondary name server. This is optional; if you do not have a secondary name server, or if you are not sure, just leave it blank.
Select whether you want to enable the automatic reboot feature from the screen shown in Figure 5-23.
Because ZoneCD does not install to your hard drive, the file system is mounted on a RAM disk. Therefore, after a while, you might experience problems when you have utilized most or all of the RAM.
Note
During reboots, the ZoneCD system should seamlessly go through the boot process and load your saved configuration information from your floppy disk or USB flash/thumb drive. Rebooting should not require you to do anything to get back to normal operation; however, you should manually reboot once, just to make sure it loads flawlessly.
If you do not want to enable the auto-reboot and would rather reboot manually on occasion, select No.
To help keep the ZoneCD memory resources optimized, select Yes, and then follow these steps:


You are almost done!
You should now continue with one of the following sections that correspond with the mode (and server type) you chosen
If you selected ZoneCD to run in Open mode, proceed with the following steps:
From the screen shown in Figure 5-24, enter a URL to redirect your users to after they click the button on the splash screen.
If you do not want your users to be redirected, select No Redirect, or just refrain from typing anything, to have them go to their normal home page (set within their browser) after the hotspot splash screen.
From the screen shown in Figure 5-25, you need to specify whether you want the content filter active.


After you finish the Open mode configuration, a screen displays the configuration summary, and the boot should continue automatically. You see several messages that update your system. When you are taken to the interface you chose earlier, your hotspot is alive and ready for users.
Congratulations! You are all done!
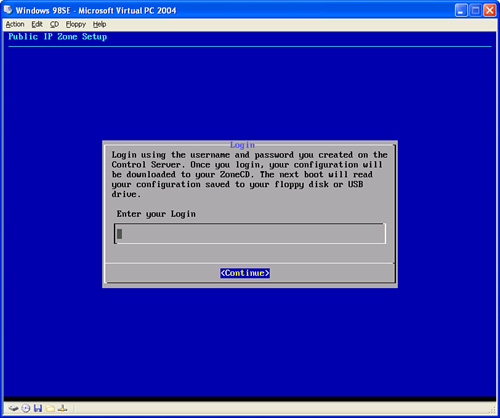
If you choose to run in Closed mode using the Free Server, proceed using the following steps:
Enter the login you created for your zone on the screen shown in Figure 5-26. Remember that these usernames and passwords are case-sensitive.
Closed mode requires that you have already created a Zone login. This is necessary for you to download your configuration from the remote server and to send and receive updates from the Control server.
Enter your password on the screen shown in Figure 5-27. This is a special dialog box that does not display what is typed, so concentrate when entering the password.
After your login information is validated, your configuration settings are downloaded from the Control server. After ZoneCD downloads the configuration information from the server, you should be taken to the interface you chose earlier. After that, your hotspot is alive and ready for users.


That’s all! You are finished!
If you choose to run in Closed mode using the Premium server, proceed with the following steps.
Note
Make sure you saved the certificate key (you received it by e-mail from Public IP) to your disk or USB flash/thumb drive, following the directions in the e-mail. If you mess up, you can restart the computer to go through the boot process again.
After the steps in the previous section, the boot process, you should have seen the configuration summary. Then you can continue with these steps:
Enter the login you created for your zone on the screen shown in Figure 5-28. Remember that these usernames and passwords are case-sensitive.
Closed mode requires that you have already created a Zone login. This is required for the to download your configuration from the remote server and to send and receive updates from the Control server.
Enter your password on the screen shown in Figure 5-29. This is a special dialog box that does not display what is typed, so concentrate when entering the password.

ZoneCD should continue to boot into the interface you chose earlier. After it does that, your hotspot is alive and ready for users.
Congratulations! You made it!
After you install your Wi-Fi hotspot, you should check that the system is actually working as intended and check if the intended coverage area is indeed covered.
Take a while to “play” with the system, and see if it works correctly. Then you should check for successful operation throughout the entire coverage area to ensure you are getting the amount you want. You can do this by moving to different locations throughout the facility with a laptop while monitoring the connection status, signal strength, and speed, as indicated by your wireless-equipped laptop. Be sure to actually make use of the Internet connection by continually browsing the web as you check the coverage areas.
If you find you aren’t getting the coverage you want or if you want, to cover a large area, such as a hotel, you should refer to Chapter 12, “Increasing Your Hotspot’s Wireless Coverage,” for more information.
After your ZoneCD computer boots into the interface you chose earlier, your hotspot should be operational. However, you should give it a try. Use a Wi-Fi-capable computer nearby, connect to the hotspot, and see if it works.
You do not change settings or view stats directly from ZoneCD; rather, you use the online admin tools, which are discussed next, if you are in Closed mode. If you are using Open mode, you cannot really change any of the settings; just reboot the computer and reconfigure the system.
If you need to reboot (after a power outage, for example), the ZoneCD system should automatically complete the boot process and load your saved configuration information from your floppy disk or USB flash/thumb drive. You should not have to do anything to get back to normal operation.
After you have everything set up and you want to view the status and settings of your zones, use the web-based admin tool (called Zone Control) on the Public IP website.
You can log into Zone Control using either the Master login or the login of a particular zone. When you log in with the Zone login, you are not allowed to change the zone’s configuration and you have access to only user permissions, registration, and reporting. However, if you log on using the Master login, you can alter the characteristics of your zones. This allows operators to give the location staff limited access to Zone Control.
For FreeNet hotspots (using Closed mode), log into Zone Control at http://ssl.publicip.net.
For premium service hotspots, log into Zone Control at http://www.publicip.com/.
Public IP hosts a discussion forum on its website (see Figure 5-30) to help you and other hotspot owners when you experience problems or issues with the ZoneCD solution. You can also use the forum to recommend features for future ZoneCD releases, share your success stories, and more.

The discussion forum was put into place for people who are using the free services it is not particularly monitored for premium subscriber problems. However, premium users might still find help on the forums, but that is not guaranteed; they should use the Public IP eSupport.
Note
As a good practice, before posting your questions on the forum, you should do some searching for the particular issue you are experiencing and try working out your problem using previous conversions.
Visit the discussion forum at http://www.publicip.net/phpBB2/.
The eSupport system (see Figure 5-31) allows you to submit “trouble tickets” for direct answers. You can also view the knowledgebase, where you can see a categorized listing of frequently asked questions. The troubleshooter tool can also help; it takes you on a step-by-step tour to find the solution for your issue.

Visit the eSupport system at http://support.publicip.com/.
The solution described in this chapter uses ZoneCD, a freely distributed LiveCD that is run from a dedicated PC, and a regular wireless router or access point, which makes this solution less expensive than other options.
Keep in mind the following things about ZoneCD:
It provides many hotspot features.
It has two modes in which it can operate: Open or Closed.
Premium services are available if you want even more features and support.