There are, as with most software systems, things XP MCE can’t do by default. However, as is the case with all Microsoft platforms, XP MCE comes with its own API, and it’s highly extensible. Many software developers have augmented the XP MCE interface with new and exciting enhancements, bolstering its already rich set of capabilities. This section examines a number of additions to the XP MCE solution that can be considered the best in their respective fields, as well as taking a look at some of the new and exciting hardware interfaces available for the Microsoft Xbox 360, Sony’s PSP, and the Apple iPod.
MCE, like any other software platform, needs support. Updates that come from Microsoft for MCE are made available through the Automatic Updates functionality of the underlying Windows XP operating system. If you choose not to use Automatic Updates, you can check to see which updates might be necessary on Microsoft’s MCE web site, at http://www.microsoft.com/mediacenter.
MCE is an extensible platform, complementing the underlying Windows XP operating system with various development interfaces and capabilities.
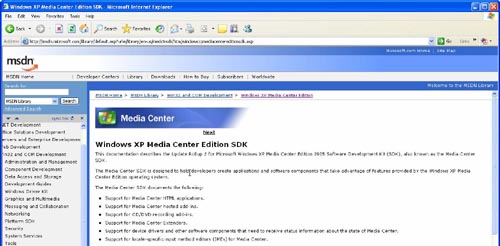
By using the Media Center Software Development Kit (SDK), which is available as a download from Microsoft’s web site (see Figure 31), developers can create plug-ins and extensions to the MCE platform in Visual Studio. The SDK is extremely flexible and extensible and is a great platform for tweaking to achieve some fantastic results. To get more information on Media Center development or to download the SDK, take a look at this web site: http://msdn.microsoft.com/library/en-us/dnanchor/html/anch_winxpmce.asp
If you are not a developer but are looking for ways to increase the functionality and capabilities of MCE, there are plenty of low-cost plug-ins available on the Internet. You’ll find many of these plug-ins and enhancements discussed on the forums on The Green Button’s web site (http://www.thegreenbutton.com) or, alternatively, you can trawl the search engines for “Media Center plug-ins.” Some of the better ones are:
mcesoft (http://mcesoft.nl)
Chris Lanier’s blog (http://msmvps.com/blogs/chrisl/archive/2005/03/22/39320.aspx)
Some of the best plug-ins are available on the Windows Marketplace web site (http://www.windowsmarketplace.com/content.aspx?ctid=163), where these software features can be purchased and downloaded directly to your MCE PC (see Figure 32).
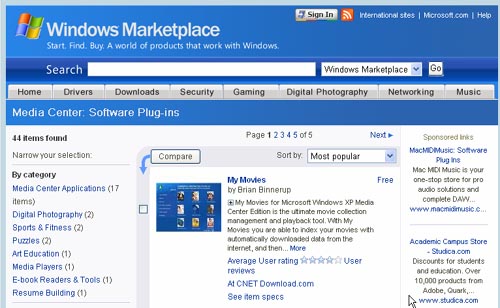
The Media Center section of Windows Marketplace has a number of categories for each type of plug-in you might need: Music & Video, Home & Education, Mobile Applications, Games, Communications & Utilities, and Graphics & Design. It’s worth taking the time to look through the contents of each category to see how your MCE experience could be enhanced.
Power Toys are effectively plug-ins that Microsoft develops for software after the software is first released. There are a number of these so-called Power Toys available for MCE, some useful and some not so critical to your viewing experience. The following Power Toys are available:
Tweak MCE
Gives you the ability to manipulate a variety of Media Center system settings that are normally hidden from the user. This will be covered in more detail in the next section.
Alarm Clock
Acts just like a clock radio, playing pre-selected music at a specified time. Using this software, you can turn your one-thousand-dollar PC into a ten-dollar alarm clock.
Playlist Editor
Lets you make content playlists using your MCE remote control, add and manipulate your playlists by MCE category and modify existing playlists without having to rely on the keyboard or mouse.
Tweak MCE (the MCE Power Toy mentioned in the previous section) is an extremely powerful interface that allows you to adjust MCE system settings that are not normally available to standard users. You can download Tweak MCE from http://www.microsoft.com/downloads/details.aspx?FamilyId=3400190A-511A-4A3A-9B89-524511A76F58&displaylang=en.
Note
Tweak MCE works with MCE Rollup 2. Rollup 2 is comprised of bug fixes and software improvements as well as many new features that augment MCE’s functionality. The get Rollup 2, connect to the Windows Update site and search for updates; see http://update.microsoft.com. Most significantly, Rollup 2 supports additional TV tuners, a feature called Away Mode that provides instant on/off, Xbox 360 connectivity, and support for external DVD changers.
You can use Tweak MCE to adjust many of the default settings in MCE that cannot be changed easily from the menu. Most of these settings are registry-based values that may have obscure meanings or be hard to find. Tweak MCE will expose these settings and allow you to modify them easily through a user-friendly interface. Following are some examples of the kinds of things you can modify using Tweak MCE:
Adjust the time interval applied to the Skip Forward and Skip Back MCE remote control function.
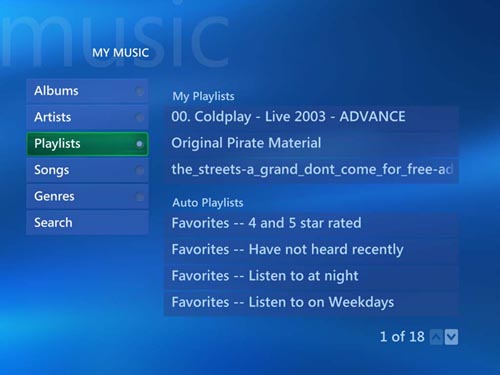
Set a default view for how My Music is presented when you enter the interface (see Figure 32). You can get MCE to automatically start My Music in the Playlists view rather than in the top-level menu.
Modify your MCE remote control settings to best suit your own system’s configuration, or set the ID to allow you to use multiple Media Centers in the same room.
Optimize your flat panel display to best suit your MCE system’s output capabilities using options such as LCD and plasma.
Warning
Tweak MCE is an extremely powerful tool, so use it with care and judgment. As with any tool that modifies low-level system settings (especially those settings that are contained in the registry), there is a risk that something will not go quite right. Before you start tinkering with these settings, it’s a good idea to make a full-system backup so that you can recover your system in the event of any unwanted behavior.
If you are regularly on the move, commuting long distances to work or staying in hotels a lot, it might be nice to take some of your MCE content with you to make the journey pass more comfortably.
The good news is, you have the option of transferring virtually all of your MCE video content and prerecorded television shows to a variety of portable devices, not only to the ones authorized as Portable Media Centers by Microsoft.
Devices such as the Apple iPod and Sony’s PSP can play video and audio content on extremely portable, compact hardware, but the trick is to obtain good quality content that you can convert to the appropriate format for transport. This is why the software you are about to be exposed to will help you so much. Bridging the gap between MCE and your portable device will mean that your high-quality MCE files can be reused and transported into this portable format using a simple software plug-in.
MyTV ToGo iPod by Proxure is capable of transforming your prerecorded television shows from MCE’s My TV into content fit for the Apple iPod, the Sony Playstation Portable (PSP), Windows Mobile-based Pocket PCs, as well as for a Smartphone.
To get a copy of MyTV ToGo iPod, you can download it on a trial basis from the Windows Marketplace, and if you like it, it’s a mere $29.95 to buy a legitimate copy. Download it from http://www.windowsmarketplace.com/Specs.aspx?itemId=2229677
You can use MyTV ToGo either on the MCE computer directly or, if you prefer, over your network from a separate Windows XP computer. The software is designed to seamlessly integrate with the Apple content library software, iTunes, meaning all content converted using the plug-in will be automatically added to the iTunes library.
When you connect your iPod (or other such mobile device) to your PC, MyTV ToGo will automatically synchronize and convert content to your device. The MCE My Videos folder on your Media Center will contain copies of the converted shows so that you can archive content that’s been reformatted without having to worry about where it’s being stored.
Note
There are other conversion products on the market (try Googling “MCE to iPod”) and it’s a matter of choice to which one suits you. You could also try the widely used and extremely popular freeware application, Videora iPod Converter from http://www.videora.com/en-us/Converter/iPod.
MCE includes an interface to Windows Messenger, allowing you to leverage the services of your Windows XP instant messaging client without having to leave the MCE menu system. You will obviously need to be hooked up to the Internet to receive this service.
Note
You will need to be an existing Windows Messenger service user to run the application inside MCE. To learn more about the Windows Messenger or to obtain a Microsoft Passport, go to http://www.msn.com.
To start Windows Messenger inside MCE, click More Programs on the MCE main menu, then select Messenger; see Figure 33.

When you see the window prompting you to sign in, click the Sign In button. On the next screen, shown in Figure 34, you need to type the email address and password for your Microsoft Passport account. If you want to automatically sign in to Messenger in the future, you can allow MCE to remember your Passport details by selecting “Sign me in automatically.”

When you are ready to start using Messenger, click Sign In. A new window will appear, showing that you are signing in.
Note
Your MCE Messenger settings must be managed using Windows Messenger, as installed on your underlying Windows XP system. You’ll need to come out of MCE then click on the Start menu, select All Programs then select Windows Messenger. Your contacts, although available in the MCE environment, are administered through this independent software application interface.
The functionality of this version of Windows Messenger is limited. Your options for defining your availability are limited to signing off and placing a Do Not Disturb notice on your contact information.
After you have selected a contact from the list, a dialog entry box will appear, allowing you to type the message that you would like to send to that contact (see Figure 35).
Unfortunately, the Messenger interface is one of the few interfaces in the MCE environment that forces you to use the MCE keyboard; it is not optimized for the remote control with a soft keypad.
To put the last piece of the (available) communications puzzle into place on your Media Center PC, you should consider downloading the free “Hotmail Plus Reader for Media Center” from the Windows Marketplace: http://www.windowmarketplace.com/prices.aspx?itemId=2200911&stext=Media%20Center%20Hotmail
This plug-in allows you to view Hotmail Plus and MSN Premium email accounts directly from MCE using your MCE remote control.
Warning
This plug-in is for browsing email only. There is no facility, by way of this plug-in, to compose, reply to, or forward email. None of the other features that come with a typical Hotmail Plus account are available. To access any of the afore mentioned features, you will still be required to log in to Hotmail as you normally would, using Internet Explorer.
To sign in to Hotmail Plus or MSN Premium, you will need to know your account email address and your associated password. You can use your MCE remote control to type in the appropriate letters and characters in the same way you would enter text into a cell phone.
Scroll through your email using the up and down arrows on the MCE remote control, clicking OK on any messages you wish to view the contents of.
As mentioned in a previous section, MCE extender technology allows you to view your MCE multimedia content on a television in a remote location, coupled to the main PC using either wired or wireless networking.
The simplest yet most effective MCE extender on the market is Microsoft’s Xbox 360. Furthermore, it is also the most cutting edge games console available. The Xbox 360 extender functionality is fully optimized to reproduce functionality (full range of MCE menu functions), streaming video, music, and picture content over the network.
Once you have connected your Xbox to your television set and paired it with your MCE system, you will be able to use your existing MCE remote control to manipulate the menus on both the MCE PC and the Xbox 360.
Connecting the two devices together couldn’t be easier. It’s a simple 12-stage process:
Connect your Xbox 360 to your television set according to the documentation then link it to your home network—this can be either a wired (UTP 10/100) or wireless (802.11a+g) network.
Switch on the Xbox 360 and begin the process of pairing the devices by pressing the green button on your MCE remote control.
You are asked if you want to connect to an MCE PC. Press the Media Center button to continue to search on the network for your system.
The Xbox 360 should find the MCE PC on the network. You will receive a unique setup key as a security measure. Write this down and keep it safe. Press the Continue button.
Go to your MCE PC, launch Internet Explorer, and go to the web site http://www.xbox.com/pcsetup.
Click the Setup button at the bottom of the page.
When the software installation begins, click Next on the Welcome screen.
Accept the terms of the software license agreement and click Next.
The MCE Extender software is now installed. This takes a few minutes. When it finishes, you are required to reboot your MCE PC.
When the MCE PC reboots, setup will resume. Microsoft recommends that you select the default setup settings by clicking Next.
Click Next on the following information screen and have your 8-digit security code handy.
Type the security code into the boxes provided and click Next.
After you pair the devices, it’s a good idea to tune the performance of your systems to best suit the network environment in which they are installed. This is the last stage of the installation, and although it’s optional, it is best to run through it, as it will adjust the way your systems communicate to suit your own network.
Click Next to start the Network Performance Tuner. This tuner will take a few seconds to scan the network in order to see what suits your systems best.
You will see a report of the network connectivity detected and a suggestion of how it will perform in your environment. Follow any advice you are offered, then click Continue.
That’s it. Simple isn’t it? The two devices can now communicate effectively, multimedia can be streamed between them, and your MCE remote control can control the Xbox 360 in the same way it controls MCE. All your digital content on your MCE box will be digitally streamed to your Xbox 360 on demand.