
In many GUI builders on other platforms, you describe what you want an application to look like and then press a button to generate a bunch of code. Xcode’s interface builder is different. It is an object editor: you create and configure objects, like windows, buttons, and labels, and then save them into an archive. The archive is a XIB (pronounced “zib”) file.
A XIB file is an XML representation of the archived objects. When you build a project, the XIB file is compiled into a NIB file. Developers manipulate XIB files (they’re easier to work with), and applications use NIB files (they’re smaller and easier to parse). However, most iOS developers use the words XIB and NIB interchangeably.
When you build an application, the compiled NIB file is copied into the application’s bundle. An iOS application is really a directory containing the executable and any resources the executable uses. We refer to this directory as the bundle. Then, when your application reads in the NIB file, the objects in the archive are brought to life. Your first application will have only one NIB file created from MainWindow.xib that is loaded when the application first launches. A complex application can have many NIB files that are read in as they are needed.
When you select a XIB file in the project navigator, the editor area displays an outline view and a canvas (Figure 1.6). The outline view is on the lefthand side of the editor area, and it shows the objects in the XIB file. You can shrink the outline view into a dock by clicking the disclosure button in the bottom left corner of the view. The dock shows fewer details and is useful when screen real estate is running low. However, for learning purposes, it is easier to see what is going on in the outline view.
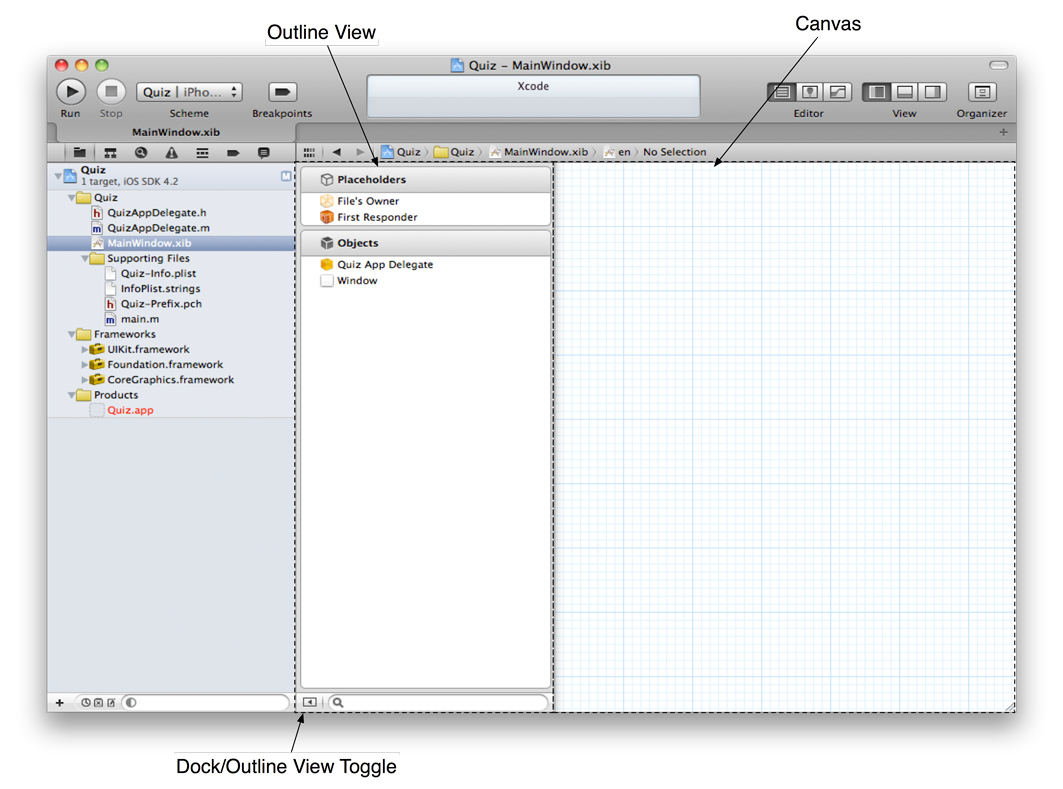
The outline view shows that MainWindow.xib contains four objects:
- File's Owner
- An instance of UIApplication. The event queue for your application is managed by this object.
- First Responder
- This object doesn’t have much use in iOS right now; it is more of a relic from Desktop Cocoa. You can ignore it.
- QuizAppDelegate
- An instance of QuizAppDelegate, an object created by Xcode specifically for this project. You will be editing the source code for this class. (We’ll talk more about classes and objects in Chapter 2.)
- Window
- An instance of UIWindow that represents the application’s window.
The canvas portion of the editor area is for viewing and manipulating the layout of your interface. Click on the Window object in the outline view to display it on the canvas (Figure 1.7). You can move the window by dragging in the blue-shaded area around it. Note that moving the window doesn’t change anything about it; it just re-organizes the canvas. You can also close the window by clicking on the x in its top left corner. Again, this doesn’t delete the window; it just removes it from the canvas. You can get it back by selecting it again in the outline view.
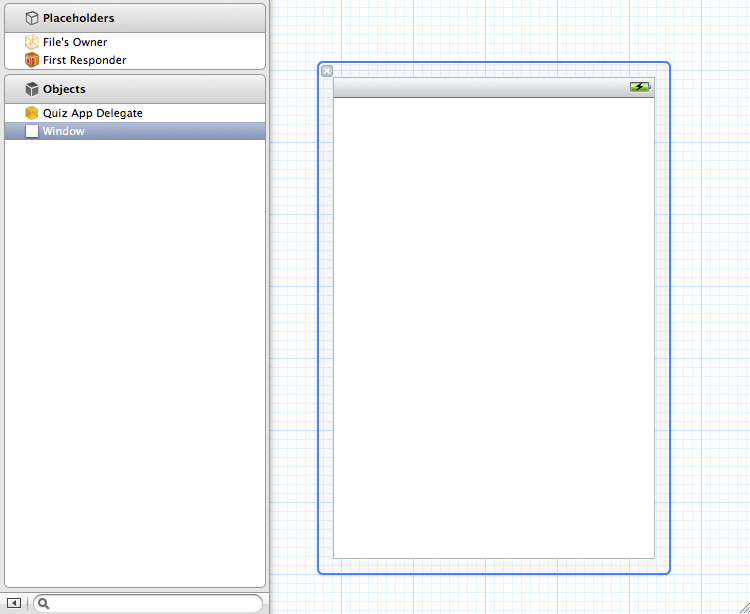
The window object in Figure 1.7 is the foundation of your user interface and appears exactly as it will in your application. Flip back to Figure 1.1, and you’ll see that Quiz needs four additional interface elements: two text labels and two buttons.
To add these elements, you need to get to the
utilities area. In the top-right corner of Xcode’s toolbar, find the ![]() buttons labeled View. These buttons toggle the navigator, debug area, and utilities. Click the right button to show the utilities area
(Figure 1.4).
buttons labeled View. These buttons toggle the navigator, debug area, and utilities. Click the right button to show the utilities area
(Figure 1.4).
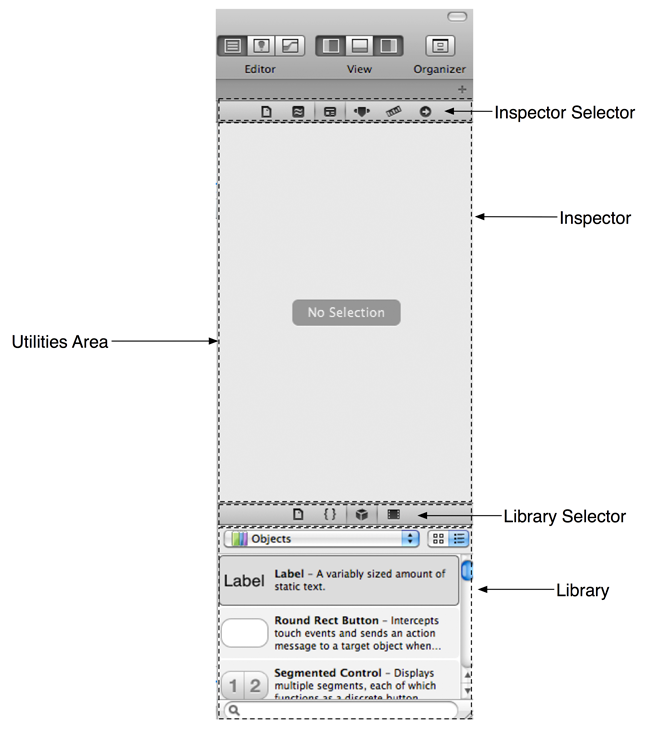
The utilities area appears to the right of the editor area and has two sections: the inspector and the library. The top section is the inspector, which contains settings for the file that is currently displayed in the editor area. The bottom section is the library, which lists items you can add to a file or project. You can change the relative sizes of these sections by dragging the line between them.
At the top of each section is a selector for different types of inspectors and libraries (Figure 1.8).
From the library selector, select the ![]() icon to reveal the object library. This library
contains the objects you can add to a XIB file.
icon to reveal the object library. This library
contains the objects you can add to a XIB file.
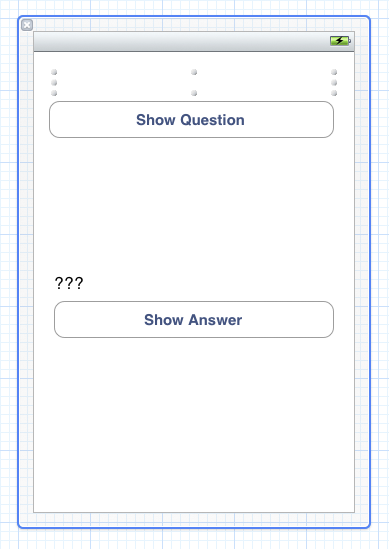
Scroll down the list or use the search bar at the bottom of the library to find Label. Then select the label and drag it onto the window object on the canvas. Position this label in the center of the window, near the top. Drag another label onto the window and position it in the center closer to the bottom. Then find Round Rect Button in the library and drag two buttons onto the window. Position one below each label. You can resize an object by selecting it and then dragging its corners and edges. Make all four objects wide enough that they span most of the window.
Now let’s give the buttons helpful titles. You can edit the title of a button simply by double-clicking it. Change the top button to and the bottom button to . You can edit the text of a label the same way; leave the top label blank and have the bottom label display ???. Your window should look like the one in Figure 1.9.
The labels and buttons are objects (of type UILabel and UIButton), and objects have instance variables that specify their behavior and appearance.
For example, when you entered a title for the top button, you set that button’s title instance variable. You
can edit a few of these instance variables directly on the canvas, but most must be edited in the utilities area. For example, labels have a textAlignment instance variable. The default is left-aligned, but we want this text to be centered. Select the bottom label and then click the ![]() icon in the inspector selector.
icon in the inspector selector.
This inspector is the attributes inspector, and here you can set the instance variables of the selected object. Near the top of this inspector is a segmented control for alignment. Select the centered text option, as shown in Figure 1.10.
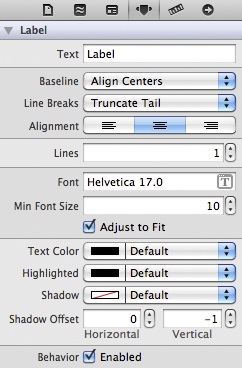
Notice the ??? is now centered in the bottom label. Now center the text in the top label. (There’s no text now, but there will be in the running application.)
Your application’s interface now looks like it should, but before we start writing code, let’s dive into some programming theory.