Chapter 12. Syncing with iTunes
Just in case you’re one of the six people out there who’ve never heard of it, iTunes is Apple’s multifunction, multimedia jukebox software. It’s been loading music onto iPods since the turn of the twenty-first century. And without it, you won’t get very far with your iPhone.
Most people use iTunes to manipulate their digital movies, photos, and music, from converting songs off a CD into iPhone-ready music files to buying songs, audiobooks, and movies online.
But as an iPhone owner, you need iTunes even more urgently, because it’s how you get music, videos, email, addresses, appointments, ringtones, and other stuff onto the phone. It also backs up your iPhone automatically.
If you already have a copy of iTunes on your Mac or PC, then you may have encountered a warning that iTunes wants to update itself to version 9.2 (or later). With a click on the OK button, you can download and install that version. And you should; iOS 4 phones don’t work with earlier versions.
If you’ve never had any version of iTunes, then fire up your Web browser and go to www.apple.com/itunes/download. Once the file lands on your computer, double-click the installer icon and follow the onscreen instructions to add iTunes to your life.
This chapter gives you a crash course in iTunes and tells you how to sync it with your iPhone.
The iTunes Window: What’s Where
Here’s a quick tour of the main iTunes window and what all its parts do.
The Source panel on the left side lists all the audio and video sources you can tap into at the moment. Clicking a name in the Source list makes the main song-list area change accordingly, like so:

Library. Click this icon to see the contents of all your different collections. As you add movies, App Store downloads, music, podcasts, ringtones, and other stuff to iTunes, subheadings appear under the Library heading (like Music, TV Shows, Podcasts, Ringtones, and so on). Click one to see what audio, video, or software your computer has in that category.
Store. Click the icons to shop for new stuff in the iTunes Store (music, movies, TV shows, free podcasts, ringtone snippets to customize your phone) or to see the list of things you’ve already bought.
Devices. If there’s a CD in the computer’s drive, it shows up under this heading. Click it to see, and play, the songs on it. If there’s an iPod or iPhone connected to the computer, then its icon shows up here, too, so you can see what’s on it. If you have an Apple TV, it hangs out here, too.
Shared. This list lets you browse the music libraries of other iTunes addicts on your network and play their music on your own computer. (Yes, it’s legal.)
Playlists.Playlists are lists of songs that you assemble yourself, mixing and matching music from different CDs and other sources as you see fit (Buy audiobooks). Here’s where you see them listed.
Here’s the basic rule of using iTunes: Click one of these headings in the Source list to reveal what’s in that source. The contents appear in the center part of the iTunes window.
The playback and volume controls, which work just as they do on the iPhone, are at the top-left corner of iTunes. At the upper-right corner is a Search box that lets you pluck one track out of a haystack. Next to it, you’ll find handy buttons to change views within the window. (Cover Flow, which works just as it does on the iPhone, is the third button in this grouping.)
Five Ways to Get Music and Video
Once you have iTunes, the next step is to start filling it with music and video so you can get all that goodness onto your iPhone. iTunes gives you at least five options right off the bat.
Let iTunes Find Your Existing Songs
If you’ve had a computer for longer than a few days, you probably already have some songs in the popular MP3 format on your hard drive, perhaps from a file-sharing service or a free music Web site. If so, the first time you open iTunes, it offers to search your PC or Mac for music and add it to its library. Click Yes; iTunes goes hunting around your hard drive.

Tip
If you use Windows, you may have songs in the Windows Media Audio (WMA) format. Unfortunately, iTunes and the iPhone can’t play WMA files. But when iTunes finds non-protected WMA files, it offers to convert them automatically to a format that it does understand. That’s a convenient assurance that your old music files will play on your new toy. (iTunes/iPhone can not, however, convert copy-protected WMA files like those sold by some music services.)
Visit the iTunes Store
Another way to feed your iPhone is to shop at the iTunes Store.
Click the iTunes Store icon in the list on the left side of the iTunes window. Once you land on the store’s main page and set up your iTunes account, you can buy and download songs, audiobooks, and videos. This material goes straight into your iTunes library, just a sync away from the iPhone.

After years of conflict and controversy, the record companies have finally allowed Apple to start selling songs that aren’t copy protected. Today, there’s almost nothing left in the music department of iTunes that still has copy protection. (The little + symbol next to a song’s price means “Not copy protected.”)

Your iPhone, of course, can also get to the iTunes Store, wirelessly; just tap that alluring purple iTunes icon on the Home screen. The Wireless iTunes Store has the details. Any songs you buy on the phone get copied back to iTunes the next time you sync.
Not everything in the iTunes Store costs money, by the way. In addition to free iPhone apps, there are plenty of free audio and video podcasts, suitable for your iPhone, in the Podcasts area of the store. And there are tons of iPhone-compatible movie trailers to download at www.apple.com/trailers/. Hit that link on your iPhone’s browser and watch the trailers stream down, perfectly formatted to the palm of your hand.
Tip
iTunes doesn’t have a monopoly on music sales for your iPhone. Both Amazon (www.amazon.com) and Rhapsody (http://mp3.rhapsody.com) sell songs in MP3 format, meaning no copy protection (and iPhone compatibility). eMusic.com has great MP3 prices, but the music comes from lesser-known bands. Amazon’s MP3 Downloader software for Mac and PC can whip your purchases right into iTunes; Rhapsody has similar helper software for Windows.
Import Music from a CD
iTunes can also convert tracks from audio CDs into iPhone-ready digital music files. Just start up iTunes, and then stick a CD into your computer’s CD drive. The program asks you if you want to convert the songs to audio files for iTunes. (If it doesn’t ask, click Import CD at the bottom of the window.)
Once you tell it to import the music, iTunes walks you through the process. If you’re connected to the Internet, the program automatically downloads song titles and artist information from the CD and begins to add the songs to the iTunes library.
If you want time to think about which songs you want from each CD, then you can tell iTunes to download only the song titles, and then give you a few minutes to ponder your selections. To do that, choose iTunes→Preferences→General (Mac) or Edit→Preferences→General (Windows). Use the When you insert a CD: pop-up menu to choose Show CD.
From now on, if you don’t want the entire album, you can exclude the dud songs by turning off their checkmarks. Then click Import CD in the bottom-right corner of the screen.
Tip
You can ⌘-click (Mac) or Ctrl-click (Windows) any box to turn all the checkboxes on or off. This technique is ideal when you want only one or two songs in the list. First, turn all the checkboxes off, and then turn just those two back on again.
In that same Preferences box, you can also click Import Settings to choose the format (file type) and bit rate (amount of audio data compressed into that format) for your imported tracks. The factory setting is the AAC format at 128 kilobits per second.
Most people think these settings make for fine-sounding music files, but you can change your settings to, for example, MP3, which is another format that lets you cram big music into a small space. Upping the bit rate from 128 kbps to 256 kbps makes for richer-sounding music files—which also happen to take up more room because the files are bigger (and the iPhone’s “hard drive” doesn’t hold as much as your computer’s). The choice is yours.
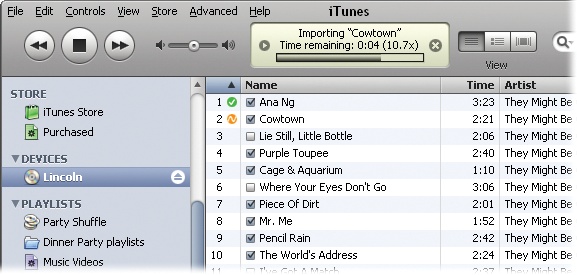
As the import process starts, iTunes moves down the list of checked songs, ripping each one to a file in your Home→Music→iTunes→iTunes Music folder (Mac) or Documents→Music→iTunes→iTunes Media→Music folder (Windows). An orange squiggle next to a song name means that the track is currently converting. Feel free to switch into other programs, answer email, surf the Web, and do other work while the ripping is under way.
Once the importing is finished, each imported song bears a green checkmark, and iTunes signals its success with a melodious flourish. Now you have some brand-new files in your iTunes library.
Download Podcasts
The iTunes Store houses thousands upon thousands of podcasts, those free audio (and video!) recordings put out by everyone from big TV networks to a guy in his barn with a microphone.
To explore podcasts, click the Podcasts tab at the top of the store’s window. Now you can browse shows by category, search for podcast names by keyword, or click around until you find something that sounds good.

Many podcasters produce regular installments of their shows, releasing new episodes onto the Internet when they’re ready. You can have iTunes keep a look out for fresh editions of your favorite podcasts and automatically download them for you, where you can find them in the Podcasts area in the iTunes Source list. All you have to do is subscribe to the podcast, which takes a couple of clicks in the store.
If you want to try out a podcast, click the price button (Free) near its title to download just that one show. If you like it (or know that you’re going to like it before you even download the first episode), then there’s also a Subscribe button that signs you up to receive all future episodes.
You play a podcast just like any other file in iTunes: Double-click the file name in the iTunes window and use the playback controls in the upper-left corner. On the iPhone, podcasts show up in their own list.
Buy audiobooks
Some people like the sound of a good book, and iTunes has plenty to offer; click the Audiobooks tab at the top of the Store window. You can find verbal versions of the latest best sellers here, usually priced lower than the hardback version of the book—which would be four times the size of your iPhone anyway.
If iTunes doesn’t offer the audiobook you’re interested in, you can find a larger collection (over 50,000 of them) at Audible.com. This Web store sells all kinds of audio books, plus recorded periodicals like The New York Times and radio shows. To purchase Audible’s wares, though, you need to go to the Web site and create an Audible account.
If you use Windows, then you can download from Audible.com a little program called Audible Download Manager, which catapults your Audible downloads into iTunes for you. On the Mac, Audible files land in iTunes automatically when you buy them.
And when those files do land in iTunes, you can play them on your computer or send them over to the iPhone with a quick sync.
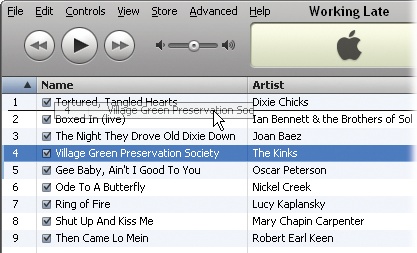
Playlists
A playlist is a list of songs you’ve decided should go together. It can be any group of songs arranged in any order, all according to your whims. For example, if you’re having a party, you can make a playlist from the current Top 40 and dance music in your music library. Some people may question your taste if you, say, alternate tracks from La Bohéme with Queen’s A Night at the Opera, but hey—it’s your playlist.
To create a playlist, press,⌘-N (Mac) or Ctrl+N (Windows). Or choose File→New
Playlist, or click the ![]() button below the Source list.
button below the Source list.

A freshly minted playlist starts out with the impersonal name “Untitled Playlist.” Fortunately, the renaming rectangle is open and highlighted. Just type a better name: Cardio Workout, Shoe-Shopping Tunes, Hits of the Highland Lute, or whatever you want to call it. As you add them, your playlists alphabetize themselves in the Source window.
Once you’ve created this new playlist, you’re ready to add your songs or videos. The quickest way is to drag their names directly onto the playlist’s icon.
Tip
Instead of making an empty playlist and then dragging songs into it, you can work the other way. You can scroll through a big list of songs, selecting tracks as you go by ⌘-clicking (on the Mac) or Ctrl-clicking (in Windows)—and then, when you’re finished, choose File→New Playlist From Selection. All the songs you selected immediately appear on a brand new playlist.
When you drag a song title onto a playlist, you’re not making a copy of the song. In essence, you’re creating an alias or shortcut of the original, which means you can have the same song on several different playlists.
iTunes even starts you out with some playlists of its own devising, like “Top 25 Most Played” and “Purchased” (a convenient place to find all your iTunes Store goodies listed in one place).
Tip
You can also create playlists right on the phone; see List Land.
Editing and Deleting Playlists
A playlist is easy to change. Here’s what you can do with just a little light mousework:
Change the order of songs on the playlist. Click at the top of the first column in the playlist window (the one with the numbers next to the songs) and drag song titles up or down within the playlist window to reorder them.
Add new songs to the playlist. Tiptoe through your iTunes library and drag more songs into a playlist.
Delete songs from the playlist. If your playlist needs pruning, or that banjo tune just doesn’t fit in with the brass-band tracks, you can ditch it quickly: Click the song in the playlist window and then hit Delete or Backspace to get rid of it. When iTunes asks you to confirm your decision, click Yes.
Deleting a song from a playlist doesn’t delete it from your music library—it just removes the title from your playlist. (Pressing Delete or Backspace when the Library Music icon is selected gets rid of the song for good.)
Delete the whole playlist. To delete an entire playlist, click it in the Source list and press Delete (Backspace). Again, this zaps only the playlist itself, not all the songs you had in it. (Those are still in your computer’s iTunes folder.)
Authorizing Computers
Before the iTunes Store moved to not-copy-protected songs, music fans had to suffer through the hostility of computer authorization. Since you may still have some of those older, protected songs, here’s the scoop.
When you create an account in iTunes (a requirement of owning an iPhone), you automatically authorize that computer to play copy-protected songs from the iTunes Store. Authorization is Apple’s way of making sure you don’t go playing those music tracks on more than five computers, which would greatly displease the record companies.
You can copy those older songs onto a maximum of four other computers. To authorize each one to play music from your account, choose Store→Authorize Computer. (Don’t worry; you just have to do this once per machine.)
When you’ve maxed out your limit and can’t authorize any more computers, you may need to deauthorize one. On the computer you wish to demote, choose Store→Deauthorize Computer.
Note
As noted above, most songs on iTunes today bear the little + sign, meaning “iTunes Plus.” They have slightly higher audio quality—and they’re not copy protected. You can play them on any player that recognizes AAC files.
Then again, you can’t go nuts, uploading them all over the Internet. Your name and email address are embedded in the file and quite visible to anyone (including any Apple lawyer) who chooses the track, chooses File→Get Info, and clicks the Summary tab.
TV, Movies, and Movie Rentals
iTunes hasn’t been just about music for years. Nowadays, you can also buy TV episodes ($2 apiece, no ads), movies, and music videos. You can also rent movies from iTunes for $3 to $5 apiece. That is, once you download a movie, you have 30 days to start watching—and once you start, you have 24 hours to finish before it turns into a pumpkin (actually, it deletes itself from your computer and phone).
You have to do your renting and buying using the iTunes software on your Mac or PC—the direct-to-phone video downloading era hasn’t yet dawned.
But once it’s on your computer, you can sync this stuff to the iPhone by following the steps later in this chapter.
When you get right down to it, the iPhone is pretty much the same idea as a Palm Pilot: It’s a pocket-sized data bucket that lets you carry around the most useful subset of the information on your Mac or PC. In the iPhone’s case, that’s music, photos, movies, ebooks, calendars, your address book, email settings, ringtones, and Web bookmarks.
Automatic Syncing
Transferring data between the iPhone and the computer is called synchronization. Syncing is sometimes a one-way street, and sometimes it’s bidirectional, as you’ll find out in a moment.
This section covers the ins and outs—or, rather, the backs and forths—of iPhone syncing over a USB cable. (Syncing wirelessly, over the airwaves, is a treat reserved for MobileMe and Microsoft Exchange people, as described in Chapters Chapter 13 and Chapter 14.)
So how do you sync? You connect the iPhone to the computer. That’s it. As long as the cable is plugged into your computer’s USB port, iTunes opens automatically, and the synchronization begins. iTunes controls all iPhone synchronization, acting as a software bridge between phone and computer.
Note
Your photo-editing program (like iPhoto or Photoshop Elements) probably springs open every time you connect the iPhone, too. See Shutting Down the Importing Process if that bugs you.
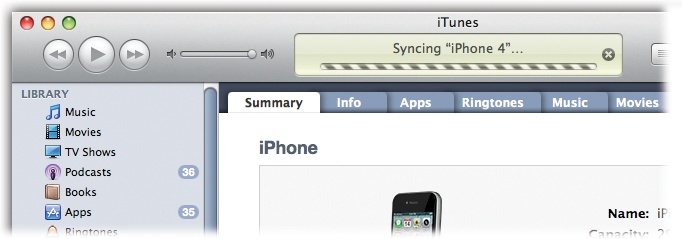
When the iPhone and the computer are communicating, the iTunes window and the iPhone screen both say, “Sync in progress.”
Unlike an iPod, which gets very angry (and can potentially scramble your data) if you interrupt while its “Do not disconnect” screen is up, the iPhone is much more understanding about interruptions. If you need to use the iPhone for a moment, just drag your finger across the “slide to cancel” slider on the screen. The sync pauses. When you reconnect the phone to the cable, the sync intelligently resumes.
In fact, if someone dares to call you while you’re in mid-sync, the iPhone cancels the session itself so you can pick up the call. Just reconnect it to the computer when you’re done chatting so it can finish syncing.
Now, ordinarily, the iPhone-iTunes relationship is automatic and complete. An automatic sync takes care of all of these details:
Contacts, calendars, and Web bookmarks. These get copied in both directions. That is, after a sync your computer and phone contain exactly the same information.
So if you entered an appointment on the iPhone, it gets copied to your computer—and vice versa. If you edited the same contact or appointment on both machines at once while they were apart, your computer now displays the two conflicting records and asks you which one “wins.”
Music, apps, TV, movies, ringtones, and ebooks you bought using iTunes on your computer; photos from your computer; and email account information. All of this gets copied in one direction: computer→phone.
Photos and videos taken with the iPhone’s camera; music, apps, and ebooks you bought right from the phone. All of this gets copied the other way: phone→computer.
A complete backup. iTunes also takes it upon itself to back up everything else on your iPhone: settings, text messages, call history, and so on. (Details on this backup business are on Backing Up the iPhone.)
Tip
If you’re in a hurry, you can skip the time-consuming backup portion of the sync.
Just click the ![]() at the top of the iTunes window whenever it says “Backing up.”
iTunes gets the message and skips right ahead to the next phase of the sync—transferring
contacts, calendars, music, and so on.
at the top of the iTunes window whenever it says “Backing up.”
iTunes gets the message and skips right ahead to the next phase of the sync—transferring
contacts, calendars, music, and so on.
Manual Syncing
OK, but what if you don’t want iTunes to fire up and start syncing every time you connect your iPhone? What if, for example, you want to change the assortment of music and video that’s about to get copied to it? Or what if you just don’t like matters being taken out of your hands, just because it reminds you too much of robot overlords?
In that case, you can stop the autosyncing in any of three ways:
Interrupt a sync in progress. Click the
 button in the iTunes status window until the syncing
stops.
button in the iTunes status window until the syncing
stops.Stop iTunes from syncing the iPhone just this time. As you plug in the iPhone’s cable, hold down the Shift+Ctrl keys (Windows) or the ⌘-Option keys (Mac) until the iPhone pops up in the iTunes window. Now you can see what’s on the iPhone and change what will be synced to it—but no syncing takes place until you command it.
Stop iTunes from autosyncing any iPhone, ever. In iTunes, choose Edit→Preferences (Windows) or iTunes→Preferences (Mac). Click the Devices tab and turn on Prevent iPods, iPhones, and iPads from syncing automatically. You can still trigger a sync on command when the iPhone is wired up—by clicking the Sync button.
Once you’ve made iTunes stop syncing automatically, you’ve disabled what many people consider the greatest feature of the iPhone: its magical self-updating with the stuff on your computer.
Still, you must have turned off autosyncing for a reason. And one of those reasons might be that you want to control what gets copied onto it. Maybe you’re in a hurry to leave for the airport, and you don’t have time to sit there for an hour while six downloaded movies get copied to the phone. Maybe you have 50 gigabytes of music but only 16 gigs of iPhone storage.
In any case, here are the two ways you can sync manually:
Use the tabs in iTunes. With the iPhone connected, you can specify exactly what you want copied to it—which songs, which TV shows, which apps, and so on—using the various tabs in iTunes, as described on the following pages. Once you’ve made your selections, click the Summary tab, and then click Apply. (The Apply button says Sync instead if you haven’t actually changed any settings.)
Drag files onto the iPhone icon. Yes, this sneaky little trick is what insiders might recognize as the iPod Paradigm. Once your iPhone is cabled into your computer, you can click its icon and then turn on Manually manage music and videos (on the Summary screen). Click Apply.
Now, you can drag songs and videos directly onto the iPhone’s icon to copy them there. Wilder yet, you can bypass iTunes entirely by dragging music and video files from your computer’s desktop onto the iPhone’s icon. That’s handy when you’ve just inherited or downloaded a bunch of song files, converted a DVD to the iPhone’s video format, or whatever.
Just two notes of warning here. First, unlike a true iPod, the iPhone accommodates dragged material from a single computer only.
Second, if you ever turn off this option, all those manually dragged songs and videos will disappear from your iPhone at the next sync opportunity.
Tip
Also on the Summary tab, you’ll find the baffling little option called Sync only checked songs and videos. This is a global override—a last-ditch “keep the embarrassing songs off my iPhone” option.
When this option is turned on, iTunes consults the tiny checkboxes next to every single song and video in your iTunes library. If you turn off a song’s checkbox, it will not get synced to your iPhone, no matter what—even if you use the Music tab to sync All songs or playlists, or explicitly turn on a playlist that contains this song. If the song’s or video’s checkbox isn’t checked in your Library list, then it will be left behind on your computer.

12 Tabs to Glory
Once your iPhone is cabled up to the computer’s USB port, click its icon in the iTunes Source list. The middle part of the iTunes window now reveals a horizontal row of file-folder tabs, representing the categories of stuff you can sync to your iPhone.
Here’s what each one tells you:
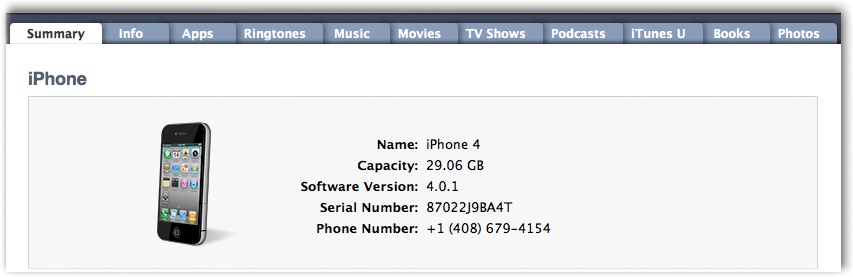
Summary. This screen gives basic stats on your iPhone, like its serial number, capacity, and phone number. Buttons in the middle let you check for iPhone software updates or restore it to its out-of-the-box state. Checkboxes at the bottom of the screen let you set up manual syncing, as described previously.
Info. The settings here control the syncing of your contacts, calendars, email account settings, and bookmarks.
Apps. Those useful and not-useful-but-totally-fun-anyway little programs from the iPhone App Store get synced up here (Chapter 7).
Ringtones. Any ringtones that you’ve bought from the iTunes Store or made yourself (Chapter 4) appear here; you can specify which ones you want synced to the iPhone.
Music. You can opt to sync all your songs, music videos, and playlists here—or, if your collection is more than the iPhone can store, just some of them.
Movies, TV Shows. You can choose both movies and TV shows from the iTunes Store for syncing here, along with other compatible video files in your library.
Podcasts. This screen lets you sync all—or just selected—podcasts. You can even opt to get only the episodes you haven’t heard yet.
iTunes U. Free educational podcasts and lectures from universities.
Books. Ebooks and PDF documents you want to read in the iBooks app.
Photos. Here you can get iPhone-friendly versions of your pictures copied over from a folder on your hard drive—or from a photo-management program like Photoshop Elements, Photoshop Album, or iPhoto.
Nike + iPod. See Chapter 4 for details.
At the bottom of the screen, a colorful map shows you the amount and types of files: Audio, Video, Photos, Apps, Books, and Other (for your personal data). More importantly, it also shows you how much room you have left, so you won’t get overzealous in trying to load the thing up.
The following pages cover each of these tabs, in sequence, and detail how to sync each kind of iPhone-friendly material.
This discussion assumes that you’ve (a) connected your iPhone to the computer with its USB cable, and (b) clicked the iPhone’s icon in the Source list at the left side of the iTunes window.
Info Tab (Contacts, Calendars, Settings)
On this tab, you’re offered the chance to copy some distinctly non-entertainment data over to your iPhone: your computer’s calendar, address book, email settings, notes, and Web bookmarks. The PalmPilot-type stuff (Rolodex, date book) is extremely useful to have with you, and the settings and bookmarks save you a lot of tedious setup on the iPhone.
Note
If you’re a subscriber to Apple’s data-in-the-clouds MobileMe service, then you won’t see the controls described on the following pages. That’s because MobileMe, not iTunes, handles synchronization with the iPhone. Instead, all you see is a message to the effect that, for example, “Your calendars are being pushed to your iPhone over the air from MobileMe.”
Syncing Notes
Any notes you create on the iPhone can synchronize with the notes in Mail, Outlook (in Windows), or in the Notes folders of Gmail, Yahoo Mail, or AOL; see Syncing Notes for details. If you’re lucky, turning on the Sync notes checkbox is all there is to it. If you’re not, try the suggestions at http://bit.ly/hKPkl.
Syncing Contacts
If you’ve been adding to your address book for years in a program like Microsoft Outlook or Mac OS X’s Address Book, then you’re just a sync away from porting all that accumulated data right over to your iPhone. Once there, phone numbers and email addresses show up as links, so you can reach out and tap someone.
Here’s how to sync up your contacts with the iPhone. The steps depend on which program you keep them in.
Outlook 2003 and 2007. Turn on Sync contacts with: and, from the pop-up menu, choose Outlook. Finally, click Apply.
Note that some of the more obscure fields Outlook lets you use, like Radio and Telex, won’t show up on the iPhone. All the major data points do, however, including name, email address, and (most importantly) phone number.
Having weird syncing issues with Outlook’s contacts and calendars? In iTunes, go to Edit→Preferences→Syncing and click Reset Sync History. This function doesn’t wipe out the data you’ve synced, just the Windows memory of it. The next time you sync the iPhone, it’ll be like the very first time.
Outlook Express. Microsoft’s free email app for Windows XP stores your contacts in a file called the Windows Address Book. To sync it with your iPhone, turn on Sync contacts from:, choose Windows Address Book from the pop-up menu, and then click Apply.
Windows Live Mail. Windows Live Mail, a free download for Windows 7 (and called Windows Mail in Windows Vista), is essentially a renamed version of Outlook Express. You set it up to sync with the iPhone’s Contacts program just as described—except in iTunes, choose Windows Contacts, rather than Windows Address Book, before clicking Apply.
Yahoo Address Book. The Yahoo Address Book is the address book component of a free Yahoo Mail account. It’s therefore an online address book, which has certain advantages—like your ability to access it from any computer on the Internet.
To sync with it, turn on Sync contacts from: and then choose Yahoo Address Book from the pop-up menu. (On the Mac, just turn on Yahoo Address Book; no menu is needed.)
Since Yahoo is an online address book, you need an Internet connection and your Yahoo ID and password to sync it with the iPhone. Click Configure, and then type your Yahoo ID and password. When finished, click OK. Now click Apply to get syncing.
Because it’s online, syncing your Yahoo address book has a couple of other quirks.
First, Yahoo Address Book, ever the thoughtful program, lets you remember both birthdays and anniversaries in a data field. The iPhone, however, grabs only the birthday part, leaving you to remember the anniversary dates yourself. Just don’t forget your own!
Furthermore, any custom labels you slap on phone entries on the iPhone side get synced into the Other field when they get to Yahoo. It seems Yahoo is just not as creative as you are when it comes to labeling things.
Finally, Yahoo Address Book doesn’t delete contacts during a sync. So if you whack somebody on the iPhone, you still have to log into Yahoo and take ’em out there, too.
Google Contacts. The addresses from your Gmail, Google Mail, and Google Apps accounts can sync up to the iPhone as well. Turn on Sync contacts from: and then choose Google Contacts from the pop-up menu. (On the Mac, just turn on Google Contacts; no menu is needed.) Agree to the legal disclaimer about iTunes snatching data.
Since Google Contacts are kept on the Web, you need an Internet connection and your Gmail/Google ID and password to sync your contacts with the iPhone. In the password box that pops up (click Configure on the Info screen if it doesn’t), type your Gmail name and password. When finished, click OK. Now click Apply to get syncing.
Only one contact per email address gets synced, so if you have multiple contacts with the same address, someone will get left out of the syncing party. Google has a page of troubleshooting tips and info for other Contacts-related questions at www.google.com/support/contactsync.
Mac OS X Address Book. Apple products generally love one another, and the built-in contact keeper that comes with Mac OS X is a breeze to sync up with your iPhone. Turn on Sync contacts from: and then pick Address Book from the pop-up menu.
If you’ve gathered sets of people together as groups in your address book, then you can also transfer them to the iPhone by turning on Selected groups and then checking the ones you want. When finished, click Apply to sync things up.
Entourage 2004 and 2008. Entourage, the email program in Microsoft Office for the Mac, also plays nice with the iPhone, as long as you introduce it properly first.
In Entourage, choose Entourage→Preferences. Under General Preferences, choose Sync Services. Turn on Synchronize contacts with Address Book and .Mac.
Click OK, and then plug the iPhone into the Mac. Click the iPhone’s icon in the iTunes Source list, and then click the Info tab. Turn on Sync contacts from: and, from the pop-up menu, choose Address Book. Finally, click Apply to sync.
Other programs. Even if you keep your contacts in a Jurassic-era program like Palm Desktop, you may still be able to get them into the iPhone/iTunes sync dance. If you can export your contacts as vCards (a contacts-exchange format with the extension .vcf), then you can import them into the Windows Address Book or the Mac’s Address Book.
In Palm Desktop 4.1 for the Mac, for instance, choose File→Export→Addresses, select vCard for the export format, and then click OK. Export the file to your desktop, open the Mac Address Book, and then import the same file.
It’s trickier on the PC version of Palm Desktop 4.1, since you can export only one contact at a time. But a handy little freeware program called Palm2iPod can do it all for you. It’s available from this book’s “Missing CD” page at www.missingmanuals.com. Chapura’s $20 PocketCopy program is another option at www.chapura.com/pocketcopy.php.
Now you can sync to your heart’s delight.


Syncing Bookmarks
Bookmarks—those helpful shortcuts that save you countless hours of mistyping Web site addresses—are a reflection of your personality, because they tend to be sites that are important to you. Fortunately, they can make the trip to your iPhone, too. In fact, any bookmarks you create on the iPhone can also be copied back to your computer; it’s a two-way street.
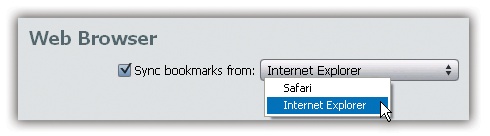
iTunes can transfer your bookmarks from Internet Explorer or Safari (Windows), or from Safari on a Mac. In iTunes, on the Info tab, scroll down past Contacts and Calendars and Mail Accounts until you get to the section called Web Browser. Then:
In Windows, turn on Sync bookmarks from: and then choose either Safari or Internet Explorer from the pop-up menu. Click Apply to sync.
On the Mac, turn on Sync Safari bookmarks and click Apply.
And what if Firefox is your preferred browser? You can still get those favorites moved over to the iPhone, thanks to an ingenious free Firefox plug-in called the Firefox Sync Add-on. It’s available at www.mozilla.com/en-US/firefox/sync/, or you can just Google it.
Best of all, the Sync Add-on doesn’t just copy your bookmarks to the phone—it creates a live two-way wireless sync between your computer and your phone. Bookmarks, yes, but also your History list and even your open tabs. Go, Google!
Actually, most other browsers can export their bookmarks. You can use that option to export your bookmarks file to your desktop and then use Safari’s File→Import Bookmarks command to pull it from there.
Syncing Your Calendar
With its snazzy-looking calendar program tidily synced with your computer, the iPhone can keep you on schedule—and even remind you when you have to call a few people.
Out of the box, the iPhone’s calendar works with Outlook 2003 and later for Windows, and with iCal and Entourage on the Mac.
The iPhone’s calendar program isn’t especially full-featured, however. For example, it doesn’t have its own built-in to-do lists (which ought to be something on Apple’s to-do list, come to think of it). The iPhone can display your calendar’s color-coded categories (Work, Social, and so on), but it can’t create categories. Otherwise, though, it’s very pretty, and it does generally keep you on track.
Here again, setting up the sync depends on the calendar program you’re using on your computer.
Note
If you have Windows Vista or Windows 7, then you have a built-in calendar program—Windows Live Calendar—but no way to sync it with the iPhone. The reason, according to Apple, is that Microsoft has not made public the format of its calendar program.
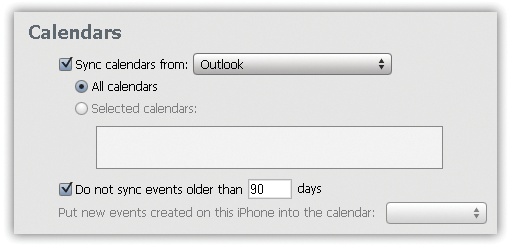
Outlook Calendar (Windows). In the Calendars area of the Info tab, turn on Sync calendars from Outlook.
You can also choose how many days’ worth of old events you want to have on your iPhone, since you probably rarely need to reference, say, your calendar from 2002. Turn on Do not sync events older than ____ days, and then specify the number of days’ worth of old appointments you want to have on hand.
Events you add on the iPhone get carried back to Outlook when you reconnect to the computer and sync up.
iCal (Macintosh). Mac OS X comes with a nimble little datebook called iCal, which syncs right up with the iPhone. To use it, on the Info tab’s Calendars area, turn on Sync iCal calendars.
If you have several different calendars (color-coded categories) in iCal—Work, Home, Book Club, and so on—then you can turn on Selected calendars and choose the ones you want to copy to the iPhone. See Editing, Rescheduling, and Deleting Events for details on using the categories once they’re on the phone.
Near the bottom of the calendar-sync preferences, there’s a place to indicate how far back you want to sync old events.
Once you get all your calendar preferences set up the way you like, click Apply to get your schedule in sync.
Entourage (Mac). Entourage can sync its calendar events with the iPhone, too. Start by opening Entourage, and then choose Entourage→Preferences. Under General Preferences, choose Sync Services, and then turn on Synchronize events and tasks with iCal and MobileMe. Click OK, and then plug the iPhone into the computer.
Click the iPhone icon in the iTunes source list, and then, on the Info tab, turn on Sync iCal calendars. Click the Apply button to sync.
Syncing Email Settings
Teaching a new computer of any sort to get and send your email can be stressful; the job entails plugging in all sorts of user-hostile information bits called things like the SMTP Server Address and Uses SSL. Presumably, though, you’ve got your email working on your Mac or PC—wouldn’t it be great if you didn’t have to duplicate all that work on your iPhone?
That’s exactly what iTunes can do for you. It can transfer the account setup information to the iPhone so it’s ready to start hunting for messages immediately.
Note
No mail messages are transferred to or from the iPhone over the cable. For that sort of magic, you need MobileMe or Exchange service. (See Chapters Chapter 13 and Chapter 14.)
It can do that—if,that is, your current email program is Mail or Entourage (on the Mac) or Outlook or Outlook Express (in Windows).
On the iTunes Info tab, scroll down to Mail Accounts. The next step varies by operating system:
Windows. Turn on Sync selected mail accounts from: and, from the shortcut menu, choose Outlook or Outlook Express.
Macintosh. Turn on Sync selected Mail accounts.
Finally, if your email program collects messages from multiple accounts, then turn on the checkboxes of the accounts you want to see on your iPhone. Click Apply to start syncing.
Note
This business of transferring email settings doesn’t always go smoothly. Mac fans have learned, for example, that Mail transfers settings more successfully than Entourage. And Windows Vista people have discovered that even though Windows Mail is just a renamed, updated version of Outlook Express, iTunes isn’t especially friendly with it.

The Apps Tab
On this tab, you get a convenient duplicate of your iPhone’s Home screens. You can drag app icons around, create and manage folders, shift Home screens into a different order, and otherwise organize your Home life much faster than you’d be able to do on the phone itself (because you have a mouse, a keyboard, and a big screen). Details are on Organizing Your Apps.
At the left side, there’s a list of all the iPhone programs you’ve got on your computer, including programs you just bought in that two-hour shopping frenzy in the App Store. The list also shows all the apps you bought on the iPhone that have since been transferred into iTunes as a backup.
If you don’t want to sync all those programs at the moment—maybe you want to leave off the Crash Bandicoot game until the weekend because you know you’ll never get any work done if you add it on Tuesday—click Sync Apps. Then turn on the checkboxes for the programs you want to load onto the iPhone right now.
Any programs you leave unchecked will be removed from the iPhone when you sync. (Of course, you can always reinstall them by turning their checkboxes back on before the next sync.)
The Ringtones Tab
Once you click the Ringtones tab in iTunes, checkboxes await, corresponding to the ringtones you’ve bought from Apple or made through various do-it-yourself craft projects (Chapter 4). Be sure to sync over any ringtones you’ve assigned to your frequent callers so the iPhone can alert you with a personalized audio cue like Pink’s rendition of “Tell Me Something Good” when they call you up.

The Music Tab
To copy over the music and audiobooks you want to take along on your phone, click the Music tab. Next, turn on Sync Music. Now you need to decide what music to put on your phone.
If you have a big iPhone and a small music library, you can opt to sync Entire music library with one click.
If you have a big music collection and a small iPhone, you’ll have to take only some of it along for the iPhone ride. In that case, click Selected playlists, artists, and genres. In the lists below, turn on the checkboxes for the playlists, artists, and music genres you want to transfer. (These are cumulative. If there’s no Electric Light Orchestra in any of your selected playlists, but you turn on ELO in the Artists list, you’ll get all of your ELO anyway.)
Tip
Playlists make it fast and easy to sync whole batches of tunes over to your iPhone. But don’t forget that you can add individual songs, too, even if they’re not in any playlist. Just turn on Manually manage music and videos. Now you can drag individual songs and videos from your iTunes library onto the iPhone icon to install them there.
If you’ve got music videos, you’ll see that they get their own checkbox. As for audiobooks, they already live in their own self-titled playlists. Click the appropriate checkbox to include them in your sync.
Making It All Fit
Sooner or later, everybody has to confront the fact that a current iPhone holds only 8, 16, or 32 gigabytes of music and video. (Actually less, because the operating system itself eats up over a gigabyte.) That’s enough for around 2,000, 4,000, or 8,000 average-length songs—assuming you don’t put any video or photos on there.
Your multimedia stash is probably bigger than that. If you just turn on all Sync All checkboxes, then you’ll get an error message telling you that it won’t all fit on the iPhone.
One way to solve the problem is to tiptoe through the Music, Podcasts, Photos, Apps, Books, and Videos tabs, turning off checkboxes and trying to sync until the “too much” error message goes away.
If you don’t have quite so much time, turn on Automatically fill free space with songs. It makes iTunes use a little artificial Genius intelligence to load up your phone automatically, using your most played and most recent music as a guide. (It does not, in fact, fill the phone completely; it leaves a few hundred megabytes for safety—so that you can download more stuff on the road, for example.)
Another helpful approach is to use the smart playlist, a music playlist that assembles itself based on criteria that you supply. For example:
In iTunes, click Music in the Source list; then choose File→New Smart Playlist. The Smart Playlist dialog box appears.
Specify the category. Use the pop-up menus to choose, for example, a musical genre, or songs you’ve played recently, or haven’t played recently, or that you’ve rated highly.
Turn on the “Limit to” checkbox, and set up the constraints. For example, you could limit the amount of music in this playlist to 2 gigabytes, chosen at random. That way, every time you sync, you’ll get a fresh, random supply of songs on your iPhone, with enough room left for some videos.
Click OK. The new Smart Playlist appears in your Source list, where you can rename it.
Click it to look it over, if you like. Then, on the Music tab, choose this playlist for syncing to the iPhone.

The Movies & TV Shows Tabs
When it assumes the role of an iPod, one of the things the iPhone does best is play video on its gorgeous, glossy screen. TV shows and movies you’ve bought or rented from the iTunes Store look especially nice, since they’re formatted with iPods in mind. (And if you started watching a rented movie on your computer, the iPhone begins playing it right from where you left off.)
Syncing TV shows and movies works just like syncing music or podcasts. You can have iTunes copy all your stuff to the iPhone, but video fills up your storage awfully fast. That’s why you can turn on the checkboxes of just the individual movies or shows you want—or, using the Automatically include pop-up menu, request only the most recent, or the most recent ones you haven’t seen yet.
Remember that if you’ve rented a movie from the iTunes Store and started watching it, you have less than 24 hours left to finish before it turns into a pumpkin.

The Podcasts & iTunes U Tabs
One of the great joys of iTunes is the way it gives you access, in the iTunes Store, to thousands of free amateur and professional podcasts (basically, downloadable radio or TV shows), including free college lectures and videos in the iTunes U category.
Here, you can choose to sync all podcast episodes, selected shows, all unplayed episodes—or just a certain number of episodes per sync. Individual checkboxes let you choose which podcast series get to come along for the ride, so you can sync to suit your mood at the time.
The Books Tab
Here are the thumbnails of your audiobooks and your ebooks—those you’ve bought from Apple, those you’ve downloaded for free from the Web, and those you’ve dragged right into iTunes from your desktop (PDF files, for example; see PDFs and ePub Files). You can ask iTunes to send them all to your phone, or only the ones whose checkboxes you turn on.

The Photos Tab (Computer→iPhone)
Why corner people with your wallet to show them your kid’s baby pictures, when you can whip out your iPhone and dazzle them with a finger-tapping slideshow?
iTunes can sync the photos from your hard drive onto the iPhone. If you use a compatible photo-management program, you can even select individual albums of images that you’ve already assembled on your computer. Here are your photo-filling options for the iPhone:
Photoshop Elements 3.0 or later for Windows.
Photoshop Album 2.0 or later for Windows.
iPhoto 4.0.3 or later on the Mac.
Aperture, Apple’s high-end program for photography pros.
Any folder of photos on your hard drive, like My Pictures (in Windows), Pictures (on the Mac), or any folder you like.
The common JPEG files generated by just about every digital camera work fine for iPhone photos. The GIF and PNG files used by Web pages work, too.
Note
You can sync photos from only one computer. If you later attempt to snag some snaps from a second machine, iTunes warns you that you must first erase all the images that came from the original computer.
When you’re ready to sync your photos, click the Photos tab in iTunes. Turn on Sync photos from, and then indicate where you’d like to sync them from (Photoshop Elements, iPhoto, or whatever).
If you want only some of the albums from your photo-shoebox software, then click Selected albums, events, and faces. Then turn on the checkboxes of the albums, events, and faces you want synced. (The Faces option is available only if you’re syncing from iPhone or Aperture on the Mac, and only if you’ve used the Faces feature, which groups your photos according to who’s in them.)
Once you make your selections and click Apply, the program computes for a very long time, “optimizing” copies of your photos to make them look great on the iPhone (for example, downsizing them from 10-megapixel overkill to something more appropriate for a 0.6-megapixel screen), and then ports them over.
After the sync is complete, you’ll be able to wave your iPhone around, and people will beg to see your photos.

Syncing Photos and Videos (iPhone→Computer)
The previous discussion describes copying photos in only one direction: computer→iPhone. But here’s one of those rare instances when you can actually create data on the iPhone so that you can later transfer it to the computer: photos and videos that you take with the iPhone’s own camera. You can rest easy, knowing that they can be copied back to your computer for safekeeping with only one click.
Now, it’s important to understand that iTunes is not involved in this process. It doesn’t know anything about photos or videos coming from the iPhone; its job is just to copy pictures to the iPhone.
So what’s handling the iPhone→computer transfer? Your operating system. It sees the iPhone as though it’s a digital camera and suggests importing them just as it would from a camera’s memory card.
Here’s how it goes: Plug the iPhone into the computer with the USB cable. What you’ll see is probably something like this:
On the Mac. iPhoto opens. This free photo-organizing/editing software comes on every Mac. Shortly after it notices that the iPhone is on the premises, it goes into Import mode. Click Import All, or select some thumbnails from the iPhone, and then click Import Selected.
After the transfer (or before it, in older iPhoto versions), click Delete Photos if you’d like the iPhone’s cameraphone memory cleared out after the transfer. (And yes, both photos and videos get imported together.)
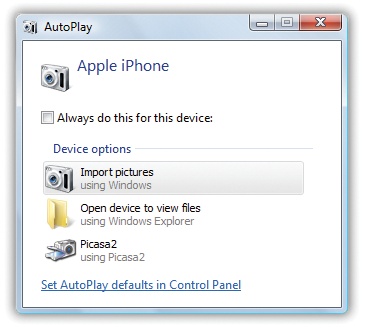
In Windows. When you attach a camera (or an iPhone), a dialog box pops up that asks how you want its contents handled. It lists any photo-management program you might have installed (Picasa, Photoshop Elements, Photoshop Album, and so on), as well as Windows’ own camera-management software (Scanner and Camera Wizard in Windows XP; using Windows in Vista or Windows 7).
Click the program you want to handle importing the iPhone pictures and videos. You’ll probably also want to turn on Always do this for this device, so it’ll happen automatically the next time.
Shutting Down the Importing Process
Then again, some iPhone owners would rather not see some lumbering photo-management program firing itself up every time they connect the phone. You, too, might wish there were a way to stop iPhoto or Windows from bugging you every time you connect the iPhone. That, too, is easy enough to change—if you know where to look.
Windows XP. With the iPhone connected, choose Start→My Computer. Right-click the iPhone’s icon. From the shortcut menu, choose Properties. Click the Events tab; next, click Take no action. Click OK.
Windows Vista, Windows 7. When the AutoPlay dialog box appears, click Set AutoPlay defaults in Control Panel. (Or, if the AutoPlay dialog box is no longer on the screen, choose Start→Control Panel→AutoPlay.)
Scroll all the way to the bottom until you see the iPhone icon. >From the pop-up menu, choose Take no action. Click Save.
Macintosh. Open iPhoto. Choose iPhoto→Preferences. Where it says Connecting camera opens:, choose No application. Close the window.
From now on, no photo-importing message will appear when you plug in the iPhone. (You can always import its photos manually, of course.)

One iPhone, Multiple Computers
In general, Apple likes to keep things simple. Everything it ever says about the iPhone suggests that you can sync only one iPhone with one computer.
That’s not really true, however. You can actually sync the same iPhone with multiple Macs or PCs.
And why would you want to do that? So you can fill it up with material from different places: music and video from a Mac at home; contacts, calendar, ebooks, and iPhone applications from your Windows PC at work; and maybe even the photos from your laptop.
iTunes derives these goodies from different sources to begin with—pictures from your photo program, addresses and appointments from your contacts and calendar programs, music and video from iTunes. So all you have to do is set up the tabs of each computer’s copy of iTunes to sync only certain kinds of material.
On the Mac, for example, you’d turn on only the Sync checkboxes for the Music, Podcasts, and Video tabs. Sync away.
Next, take the iPhone to the office; on your PC, turn on the Sync checkboxes only on the Info, Books, and Apps tabs. Sync away once more.
Then on the laptop, turn off Sync on all tabs except Photos.
And off you go. Each time you connect the iPhone to one of the computers, it syncs that data set according to the preferences set in that copy of iTunes.
One Computer, Multiple iPhones
It’s fine to sync multiple iPhones with a single computer, too. iTunes cheerfully fills each one up, and backs each one up, as they come. In fact, if you open the Preferences box (in the iTunes menu on the Mac, the Edit menu on Windows), the Devices tab shows a list of all the iPhones (and iPads, and iPod Touches) that iTunes is tracking.
If you use Windows, however, here’s a note of warning: You have to use the same sync settings for everyone’s phones.
If, for example, you try to switch your Contacts syncing from Google to Outlook Express, an iTunes dialog box informs you that your changes will affect everyone else syncing iPods and iPhones on the PC. (If you really want every family member happy, have each person sign in with his own Windows user account and copy of iTunes.)
Tip
How’s this for an undocumented secret? You can use the iPhone to combine several different address books—Outlook on a PC and Address Book on a Mac, for example. All your contacts wind up on all machines—iPhone, Mac, and PC—and without having to pay $100 for a MobileMe account.
Suppose you’ve synced the iPhone with Computer #1. When you plug it into Computer #2, click the iPhone icon and then the Info tab. Select the additional program you want to sync from—Outlook, Yahoo, whatever. Click Apply.
When iTunes asks if you want to Merge Info or Replace Info, click Merge Info. Now all the iPhone’s existing addresses remain in your current address book, but it also copies the contacts from the second computer to the iPhone.

Conflicts
If you use only one machine at a time, you’ll never have conflicts. You’ll never change your dentist appointment to 3:00 p.m. on the iPhone but change it to 4:00 p.m. on your computer, between syncs. Or you’ll never edit a phone number in Contacts simultaneously in two different ways on the two different machines. One machine would always be the “hot potato.”
In the real world, though, conflicts occasionally happen. Fortunately, iTunes is pretty smart about handling them. In fact, you can set it up to warn you if more than, say, 5 percent of the address book or calendar is now different from what’s on your computer.
In Windows, you set up this alert in iTunes at Edit→Preferences→Syncing. On the Mac, go to your Applications folder. Open the iSync program; choose iSync→Preferences.
The same preference screen also gives you access to the Reset Sync History button, which wipes out the computer’s record of your data-sync sessions (but not the data itself). This can be useful if your iPhone just won’t sync right and you want to start clean.
If, when encountering the conflict warning, you don’t know what could possibly be that different in your contacts file, click Show Details. You’re shown a list of all the contacts that will be affected if you go through with the change. Better yet, you get a Before and After button for each one, so you can see the discrepancies up close. That way, you can make an informed decision to sync or not to sync (that is, cancel).
Many conflict problems are not especially drastic. If iTunes discovers that, since the last sync, you’ve edited a single phone number or appointment in two different ways (once each on the iPhone and your computer), it lets you know with a message box.
You’re offered two buttons:
Review Later. This button actually means, “The computer’s version wins for now. I’ll ask you again the next time you sync.”
Review Now. You’re shown the two changes, side by side, in a window. Click the one you think seems more authoritative; that’s the one that will wind up prevailing on both machines. Then click Done.
Of course, the computer has to sync one more time to apply the change you’ve indicated. On the Mac, you’re offered buttons that say Sync Now or Sync Later; in Windows, the buttons say Sync Now or Cancel (meaning “Not now”). In both cases, you should click Sync Now to avoid confusion.
Tip
If you edit two different phone numbers on a single person’s card—like a cellphone number on the PC and a fax number on the iPhone—that doesn’t count as a conflict. Both machines will inherit both phone numbers.
iTunes considers it a conflict, and asks you to settle it, only when two changes were made to the same phone number.

One-Way Emergency Sync
In general, the iPhone’s ability to handle bidirectional syncs is a blessing. It means that whenever you modify the information on one of your beloved machines, you won’t have to duplicate that effort on the other one.
It can also get hairy. Depending on what merging, fussing, and button-clicking you do, it’s possible to make a mess of your iPhone’s address book or calendar. You could fill it with duplicate entries, or the wrong entries, or entries from a computer that you didn’t intend to merge in there.
Fortunately, as a last resort, iTunes offers a forced one-way sync option, which makes your computer’s version of things the official one. Everything on the iPhone gets replaced by the computer’s version, just this once. At least you’ll know exactly where all that information came from.
To do an emergency one-way sync, plug the iPhone into the computer with the USB cable. Click its icon in iTunes. On the Info tab, scroll all the way to the bottom, until you see the Advanced area. There it is: Replace the information on this iPhone, complete with checkboxes for the five things that iTunes can completely replace on the phone: Contacts, Calendars, Bookmarks, Notes, or Mail Accounts. Click Apply to start minty fresh.

Backing Up the iPhone
You’ve spent all this time tweaking preferences, massaging settings, and getting everything just so on your brand-new iPhone. Wouldn’t it be great if you could back up all that work so that if something bad happens to the phone, you wouldn’t have to start from scratch?
With iTunes, you can. You get a backup every time the iPhone syncs with iTunes. The backup also happens before you install a new iPhone firmware version from Apple. iTunes also offers to do a backup before you use the Restore option described on the next page. iTunes backs up everything it doesn’t already have a copy of: stuff you’ve downloaded to the phone (music, ebooks, apps, and so on), plus less visible things, like your iPhone’s mail and network settings, your call history, contact favorites, notes, text messages, and other personal preferences that are hard or impossible to recreate.

Using That Backup
So the day has come when you really need to use that backup of your iPhone. Maybe it’s become unstable, and it’s crashing all over. Or maybe you just lost the dang thing, and you wish your replacement iPhone could have all of your old info and settings on it. Here’s how to save the day (and your data):
Connect the iPhone to the computer you normally use to sync with.
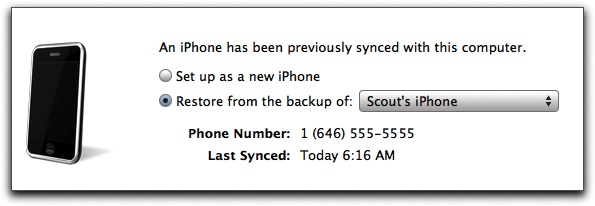
When the iPhone pops up in the iTunes source list, click the Summary tab.
Take a deep breath and click Restore. A message announces that after iTunes wipes your iPhone clean and installs a fresh version of the iPhone firmware, you can restore your personal data.
Take iTunes up on its offer to restore all your settings and stuff from the backup. If you see multiple backup files listed from other iPhones (or an iPod Touch), be sure to pick the backup file for your phone. Let the backup restore your phone settings and info. Then resync all your music, videos, and podcasts. Exhale.
Tip
For the truly paranoid, there’s nothing like a backup of your backup. Yes, you can actually back up the iTunes backup file, maybe on a flash drive for safekeeping. On a Mac, look in Home→Library→Application Support→MobileSync→Backup. In Windows XP, go to the C: drive→Documents and Settings→Usernam→Application Data→Apple Computer→MobileSync→Backup. For Windows Vista or Windows 7, visit C: drive→User→App Data (hidden folder)→Roaming→Apple Computer→MobileSync→Backup.
If you get in a situation where you need to restore your iPhone through iTunes on a different computer (say, if your old machine croaked), install iTunes on it and slip this backup file into the same folder on the new computer. Then follow the steps on Using That Backup to restore your data to the iPhone.

Deleting a Backup File
Want to delete the existing iPhone backup and start over completely from a little place called Square One? Go to the iTunes preferences (Edit→Preferences in Windows or iTunes→Preferences on the Mac) and click the Devices tab.
Click the dated backup file you don’t want and hit Remove Backup. Then connect your iPhone and do one of the things described on Backing Up the iPhone to make yourself a new backup.