
Previously, in Chapter 10, “Image Detection,” we looked at how we can get our AR mobile app to recognize and respond to predefined 2D images when they are detected in our scenes. Well, in a similar way, we can get our app to respond to predefined 3D objects. It’s a more complex process than 2D image recognition; however, ARKit makes this possible. All we need to do is plumb the functionality together.
This process requires two parts, the first to enable the user to use the app to scan a 3D object and store some of its “spatial data,” then a second part to use that spatial data again to detect the object in the scene.
While this chapter gives an overview of the concept, the code required to demonstrate this is too long to include in full. Fortunately, Microsoft have created an open source Xamarin Body Detection sample app that we can download and try out.
The example app and resulting screenshots discussed and shown in this chapter are from the Microsoft Xamarin.iOS Scanning App sample here:
https://docs.microsoft.com/en-us/samples/xamarin/ios-samples/ios12-scanninganddetecting3dobjects/
Scanning and Saving Object Spatial Data
Using ARObjectScanningConfiguration

Position the bounding box around the object you wish to scan
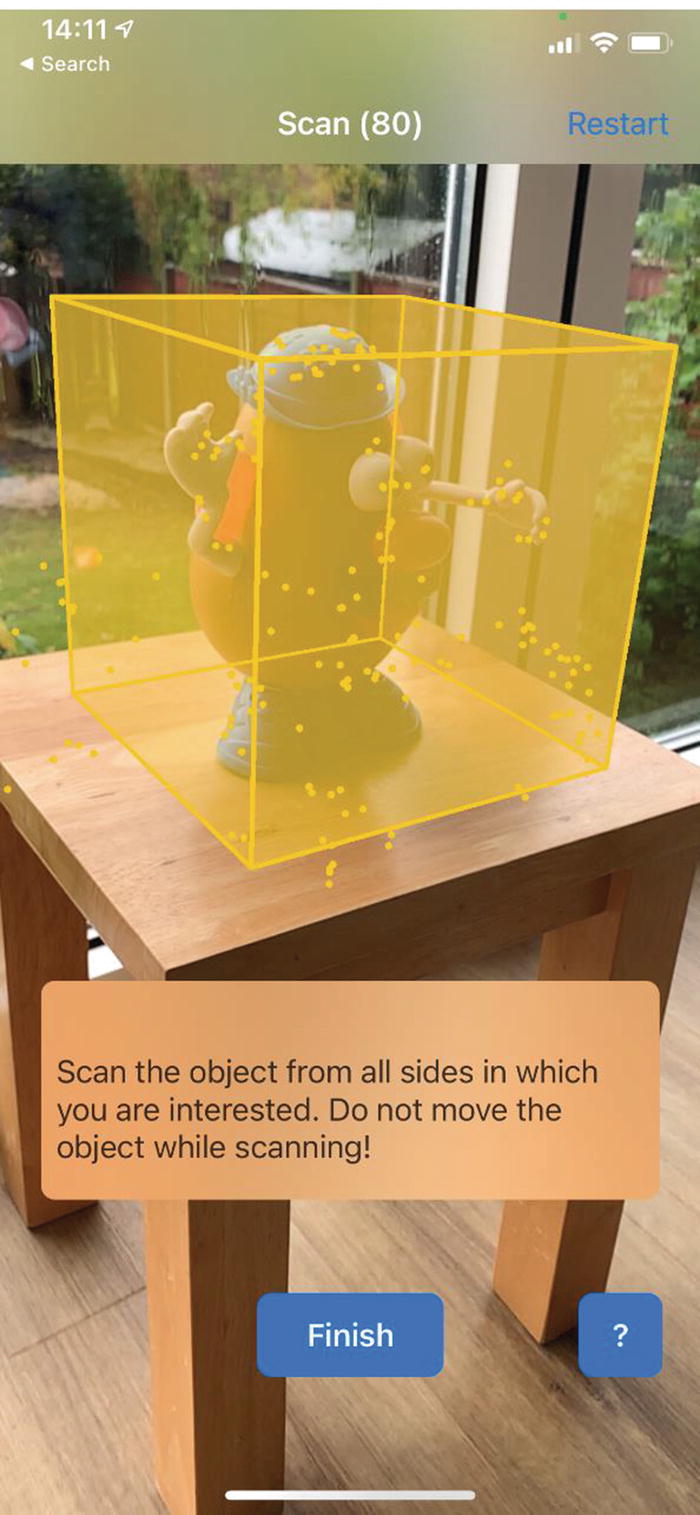
Scan the object from multiple directions
Once the scan is complete, the scanned object is stored as an ARReferenceObject in the app for later reference.
Recognizing Scanned Objects
In order to recognize the 3D object in the scene, we need to retrieve (or at least reference) the previously scanned and saved spatial data for the 3D object and use it to allow the app to detect any objects that match it.
When you are ready, press the “Test” button in the app which will begin detection of the 3D object you have scanned in the scene.
The code that fires when the object is detected
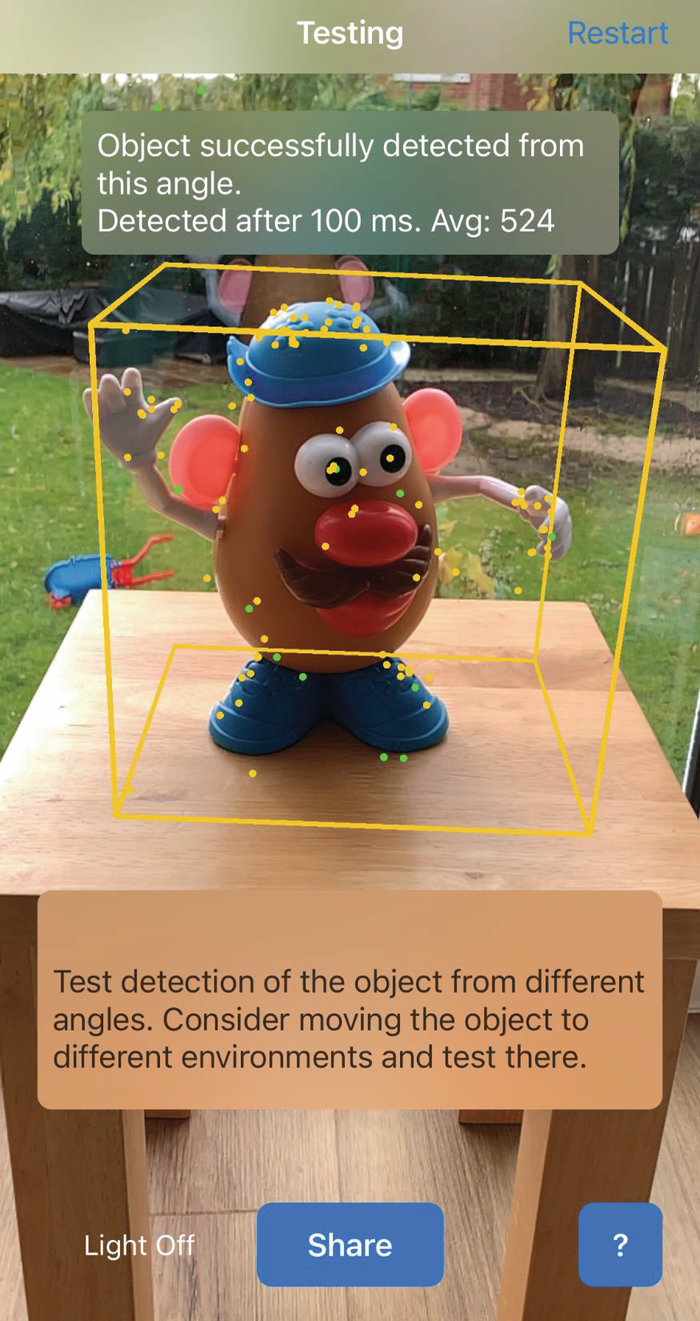
Successfully detecting object
Things to Try
Here are some ideas of things to try using Object Detection.
Scan and store multiple objects.
See if you can scan and store multiple different objects.
Scan a product and retrieve/display product information upon successful detection.
Scan and save the 3D characteristics of a product (such as a cuddly toy); then when it is detected, display additional information next to it such as product details, description, price, and so on.
Scan someone’s head to see how accurate recognition is.
Try scanning someone’s head and seeing if Object Detection can recognize it.
See how small/big an object you can scan and detect.
Play around with scanning very small or very large objects to see if there are limitations to how well object detection works with very small or very large objects.
Change the color of the bounding box.
Try changing the color or other aspects of the bounding box used for scanning and detection.
Summary
The built-in Object Detection functionality in ARKit continues to show just how varied and powerful ARKit is and literally adds another dimension to the 2D image detection we previously looked at opening up a whole bunch of interesting use cases.
Continuing the theme of detecting interesting subjects in our scene, in the next chapter, we will look at Body Detection where we will see how ARKit can determine the position and orientation of a person in a scene.