
As promised from the very start, everything we have looked at in this book has been possible to experiment with and put into your app and deploy onto your phone without an Apple Developer Account.
That said, if what you have created is ready to be shared with the rest of the world, you are going to want to put it in the App Store for others to download and install. To do this, you will need an Apple Developer Account, and you will need to follow the steps outlined in this chapter.
App Store Submission To-Do List
Set up icons for the app.
Set up the launch screen (optional).
Set up App ID and Entitlements.
Create and install an App Store provisioning profile.
Update the build release configuration.
Build your app and submit it to Apple.
Set Up Icons for the App
Because the icon for your app will be used in a variety of different places, you will need to provide the icon in several different sizes.
App Store
Notifications
Settings
Spotlight
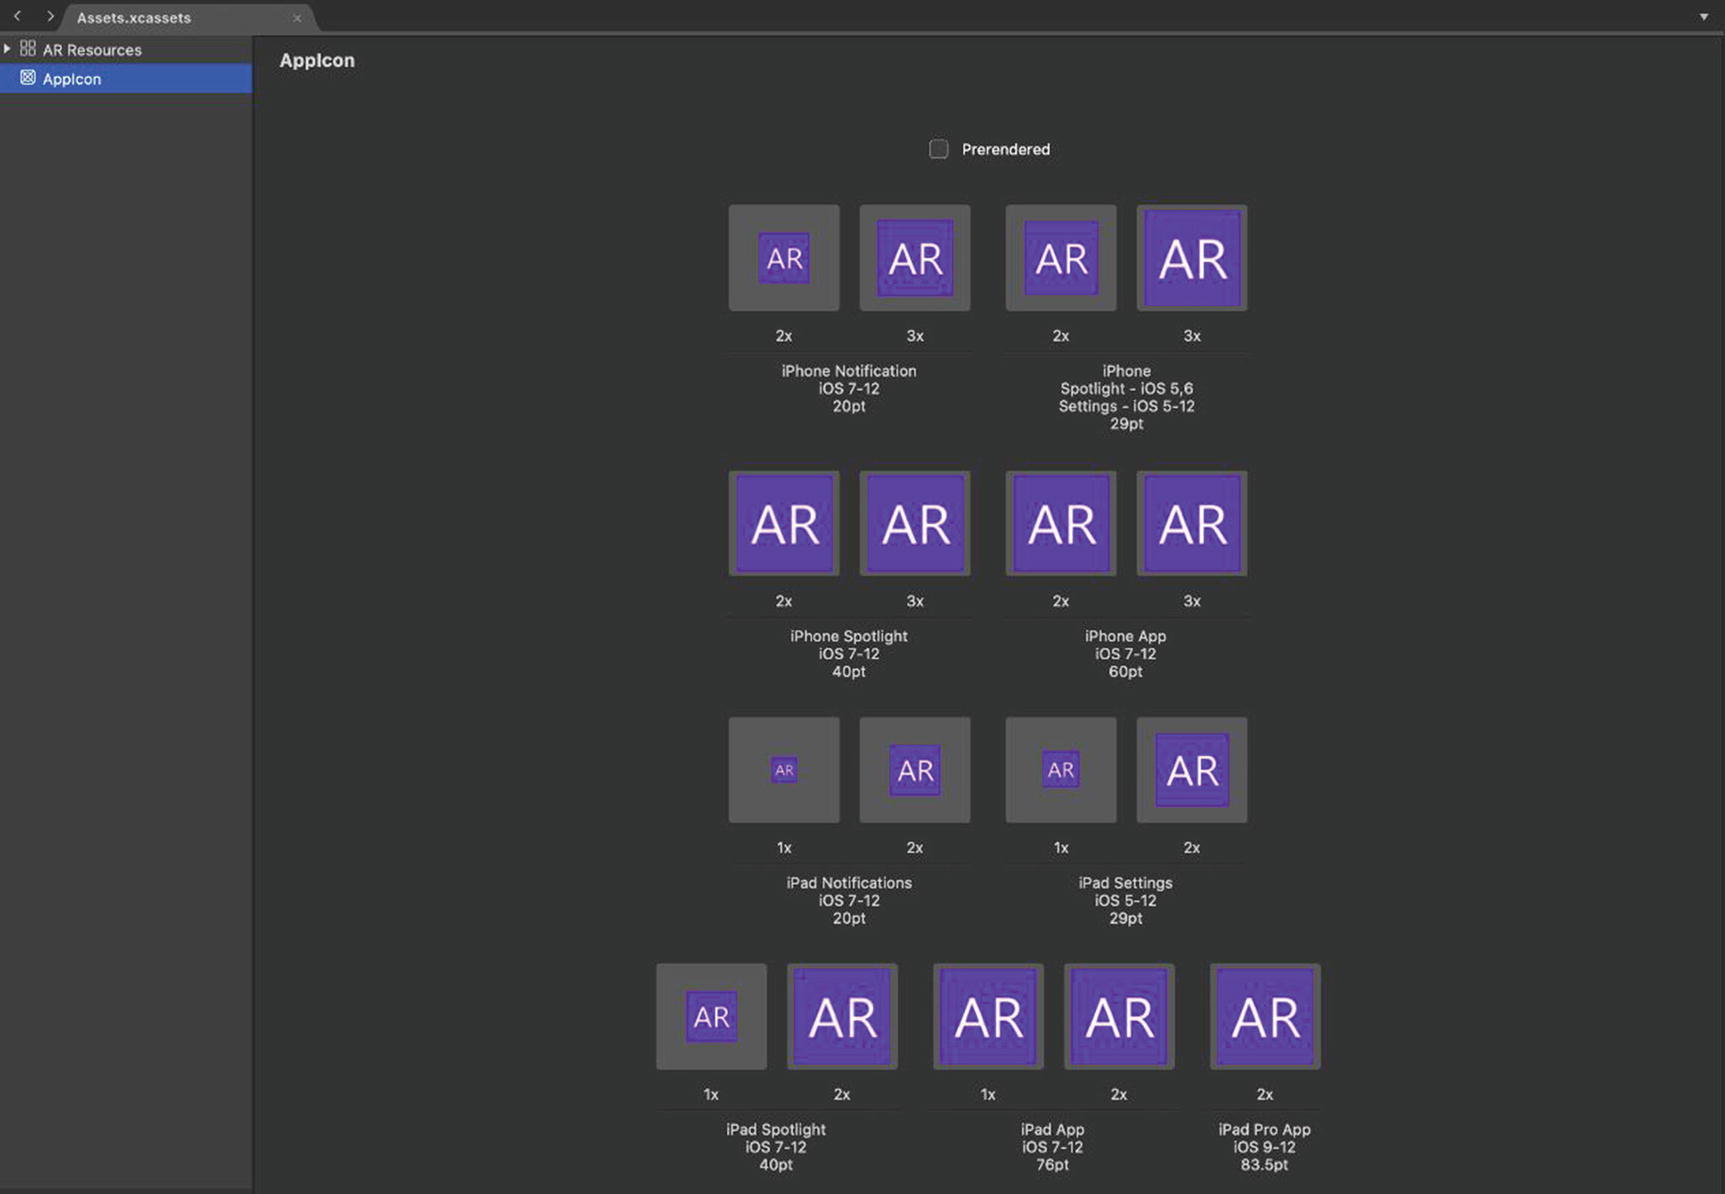
Provide images for an AppIcon resource in the Assets.xcassets folder
Set Up Launch Screen Image
The launch screen for your app is the screen that you see immediately after launching your app but before you initially see the main page of your app and by default it is a blank white screen. And fortunately, it is very easy to change if you choose to do so. It is something I recommend because it is relatively simple and can help with the initial experience a user has with your app.

You can customize your app’s launch screen
Set Up App ID and Entitlements
Before you go much further, you will need to create an App ID for your app. You do this in the Apple Developer Portal at https://developer.apple.com, and to be able to do this, you will need an Apple Developer Account which at the time of writing costs £79.
Also, if you do not already have an Apple ID, you will need to create one first at https://appleid.apple.com/account.

Your Apple Developer Account

The identifiers section of your developer account
We are going to create a new Identifier for our app in the form of an App ID, so click the + button next to the Identifiers heading to start creating a new identifier for our app.

Beginning to register a new identifier
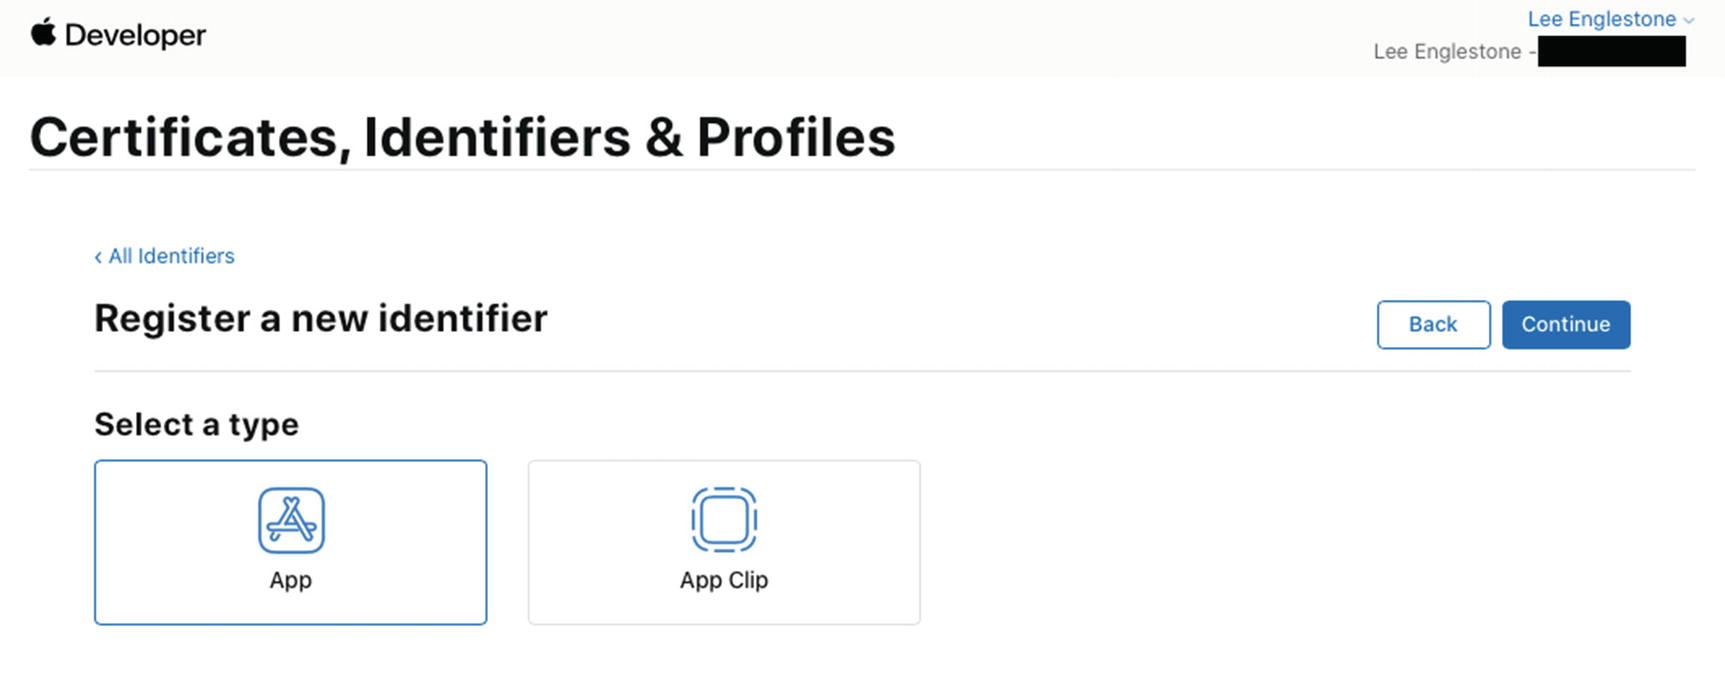
Choosing what we are using the App ID for
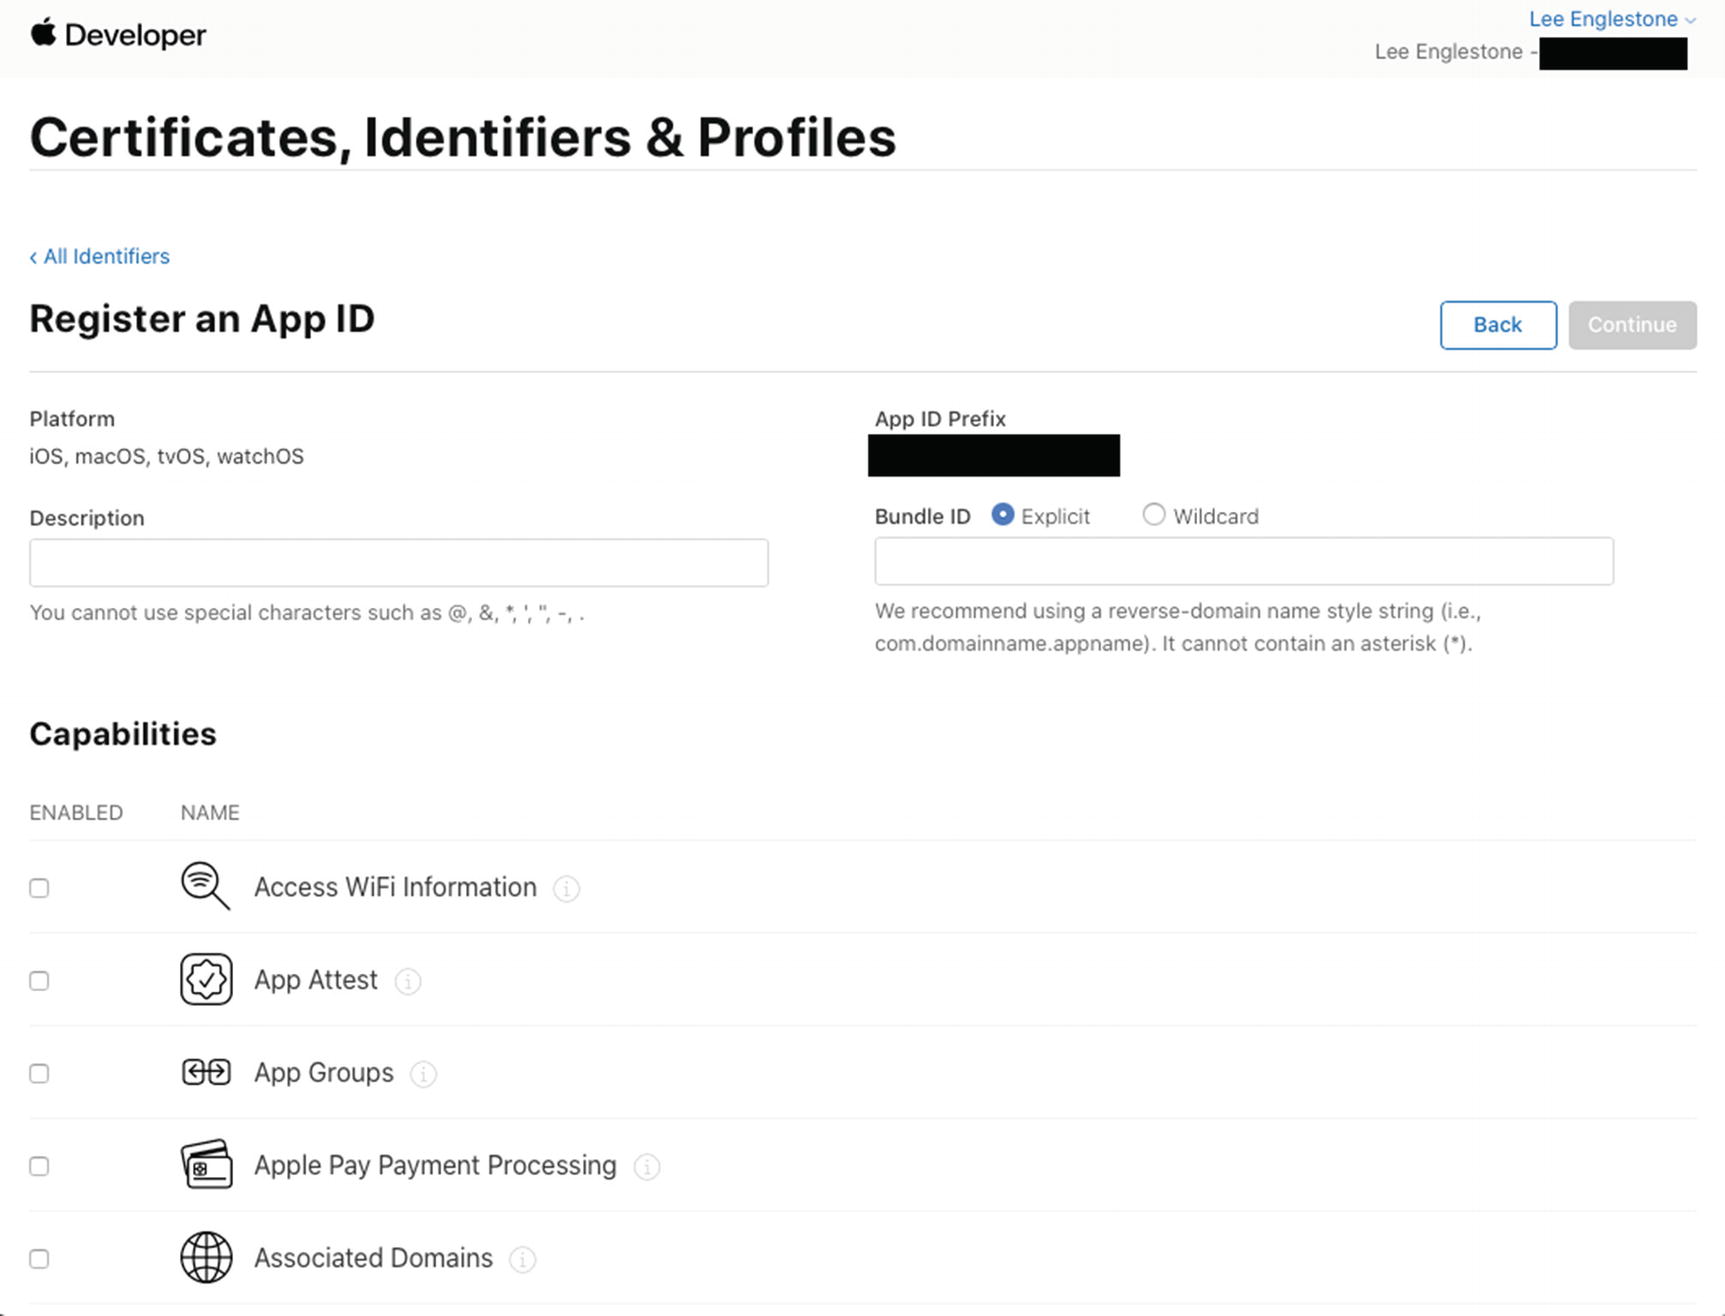
Providing information for your App ID

Confirm your App ID details before registering
Congratulations! You have created your first App! Well, App ID anyway. Don’t worry. We’ll put it to good use soon enough.
Create and Install an App Store Provisioning Profile
In order to publish your app to the App Store, you will need to create, install, and use an appropriate distribution provisioning profile on your computer. These provisioning profiles contain information about the certificate that is used to sign your app, the App ID, and where it can be installed.
To create and install a provisioning profile for your app, go to Certificates, IDs & Profiles section in the Apple Developer Portal again.
This time, go to the Profiles section. From here, you will see any existing Development or Distribution profiles and can create new ones.

Development and Distribution profiles

Registering a new distribution provisioning profile

Select the App the provisioning profile is for

Select certificate

Provide a name for the provisioning profile
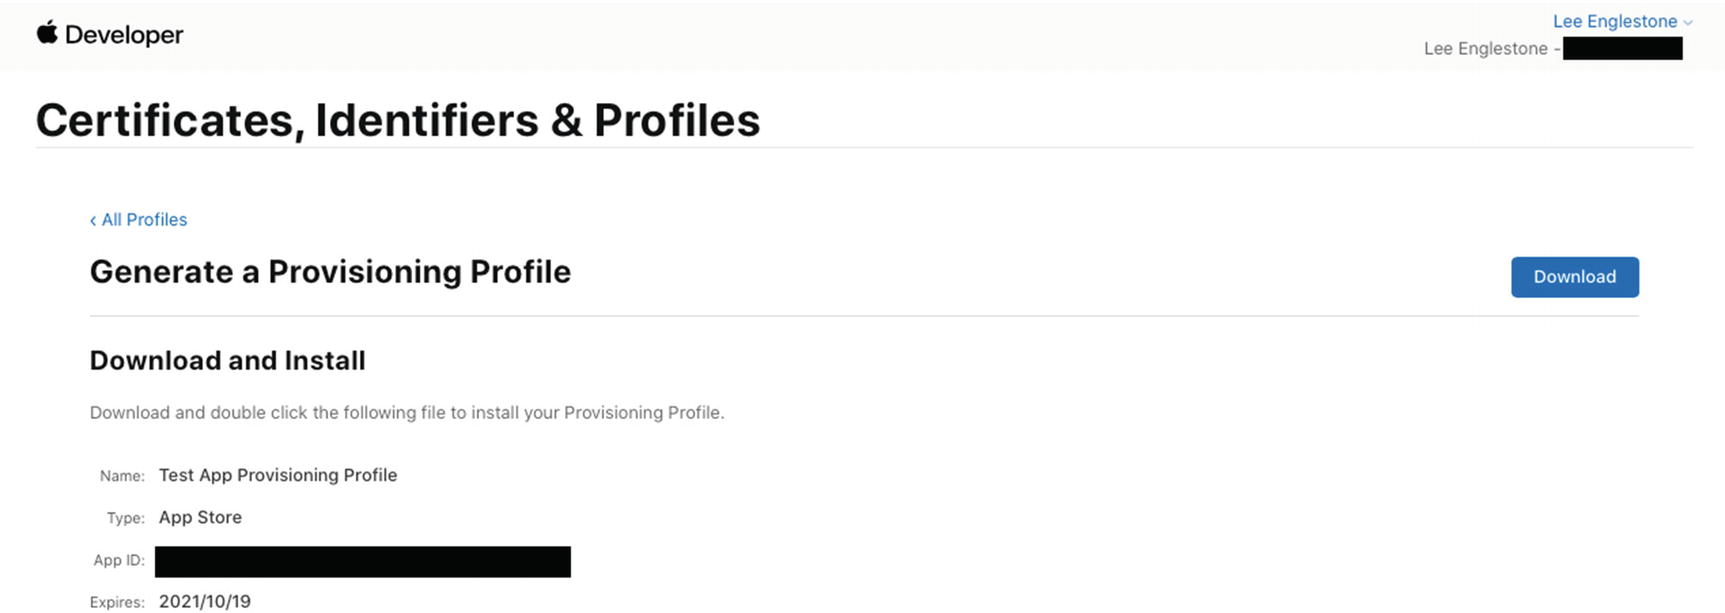
Download and install the provisioning profile
Phew, now you will have successfully installed a distribution provisioning profile onto your machine that can be used to put your app in the App Store.
Now, let’s go and build the version of the app we wish to upload in the next section.
Update Build Release Configuration
Before we build our app for submission to the App Store, we need to do a few more things including assigning the Provisioning Profile we created in the previous section.

Ensure Signing is using Manual Provisioning

Setting the iOS Build settings
The Configuration should be set to Release and the Platform set to iPhone.
The Signing Identity should be Distribution (Automatic).
The Provisioning Profile should be the one you created in the previous step.
Note You will only see Provisioning Profiles that have a bundle ID that match the app’s bundle ID in the Info.plist file.
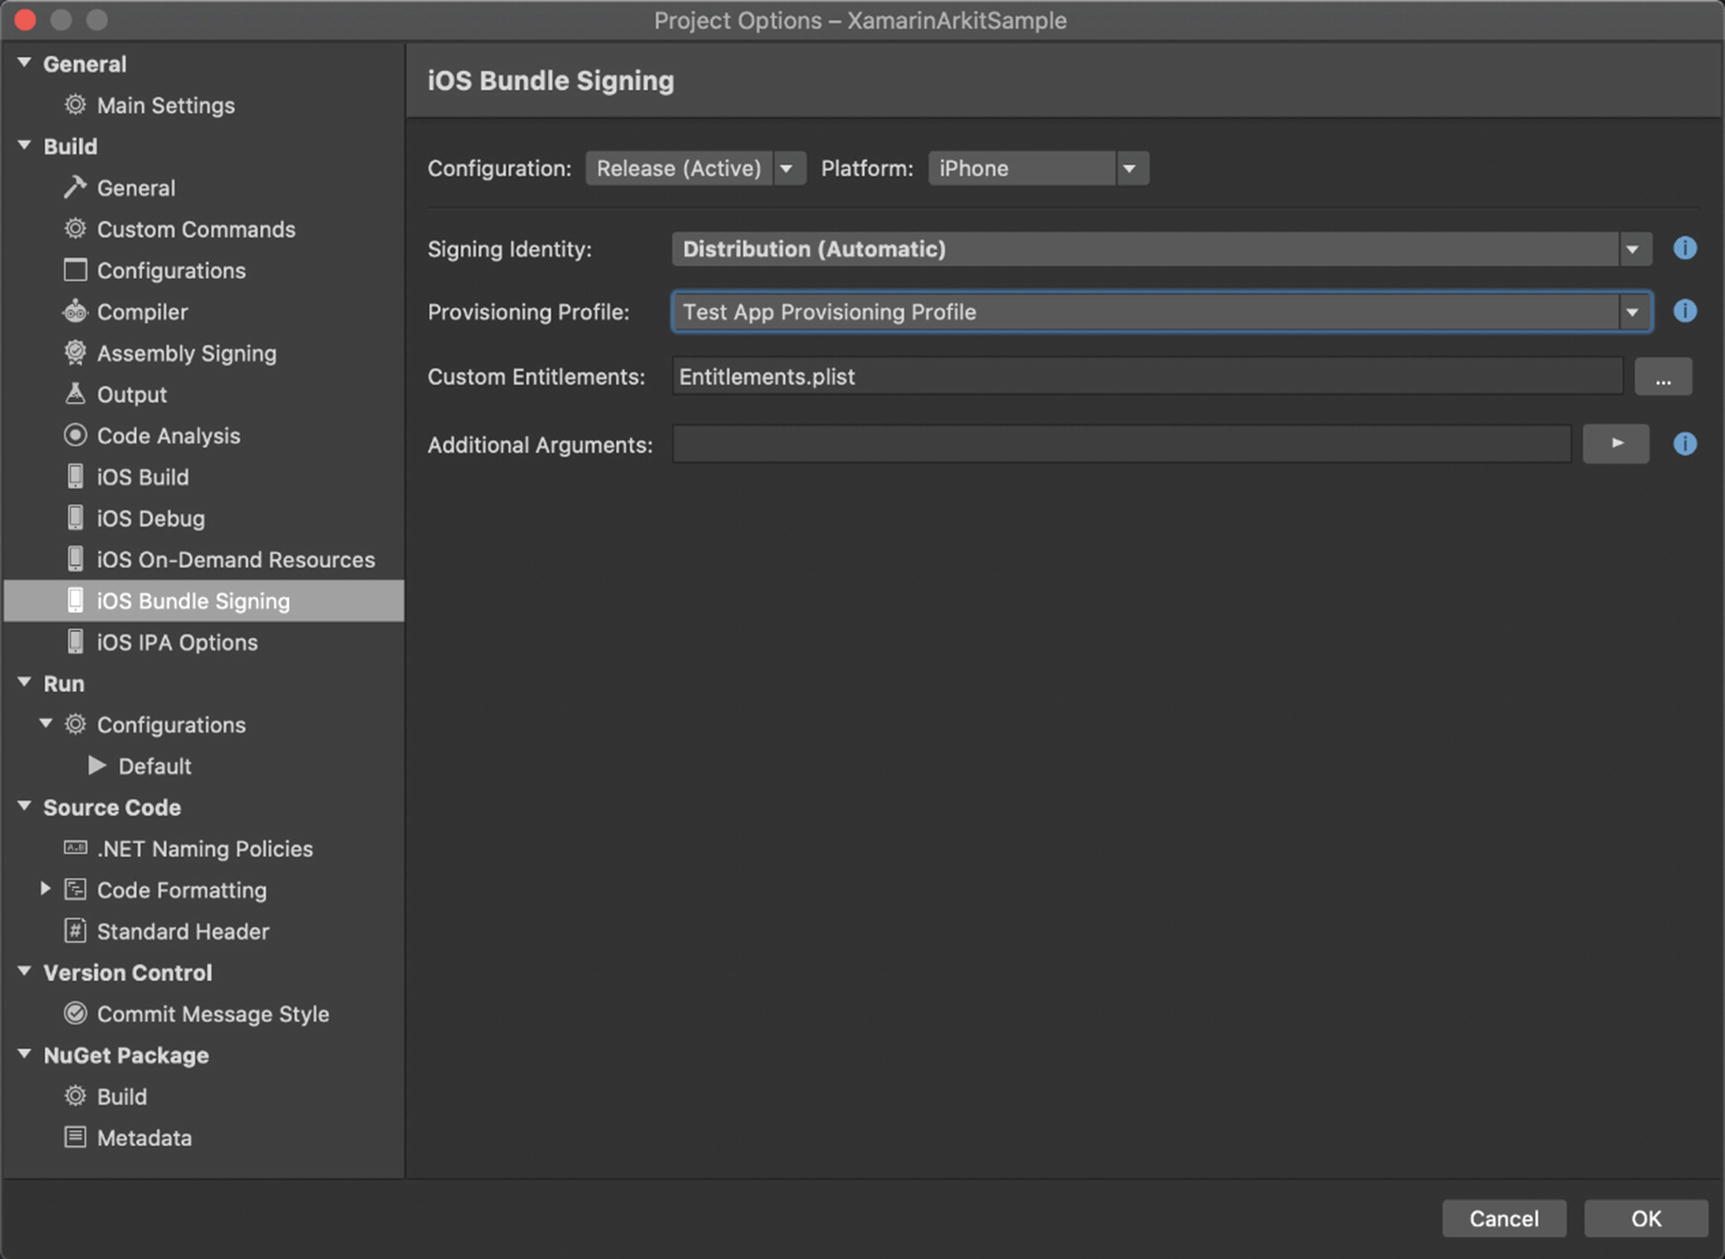
Setting the iOS Bundle Signing settings
Your project should now be ready to build and publish. But first, we need to get the App Store side of things ready to receive the upload of the app.
Set Up the App in App Store Connect
Before you can submit your app to the Apple for review, you must first configure it in App Store Connect. App Store Connect is an online portal used to manage your iOS apps in the App Store and can be found at https://appstoreconnect.apple.com/.
Provide app name as will appear in store
Select Bundle ID
Provide description, keywords, category
Provide screenshots
Declare price and availability

App Store Connect
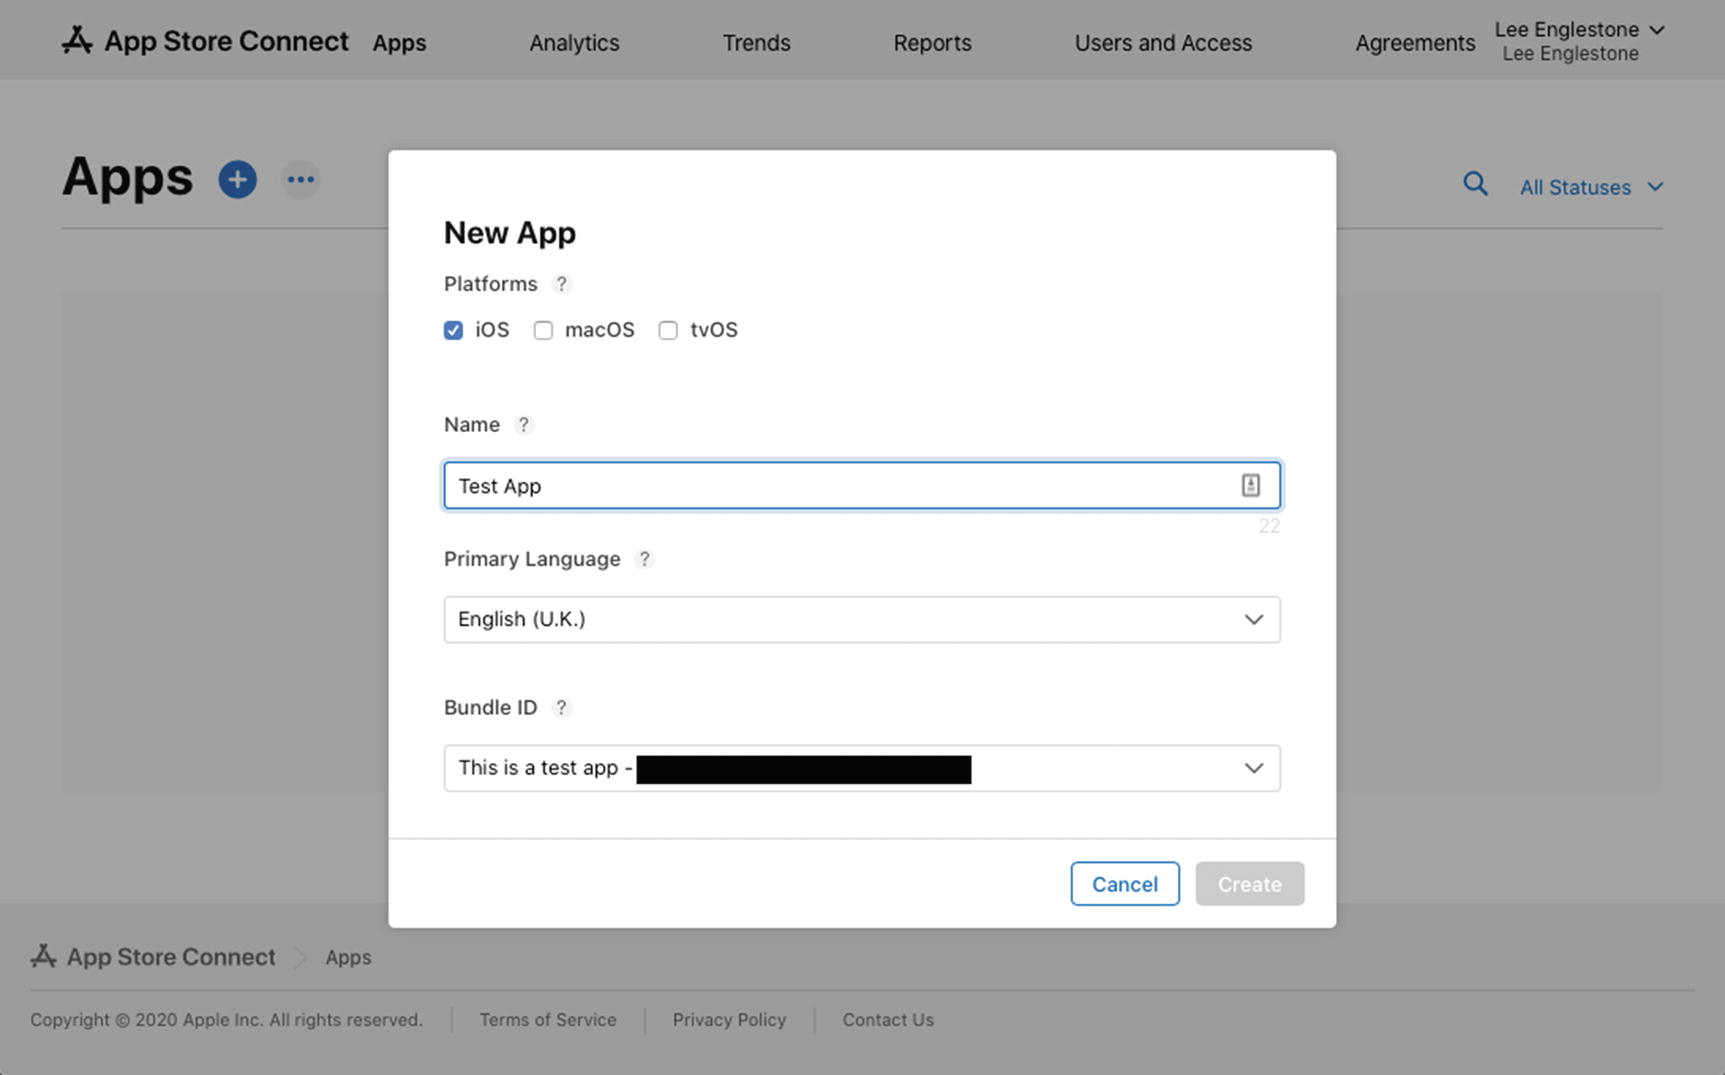
Creating a new app from the Apps section

Your draft unpublished app

Providing pricing information
In the General Information section, you should provide your app’s Primary Category and Secondary Category as well as a Subtitle to aid people searching for apps like yours and give them the best chance of stumbling onto your app. See Figure 17-22.

Providing general app information
But don’t press Submit for Review yet as you will need to create and upload/associate a build with your initial release. For this, we need to go back to Visual Studio for Mac which we will see in the next section.
Build the App and Submit It to Apple
Now that you have set up your app in App Store Connect, you need to finally build and submit your app.

Setting to Release build configuration

Archiving your app for Publishing

After Archive creation

Select distribution channel
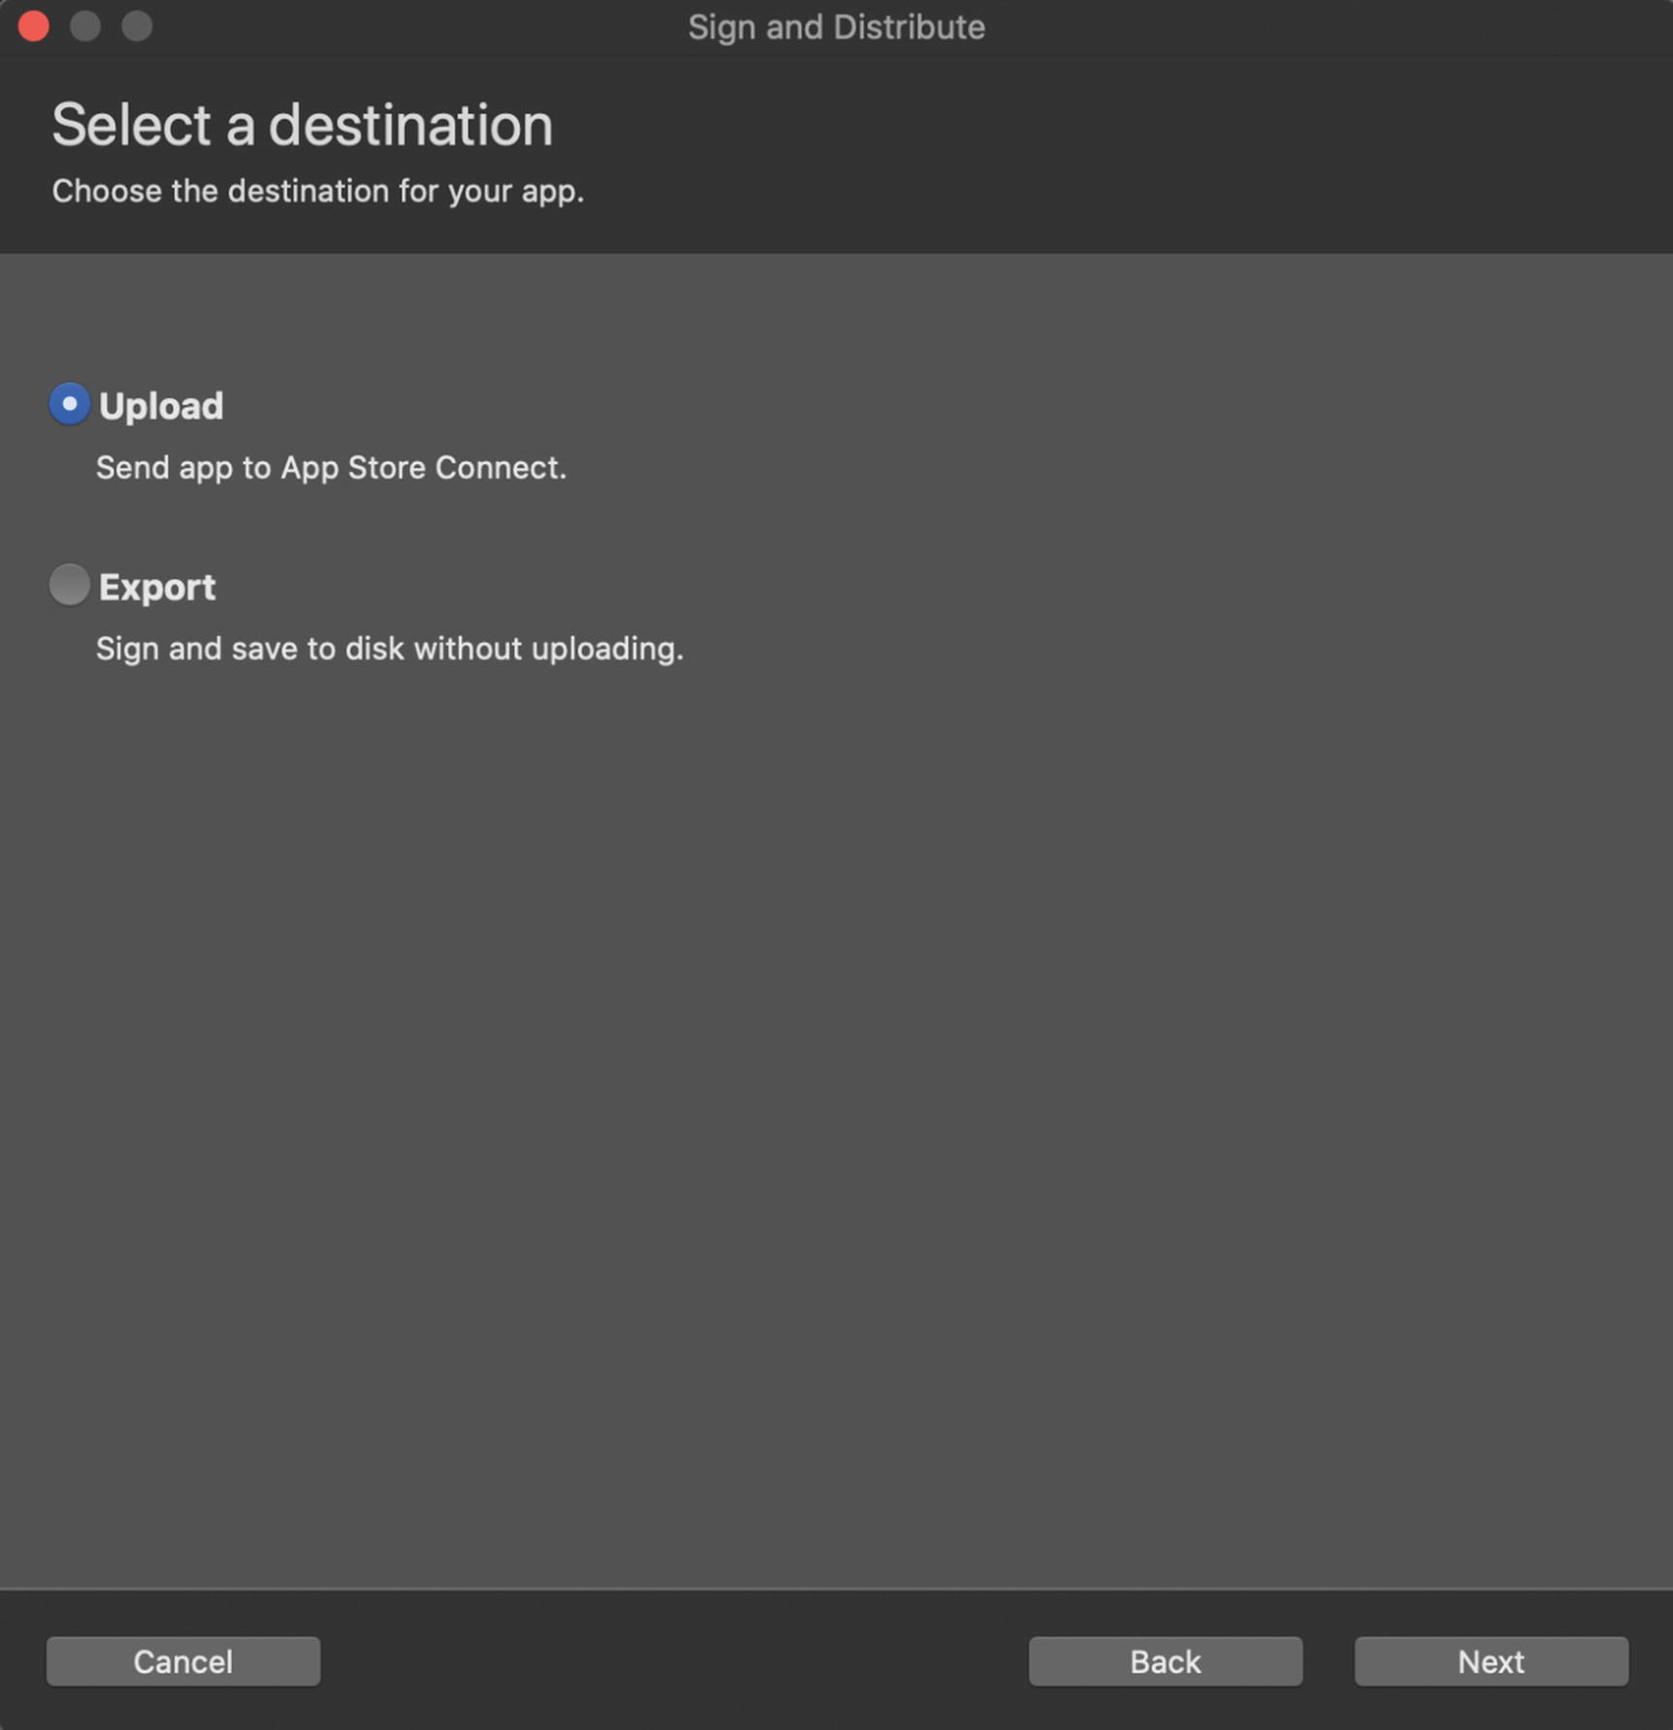
Select destination
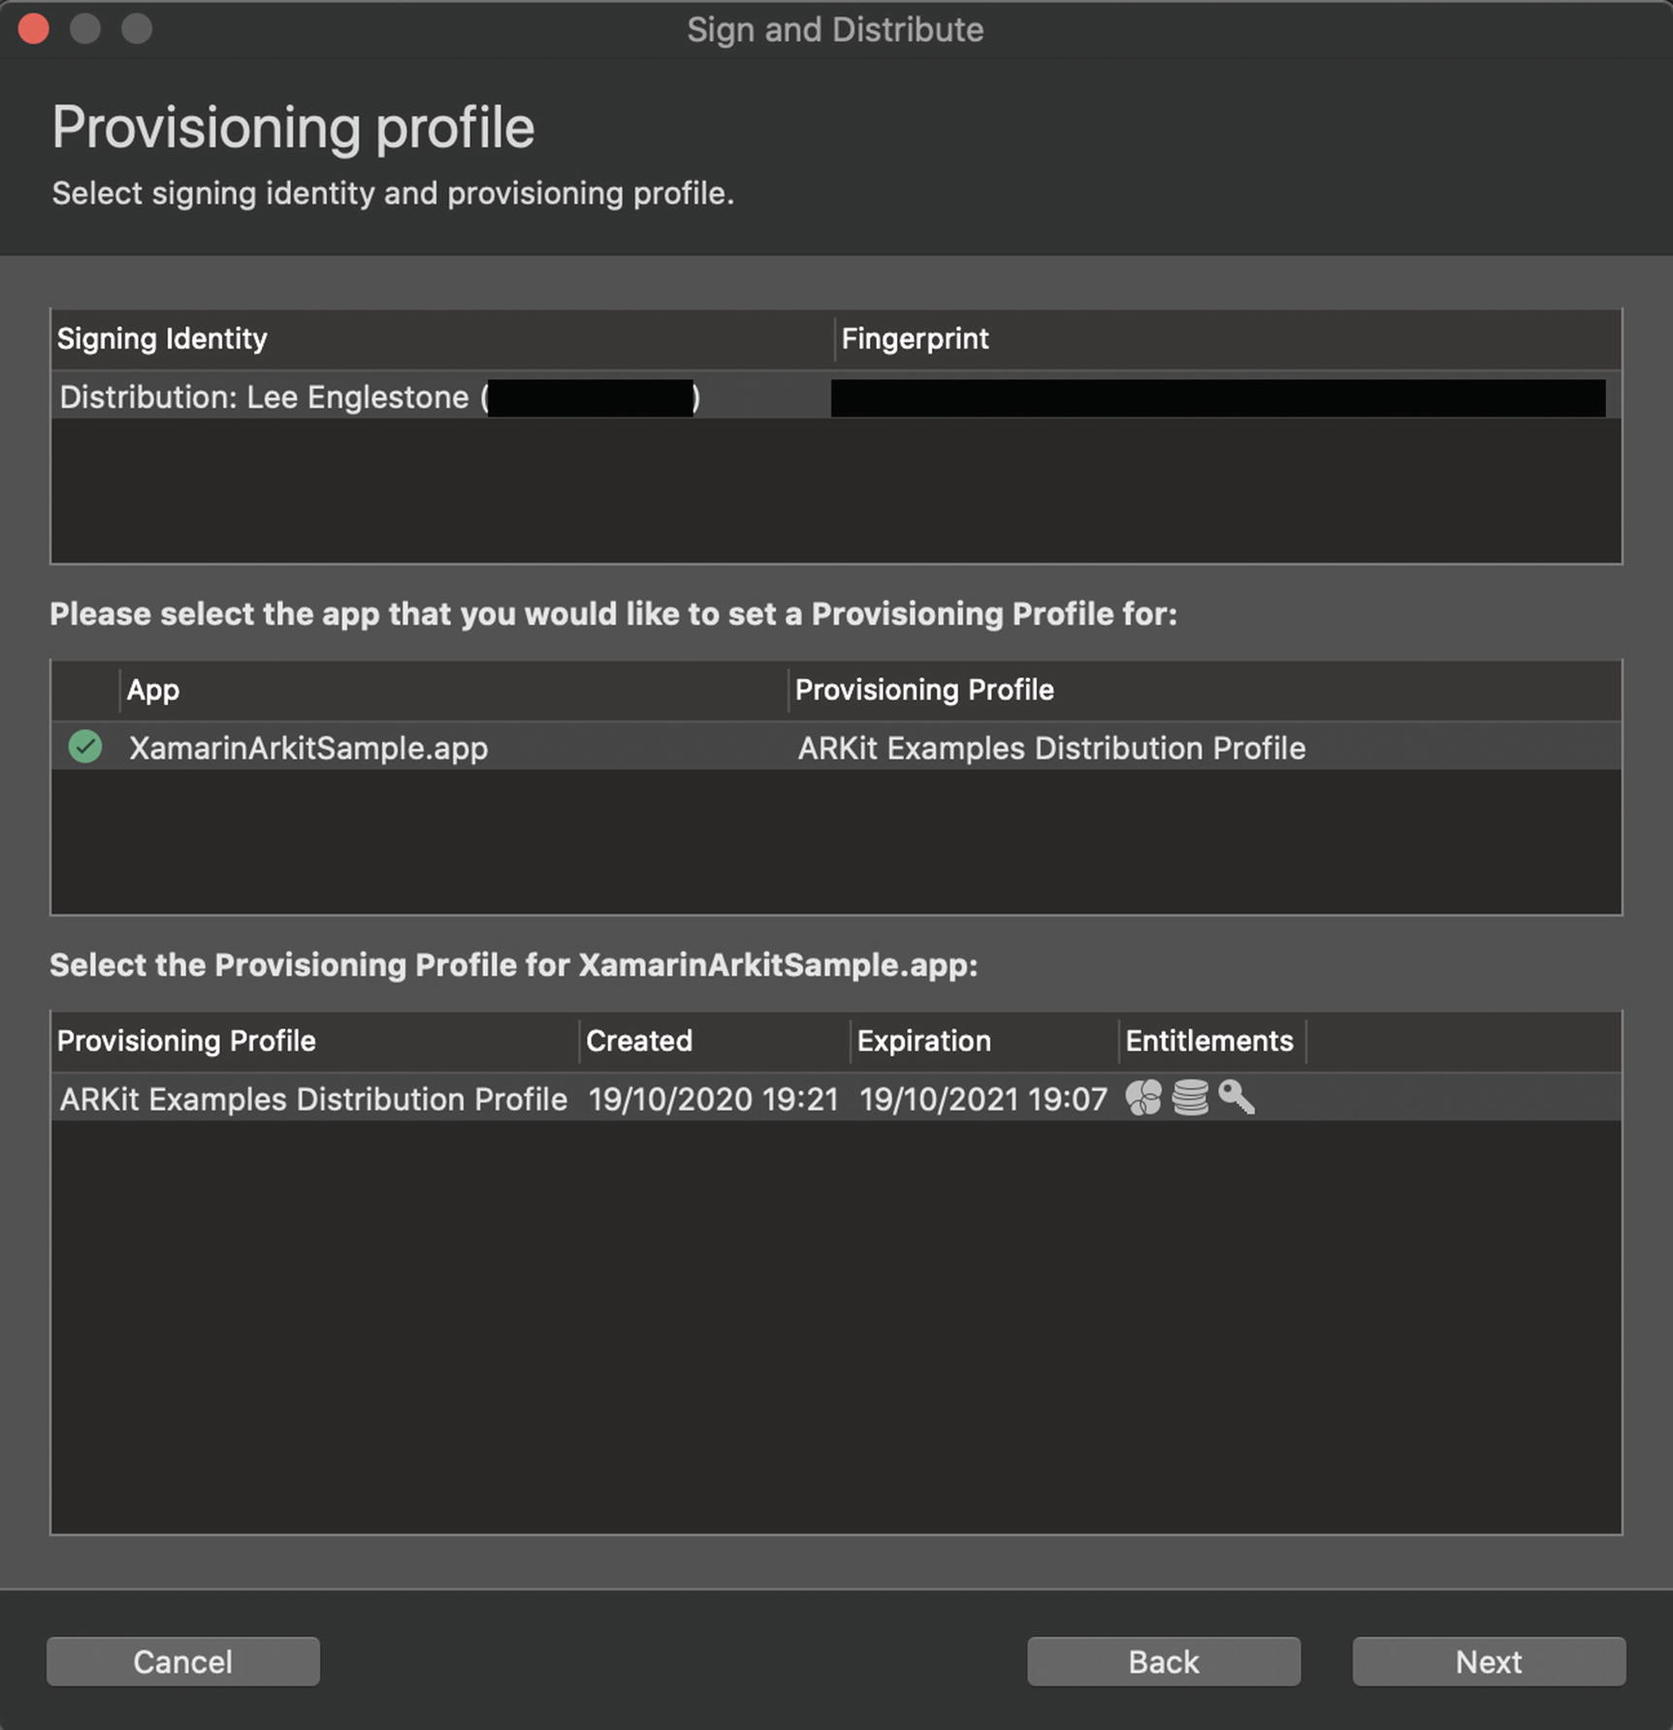
Select the relevant provisioning profile
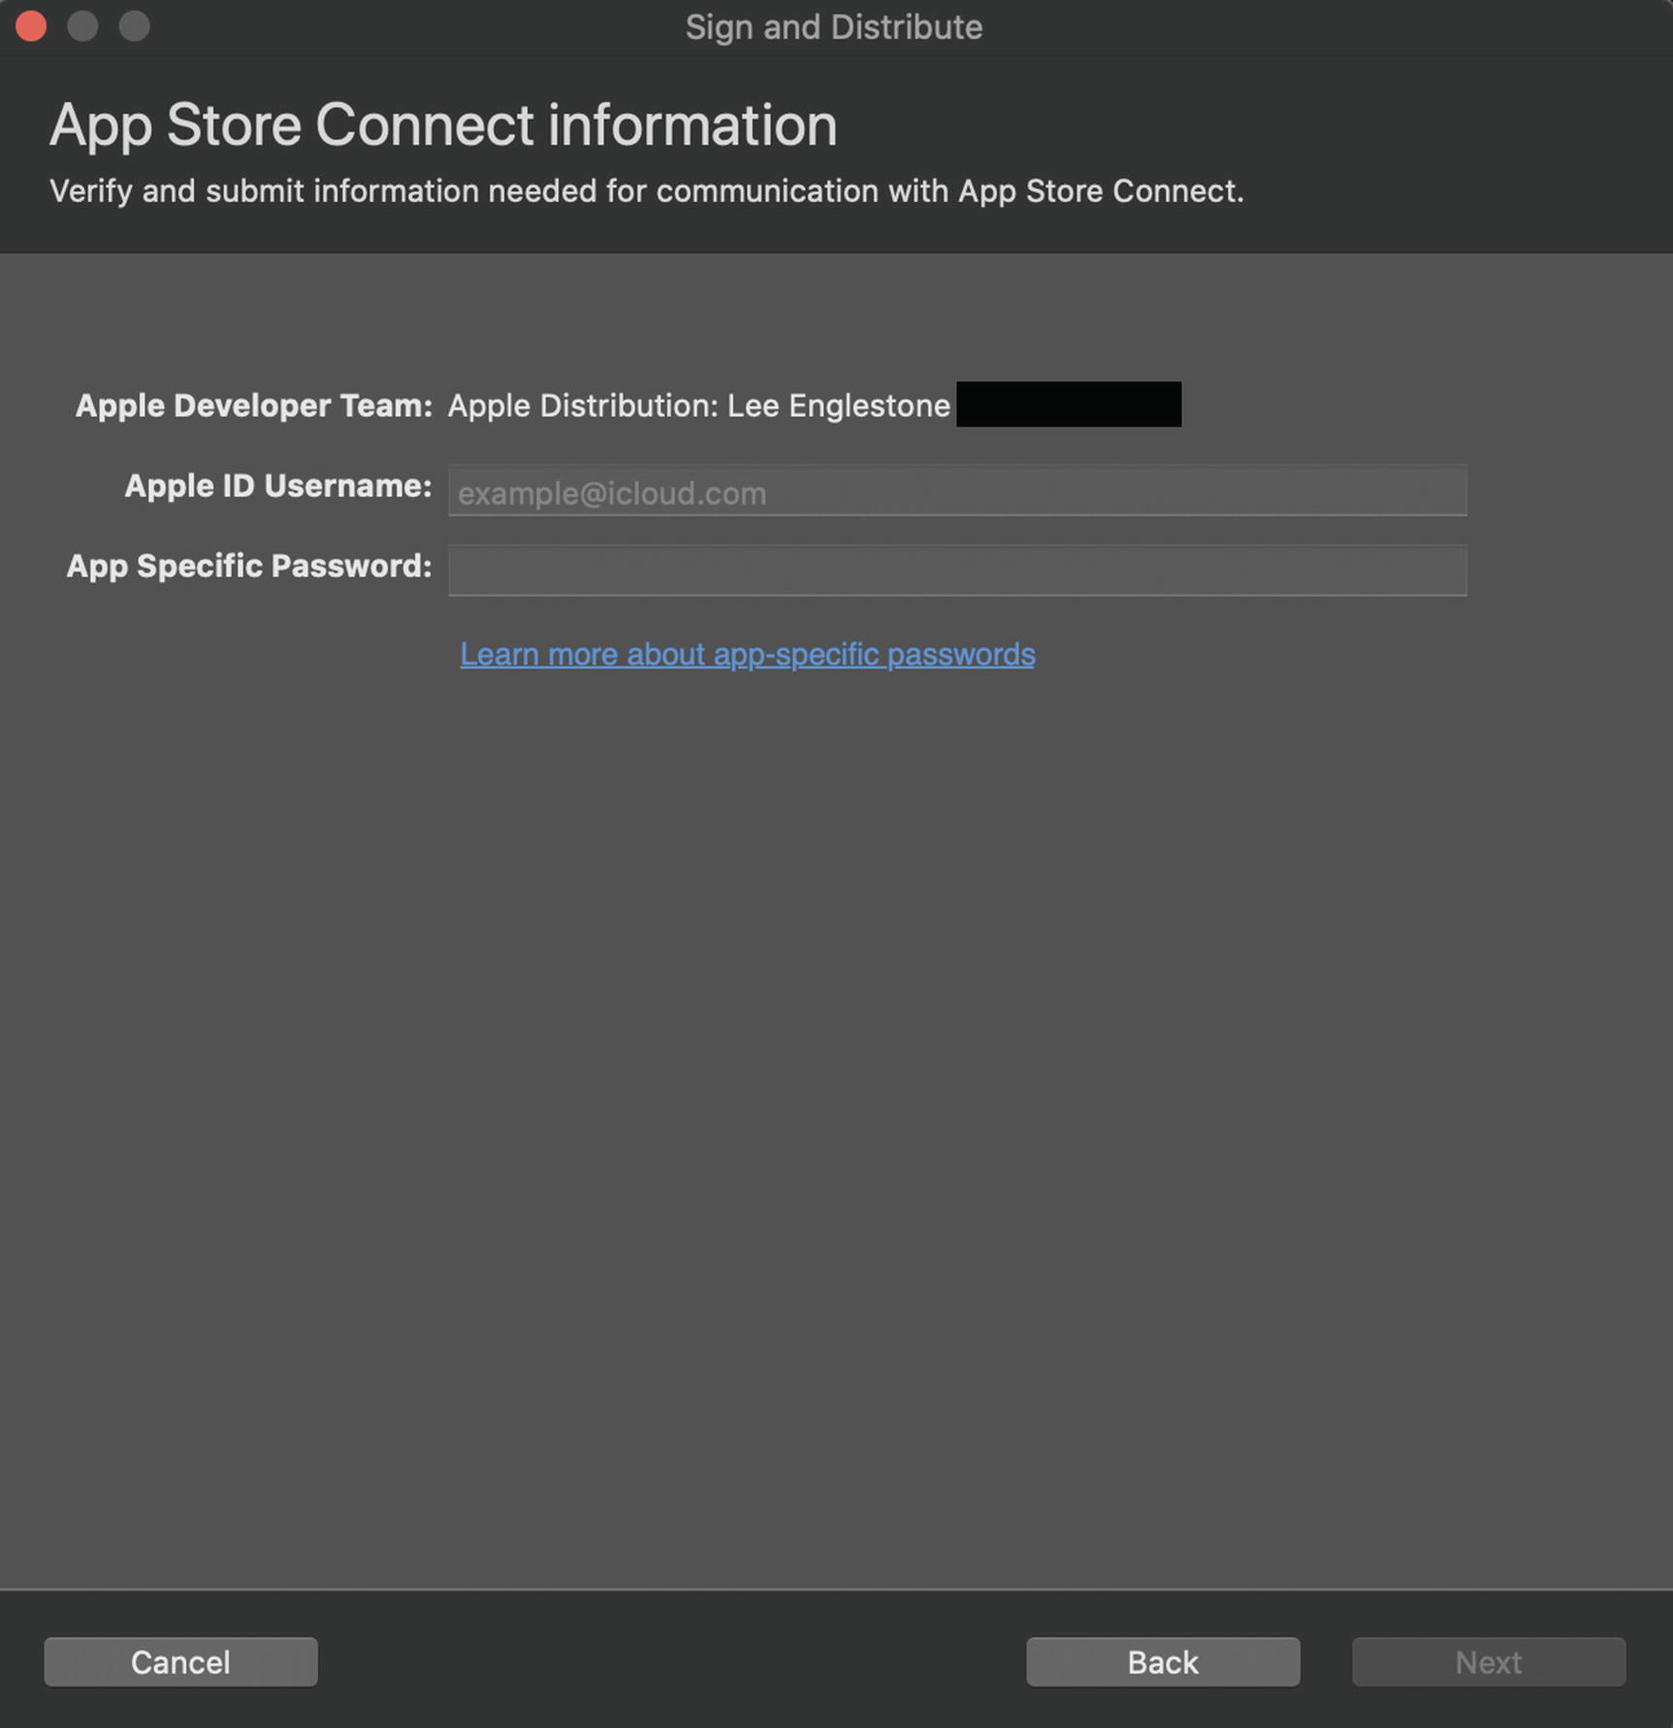
Provide communication details for the App Store
Now you may wonder what on earth this App Specific Password is. I certainly did.

Provide communication details for the App Store
After you have generated an app specific password, enter your Apple ID Username and the password and press Next.

Get ready to publish your app
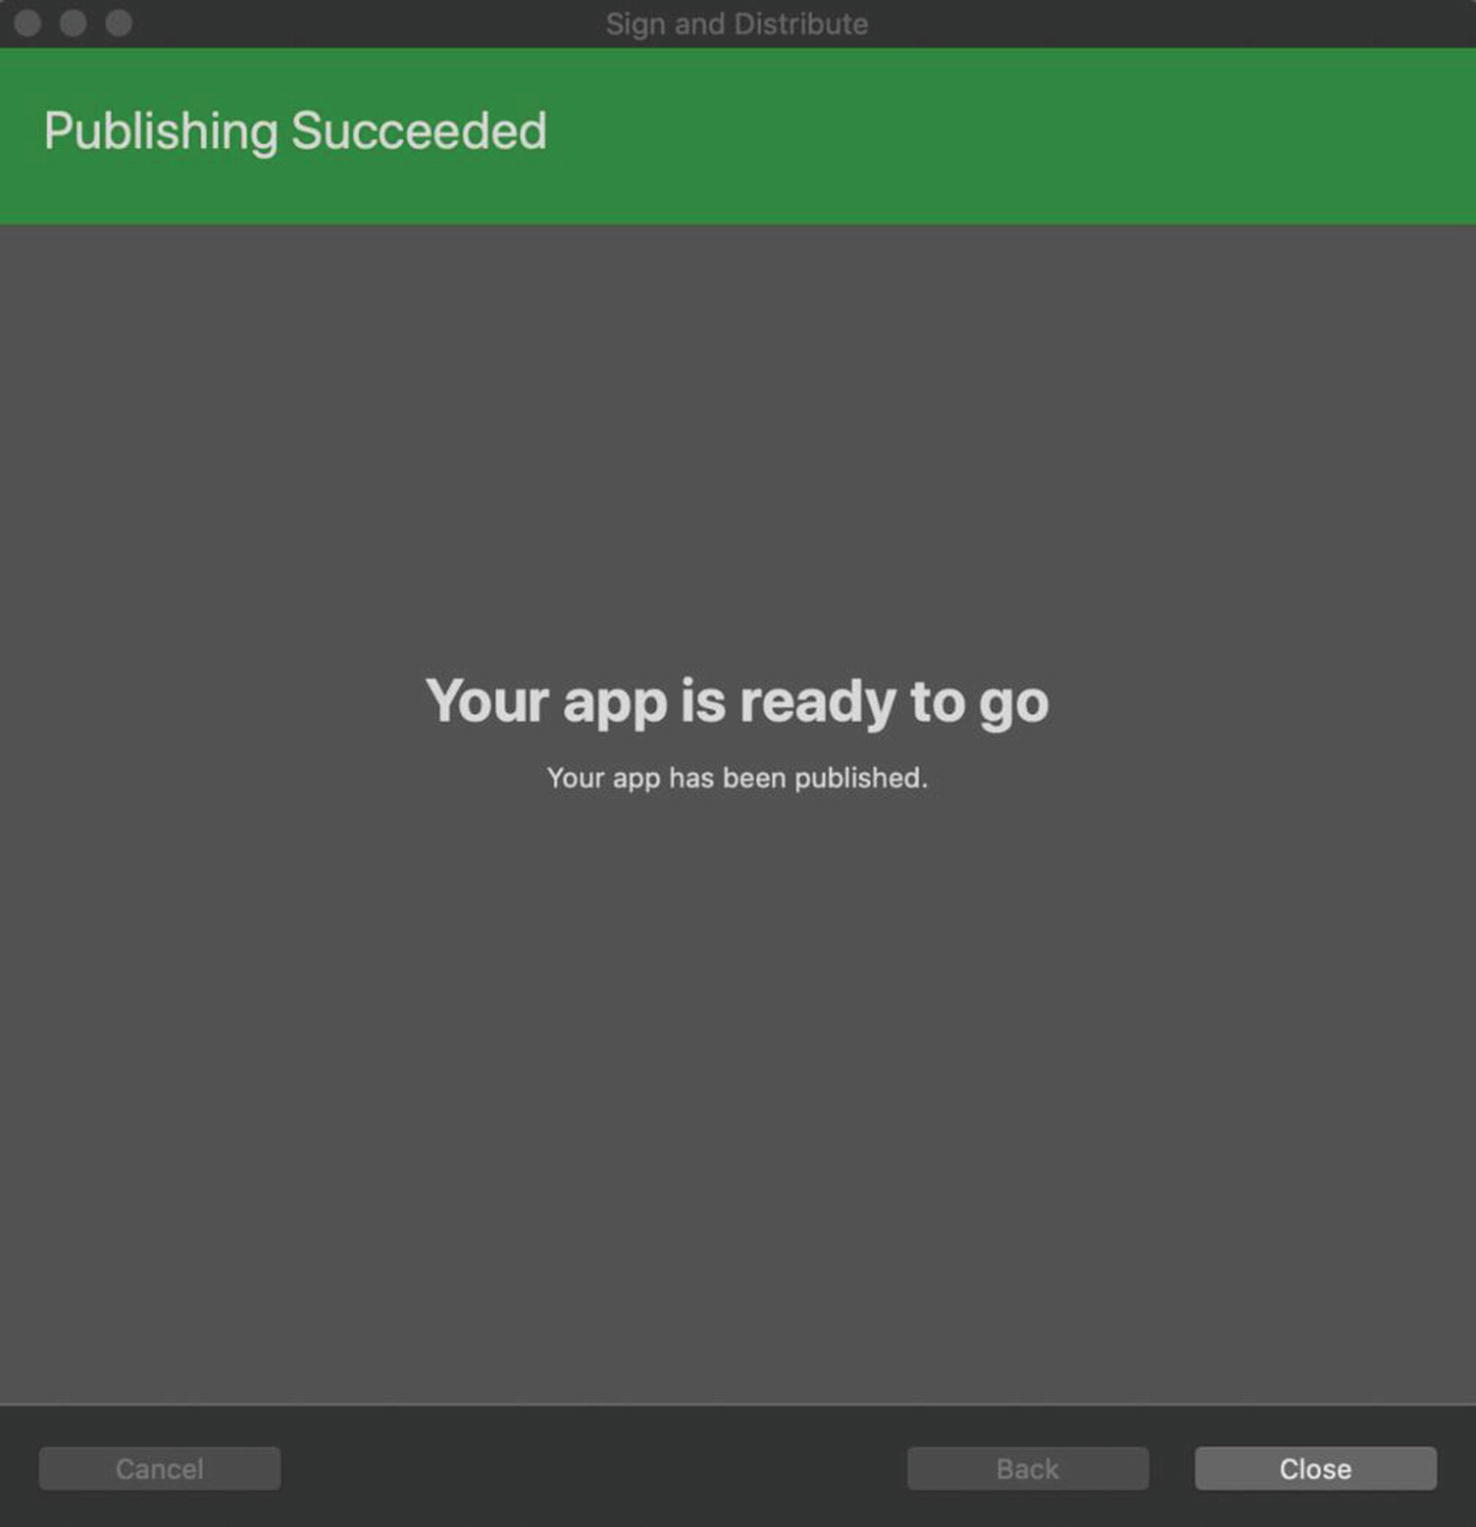
Successfully publishing your app to the App Store
You will notice that the status of your app will change to “Waiting for Review.” You just have to wait now for Apple to make its automated and manual checks on your app by its team of reviewers. If Apple have any means to reject your app such as copyright infringement or unclear permission requests, your app will be rejected, and you will be given feedback. If this happens, you will be able to make the relevant changes to your app and resubmit for approval.
Once Apple have successfully approved your app, it will shortly appear in the App Store.
Summary
Well, that’s it. You now have everything you need to not only develop some pretty impressive and useful Augmented Reality experiences but also distribute and share them with the world. What you choose to make next is up to you.
Augmented Reality is set to become increasingly popular over the coming years, and the rich variety of abilities that ARKit allows us to leverage right out of the box to deliver amazing AR experiences should be apparent by now.
The experiences you can create are limited only by your imagination.
Good luck and have fun.