Still Life
Begin painting still lifes by practicing different types of fruit. Feel free to choose local fruits and challenge yourself with assorted shapes and colors.

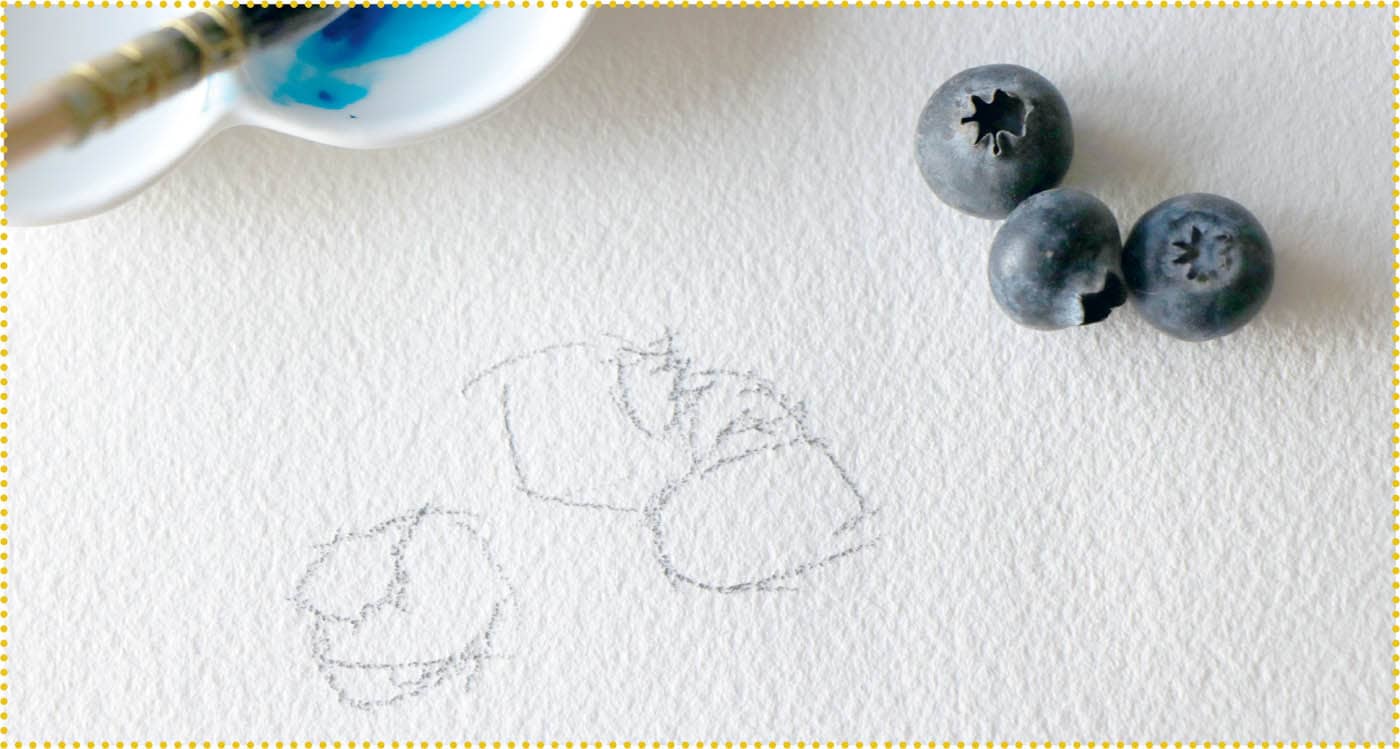
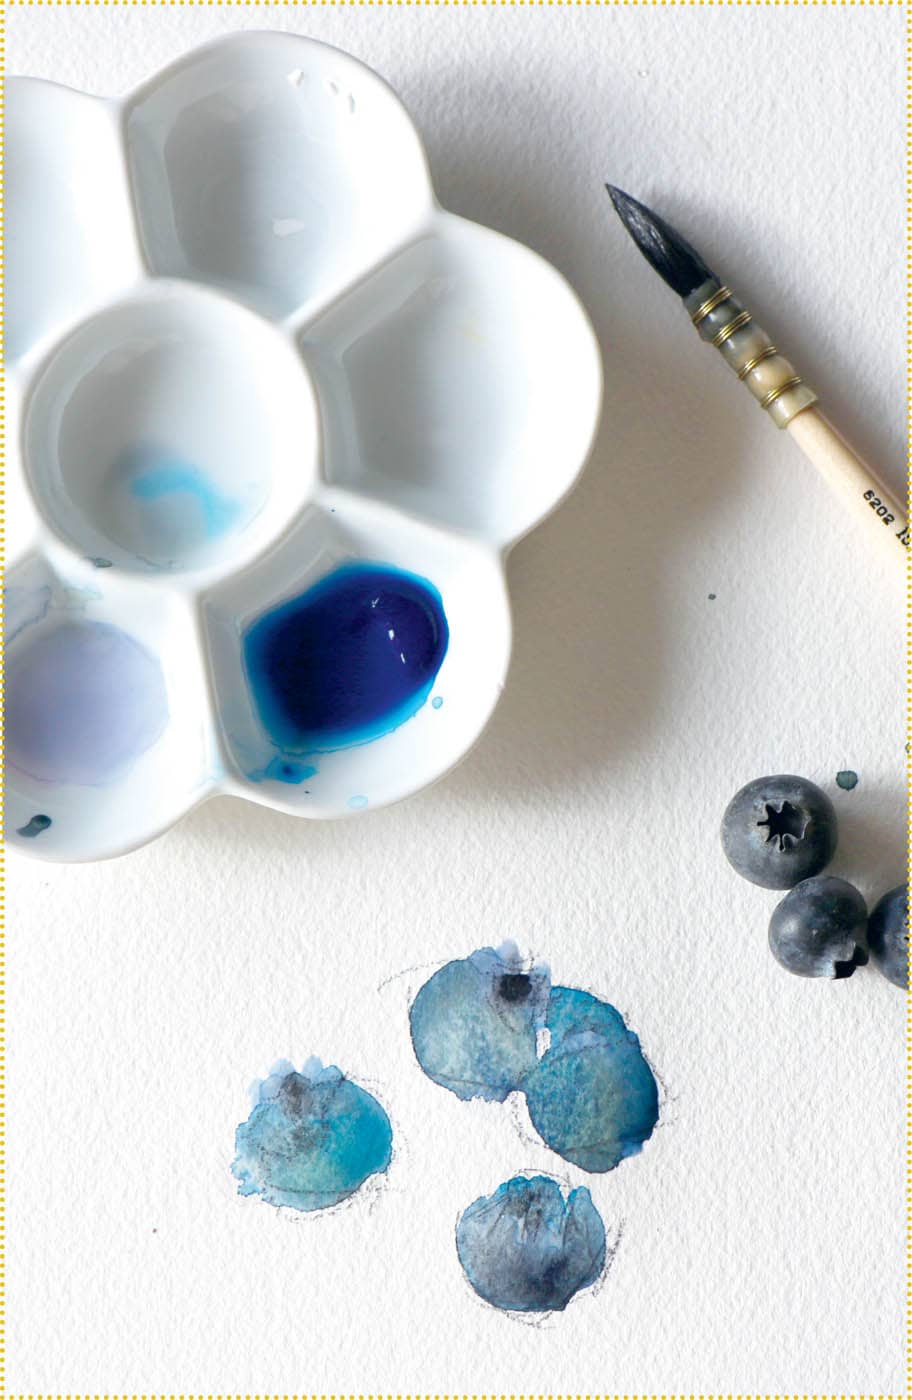
Sketch out some blueberries. They are round, but slightly flat with a crown for a stem. Paint the blueberries with a dark blue mixture. Add some rose to the blue and a touch of burnt sienna. Add some black or blue-black to the center of the crown stems. Use a pale watered-down blue for the lightest color of the crowned stem. It’s okay if some paint goes outside the lines.BLUEBERRIES
STEP 1:
STEP 2:

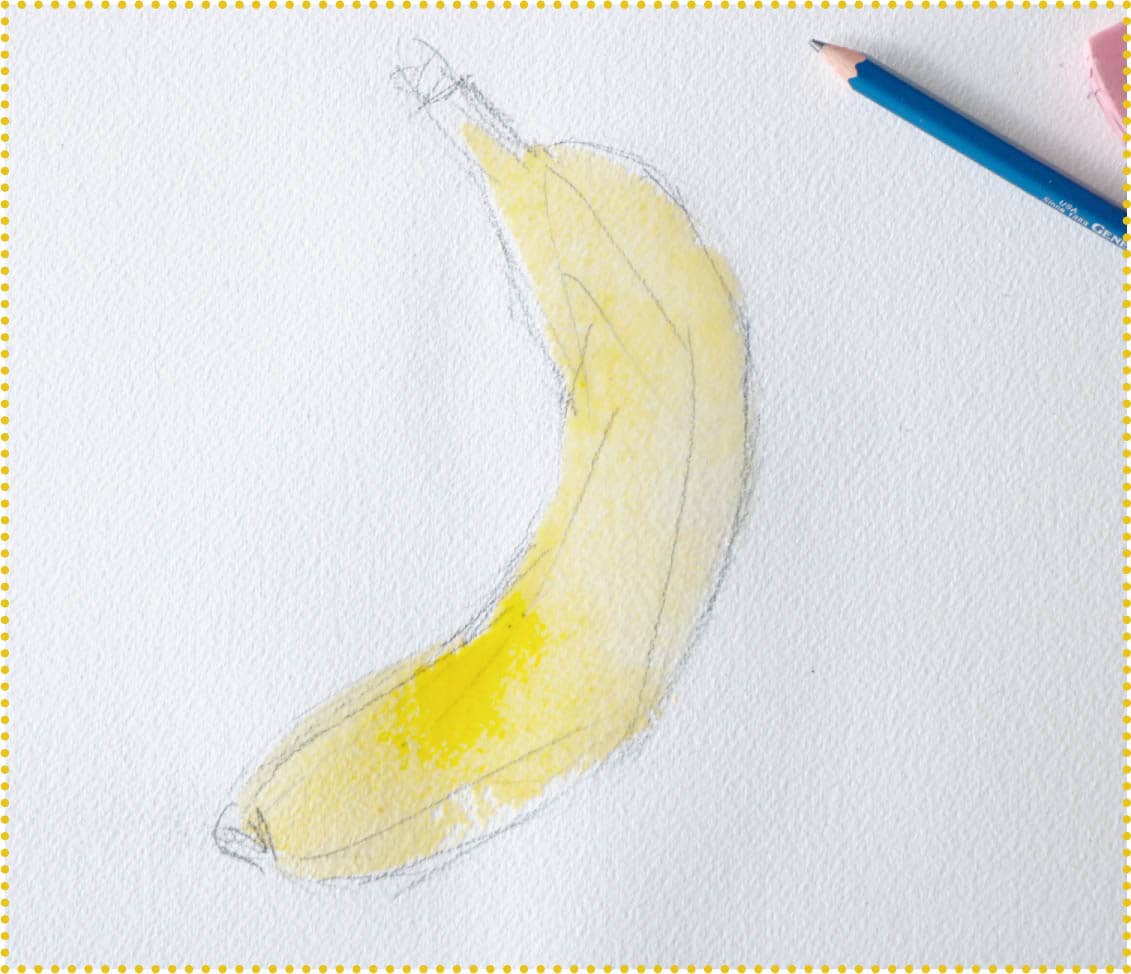
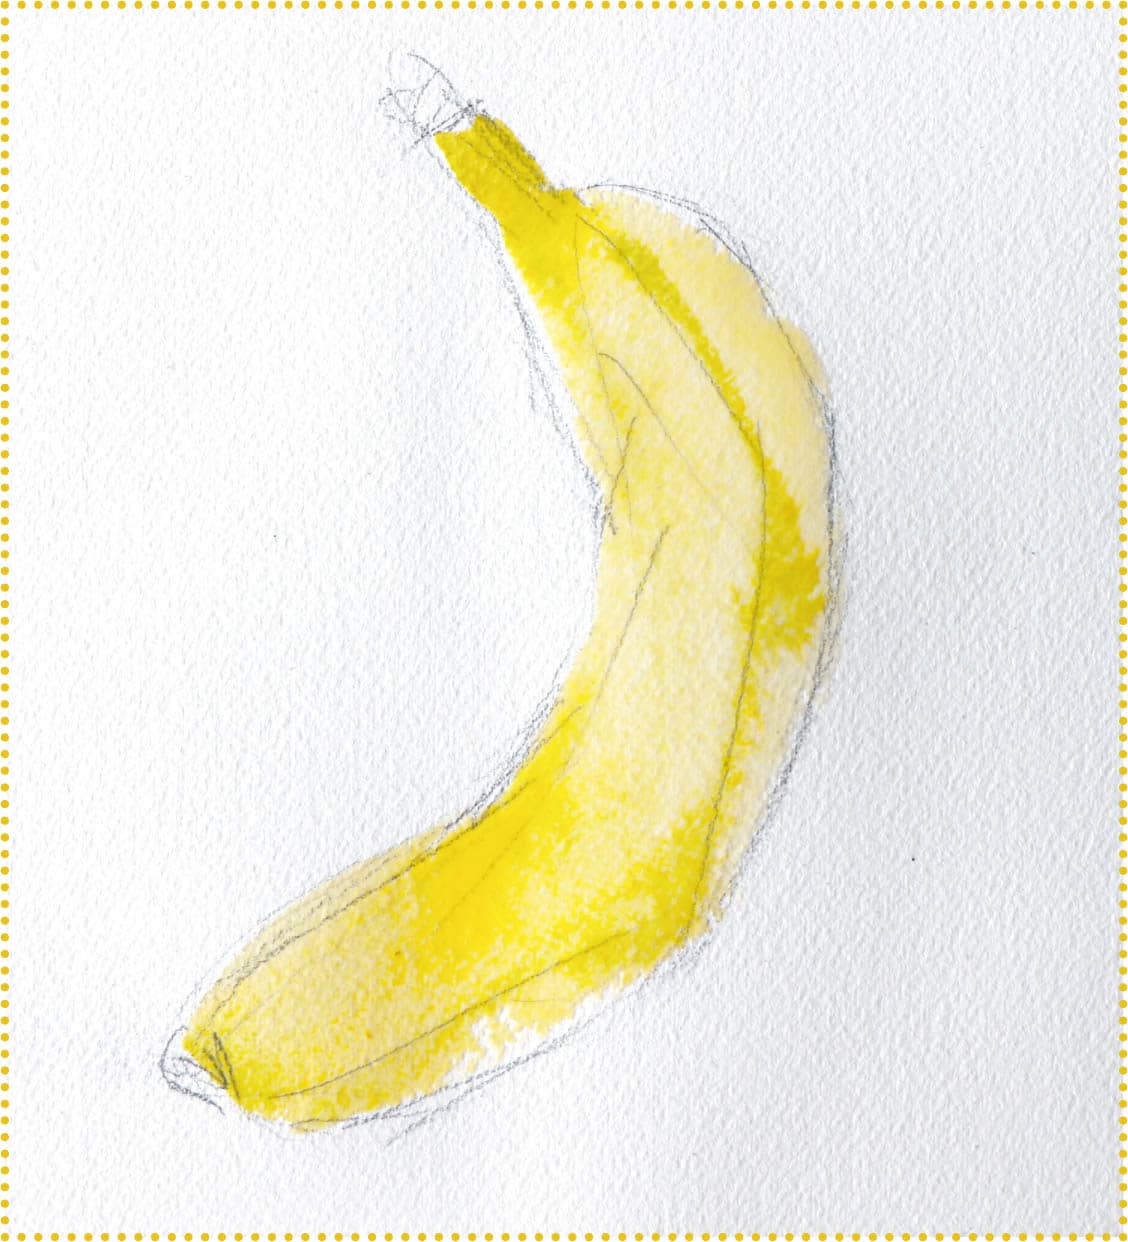
Use straight yellow and a round brush for the first wash of color. Add some warm green to the stem and end of the banana. Tone the green down with burnt sienna so that it looks slightly brown. Use the tip of a round brush to paint the ribs of the banana peel wet-into-wet. Add brown paint to the stem and end of the banana. Add a touch of black to create the darkest color at the tip of the banana. Create a violet by combining your red (or pink) and blue paint. Mix the violet into the yellow for the shaded side of the banana. Use the tip of a round brush to add more definition to the ribs of the banana peel. Add more plain saturated yellow the center of the banana.BANANA
STEP 1:
STEP 2:
STEP 3:

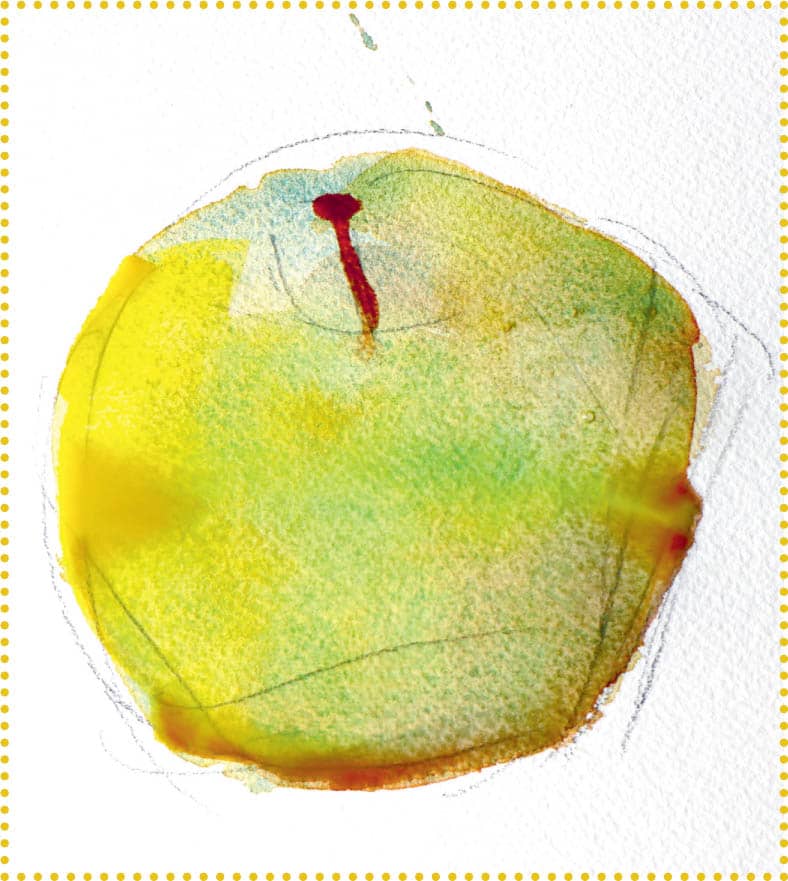
Start by sketching the apple. Erase any unwanted lines. Mix a red paint for the apple. I used a rose mixed with some burnt umber and a little green. Add some yellow to the red mixture and paint the top of the apple behind the stem, as well as the shaded side of the apple. Mix a dark red for the shaded side of the apple using a darker green and/or some black paint added to the red mixture. I make two different mixtures: one medium dark mixture, and one very dark mixture. Paint the shaded side of the apple. Add some inside the stem area, if needed, to create the shadow area by the stem. Paint the center of the apple with another layer of saturated pink-red mixture. This will be the brightest part of the apple, both front and center. Add some yellow to the saturated red mixture for the highlighted side of the apple (the side where the light hits the apple). When apple is dry, touch up the stem with more brown paint, and add a shadow of the stem onto the apple, if desired. Start by sketching your apple. Mix yellow, blue, and a touch of red or burnt sienna for the green. Use a round brush to paint the apple. If paint splatters or drips, simply consider it as added interest to the painting. Add more green paint to the center of the apple to make it come forward on the paper. Create dark green paint by adding red or black to the green paint. Apply to shadow side of the apple. To balance and soften the shadow area, add a bit brighter green paint mixture to center of the apple. When paint is dry at the top of the apple, apply brown paint to create the stem of the apple.APPLES
STEP 1:


STEP 2:
STEP 3:

STEP 1:

STEP 2:
STEP 3:

Sketch the lemon shape. Use two different yellows: aureolin yellow is a little cooler than cadmium yellow. Paint the entire lemon using a flat or round brush and yellow paint. For the shaded side of the lemon, add violet to the yellow mixture. Wet the paint to blend, if necessary. Add a touch of green to the stem. Add more of the violet mix to the shaded side of the lemon, and then add cadmium yellow to the center of the lemon to add depth. Remember, watercolors are less vibrant once dry.LEMON
STEP 1:

STEP 2:

STEP 3:

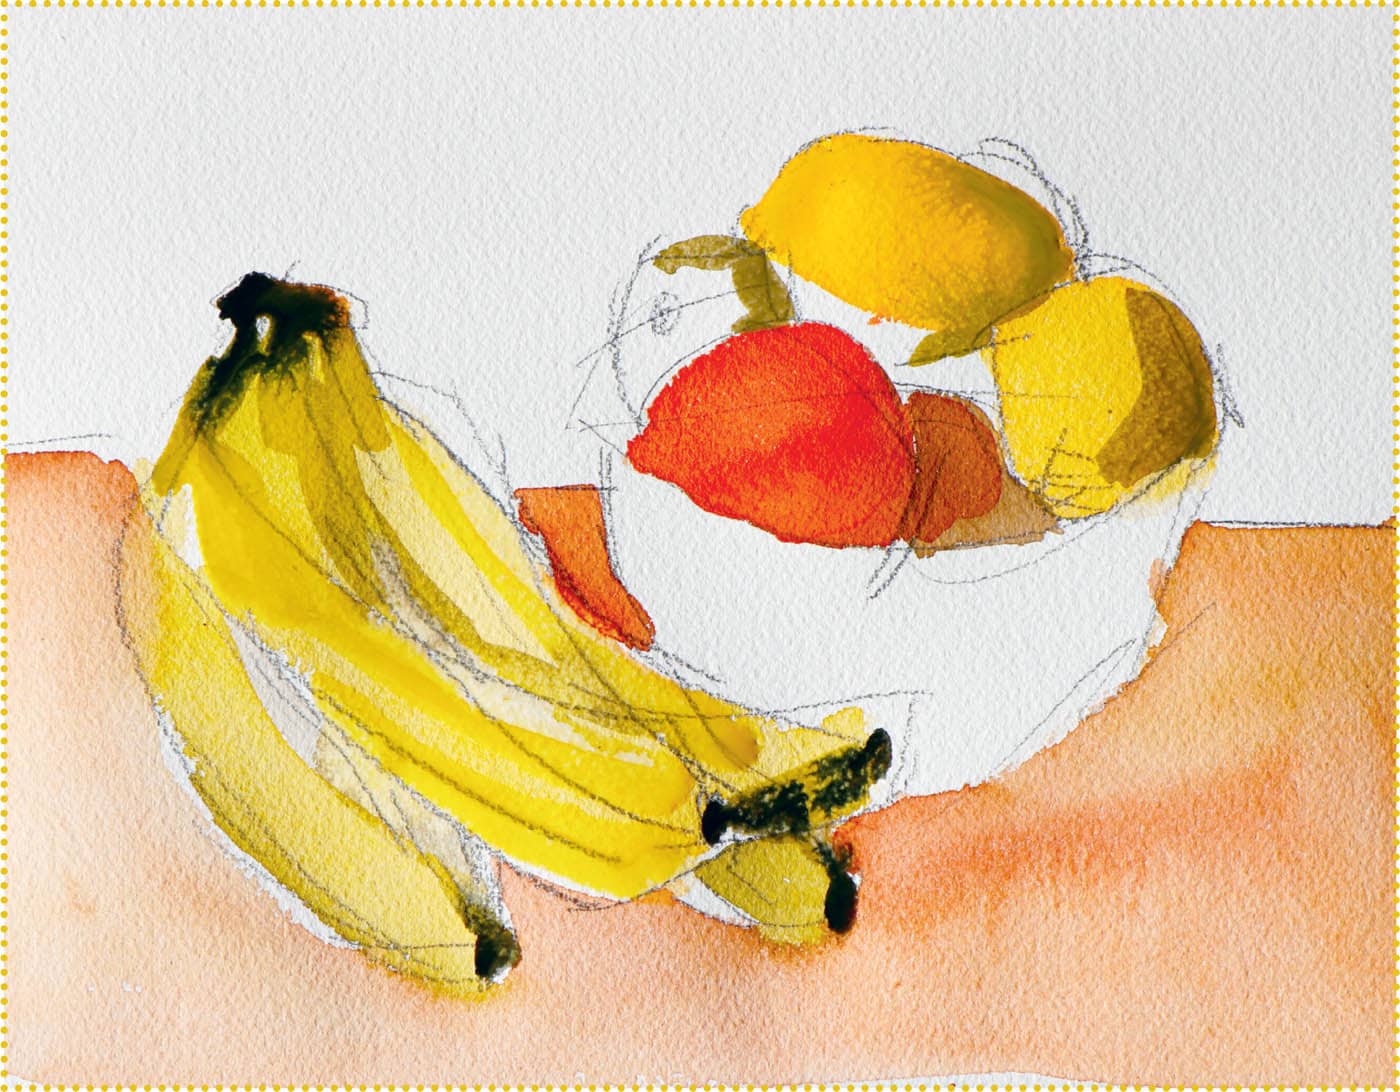
Start by drawing your bowl of fruit on the table. Mix orange by combining yellow and red paint. Paint the orange if you are using oranges for your painting. Now add some blue to the orange mix to create the shaded darker side of the orange and the orange in the shadow area of bowl. Add some yellow to the lemons and bananas. Add some violet to the yellow paint on your palette. Add shaded areas to the bananas and lemons. Remember, bananas have squared sides; determine which side is bright and which side is in shadow. Mix brown and black together for the stem and ends of the bananas. It’s okay if the paint runs a bit. Paint more shadow to the lemons, using either yellow mixed with violet or yellow mixed with blue or black, and complete the table. Paint the background a dark brown behind the bowl of fruit and a light blue by the bananas. Using a darker color, such as transparent earth orange and blue, paint a shadow of the bowl on the table. It is late in the day, so this shadow is quite long and sharp. Also start painting the shadow side of the bowl with a toned-down blue. Tone down blue by mixing in its compliment, orange, or black or brown. When mostly dry, paint the rest of bowl with a light blue mixture. Add more saturated blue paint to middle and front of the bowl. Fill in all of the fruits with their respective colors, as needed. Make any adjustments and add any details, as desired. I add some shaded areas to the lemons and add more dark values to the background and shadow areas.BOWL OF FRUIT
STEP 1:

STEP 2:
STEP 3:
STEP 4:

STEP 5:
