Everyday Objects
What better way to create art than with everyday objects. Besides the personal touch, everyday objects are convenient and accessible. One can find serious, sentimental, and even whimsical objects for watercolor painting projects.

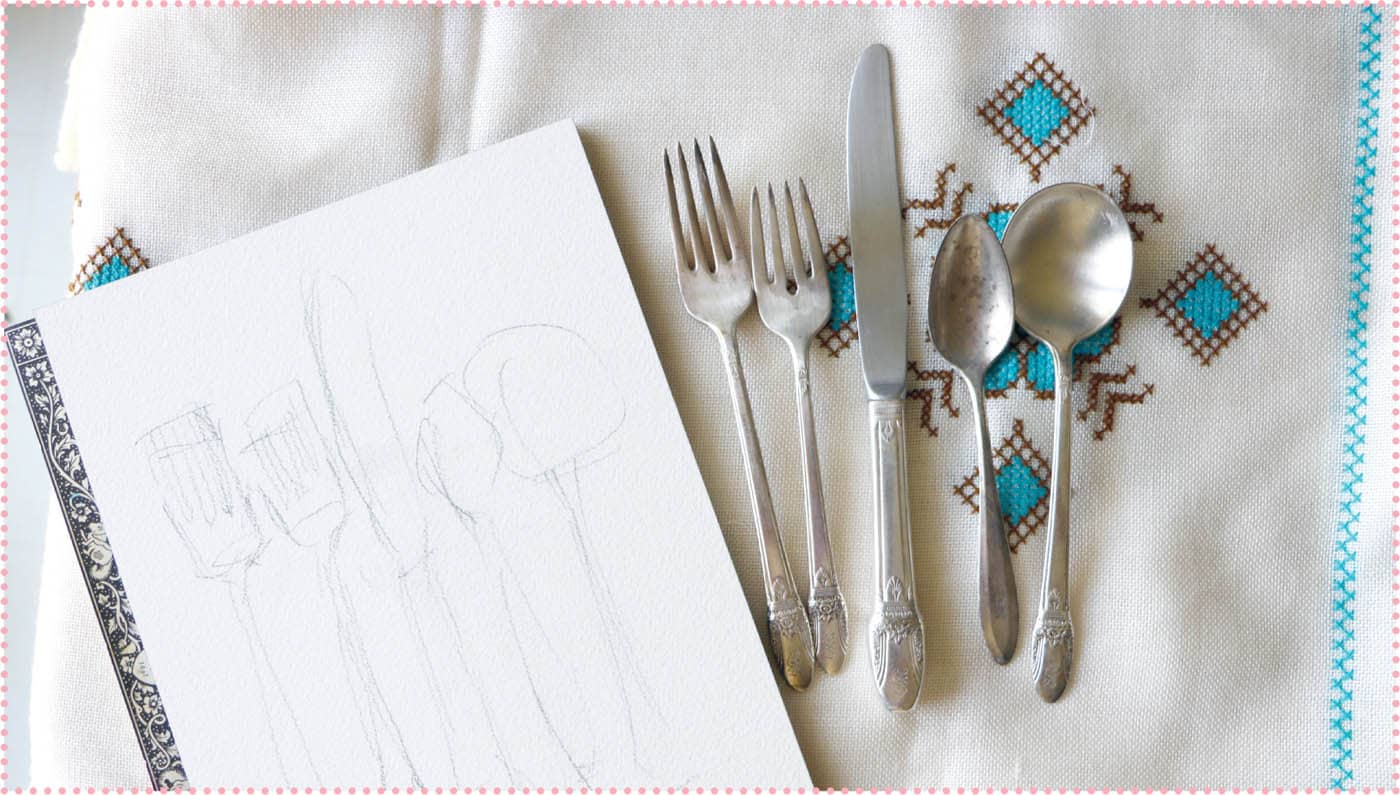
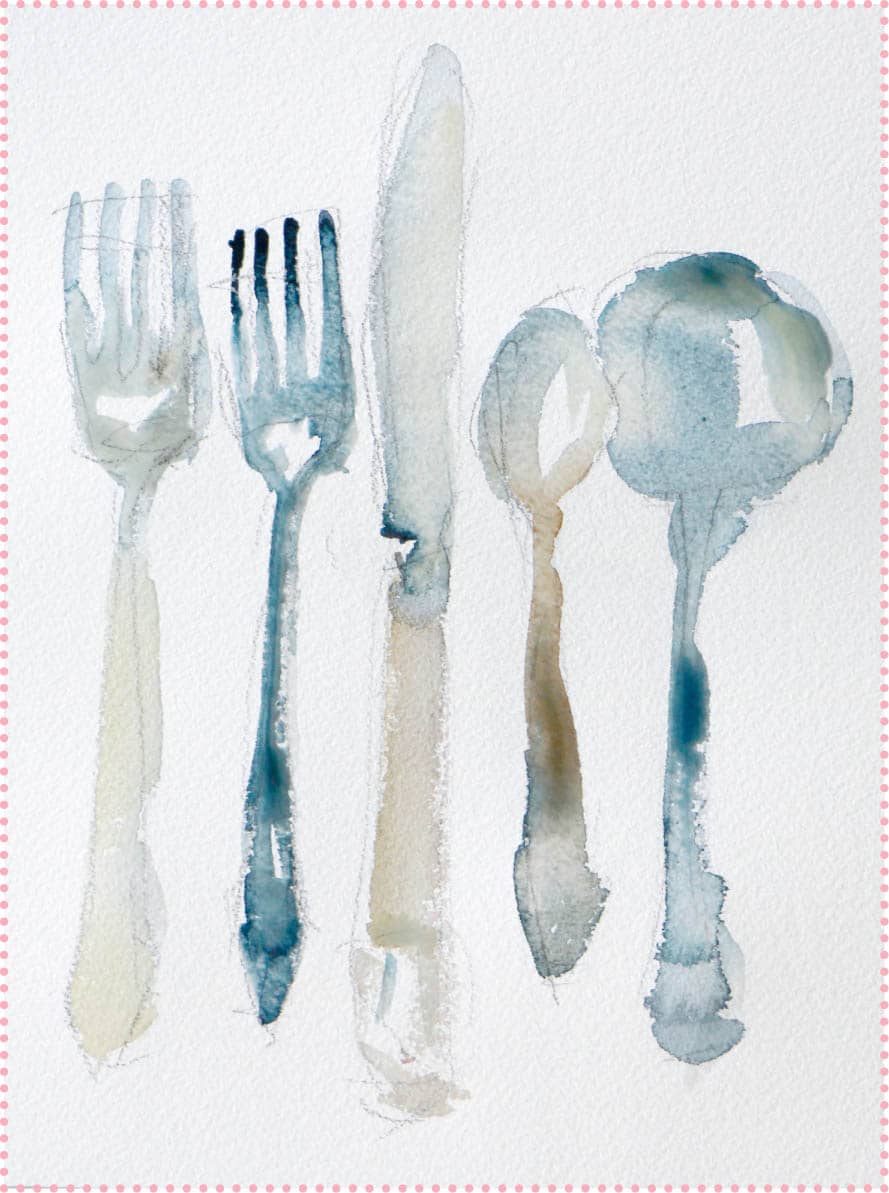
Find some old, tarnished silverware with interesting features and shapes. This project only requires two colors, Payne’s gray and a transparent oxide red lake or transparent earth orange. Toward the end, I did add a bit of muted pink and yellow from my palette, but the project will work with only the two colors, if preferred. Start by sketching the silverware onto your paper. I used my 8-by-10-inch watercolor paper block in portrait orientation (with the long side vertical). Place the tines and bowls of the spoons and forks first. Only sketch the basic shape and the edge of the handles. Don’t worry about all the ornate details. Use the Payne's gray to paint the first spoon. Make sure to leave blank spots for the highlights on the shiny silverware. Add color anywhere you feel needs more detail or extra paint. Working wet-into-wet, add transparent earth orange or oxide red lake to create the tarnished parts or warmer tones of the silver.SILVERWARE
STEP 1:
STEP 2:

STEP 3:
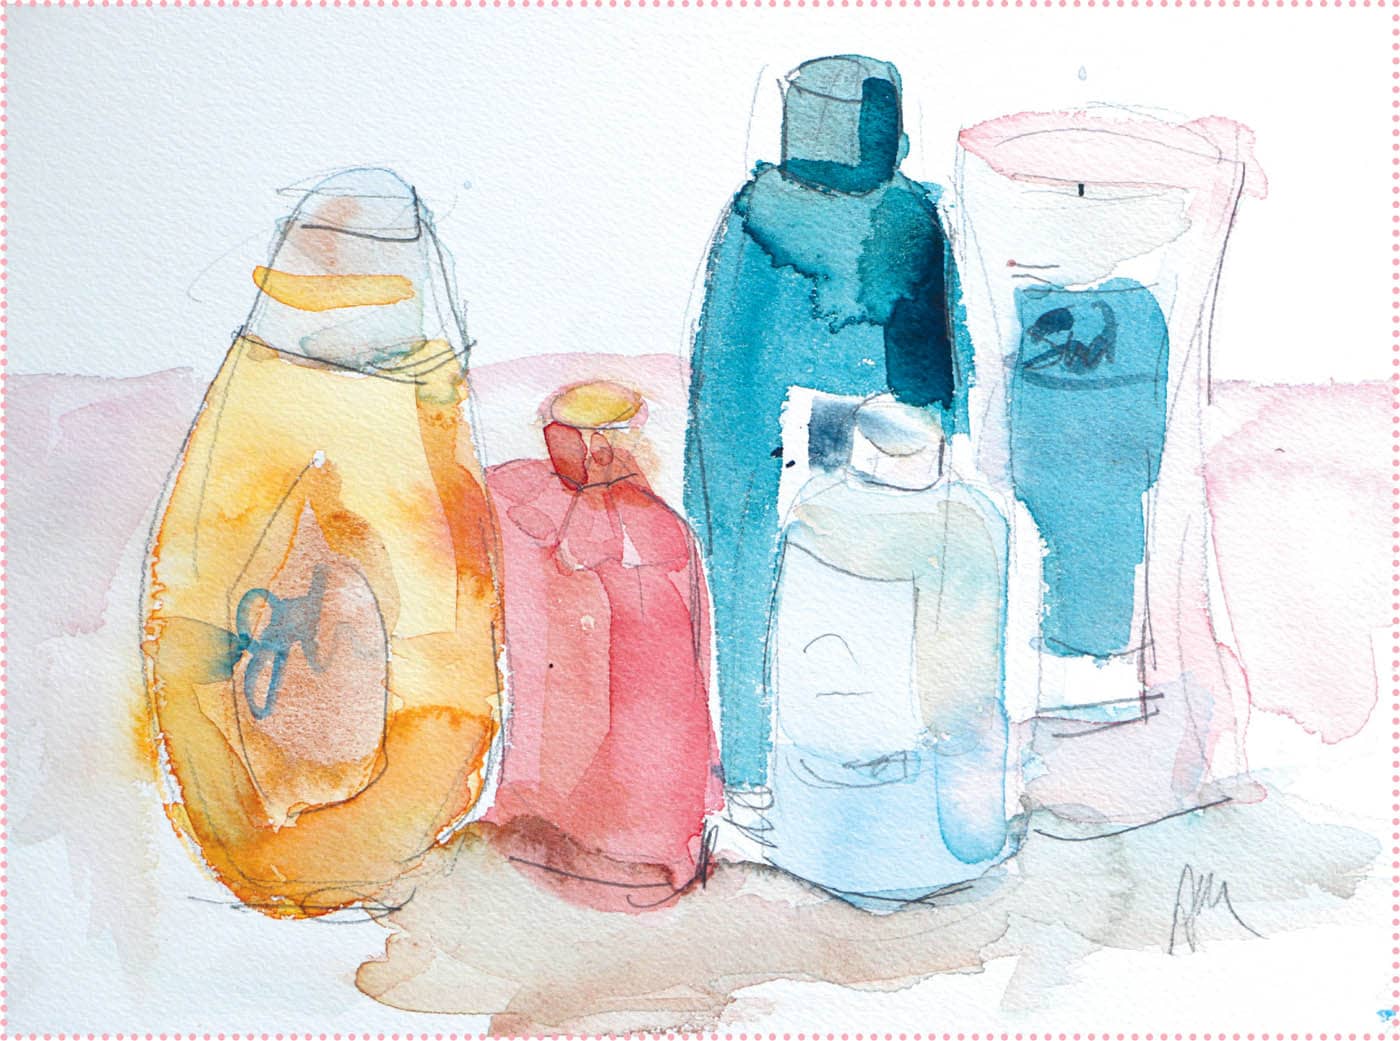
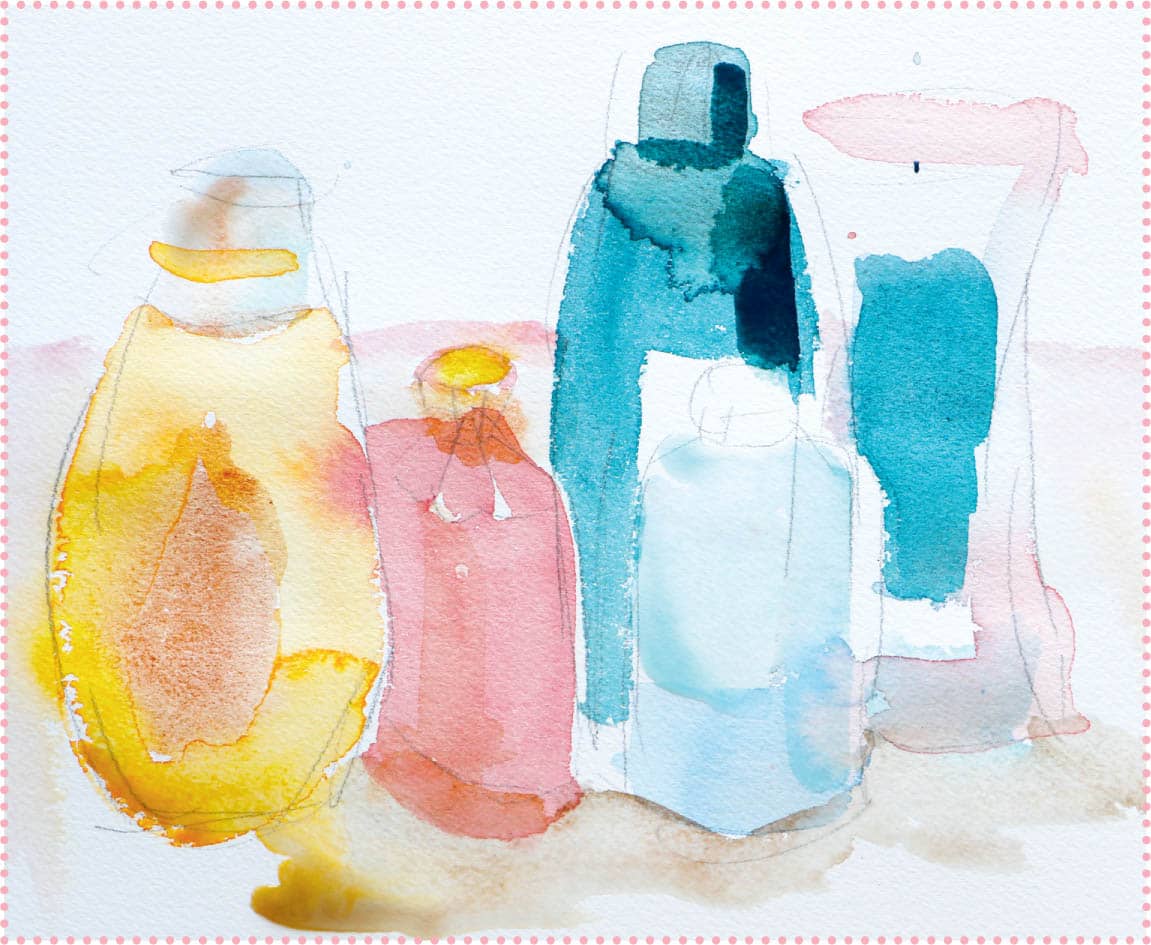
Start your composition by marking on your paper where you want your bottles to be. Mark the bottoms and tops. Allow space so the composition doesn’t get too close to the edges. Use a round brush to paint the bottles of shampoo. For the first bottle, I mixed cadmium yellow and rose. I also used some warm pink for the second bottle and the shaded areas of the last tall bottle. After the paint has dried, if the bottle is clear, add a horizontal line to suggest the level of shampoo inside the bottle. I mixed a dark Berlin blue (MaimeriBlu) to paint the dark blue bottle and the label on the bottle to the right. When painting the labels, wait until the paint around the label is dry so the paint doesn’t run. Once dry, add more subtle colors for the shampoo bottle caps, labels, and shading. Just remember the colors will run together when painting wet-into-wet. Mix some dark blue with transparent oxide red lake (or another brown) to make a dark mixture for the shadow side of the blue bottle. When most of the paint is dry, add some details to the bottles, such as the golden bottle cap on the rose bottle. Let dry. Using a mixture of the primary colors, add a gray shadow along the bottom of the bottles. Some of the wet paint from the bottles may blend into the shadow. Add a horizon line about a third of the way down the paper to suggest the table behind the bottles. Place the horizon line either above or below the halfway point of the paper. Don’t go overboard with the details. Suggest writing on some of the labels, which may run slightly into the wet colors for a loose and painterly effect. I also add a bit more color to the table and across the different facets of the bottles and caps. Let the painting dry completely. Using a pencil, add any additional details and outlines. Again, avoid too many fine details to keep the painting loose. Here I outline some of the bottles’ softer edges and add some details like label edges and bottle caps.BOTTLES
STEP 1:

STEP 2:

STEP 3:

STEP 4:
STEP 5:

STEP 6: