
Creating a Repeater
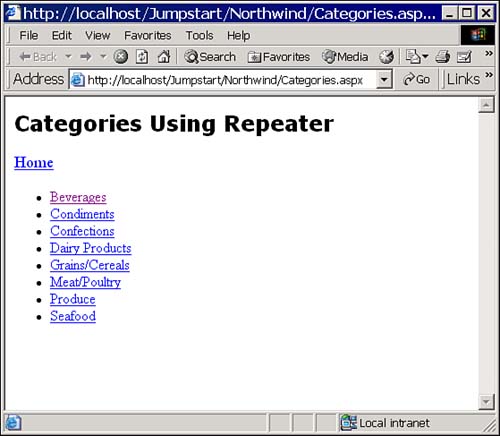
The following set of steps walks you through creating a simple demonstration of using the Repeater control. For this demonstration, you'll create a page that reads product category information from the Northwind SQL Server sample database, and creates a list, as shown in Figure 18.1. |
Figure 18.1. Creating a list of data items using the Repeater control.
To get started working with the Repeater control, you'll need to both create a new demonstration page and add a link to Main.aspx that navigates to the new page. To get started, follow these steps to modify Main.aspx:
1. |
Open Main.aspx in the page designer. |
2. | |
3. |
| Property | Value |
|---|---|
| ID | hypCategories |
| Text | Categories |
| NavigateURL | Categories.aspx |
Now, you can create the Categories page that will show you how to use the Repeater control. Follow these steps to create the sample page:
1. |
Select Project, Add Web Form from the menu bar. | |||||||||||||||||||||||||||
2. |
Name this new Web Form Categories.aspx. | |||||||||||||||||||||||||||
3. | ||||||||||||||||||||||||||||
4. |
Add Label, HyperLink, and Repeater controls to the page and set the properties of each as shown in Table 18.5. When you're done, the page should lay out as shown in Figure 18.1. As you can see in Figure 18.2, you'll need to switch to HTML view in order to do any work with this control—there's no interface within the page designer.
| |||||||||||||||||||||||||||
5. |
Click the HTML tab at the bottom of the designer window to switch to HTML view. |

Adding the Header and Footer Templates
Because bulleted lists in HTML start with <ul> and end with </ul>, you can put those tags in the HeaderTemplate and FooterTemplate elements, respectively. Follow these steps to set up the header and footer templates:
1. |
Find the following element within the page's HTML: <asp:Repeater id="repCat" runat="server"></asp:Repeater> |
2. |
Between the start and end <asp:Repeater> tags, insert the following HTML, which defines the header and footer templates: <HeaderTemplate> <ul> </HeaderTemplate> <FooterTemplate> </ul> </FooterTemplate> |
TIP
As you type, you'll see that Visual Studio's editor helps out: It provides a list of available templates and elements, and you can simply choose from the supplied list.
Adding the Data-Retrieval Code
Follow these steps in order to provide the code that's required to retrieve the data from SQL Server:
1. |
Press F7 (or use the View, Code menu item) to bring up the code-behind file for the page. |
2. |
Add the following procedure within the page's class to retrieve the data, set the Repeater control's DataSource property, and then bind the data: Private Sub RepeaterBind()
Dim ds As DataSet
Dim strSQL As String
Dim strConn As String
strConn = Session("ConnectString").ToString
strSQL = "SELECT CategoryID, CategoryName " & _
"FROM Categories ORDER BY CategoryName"
ds = DataHandler.GetDataSet(strSQL, strConn)
repCat.DataSource = ds
repCat.DataBind()
End Sub
|
3. |
Adding the ItemTemplate Element
The next goal is to add the ItemTemplate element to the Repeater control. This template causes the control to display data, one row at a time, from the control's data source.
Follow these steps to add the template and to test out the page:
1. |
In the Solution Explorer, select the Categories.aspx page. Double-click to load the page. |
2. |
Select the View, HTML Source menu item to view the page's source. |
3. |
Find the HeaderTemplate and FooterTemplate elements you inserted previously. Between the two templates, insert the following element (note the bound expression). This template will simply display the CategoryName from the Categories table in a bulleted list: <ITEMTEMPLATE>
<LI>
<%# Databinder.Eval(Container.DataItem, _
"CategoryName") %>
</LI>
</ITEMTEMPLATE>
|
4. |
In the Solution Explorer window, right-click Categories.aspx and select Build and Browse from the context menu. Verify that the page displays a bulleted list of categories. |
5. |
Close the browser and save the project. |
The HTML you added can be confusing, so take the time to review again:
The DataBinder object provides support for evaluating data binding expressions at runtime.
The DataBinder.Eval method evaluates its parameters, at runtime, and retrieves a value from the control's data source.
The Container class represents the control that's currently being rendered (the Repeater control, in this case).
The Container.DataItem property returns the current row of data from the data source.
The field name, CategoryName, indicates which field to retrieve from the data source.
Combining all these concepts together provides a somewhat complex expression that retrieves a value from the data source at runtime, based on the expression you create at design time.
You've now seen just about all the Repeater control can do—it displays a repeated list of values from a data source. There's more to the control, of course, and the rest of the chapter digs into some of the details. But the basics are all here—you create templates describing the various parts of the display, and the Repeater control repeats the layout for each row in the input data source.
Adding a Hyperlink
You've created a simple bulleted list, but that wasn't the goal—you need to add links to each of the bullets so that you can use them to navigate to a page that displays category detail information. To finish the page, you'll need to add a HyperLink control (using the <asp:hyperlink> tag) between each <LI></LI> pair. To add this feature, follow these steps (we've provided the text for this step in a text file, so that you don't need to type it yourself):
1. |
Open JumpstartRepeaterRepeaterHTML.txt in Notepad or any text editor. |
2. | |
3. |
Once you're done, the Repeater control's HTML should look like this: <asp:repeater id="repCat" runat="server">
<HEADERTEMPLATE>
<UL>
</HEADERTEMPLATE>
<ITEMTEMPLATE>
<LI>
<asp:HyperLink id="Hyperlink1"
NavigateUrl='<%# "CategoryDetail.aspx?ID=" &
Databinder.Eval(
Container.DataItem, "CategoryID")%>'
Text='<%# Databinder.Eval(
Container.DataItem, "CategoryName") %>'
Runat="server">
</asp:HyperLink>
</LI>
</ITEMTEMPLATE>
<FOOTERTEMPLATE>
</UL>
</FOOTERTEMPLATE>
</asp:repeater>
|
4. |
Press F5 to run the project, click the Categories hyperlink, and verify that you see the list of category names in the browser window. You can select the links but they'll fail at this point. (You haven't yet supplied the CategoryDetail.aspx page, so the links can't work.) |
5. |
Close the browser, and save the project. |
You've just added a HyperLink control, with its NavigateURL and Text properties set to include values from the control's data source. The NavigateURL attribute should contain, at runtime, an expression like this:
CategoryDetail.aspx?ID=17
The CategoryID value (17) needs to be supplied for each row, as the control renders its display. Therefore, the NavigateURL attribute contains this expression, which retrieves the CategoryID value at runtime for each row and appends it to the URL:
NavigateUrl='<%# "CategoryDetail.aspx?ID=" &
  Databinder.Eval(Container.DataItem, "CategoryID")%>'
The Text attribute should contain a category name at runtime, and the control's HTML therefore contains this expression:
Text='<%# Databinder.Eval(
  Container.DataItem, "CategoryName") %>'
This expression retrieves the row's CategoryName field and displays it as the text of the hyperlink.
So far, you've created a simple Repeater control and had it render Header, Footer, and Item templates. The Item template contains information pulled from a SQL Server database, including CategoryName and CategoryID fields.