Appendix A. Help and Installation
Installing Access 2003
Like all Microsoft Office programs, Access is pretty simple to install. The hardest part may be typing that 25-digit Product Key number (and making sure you don’t lose it in case you ever have to reinstall). If you have Microsoft Office 2003 on your computer, you probably already have Access 2003. To check, click Start menu → All Programs → Microsoft Office, and see if Access is on the submenu.
Note
To install Access 2003, your computer has to run on Windows 2000 or Windows XP. If you’re on Windows 2000, Microsoft recommends installing Service Pack 3 and any subsequent updates first. Choose Start → All Programs → Windows Update to check for and install updates. You can also search for updates at www.microsoft.com/windows.
Installing Office
If you’re upgrading or installing Office 2003, you’re best off doing a full install or upgrade, which gives you a clean, fresh copy of all Office programs, auxiliary programs, and files. Nothing breaks up your workflow like getting an error message saying that Access needs you to install additional software.
To install all Office programs and components:
Exit all running programs, and then insert the Office 2003 CD.
The CD launches its own setup and install program. (If it doesn’t, double-click the Setup icon.) You may see messages like “Preparing to Install.”
In the first Setup screen, type your Product Key.
If you make a mistake, you get to keep trying.
Next, the Setup program asks for your name and initials. When you’re done typing them, click Next.
Access (and other Office programs) uses this as the Author information in the File → Properties box for all files you create. Microsoft pledges not to reveal any personal information you type into its software.
Turn on “I accept the terms in the License Agreement” and click Next again. On the next screen, select an installation type.
Install Now (or Upgrade Now) is your best bet, especially if you choose the option to remove older versions, which saves space on your computer’s hard drive.
When the setup program lets you know it’s done, click OK.
Installing Access Only
If you didn’t install Access when you first installed Office, you can simply add it, as long as you have the CD and Product Key. Here’s how to get Access onto your computer.
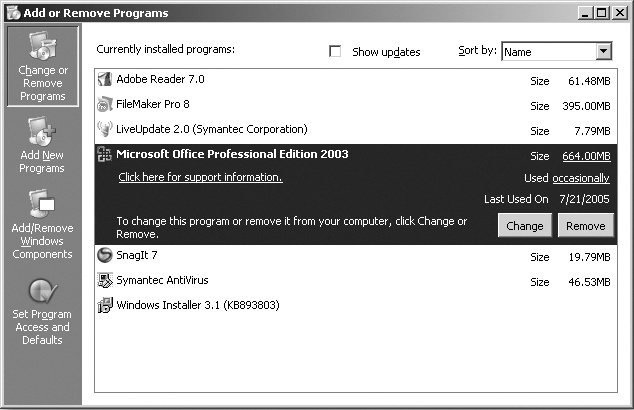
Insert the Office 2003 CD. Next, choose Start → Control Panel → Add or Remove programs.
The Add or Remove Programs window opens (Figure A-1).
In the left panel, click the Add New Programs icon. In the panel that opens, click the CD or Floppy button.
Your computer locates the Office 2003 CD. The Run Installation Program box should open and show SETUP.EXE. If so, click Finish. If not, click Browse, and choose your CD drive.
When the setup program launches, follow the installation instructions above and choose the Custom Install option. Click Next.
You’ll see a screen that lets you choose which Office components to install. Click the plus (+) signs to expand each heading and see all the individual programs, plug-ins, and example files you can choose to install or remove.
When you’re done customizing, click Next.
The setup program installs Access. Click OK to close Setup and get back to work.
Access Help
In Access, help is never far away. Some forms of help show up unbidden, like the Tip of the Day that pops up every time you open the program, and the screen tips that appear when you point to a button or toolbar. In addition to the help that’s right on the screen in front of you, help documents are stored on your computer, and Microsoft Office Online features an entire Web site full of resources.
In this appendix, you’ll see how to visit the online support site, download Access templates, get advanced training through tutorials, and post questions for other people who use Access, including experts designated as Microsoft Most Valued Professionals (MVPs) because of their wealth of experience with products like Access.
Where to Look for Help
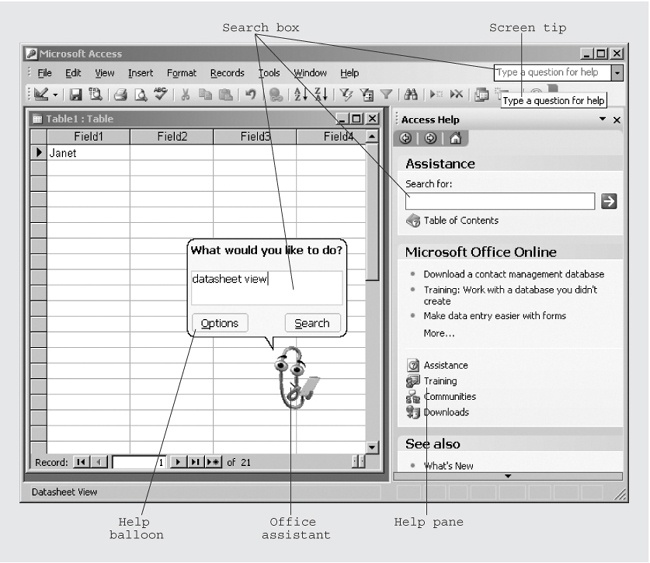
The best answer is usually the one you get first, so here (in order from quickest and simplest to most time-consuming and complex) are the ways you can summon Access’s help system (see Figure A-2).
Screen tips
The quickest way to get help on a feature is to point to it. A small, yellow screen tip identifies the toolbar or icon under your mouse pointer. Often, that’s enough of a clue. If it’s not, type the name of the feature in the menu bar search field or Office Assistant, as described next.
Menu bar
The box at the upper right of Figure A-2 is actually a help search field. Type a word or two of what you’re curious about and press Enter. The task pane opens (Figure A-3), showing the list of related help documents on your computer (and on Microsoft’s Web site, if you’re connected to the Internet).
Office Assistant
So many people complained about “Clippy,” the annoyingly helpful Office Assistant character, that Microsoft no longer has him appear automatically. You have to turn him on by choosing Help → Show the Office Assistant.
When the Assistant is on your screen, error messages show up in a speech balloon instead of in a boring message box. These messages often include a link to a corresponding help page. Also, occasionally the Assistant notices what you’re trying to do in Access and offers advice and more help links. If you can’t stand this behavior, choose Help → Hide the Office Assistant to turn it off. You can always search for help, when you’re good and ready, in the task pane, described next.
Tip
If you like having an onscreen assistant, but just don’t like Clippy, you can choose another character. Click the Assistant to display his help balloon, and then click Options. Click the Gallery tab to see all the Assistants installed on your computer. (And if you don’t see any additional Assistants, refer to the installation section at the beginning of this appendix.)
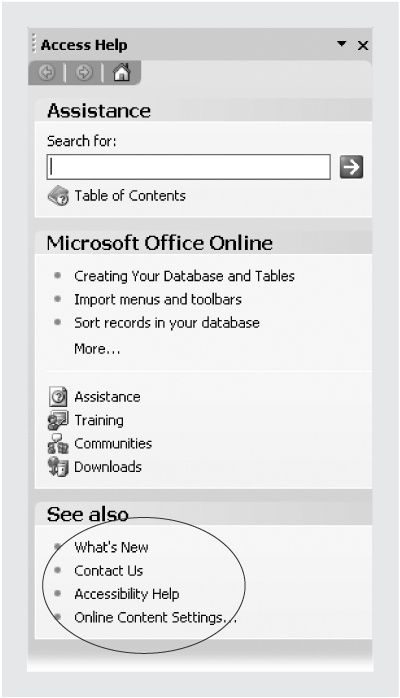
Help Task Pane
The Access task pane has a help panel (Figure A-3). It opens whenever you summon it from the Assistant or the search field in the menu bar (Where to Look for Help). If the task pane is open, click its top bar and, from the pop-up menu, choose Help to get to the help pane. You can also choose Help → Microsoft Access Help to display it.
Whenever you search for help using any of the methods described in this appendix, Access automatically searches the online help screens (if your computer is currently connected the Internet) and a smaller set of help screens installed on your computer and displays the results on the task pane. You can tell the difference by the question mark (online) and book (on-your-computer) icons next to each link. Click one of the links to read the full article in the task pane.
Note
When you click one of the offline topics, it pops up in a separate window to the right of the task pane. (In general, Access gives preference to the online help information, since it’s newer and freshly written.)
When you’re using Help, the task pane has all the navigation features you need in one place. As shown in Figure A-3, here are the highlights:
The Search pop-up menu is where you enter the keywords or a question. Click the arrow button next to it or hit Enter to start the search. If you can’t seem to come up with the right search term to find the information you’re hoping for, try the Table of Contents link.
Clicking the Table of Contents link displays all the help pages both on your PC and online, organized by category. When you click a category, a list of pages and subcategories opens up beneath it.
Contact us opens up the contact Web page for Microsoft Office products. This page mostly offers links to parts of the Office Web site described in the next section. If you click “Contact a support professional” because you actually want to talk to someone, you’ll probably end up paying money for the privilege.
Online Content Settings opens up a very simple Options window for the help system. You can turn online help on and off (forcing help searches to look only in the installed help pages), choose to include any relevant templates (Finding Help Articles and Training Tutorials Not Listed) in help results, and so on.
The Accessibility Help link opens a page of instructions for navigating the Help system with keyboard shortcuts, a more legible font size and color, and so on.
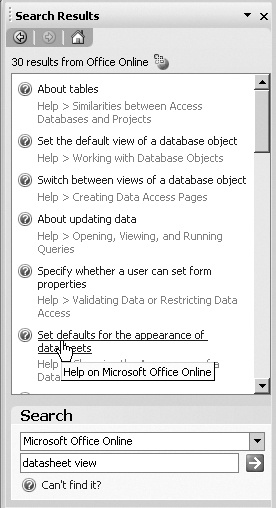
Can’t find it? After Access performs a search and shows your results (Figure A-4), this link appears at the bottom of the task pane. Clicking it opens up a page with hints on improving your search techniques.
Visiting Microsoft Office Online
You can choose a few ways to get to Microsoft Office Online. You can go directly through your Web browser by typing www.microsoft.com/office (this address redirects you to the actual site, the address of which sometimes changes). But if you’re already working in Access, and your Internet connection is up and running, it’s quicker to choose Help → Microsoft Office Online, or, on the task pane, click the Connect to Microsoft Office Online link.
Either way, you see the main screen shown in Figure A-5, at the left. Scroll down and you’ll see links to a host of specialty areas that:
Give you access to online tips, help articles, how-to steps, and tutorials on databases in general and Access in particular.
Let you check for updates to the software.
Test your Access knowledge through pop quizzes.
Offer the opportunity to view and download templates for different types of Access databases, forms, and reports—these can help you see how others are using the program to create solutions and more powerful record-keeping.
Connect you to a packed library, called the Microsoft Design Gallery Live, of clip art and photographs you can download and use to enrich—or simply “jazz up”—your forms and reports.
Provide demos for other Office products and give you the option to download free 60-day trial versions of other Microsoft programs.
Guide you into Web-based newsgroups where you can post questions, read tips, and get answers to the questions you ask.
Tip
To go directly to the Access page shown at front in Figure A-5, you can also type www.microsoft.com/access in your browser’s address bar.
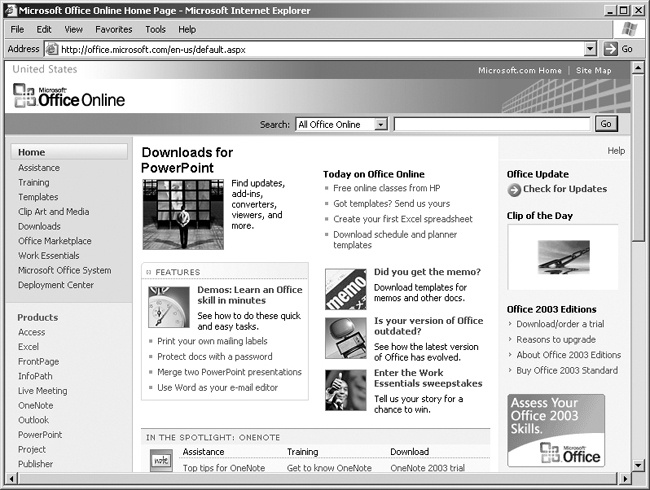
You’ll see Access mentioned several times on the Office Online home page. Those links take you to articles and tutorials, as discussed later in this appendix. In fact, since Office programs work well together, you may get some idea of new ways of using Access by skimming this main page. However, to get to the Access help material you came here for, you have a little more clicking to do:
In the Office Online home page’s left panel, click Assistance. Again, the Assistance page offers some Access resources, but they’re mixed in with information about all the other office programs, too. Halfway down that page, under the Browse Assistance heading, click Access 2003.
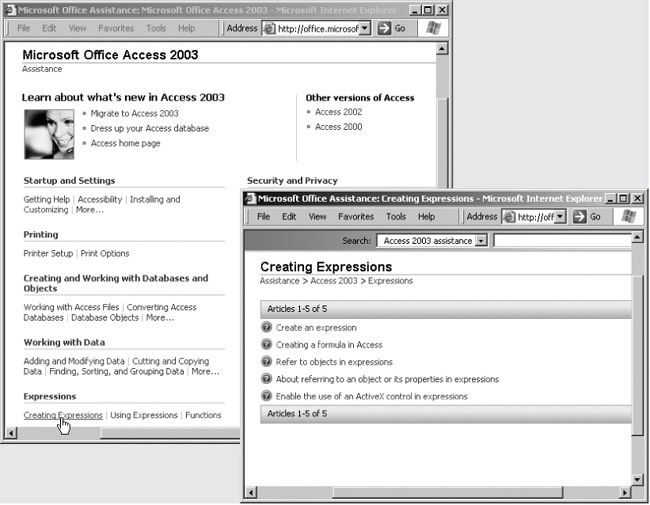
Or, in the Office Online home page’s left panel under Products, click Access (Figure A-6, right). The Access main page has all kinds of Access information, but to get to help pages, scroll down to the Browse Access heading, and click “2003 assistance.”
Either way, the Access 2003 Assistance page opens, as shown in Figure A-6. This dry, no-nonsense page is a sort of index to the online help articles you can read in the task pane in Access. The benefit of looking at them here online is that you can read them in full-sized browser windows and have more than one page open at a time. Also, you may find it easier to navigate from one help page to the next and jump to other parts of the site.
Tip
At the top of the left panel, click Home whenever you want to return to the glitzier Office Online main page.
Here’s an example of how to locate and read featured help articles:
On the Access Assistance page, as shown in Figure A-6, left, scroll down to the Expressions heading. Under it, click the Creating Expressions link.
A new page opens, with links related to the topic of expressions in Access (Figure A-6, right). In this book, expressions come up on pages 175 (Chapter 5) and 222 (Chapter 6).
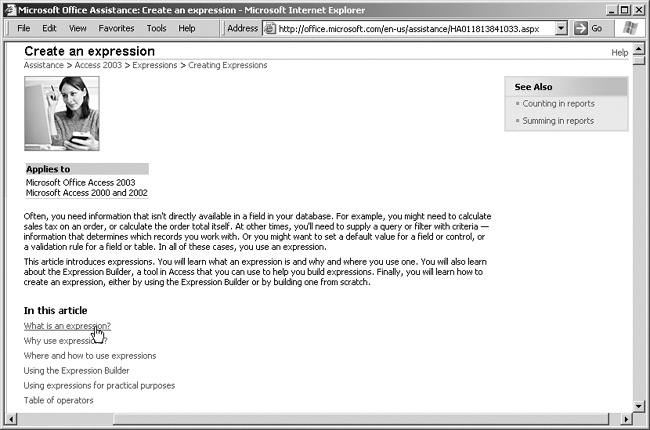
Click the “Create an expression” link.
Finally! The “Create an expression” page opens, as shown in Figure A-7. This article is long, so you’ll have to scroll to read it all. Or, use the list of links that Microsoft thoughtfully provided under the heading “In this article.”
Click “Where and how to use expressions.”
This section of the article discusses the process of adding expressions to your database and provides a step-by-step example. If you scroll down to step 5, you’ll see the words “Expression Builder” are in a different color, indicating that they’re a link.
Click the Expression Builder link.
The page jumps to the “Using the Expression Builder” section of the same article. Stop and read, if you wish.
At the end of the Expression Builder passage, click the <back to top> link.
At the end of each section, a <back to top> link takes you back to the beginning of the article. Next, look at the upper right of the page. The See Also box contains links to related articles.
For example, here you can surmise that expressions have something to do with reports, so if you feel you need more about reports, now’s your chance.
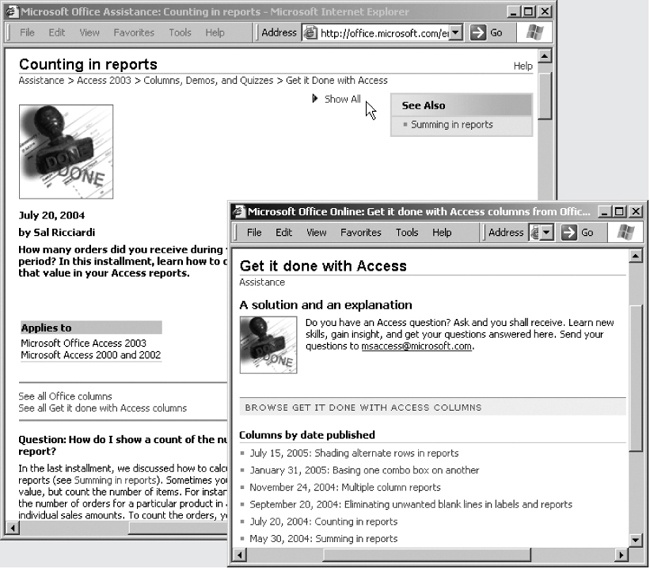
Click the “Counting in reports” link.
The “Counting in reports” page is a different kind of article than a typical help screen; you can see by the name and date that a real live person wrote it (Figure A-8, back). If you scroll down, you’ll see links that reveal more step-by-step tutorials.
Click the “See all ‘Get it done with Access’ columns” link.
The “Get it done with Access” page lists, by date written, several columns written by experts in the field. These pages supplement the usual help screens, and may cover exactly the issue you’re dealing with.
By now you have an idea of the vast sea of online help you’re dealing with. To return to dry land, you can use your Back button, or click Assistance in the left-hand panel.
Learning with Tutorials
Did that stuff about expressions in the previous section leave your head spinning? Performing calculations on your database records really lets you use your information to the fullest in Access, but it’s a topic many people find challenging. Microsoft understands. If help pages are too dry for your taste, you can try the Training tutorials on Microsoft Office Online, complete with audio to guide you along the way, sort of like a virtual classroom.
Tip
Since the tutorials contain audio, make sure your computer’s speakers are turned on, with the volume adjusted to a comfortable level. Better yet, you may want to plug in a set of headphones so you can listen in private, even if you’re doing this from home in the same room where others are talking or watching TV.
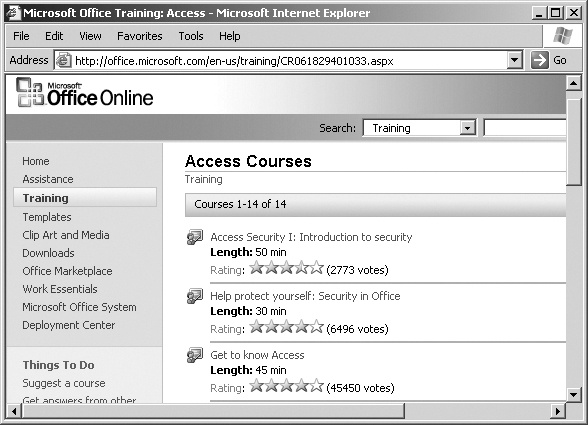
You’ll often see Training tutorials on Microsoft Office Online’s home page, under Featured Courses. You can always get to them by clicking Training in the left panel of any page of the site, and then, under the heading Browse Training Courses, clicking Access. You’ll see a list of courses, as shown in Figure A-9.
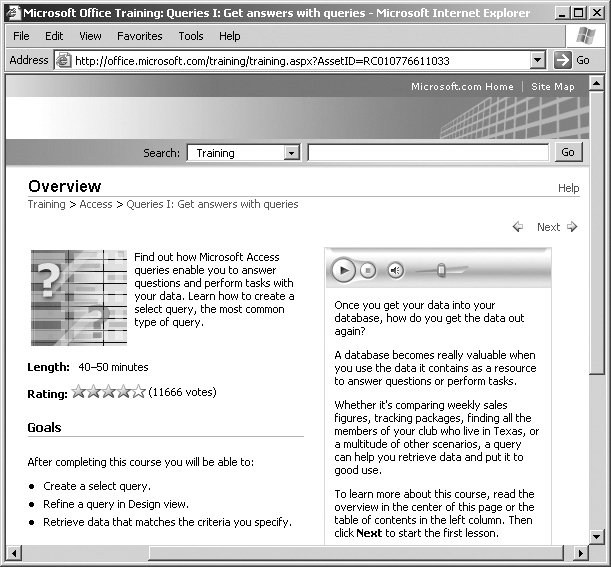
The training session then opens in your browser (Figure A-10), and you can proceed along at your own speed. Many of these modules pause to let you try examples of the information being presented as a way to test your skill.
At the top of the page, click the Next arrow to move forward (or the back-pointing arrow to review). A little control bar lets you play, pause, and adjust the audio volume.
Finding Help Articles and Training Tutorials Not Listed
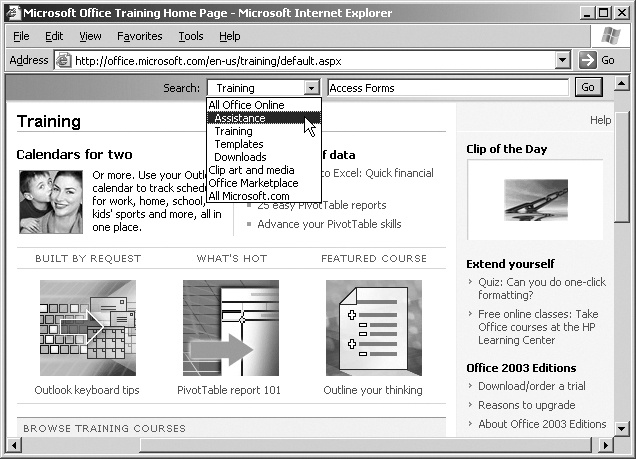
Just about every page on the Microsoft Office Online site features a search tool that lets you type in a topic or click within the Search window to choose from an overall category. You can see one in the top right of Figure A-9, for example.
Suppose you’re taking a Training course on Forms but want to know if the site has an Assistance article on the same subject. Follow these steps to use the search tool:
Click in the list box to the immediate right of Search, and choose either Assistance or All Microsoft Office Online.
The first possibility restricts your search to just those articles appearing in the Assistance area, while the second performs a search throughout the Office site.
Click within the second, right-most window in the Search tool and type Access Forms (see Figure A-11). Click Go.
When the search is complete, your browser opens to a search results page.
Locating and Downloading Access Templates
Members of the Office Online community frequently share templates or copies of special documents, databases, and other files they’ve developed. You can browse these templates to see if any of them look like they hold a solution for you, and then download them. Once they’re on your computer, you can use them just like any of the templates that came with Access. Best of all, you can tinker with their design to better suit your own information.
On the Access toolbar, select File → New, or click New.
One of the options when creating a new database is to use a template for an already existing one—either on your computer or available from the Microsoft Office Online site.
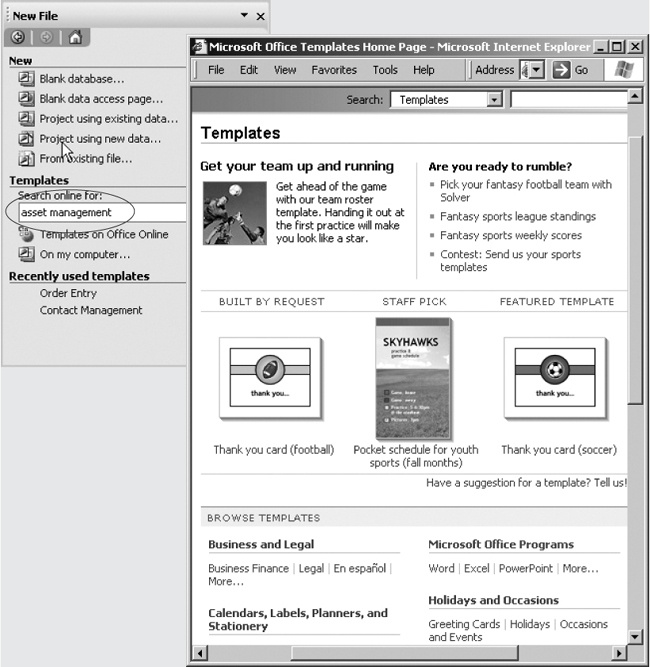
When the task pane opens, on Microsoft Office Online, click Templates, as shown in Figure A-12.
So long as your Internet connection is open and active, your Web browser opens automatically and whisks you to the Templates library online. (The stars are a user-rating system, as described in Figure A-9.)
Figure A-12. On Microsoft Office Online, when you click Templates, Access launches your Web browser and takes you straight to the list. Typing the kind of template you’re looking for in the task pane (circled) is another way to search online.Tip
If you’re browsing Microsoft Office online, you’ll see templates listed on the main page and all over the place. In the left panel, click the Templates link to see them all in one place. Click Microsoft Office Programs to see them listed by program, so you can pick out the ones that are specifically for Access.
Click the name of a template to see a full-page description.
The page usually includes images of the forms in the database template, so you can see what you get.
When you’ve inspected a template online and want it, click Download Now.
Follow the onscreen instructions to save the template on your hard drive. You can keep it in your My Documents folder, so you can double-click its icon to open it, or with the other Access templates in the My Computer → Local Disk (C:) → Program Files → Microsoft Office → Templates → 1033 folder.
Asking Questions and Finding Answers
Newsgroups and Web-based message boards are a popular way for people to either post messages seeking help or offering a tip or trick, or to reply with answers to previously asked questions. Microsoft Office Online offers a broad range of newsgroups and message boards, often including several for different aspects of their many products.
You’ve read this book, used the help options from Access, and maybe even browsed through some of the online resources already covered here, and you’re still stumped. Another alternative is to post a question stating your problem to one of the Access message boards to see if someone can give you a hand.
Follow these steps to post a question (or a tip or trick of your own):
Go to the Microsoft Office Online Access area using any of the methods already discussed. Click the Discussion Groups link.
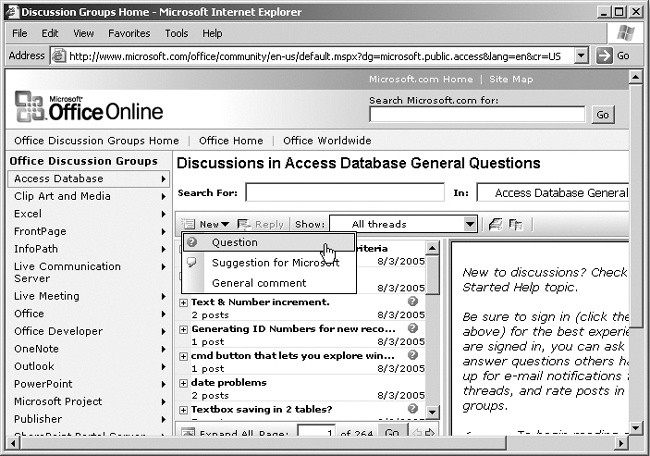
Depending on the speed of your Internet connection, it may take a few moments for the next Web page to open, displaying a list of available discussion groups/message boards. The page automatically opens to the Access General message area, as shown in Figure A-13.
Click New → Question.
To post, you need to sign in using your Microsoft Passport account. If you don’t have one, you’ll be taken to another Web page where you click Register and fill out the required information, including your email address and password, to create an account. If you have a Microsoft Passport account, you’ll be prompted to sign in using your email address and password. After you’re signed in, you end up back on the Discussion Group page, where you may need to click New → Question again.
Pop-up boxes and onscreen prompts may ask you to enter a profile, as well.
When you get to the New Question screen, type a subject line and your question.
Be as clear and concise as you can about what you’re asking. And yes, you may see little more legalese on this screen. Turn on “I accept” to agree to Microsoft’s terms, which basically say that they get to use any great ideas you send in.
If you wish, turn on the “Notify me of replies” checkbox, so that you’ll get an email when someone answers your question.
If you don’t turn this on, you’ll have to remember to keep checking back on your own, as described next.
Click Post when you’re done.
Later, when you want to go back and see if anyone has posted a reply to your message, simply return to the Discussion Group where you left your message following these same basic steps. Browse through the messages listed until you find yours. Click the plus (+) sign next to your message to expand it and show any replies. Next, click a reply and follow onscreen prompts to read and respond to your reply.