
Chapter 7. Creating Java applications with ActiveMQ
- Embedding ActiveMQ in Java applications
- Embedding ActiveMQ using Spring
- Creating request/reply applications
- Writing JMS clients using Spring
Thus far the book has concentrated on ActiveMQ as a software application. Most of the information we’ve presented has concerned the internal structure of ActiveMQ and how its components can be configured. But apart from basic JMS examples, using ActiveMQ in your applications hasn’t been discussed. This chapter is dedicated to explaining how to create applications with ActiveMQ.
One of the things you might want to do with ActiveMQ is to embed it into your application. Since ActiveMQ is written in Java, it can naturally be integrated in another Java application. As you’ll see, you can configure the broker using either Java code or XML (via the Spring Framework). A fully configured broker can serve clients from the same application (using the VM protocol) as well as clients from remote applications to exchange messages over the network. This scenario is depicted in figure 7.1.
Figure 7.1. Local and remote applications exchange messages with an embedded broker.

The first section of this chapter will explore various techniques available for embedding ActiveMQ in your Java applications. The second section will explain how to embed ActiveMQ using Spring. You’ll see how to configure ActiveMQ using both pure Spring XML and custom namespaces, as well as the standard ActiveMQ XML via Apache XBean (http://mng.bz/EAfX). This will be followed by a discussion of some advanced programming techniques that include ActiveMQ. This is a vast topic and we’ll dig into two common use cases. We’ll also take a look at how to create a request/reply system using JMS and ActiveMQ. We’ll discuss advantages of such a system over the traditional client-server architecture.
Finally, you’ll learn about using Spring JMS to simplify the creation of JMS clients with ActiveMQ. Using the stock portfolio sample application, we’ll use Spring JMS to set up connections, consumers, and producers in a quick manner. To begin, let’s discuss embedding ActiveMQ in your applications. There’s no single correct way to embed ActiveMQ. The method you choose will probably depend on your application design.
7.1. Embedding ActiveMQ using Java
Although most developers today use some kind of framework for composing their applications, it’s always good to start with plain old Java. In this section we’ll initialize and configure ActiveMQ using its Java APIs. You’ll see how to use the BrokerService class to configure a broker using nothing but pure Java code.
Next, we’ll describe how you can configure your broker using custom configuration XML files. We’ll use the BrokerFactory class to achieve this and you’ll learn how you can use regular configuration files to embed the broker in your Java applications. After this section you’ll be able to embed ActiveMQ with any configuration in your Java applications.
7.1.1. Embedding ActiveMQ using the BrokerService
When using plain old Java to set up your broker, the org.apache.activemq.broker. BrokerService class is one starting point. This class is used to configure the broker and manage its entire lifecycle. The best way to demonstrate the usage of the Broker-Service class is with an appropriate example. Let’s start with a broker configuration we used in chapter 6 to configure a simple authentication plug-in and see how we can achieve the same functionality with plain old Java code. For starters, let’s take a look at the well-known XML configuration example shown here.
Listing 7.1. Configure ActiveMQ with security plug-ins using XML
<broker xmlns="http://activemq.apache.org/schema/core"
  brokerName="myBroker"
  dataDirectory="${activemq.base}/data">

 <transportConnectors>
  <transportConnector name="openwire"
   uri="tcp://localhost:61616" />
 </transportConnectors>

 <plugins>
   <simpleAuthenticationPlugin>
     <users>
       <authenticationUser username="admin"
                              password="password"
                              groups="admins,publishers,consumers"/>
       <authenticationUser username="publisher"
                              password="password"
                              groups="publishers,consumers"/>
       <authenticationUser username="consumer"
                              password="password"
                              groups="consumers"/>
       <authenticationUser username="guest"
                              password="password"
                              groups="guests"/>
     </users>
   </simpleAuthenticationPlugin>
 </plugins>
</broker>
Listing 7.1 uses the standard ActiveMQ XML to define a broker instance with a name and data directory, as well as one transport connector and one plug-in. Now look at the same configuration using plain old Java and the BrokerService as shown next.
Listing 7.2. Configure ActiveMQ with security plug-ins using Java


As you can see, listing 7.2 instantiates the BrokerService and configures the broker-Name and dataDirectory properties. Next the SimpleAuthenticationPlugin is added to the BrokerService via the setPlugins() method. Then a transport connector is added to the BrokerService via the addConnector() method. Finally the start() method is used to start the BrokerService instance. Now your broker is fully initialized using just plain old Java code; no XML configuration files were used. To see this class in action, execute it as shown in this listing.
Listing 7.3. Run the pure Java example of the BrokerService
$ mvn exec:java
 -Dexec.mainClass=org.apache.activemq.book.ch7.broker.Broker
 -Dlog4j.configuration=file:src/main/java/log4j.properties
...
[INFO] [exec:java {execution: default-cli}]
INFO | Using Persistence Adapter: AMQPersistenceAdapter(data/localhost)
INFO | AMQStore starting using directory: data/localhost
INFO | Kaha Store using data directory data/localhost/kr-store/state
INFO | AMQPersistenceAdapter     - Active data files: []
INFO | ActiveMQ 5.4.1 JMS Message Broker (localhost) is starting
INFO | For help or more information please see: http://activemq.apache.org/
INFO | Kaha Store using data directory data/localhost/kr-store/data
INFO | Listening for connections at: tcp://localhost:61616
INFO | Connector tcp://localhost:61616 Started
INFO | JMX consoles can connect to
  service:jmx:rmi:///jndi/rmi://localhost:1099/jmxrmi
INFO | ActiveMQ JMS Message Broker
  (localhost, ID:dejanb-63935-1269536159457-0:0) started

Press any key to stop the broker
...
One important thing to note in listing 7.3 is that you should always add your plug-ins before connectors; otherwise they won’t be initialized. Also, any connectors added after the broker has been started won’t be properly started either.
The BrokerService class is useful when you want to use plain old Java for the broker configuration. This method is useful for many situations where you don’t need an externally customizable configuration. In many applications, you’ll want to be able to initialize the broker using the same configuration files used to configure standalone instances of the ActiveMQ broker. For that purpose ActiveMQ provides the utility org.apache.activemq.broker.BrokerFactory class.
7.1.2. Embedding ActiveMQ using the BrokerFactory
The BrokerFactory class is a utility that makes it easy to create a broker instance simply using an ActiveMQ URI. Depending on the broker URI scheme, the BrokerFactory locates the appropriate factory and uses it to create an instance of the BrokerService class. The most widely used factory is the XBeanBrokerFactory class and is configured by simply passing the XBean-style of URI. An example of an XBean broker URI is shown next:
xbean:/path/to/activemq.xml
This example URI tells the BrokerFactory to use the XBeanBrokerFactory and the path following the colon to create the broker instance.
Now, let’s look at the following listing. The BrokerFactory can instantiate the BrokerService class using the standard ActiveMQ XML configuration file as shown.
Listing 7.4. Using the BrokerFactory with an XML configuration
public class Factory {

 public static void main(String[] args) throws Exception {
  System.setProperty("activemq.base", System.getProperty("user.dir"));

  String configUri =
    "xbean:target/classes/org/apache/activemq/book/ch6/activemq-simple.xml"

  URI brokerUri = new URI(configUri);

  BrokerService broker = BrokerFactory.createBroker(brokerUri);
  broker.start();

  System.out.println();
  System.out.println("Press any key to stop the broker");
  System.out.println();

  System.in.read();
 }

}
As you can see in listing 7.4, the BrokerFactory.createBroker() method uses a configuration URI to create the BrokerService instance. Note that the configuration URI used in listing 7.4 is the xbean: URI scheme. This tells the broker factory to search for the given XML configuration file in the classpath or somewhere on the file system. To illustrate this example in action, the following listing shows how to execute it.
Listing 7.5. Run the example of the BrokerFactory
$ mvn exec:java
 -Dexec.mainClass=org.apache.activemq.book.ch7.broker.Factory
 -Dlog4j.configuration=file:src/main/java/log4j.properties
...
[INFO] [exec:java {execution: default-cli}]
INFO | Using Persistence Adapter: AMQPersistenceAdapter(data/localhost)
INFO | AMQStore starting using directory: data/localhost
INFO | Kaha Store using data directory data/localhost/kr-store/state
INFO | Active data files: []
INFO | ActiveMQ 5.4.1 JMS Message Broker (localhost) is starting
INFO | For help or more information please see: http://activemq.apache.org/
INFO | Kaha Store using data directory data/localhost/kr-store/data
INFO | Listening for connections at: tcp://localhost:61616
INFO | Connector openwire Started
INFO | ActiveMQ JMS Message Broker
  (localhost, ID:dejanb-65001-1269594442403-0:0) started

Press any key to stop the broker
...
You can also use the broker: URI scheme for simple broker configuration performed completely via the configuration URI. See the following example URI:
broker:(tcp://localhost:61616,network:static:tcp://remotehost:61616)
?persistent=false&useJmx=true
This single URI contains enough configuration to start up a broker, including both network and transport connectors; persistence has been disabled and JMX has been explicitly enabled. For more information, see the complete URI reference on the ActiveMQ website (http://mng.bz/FNos).
As mentioned earlier, most Java developers use some kind of framework to compose their applications. Since the Spring Framework (http://www.springframework.org/) is the most popular framework used today, let’s examine how to configure and use ActiveMQ as a component in a Spring application.
7.2. Embedding ActiveMQ using Spring
ActiveMQ is developed with Spring in mind. In fact, ActiveMQ uses a Spring XML configuration file by default. This makes it easy to embed an ActiveMQ broker in Spring-enabled applications. This section will explore numerous methods for utilizing ActiveMQ with Spring. Although there are advantages and disadvantages to some methods, and some are recommended more than others, no single method is the best one. The decision on which method to use typically can be made by considering your application and system architecture, the skill set of your developers, and the difficulty to maintain the solution once it’s deployed to your production systems.
7.2.1. Pure Spring XML
The first style of Spring configuration to examine is what’s known as a pure Spring configuration. A pure Spring configuration is characterized by the style of the XML. It uses the standard Spring <bean id="..." class="..."> style of XML in the configuration file. This style of XML is widely known because Spring is so ubiquitous and it’s easy to understand.
Using a pure Spring XML syntax is easy to do with ActiveMQ. All you have to do is define the BrokerService as a bean and any dependencies in the Spring configuration file. The following listing shows the same broker configuration that was shown in listing 7.2.
Listing 7.6. A pure Spring configuration for ActiveMQ
<beans>
  <bean id="admins" class="org.apache.activemq.security.AuthenticationUser">
    <constructor-arg index="0" value="admin" />
    <constructor-arg index="1" value="password" />
    <constructor-arg index="2" value="admins,publisher,consumers" />
  </bean>

  <bean id="publishers"
    class="org.apache.activemq.security.AuthenticationUser">
    <constructor-arg index="0" value="publisher" />
    <constructor-arg index="1" value="password" />
    <constructor-arg index="2" value="publisher,consumers" />
  </bean>

  <bean id="consumers"
    class="org.apache.activemq.security.AuthenticationUser">
    <constructor-arg index="0" value="consumer" />
    <constructor-arg index="1" value="password" />
    <constructor-arg index="2" value="consumers" />
  </bean>

  <bean id="guests" class="org.apache.activemq.security.AuthenticationUser">
    <constructor-arg index="0" value="guest" />
    <constructor-arg index="1" value="password" />
    <constructor-arg index="2" value="guests" />
  </bean>

  <bean id="simpleAuthPlugin"
    class="org.apache.activemq.security.SimpleAuthenticationPlugin">
    <property name="users">
      <util:list>
        <ref bean="admins" />
        <ref bean="publishers" />
        <ref bean="consumers" />
        <ref bean="guests" />
      </util:list>
    </property>
  </bean>

  <bean id="broker" class="org.apache.activemq.broker.BrokerService"
    init-method="start" destroy-method="stop">
    <property name="brokerName" value="myBroker" />
    <property name="persistent" value="false" />
    <property name="transportConnectorURIs">
      <list>
        <value>tcp://localhost:61616</value>
      </list>
    </property>
    <property name="plugins">
      <list>
        <ref bean="simpleAuthPlugin"/>
      </list>
    </property>
  </bean>

</beans>
As noted, the broker configuration in listing 7.6 follows exactly the same broker configuration that was shown in listing 7.2. The difference between these two configurations is that listing 7.2 directly makes use of the ActiveMQ Java API, and listing 7.6 indirectly uses the ActiveMQ Java API by way of the Spring container and a pure Spring style of XML. There’s no distinct advantage necessarily; this is just another available option. Even if you use the standard ActiveMQ XML in the config file, you can still use the standard Spring XML syntax in that file as well.
To start up ActiveMQ using this style of configuration, use the SpringConfig class as shown next.
Listing 7.7. Start ActiveMQ using a pure Spring XML syntax
$ mvn exec:java
-Dexec.mainClass=org.apache.activemq.book.ch7.broker.SpringConfig
...
13:27:42,125 | INFO | Loading XML bean definitions from class path
resource [org/apache/activemq/book/ch7/pure-spring.xml]
13:27:42,366 | INFO | Bean factory for application context
[org.springframework.context.support.
ClassPathXmlApplicationContext@20edbca8]:
org.springframework.beans.factory.support.
DefaultListableBeanFactory@7c959fa1
13:27:42,418 | INFO | Pre-instantiating singletons in
org.springframework.beans.factory.support.
DefaultListableBeanFactory@7c959fa1:
defining beans
[admins,publishers,consumers,guests,simpleAuthPlugin,broker];
root of factory hierarchy
13:27:42,719 | INFO | Using Persistence Adapter: MemoryPersistenceAdapter
13:27:42,721 | INFO | ActiveMQ 5.4.1 JMS Message Broker (myBroker) is
starting
13:27:42,721 | INFO | For help or more information please see:
http://activemq.apache.org/
13:27:43,224 | INFO | Listening for connections at:
tcp://mongoose.local:61616
13:27:43,225 | INFO | Connector tcp://mongoose.local:61616 Started
13:27:43,227 | INFO | ActiveMQ JMS Message Broker
(myBroker, ID:mongoose.local-50630-1282246062743-0:0) started

Press any key to stop the broker
The SpringConfig class is a simple class that uses the Spring ClassPathXmlApplicationContext (http://mng.bz/71U2) in a main method to read in the pure Spring config and start the ActiveMQ broker. A slight variation on this style of startup is to use the BrokerFactoryBean that’s provided with ActiveMQ.
7.2.2. Using the BrokerFactoryBean
It’s common in enterprise Java development to use Spring factory beans (http://mng.bz/h0OJ) to expose beans that are themselves factories. The purpose of Spring factory beans is to instantiate a factory that requires a complex configuration. The use of the factory bean replaces writing a bunch of complex XML, and it hooks right into the Spring container. The org.apache.activemq.xbean.BrokerFactoryBean class does this job for ActiveMQ. Using the BrokerFactoryBean is easier than creating and maintaining your own class for this purpose. An ActiveMQ broker can be started up using the BrokerFactoryBean class as shown next.
Listing 7.8. ActiveMQ XML configuration for projects using Spring syntax
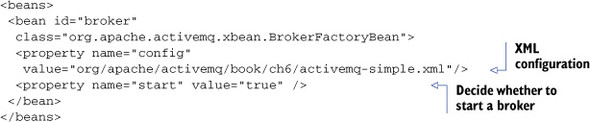
Note in listing 7.8 that the XML to configure the BrokerFactoryBean is minimal. It uses a property named config to point to the standard ActiveMQ XML configuration file that was described in earlier chapters and a property named start to instruct Spring to invoke the start method on the factory bean after it’s initialized (this starts up the ActiveMQ broker instance). You can also disable this feature and simply start the broker manually if you wish. To execute this example, see the following listing.
Listing 7.9. Start ActiveMQ using the BrokerFactoryBean
$ mvn exec:java
-Dexec.mainClass=
org.apache.activemq.book.ch7.spring.BrokerFactoryBeanExample
-Dlog4j.configuration=file:src/main/java/log4j.properties
-Dexec.args="src/main/resources/org/apache/activemq/book/ch7/spring-1.0.xml"
...
[INFO] [exec:java {execution: default-cli}]
Starting broker with the following configuration:
 src/main/resources/org/apache/activemq/book/ch7/spring-1.0.xml
INFO | Using Persistence Adapter:
 AMQPersistenceAdapter(data/localhost)
INFO | AMQStore starting using directory:
 data/localhost
INFO | Kaha Store using data directory
 data/localhost/kr-store/state
INFO | Active data files: []
INFO | ActiveMQ 5.4.1 JMS Message Broker (localhost) is starting
INFO | For help or more information please see:
http://activemq.apache.org/
INFO | Kaha Store using data directory
 data/localhost/kr-store/data
INFO ManagementContext             - JMX consoles can connect to
 service:jmx:rmi:///jndi/rmi://localhost:1099/jmxrmi
INFO | Listening for connections at: tcp://localhost:61616
INFO | Connector openwire Started
INFO |ActiveMQ JMS Message Broker
 (localhost, ID:wfh-dejanb-65076-1269595139615-0:0) started
Sending: {price=22.74502068626, stock=JAVA, offer=22.767765706954,
up=true}
 on destination: topic://STOCKS.JAVA
Sending: {price=65.23301909637, stock=IONA, offer=65.29825211547,
up=true}
 on destination: topic://STOCKS.IONA
Sending: {price=65.09672311118, stock=IONA, offer=65.16181983429,
up=false}
 on destination: topic://STOCKS.IONA
Sending: {price=64.84016157839, stock=IONA, offer=64.90500173997,
up=false}
 on destination: topic://STOCKS.IONA
Sending: {price=22.560415476111, stock=JAVA, offer=22.582975891587,
up=false}
 on destination: topic://STOCKS.JAVA
Sending: {price=64.43834994393, stock=IONA, offer=64.50278829387,
up=false}
 on destination: topic://STOCKS.IONA
Sending: {price=22.583510723322, stock=JAVA, offer=22.606094234045,
up=true}
 on destination: topic://STOCKS.JAVA
...
In listing 7.9, you should see that the broker is started using the BrokerFactoryBean via the Spring configuration and stock price messages are being sent to the broker.
In addition to the BrokerFactoryBean, you can also use XBean with Spring.
7.2.3. Using Apache XBean with Spring
By default, ActiveMQ uses Spring and Apache XBean (http://mng.bz/EAfX) for its internal configuration purposes. Therefore all activemq.xml files we used in previous chapters to configure various features of ActiveMQ are basically Spring configuration files, powered by an XBean custom XML schema. XBean provides the ability to define and use a custom XML syntax that’s much more compact than the standard Spring XML syntax. Although Spring provides the ability to do this now, such features weren’t available when ActiveMQ was created (Spring only supported DTDs at the time).
The following listing shows an example of a simple Java application using Spring and XBean.
Listing 7.10. The XBeanBroker class

figure 7.10 accepts an argument for the path to the XML configuration file, sets the activemq.base system property, and instantiates a Spring application context using the XML configuration file. Then the publisher is instantiated and used to send a simple message 100 times. That’s the entire application. Everything else that’s needed is handled by ActiveMQ and the Spring Framework. Please note that the application context class used in this example is from XBean, not the Spring Framework. This example can be run using the command shown in the following listing.
Listing 7.11. Start ActiveMQ Using XBean with Spring
$ mvn exec:java
-Dexec.mainClass=org.apache.activemq.book.ch7.xbean.XBeanBroker
-Dlog4j.configuration=file:src/main/java/log4j.properties
-Dexec.args=
"src/main/resources/org/apache/activemq/book/ch6/activemq-simple.xml"
...
[INFO] [exec:java {execution: default-cli}]
Starting broker with the following configuration:
 src/main/resources/org/apache/activemq/book/ch6/activemq-simple.xml
INFO | Using Persistence Adapter:
 AMQPersistenceAdapter(data/localhost)
INFO | AMQStore starting using directory: data/localhost
INFO | Kaha Store using data directory data/localhost/kr-store/state
INFO | Active data files: []
INFO | ActiveMQ 5.4.1 JMS Message Broker (localhost) is starting
INFO | For help or more information please see:
http://activemq.apache.org/
INFO | Kaha Store using data directory data/localhost/kr-store/data
INFO | JMX consoles can connect to
 service:jmx:rmi:///jndi/rmi://localhost:1099/jmxrmi
INFO | Listening for connections at: tcp://localhost:61616
INFO | Connector openwire Started
INFO | ActiveMQ JMS Message Broker
 (localhost, ID:dejanb-65363-1269596340878-0:0) started
Sending: {price=53.794098159875, stock=IONA, offer=53.847892258035,
up=false}
 on destination: topic://STOCKS.IONA
Sending: {price=53.489740886575, stock=IONA, offer=53.543230627461,
up=false}
 on destination: topic://STOCKS.IONA
Sending: {price=53.5342708859, stock=IONA, offer=53.58780515680,
up=true}
 on destination: topic://STOCKS.IONA
Sending: {price=53.86122035252, stock=IONA, offer=53.91508157288,
up=true}
 on destination: topic://STOCKS.IONA
Sending: {price=54.15343454330, stock=IONA, offer=54.207587977851,
up=true}
 on destination: topic://STOCKS.IONA
Sending: {price=49.27384513708, stock=JAVA, offer=49.323118982218,
up=false}
 on destination: topic://STOCKS.JAVA
Sending: {price=53.83373859262, stock=IONA, offer=53.8875723312,
up=false}
 on destination: topic://STOCKS.IONA
Sending: {price=53.933391780045, stock=IONA, offer=53.98732517182,
up=true}
 on destination: topic://STOCKS.IONA
...
The broker that’s started behaves the same as the previously defined examples.
In addition to the compact XML syntax provided by XBean, Spring also support XML namespaces.
7.2.4. Using a custom XML namespace with Spring
All recent versions of the Spring Framework allow developers to utilize a custom XML schema. ActiveMQ provides a custom XML schema to configure ActiveMQ via the Spring configuration file. The following listing demonstrates how to configure ActiveMQ using its custom Spring schema via an XML namespace.
Listing 7.12. ActiveMQ XML configuration using Spring 2.x (and newer)


As you can see in figure 7.12, first a prefix is declared that will be used throughout the XML document to reference element types from the custom schema. The prefix that’s commonly used for ActiveMQ is amq. Second is the URI to the right of the prefix, which in this case is http://activemq.apache.org/schema/core. The prefix is used to reference the URI from within the XML document. Third, the URI is used as an identifier to point to the actual location of the XML schema document (XSD) via the schemaLocation attribute. For example, when the <amq:broker> element is used, the amq prefix serves as an alias to the URI and the URI points to the XSD where the broker element can be found.
Once the XML namespace is declared, we’re free to define our broker-related beans using the custom XML syntax. In this particular example we’ve configured the broker as it was configured in our previously used chapter 6 example, with the simple authentication plug-in. Now the Spring broker can be started as shown next.
Listing 7.13. Start ActiveMQ using a configuration with a custom XML namespace
$ mvn -e exec:java
-Dexec.mainClass=org.apache.activemq.book.ch7.spring.SpringBroker
-Dlog4j.configuration=file:src/main/java/log4j.properties
-Dexec.args=
src/main/resources/org/apache/activemq/book/ch7/spring-2.0.xml
...
[INFO] [exec:java {execution: default-cli}]
Starting broker with the following configuration:
 src/main/resources/org/apache/activemq/book/ch7/spring-2.0.xml
INFO | Using Persistence Adapter:
 AMQPersistenceAdapter(${activemq.base}/data/localhost)
INFO | AMQStore starting using directory: data/localhost
INFO | Kaha Store using data directory data/localhost/kr-store/state
INFO | Active data files: []
INFO | ActiveMQ 5.4.1 JMS Message Broker (localhost) is starting
INFO | For help or more information please see: http://activemq.apache.org/
INFO | Kaha Store using data directory data/localhost/kr-store/data
INFO | JMX consoles can connect
 to service:jmx:rmi:///jndi/rmi://localhost:1099/jmxrmi
INFO | Listening for connections at: tcp://localhost:61616
INFO | Connector openwire Started
INFO | ActiveMQ JMS Message Broker
 (localhost, ID:dejanb-65324-1269595874364-0:0) started
Sending: {price=83.53568740848, stock=IONA, offer=83.61922309589, up=true}
 on destination: topic://STOCKS.IONA
Sending: {price=84.15670625187, stock=IONA, offer=84.24086295812, up=true}
 on destination: topic://STOCKS.IONA
Sending: {price=83.64752134809, stock=IONA, offer=83.7311688694, up=false}
 on destination: topic://STOCKS.IONA
Sending: {price=83.33023218494, stock=IONA, offer=83.41356241712, up=false}
 on destination: topic://STOCKS.IONA
Sending: {price=84.05476877613, stock=IONA, offer=84.13882354490, up=true}
 on destination: topic://STOCKS.IONA
Sending: {price=57.75764610250, stock=JAVA, offer=57.815403748606, up=true}
 on destination: topic://STOCKS.JAVA
Sending: {price=84.3813034823, stock=IONA, offer=84.46568478585, up=true}
 on destination: topic://STOCKS.IONA
Sending: {price=84.77874758495, stock=IONA, offer=84.86352633253, up=true}
 on destination: topic://STOCKS.IONA
...
The example shown in figure 7.13 uses the most common type of XML configuration file. So although this is nothing new, it’s something that many developers don’t fully understand.
Now that we’ve examined and demonstrated various styles of configuration examples for ActiveMQ, it’s time to shift gears a bit to look at a common use of ActiveMQ: creating an application that uses a common JMS paradigm known as request/reply.
7.3. Implementing request/reply with JMS
As described in earlier chapters, messaging is all about the decoupling of senders from receivers. Messages are sent by one process to a broker, and messages are received from a broker by a different process in an asynchronous manner. One style of system architecture that can be implemented using JMS is known as request/reply. From a high level, a request/reply scenario involves an application that sends a message (the request) and expects to receive a message in return (the reply). Traditionally, such a system design was implemented using a client-server architecture, with the server and the client communicating in a synchronous manner across a network transport (TCP, UDP, and so on). This style of architecture certainly has scalability limitations, and it’s difficult to distribute it further. That’s where messaging enters the picture—to provide the ability to design a system that can easily scale much further via a messaging-based request/reply design. Some of the most scalable systems in the world are implemented using asynchronous processing like that being demonstrated in this example.
The diagram shown in figure 7.2 depicts an overview of the request/reply paradigm. Note that the client consists of both a producer and a consumer, and the worker also consists of both a producer and a consumer. These two entities are both explained next.
Figure 7.2. Overview of a request/reply implementation using JMS

First, the producer creates a request in the form of a JMS message and sets a couple of important properties on the message—the correlation ID (set via the JMSCorrelationID message property) and the reply destination (set via the JMSReplyTo message property). The correlation ID is important, as it allows requests to be correlated with replies if there are multiple outstanding requests. The reply destination is where the reply is expected to be delivered (usually a temporary JMS destination since it’s much more resource friendly). The client then configures a consumer to listen on the reply destination.
Second, a worker receives the request, processes it, and sends a reply message using the destination named in the JMSReplyTo property of the request message. The reply message must also set JMSCorrelationID using the correlation ID from the original request. When the client receives this reply message, it can then properly associate it with the original request.
Now comes the interesting part—to demonstrate how this architecture can be highly scalable. Imagine that a single worker isn’t enough to handle the load of incoming requests. No problem: just add additional workers to handle the load. Those workers can even be distributed across multiple hosts—this is the most important aspect of scaling this design. Because the workers aren’t contending for the same resources on the same host, the only limit is the maximum throughput of messages through the broker, which is much higher than you can achieve with any classic client-server setup. Furthermore, ActiveMQ can be scaled both vertically and horizontally, as discussed in part 4. Let’s now take a look at a simple implementation of request/reply.
7.3.1. Implementing the server and the worker
The first piece of the system on which to focus is the message broker. Get the broker up and running so that it’s ready for connections when both sides are started up. An embedded broker will be used for this example because it’s easy to demonstrate. The second piece of the system to get running is the worker. The worker is composed of a message listener that consumes the message and sends a response. Even though this is a simple implementation, it’ll provide you enough information to use it with your systems. So take a look at the server implementation.
Listing 7.14. Create a broker, a consumer, and a producer for the request/reply example


As you can see, the start() method calls one method to create and start an embedded broker, and another method to create and start up the worker. The create-Broker() method uses the BrokerService class to create an embedded broker. The setupConsumer() method creates all the necessary JMS objects for receiving and sending messages including a connection, a session, a destination, a consumer, and a producer. The producer is created without a default destination, because it’ll send messages to destinations that are specified in each message’s JMSReplyTo property.
Taking a closer look at the listener, note how it handles the consumption of each request as shown next.
Listing 7.15. The message listener for the request/reply example

The listener creates a new message, assigns the appropriate correlation ID, and sends a message to the reply-to queue. Simple stuff, but still important. Although this message listener isn’t earth shattering in its implementation, it demonstrates the basic steps necessary to complete the task of the worker. Any amount of extra processing or database access could be added to the listener in your systems depending on the requirements.
Starting the server is rather obvious: create an instance of it and call the start() method. All of the server functionality is housed in the main method, as shown in the following listing.
Listing 7.16. Starting the server for the request-reply example
...
 public static void main(String[] args) throws Exception {
  Server server = new Server();
  server.start();

  System.out.println();
  System.out.println("Press any key to stop the server");
  System.out.println();

  System.in.read();

  server.stop();
 }
...
Once the server is started and the worker is running, everything is ready to accept requests from the client.
7.3.2. Implementing the client
The job of the client is to initiate requests to the broker. This is where the whole request/reply process begins, and is typically triggered by one of your business processes. This process could be to accept an order, fulfill an order, integrate various business systems, or buy or sell a financial position. Whatever the case may be, request-reply begins by sending a message.
Sending a message to the broker requires the standard connection, session, destination, and producer which are all created in the client by the start() method. This is all shown in the following listing.
Listing 7.17. Methods for starting and stopping the request/reply client
...
 public void start() throws JMSException {
  ActiveMQConnectionFactory connectionFactory =
    new ActiveMQConnectionFactory(brokerUrl);
  connection = connectionFactory.createConnection();
  connection.start();
  session = connection.createSession(false, Session.AUTO_ACKNOWLEDGE);
  Destination adminQueue = session.createQueue(requestQueue);

  producer = session.createProducer(adminQueue);
  producer.setDeliveryMode(DeliveryMode.NON_PERSISTENT);

  tempDest = session.createTemporaryQueue();
  consumer = session.createConsumer(tempDest);

  consumer.setMessageListener(this);
 }
public void stop() throws JMSException {
  producer.close();
  consumer.close();
  session.close();
  connection.close();
 }
...
The producer sends a message to the request queue and then the consumer listens on the newly created temporary queue. Now it’s time to implement an actual logic for the client, as shown next.
Listing 7.18. Implementation of logic for request/reply client

The request() method shown in figure 7.18 creates a message with the request content, sets the JMSReplyTo property to the temporary queue, and sets the correlation ID—these three items are important. Although the correlation ID in this case uses a random UUID, just about any ID generator can be used. Now we’re ready to send a request.
Just like starting the server was a simple main method, the same is true of the client as shown in the next listing.
Listing 7.19. Starting the request/reply client
...
 public static void main(String[] args) throws Exception {
  Client client = new Client();
  client.start();
  int i = 0;
  while (i++ < 10) {
   client.request("REQUEST-" + i);
  }
  Thread.sleep(3000); //wait for replies
  client.stop();
 }
...
As explained earlier, this is a simple implementation. So upon starting up the client, 10 requests are sent to the broker. Now it’s time to actually run the example.
7.3.3. Running the request/reply example
Running the example requires two terminals: one for the server and one for the client. The server needs to be started first. The server is implemented in a class named Server and the client is implemented in a class named Client. Because each of these classes is initiated via a main method, it’s easy to start each one. The following listing demonstrates starting up the server class.
Listing 7.20. Start up the server for the request/reply example
$ mvn exec:java -Dexec.mainClass=org.apache.activemq.book.ch7.sync.Server
...
INFO | Using Persistence Adapter: MemoryPersistenceAdapter
INFO | ActiveMQ 5.4.1 JMS Message Broker (localhost) is starting
INFO | For help or more information please see:
  http://activemq.apache.org/
INFO | Listening for connections at:
  tcp://dejan-bosanacs-macbook-pro.local:61616
INFO | Connector tcp://dejan-bosanacs-macbook-pro.local:61616 Started
INFO | ActiveMQ JMS Message Broker
  (localhost, ID:dejanb-57522-1271170284460-0:0) started

Press any key to stop the server


INFO | ActiveMQ Message Broker
  (localhost, ID:dejanb-57522-1271170284460-0:0) is shutting down
INFO | Connector tcp://dejan-bosanacs-macbook-pro.local:61616 Stopped
INFO | ActiveMQ JMS Message Broker
  (localhost, ID:dejanb-57522-1271170284460-0:0) stopped
...
When the server is started up, then it’s time to start up the client and begin sending requests. The following listing shows how to start up the client.
Listing 7.21. Start up the client for the request/reply example
$ mvn exec:java -Dexec.mainClass=org.apache.activemq.book.ch7.sync.Client
...
Requesting: REQUEST-1
Requesting: REQUEST-2
Requesting: REQUEST-3
Requesting: REQUEST-4
Requesting: REQUEST-5
Requesting: REQUEST-6
Requesting: REQUEST-7
Requesting: REQUEST-8
Requesting: REQUEST-9
Requesting: REQUEST-10
Received response for: Response to 'REQUEST-1'
Received response for: Response to 'REQUEST-2'
Received response for: Response to 'REQUEST-3'
Received response for: Response to 'REQUEST-4'
Received response for: Response to 'REQUEST-5'
Received response for: Response to 'REQUEST-6'
Received response for: Response to 'REQUEST-7'
Received response for: Response to 'REQUEST-8'
Received response for: Response to 'REQUEST-9'
Received response for: Response to 'REQUEST-10'
...
Note that when the client is started, 10 requests are sent to initiate the request/reply process and 10 replies are received back from the worker. Although it’s not glorious, the power in this simple request/reply example will become evident when you apply it to your own business processes.
Using the request/reply pattern, envision that there are thousands of requests entering the broker every second from many clients, all distributed across many hosts. In a production system, more than just a single broker instance would be used for the purposes of redundancy, failover, and load balancing. These brokers would also be distributed across many hosts. The only way to handle this many requests would be to use many workers. Producers can always send messages much faster than a consumer can receive and process them, so lots of workers would be needed, all of them spread out across many hosts as well. The advantage of using many workers is that each one can go up and down at will, and the overall system itself isn’t affected. The producers and workers would continue to process messages, and even if one of them crashed, it wouldn’t affect the system. This is exactly how many large-scale systems can handle such a tremendous load—through the use of asynchronous messaging like that demonstrated by the request/reply pattern.
The JMS API can be tedious, as it requires you to write a lot of code for initializing all the necessary JMS objects such as connections, sessions, producers, consumers, and so forth. This is where the Spring Framework provides a lot of benefit. It helps you to remove such boilerplate code by supplying a more cogent API and by simplifying the overall configuration.
7.4. Writing JMS clients using Spring
ActiveMQ uses the Spring Framework to ease the various aspects of client-to-broker communication, but the Spring Framework goes much further, with its API and container designed specifically for JMS messaging. Together, ActiveMQ and Spring make an excellent JMS development platform, making many common tasks extremely easy to accomplish. Some of the tasks to be covered in this section include
- Configuring JMS connections —ActiveMQ provides classes that can be used to configure URLs and other parameters of connections to brokers. The connection factory could later be used by your application to get the appropriate connection.
- Configuring JMS destinations —ActiveMQ destination objects can be configured simply as beans representing JMS destinations used by your producers and consumers.
- Defining JMS consumers —Spring provides helper classes that allow you to easily configure a message listener container and hook message listeners to it.
- Implementing JMS producers —Spring also provides helper bean classes for creating new producers.
In the following sections, these tasks will be demonstrated and the portfolio application will be changed to use all benefits of the ActiveMQ and Spring integration.
7.4.1. Configuring JMS connections
As seen in the previous examples, the first step in creating a JMS application is to create a connection to the ActiveMQ broker. The ActiveMQConnectionFactory is a factory that creates an ActiveMQConnection, both of which can be easily used with Spring. The following snippet shows how to define an ActiveMQConnectionFactory using a Spring XML config:
<bean id="jmsConnectionFactory"
   class="org.apache.activemq.ActiveMQConnectionFactory">
 <property name="brokerURL" value="tcp://localhost:61616" />
 <property name="userName" value="admin" />
 <property name="password" value="password" />
</bean>
In the snippet, note the properties that are configured on the ActiveMQConnection-Factory.
In some use cases a pool of connections is necessary in order to achieve a desired performance. For this purpose, ActiveMQ provides the PooledConnectionFactory class, which maintains a pool of JMS connections and sessions. Here’s an example Spring XML configuration for the PooledConnectionFactory:
<bean id="pooledJmsConnectionFactory"
   class="org.apache.activemq.pool.PooledConnectionFactory"
   destroy-method="stop">
 <property name="connectionFactory" ref="jmsConnectionFactory" />
</bean>
Only one property is configured on the PooledConnectionFactory in this case—the connectionFactory property. The connectionFactory property is used to define the underlying connection factory to the ActiveMQ broker that’ll be used by the pooled connection factory. In this case we’ve used our previously defined jmsConnection-Factory bean.
Since the pooled connection factory has a dependency on the Apache Commons Pool project (http://mng.bz/j3PV), you’ll need to add the JAR to the classpath. Or, if you use Maven for your project management, just add the following dependency to the pom.xml file:
<dependency>
 <groupId>commons-pool</groupId>
 <artifactId>commons-pool</artifactId>
 <version>1.4</version>
</dependency>
The preceding XML defines a Maven dependency on the commons-pool-1.4.jar file, and even fetches it for you automatically.
Once the JMS connection has been defined, you can move on to defining the JMS destinations, producers, and consumers.
7.4.2. Configuring JMS destinations
JMS destinations can be predefined in the activemq.xml file using the ActiveMQTopic and ActiveMQQueue classes. The following snippet contains two new topic definitions to be used in the portfolio example:
<bean id="cscoDest" class="org.apache.activemq.command.ActiveMQTopic">
  <constructor-arg value="STOCKS.CSCO" />
</bean>

<bean id="orclDest" class="org.apache.activemq.command.ActiveMQTopic">
  <constructor-arg value="STOCKS.ORCL" />
</bean>
As you can see, these classes use constructor injection for setting a desired destination name on the ActiveMQTopic class. Predefining topics isn’t required in ActiveMQ, but it can be handy for environments where the broker requires clients to authenticate for various operations. For more information about client authentication, see chapter 6. Now that a connection and a couple of destinations exist, you can begin sending and receiving messages.
7.4.3. Creating JMS consumers
The next two sections touch upon basic use of Spring JMS (http://mng.bz/I0Pe) for creating consumers and producers, as it makes creating JMS consumers and producers incredibly easy. Although Spring JMS provides some powerful features, these two sections won’t dive into deep details, since this is outside of the scope of this book. Instead, we’ll show some of the basic concepts to get you up and running quickly with the portfolio example. For more information on Spring JMS, consult the Spring documentation.
The basic abstraction for receiving messages in Spring is the message listener container (MLC: see http://mng.bz/LJti). The MLC design provides an intermediary between your message listener and broker to handle connections, threading, and more, leaving you to worry only about your business logic that lives in the listener. In the following listing, the portfolio message listener from chapter 3 is used by two message listener containers for the two destinations that were defined in the previous section.
Listing 7.22. Defining two Spring message listener containers and a message listener
<!-- The message listener -->
<bean id="portfolioListener"
  class="org.apache.activemq.book.ch3.portfolio.Listener">
</bean>

<!-- Spring DMLC -->
<bean id="cscoConsumer"
class="org.springframework.jms.listener.DefaultMessageListenerContainer">
  <property name="connectionFactory" ref="jmsConnectionFactory" />
  <property name="destination" ref="cscoDest" />
  <property name="messageListener" ref="portfolioListener" />
</bean>

<!-- Spring DMLC -->
<bean id="orclConsumer"
class="org.springframework.jms.listener.DefaultMessageListenerContainer">
  <property name="connectionFactory" ref="jmsConnectionFactory" />
  <property name="destination" ref="orclDest" />
  <property name="messageListener" ref="portfolioListener" />
</bean>
Each MLC instance in figure 7.22 requires a connection factory, a destination, and a message listener. So all you have to do is to implement a message listener bean and leave everything else to the Spring MLC. Note that in this example we’ve used the plain (not pooled) connection factory. This is because no connection pooling is needed for this simple example. This example uses the Spring DefaultMessageListenerContainer (DMLC), which is the most commonly used MLC. Although numerous other properties on the DMLC can be configured, this example is using only the basics. When these two DMLC instances start up, they’ll be ready to receive messages and hand them off to the message listener.
Now let’s send some messages to ActiveMQ.
7.4.4. Creating JMS producers
As was the case for receiving messages, Spring also provides conveniences for sending messages. The crucial abstraction for sending messages is the Spring JmsTemplate class. The JmsTemplate follows the standard template pattern to provide a convenience class for sending messages.
One of the most common ways to send a message using Spring is by implementing the Spring MessageCreator interface and utilizing it with the appropriate send() method of the JmsTemplate class. The following listing demonstrates this by implementing all message creation logic borrowing the stock portfolio publisher from chapter 3.
Listing 7.23. Implementation of a MessageCreator for sending messages using Spring
public class StockMessageCreator
             implements MessageCreator {

 private int MAX_DELTA_PERCENT = 1;
private Map<Destination, Double> LAST_PRICES
   = new Hashtable<Destination, Double>();

 Destination stock;

 public StockMessageCreator(Destination stock) {
  this.stock = stock;
 }

 public Message createMessage(Session session) throws JMSException {
  Double value = LAST_PRICES.get(stock);
  if (value == null) {
   value = new Double(Math.random() * 100);
  }

  // lets mutate the value by some percentage
  double oldPrice = value.doubleValue();
  value = new Double(mutatePrice(oldPrice));
  LAST_PRICES.put(stock, value);
  double price = value.doubleValue();

  double offer = price * 1.001;

  boolean up = (price > oldPrice);
  MapMessage message = session.createMapMessage();
  message.setString("stock", stock.toString());
  message.setDouble("price", price);
  message.setDouble("offer", offer);
  message.setBoolean("up", up);
  System.out.println(
     "Sending: " + ((ActiveMQMapMessage)message).getContentMap()
   + " on destination: " + stock
  );
  return message;
 }

 protected double mutatePrice(double price) {
  double percentChange = (2 * Math.random() * MAX_DELTA_PERCENT)
    - MAX_DELTA_PERCENT;

  return price * (100 + percentChange) /100;
 }

}
The MessageCreator interface defines only the createMessage() method, which returns a JMS message. Here, we’ve implemented some logic for creating random stock prices, and we’re creating an appropriate JMS map message to hold all of the relevant data. To send the message, the JmsTemplate’s send() method will utilize the StockMessageCreator as shown next.
Listing 7.24. JMS publisher implementation in Spring

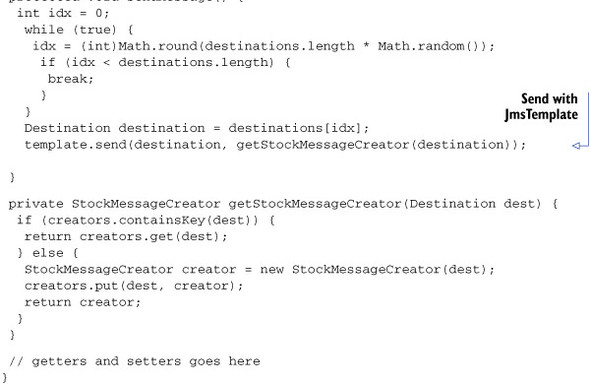
The important thing to note in figure 7.24 is how the send() method uses the message creator. Everything else in this example is the same as in the original stock portfolio publisher from chapter 3. Now you have all the necessary components to publish messages to ActiveMQ using Spring. All that’s left to be done is to configure it properly as demonstrated in the following listing.
Listing 7.25. JMS publisher configuration in Spring
<!-- Spring JMS Template -->
<bean id="jmsTemplate" class="org.springframework.jms.core.JmsTemplate">
  <property name="connectionFactory" ref="pooledJmsConnectionFactory" />
</bean>
<bean id="stockPublisher"
  class="org.apache.activemq.book.ch7.spring.SpringPublisher">
  <property name="template" ref="jmsTemplate" />
  <property name="destinations">
       <list>
            <ref local="cscoDest" />
            <ref local="orclDest" />
       </list>
  </property>
</bean>
The snippet in figure 7.25 shows an instance of the Spring JmsTemplate and the publisher. The publisher simply needs a reference to the JMS destinations being used, and the JmsTemplate requires a connection factory.
Note
The pooled connection factory is used with the JmsTemplate. This is important because the JmsTemplate is designed for use with Java EE containers in mind, which typically provide connection pooling capabilities as required by the Java EE specifications. Every call to the JmsTemplate.send() method creates and destroys all the JMS resources (connections, consumers, and producers). So if you’re not using a Java EE container, make sure to use a pooled connection factory for sending messages with the JmsTemplate.
The connections and destinations are defined; the consumers and producer have been created. Now let’s run the example.
7.4.5. Putting it all together
After implementing all pieces of the example, the application should be ready to run. Take a look at the following listing to see the main method that will execute the example.
Listing 7.26. The main method for the Spring example

This simple class starts a minimal ActiveMQ broker configuration and initializes the Spring application context to start the JMS clients.
The example can be run from the command line using the following command.
Listing 7.27. Run the Spring example
$ mvn exec:java
-Dexec.mainClass=org.apache.activemq.book.ch7.spring.SpringClient
-Dlog4j.configuration=file:src/main/java/log4j.properties
...
Sending: {price=65.958996694, stock=CSCO, offer=66.0249556914, up=false}
  on destination: topic://STOCKS.CSCO
topic://STOCKS.IONA 79.97 80.05 down
Sending: {price=80.67595675108, stock=ORCL, offer=80.7566327078, up=true}
  on destination: topic://STOCKS.ORCL
topic://STOCKS.JAVA 65.96 66.02 down
Sending: {price=65.63333898492, stock=CSCO, offer=65.69897232391, up=false}
  on destination: topic://STOCKS.CSCO
topic://STOCKS.IONA 80.68 80.76 up
Sending: {price=80.50525969261, stock=ORCL, offer=80.58576495231, up=false}
  on destination: topic://STOCKS.ORCL
topic://STOCKS.JAVA 65.63 65.70 down
Sending: {price=81.2186806051, stock=ORCL, offer=81.29989928577, up=true}
  on destination: topic://STOCKS.ORCL
topic://STOCKS.IONA 80.51 80.59 down
Sending: {price=65.48960846536, stock=CSCO, offer=65.5550980738, up=false}
  on destination: topic://CSCO
topic://STOCKS.IONA 81.22 81.30 up
topic://STOCKS.JAVA 65.49 65.56 down
...
As you can see, both producer and consumer print their messages to standard output as the example runs.
In this section, you used Spring to augment the stock portfolio example application from chapter 3. You were able to reuse most of the original logic, but this time you used some Spring utilities to simplify the example a lot. As stated previously, this example simply touched on the basics of using Spring JMS. If you’d like more information about Spring JMS, see the documentation (http://mng.bz/I0Pe).
7.5. Summary
In this chapter, you’ve seen how ActiveMQ can be viewed not only as a separate Java infrastructure application, but also as a Java module that can be easily integrated in your Java applications. Offering a wide range of flexibility, ActiveMQ can be configured with plain Java code or by using XML configuration files.
You’ve also seen how ActiveMQ can play well with the Spring Framework, both in terms of integrating brokers in Java applications and simplifying the implementation of JMS clients.
We covered some advanced programming techniques with ActiveMQ as well. The request/reply pattern was explained in terms of the benefits it brings to your application’s architecture and how to implement it using ActiveMQ. Lastly, we revisited the portfolio example from chapter 3 in order to refactor it to use Spring JMS. Though only the basics of Spring JMS were demonstrated here, its capabilities are powerful and incredibly streamlined, and we encourage you to read more about it for your applications.
The next chapter focuses on ActiveMQ integration options with various Java EE containers. You’ll see how ActiveMQ can be used in conjunction with Java application servers such as Apache Geronimo and Apache Tomcat, for example, and how to use JNDI.